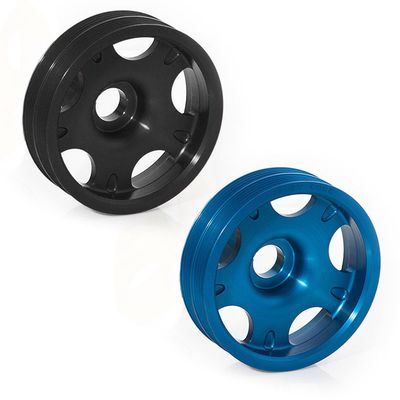
300102 - COBB Tuning Lightweight Main Pulley
300102
Congratulations on your purchase of the COBB Lightweight Main Pulley for your Subaru. The following instructions will assist you through your installation process. These instructions were based off a 2014 WRX, thus it may vary for your vehicle. Please read them first BEFORE beginning the install and familiarize yourself with the steps and tools needed. If you feel that you cannot properly perform this installation, we HIGHLY recommend you take the vehicle to a qualified and experienced automotive technician.
Part List
- COBB Lightweight Main Pulley
- (2) COBB 6" Stickers
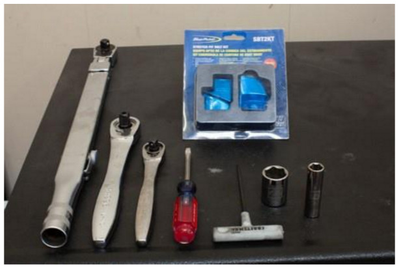
Tools Needed
- Flat Head Screwdriver
- M2.5 Allen Wrench (Needed for SF Intake Lid Removal)
- 1/4" Drive Ratchet
- 1/2" Drive Ratchet
- 1/2" Drive Torque Wrench
- 10mm 1/4" Socket
- 12mm 1/4" Socket
- 22mm 1/4" Socket
- Stretch Belt Installation Tool (Recommended Later Model Subaru's)
- We used Blue Point Stretch Fit Belt Kit (SBT2KT)
Removal of the Stock Pulley
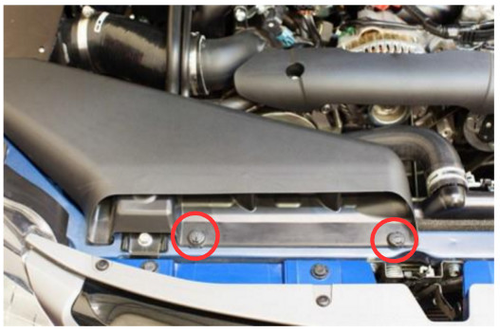
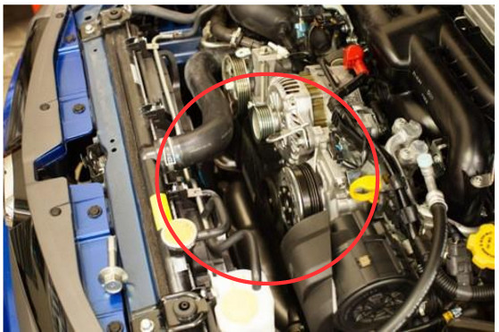
- Remove the OEM air duct. There are (2) clips that can be released using a flat head screwdriver. If you have a SF Intake installed, you may need to remove the top lid in order to disengage the OEM air duct.
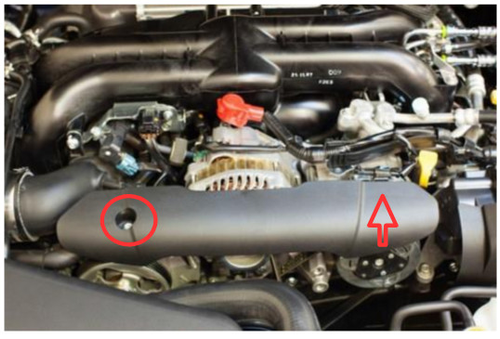
- Remove the alternator cover. There is (1) bolt on the left hand side that can be removed using a 10mm socket. The right side is held down by a pressure clip that can be released by gently applying pressure upwards.
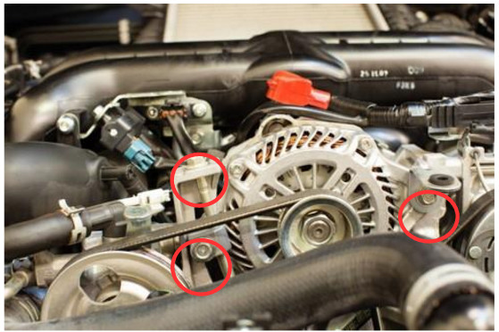
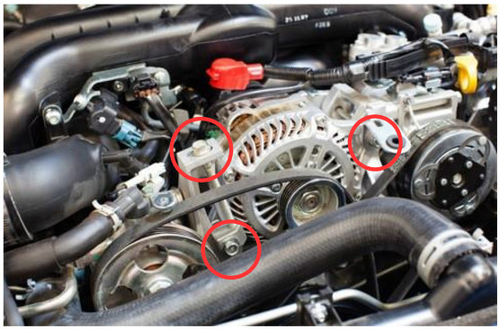
- Loosen the front, top and right bolt tensioner using a 12mm socket.
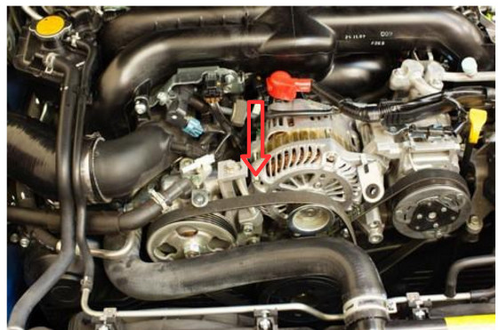
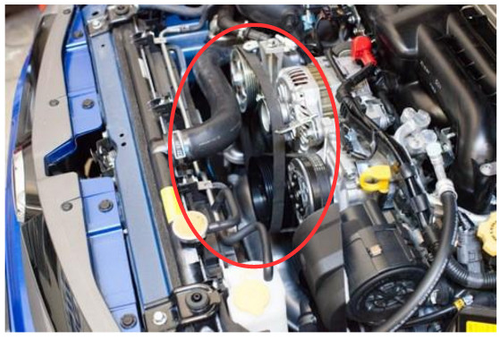
- Apply downward pressure on the left hand side if the alternator in order to release tension on the belt.
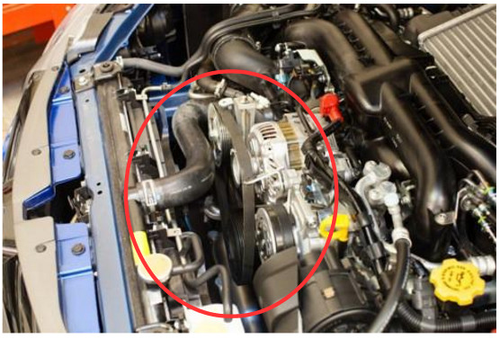
- Remove the alternator/power steering/main pulley belt.
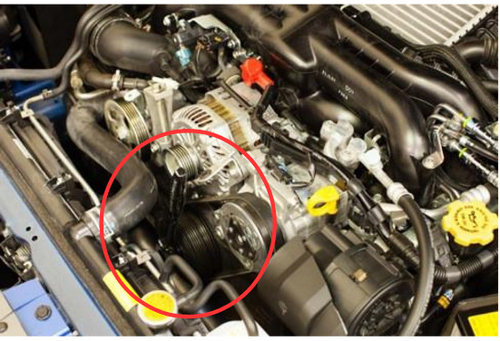
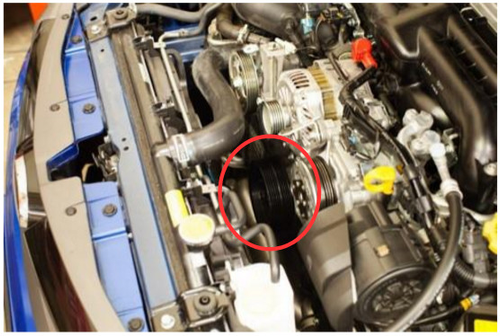
- Attach a 22mm 1/2" drive socket to the main pulley.
- Rotate the main pulley clockwise while applying pressure to the stretch belt so that you can "walk it off". This process may take a few minutes, so have patience! if your vehicle does not have a stretch belt, loosen the tensioner to remove the belt.
- There are a couple different ways to remove the stock crank pulley.
- If you have a main pulley key, attach the key to the pulley and also a 22mm 1/2" drive socket to the center bolt. While keeping the pulley stationary with the key, rotate the socket wrench counter clockwise to loosen the bolt.
- Attach a 22mm 1/2" drive socket to the main pulley bolt. Have a friend put your car in 5th or 6th gear and fully depress the brake. While the brake is held down and the car is in gear, rotate the socket counter clockwise to loosen the bolt.
- Once the bolt is loosened, finish removing the bolt and pulley by hand.
Installation of the COBB Lightweight Main Pulley
- After verifying the key way on the pulley lines up with the insert on the crankshaft, install the pulley.
- Hand tighten the bolt on the pulley.
- Using a 22mm 1/2" drive torque wrench, tighten the bolt to approximately 94 ft/lbs of torque.
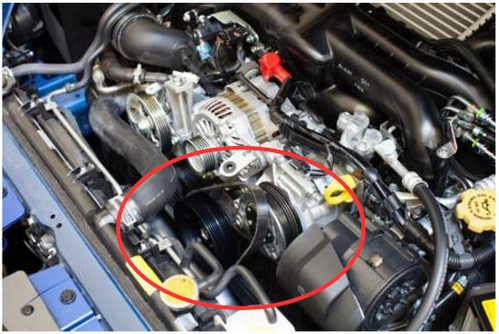
- Reinstall the stretch belt. This can be quite frustrating without the proper tools. we highly recommend using a stretch belt installation tool.
- Reinstall the alternator/power steering/main pulley belt.
- Apply upward pressure on the alternator to create tension on the belt and tighten the top bolt to secure it. Once you've created tension equal to the stretch belt you installed previously, tighten the front bolt and the right bolt to secure the alternator.
- Reinstall the alternator cover. Apply downward pressure to the right pressure clip to engage it. Reinstall and tighten the left bolt.
- Reinstall the OEM air duct along with the (2) clips and SF intake lid (if applicable).
- Enjoy a freer-revving, more responsive engine!
Links
COBB Product Install Instructions for Subaru Vehicles
Main Installation Instruction Repository for Subaru Parts
COBB Customer Support Web Support and Tech Articles: COBB Tuning Customer Support Center Email: support@cobbtuning.com Phone support available 9am to 6pm Monday-Thursday. 9am to 4pm Friday (CST) 866.922.3059 return to www.cobbtuning.comContact Us:
Related content
Copyright 2025 © COBB Tuning Products LLC. All Rights Reserved. | www.cobbtuning.com

