712150 - COBB SF INTAKE AIR BOX
- Chris Mitchell
- Brandyn Mowat
- Will Trang

712150 - COBB SF INTAKE AIR BOX INSTALL INSTRUCTIONS
2002-2007 WRX, 2004-2007 STI (Sedan), 2004-2008 Forester XT

Part List
- 1-AIr Box Surround
- 1-Air Box Lid
- 1- Lid Support Bracket
- 53" of Edge Trim
- 23" of Rubber Hose
- 19" of Silicon Hose
- 2.5 Hex Key (1)
- M6 Blk Nylon Washer
- M6-1.0 X 16mm Hex Serrated
- 6 - M4 X 10mm Button Head
- 6 - M4 Blk Nylon Washer
Tools Needed
- Flat Head Screwdriver
- Phillips Head Screwdriver
- Socket Wrench (We recommend 3/8" drive)
- 12" Extension for Socket Wrench
- 10mm Socket
- 12mm Socket
- 10mm Boxed End Wrench
- M2.5 Hex Head/Allen Wrench (included)
- M3-Hex Head/Allen Wrench
- Needle Nose Pliers
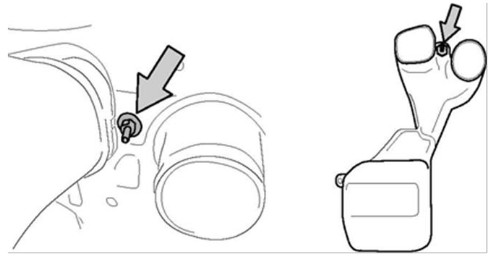
Removal of Stock Air Box and Silencer
1) Disconnect car battery.
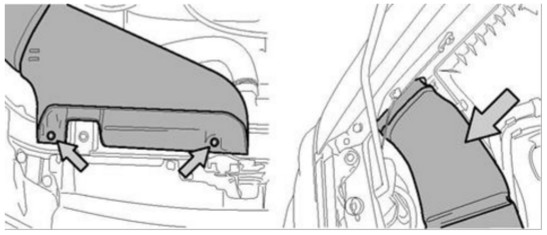
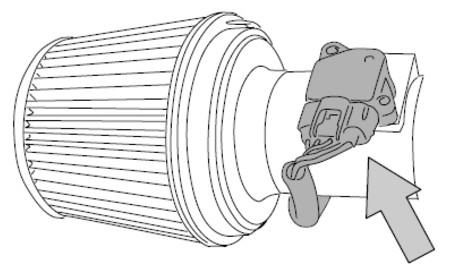
4) Remove the coolant hoses from their clips on the top of the air box.

Installation of COBB Tuning Intake and Air Box
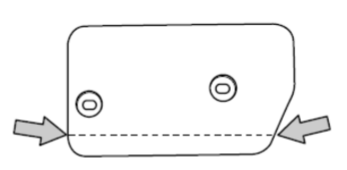
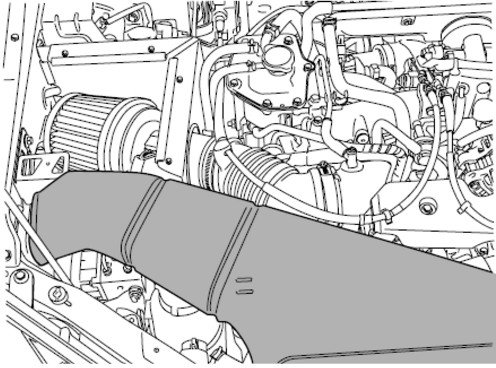
1) Now install the two factory hose retainers in the COBB air box as shown. Note that the small hose is below the large hose on both clips. Also install the edge trim around the outer edges of the air box, see diagram below for proper placement. Remember to notch the edge trim for a better fit around tight bends.
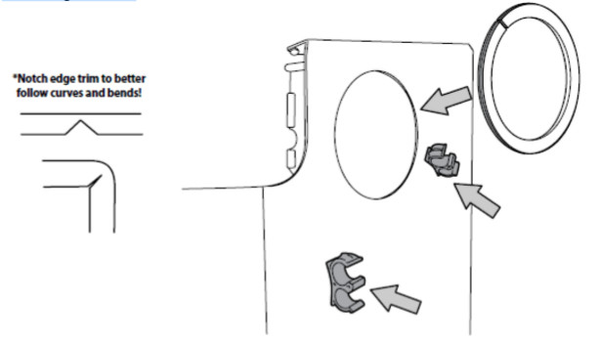
(Optional) If a tighter seal is desired, cut the supplied edge trim and install as shown.
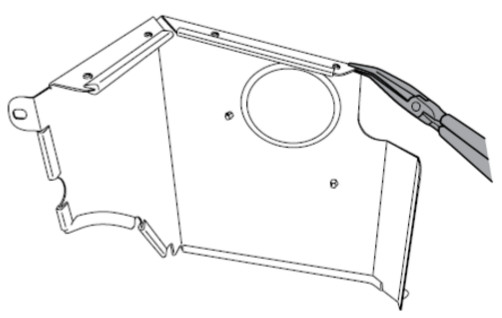
*Note 02-03 WRX owners will need to remove and /or trim the boost control solenoid cover a shown.
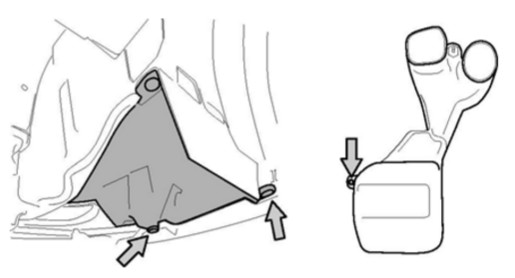
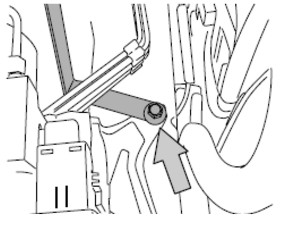
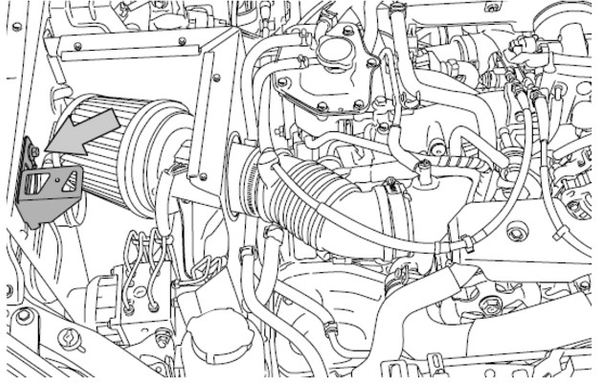
2) Using one of the bolts that secured the factory air box to the chassis, install the bracket for the COBB SF Intake System in the most forward facing of the two bolt holes. Do not tighten the bolt so that it can move to properly position the housing/filter later.
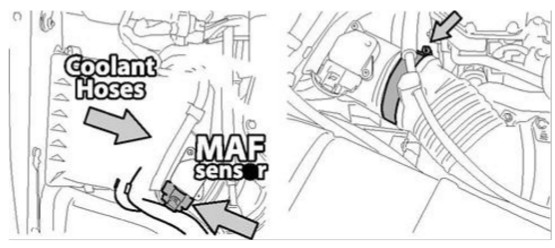
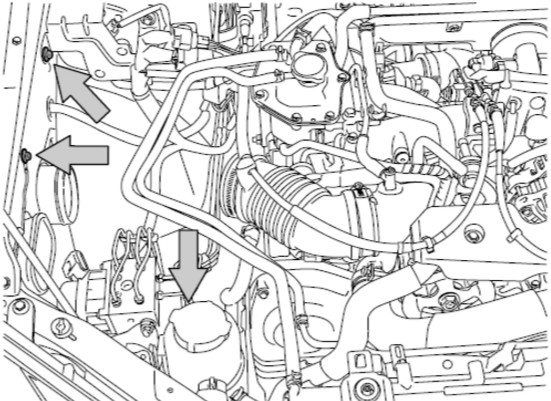
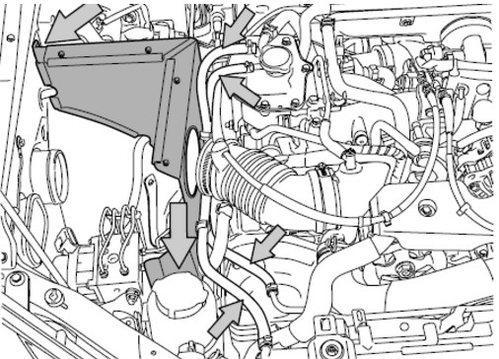
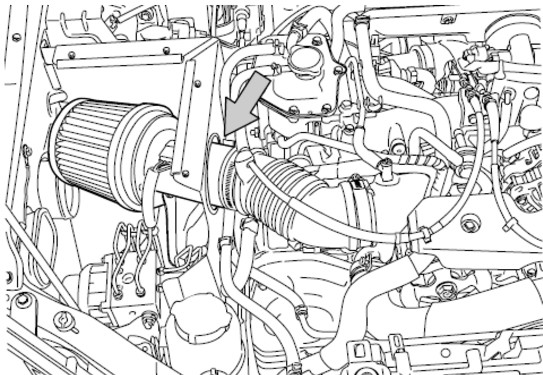
3) At this point it is time to replace the coolant lines going from the radiator to the air separator tank.IMPORTANT!!! MAKE SURE THE CAR HAS HAD PLENTY OF TIME TO COOL DOWN BEFORE ATTEMPTING TO REMOVE THE HOSES (30 minutes to 1 hour). Once cool, remove the radiator cap to relieve any pressure still remaining in the system. Star by using a pair of needle nose pliers to remove the clamps from both hoses. Be ready with the new hoses, or a way to catch the coolant that may come out when removing the hoses. Reusing the hose clamps from the factory lines install the shorter silicone hose in between the nipple off of the radiator cap and the line that goes to the coolant overflow bottle. The longer rubber hose goes in between the nipple just above the radiator cap and the nipple on the radiator. See diagram below for proper hose routing.
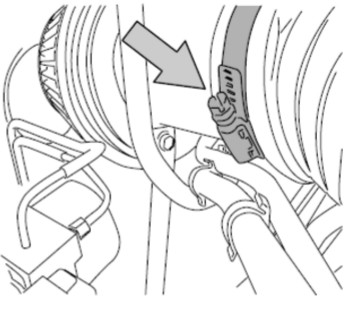
4) Install the COBB air box bottom reusing the 10 mm bolt that holds the boost control solenoid bracket in place and the 12 mm bolt that hold the ABS bracket in place. The coolant hoses may now be clipped on to the side of the air box.
5. Place the filter on the air horn end of the COBB MAF Sensor Housing and secure it using the supplied clamp.
6. Install the factory MAF sensor into the COBB MAF housing using the supplied hex bolts. BE VERY CAREFUL WITH THE SENSOR AS IT IS SENSITIVE AND CAN BE DAMAGED. The sensor can only be mounted one way due to the orientation of the mounting holes. TAKE CARE NOT TO PINCH THE O-RING WHEN INSTALLING. Tighten the hex bolts securely, but do not over tighten.
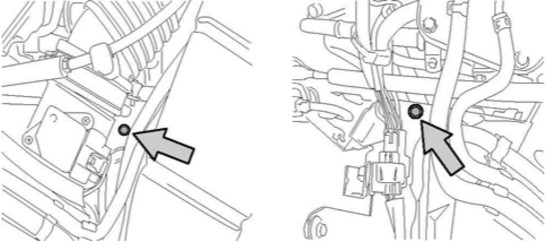
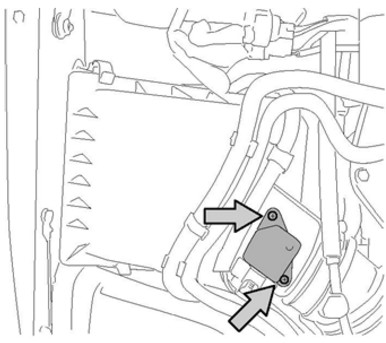
7. Now carefully slide the COBB MAF/filter assembly into the hole in the air box and into the factory intake tube. Before tightening the hose clamp on the intake tube, loosely bolt the bracket to the MAF housing using the supplied 10 mm bolt, lock washer, and washer, in that order.
8. Now position the MAF housing directly in the center of the hole in the air box and tighten the 10mm and 12 mm bolts on the MAF housing bracket and the hose clamp on the factory intake tube.
9. Install the lid support bracket using the 10mm bolt and washer to hold the ground in place. Make sure to install the ground under the bracket in the cutout to retain a good ground. Note: the plastic clip that retains the ground wire may not reach and may need to be removed.
10. Reinstall the factory air intake scoop.
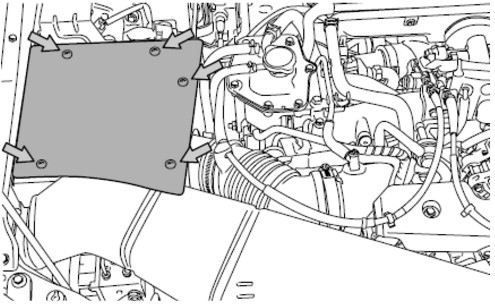
11. It is now time to install the air box lid. Using the 5 supplied button head hex bolts and 5 blacknylon washers, loosely install all 5 of the hex bolts with the nylon washers underneath to protect the finish on the lid. If you find that the bolt holes do not line up, the air box bottom and/or lid support bracket may need to be loosened, adjusted, and re tightened for a perfect fit. All of the holes are slotted to allow for differences from car to car.
12. The car should be started and warmed up to check for any vacuum or coolant leaks.
13. Enjoy your new COBB Tuning intake system!
Links
COBB Product Install Instructions for Subaru Vehicles
Main Installation Instruction Repository for Subaru Parts
Calibration Map Notes for Subaru Vehicles
Link to Subaru Map Notes to see what map you should be on given the parts you've added
COBB Customer Support Web Support and Tech Articles: COBB Tuning Customer Support Center Email: support@cobbtuning.com Phone support available 9am to 6pm Monday-Thursday. 9am to 4pm Friday (CST) 866.922.3059 return to www.cobbtuning.comContact Us:
Copyright 2024 © COBB Tuning Products LLC. All Rights Reserved. | www.cobbtuning.com