712100 - COBB SF SHORT RAM INTAKE SYSTEM
- Chris Mitchell
- Brandyn Mowat
- Will Trang

712100
COBB SF SHORT RAM INTAKE INSTALL INSTRUCTIONS
2002-2007 WRX, 2004-2007 STI (Sedan), 2004-2008 Forester XT
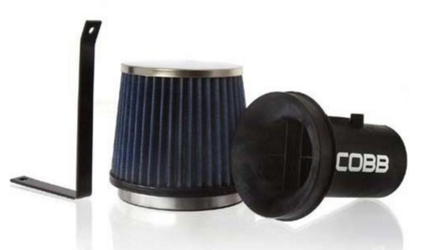
Part List
- Instructions Intake
- MAF Sensor Housing (1)
- Filter (1)
- Mounting Bracket (1)
- Bolt (1)
- Flat Washer (1)
- Hex-Head Bolts (2)
- Lock Washer (1)
Tools Needed
- Flat Head Screwdriver
- Phillips Head Screwdriver
- Socket Wrench (We recommend 3/8" drive)
- 12" Extension for Socket Wrench
- 10mm Socket
- 12mm Socket
- 10mm Boxed End Wrench
- 3mm Hex-Head /Allen Wrench
Removal of Stock Intake
1) Disconnect car battery.
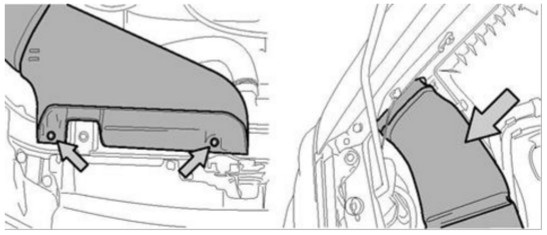
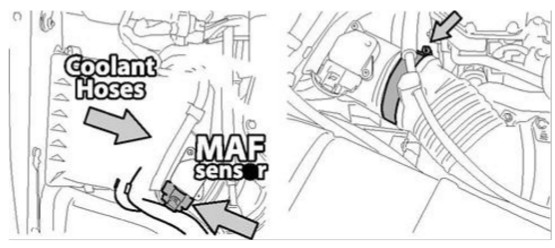
4) Remove the coolant hose from their clips on the top of the air box.
Installation of Cobb Tuning SF Intake
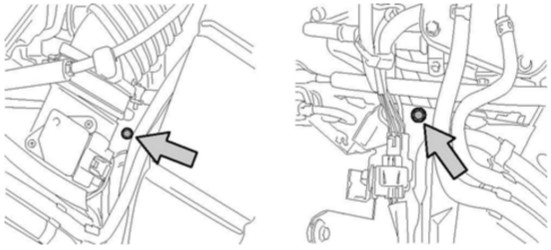
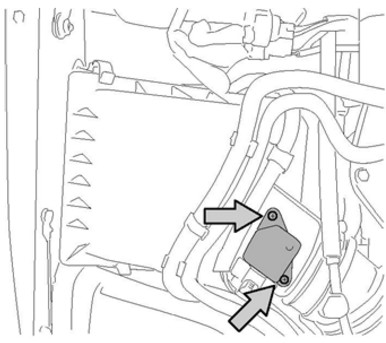
1) Using one of the bolts that secured the factory airbox to the chassis, install the bracket for the COBB SF Intake System in the most forward facing of the two bolt holes. Do not tighten the bolt so
that it can move to properly position the housing/filter later.
2) Place the filter on the air horn end of the COBB MAF Sensor Housing and secure it using the supplied clamp.
3) Slide the COBB SF Intake/fllter assembly onto the factory intake hose and orient the intake so that the bracket mounting hole rotated down. Place the COBB SF intake so that the mounting hole
is lined up with the hole in the bracket and install the provided hardware. The flat washer should be contacting the bracket and the lock washer should be contacting the head of the bolt. Leave
the bolt somewhat loose so that you can position the intake. The coolant hoses can be either above or below the intake.
4) Install the MAF sensor into the COBB MAF Sensor Housing using the two hex-head bolts provided. BE VERY CAREFUL WITH THE SENSOR AS IT IS SENSITIVE AND CAN BE DAMAGED. It
can only be installed one way due to the orientation of the mounting holes. Make sure to tighten screws securely, but do not use too much torque. The sealing is done by an O-ring, so it does
not need much pressure.
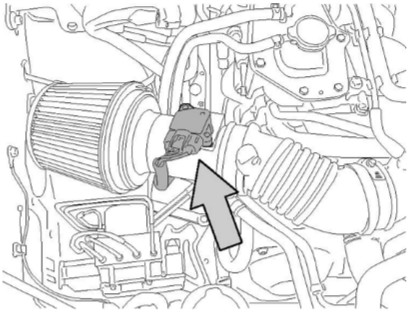
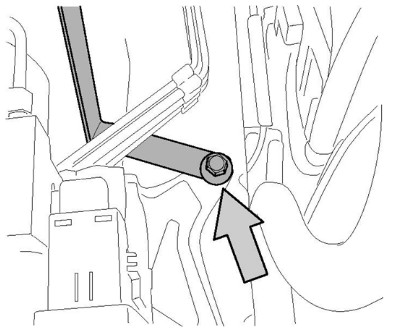
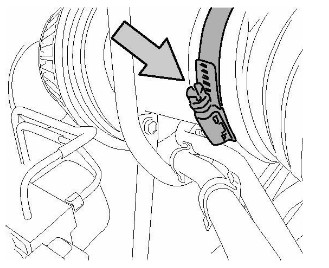
5) Position the COBB SF Intake in a manner which closely matches the stock MAF sensor orientation. Assure that it does not contact the ABS system, strut tower, fender, or the wheel well. Tighten
the mounting bolts to secure the COBB SF intake into position. Tighten the clamp that secures the intake hose to the COBB SF Intake. Make sure that it is fully inserted.
Links
COBB Product Install Instructions for Subaru Vehicles
Main Installation Instruction Repository for Subaru Parts
Calibration Map Notes for Subaru Vehicles
Link to Subaru Map Notes to see what map you should be on given the parts you've added
COBB Customer Support Web Support and Tech Articles: COBB Tuning Customer Support Center Email: support@cobbtuning.com Phone support available 9am to 6pm Monday-Thursday. 9am to 4pm Friday (CST) 866.922.3059 return to www.cobbtuning.comContact Us:
Copyright 2024 © COBB Tuning Products LLC. All Rights Reserved. | www.cobbtuning.com