724455 - COBB TUNING SUBARU TMIC COUPLER
- Chris Mitchell (Deactivated)
- Brandyn Mowat
- Dean Nixon

COBB TUNING SUBARU TMIC COUPLER INSTALL INSTRUCTIONS
WRX 2008-2017, FXT 2009-2013, LGT 2005-2009, 2.5GT 2009-2010, OBXT 2005-2009
Part List
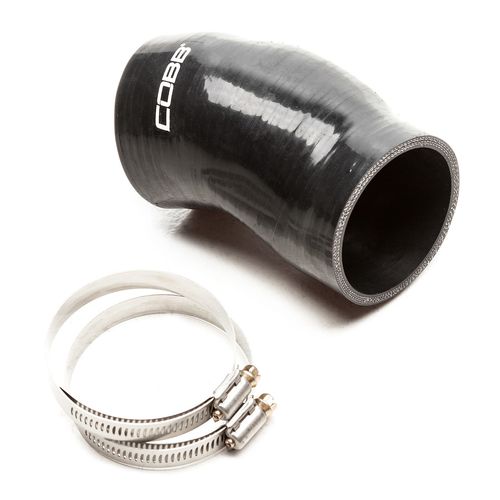
- COBB Tuning Subaru TMIC Coupler
- 2X SAE #44 Worm Clamps
- Flathead Screwdriver
- 12mm Socket
- 8mm Socket
Removal of Stock TMIC Coupler
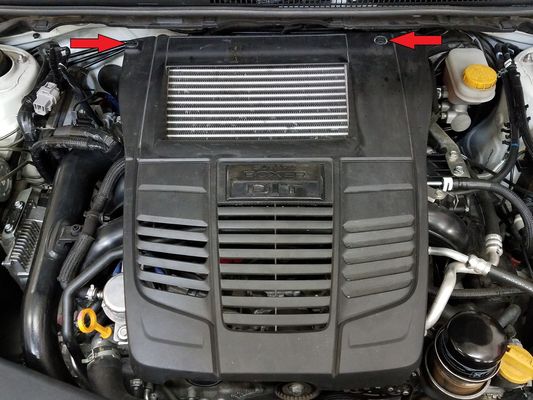
- Using a flat head screwdriver, remove plastic retaining clips from engine cover. Once removed, gently lift the front of the engine cover until it releases from the two grommets holding it in place and remove engine cover.
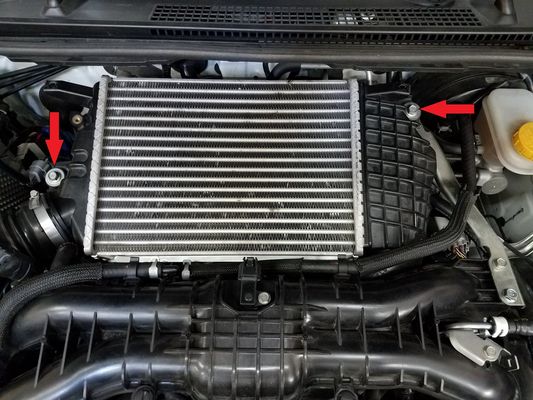
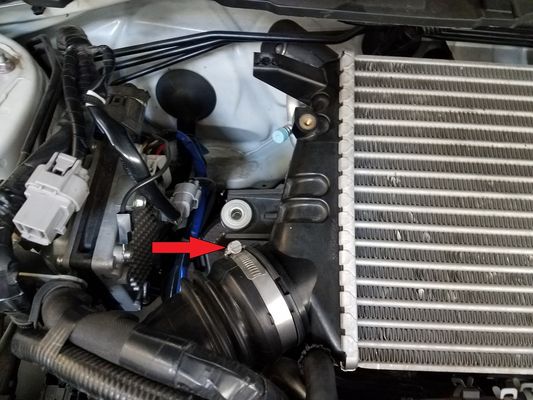
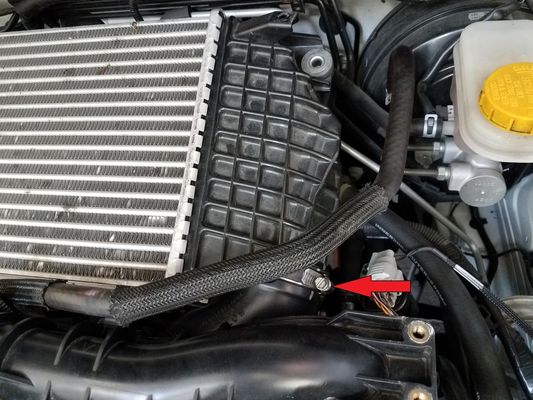
2. Using a 12mm socket and socket driver, remove two intercooler mounting bolts.
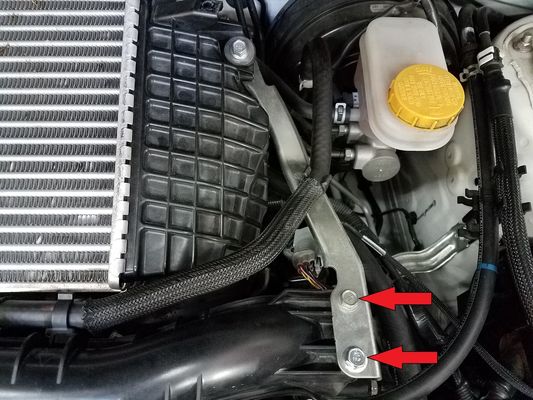
3. Using a 12mm socket and socket driver remove the two intercooler bracket bolts and remove intercooler mounting bracket. (This will make the removal and installation process easier.)
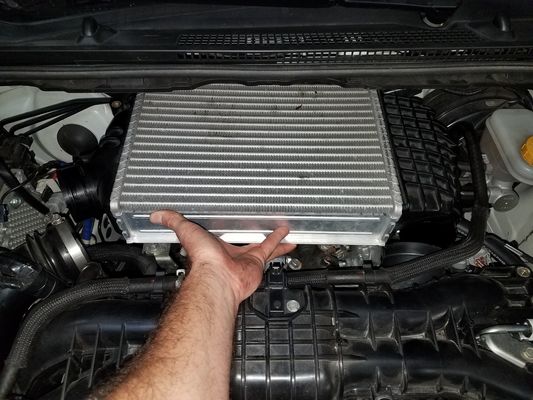
4. Using an 8mm socket and socket driver, loosen worm clamps on hot and cold side of intercooler.
5. Grasp intercooler and push towards firewall until it releases from hot and cold side connections. (This may take some effort, be careful not to damage the intercooler fins). Once released, lift
the front of the intercooler up and pull the intercooler out of the engine bay.
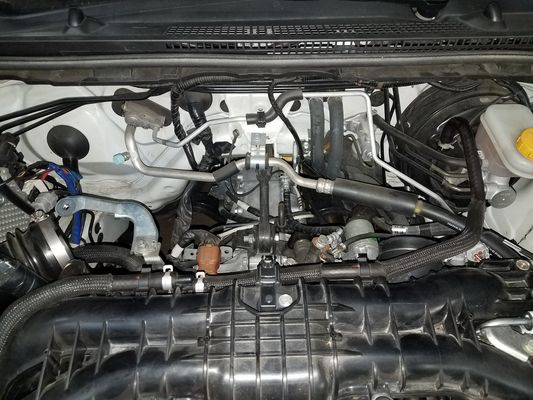
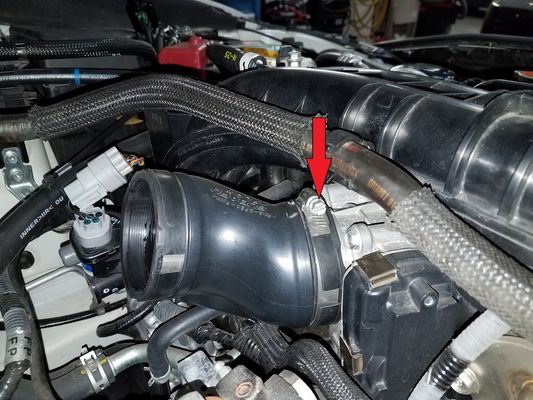
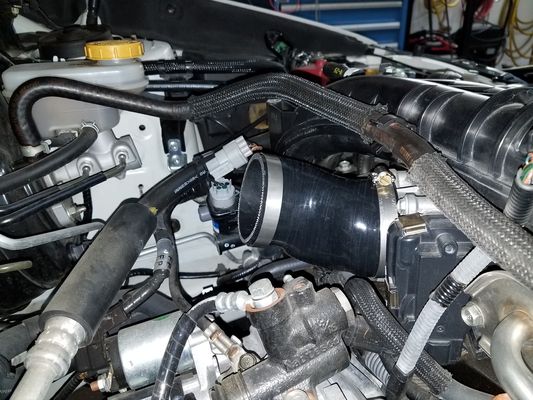
6. Using an 8mm socket and socket driver loosen the worm clamp holding the stock coupler to the throttle body and remove the stock coupler.
Installation of COBB Tuning Subaru TMIC Coupler
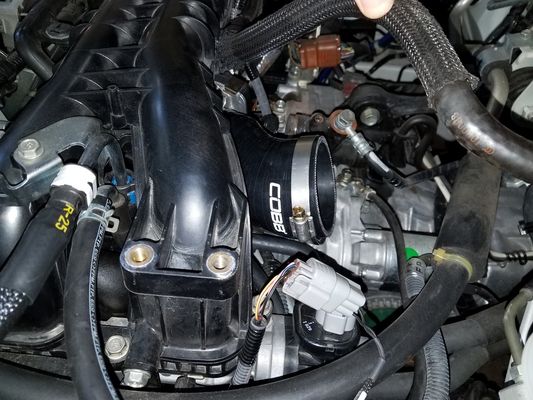
1. Install two provided worm clamps onto ends of COBB Subaru TMIC coupler. Position the coupler so that the lump is facing directly down and COBB logo is approximately as shown
below. Tighten worm clamp on throttle body using 8mm socket and socket driver.
2. Re-install the intercooler mounting bracket. Leave the two 12mm bolts finger tight so you can adjust the position of the bracket later.
3. Re-install the intercooler by reversing the process used to remove it. (You may want to apply some silicone lubricant to the stock coupler on the hot side connection to the intercooler as the rubber
on it tends to roll in on itself during re-installation of the intercooler. If this occurs it will likely cause a boost leak.)
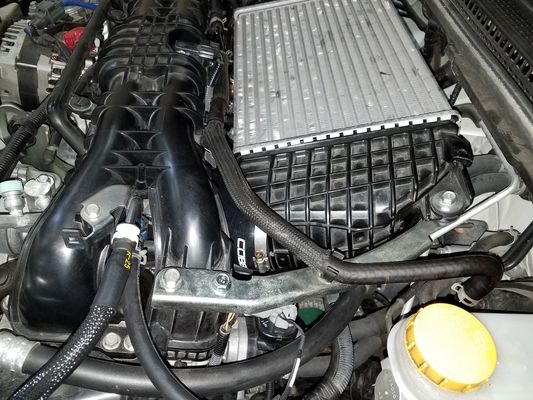
4. Once both sides of the intercooler are reconnected, tighten the two worm clamps using an 8mm socket and socket driver, reinstall the (2) intercooler mounting bolts, and tighten the (2) intecooler
bracket bolts using a 12mm socket and socket driver. (At this point you may want to loosen worm clamps and adjust the coupler so that both ends are as flush as possible with the throttle body
and intercooler to ensure a good seal. It is also suggested that after this installation you check for boost leaks). Reinstall engine cover.
Congratulations on installation of the COBB Tuning Subaru TMIC Coupler!
Links
COBB Product Install Instructions for Subaru Vehicles
Main Installation Instruction Repository for Subaru Parts
Calibration Map Notes for Subaru Vehicles
Link to Subaru Map Notes to see what map you should be on given the parts you've added
COBB Customer Support Web Support and Tech Articles: COBB Tuning Customer Support Center Email: support@cobbtuning.com Phone support available 9am to 6pm Monday-Thursday. 9am to 4pm Friday (CST) 866.922.3059 return to www.cobbtuning.comContact Us:
Related content
Copyright 2025 © COBB Tuning Products LLC. All Rights Reserved. | www.cobbtuning.com