COBB XLE BPV Installation Instructions [Discontinued]
- Will Trang
- Brandyn Mowat

COBB Tuning XLE BPV Install Instructions
Subaru - 712660
Mitsubishi - 752660
Mazda - 771660

Subaru - 724660
Nissan GT-R - 7C1660
Congratulations on your purchase of the COBB Tuning XLE Bypass Valve Kit. The following instructions will assist you through your installation process. Please read them first BEFORE beginning the install and familiarize yourself with the steps and tools needed. If you feel that you cannot properly perform this installation, we HIGHLY recommend you take the vehicle to a qualified and experienced automotive technician.
Part List
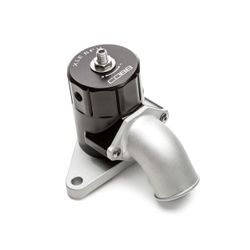
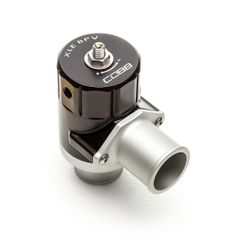
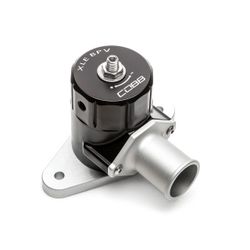
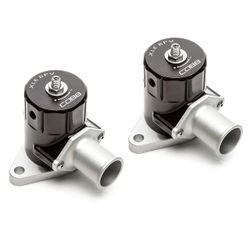
- Bypass Valve (2 x Nissan GT-R)
- Paper Gasket (Mazdaspeed 3 or Legacy and 08+ WRX Applications Only)
- 4mm Allen Key
- 1/16” NPT Barbed Hose Fitting (Per Valve)
- 2 x 1/16” NPT Hex Plug (Per Valve)
- Thread Sealant Packet (Per Valve)
- 6mm COBB Vacuum Hose
Tools Needed
- 3/8” Ratchet
- 10mm & 12mm Socket
- 10mm & 12mm Open End Wrench
- 8mm Socket or Wrench
- Pliers
Tools Required for Maintenance
- 3mm Allen Key
- 4mm Allen Key
- 13mm Open End Wrench
- Lubrication Grease (We recommend Super-Lube Silicone Lubricating Grease with Syncolon)
Removal of Factory Bypass Valve
- Locate your stock bypass valve. Use the pictures below for reference if needed.
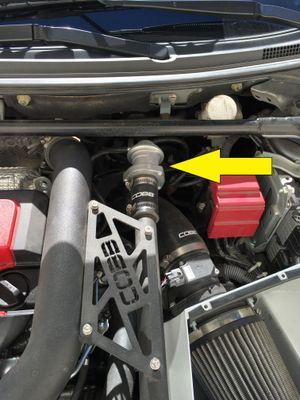
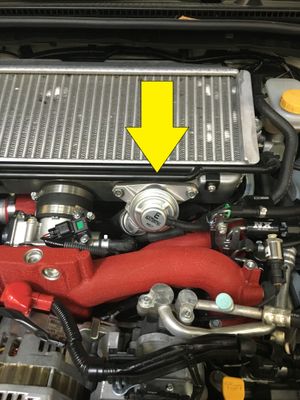
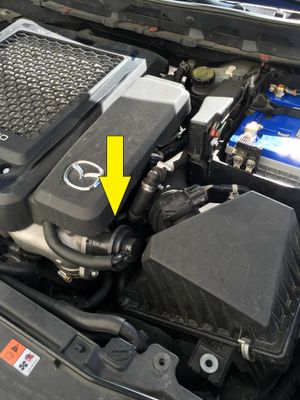
EVO X WRX/STi Mazdaspeed3/6
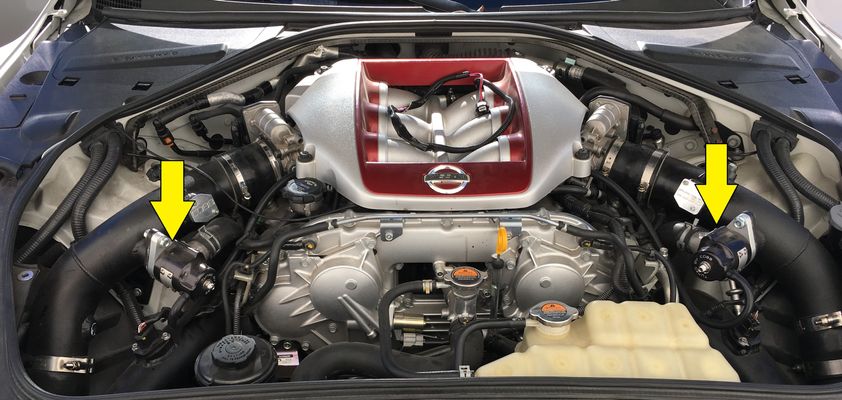
R35 Nissan GT-R
2. Using a pair of pliers, remove the return line from the bypass valve. Each application is a bit different.
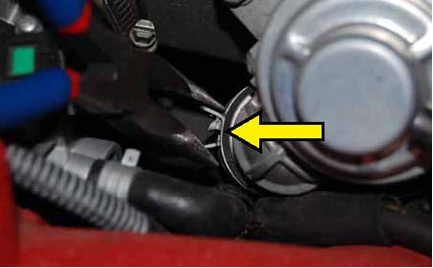
3. Remove the vacuum line from the factory bypass valve. Each application is a bit different.
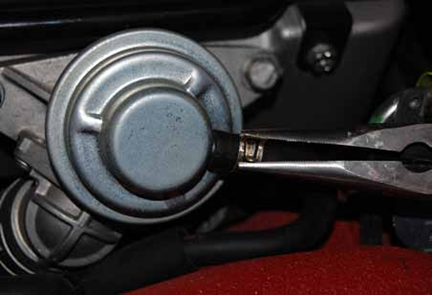
4. Using a 10mm or 12mm socket with ratchet or 10mm or 12mm open end wrench (depending on application), remove the 2 bolts that hold the bypass valve in place.
TIP: Make sure to keep an eye on the factory gasket behind the BPV. They can fall when you remove the valve and end up in difficult to reach locations!
5. Remove the bypass valve.
Installation of Vacuum Barb and Plugs in COBB BPV
- Depending on application and hose routing preference, you need to decide how you would like to install the vacuum barb and plugs into the COBB BPV. To do so, go ahead and place your BPV onto the car to get an idea of how you would like things routed. You can simply hold it in place or loosely install it with the factory bolts. There are three mounting options for the vacuum barb on the new COBB BPV, each 90 degrees apart. Choose which port will work best for your setup.
- Get the valve back to your work area and install the vacuum barb using a drop or two of the supplied thread sealant and an 8mm socket or wrench. Wipe off any excess thread sealant after the barb is installed.
NOTE: There is no need to over tighten this; simply snug it into place and give it an extra quarter turn to tighten. Over tightening this component could cause it to protrude too far into the BPV body and affect performance. - Now you can go ahead and install the two 1/16" NPT plugs into the valve body. To do this, apply a drop or two of thread sealant to the plug and install into the BPV body using the supplied 4mm Allen key. Wipe off any excess thread sealant after plugs are installed.
NOTE: There is no need to over tighten this; simply snug it into place and give it an extra quarter turn to tighten. Over tightening this component could cause it to protrude too far into the BPV body and affect performance.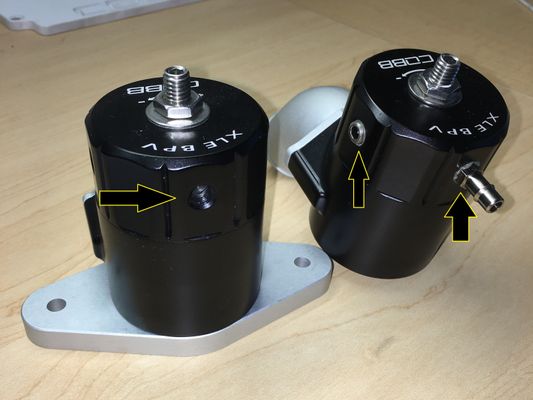
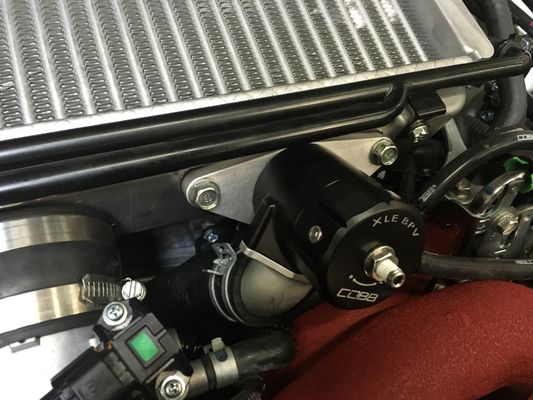
Installation of COBB BPV
- With the vacuum barb and plugs installed, it is now time to install the valve onto your car. To do so, simply reinstall it in place of your factory BPV in reverse order from which you removed it. If your BPV arrived with a replacement paper gasket, use this between the flange of the BPV and the car. If your vehicle has a factory BPV gasket, you can reuse it if it appears to be in good condition.
- If the factory vacuum line is in good condition and terminates in the correct area, we recommend reusing the factory line. If not, we've provide a length of COBB vacuum line you can use. We recommend that all connections be locked in with a small zip tie, if possible.
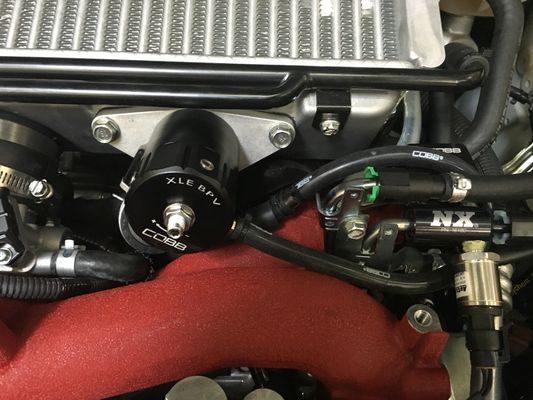
- Remember to reinstall the factory BPV return line onto the nose of the BPV. Be sure to get as much of the return line onto the new BPV nose as possible before clamping it in place.
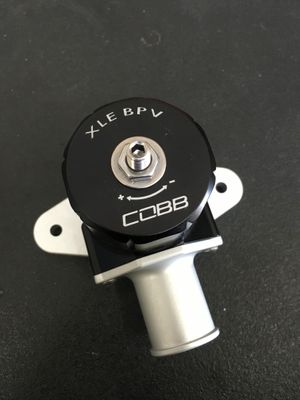
Adjusting the Spring Preload
In order to adjust the spring tension on the COBB BPV, adjust the set screw in the top of the BPV body.
- Loosen the jam nut on the top of the valve a turn or two using a 13mm wrench.

- Using a 4mm Allen key, turn the screw clockwise to increase spring tension, increase the chance of compressor surge and make the BPV vent air slower. This will also cause the BPV to vent later when you lift your foot off the throttle.

- Turning the screw counter clockwise will decrease spring tension, decrease compressor surge and make the BPV vent faster. This will also cause the BPV to vent sooner when you lift your foot off the throttle and may cause more re-circulation during part-throttle driving.
NOTE: Adjusting the spring tension does NOT adjust the amount of boost the BPV will hold.
Bypass Valve Maintenance
It is recommended that every time you change your oil you inspect your COBB Tuning Bypass Valve to make sure the piston is still moving freely. You can do so by unbolting the BPV from the vehicle mounting flange and pushing on the piston. If you can feel some resistance, it is advised to remove the piston from the body and clean and re-grease the piston, we recommend ARP Ultra-Torque Fastener Assembly Lubricant, P/N 100-9911 or Super-Lube Silicone Grease with PTFE, but any moly-based grease will work fine.
Disassemble the COBB Tuning Bypass Valve
In order to remove the piston, unbolt the base flange from the body using a 3mm allen key. Depending on the BPV model you have, this may be 5-7 socket head cap screws. When removing the piston, be careful to not cut the o-ring. If your o-ring is damaged, you can contact COBB Tuning for a replacement.
COBB Customer Support Web Support and Tech Articles: COBB Tuning Customer Support Center Email: support@cobbtuning.com Phone support available 9am to 6pm Monday-Thursday. 9am to 4pm Friday (CST) 866.922.3059 return to www.cobbtuning.comContact Us:
Related content
Copyright 2025 © COBB Tuning Products LLC. All Rights Reserved. | www.cobbtuning.com