/
VA DIT WRX Stock Intake Removal
VA DIT WRX Stock Intake Removal
- Brandyn Mowat
Owned by Brandyn Mowat
Last updated: Dec 08, 2021
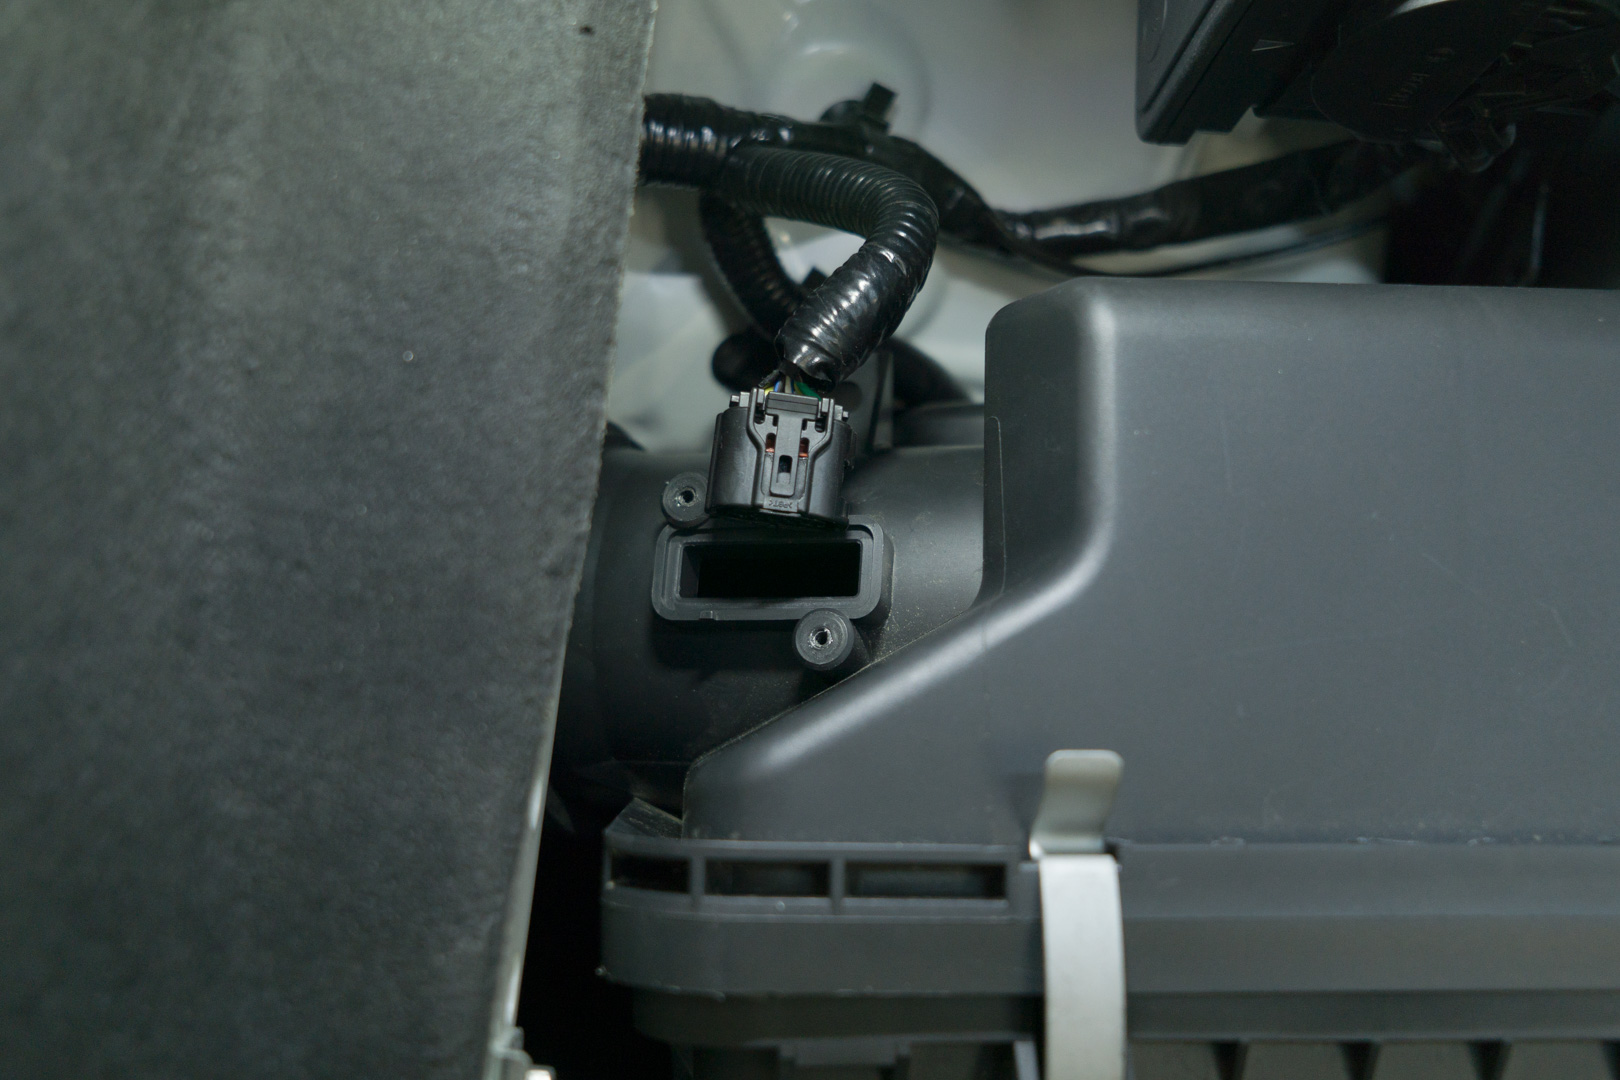
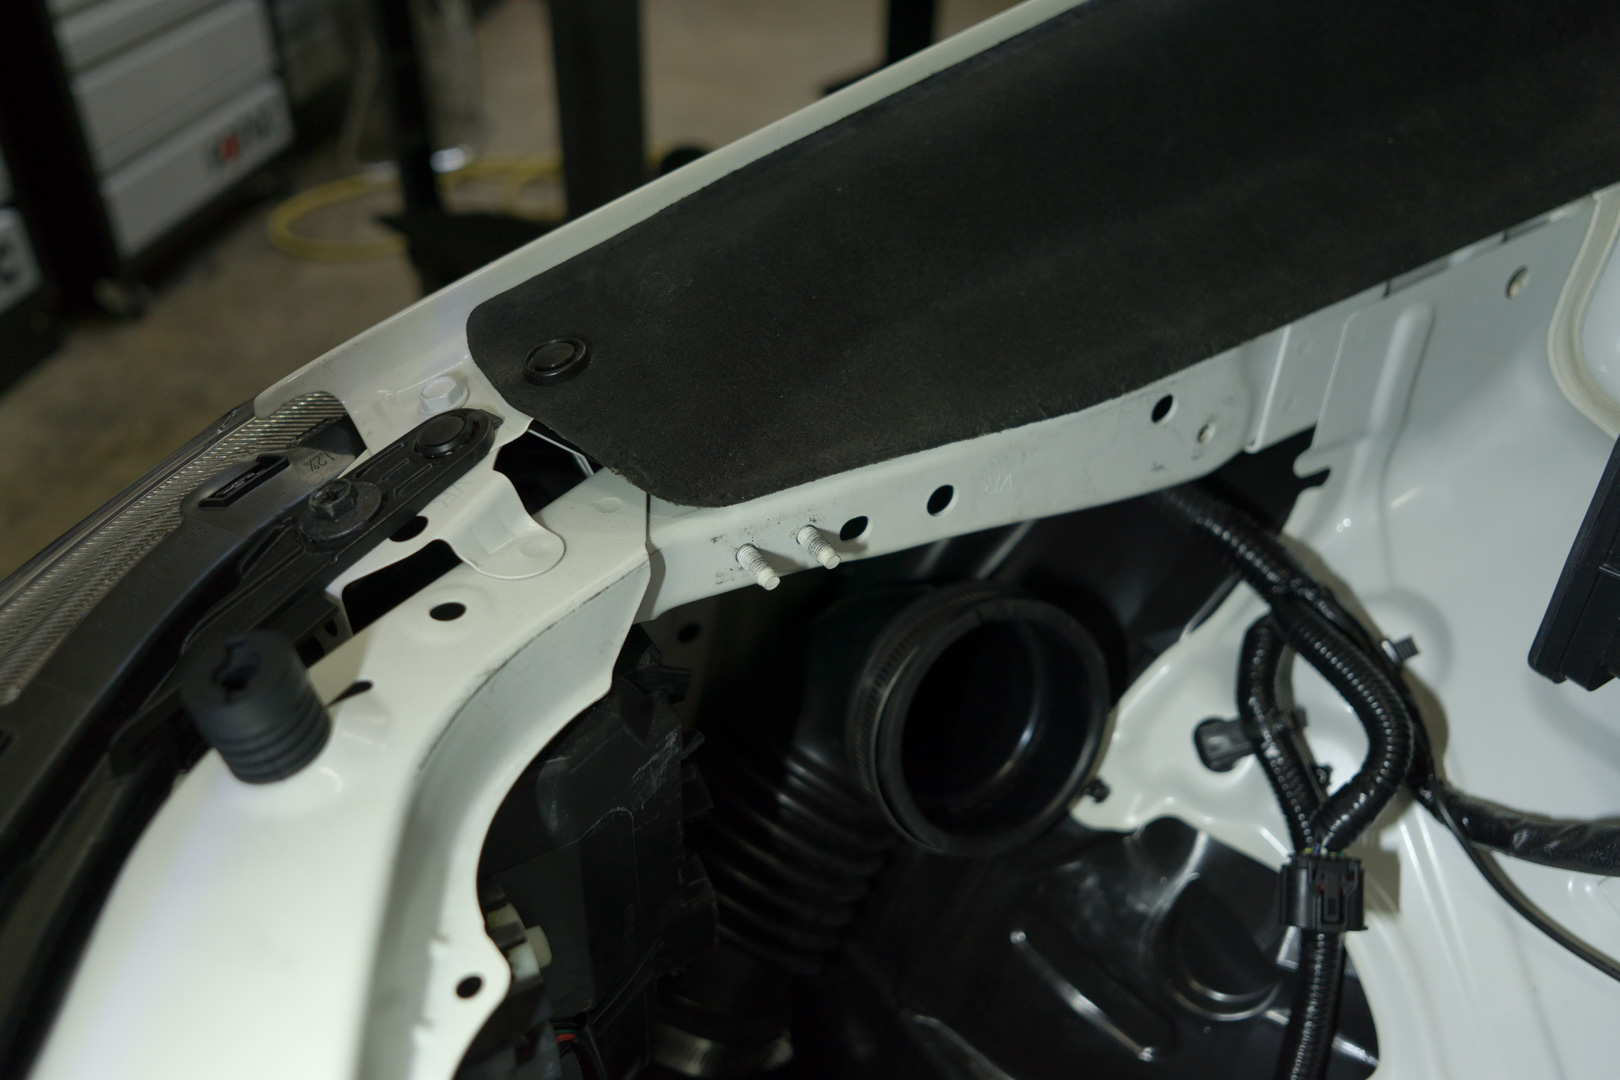
- Unscrew the Mass Airflow (MAF) sensor using a Phillips head screwdriver.
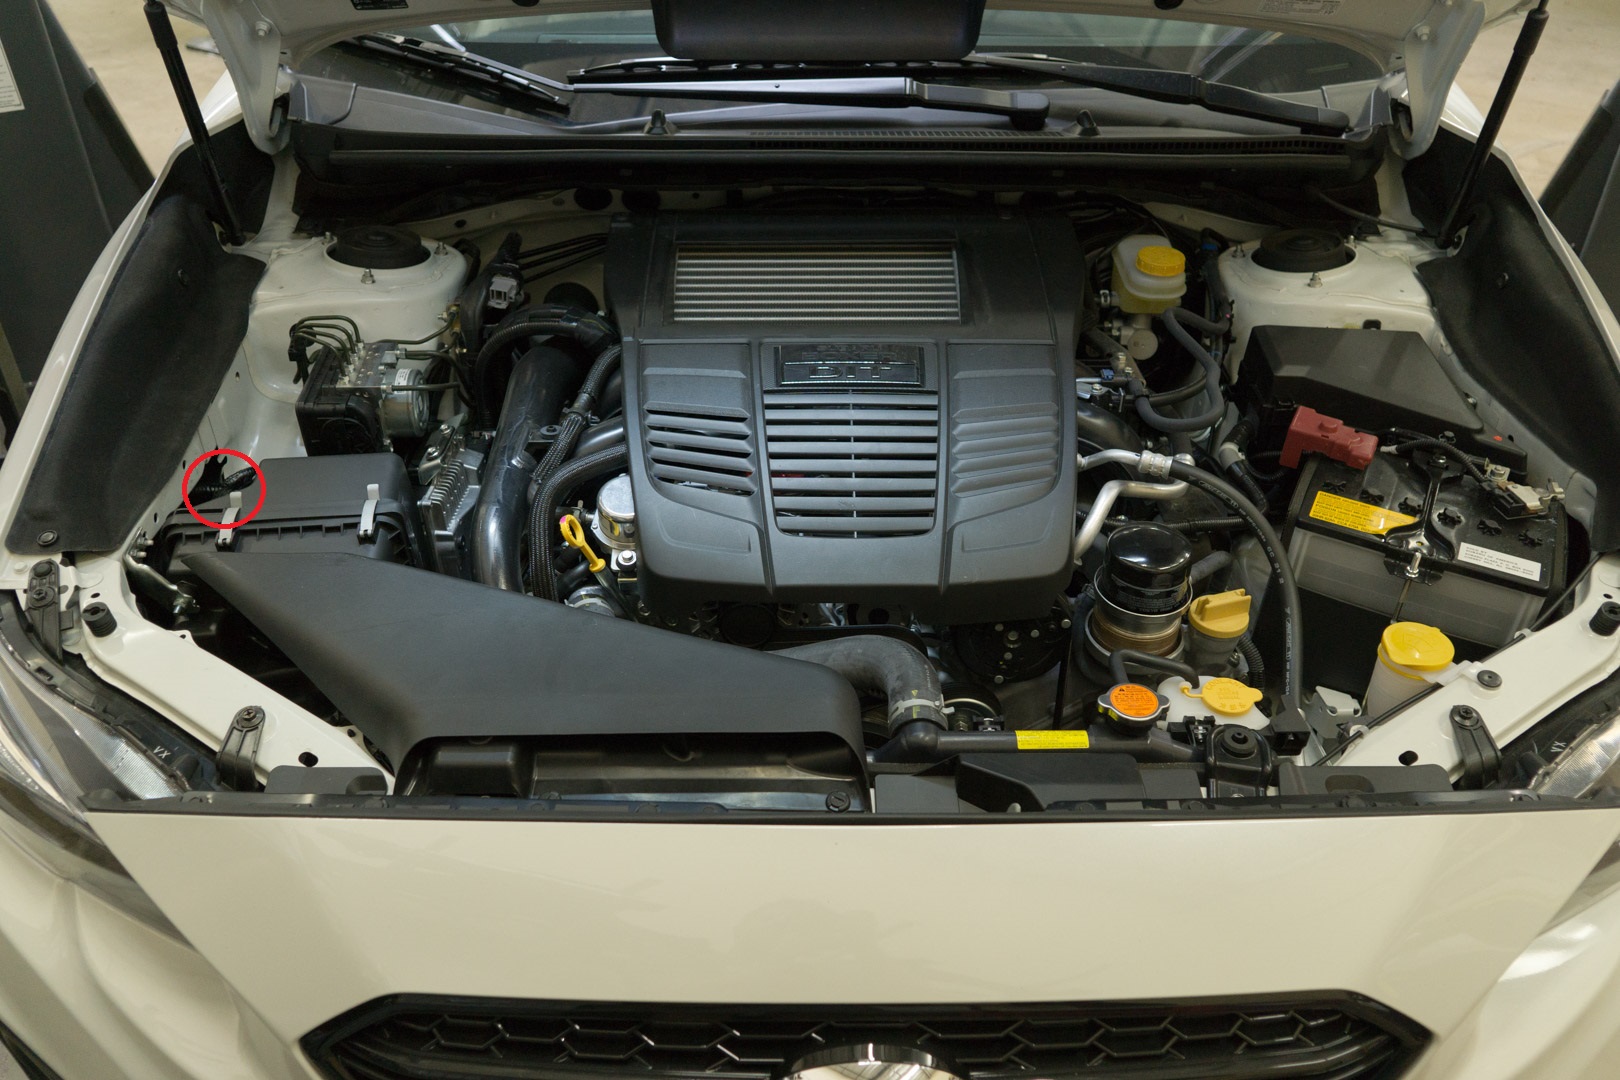
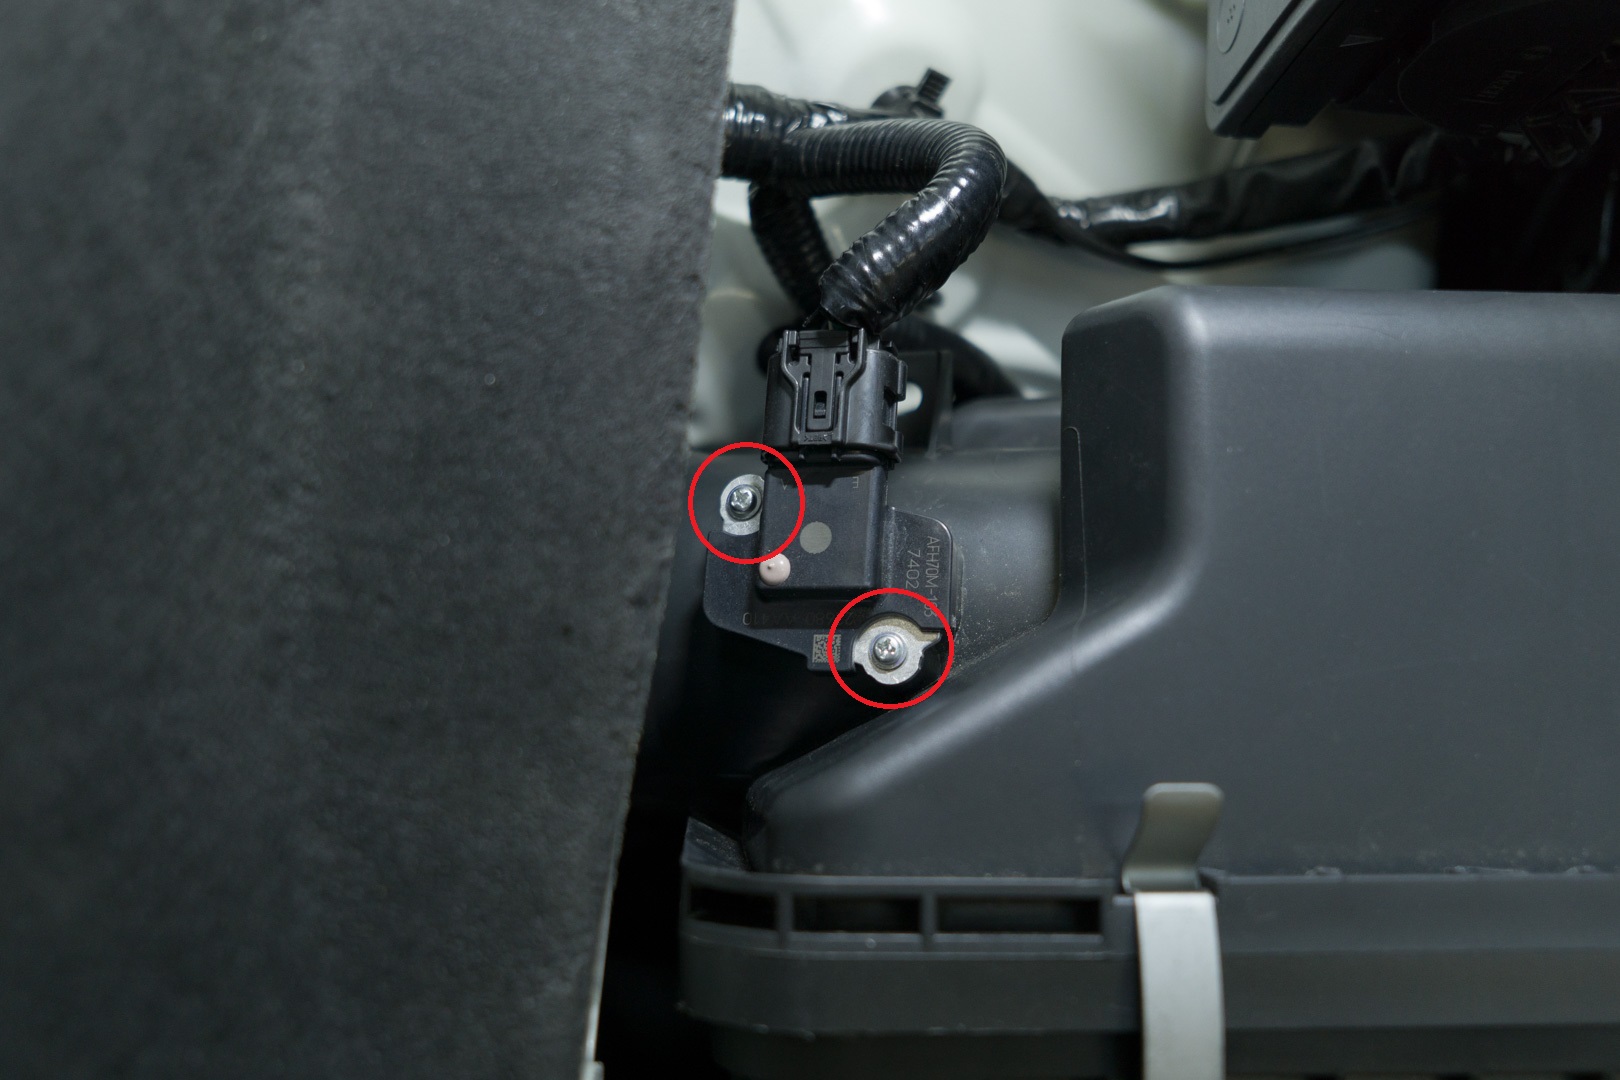
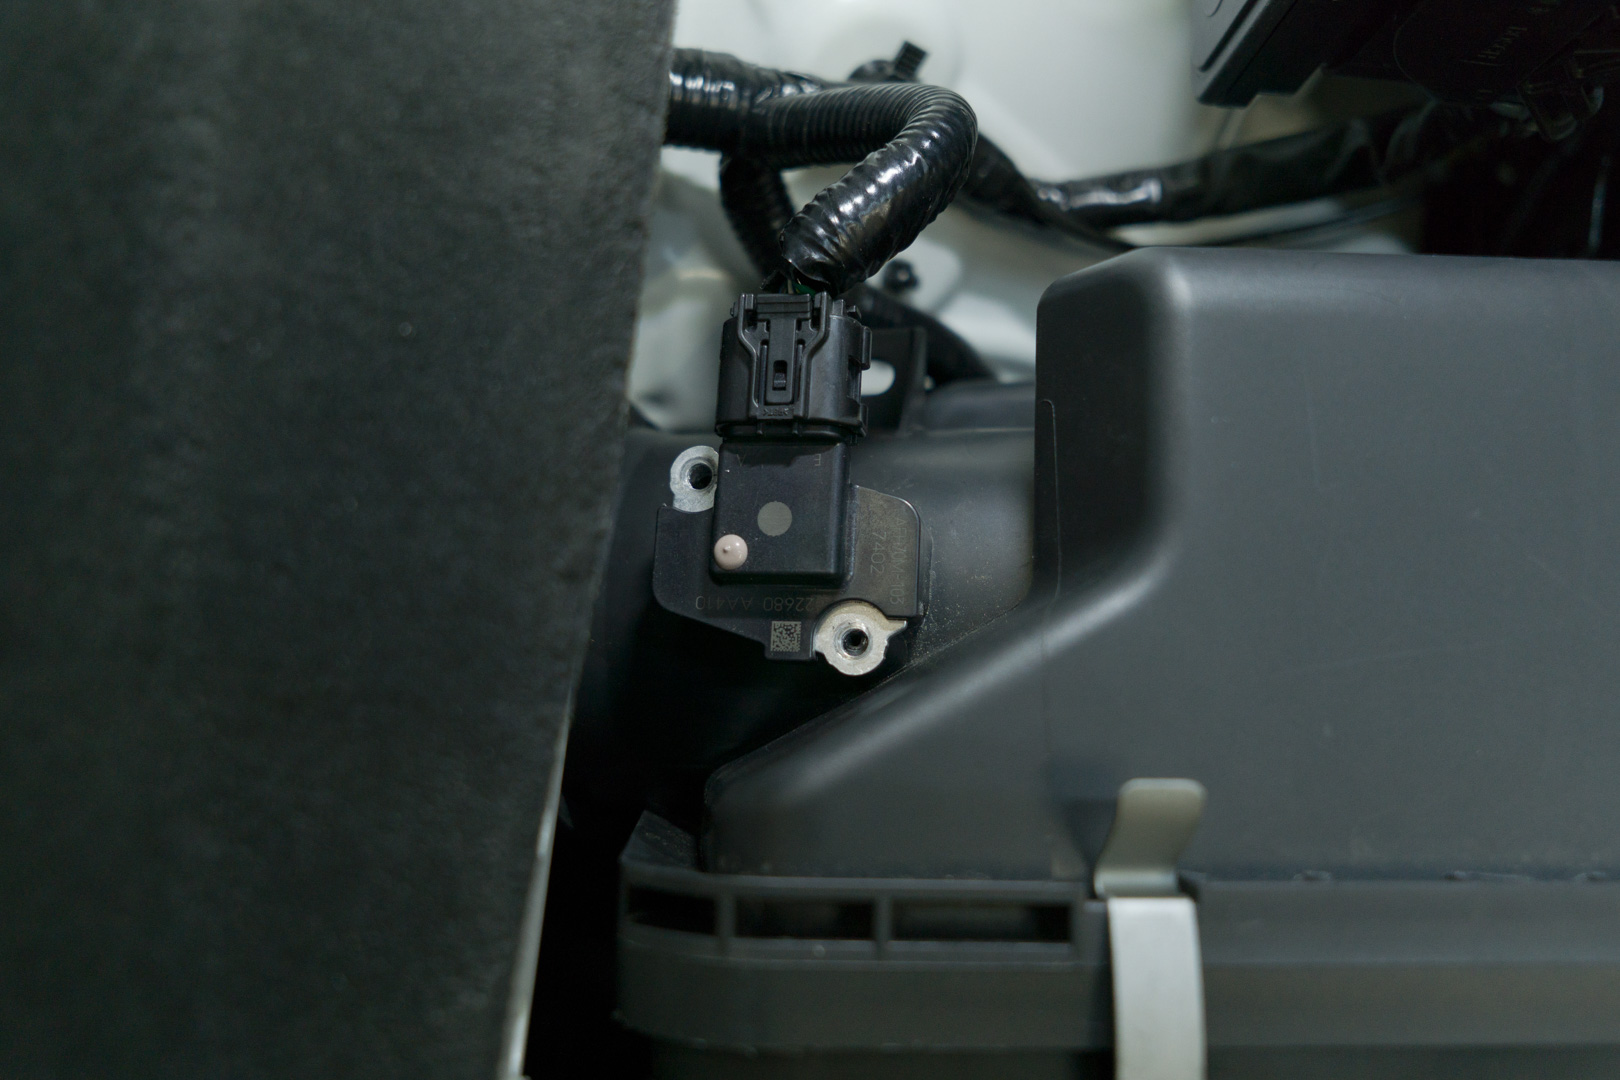
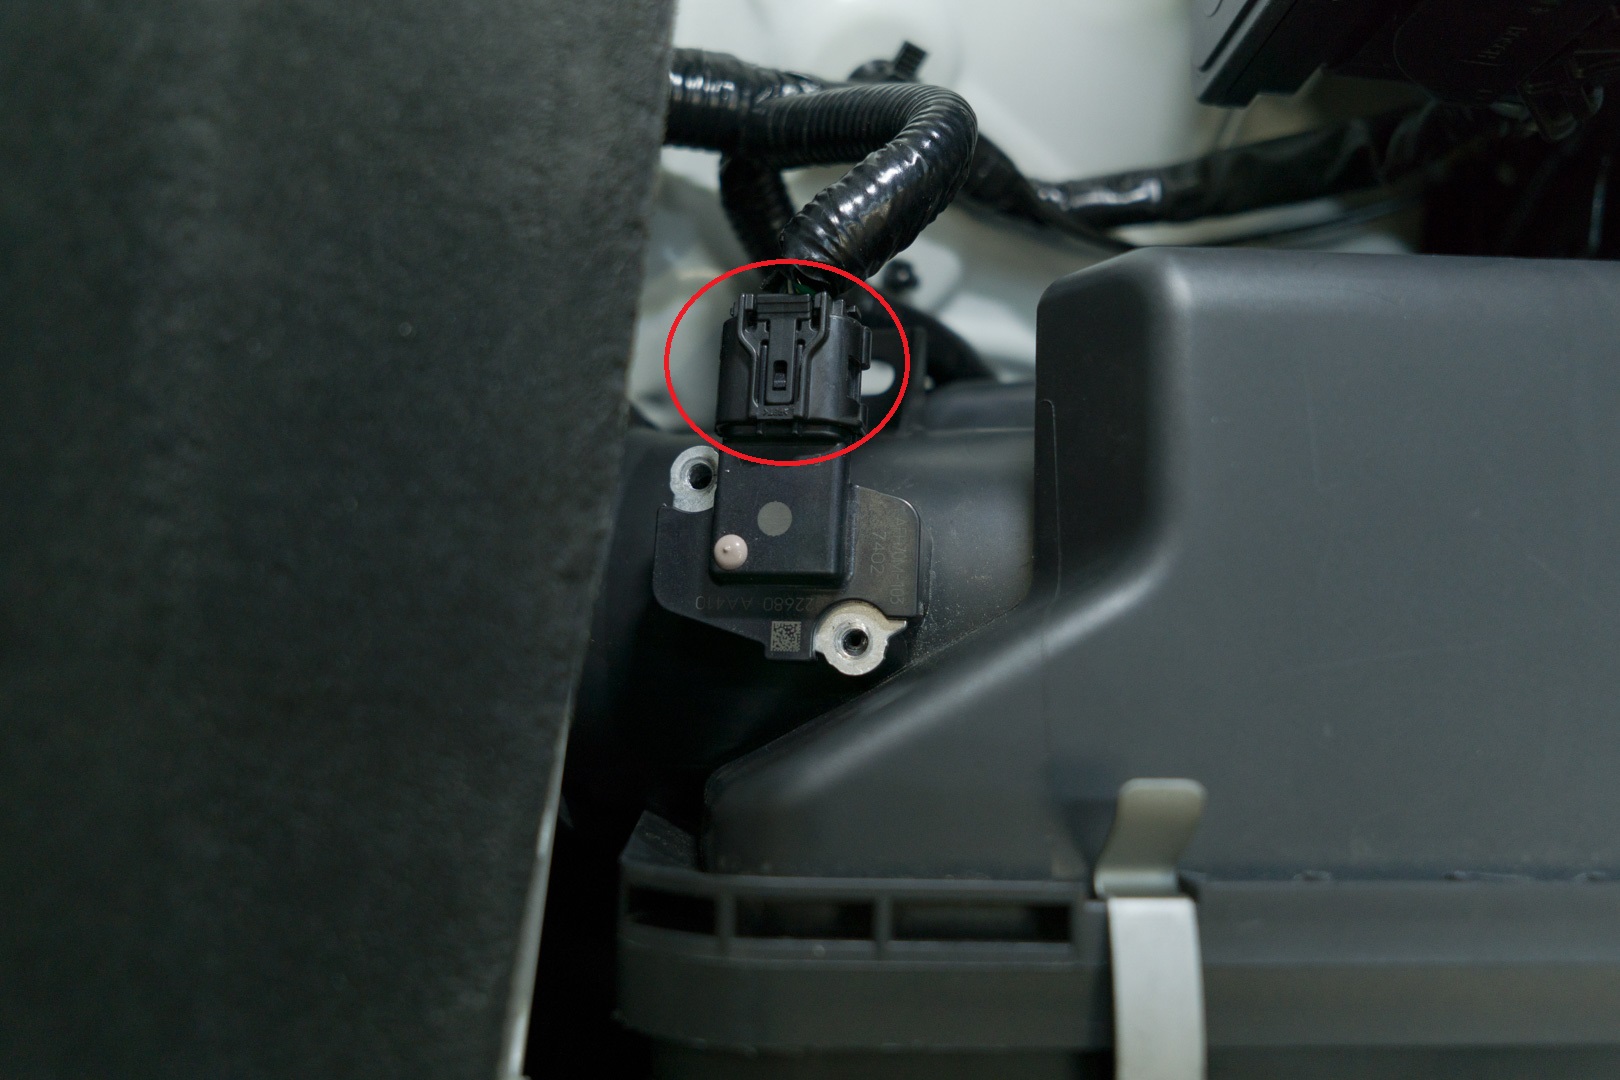
- Unclip the MAF sensor from the electrical harness and remove the MAF sensor.
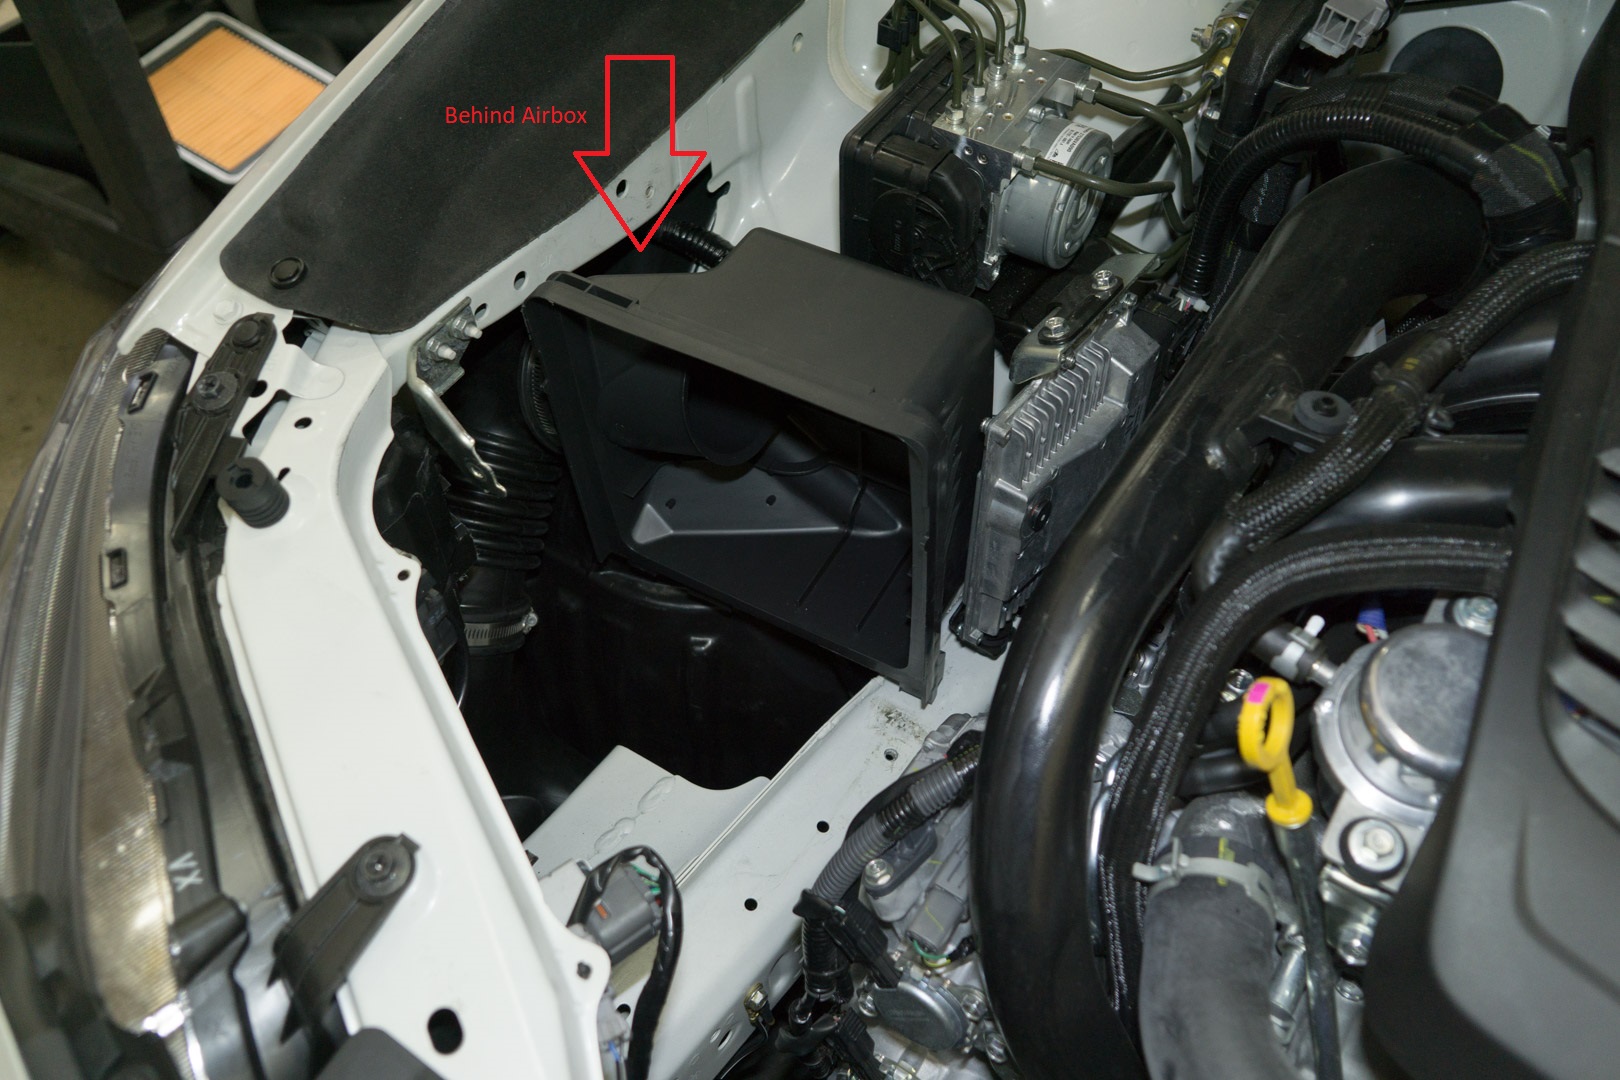
- Remove front air snorkel using a flathead screwdriver to release the clips.

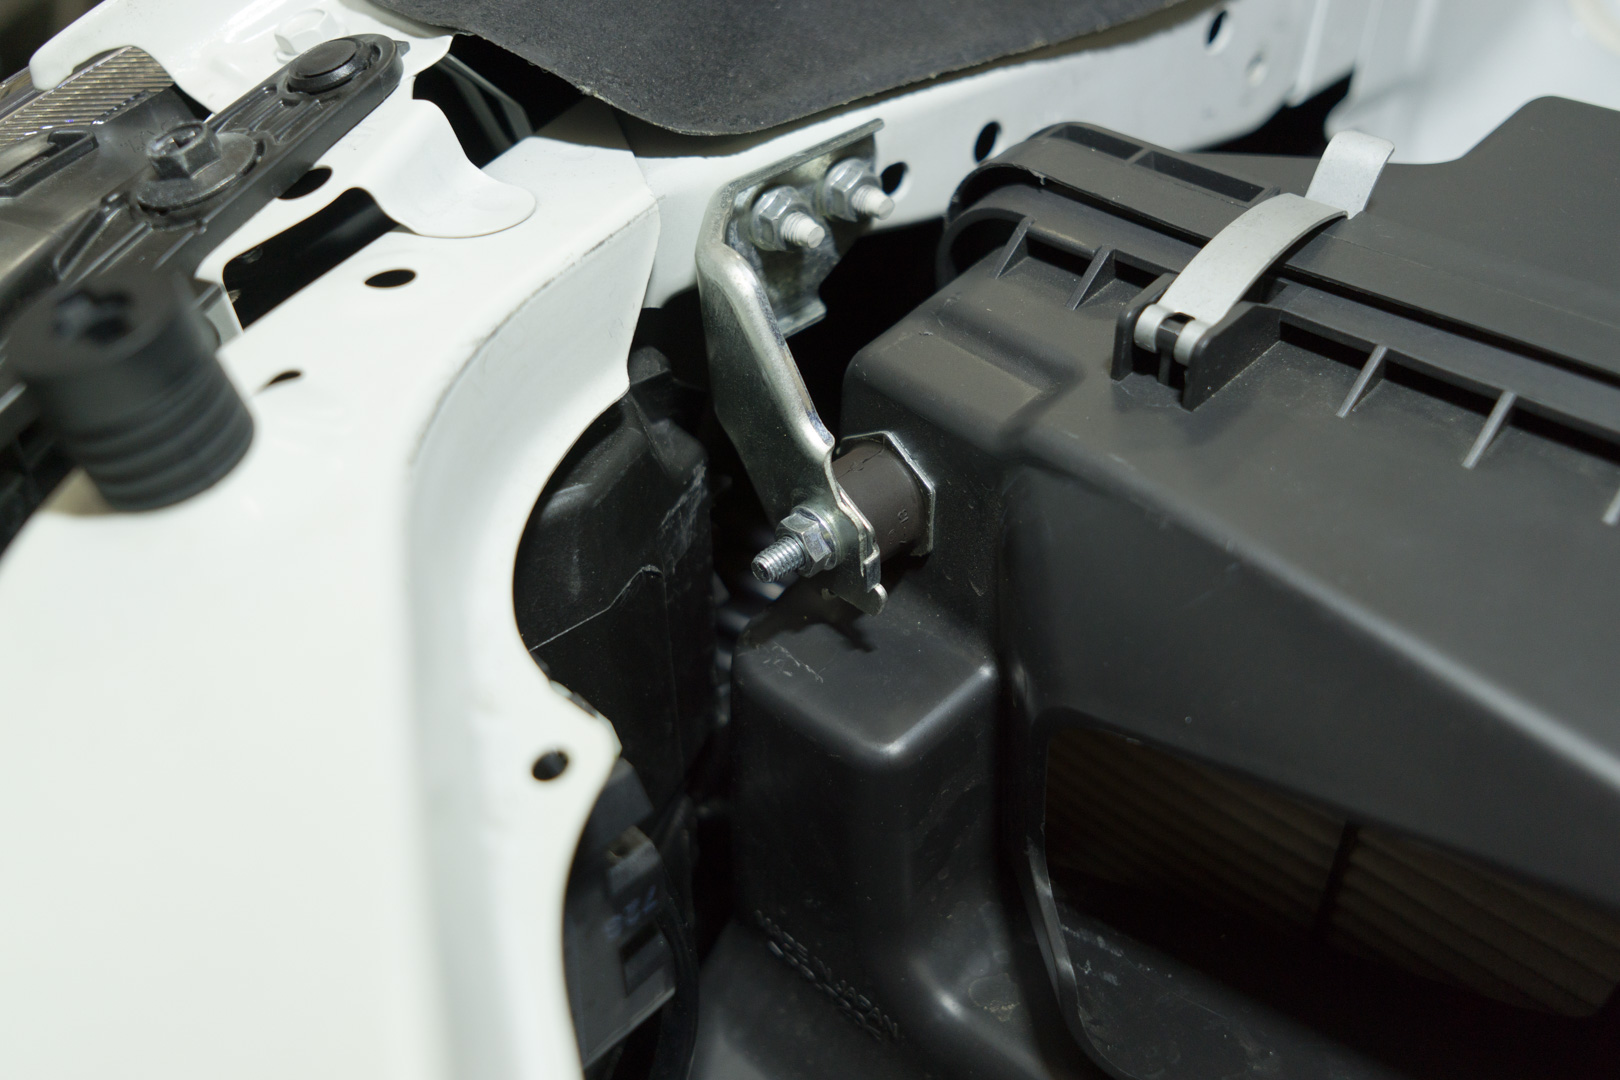
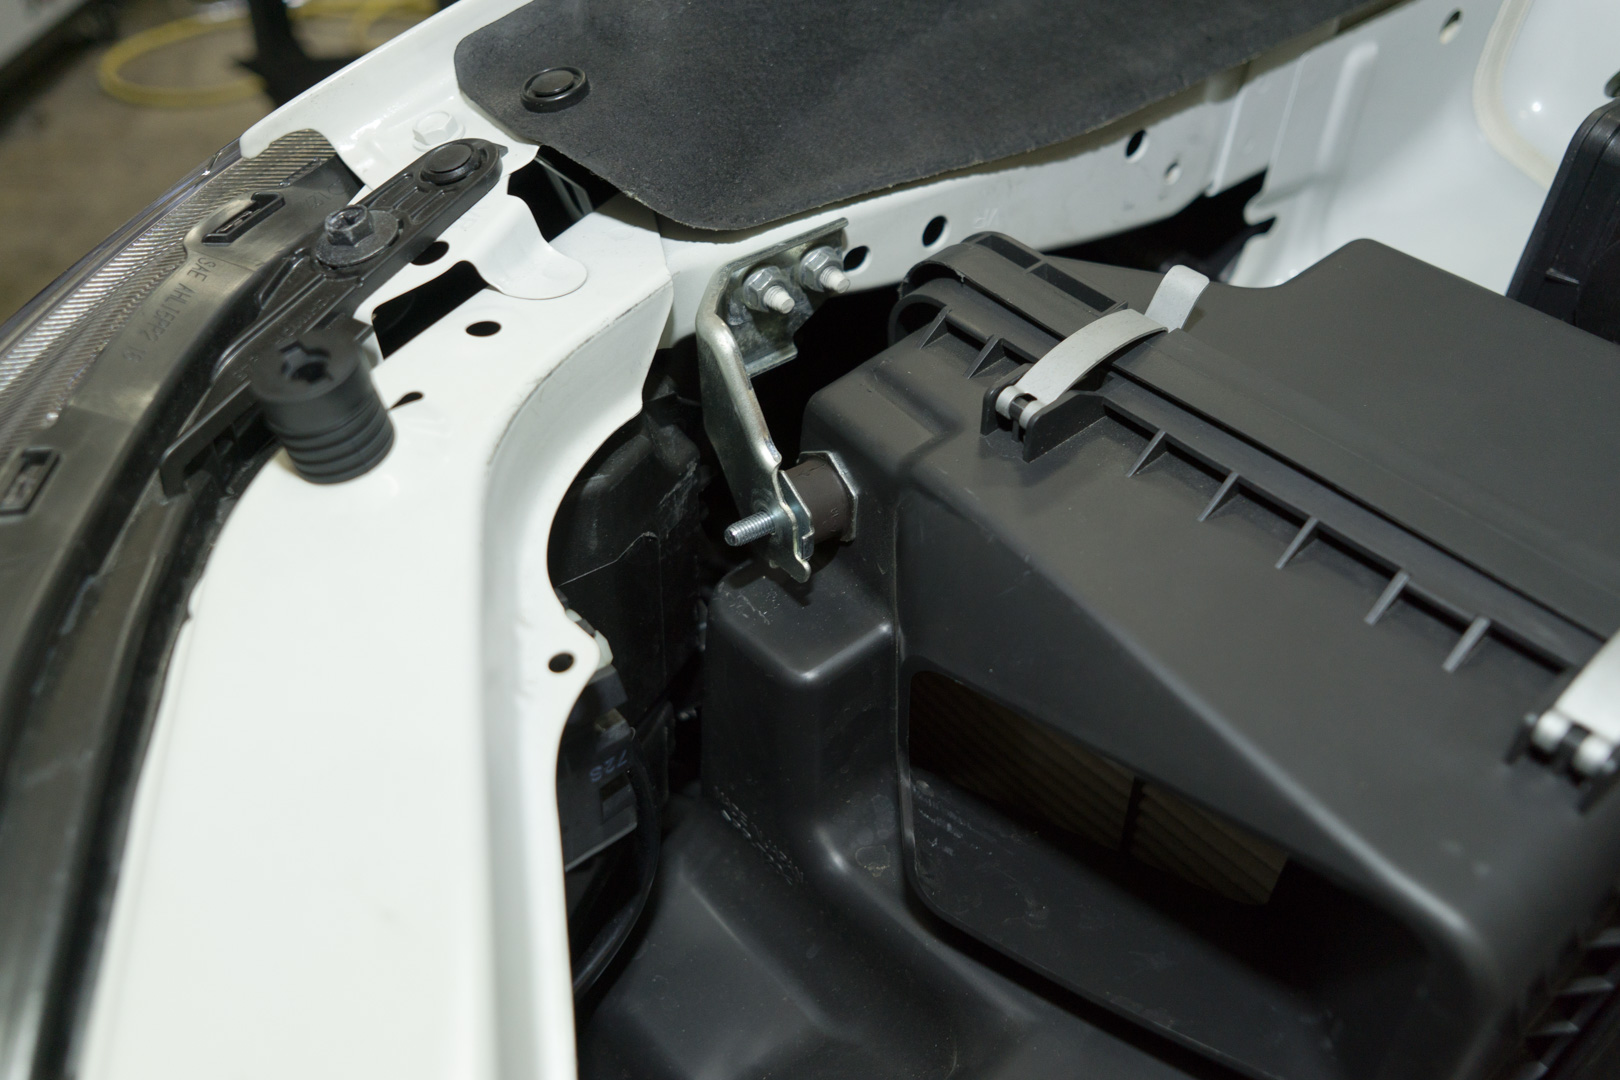
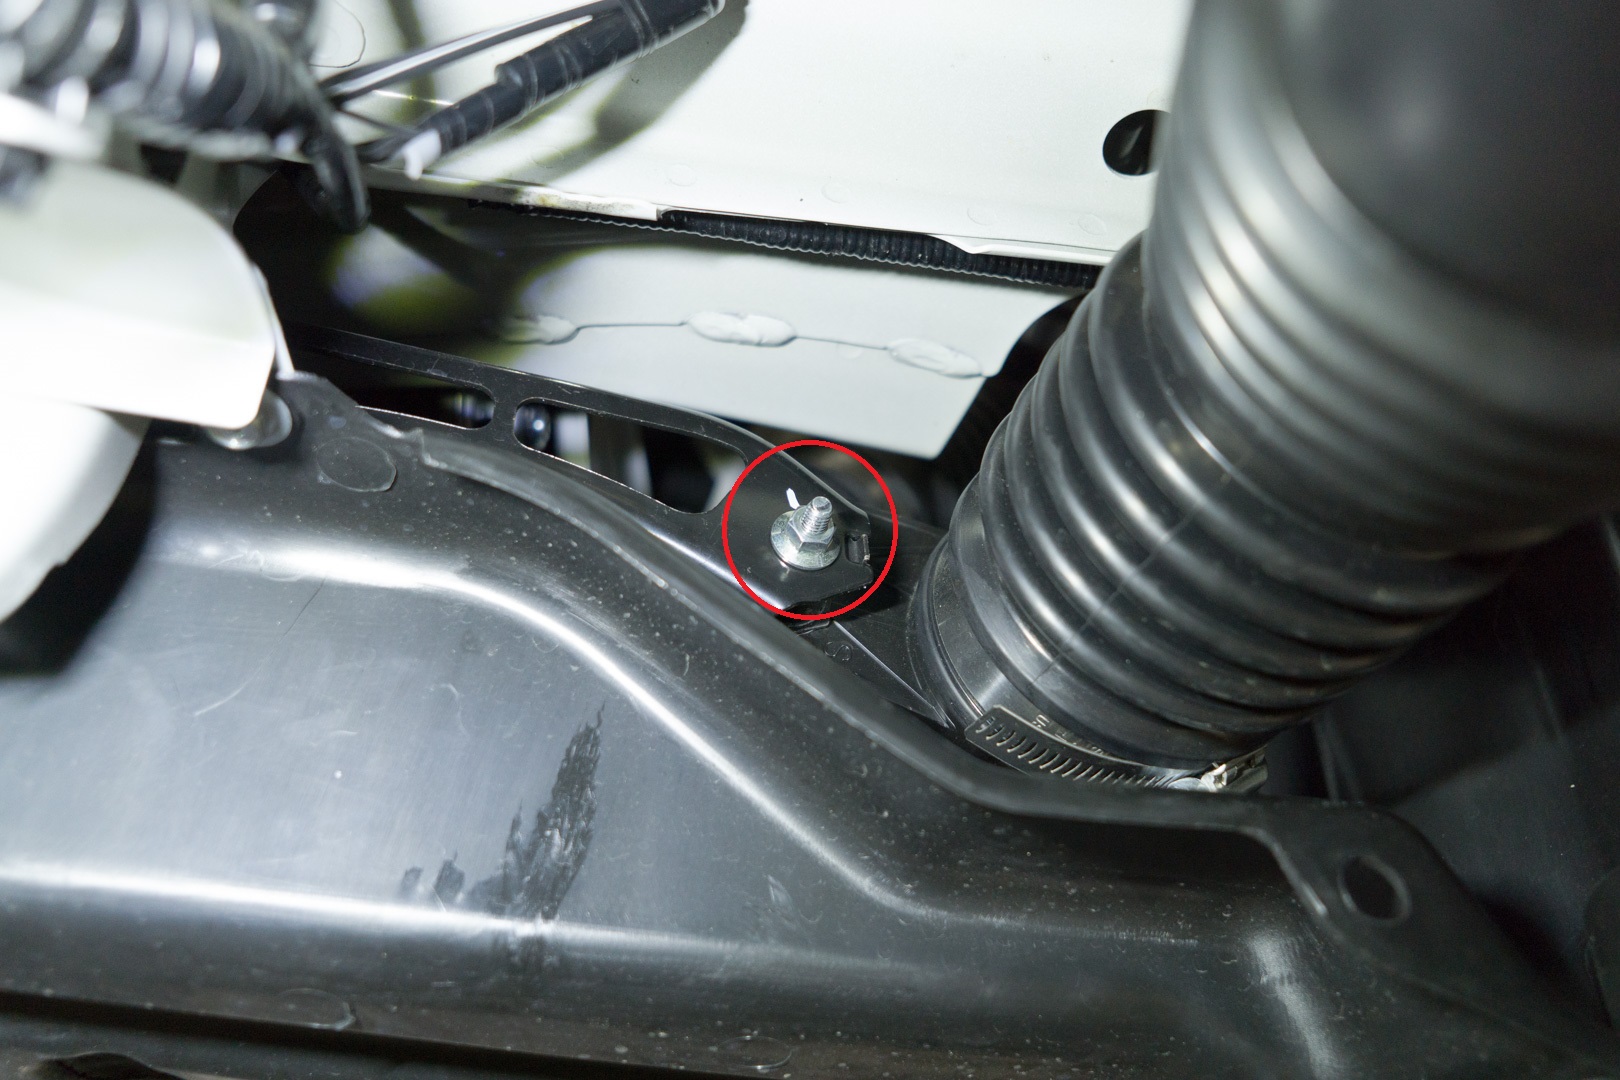
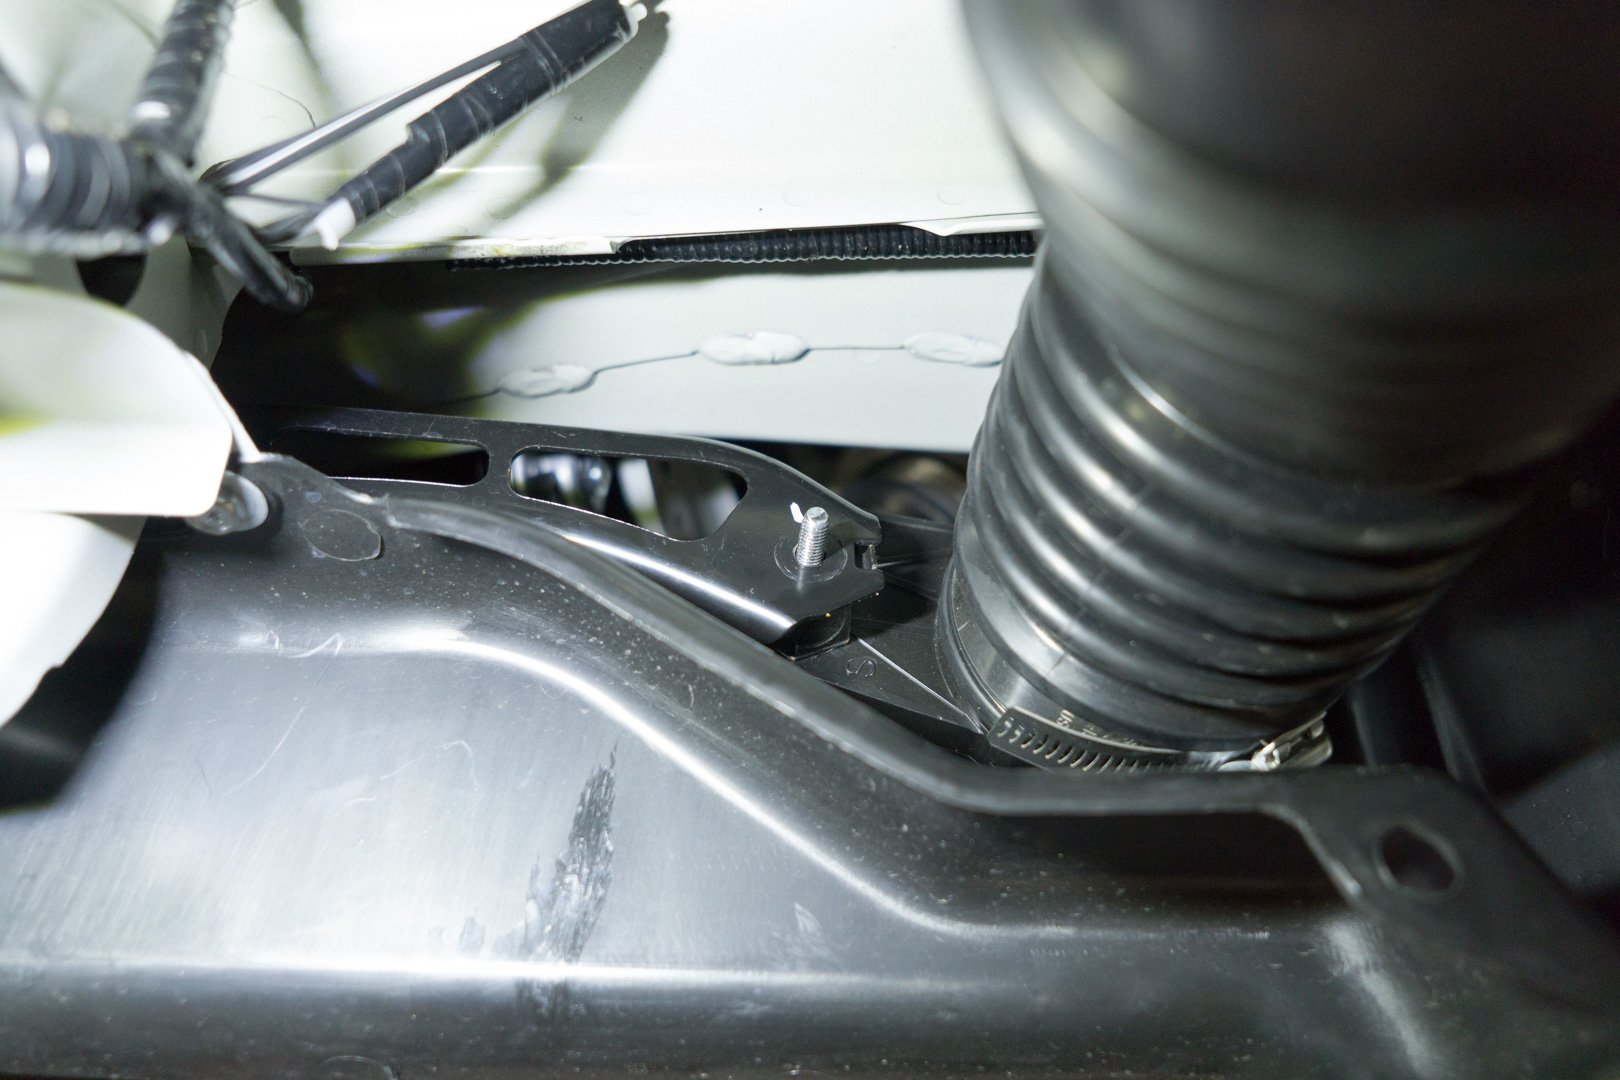
- Remove the 10mm nut on the intake bracket and 10mm bolt to the chassis.
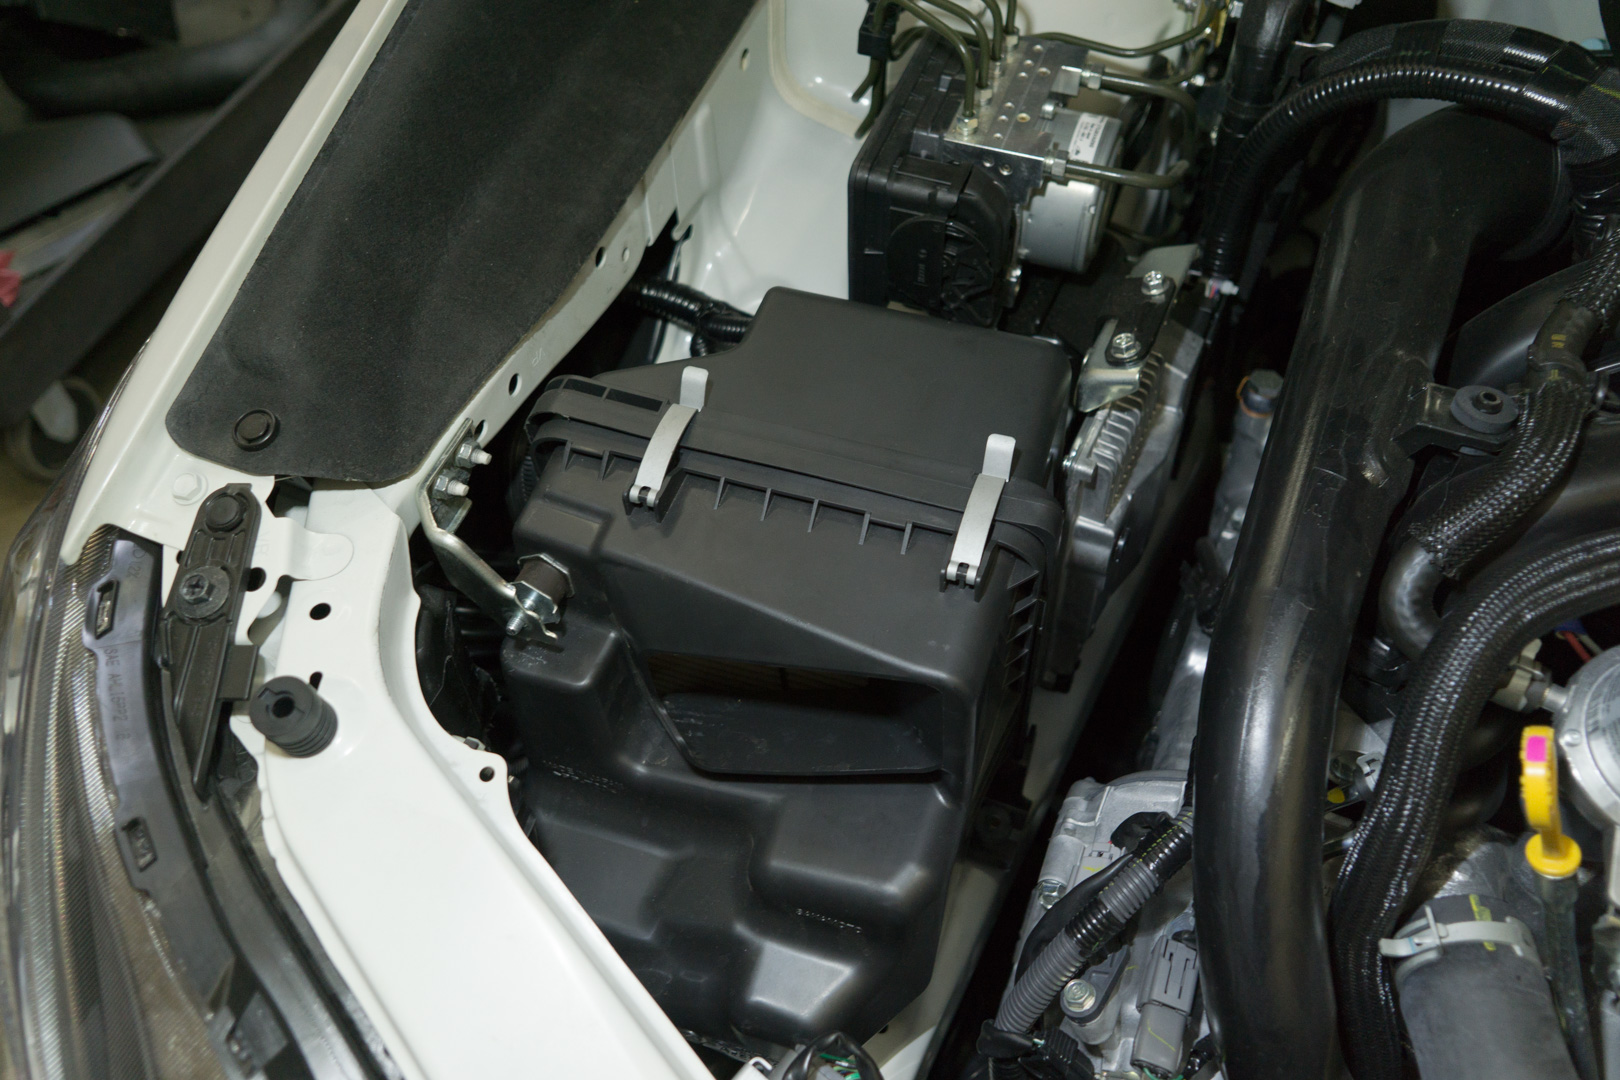
- Unclip the the two airbox halves.

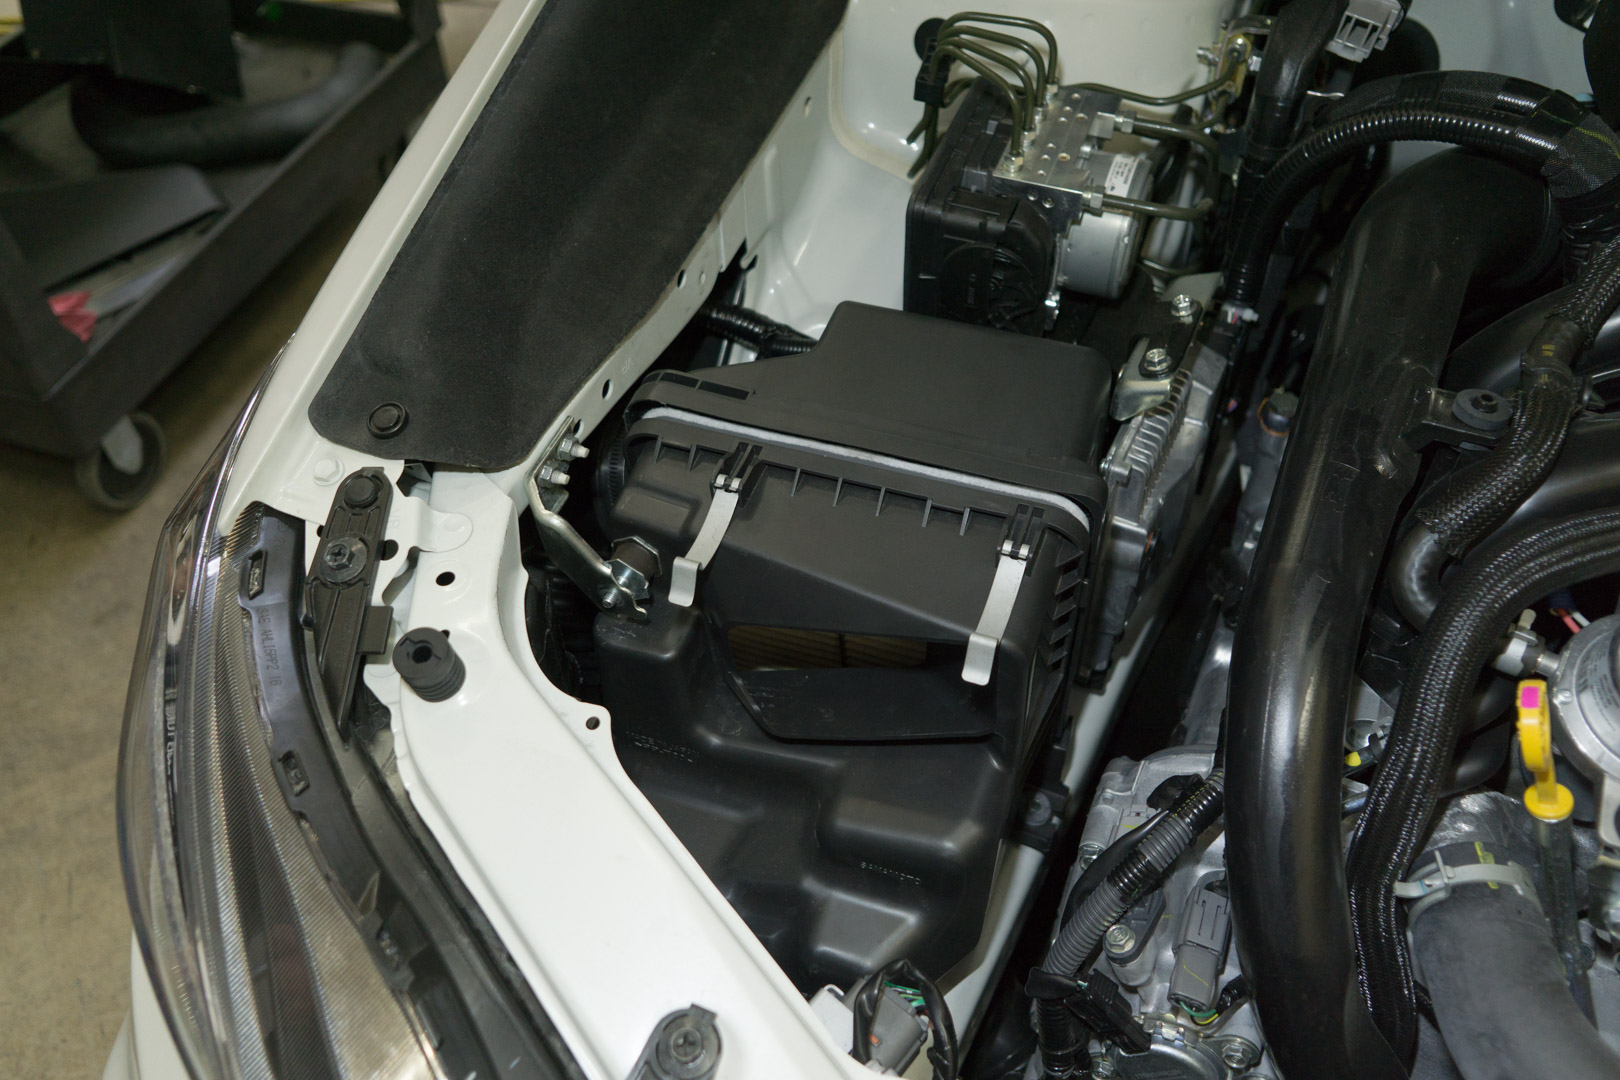
- Gently push down on the back side and pull up on the front side to separate and remove the front airbox half.
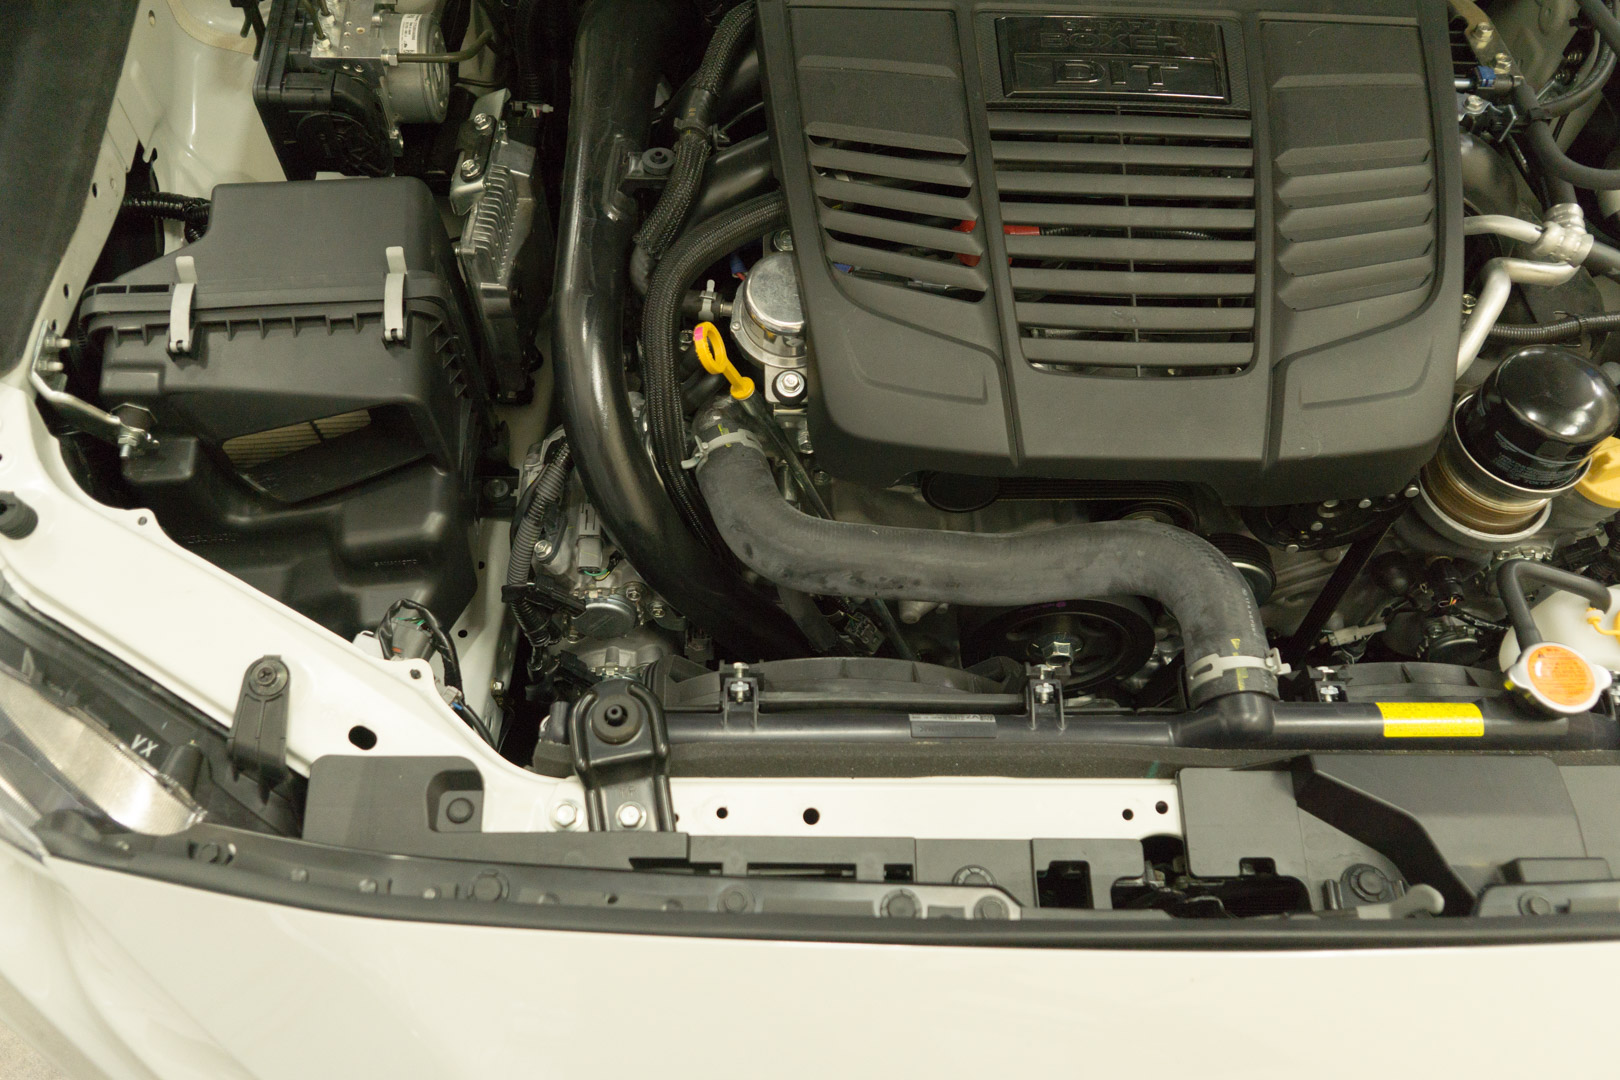
- On the backside of the remaining airbox half, loosen the worm clamp for the intake tube using an 8mm socket, and then remove the airbox.
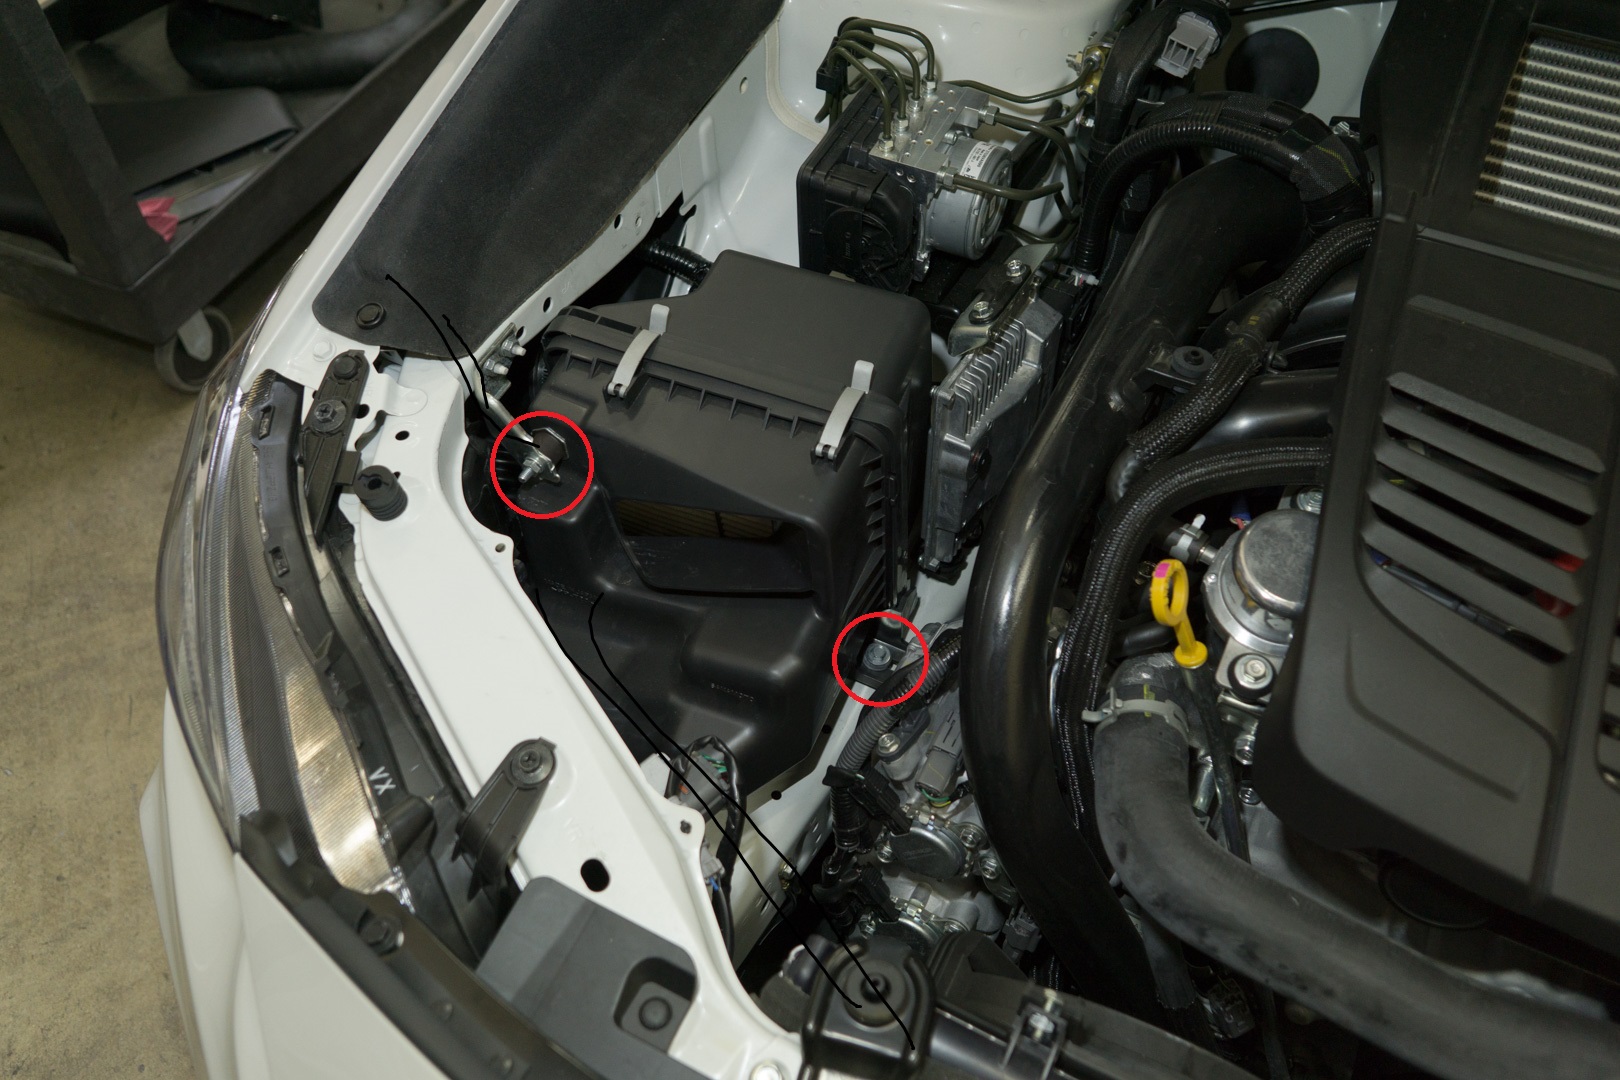
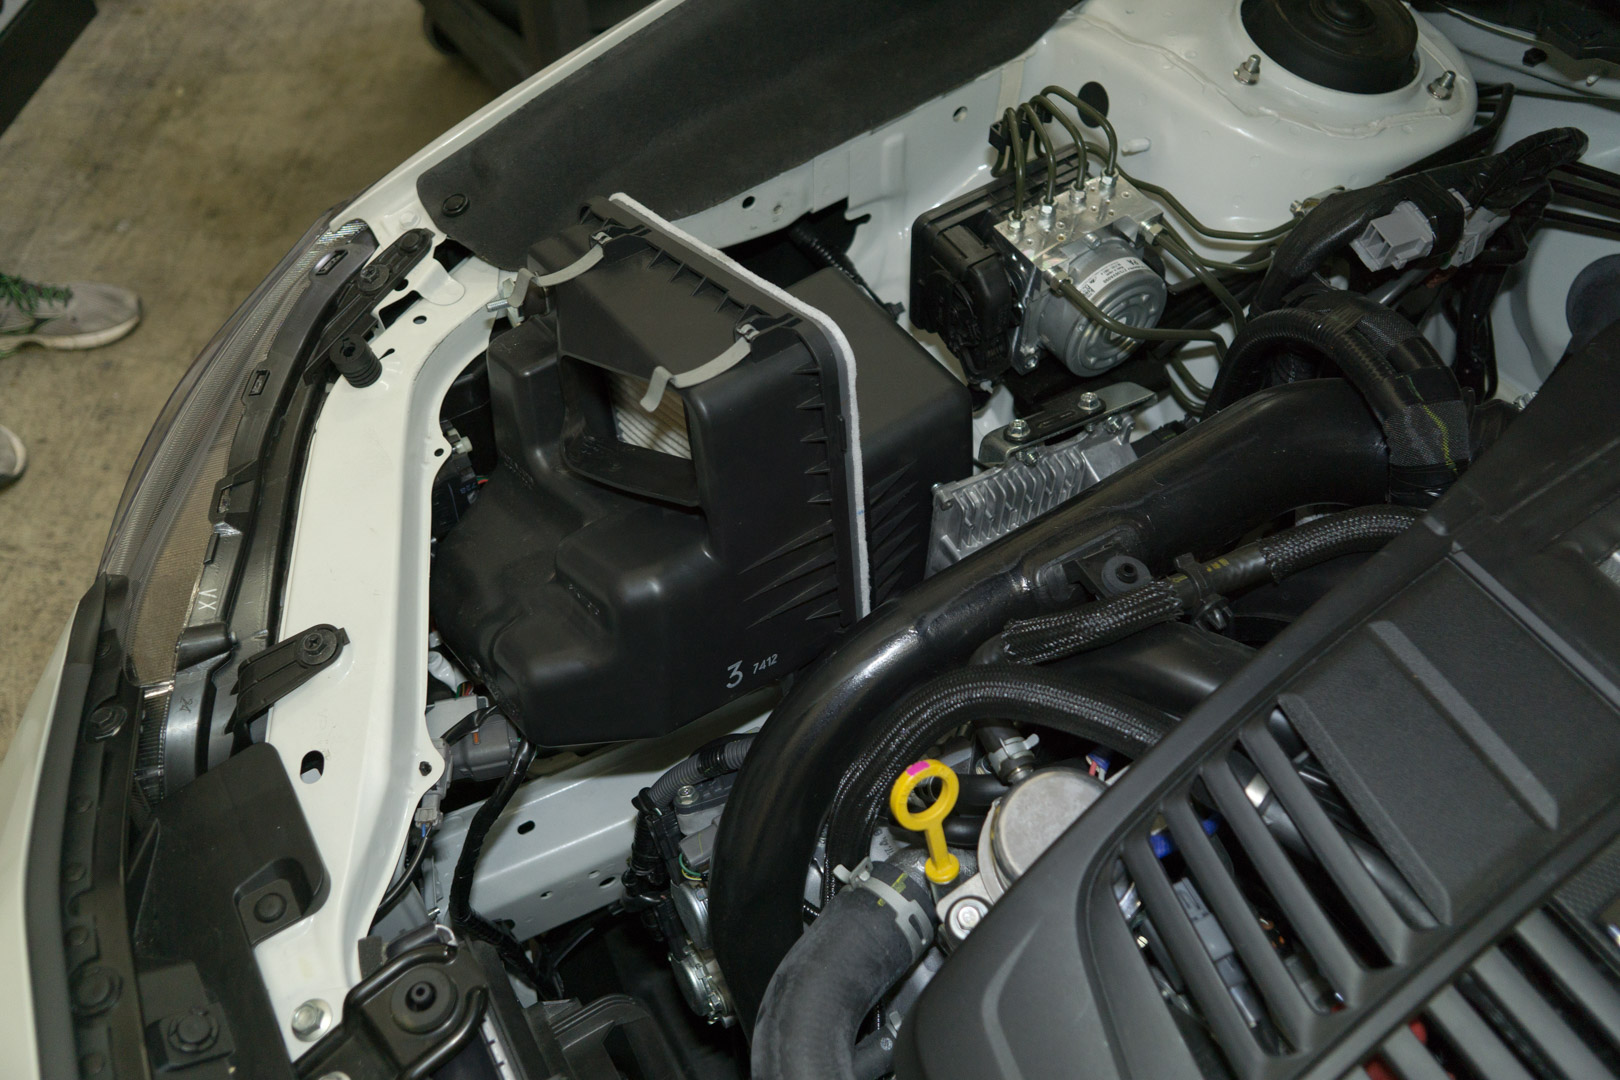
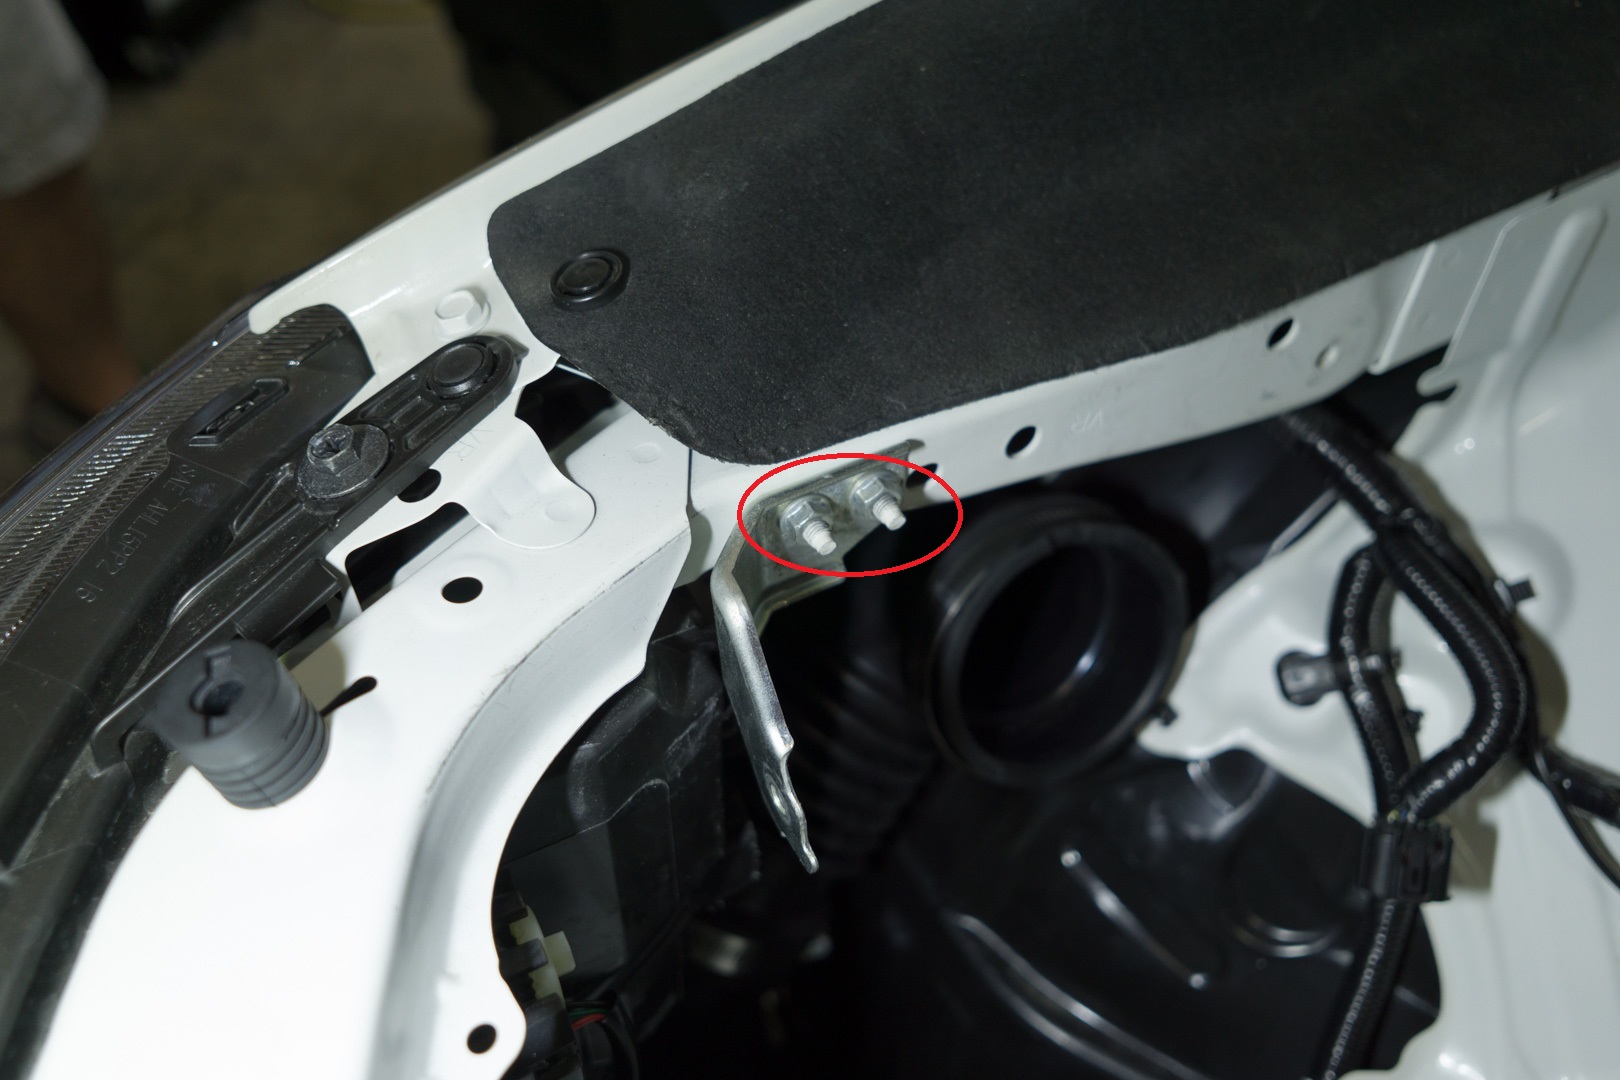
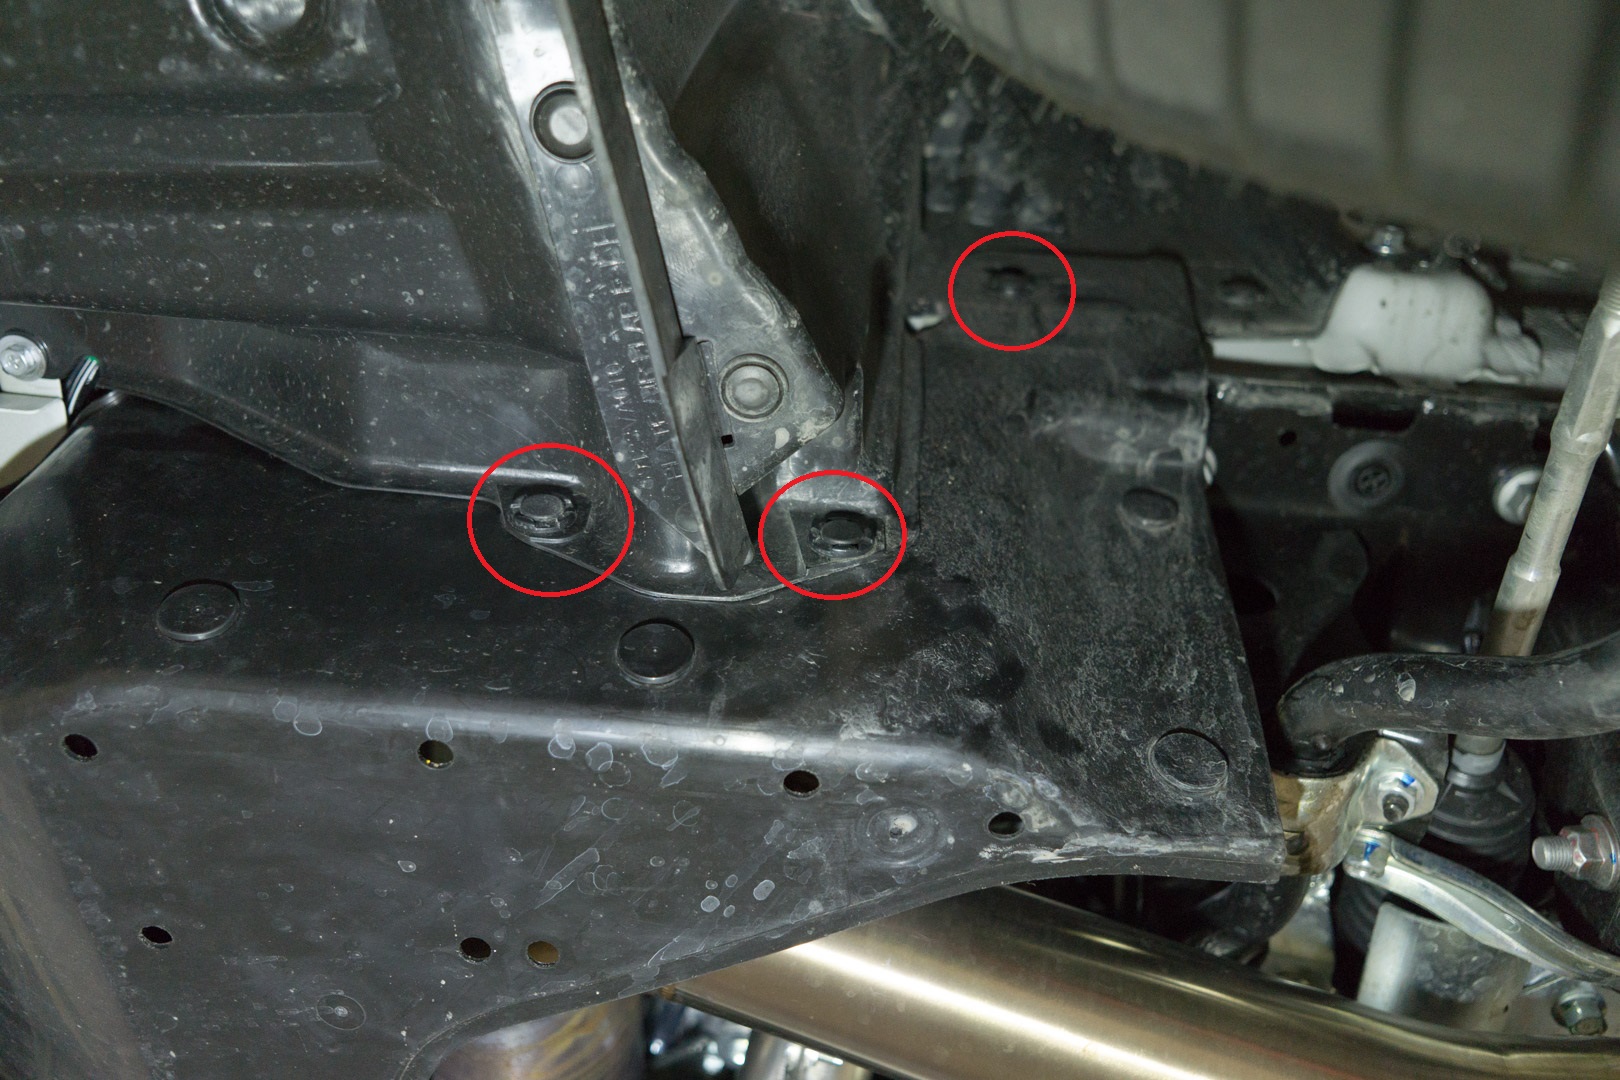
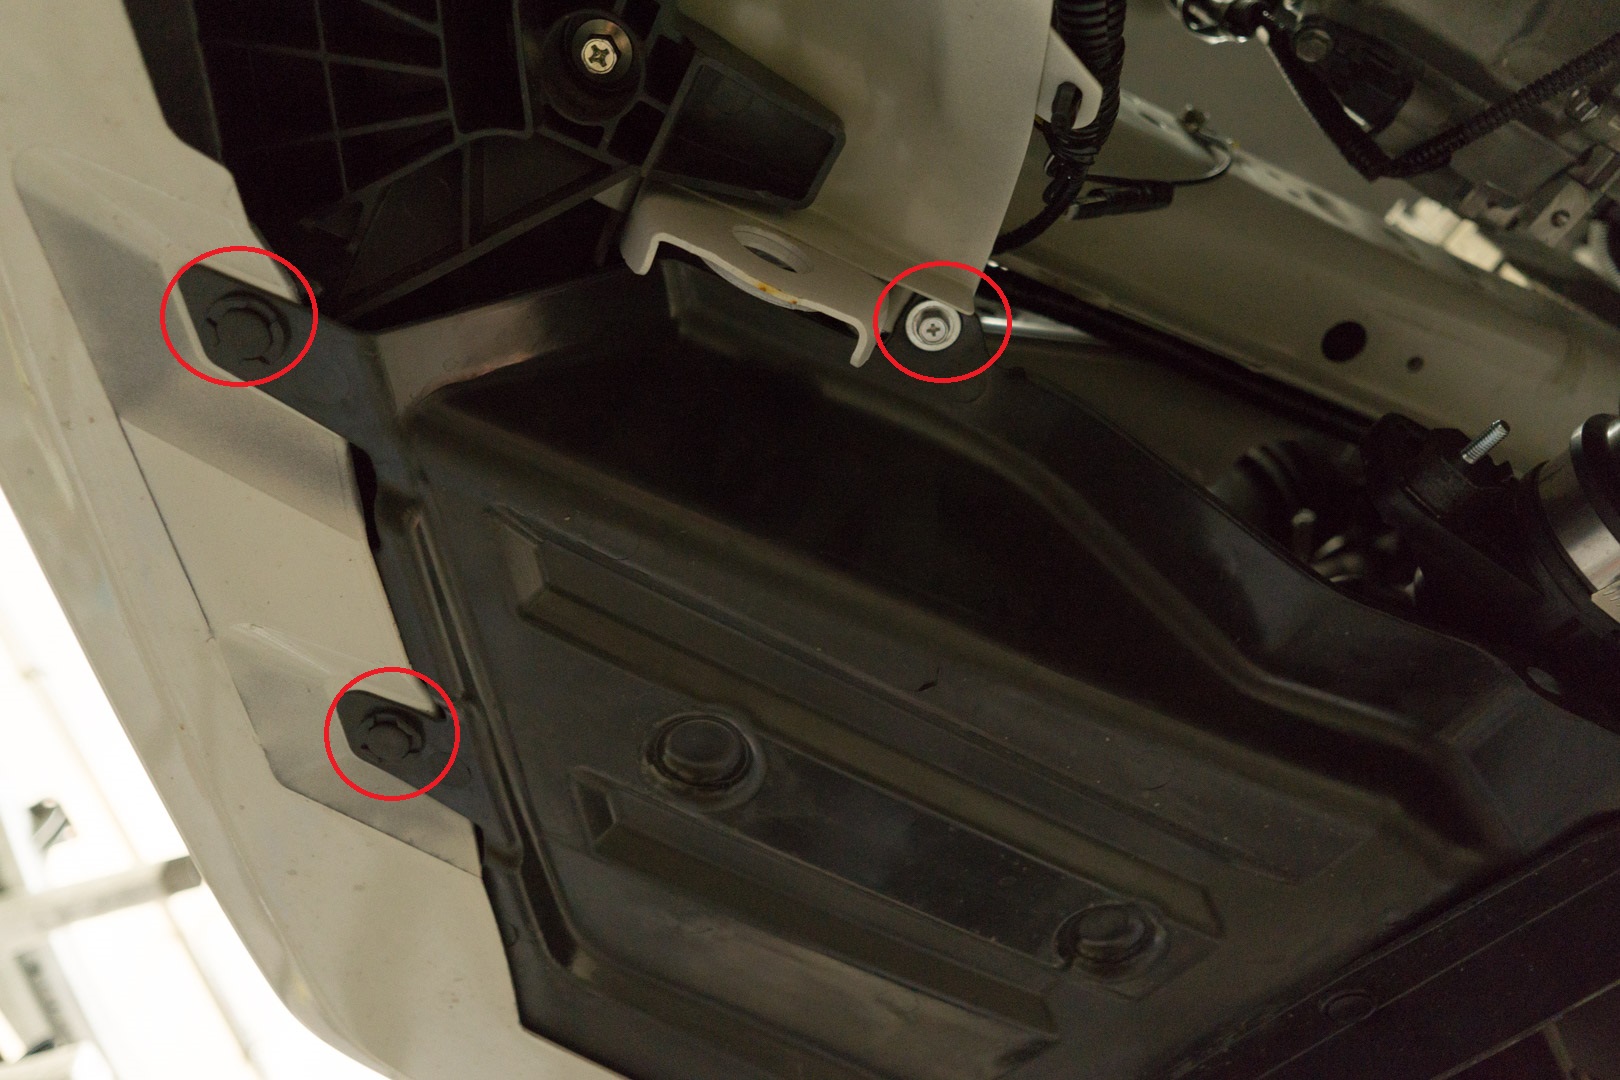
- Remove the forward intake bracket by removing the (2) 10mm nuts using a 10mm socket.
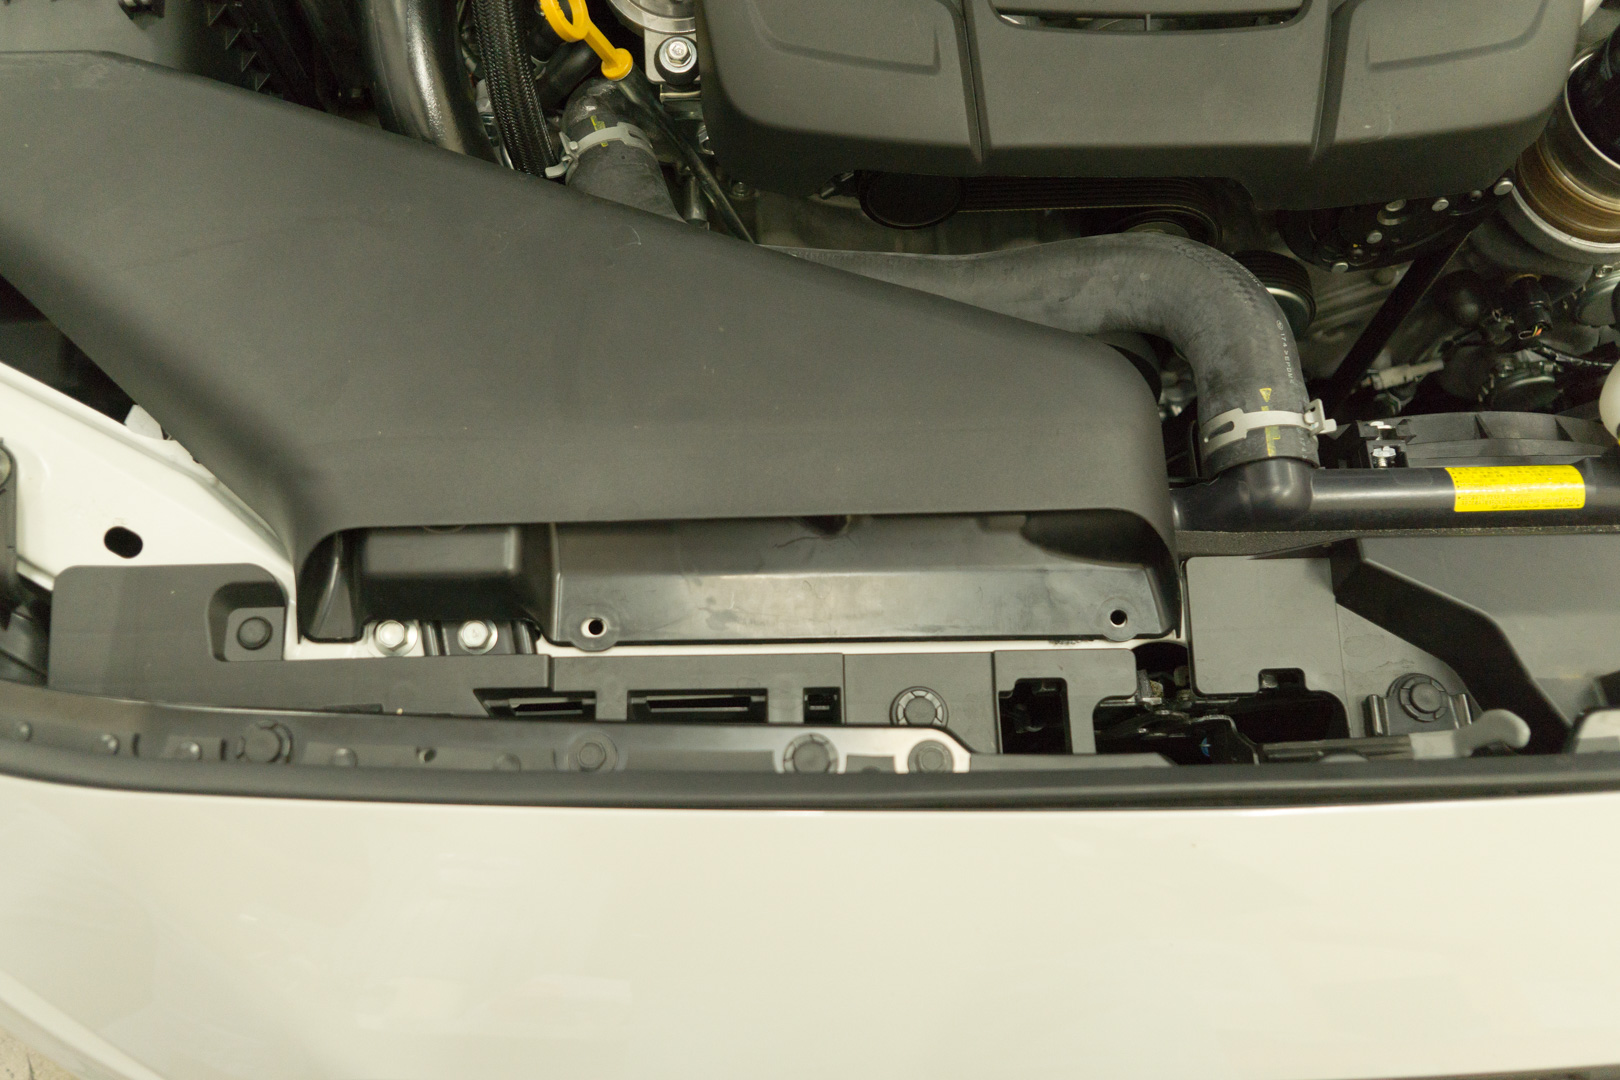
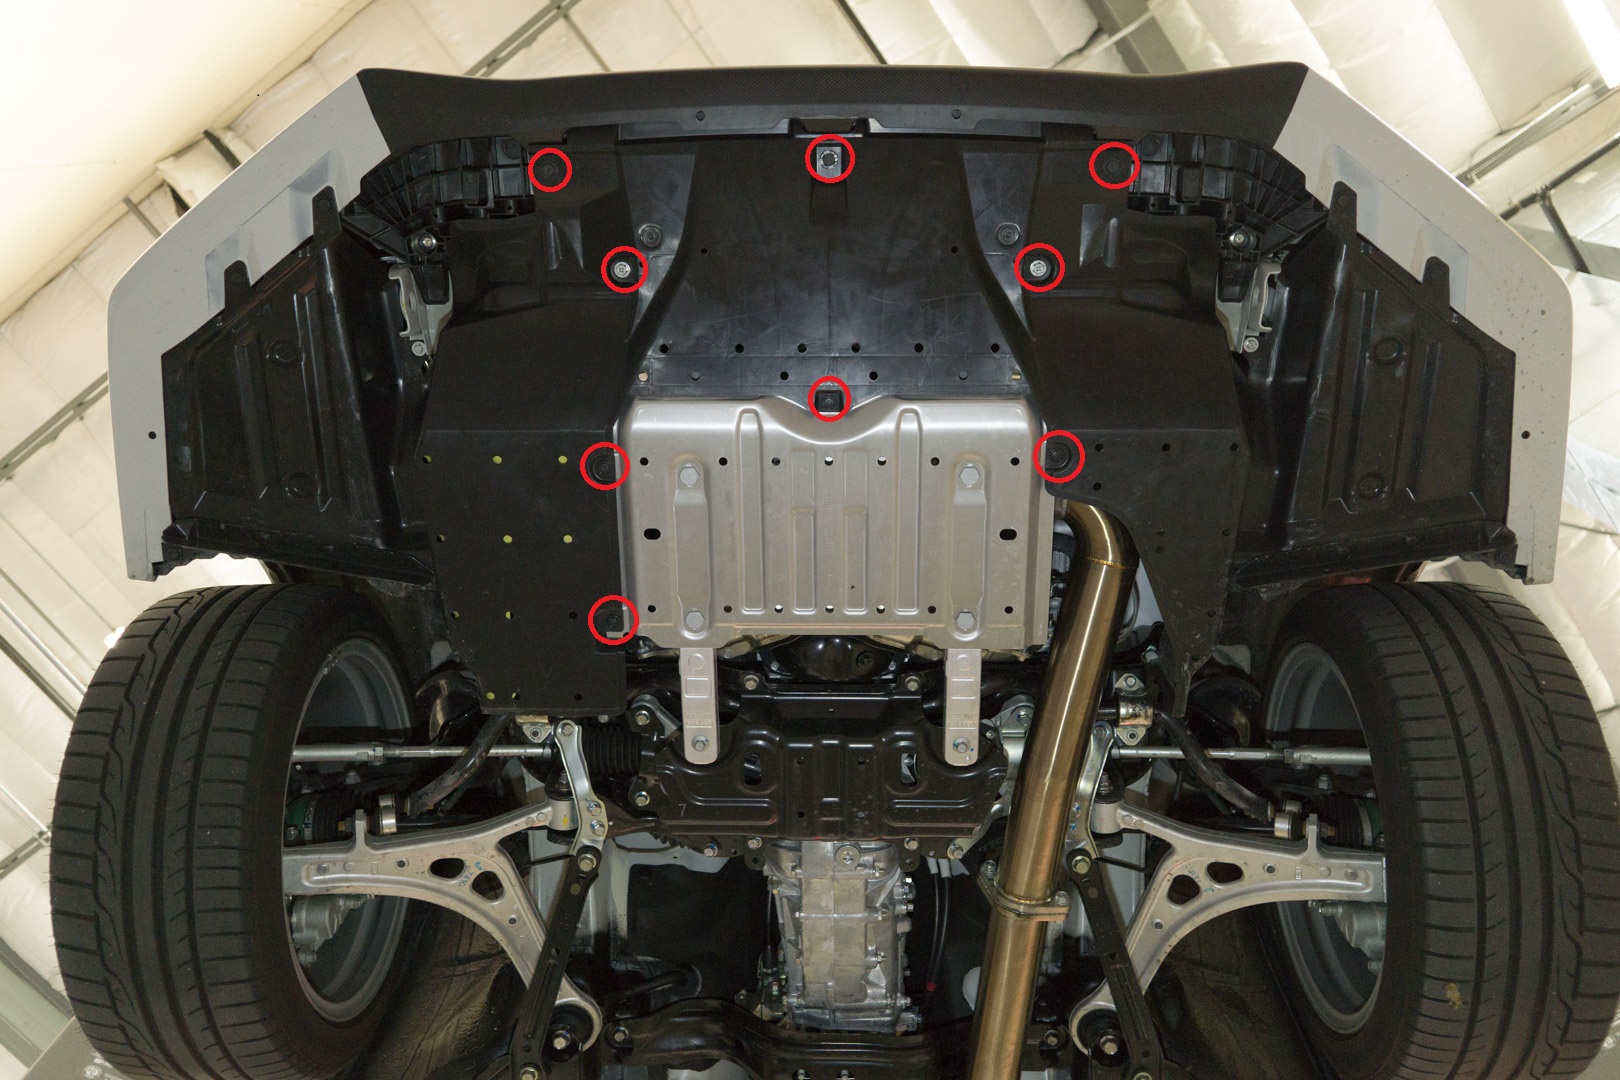
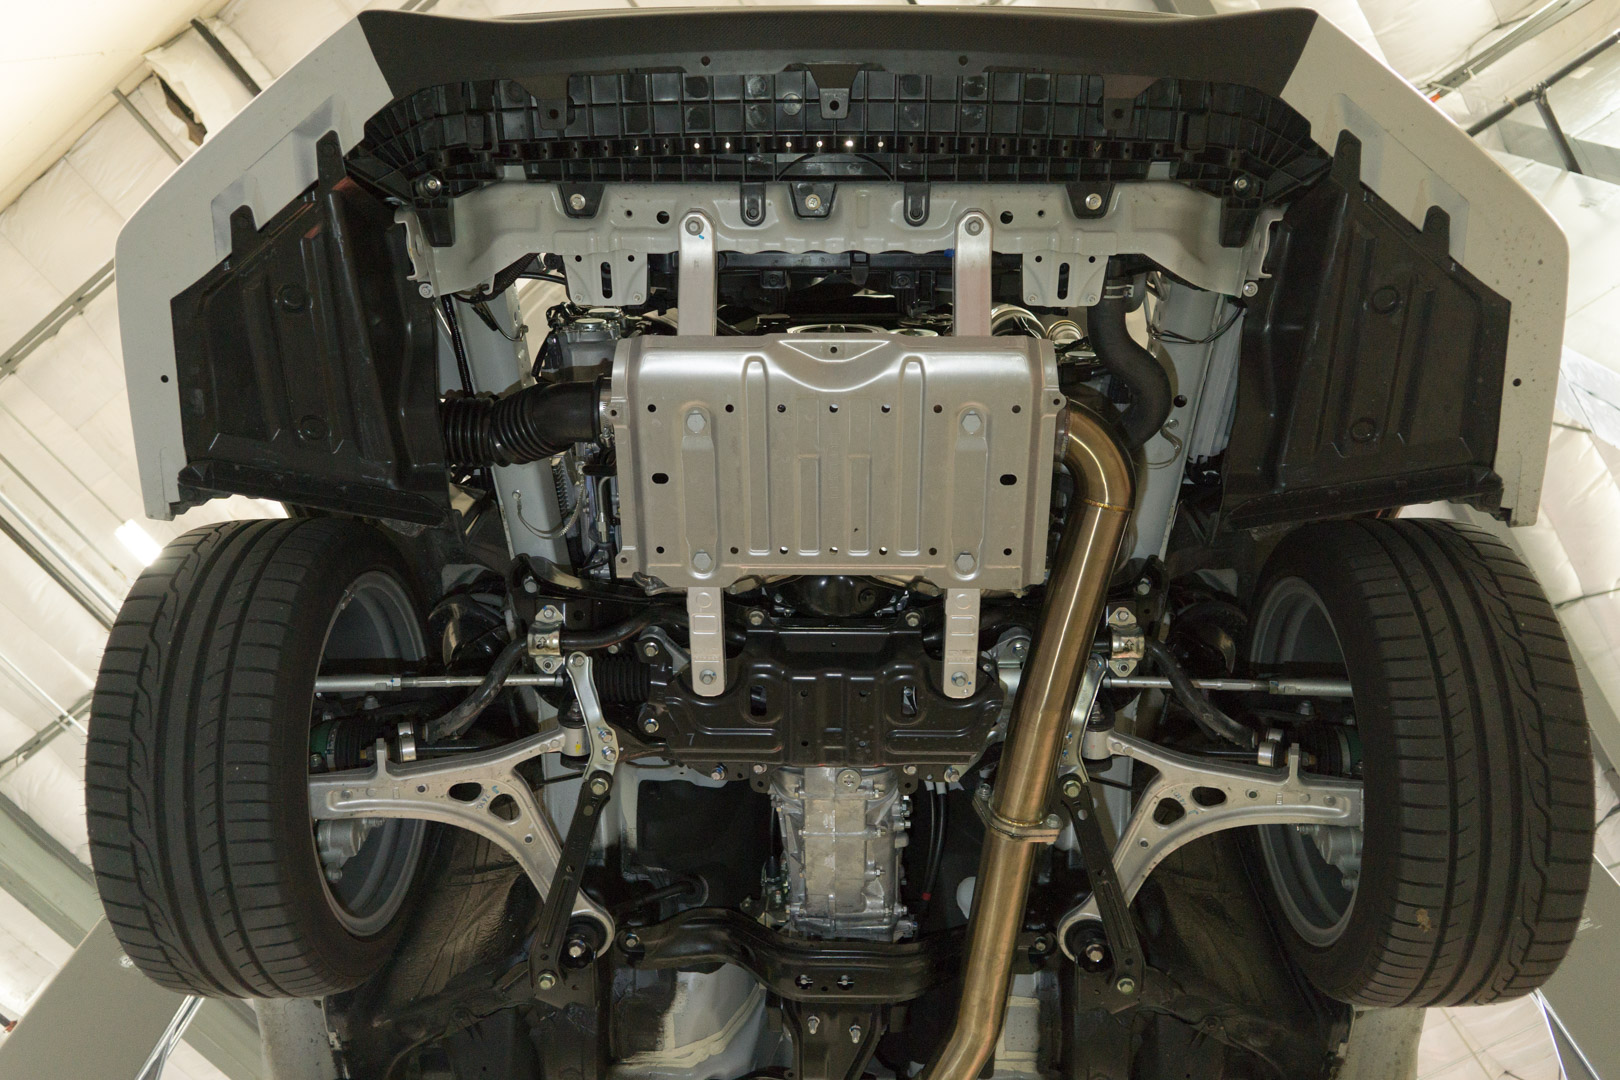
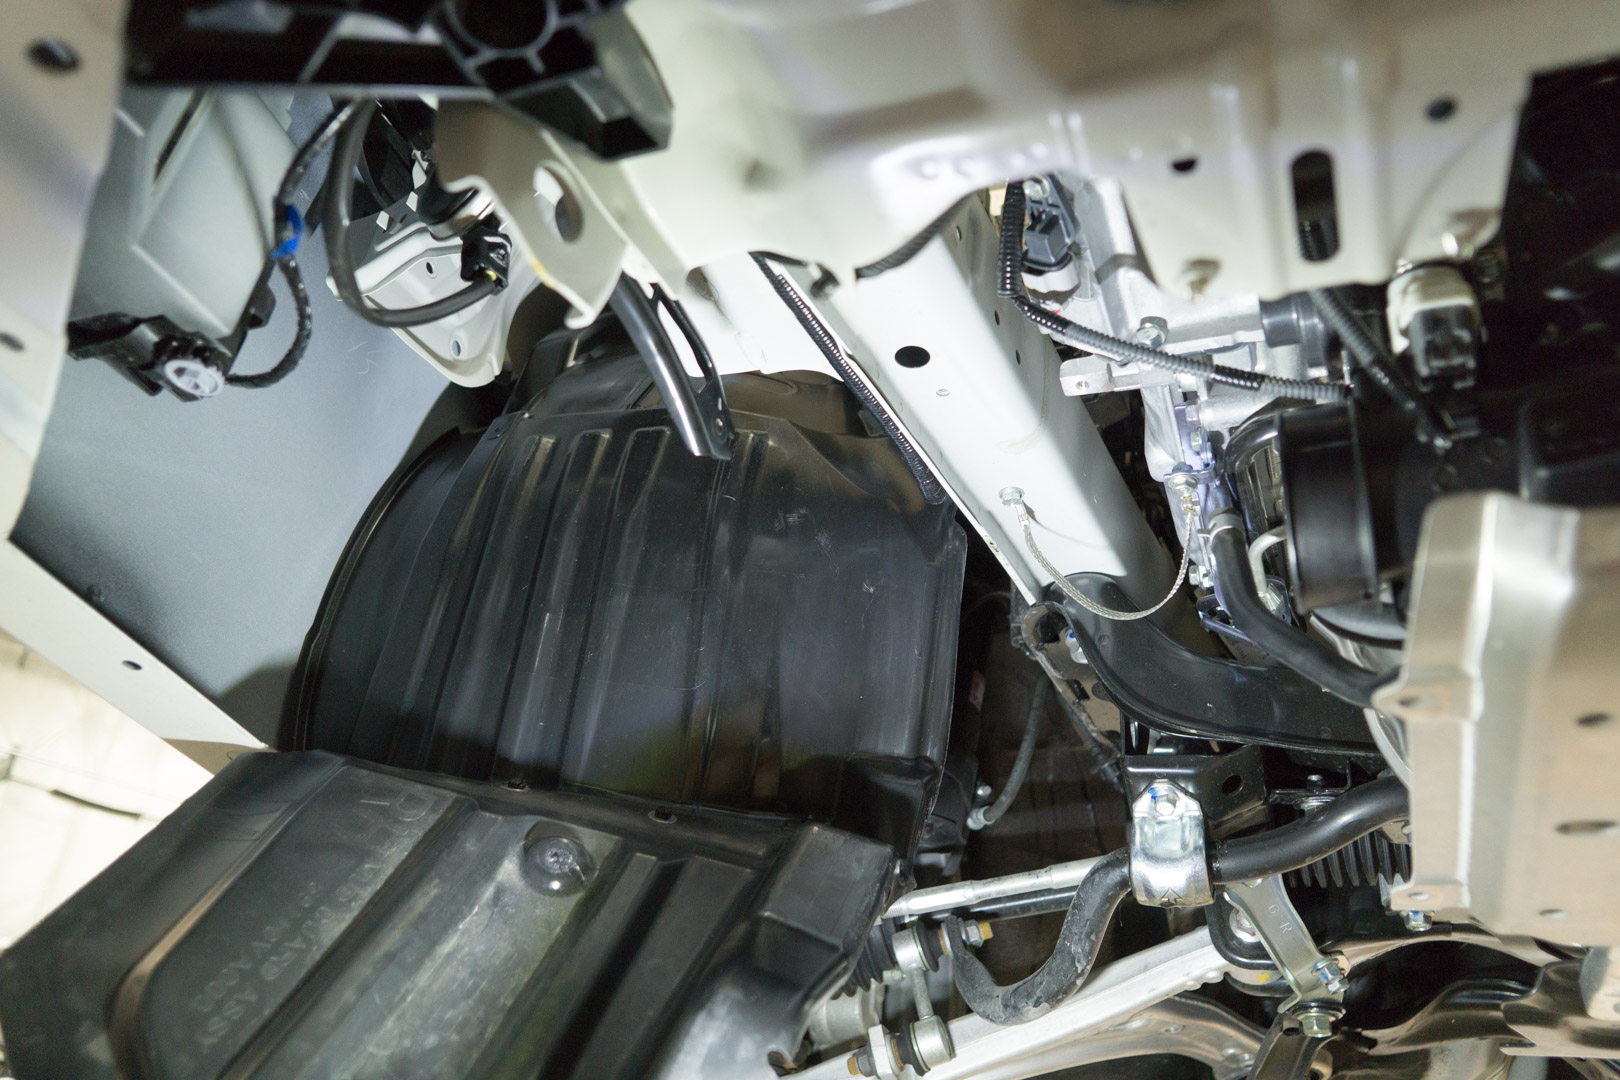
- Remove the undertray by removing (2) 12mm bolts and (13) push clips using a flathead screwdriver, 12mm socket, and 6” extension. (6) of the push clips are in each front wheel well.
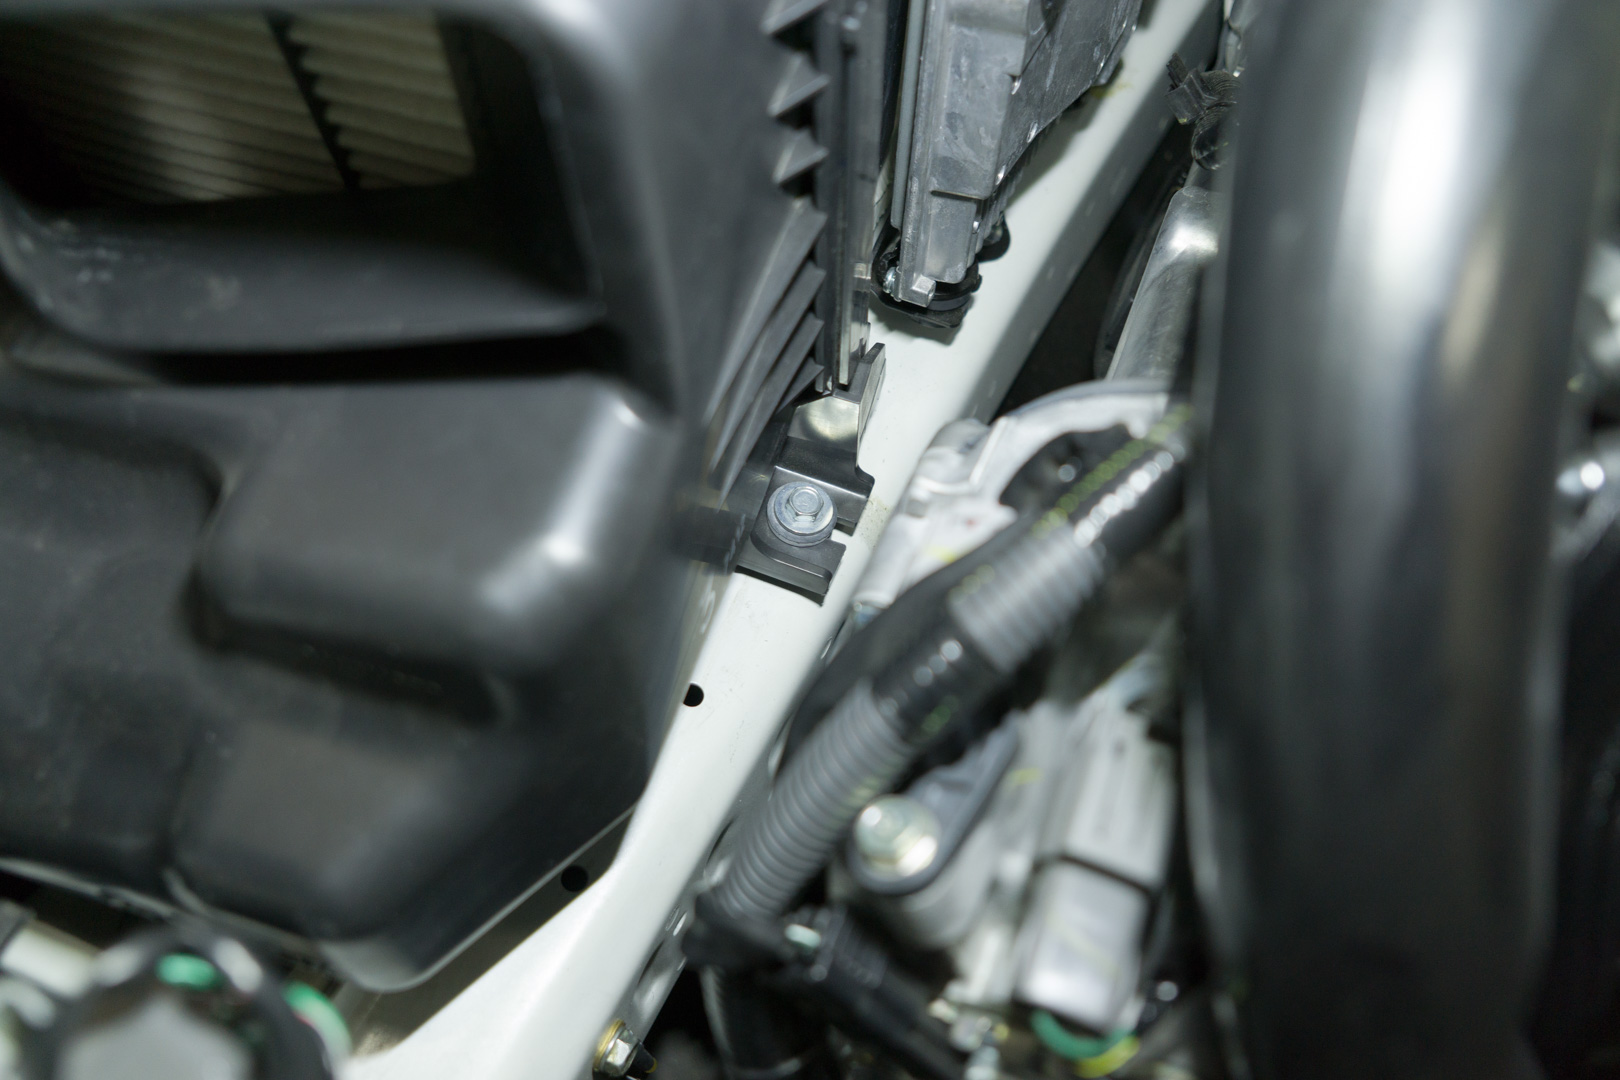
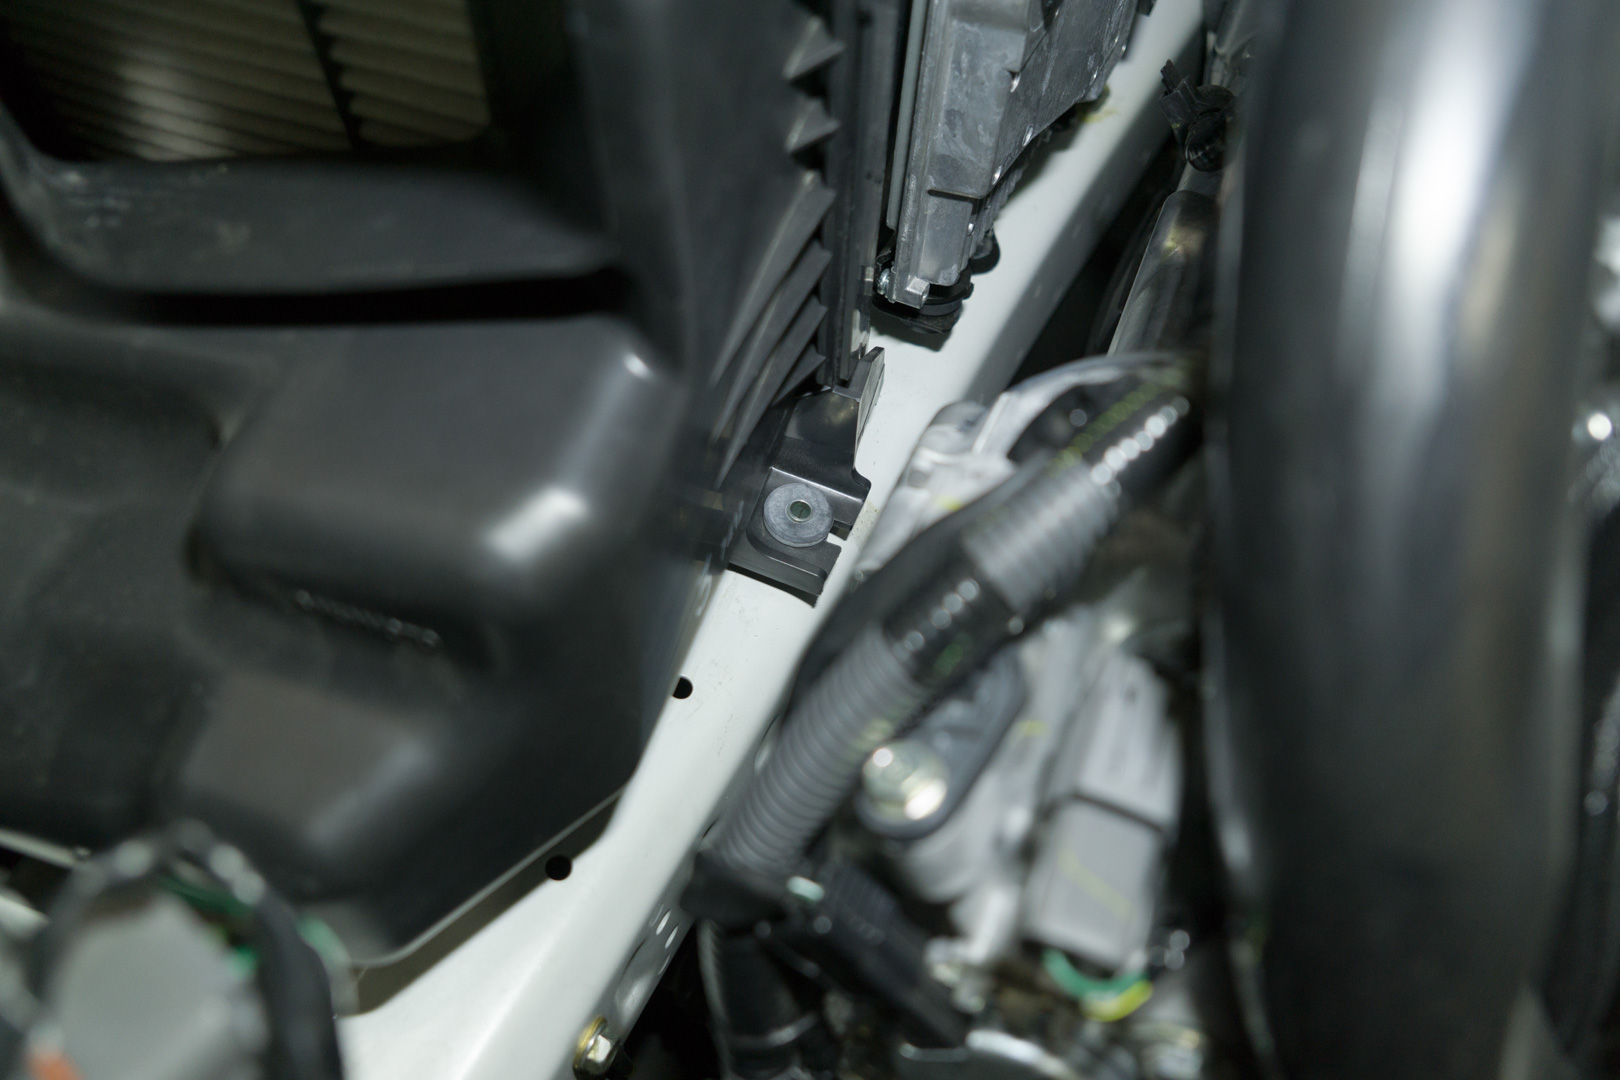
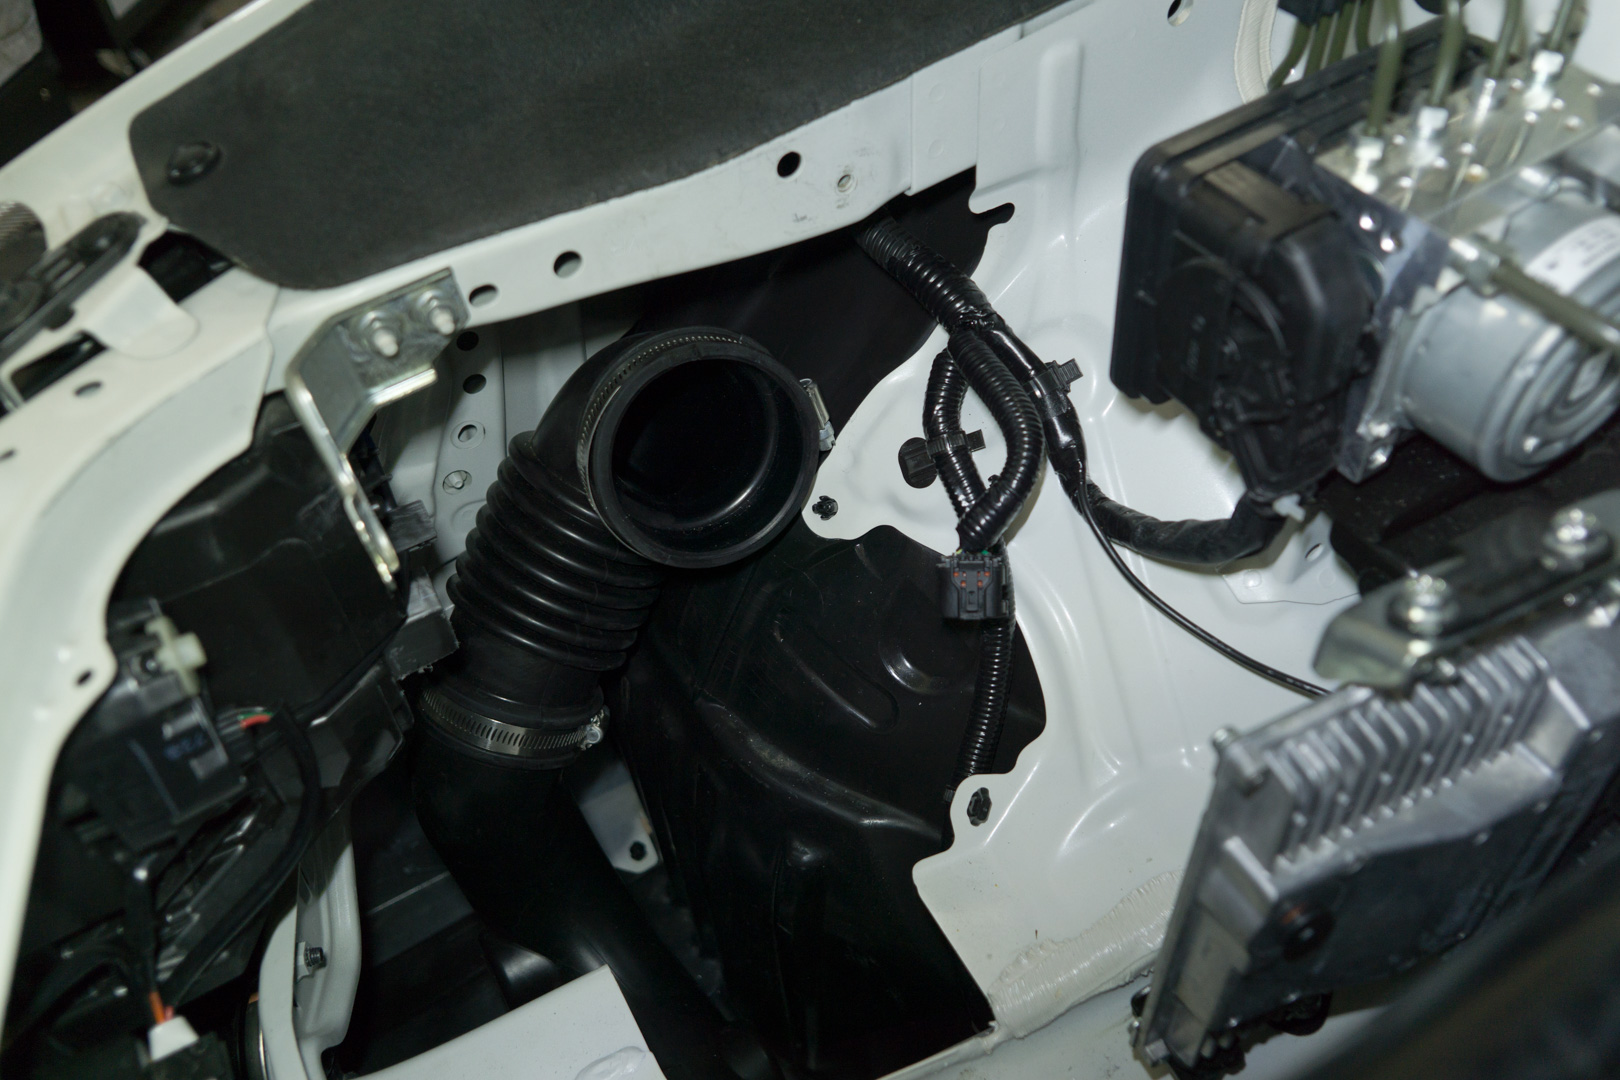
- Remove the 10mm nut holding on the stock intake tube using a 10mm socket and 6” extension then remove the intake bracket we do not reuse it.
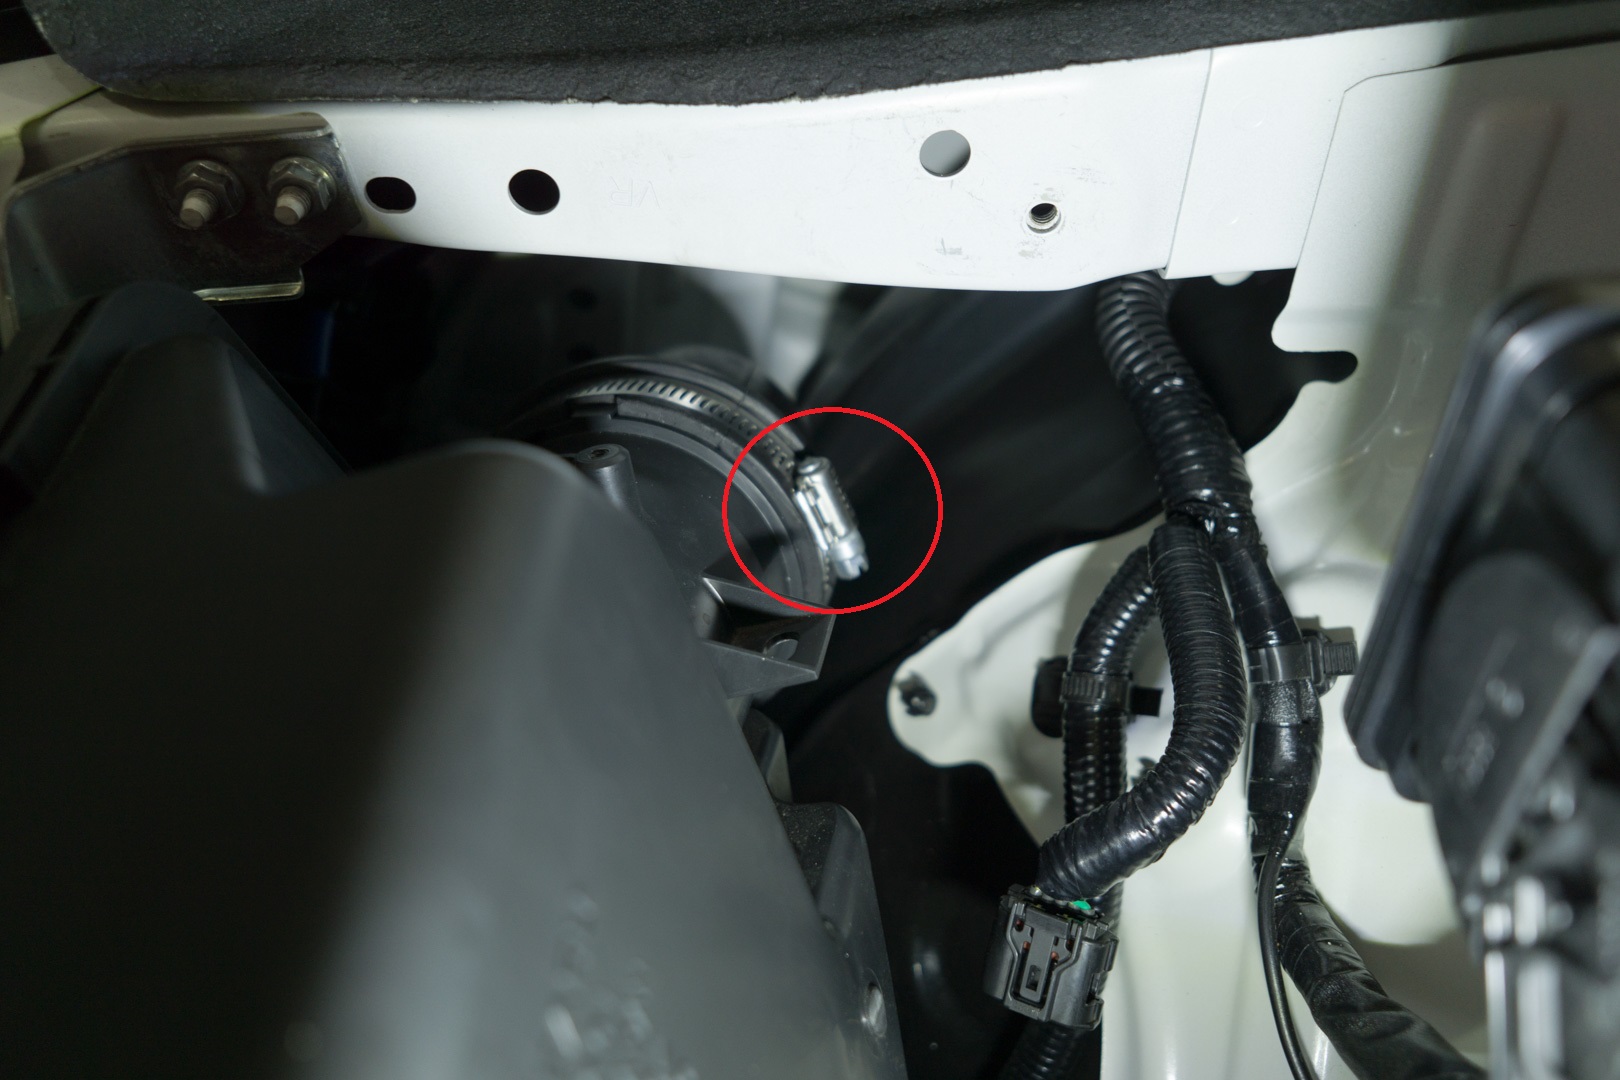
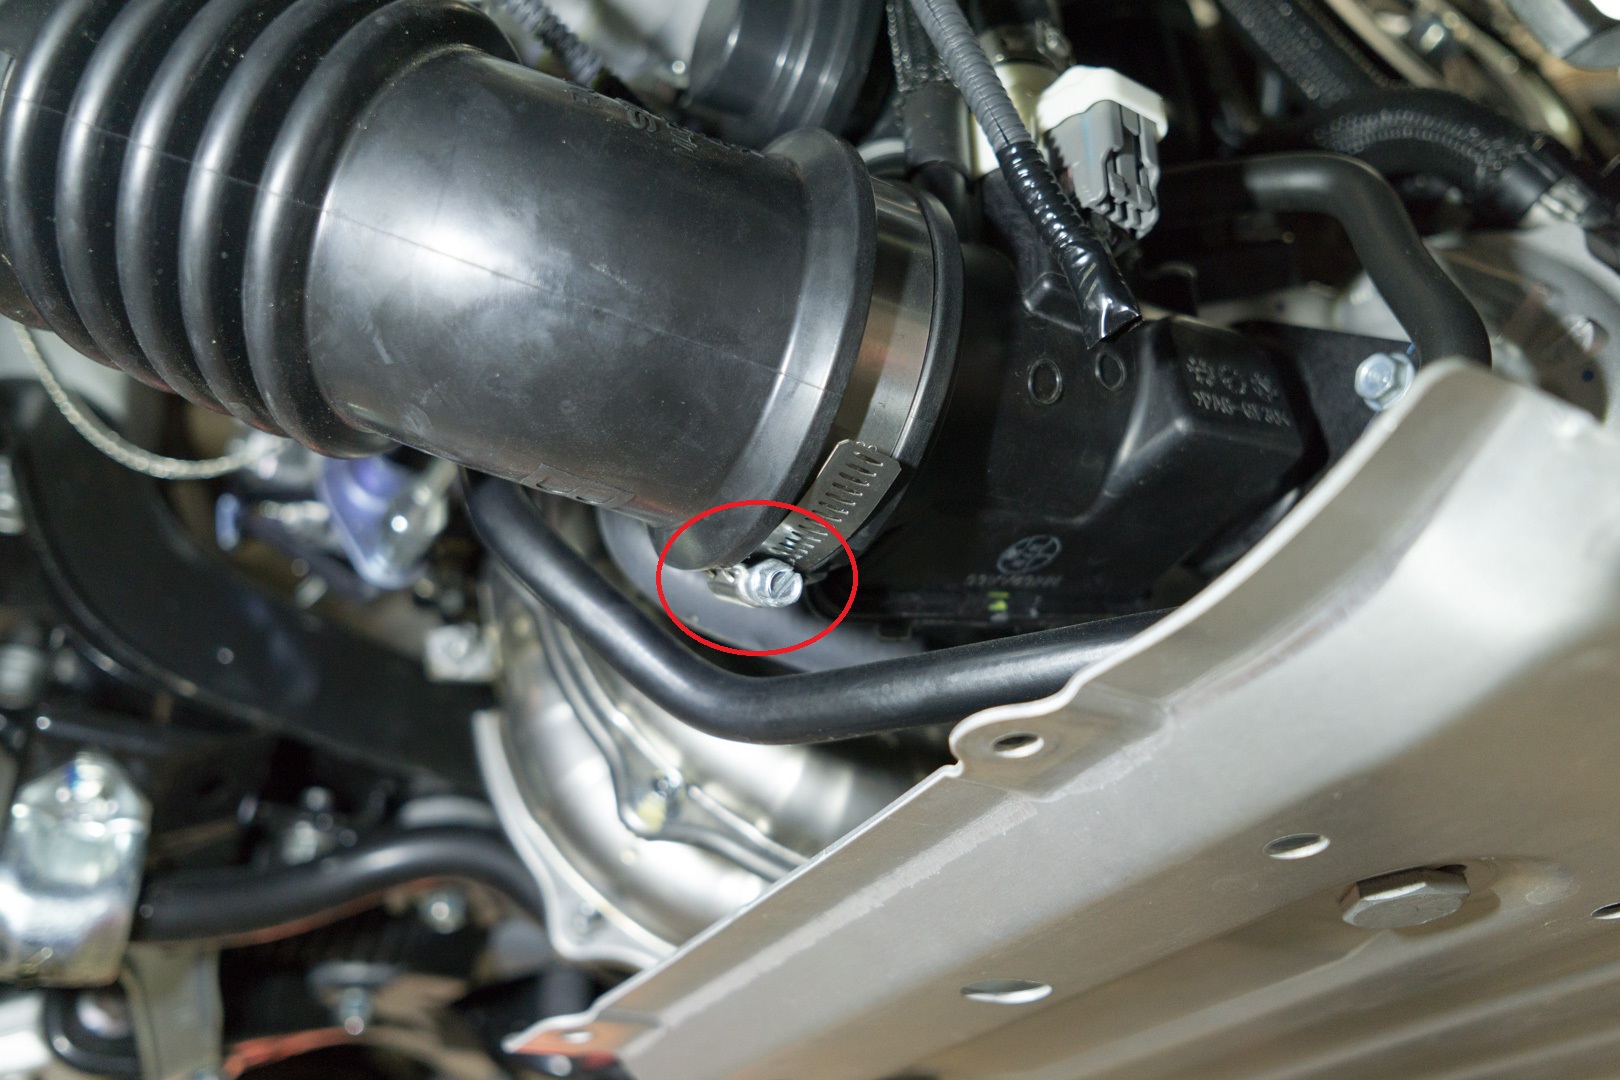
- Loosen the 8mm hose clamp holding the intake tube to the turbo inlet using an 8mm socket.
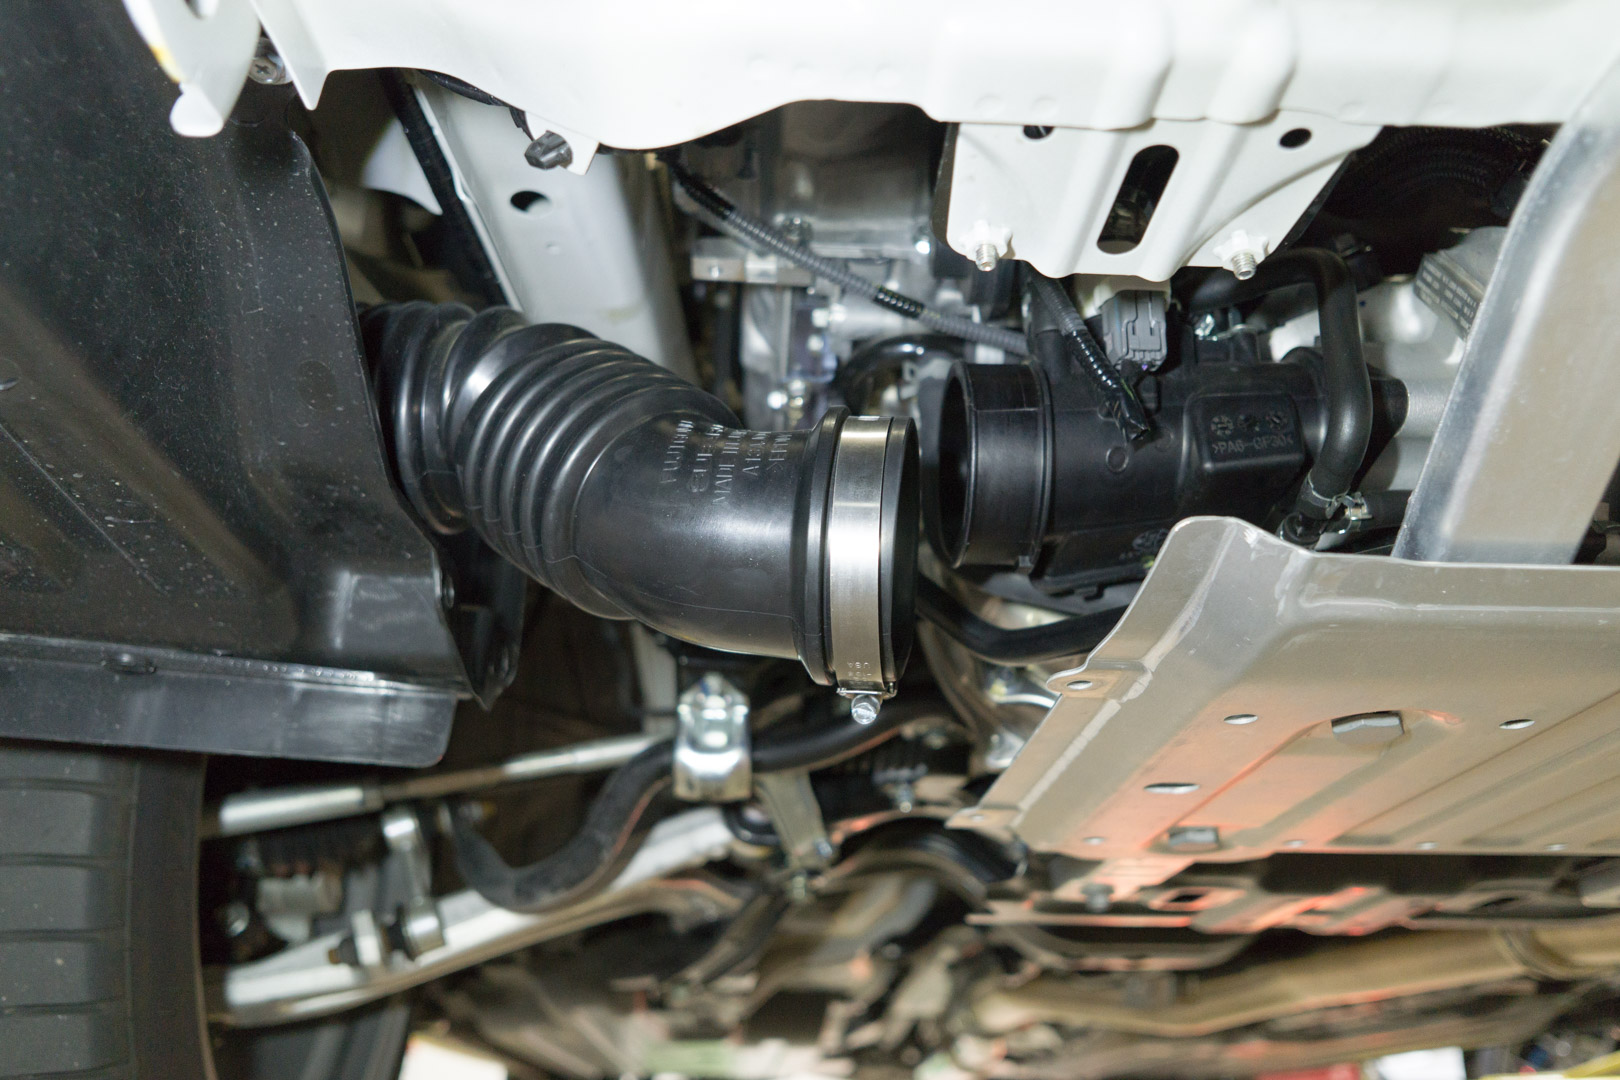
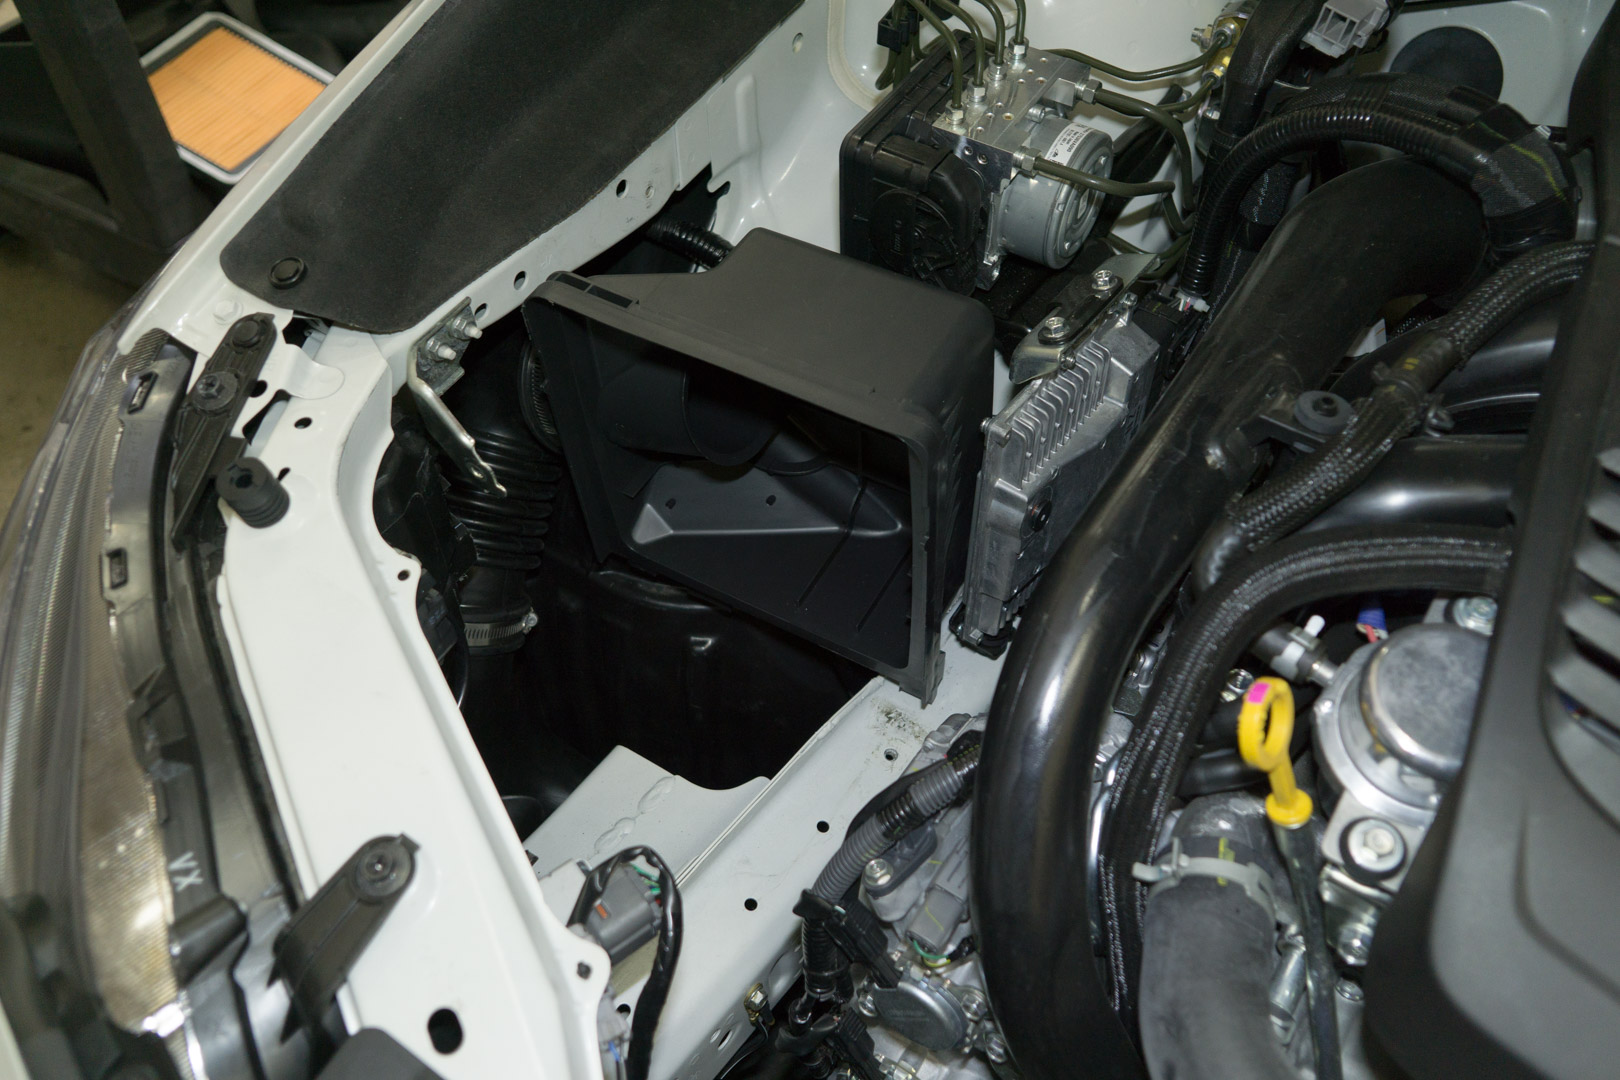
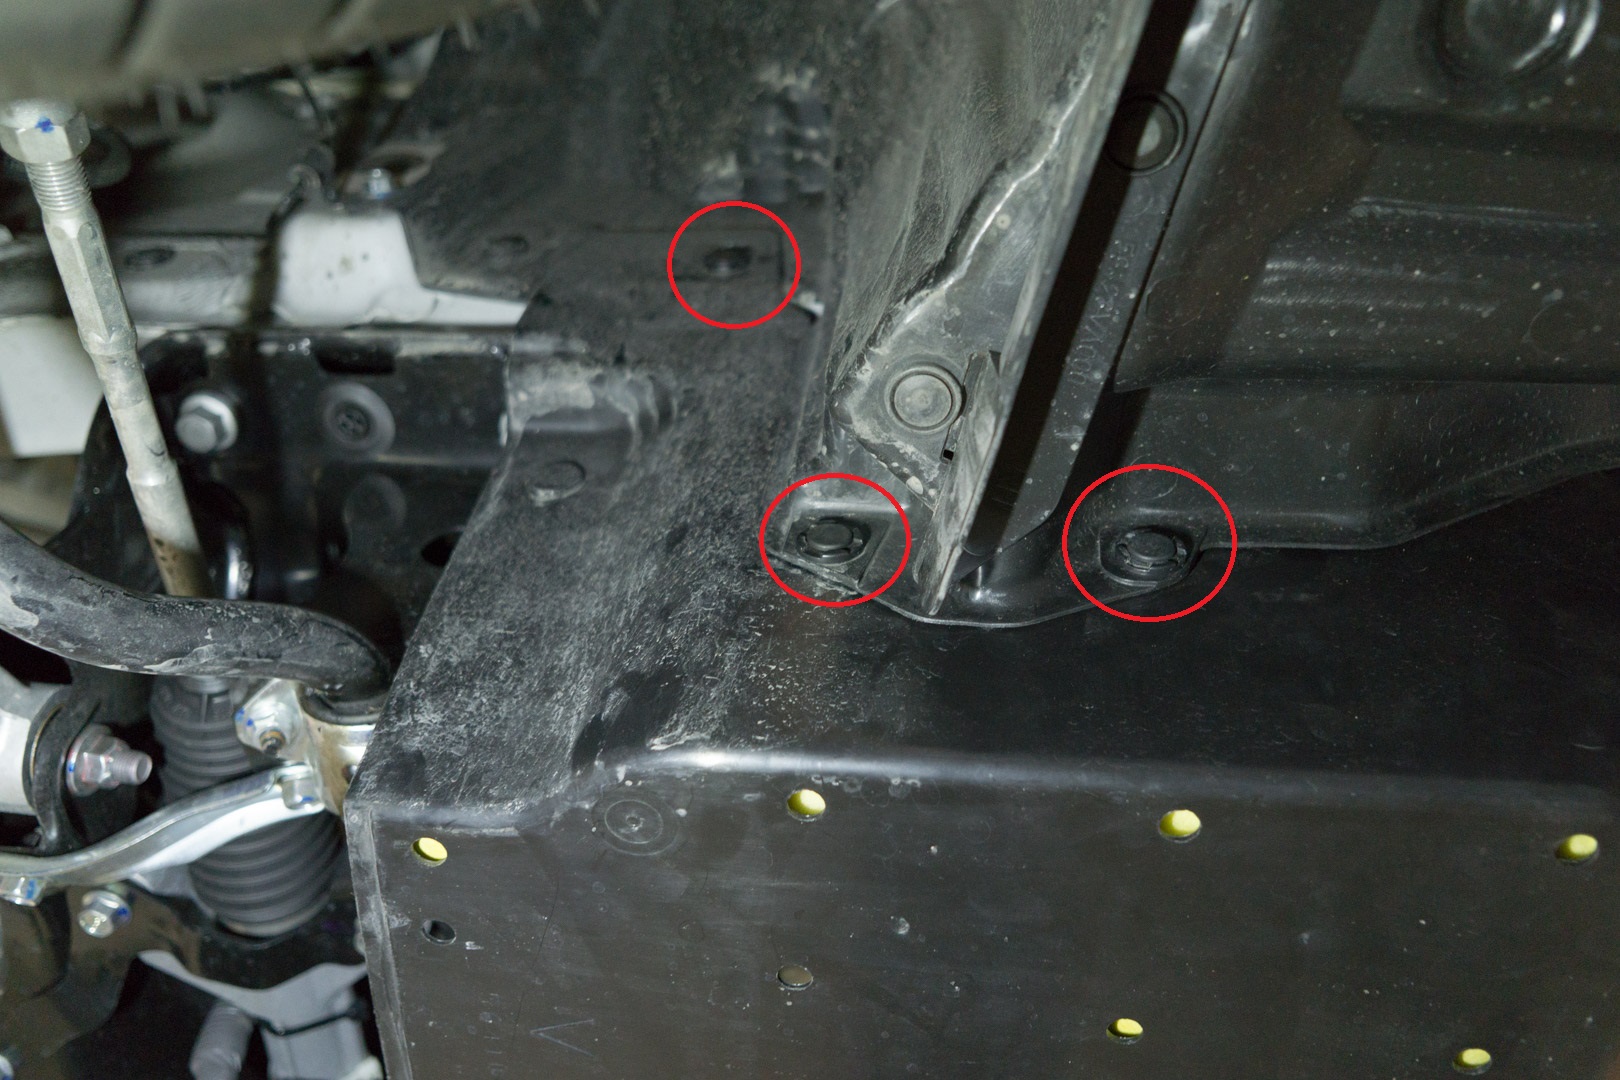
- Remove the 10mm bolt and (2) push clips securing the passenger side undertray using a 10mm socket and flathead screwdriver. The stock intake tube will then slide out very easily.
Related content
742100 - VA DIT WRX Redline Carbon Intake
742100 - VA DIT WRX Redline Carbon Intake
More like this
746160 - Subaru Redline Carbon Fiber Intake Grill Scoop VB WRX
746160 - Subaru Redline Carbon Fiber Intake Grill Scoop VB WRX
More like this
742110 - VA WRX Charge Pipe
742110 - VA WRX Charge Pipe
More like this
B42405 – VA DIT WRX TMIC
B42405 – VA DIT WRX TMIC
More like this
Copyright 2025 © COBB Tuning Products LLC. All Rights Reserved. | www.cobbtuning.com