7V1100 - Volkswagen MK6 Big SF Intake System
- Will Trang
- Brandyn Mowat

COBB Tuning Volkswagen MK6 Big SF Intake - 7V1100
Congratulations on your purchase of the COBB Tuning Volkswagen MK6 Intake Kit. The following instructions will assist you through your installation process. Please read them first BEFORE beginning the install and familiarize yourself with the steps and tools needed. If you feel that you cannot properly perform this installation, we HIGHLY recommend you take the vehicle to a qualified and experienced automotive technician.
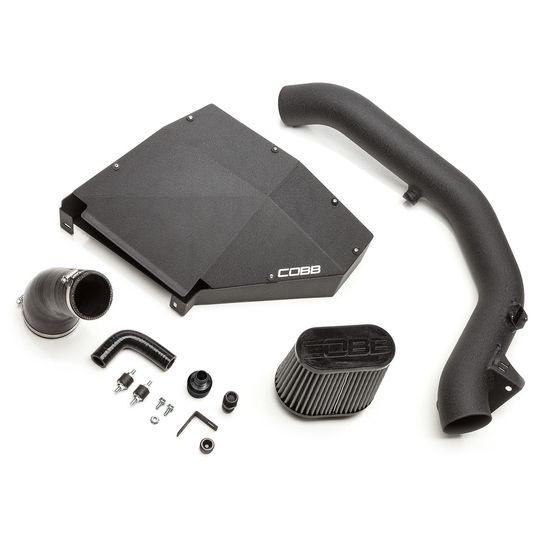
Part List
- Airbox Body
- Airbox Lid
- Airbox Bracket
- VW Intake Pipe
- Silicone Turbo Reducer
- Custom Air Filter
- 1/2" NPT Plug
- 1/2" NPT Hose Barb (CBFA Air Pump Setup)
- Air Pump Adapter (CBFA Air Pump Setup)
- 90° Hose (CBFA Air Pump Setup)
- 6x SS Button Head M4 x 10 Screw
- 6x Nylon Washer, 4mm
- 2x Flange Bolt M6 x 12
- 2x 6mm Flat Washer
- 2x 6mm Rubber Isolator
- 5x 6mm Serrated Nut
- Worm Clamp, 3"-3.5"
- Worm Clamp, 2.5"-2.75"
- Hex Key, 2.5mm
Tools Needed
- 3/8" Ratchet
- Sockets: 7mm. 8mm, 10mm, T30 Torx
- T25 Torx Screwdriver
- 5mm, 3/8" Hex Key
- Nose Clamp Pliers
- T20 Security Torx Drive
- Flathead Screwdriver
Removal of Factory Volkswagen MK6 Intake
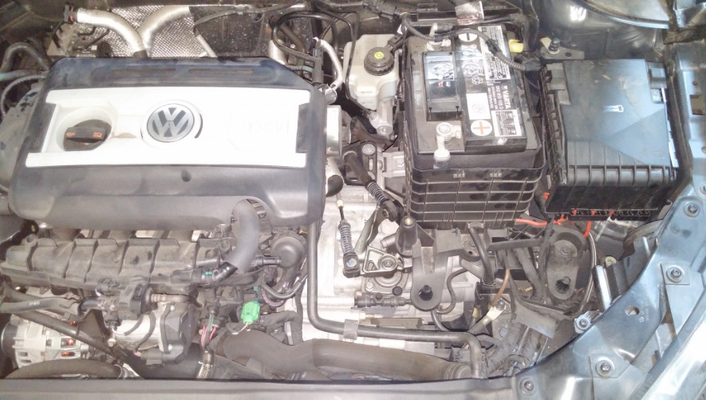
Before removal of factory intake, it is recommended to remove the engine cover by pulling it off of its grommets.
- Inspect the new components included with the COBB kit. If anything appears out of place, please contact COBB immediately and do not proceed with the installation.
- Unplug the MAF sensor.
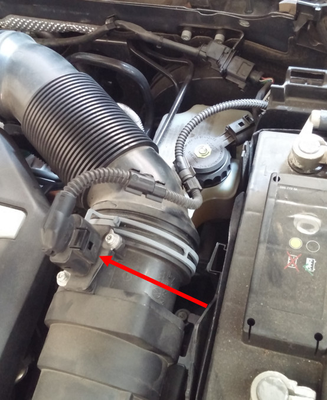
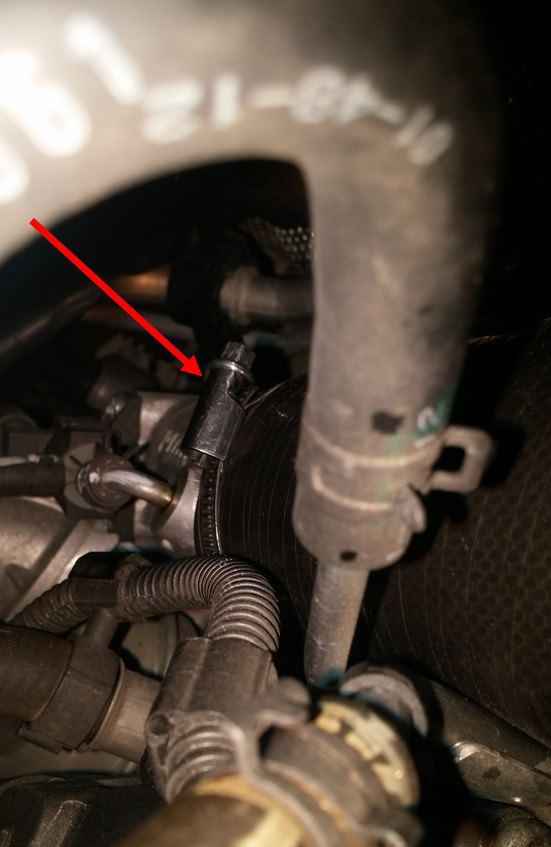
- Remove the stock intake tube by first unplugging the the PCV. This may be easier if you pry one side of the tab over the lip of the PCV bung with a flathead screwdriver. NOTE: This step may be easier after step 5.
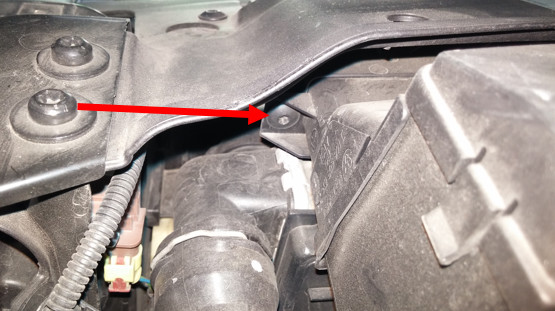
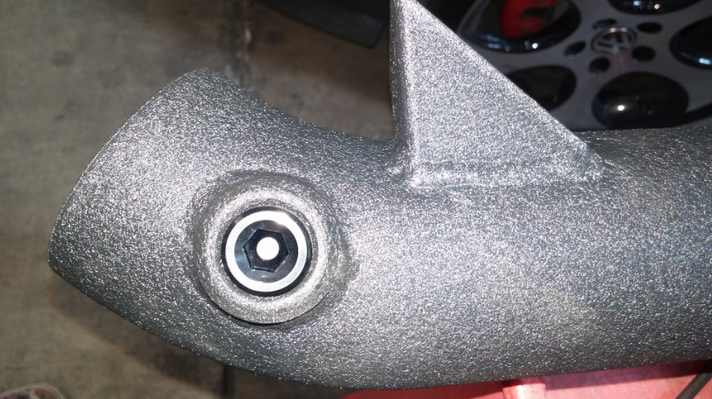
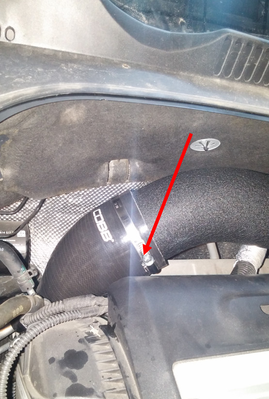
- Now unscrew the intake tube mounting screw on the backside of the tube using a T30 torx socket and 3/8" ratchet.

- The final step to remove the intake tube is to unclamp the turbo and airbox ends of the tube using nose clamp pliers.


- With the MAF and PCV unplugged, along with the mounting screw and clamps removed, you can now pull the stock intake tube out of the car.
- Once the intake tube is uninstalled, be sure to unclamp the stock silicone attached to the turbo if you have not already!
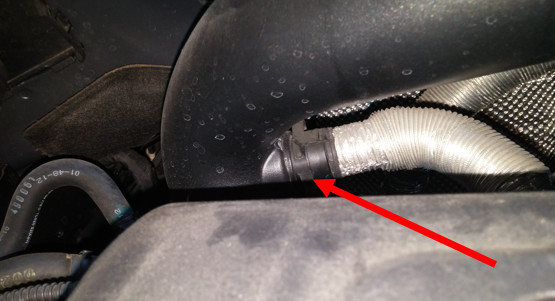
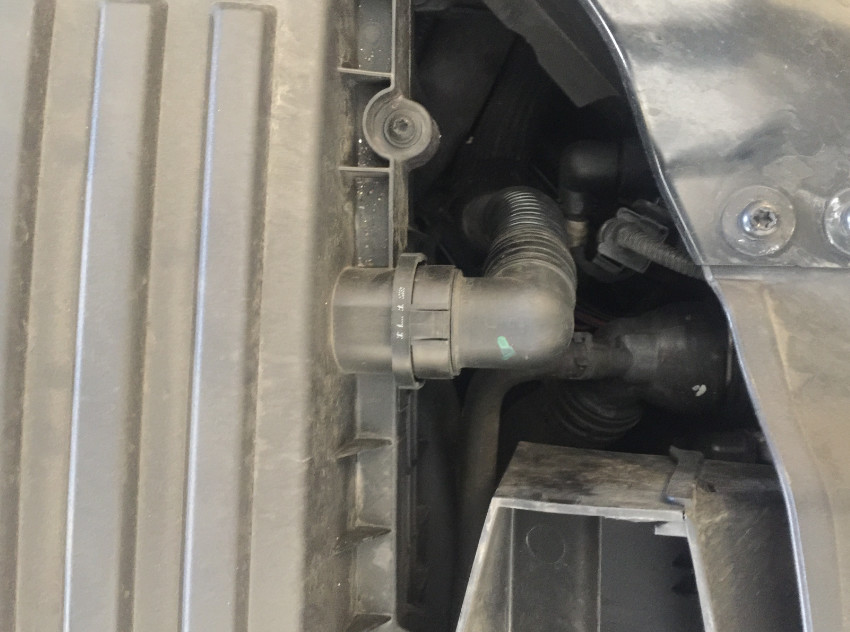
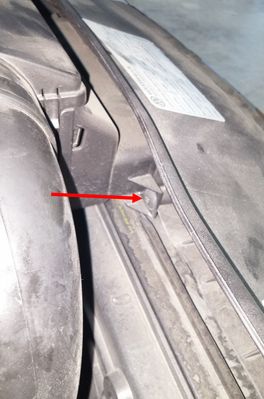
- Moving on to removing the stock airbox, begin by removing the air channel near the front of the airbox to ease the removal process. Do this by unclipping the top cover of the front section of the air channel. Once the cover is off, lift the air channel tube out of its slot.
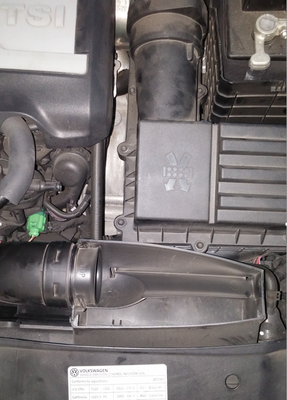
- Now pull the remainder of the tube out of the side of the airbox. Make sure the tube is unclipped, it should just wiggle out.
- For a CBFA car, unclip the air pump hose from the stock airbox.
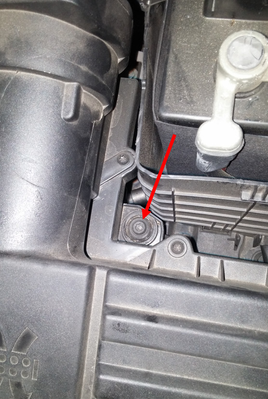
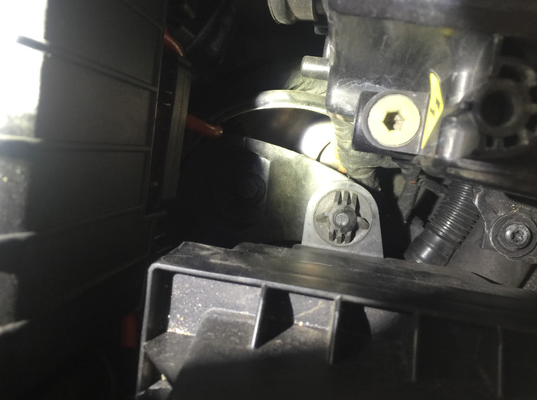
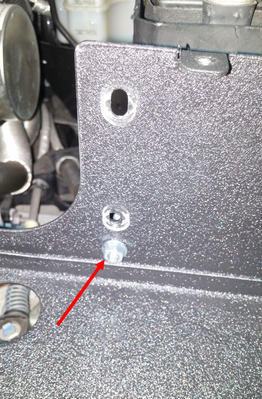
- Using a 5mm hex key to loosen the mounting screw.
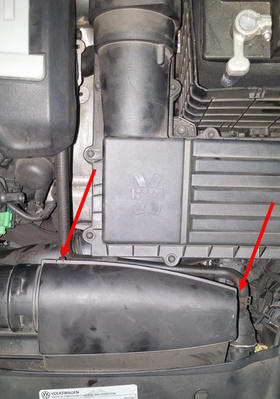
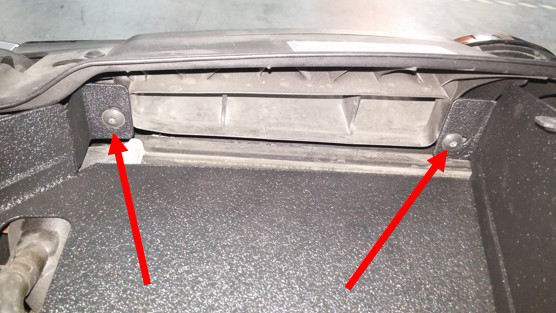
- Remove the front two mounting screws using a T25 torx screwdriver or socket. NOTE: Keep these stock screws for the installation of the COBB Intake.
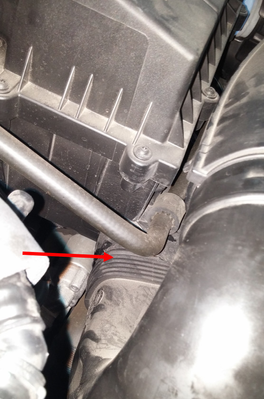
- With the 5mm hex mounting screw completely loosened and the front two screws removed, pull the stock airbox out of the car. The airbox is held down by ball sockets and grommets so you will need to pull hard enough to pop the ball sockets out of place. There is also a drain hose that will pull out of the car with the airbox, you do not need to disconnect it!
Installation of COBB Volkswagen MK6 Intake Airbox
- Place the COBB airbox body in the car and line up the front two tabs with the same two mounting holes that the stock intake used. Thread in the two stock torx screws with a T25 torx screwdriver or socket. DO NOT TIGHTEN!
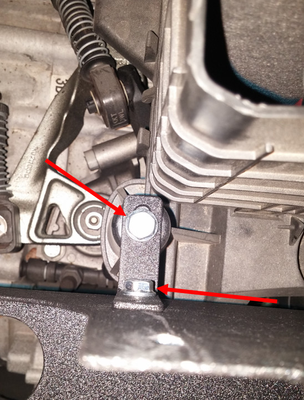
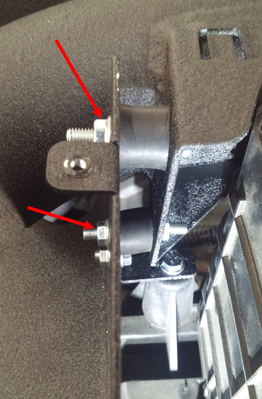
- Place one M6 x 12 flange bolt through the bottom hole on the COBB airbox bracket and then through the bottom hole on the back side of the airbox as shown. Place a 6mm serrated nut on the end of the bolt and loosely thread on. Then place another M6 x 12 bolt through the slotted section of the bracket into the mounting bung.
- Tighten all above steps! Make sure that the slot on the bracket is in line with the slot on the airbox.
Installation of COBB Volkswagen MK6 Intake Pipe
Non CBFA Application
- Thread on and tighten the 1/2" NPT plug into the threaded bung on the intake pipe.
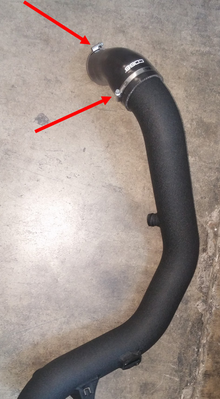
- Attach the silicone adapter to the opposite end of the intake tube. Use a 7mm socket or flathead screwdriver to tighten the 3"-3.5" worm clamp that fastens the silicone to the tube. Loosely place the 2.5"-2.75" worm clamp around the smaller end of the silicone.
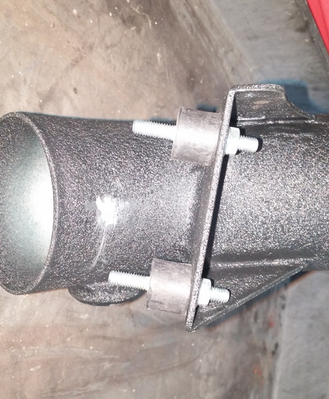
- Place the two spacers with two 6mm serrated nuts on the mounting bracket before you connect to the airbox.
- Place the smaller end of the silicone tube (with the intake tube attached) around the turbo inlet and tighten the worm clamp using a 7mm socket or flathead screwdriver. Make sure the intake tube is positioned correctly in the car before you tighten the clamp!
- To get the open ends of the spacers through the corresponding slots on the airbox, pull the back wall of the airbox inward to allow the intake tube to slide down to the slots. Once the spacers are through the slots, place 6mm serrated nuts on the end.
- With all parts in place, tighten all nuts and bolts.

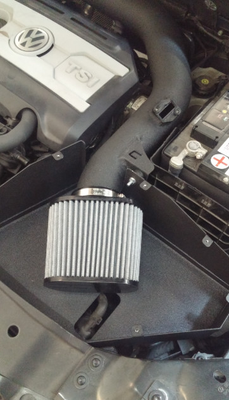
- Now place the custom COBB filter on the open end of the intake pipe and tighten the worm clamp around it using an 8mm socket or flathead screwdriver. NOTE: Make sure the filter sits parallel to the bottom of the airbox and is sitting as low as possible for correct fitment.
- Using six M4 button head screws and six 4mm nylon washers, fasten the lid to the airbox. Use the provided 2.5mm hex key to do so.
- Plug in the PCV into the bung on the intake tube. This should just click right on.
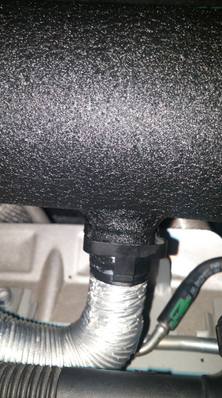
- Remove the stock MAF housing using a T20 security torx drive. Using the same screws and MAF housing, correctly install onto the COBB intake tube.
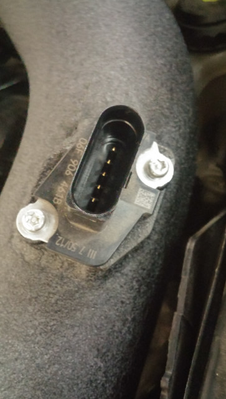
- Plug the MAF sensor into the MAF housing.
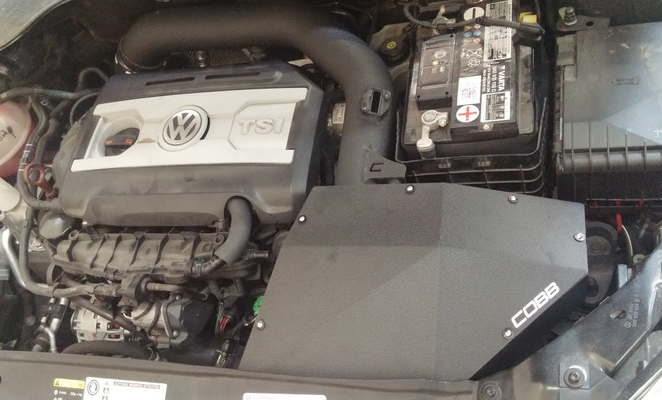
- Check to make sure all nuts and bolts are tight along with ensuring no steps were skipped. Enjoy your COBB Tuning Volkswagen MK6 Intake!
COBB CBFA Application
- Thread on the 1/2" NPT hose barb to hand tight and then, using a 7/8" wrench, tighten it another 1/4 turn. Attach the silicone adapter to the opposite end of the intake tube. Use a 7mm socket or flathead screwdriver to tighten the 3"-3.5" worm clamp that fastens the silicone to the tube. Loosely place the 2.5"-2.75" worm clamp around the smaller end of the silicone.
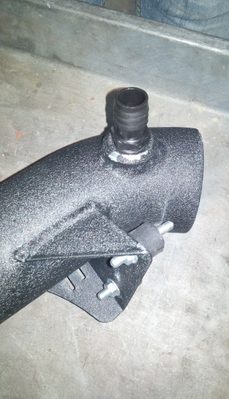
- Place the two spacers with two 6mm serrated nuts on the mounting bracket before you connect to the airbox.
- Place the smaller end of the silicone tube (with the intake tube attached) around the turbo inlet and tighten the worm clamp using a 7mm socket or flathead screwdriver. Make sure the intake tube is positioned correctly in the car before you tighten the clamp!
- To get the open ends of the spacers through the corresponding slots on the airbox, pull the back wall of the airbox inward to allow the intake tube to slide down to the slots. Once the spacers are through the slots, place 6mm serrated nuts on the end.
- With all parts in place, tighten all nuts and bolts.
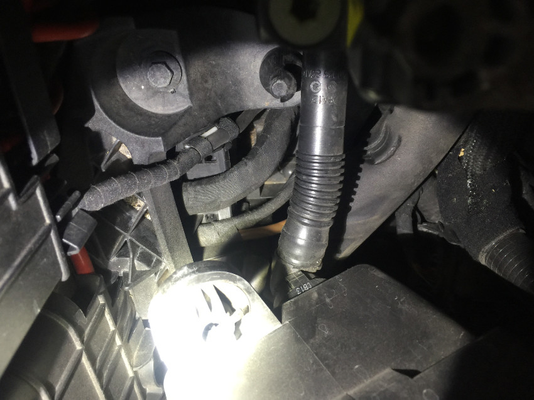
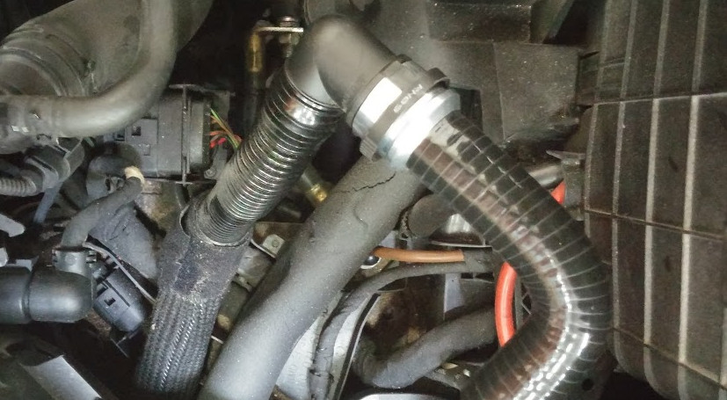
- Take the 90° hose and install the air pump adapter to the longer end. Reach up from underneath the airbox, through the hole cutout, and to the 1/2" NPT hose barb with the open end of the 90° hose. Push the barbed end through the hose to connect the hose to the intake tube.
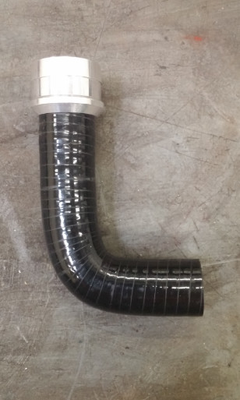
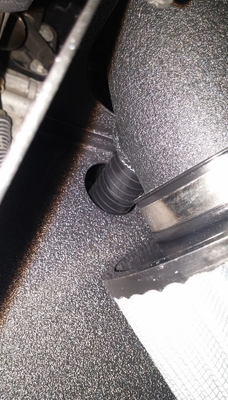
- Now attach the air pump adapter to the air pump. This should just click right over the adapter. NOTE: The picture shown is for clarity reasons only (airbox not shown).
- Now place the custom COBB filter on the open end of the intake pipe and tighten the worm clamp around it using an 8mm socket or flathead screwdriver. NOTE: Make sure the filter sits parallel to the bottom of the airbox and is sitting as low as possible for correct fitment.
- Using six M4 button head screws and six 4mm nylon washers, fasten the lid to the airbox. Use the provided 2.5mm hex key to do so.
- Plug in the PCV into the bung on the intake tube. This should just click right on.
- Remove the stock MAF housing using a T20 security torx drive. Using the same screws and MAF housing, correctly install onto the COBB intake tube.
- Plug the MAF sensor into the MAF housing.
- Check to make sure all nuts and bolts are tight along with ensuring no steps were skipped. Enjoy your COBB Tuning Volkswagen MK6 Intake!
Links
Can let you know what parts will work with what map
The main resource page for MK7 GTI Installation Instructions
COBB Customer Support Web Support and Tech Articles: COBB Tuning Customer Support Center Email: support@cobbtuning.com Phone support available 9am to 6pm Monday-Thursday. 9am to 4pm Friday (CST) 866.922.3059 return to www.cobbtuning.comContact Us:
Related content
Copyright 2025 © COBB Tuning Products LLC. All Rights Reserved. | www.cobbtuning.com