7M1100 - Ford Cold Air Intake Mustang Ecoboost
- Brandyn Mowat

7M1100 - Ford Cold Air Intake Mustang Ecoboost
Ford Mustang Ecoboost 2015 - 2019
Congratulations on your purchase of the COBB Tuning SF Intake for the Ecoboost Mustang! The following instructions will assist you through the installation process. Please read them BEFORE beginning the install to familiarize yourself with the steps and tools needed. If you feel you cannot properly perform this installation, we HIGHLY recommend you take the vehicle to a qualified and experienced automotive technician.
Table of Contents
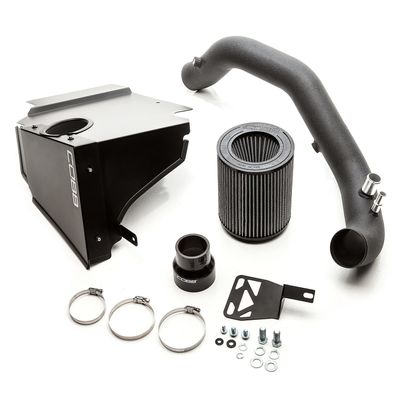
Parts List
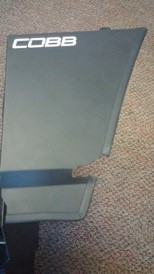
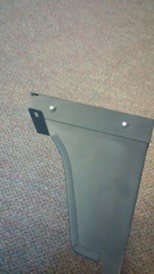
- Sheetmetal Airbox
- Sheetmetal Airbox Lid
- Edge Trim
- COBB 3” Intake Pipe
- Intake Engine Mount Bracket
- 4 x SS Button Head M6 x 10 Screws
- 4 x 4mm Black Nylon Washers
- Flange Head M8 x 12 Bolt
- Flange Head M6 x 12 Bolt
- 6mm Black Nylon Washer
- 8mm Black Nylon Washer
- 3” Silicone Reducer Coupler
- 040 Worm Clamp
- 048 Worm Clamp
- 052 Worm Clamp (pre-installed on filter)
- Intake Engine Mount Bracket
- 2 x Flange Head M12 x 30 Bolt
- Flange Head M8 x 12 Bolt
- 8mm Flat Washer
- 12mm Flat Washer
- Intake Air Filter
- 4mm Allen/Hex Wrench
Tools Needed
- Phillips head screwdriver
- Flathead screwdriver
3/8" ratchet
- 3/8" 7mm socket
3/8" 8mm socket
3/8" 10mm socket
3/8" 12mm socket
3/8" 13mm socket
- 3/8" 16mm socket
- 3/8" 17mm socket
3/8" 12" extension
3/8" 6" extension
3/8" Socket Swivel
Channel Lock Pliers
- Hose cutter or large sharp scissors.
Removal of Stock Intake
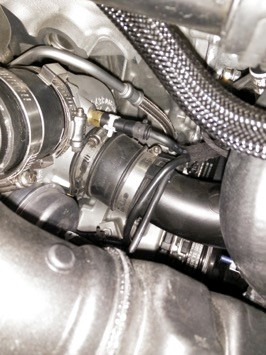
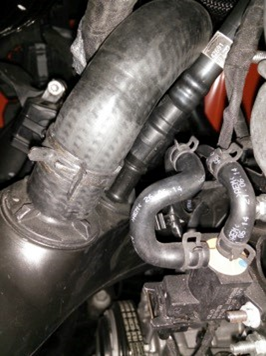
- Disconnect the clamps connecting the stock intake tube to the turbocharger, the tube for the bypass valve, and the PCV. To remove the 2 worm clamps holding the stock intake tube, use either a flathead screwdriver or 7mm socket. To remove the bypass valve tube, use channel lock pliers to loosen the clamp to where you can pull the hose off. To remove the PCV, pull back the plastic lever that locks the valve in place to where you can remove the PCV connector.
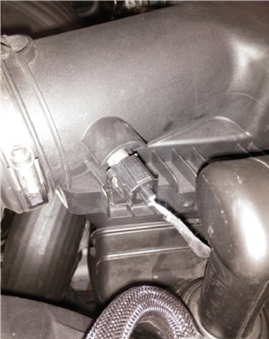
- Now disconnect the IAT sensor along with its wiring harness that is connected to the stock airbox.
- Remove the bolt that is holding the back of the airbox in place with a 10mm socket.
- Now, you should now be able to pull out the complete intake along with the stock airbox!
- Remove remaining stock silicone hoses and the grommet used to hold the stock intake in place. If needed you can take the airbox out first and then the intake tubing if you are unable to remove it all at once easily.
COBB SF Intake Installation
- Inspect the new components included with the COBB kit. If anything appears out of place or damaged, please contact COBB immediately and do not proceed with the installation.
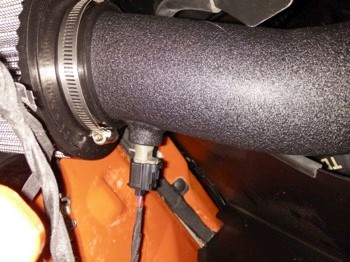
- Place the smaller diameter (2.25”) side of the COBB silicone reducer coupler on the turbo inlet and use the 040 worm clamp to tighten around the inlet. Use a flathead screwdriver or 8mm ratchet to tighten the worm clamp. May be easier to install using silicone spray.
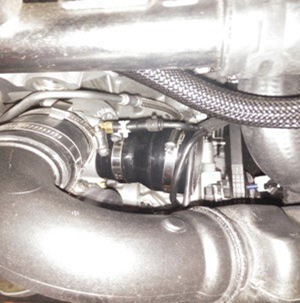
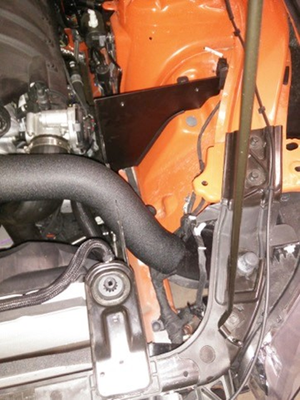
- Install the COBB 3” Intake Pipe into the turbo silicone. Make sure the side that goes into the turbo silicon has the bungs to reattach the BPV and PCV. Apply some silicone spray if needed. Loosely install the 048 worm clamp to hold the intake pipe to the silicone reducer coupler.
- For a tighter seal, cut the supplied edge trim and install onto the Airbox and Airbox Lid as shown. Do this before installing the airbox in the car. To get the edge trim to bend around edges, cut triangles where the bends occur.
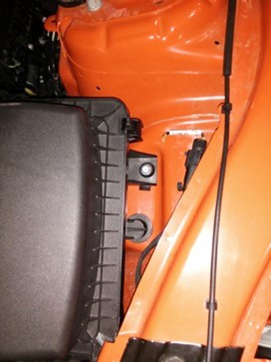
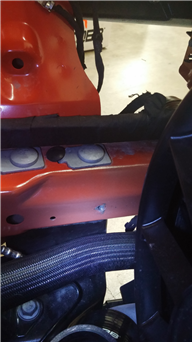
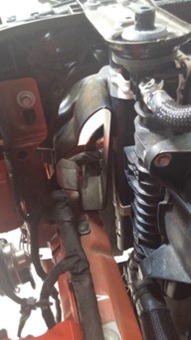
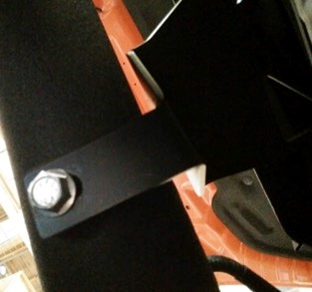
- While the pipe is unfastened and has some wiggle room, install the lower airbox to your EB Mustang. Do this by first locating the threaded mounting hole located on the frame rail of the car. This threaded hole is located on the driver’s side frame rail below where the stock airbox originally was. This makes it easier to line up the hole on the airbox and thread in a bolt. Now you can take the airbox and move it into position in the engine bay by making sure the front vertical tab of the airbox slides between the air inlet scoop and the radiator and the hole in the airbox is concentric with the mounting hole on the frame rail. Take an M8 x 12 flange head bolt along with an 8mm nylon washer and once the airbox has been placed correctly, begin to fasten it to the mounting hole. Use a 12mm socket to tighten.
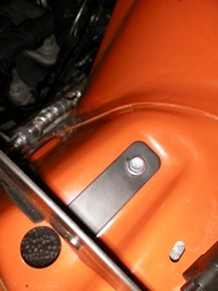
- Using the M6 flange head bolt and the 6mm nylon washer, bolt down your new airbox using a 10mm socket in the same location using the mounting slot on the COBB Airbox. Tighten both bolts used to install the airbox.
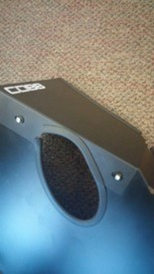
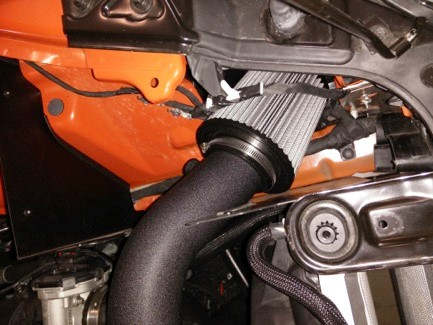
- Place the Intake Filter on the end of the COBB 3” Intake Pipe and using the worm clamp that came with the filter, fasten to the intake pipe. Use a flathead screwdriver or 8mm ratchet to tighten the worm clamp.
- Take the Intake Engine Mount Bracket and the 2 flange head M12 x 30 bolts with the 2 corresponding 12mm flat washers and lock washers and loosely fasten the bracket to the front engine mount. Use a 17mm socket to tighten.
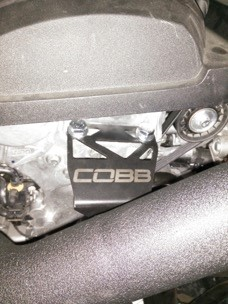
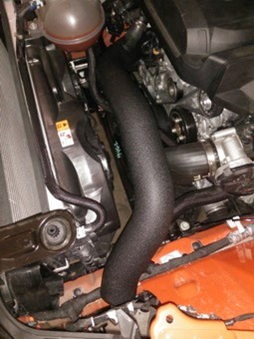
- Now you can move the Intake Pipe to where you are able to loosely fasten the pipe to the bracket using an M8 x 12 Flange Head Bolt along with the 8mm flat washer. Before doing so, make sure the intake pipe is fitted inside the cutout on the airbox. Use a 12mm socket to tighten.
- Once the COBB 3” Intake Pipe is positioned correctly in the airbox, tighten down the 3 bolts connecting the Engine Mount Bracket to the engine and the intake pipe.
- Reconnect the PCV and the IAT sensor along with reattaching the blow off using the stock clamp to your new Intake System!
- Now that the filter is in place and the sensors are connected, place the Airbox Lid on top of the airbox and fasten to the body of the airbox using the (4) SS Button Head M4 x 10 Screws and the (4) 4mm Black Nylon Washers. Use a 3mm Allen Wrench to tighten the screws.
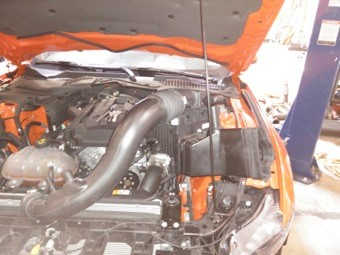
- Double check the hose clamps and go out and enjoy! The installation of your new COBB 3” SF INTAKE SYSTEM is now complete!
CARB Sticker Application
(Where Applicable)
Apply the supplied CARB sticker in a clear, easy to find location. Typically underhood, or on the radiator core support.
Links
COBB Product Install Instructions for Ecoboost Mustsang
Main Installation Instruction Repository for Mustang EcoBoost Parts
Map Notes for Ecoboost Mustang
Link to Mustang EcoBoost Map Notes to see what map you should be on given the parts you've added
COBB Customer Support Web Support and Tech Articles: COBB Tuning Customer Support Center Email: support@cobbtuning.com Phone support available 9am to 6pm Monday-Thursday. 9am to 4pm Friday (CST) 866.922.3059 return to www.cobbtuning.comContact Us:
Related content
Copyright 2025 © COBB Tuning Products LLC. All Rights Reserved. | www.cobbtuning.com