702120 - Fiesta ST Redline Carbon Fiber Intake
- Brandyn Mowat

702120 - Fiesta ST Redline Carbon Fiber Intake
2014 - 2019 Ford Fiesta ST
Congratulations on your purchase of the COBB Tuning Intake System for the Fiesta ST! The following instructions will assist you through the installation process. Please read them BEFORE beginning the install to familiarize yourself with the steps and tools needed. If you feel you cannot properly perform this installation, we HIGHLY recommend you take the vehicle to a qualified and experienced automotive technician.
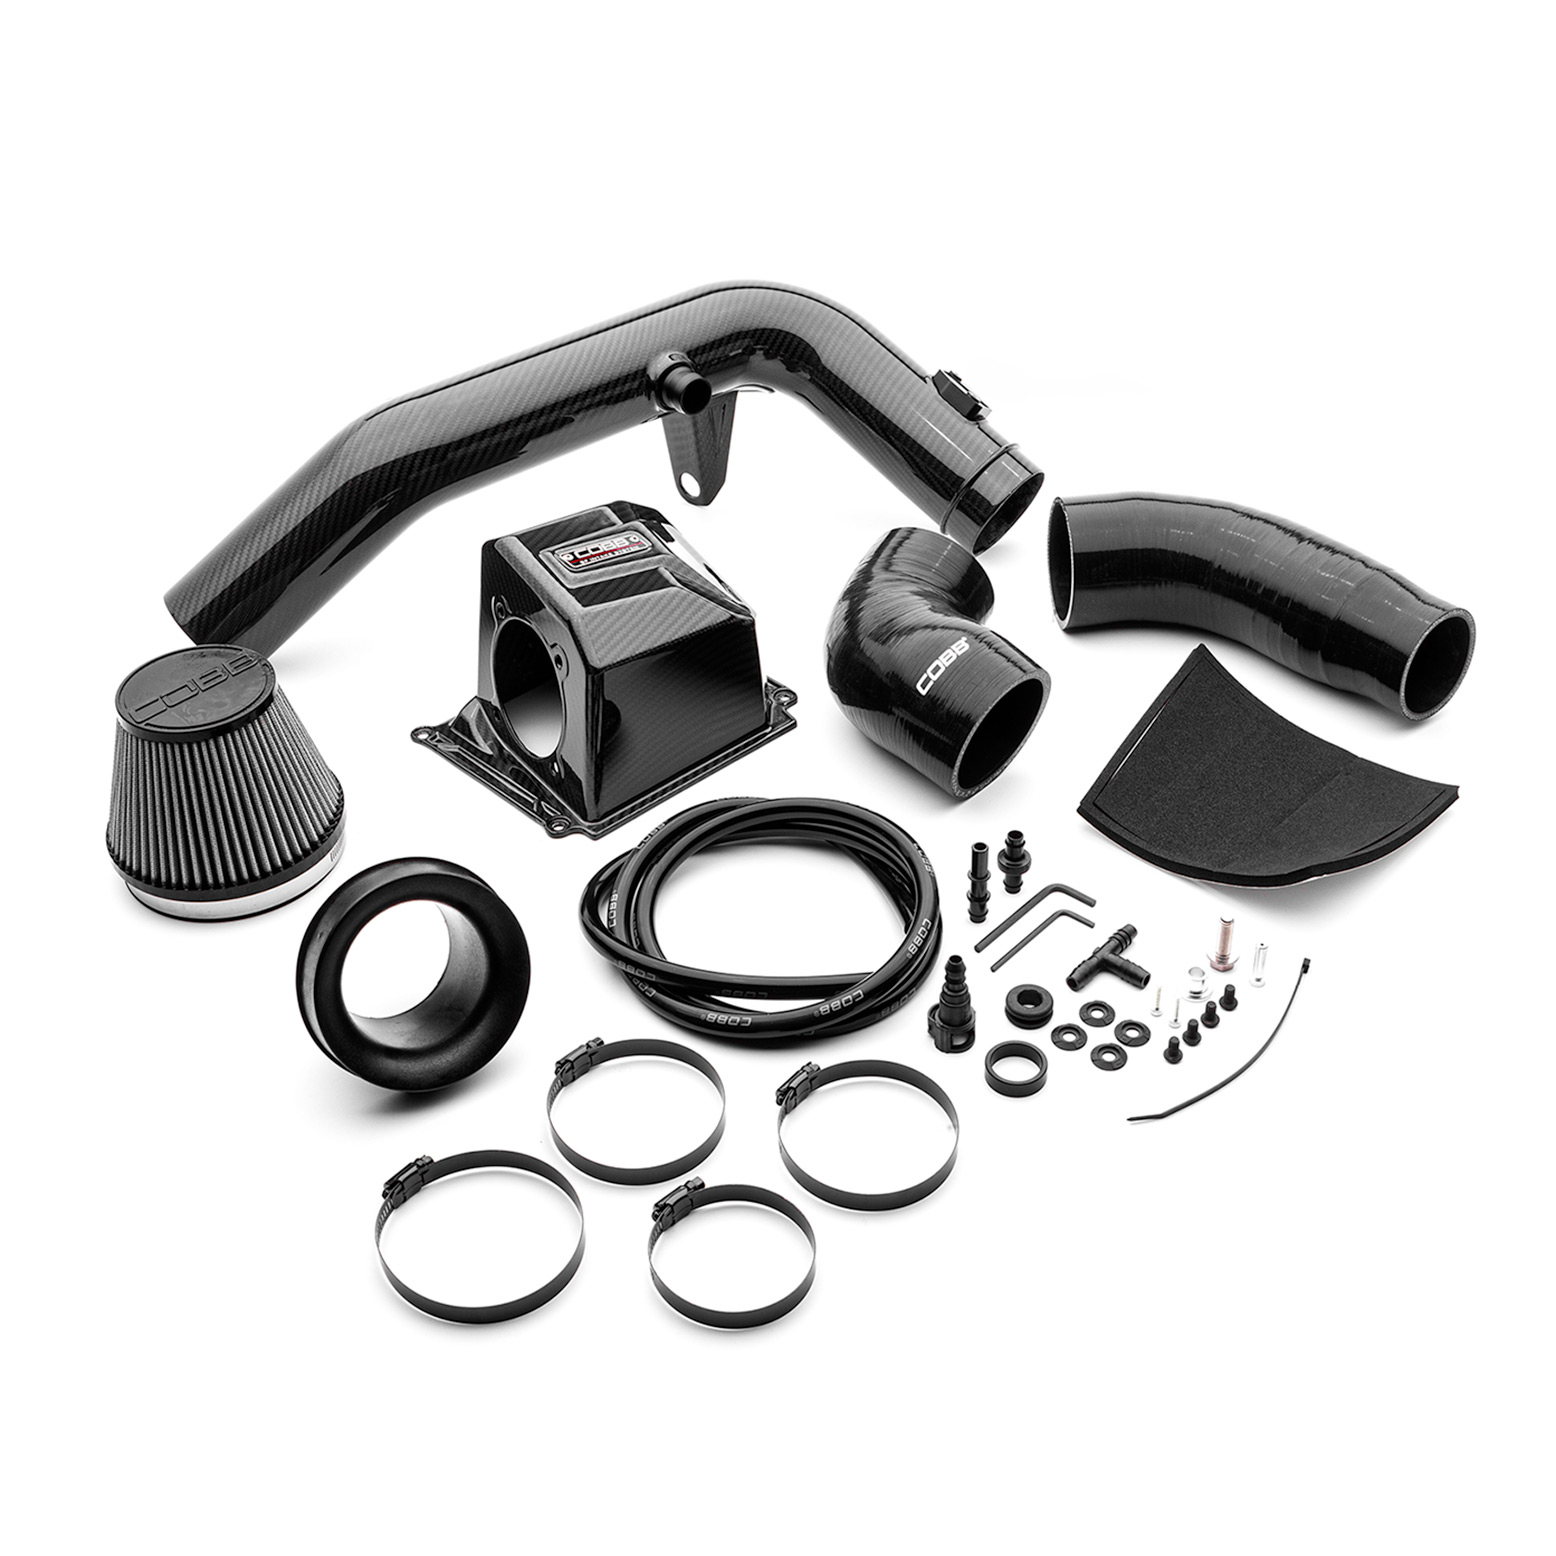
Parts List
- Intake Tube
- Velocity Stack
- 713101 Fiesta ST High Flow FIlter
- Airbox Lid
- 2.5" - 3" Adapter
- Airbox to Intake Silicone
- Fiesta ST Airbox Gasket
- 8mm Grommet Insert
- 3/4" Grommet
- (4) COBB Nylon Washer 6MM
- Fiesta ST Airbox Spacer
- Evap hose assembly
- (1) #48 Hose Clamp Black Stainless
- (1) #40 Hose Clamp Black Stainless
- (2) #52 Hose Clamp Black Stainless
- (1) M8 x 25mm
- (4) M6 x 10mm Stainless Black Oxide Hex Bolt
- (2) M4 x 6mm Socket Head Cap Bolt
- M3 hex Key
- M4 hex Key
Tools Needed
Sockets
3/8"
3/8" ratchet
3/8" 12" extension
3/8" 6" extension
3/8" Socket Swivel
- 3/8" 7mm socket
3/8" 8mm socket
3/8" 10mm socket
3/8" 12mm socket
- 3/8" 15mm socket
- 3/8" 15mm deep socket
3/8" T20 Torx Bit
3/8" T25 Torx Bit
3/8" T30 Torx Bit
- 3/8" 4mm Allen Socket
- 3/8" 5 mm Allen Socket
- 3/8" 10 mm Allen Socket
Hand Tools
- Phillips head screwdriver
- Flathead screwdriver
- 3mm Allen Key
- 7mm Nut Driver
- Trim removal tool
Pick
Needlenose pliers
Channel Lock Pliers
- Deadblow Hammer
Removing Factory Intake
- To start off, it’s best to go ahead and unplug the negative battery cable from the battery. You will need a 10mm socket or wrench to do so.
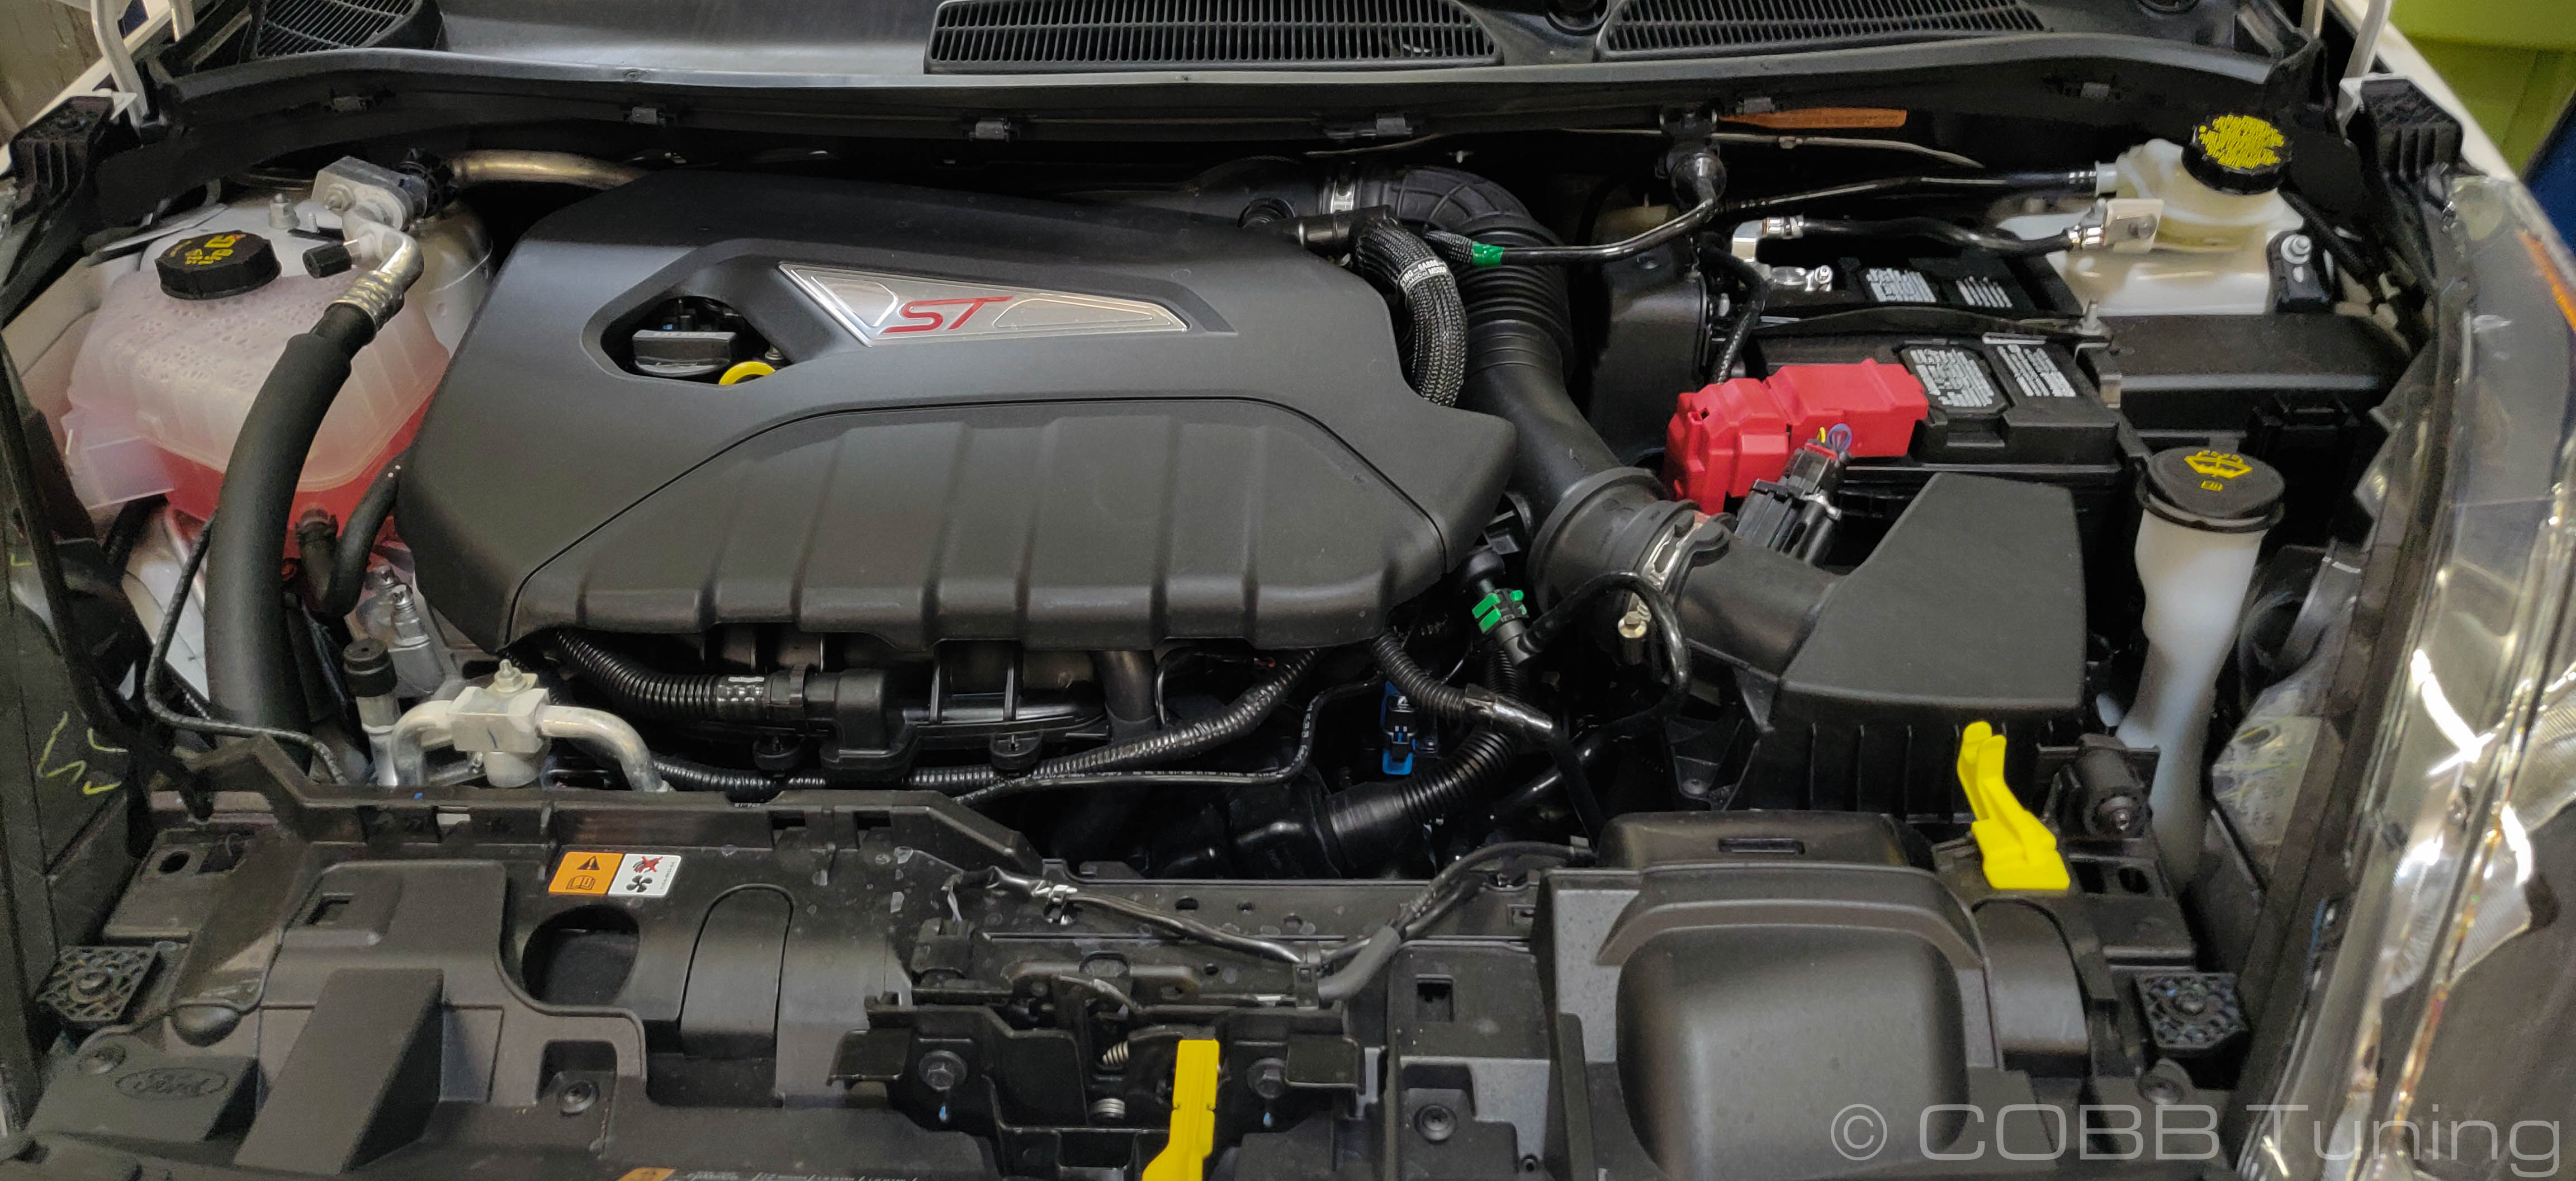
- Pull the engine cover off of the motor by pulling upward and away. It’s held in place by three (3) grommets that will pop out with force.
- Remove the two (2) rubber caps off of the base of the windshield wipers. Use a 15mm socket to remove the nut holding each wiper to the vehicle. Remove the wipers by wiggling them back and forth off of their spline. This may require the use of a small bearing puller type tool.
Pro Tip: Use blue painters tape to mark where the wipers rest in a down position so that it’s easy to reinstall later.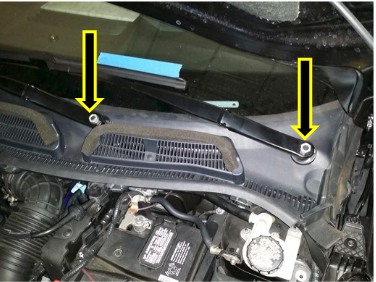
- Using a small pick or a small flat-head screwdriver, pry off the six (6) clips that hold the two layers of cowl together and set them aside. Remove the top cowl piece and set aside.
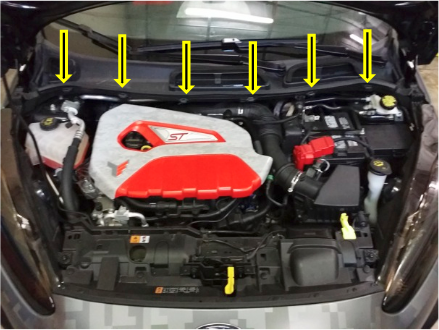
- Using a T30 Torx bit, remove the two (2) screws that hold each headlight on. Use a flat-head screwdriver to remove the plastic fastener as well. Starting at the back of the light, pull upward on the headlight until it pops free. You may need to push the headlight toward the windshield to release the upper clip. Unplug the plug on the back of the headlight and set it aside. Remove both headlights.
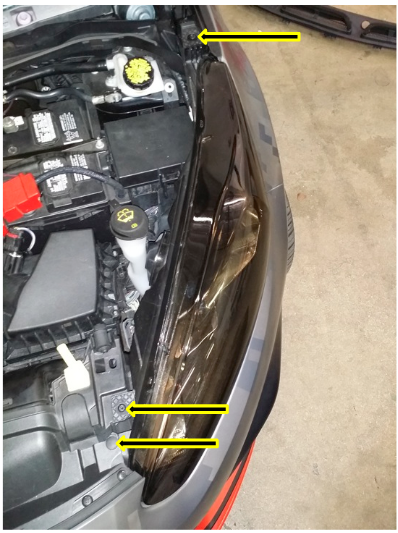
- With the headlights out of the way, use a 10mm socket, remove the two (2) fasteners on each end of the lower cowl section. Once all four (4) fasteners are removed, use your fingers to pinch and remove the line in the center of the cowl and remove the cowl.
- With the cowl finally out of the way, we can now remove the factory intake. Use a 10mm socket to remove the nut holding down the intake to the valve cover. Use a 12mm wrench to remove the plastic engine cover mount that is also holding the intake in place at the back of the motor.
- Use a 7mm socket to loosen all three (3) of the worm clamps on the intake. There is one behind the motor where the intake meets the turbo as well as one clamp where the two intake tubes meet and one clamp that secures the tube to the airbox.
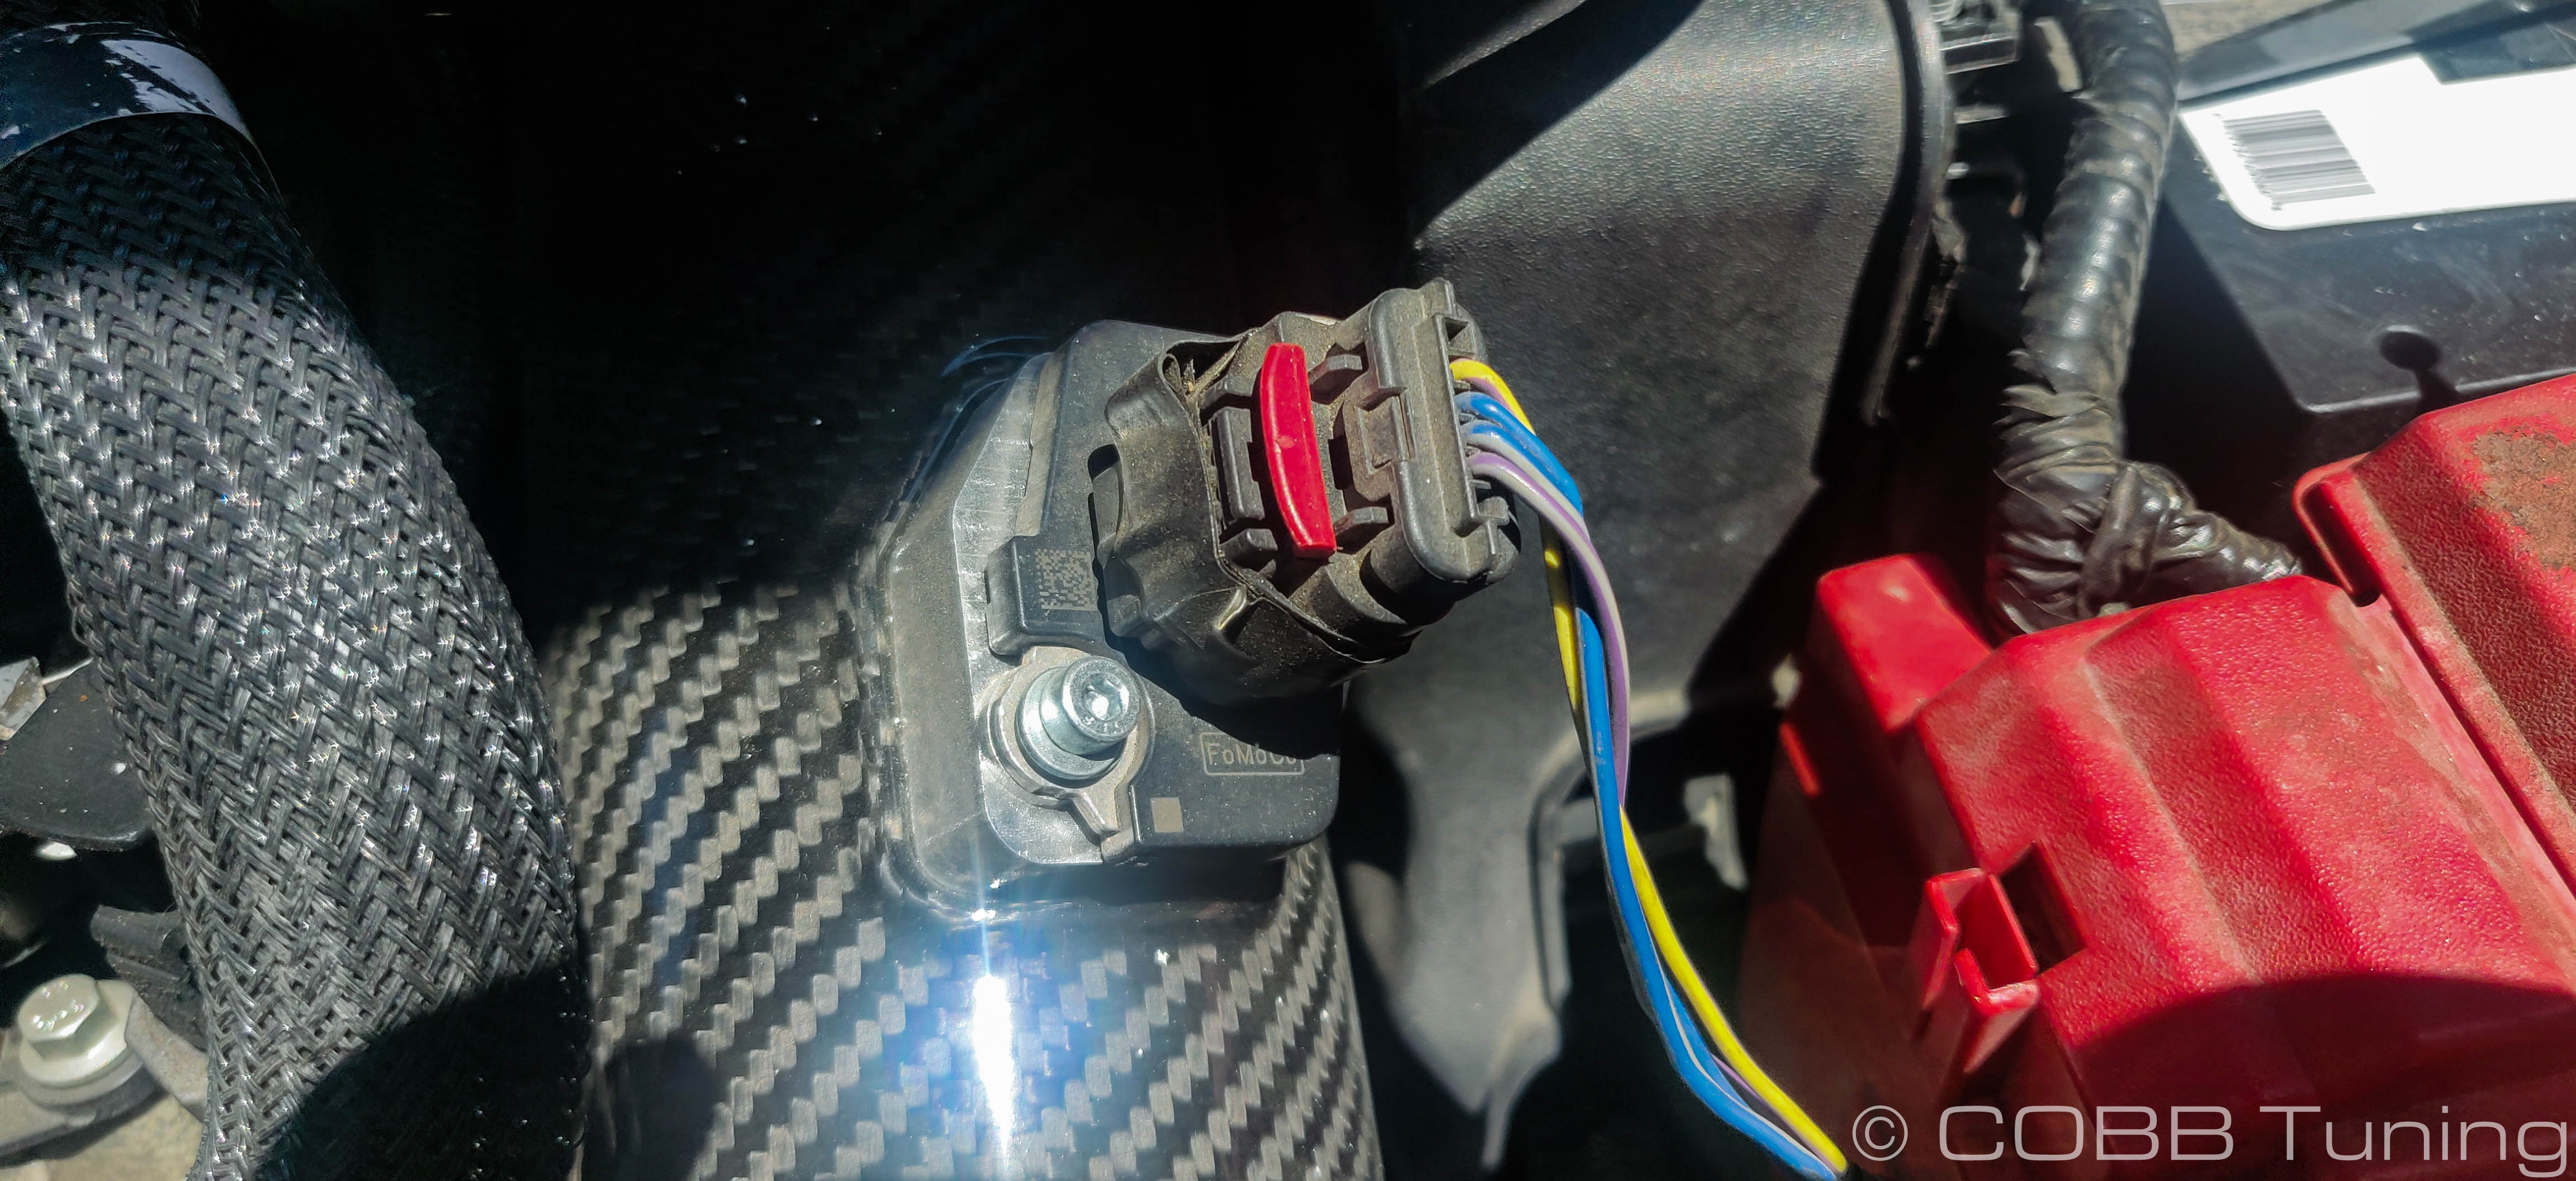
- a) If you have a 2014-2015 MY use a pair of pliers to pull the Evap hose off of the valve cover. (Refer to the picture on left)
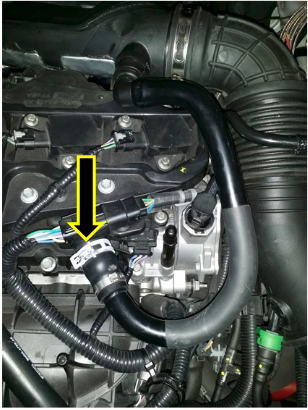
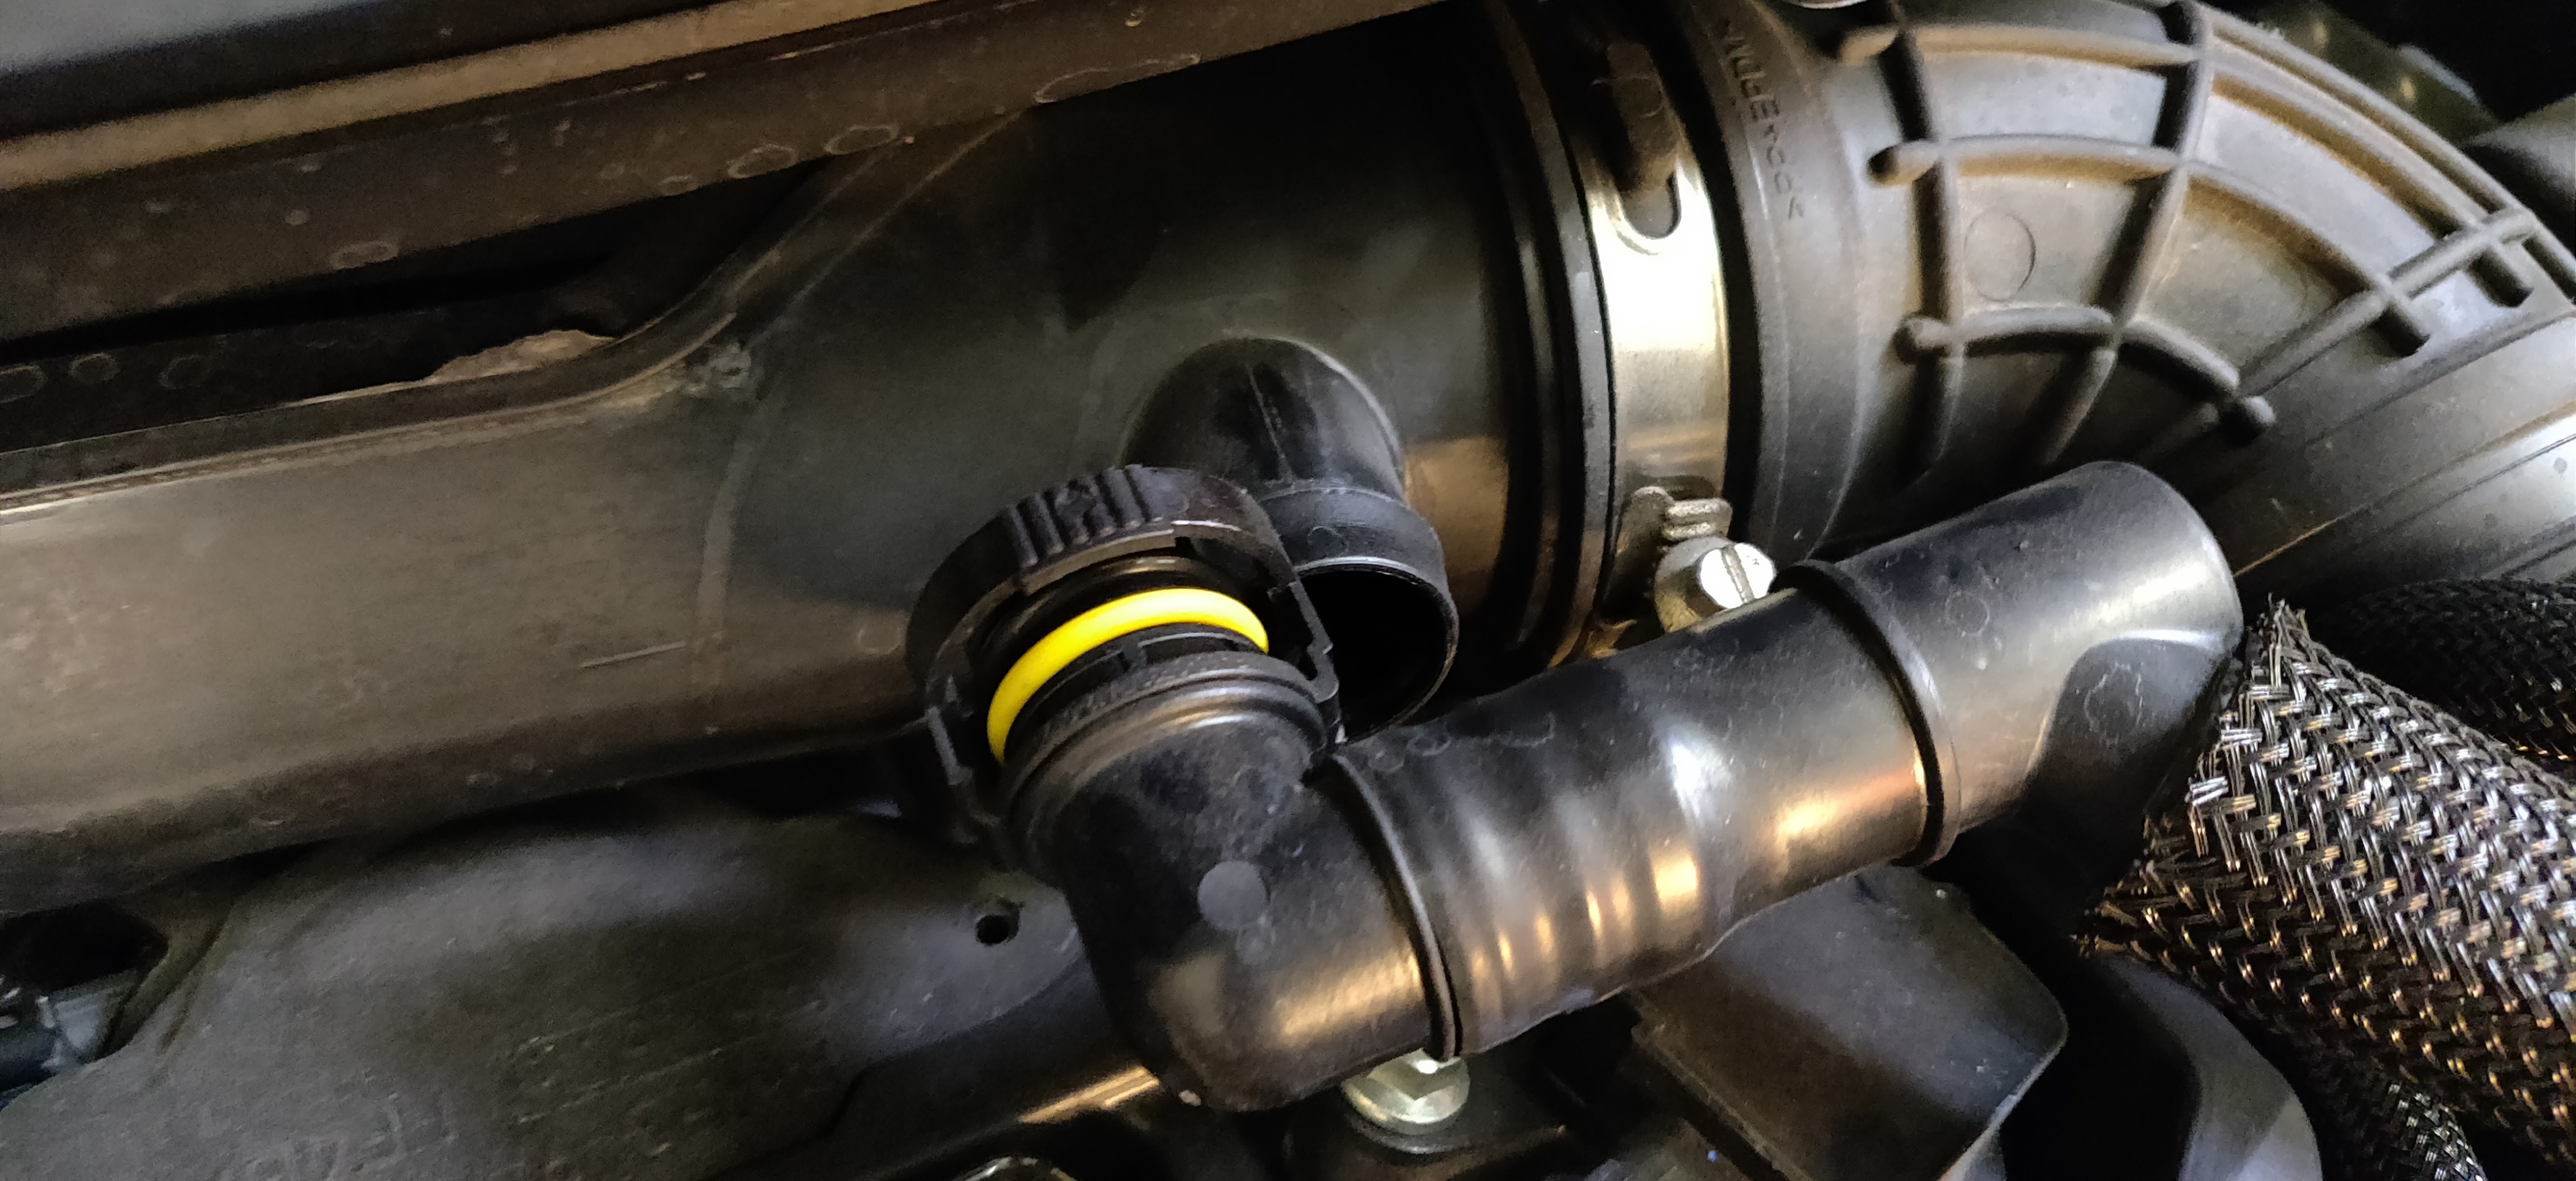
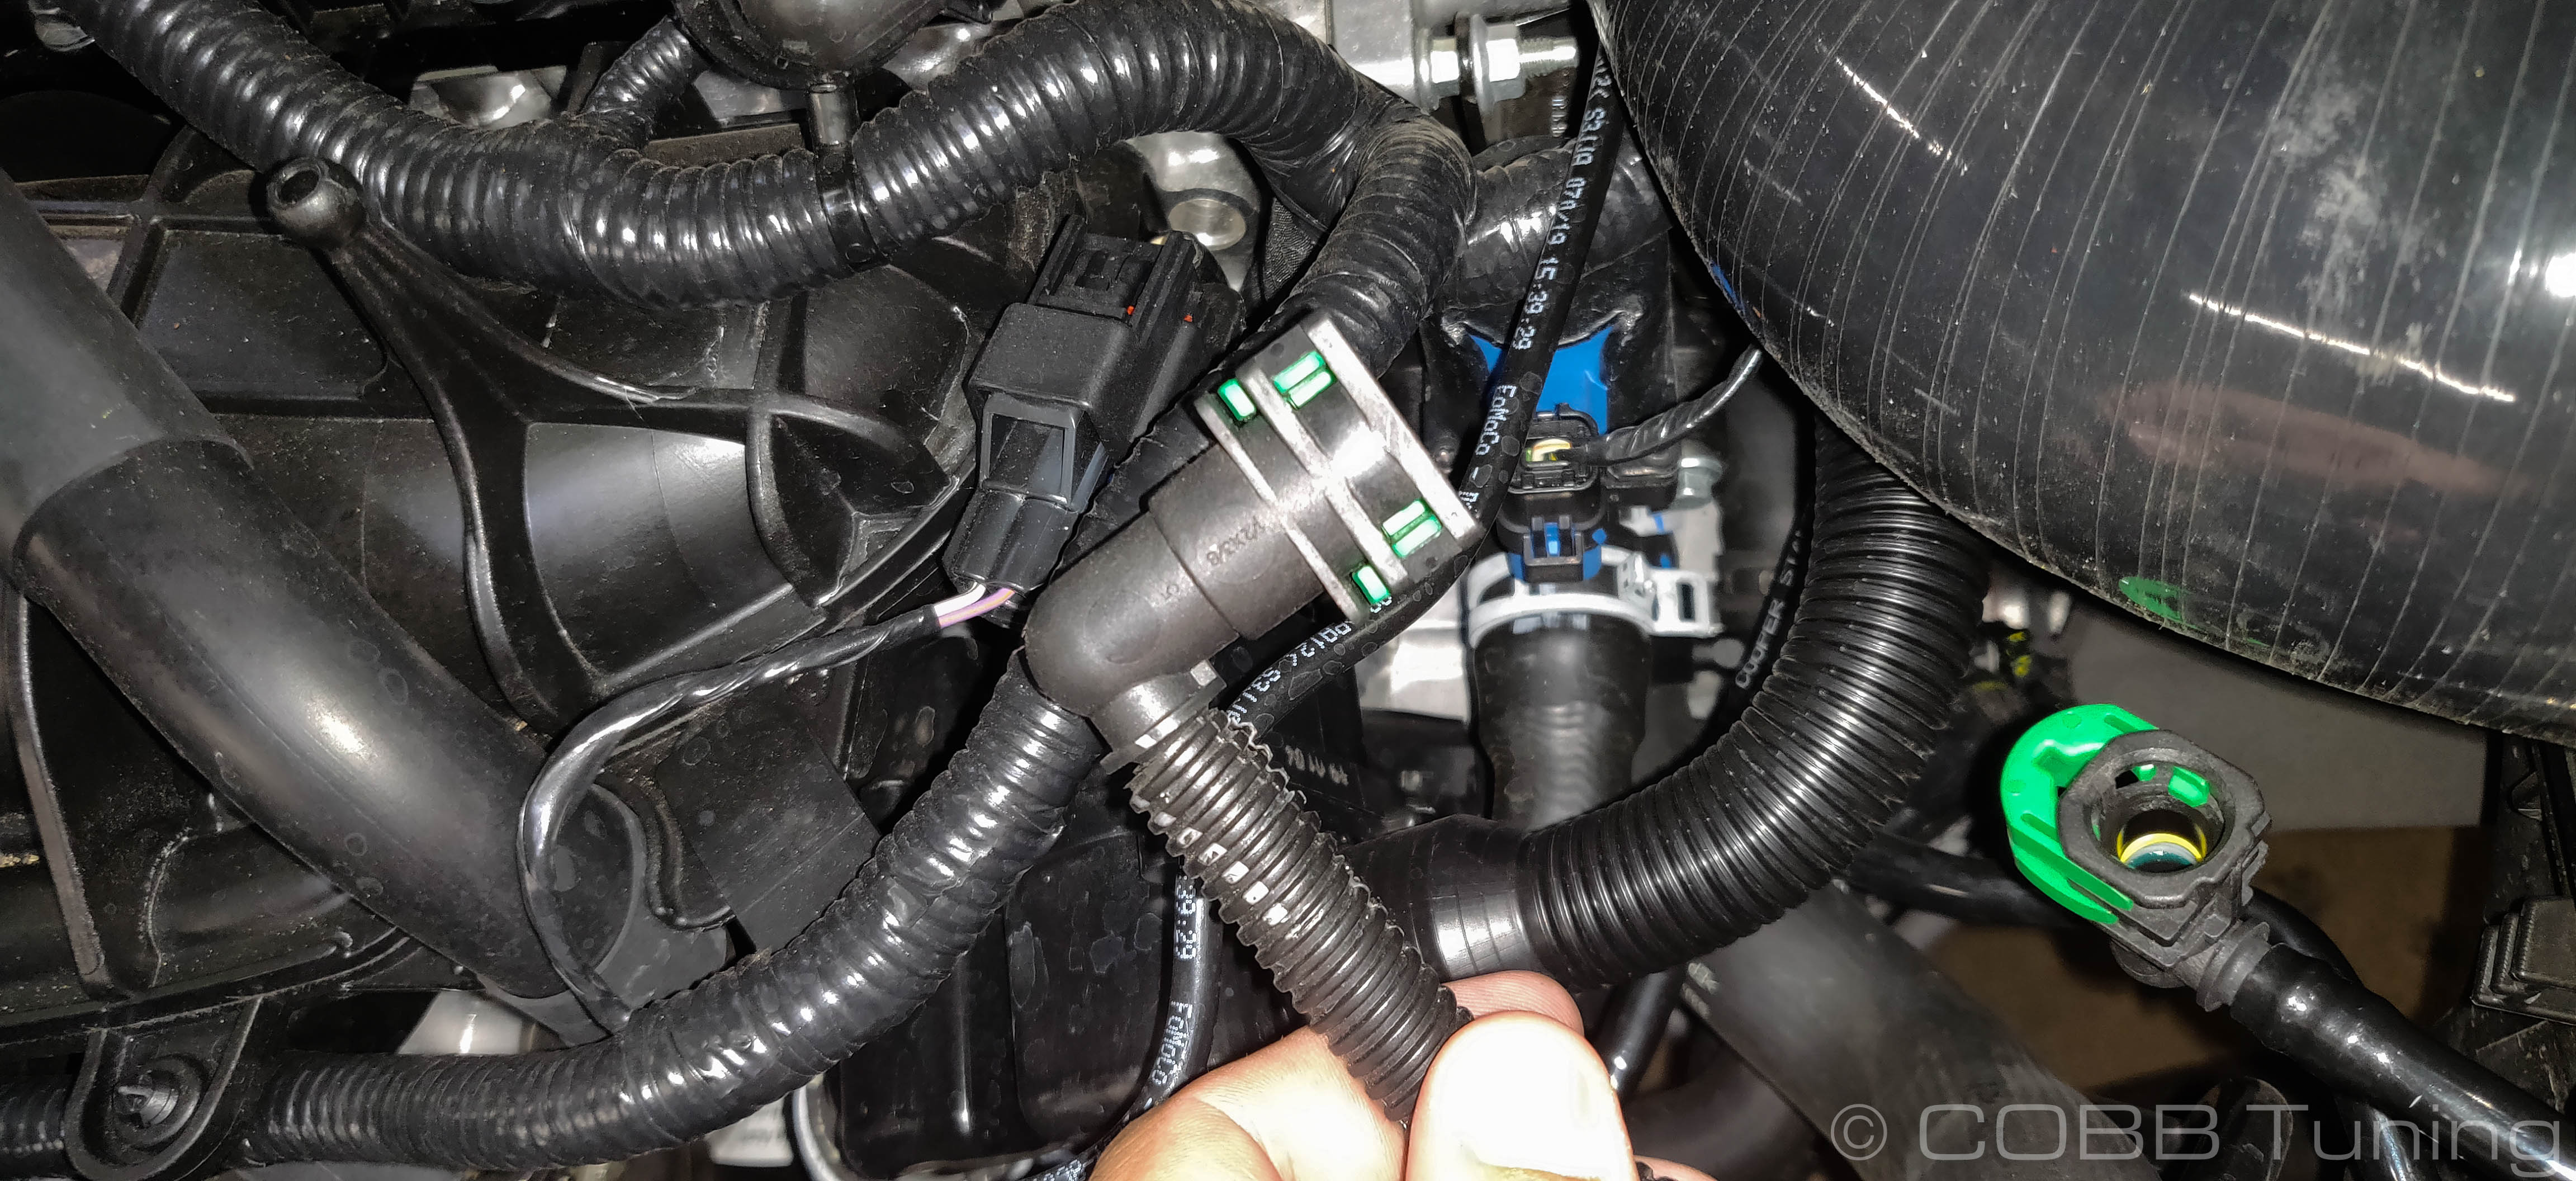
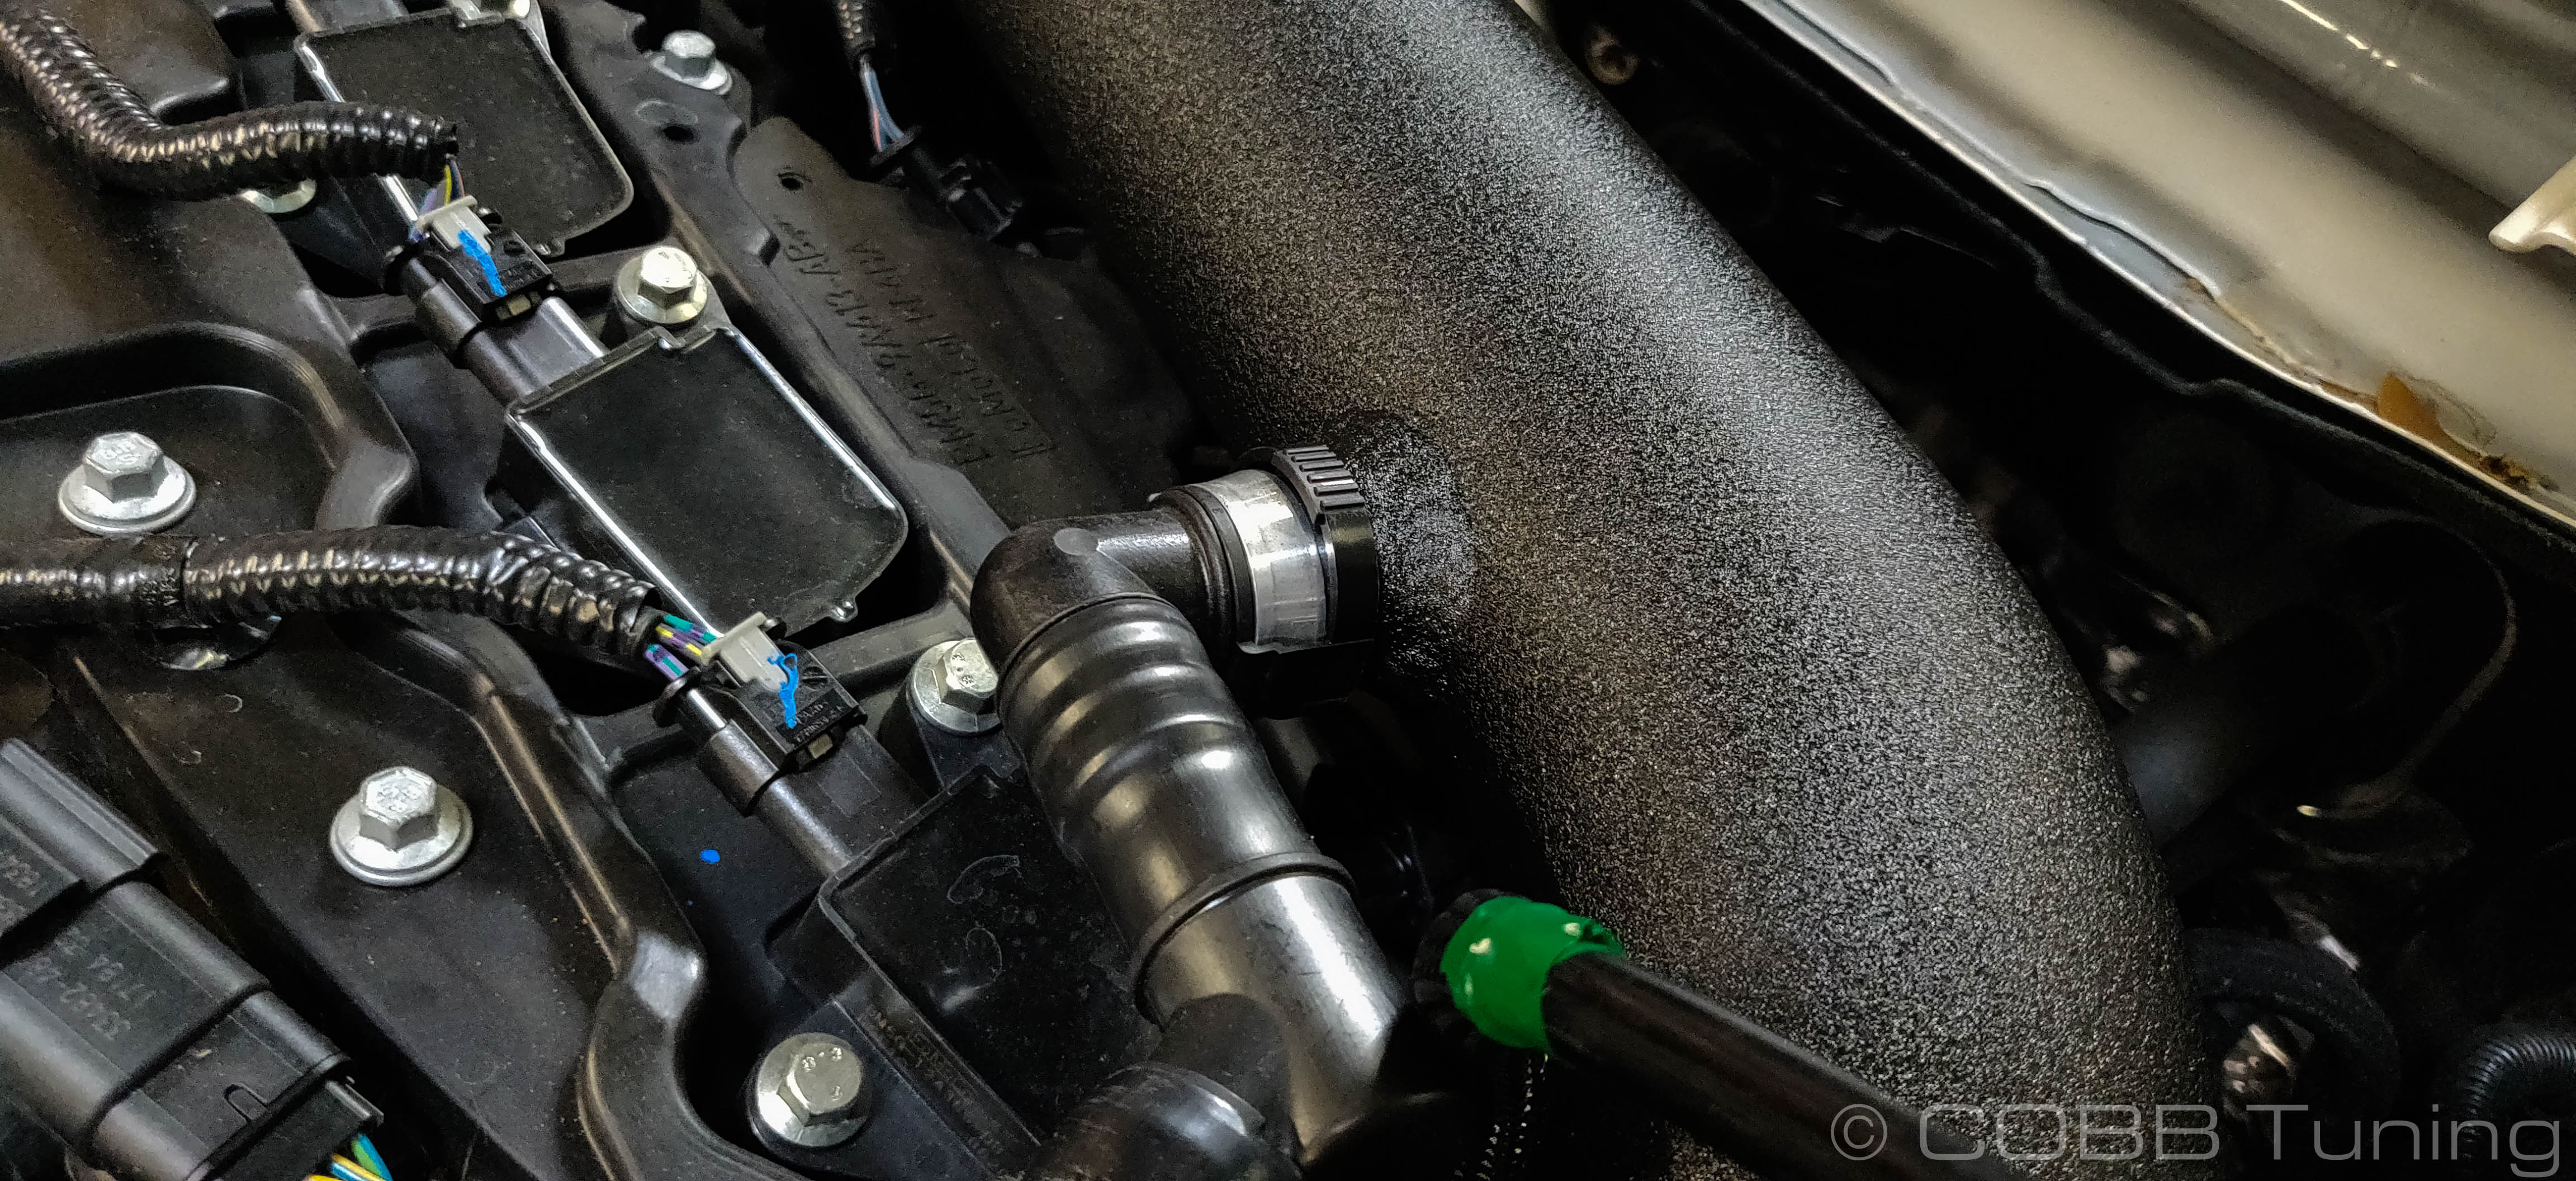
b) If you have a 2016-2017 MY, un-clip the Evap hose from the stock intake tube by squeezing the plastic ring and pulling away from the tube. (Refer to picture on right)
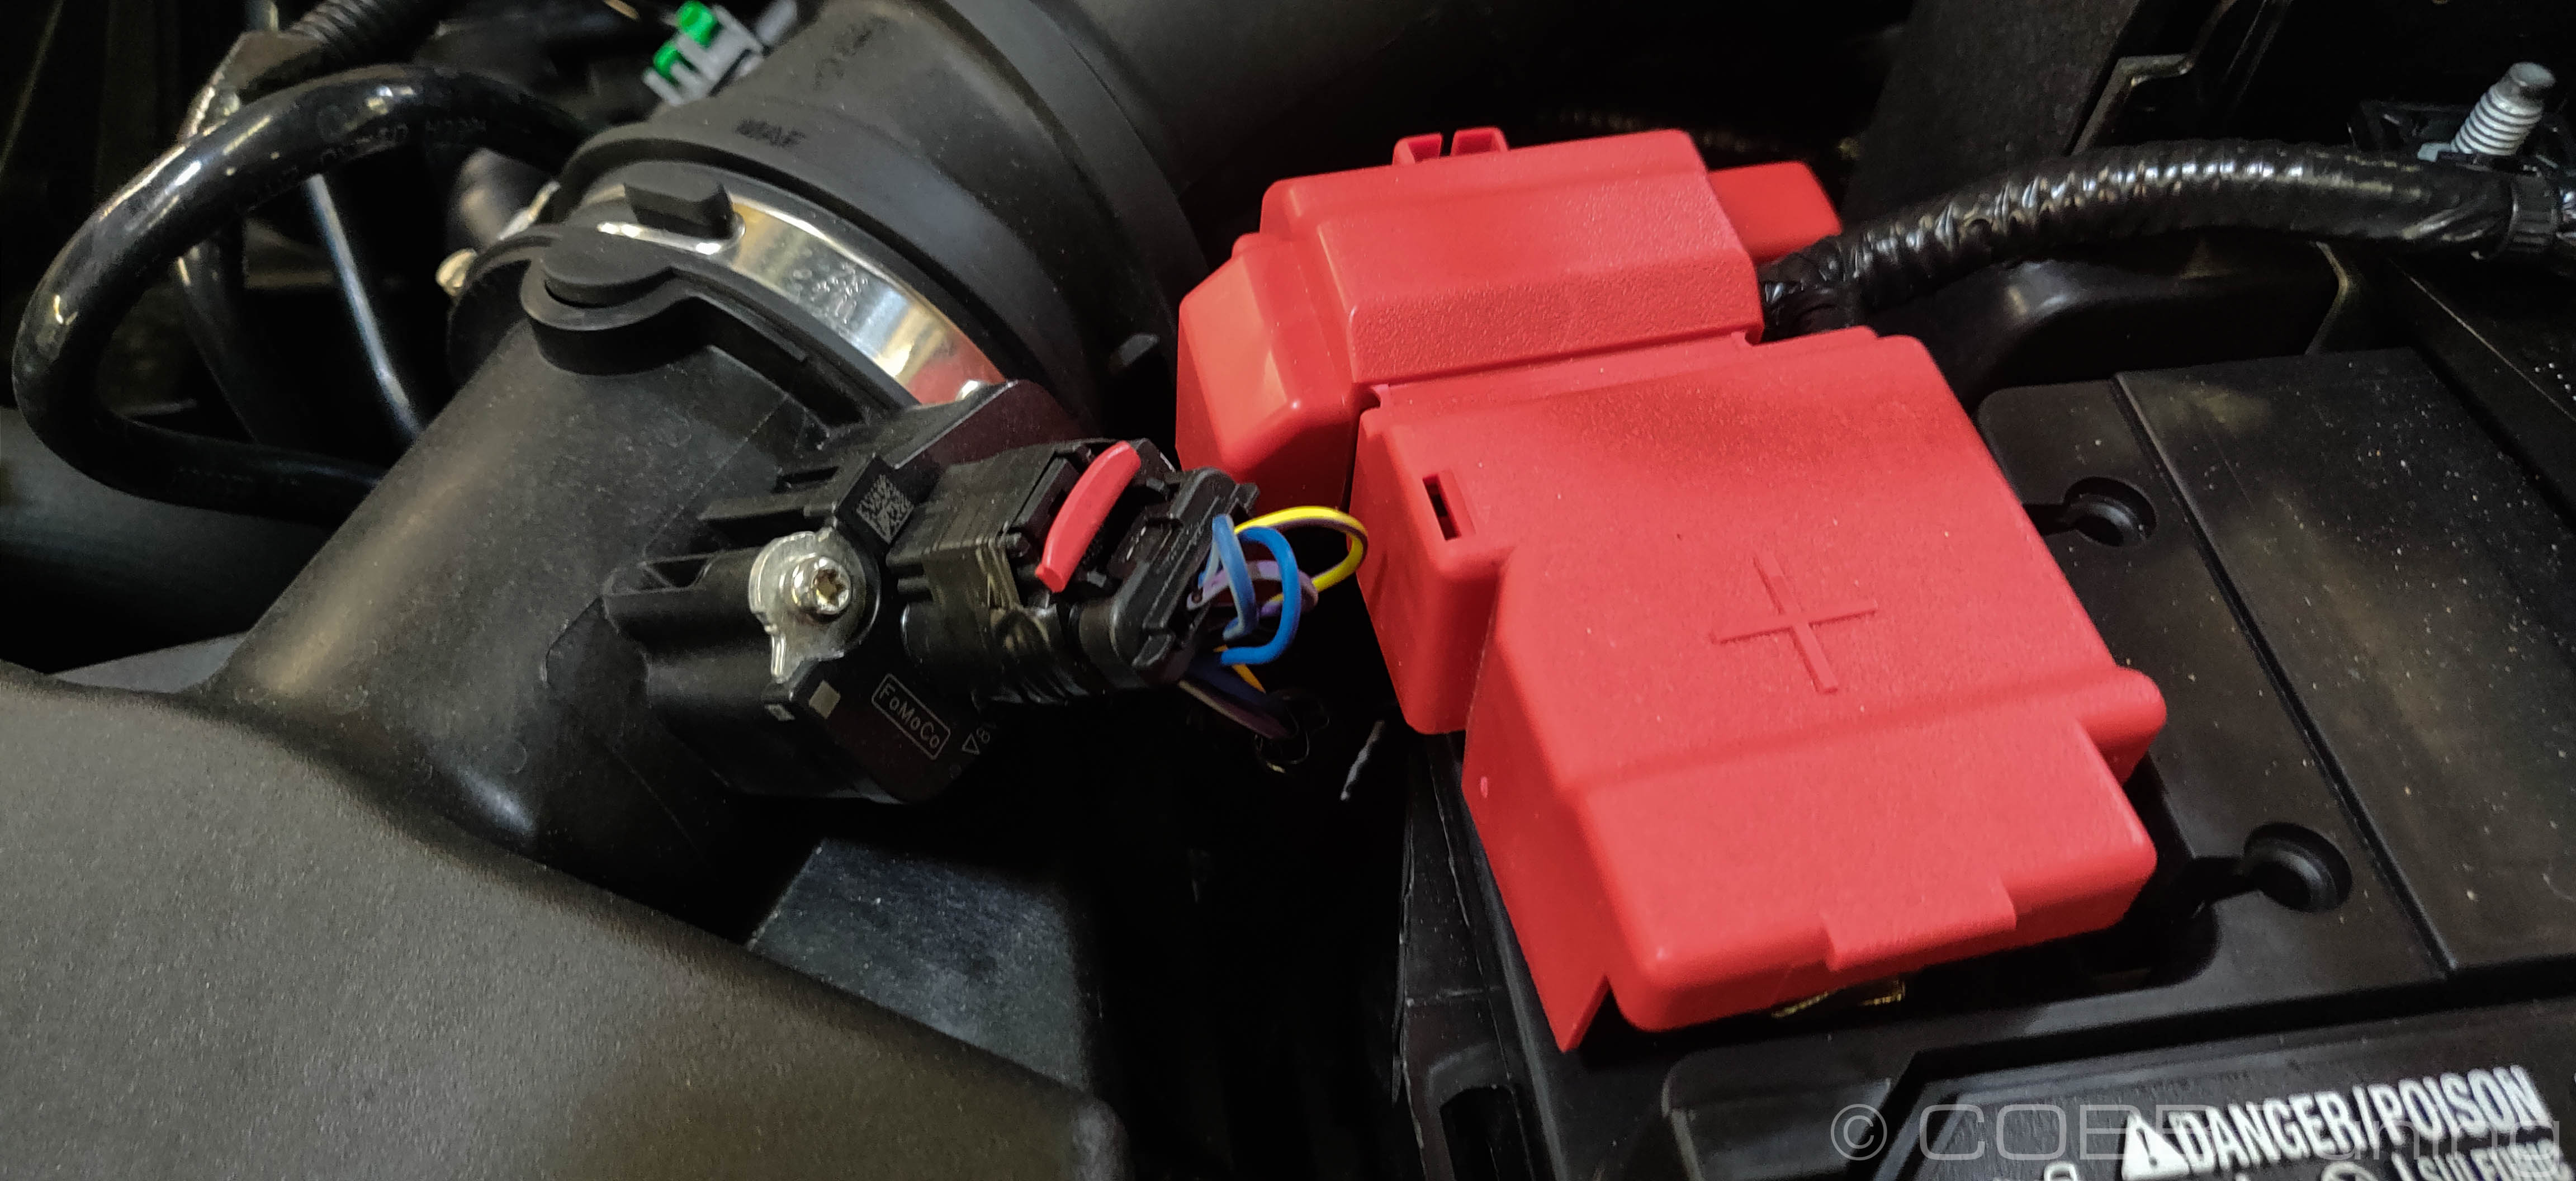
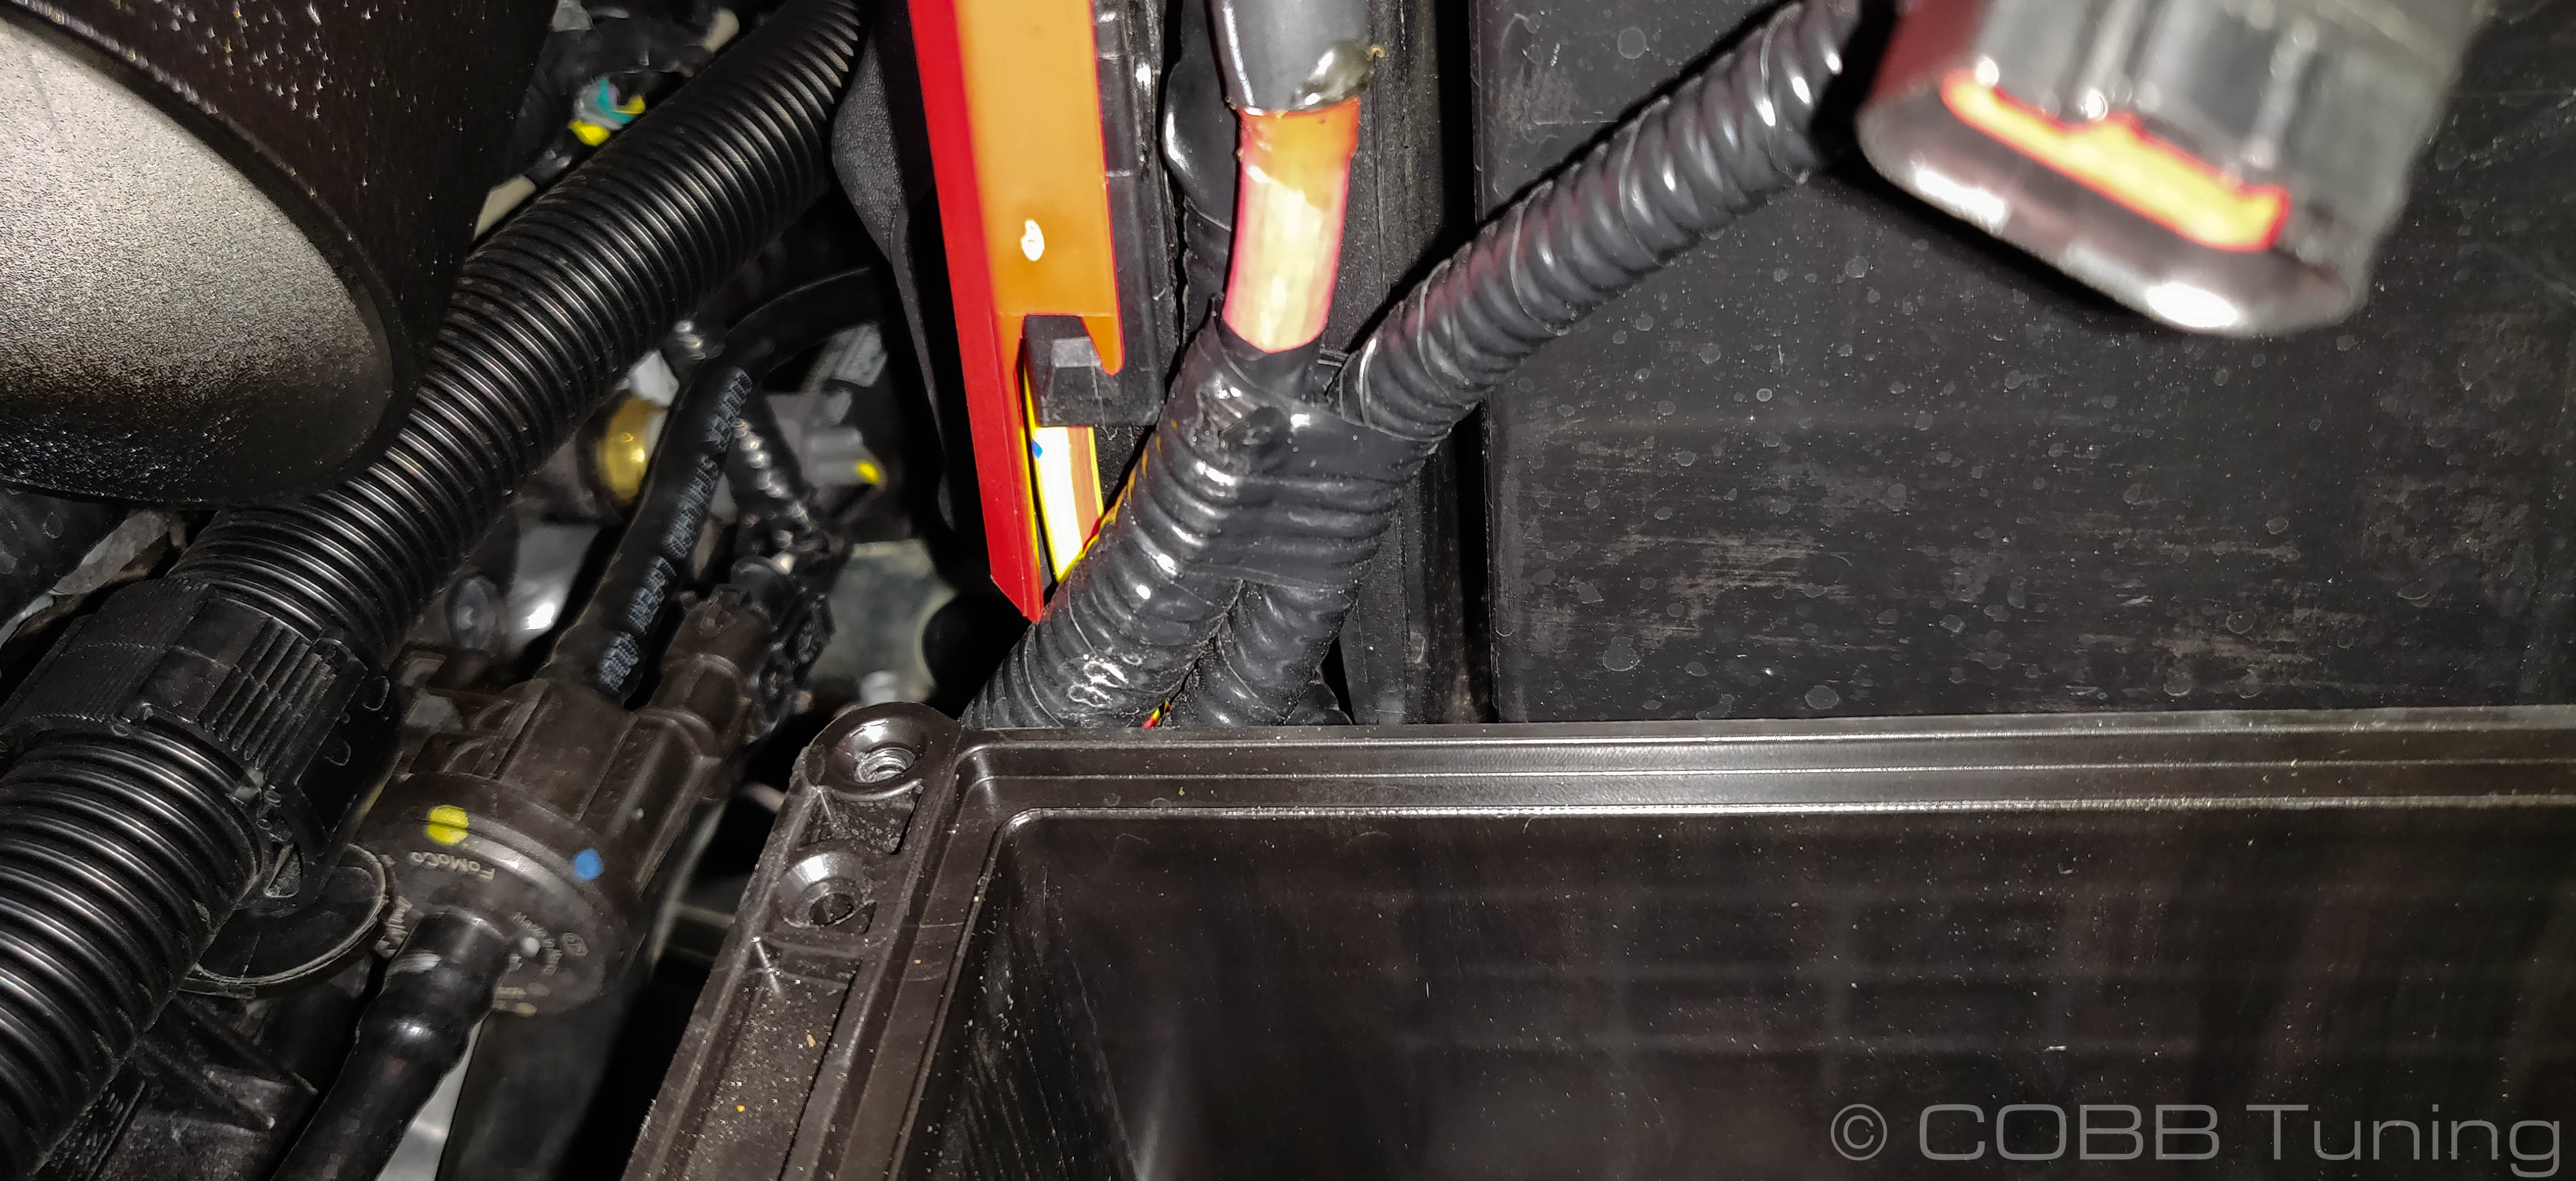
- a) If you have a 2014-2015 MY remove the tube at the start of the intake by disconnecting the connector with the green clip and pulling it away from the intake. Pull back the red tab on the MAF sensor attached to the airbox and unplug the sensor. (Refer to picture on left)

b) If you have a 2016-2017 MY remove the two (2) connectors with the green clips and pull back the red tab on the MAF sensor attached to the airbox and unplug the sensor. With your hand, follow the hardline coming from the larger of the two connectors until you find the clip connecting the other end to the lower intercooler piping. Unclip this and remove the entire stock hardline. Remember where this connection is as you will need to connect the intake adapter to it later. (Refer to picture on right).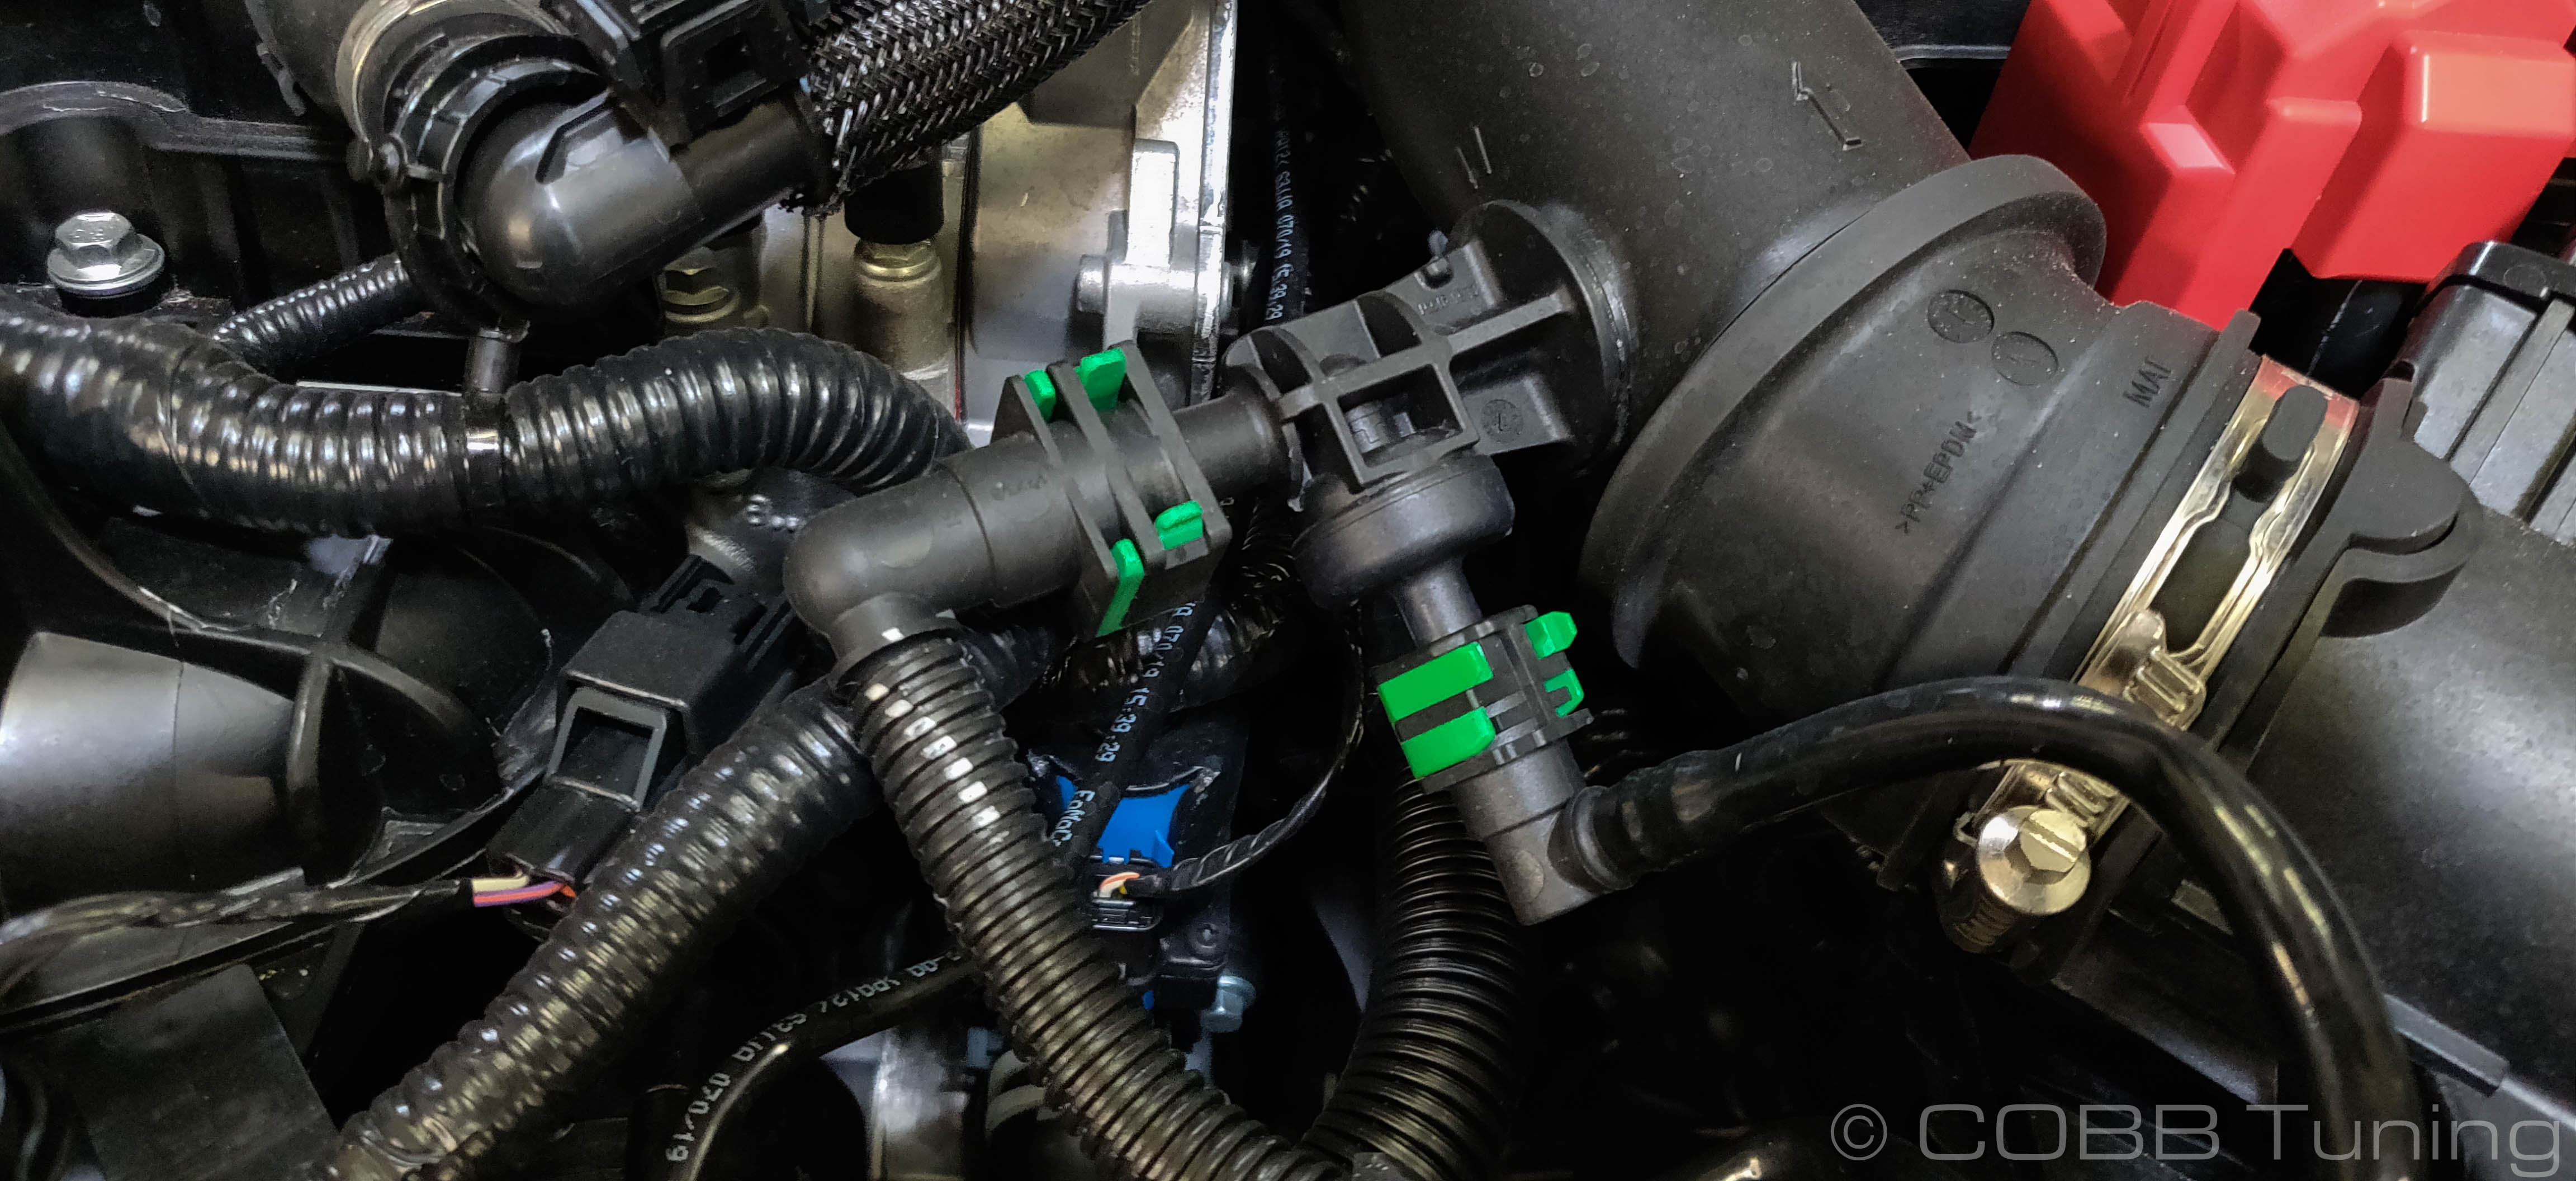
- With all the connections and clamps loose on the intake, break the two tubes apart and remove the intake from the car.
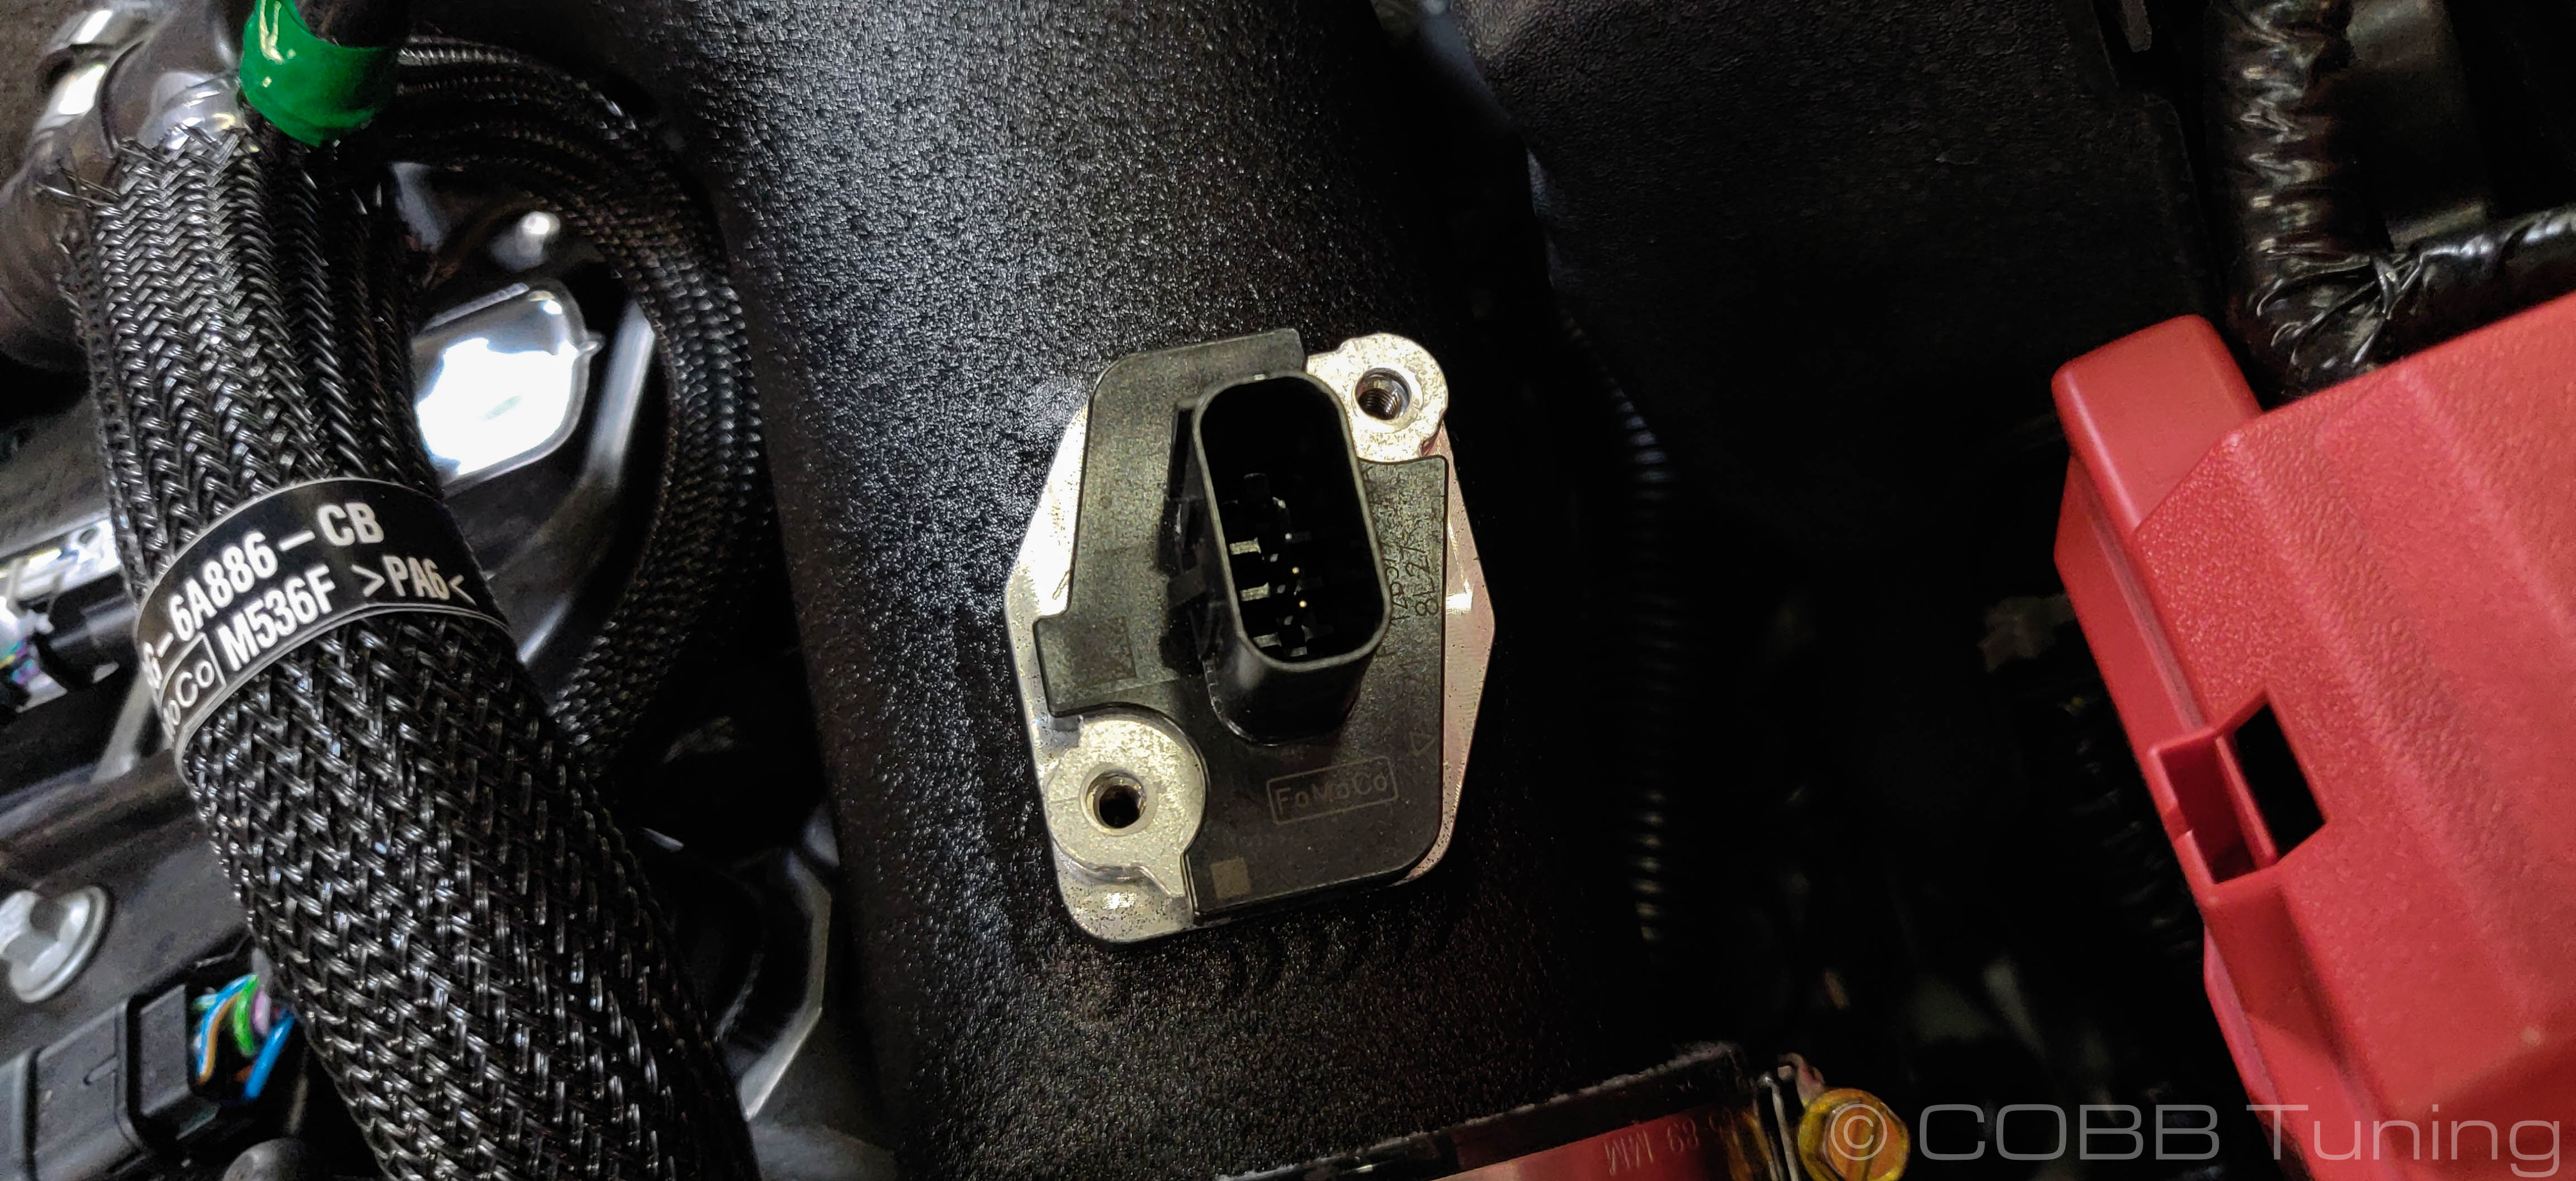
- Using a T20 Torx bit, remove the four (4) screws holding the top of the airbox onto the lower part of the box. Once removed, remove the MAF sensor from the box using a T20 Torx bit.

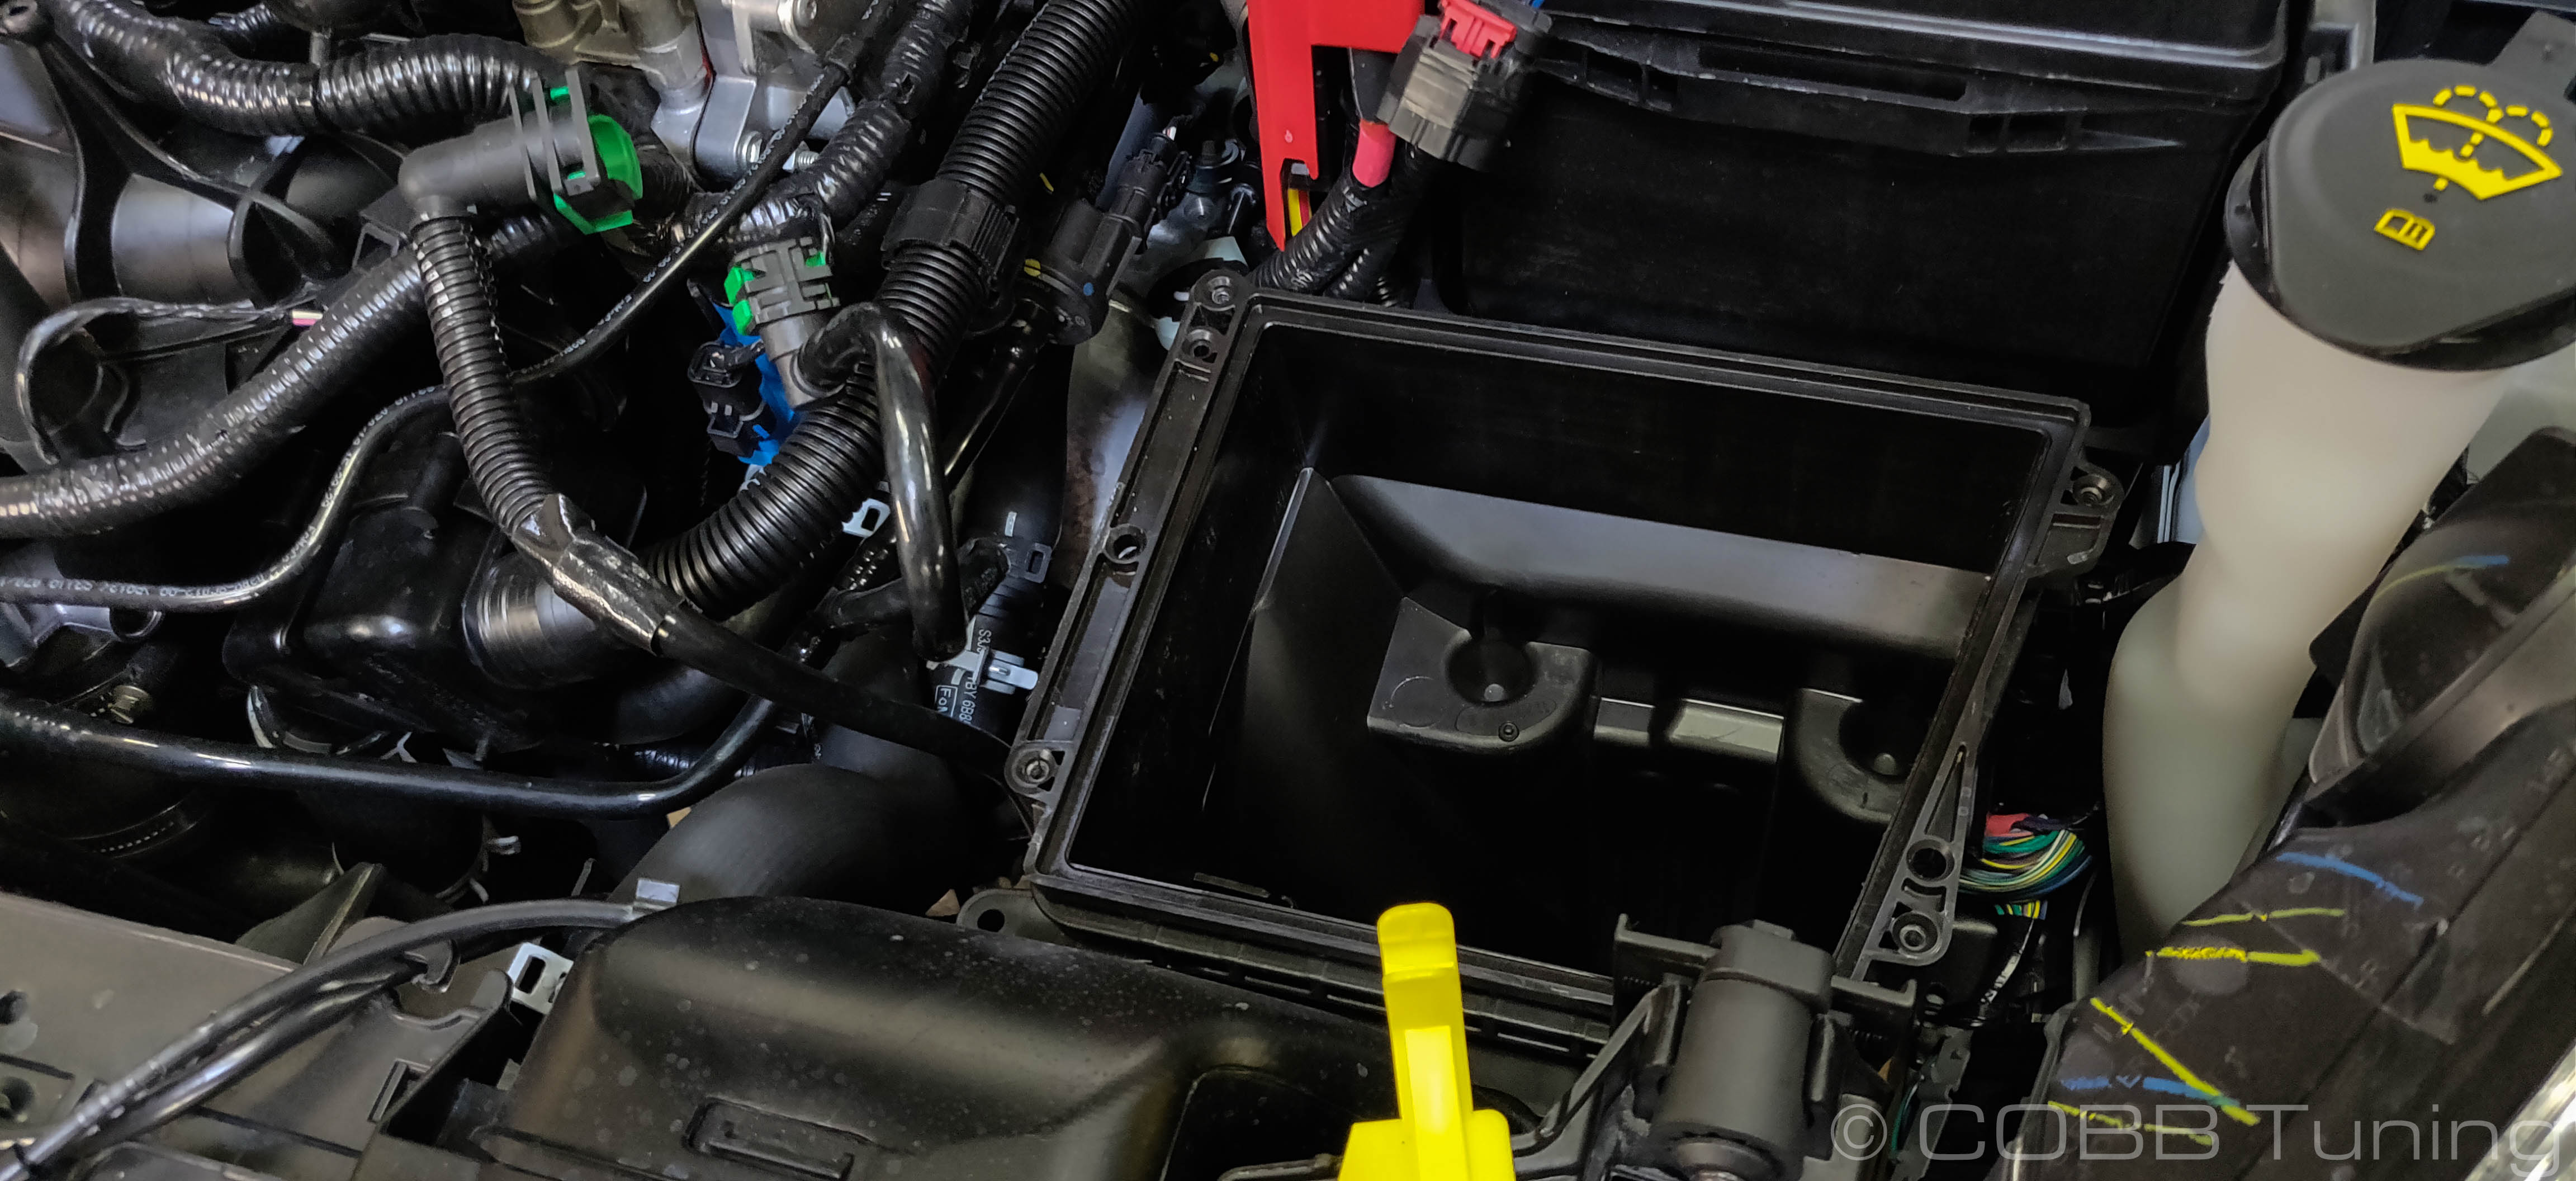
- If you have plans to continue using the engine cover, re-install the engine cover mount that was previously holding down the intake.
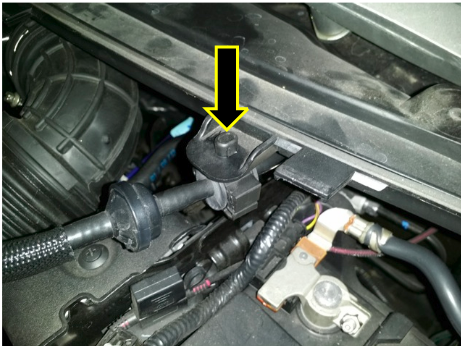
- (my17+) Reach down and unclip this Evap hose.
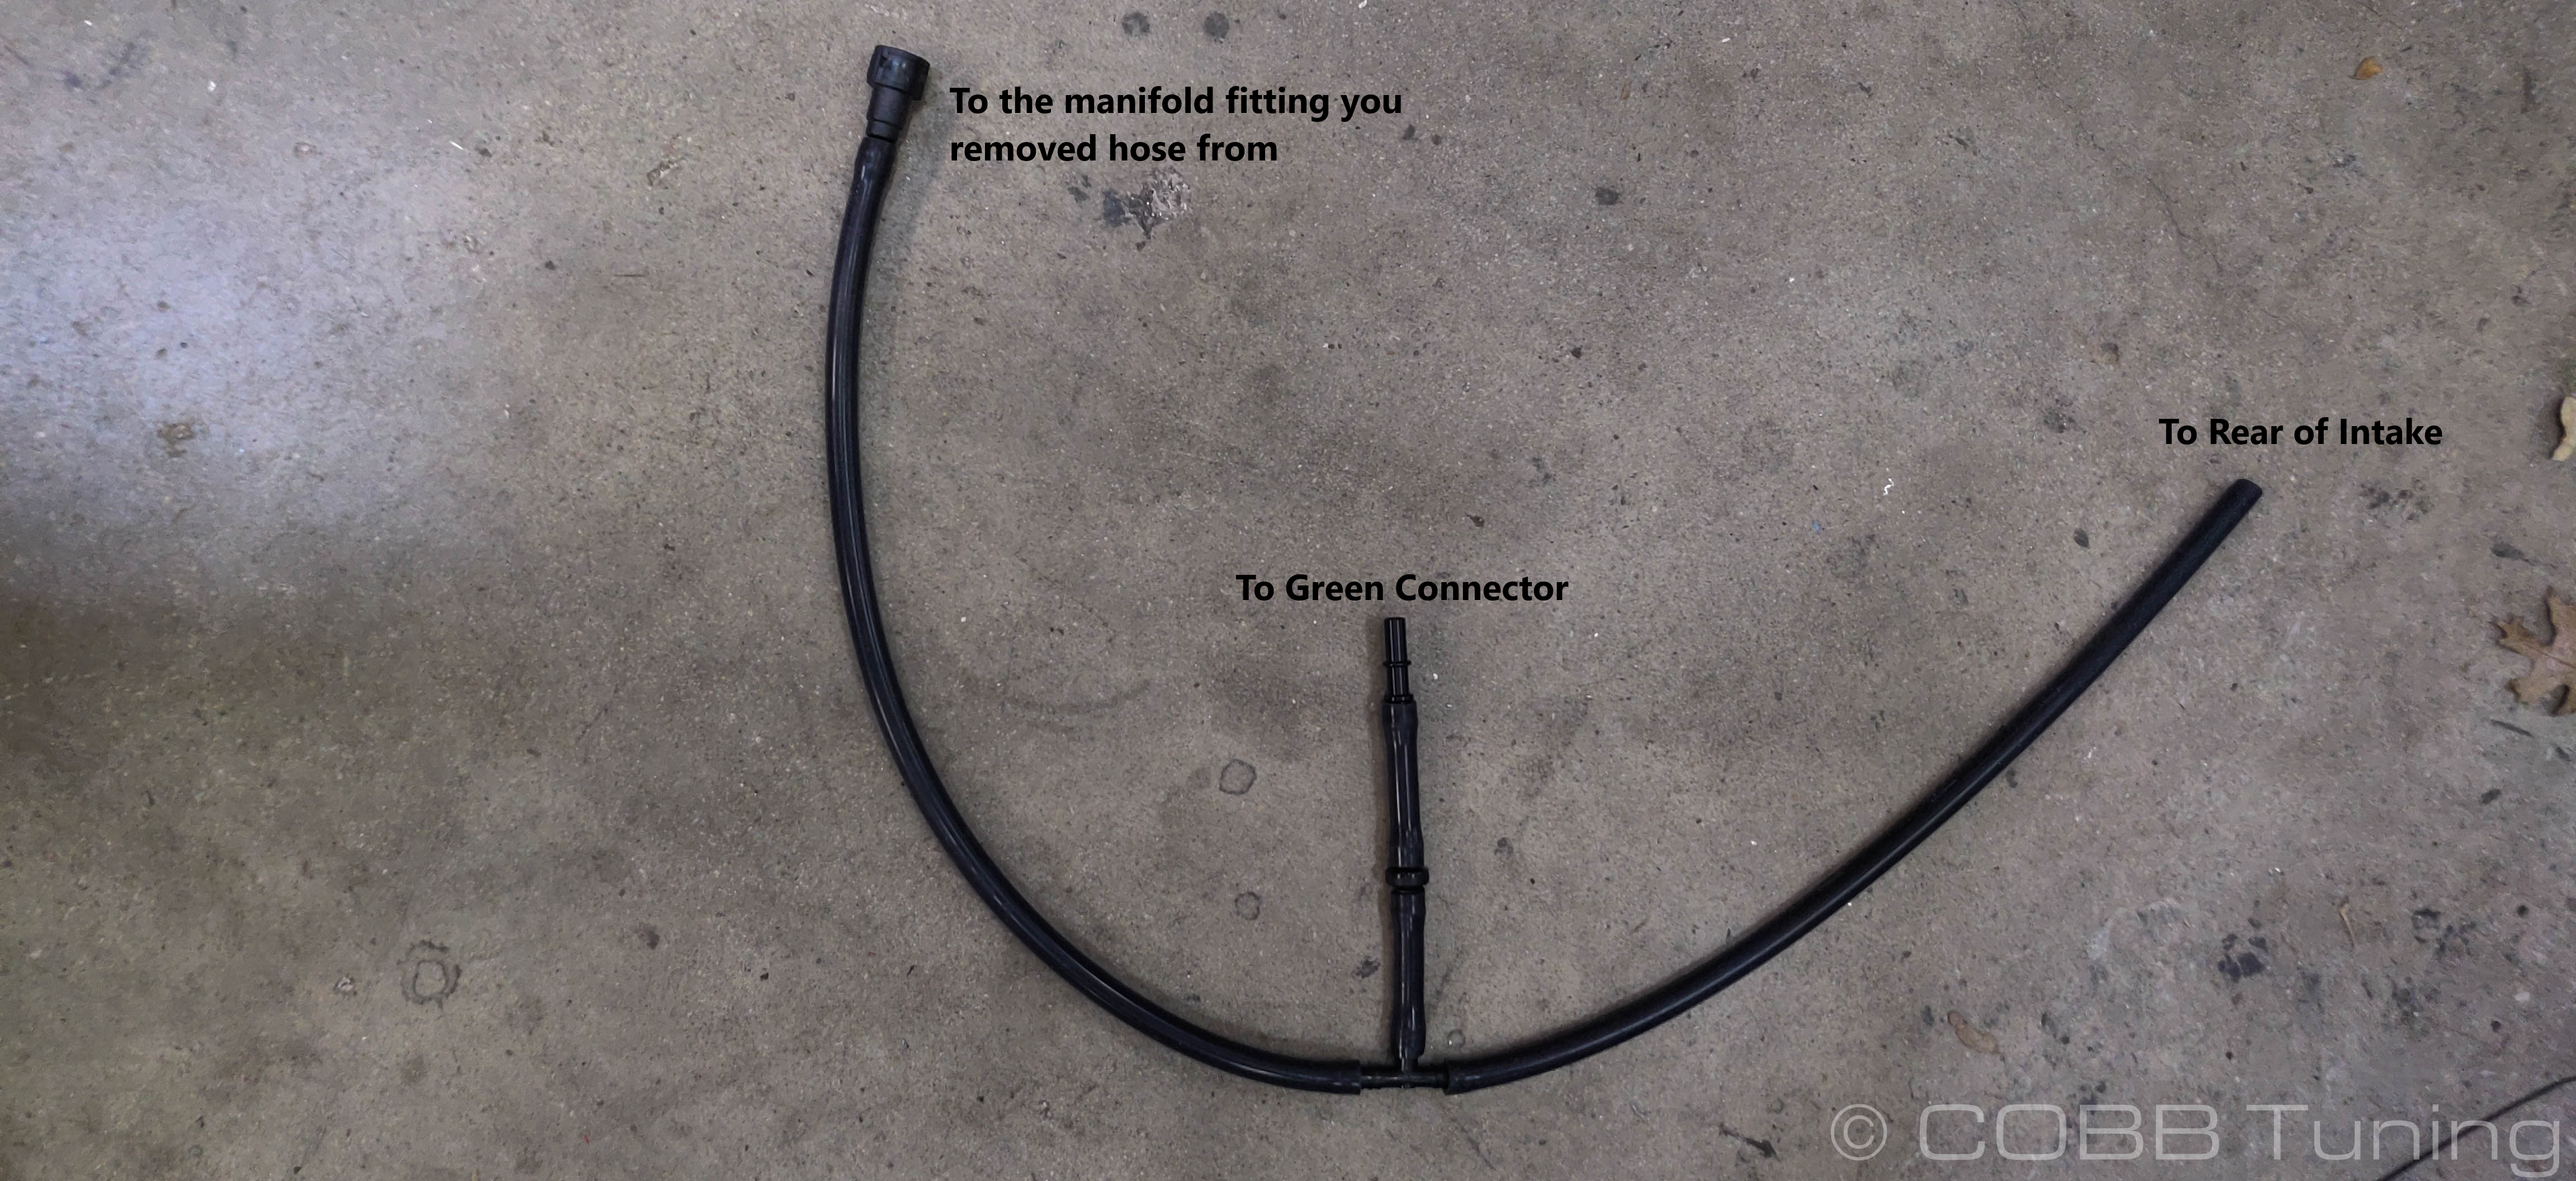
Assemble the EVAP Line
MY 2014 - 2015
Using only the longer length of hose and the male quick connect fitting, insert the fitting into one side, and connect the other end of the hose to the port coming off the bottom of the intake.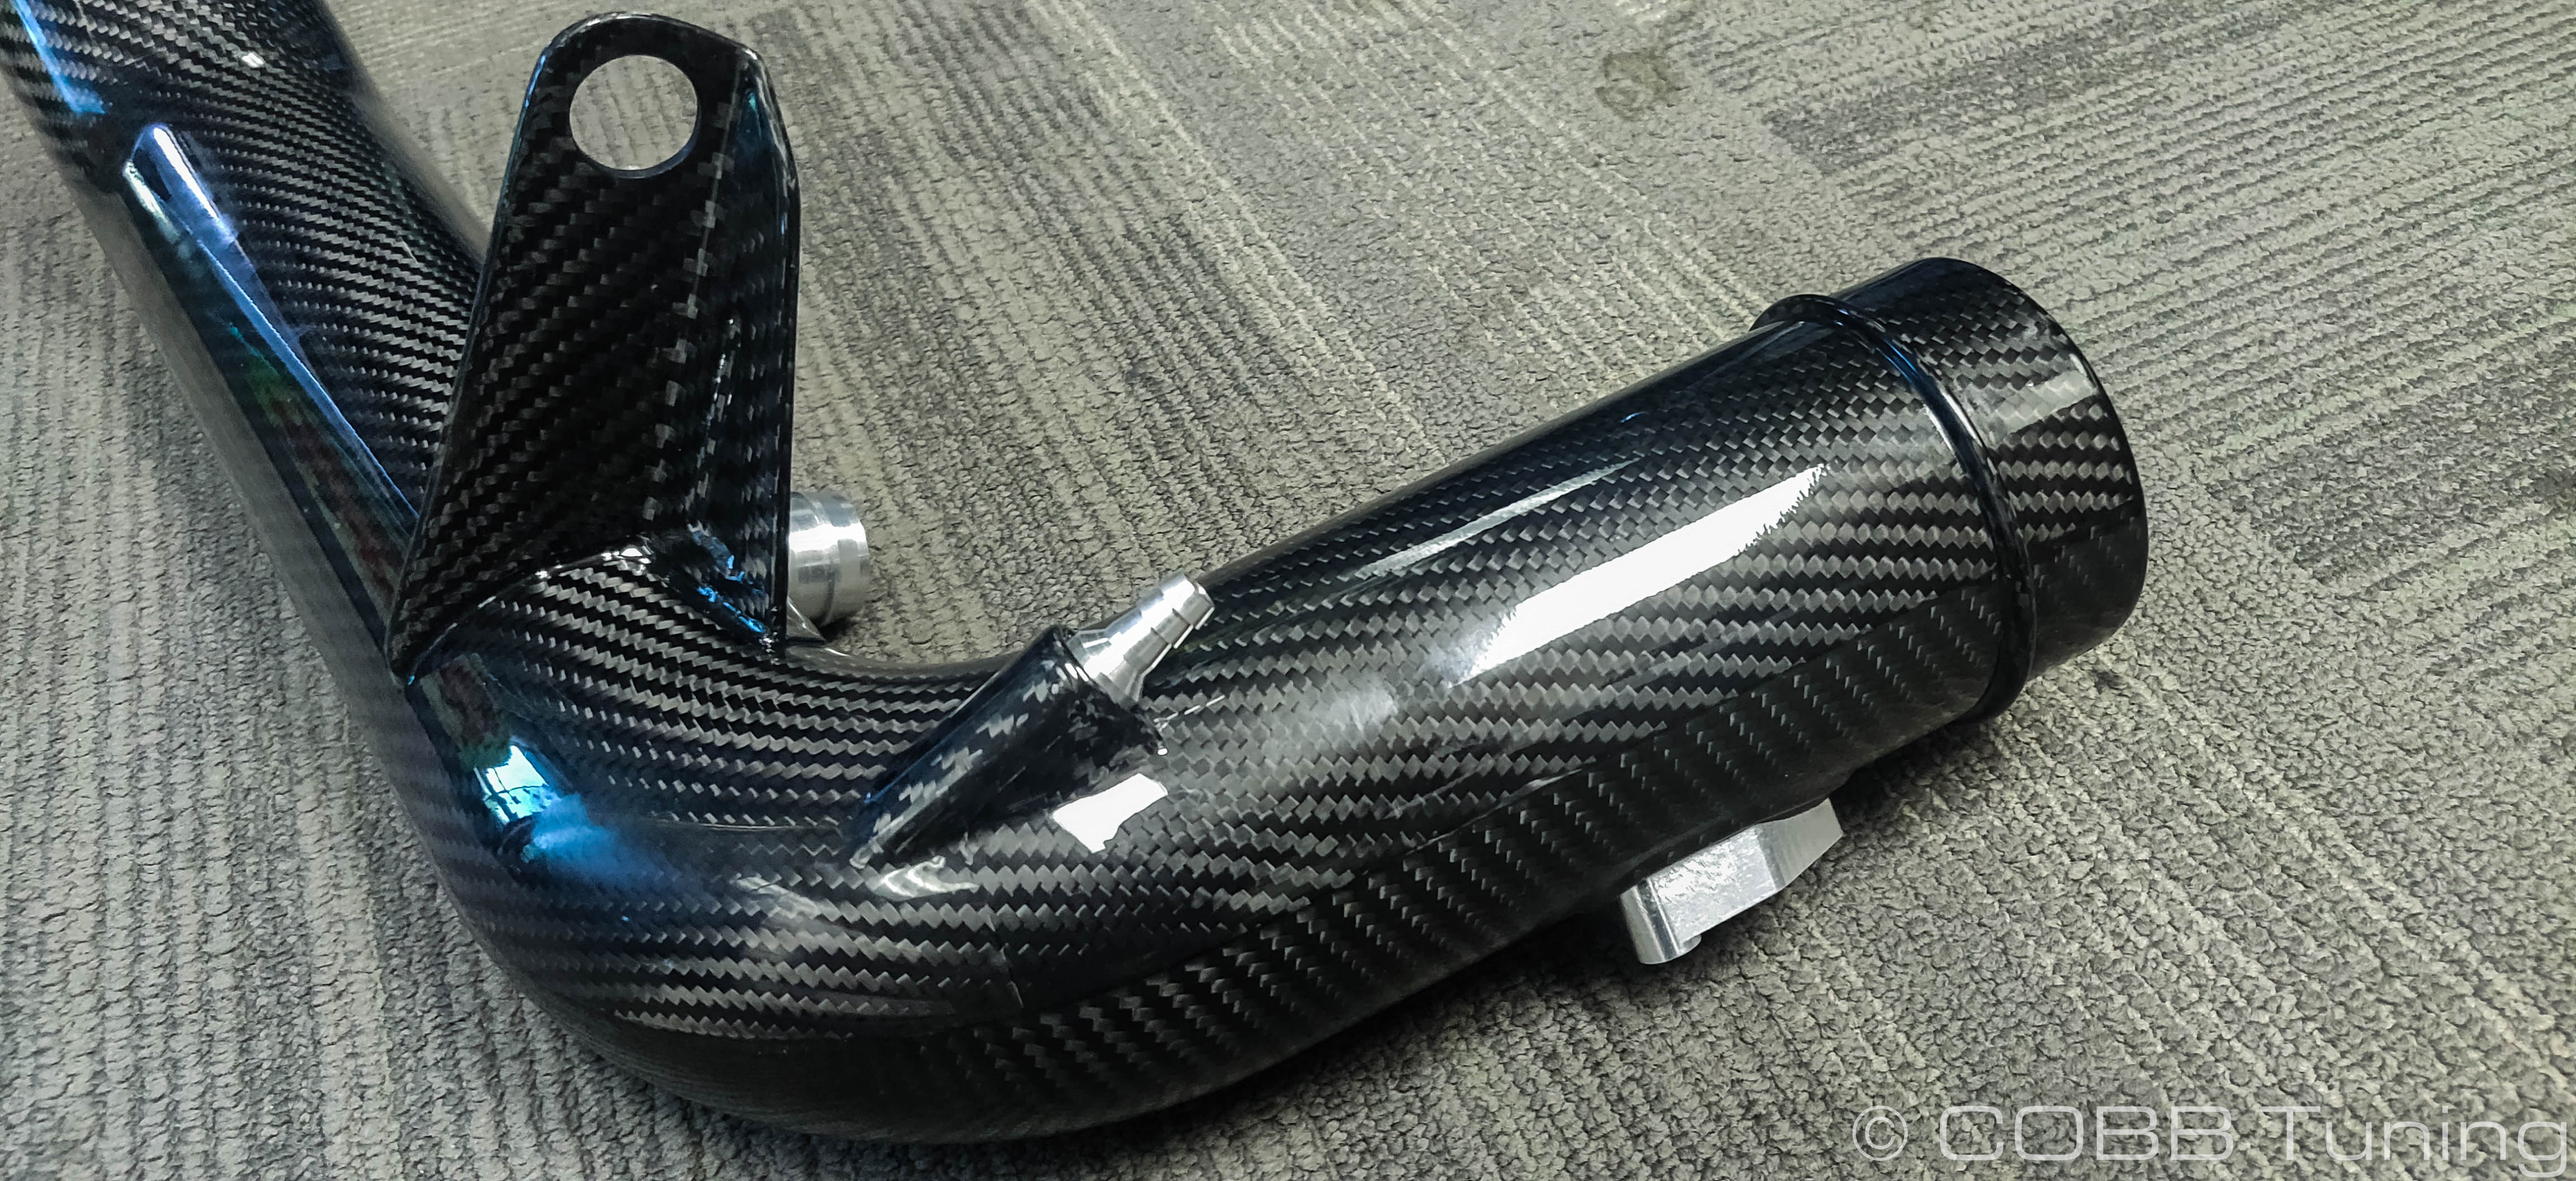
(reference for the fitting and hose, as seen when installed on the aluminum Fiesta ST intake.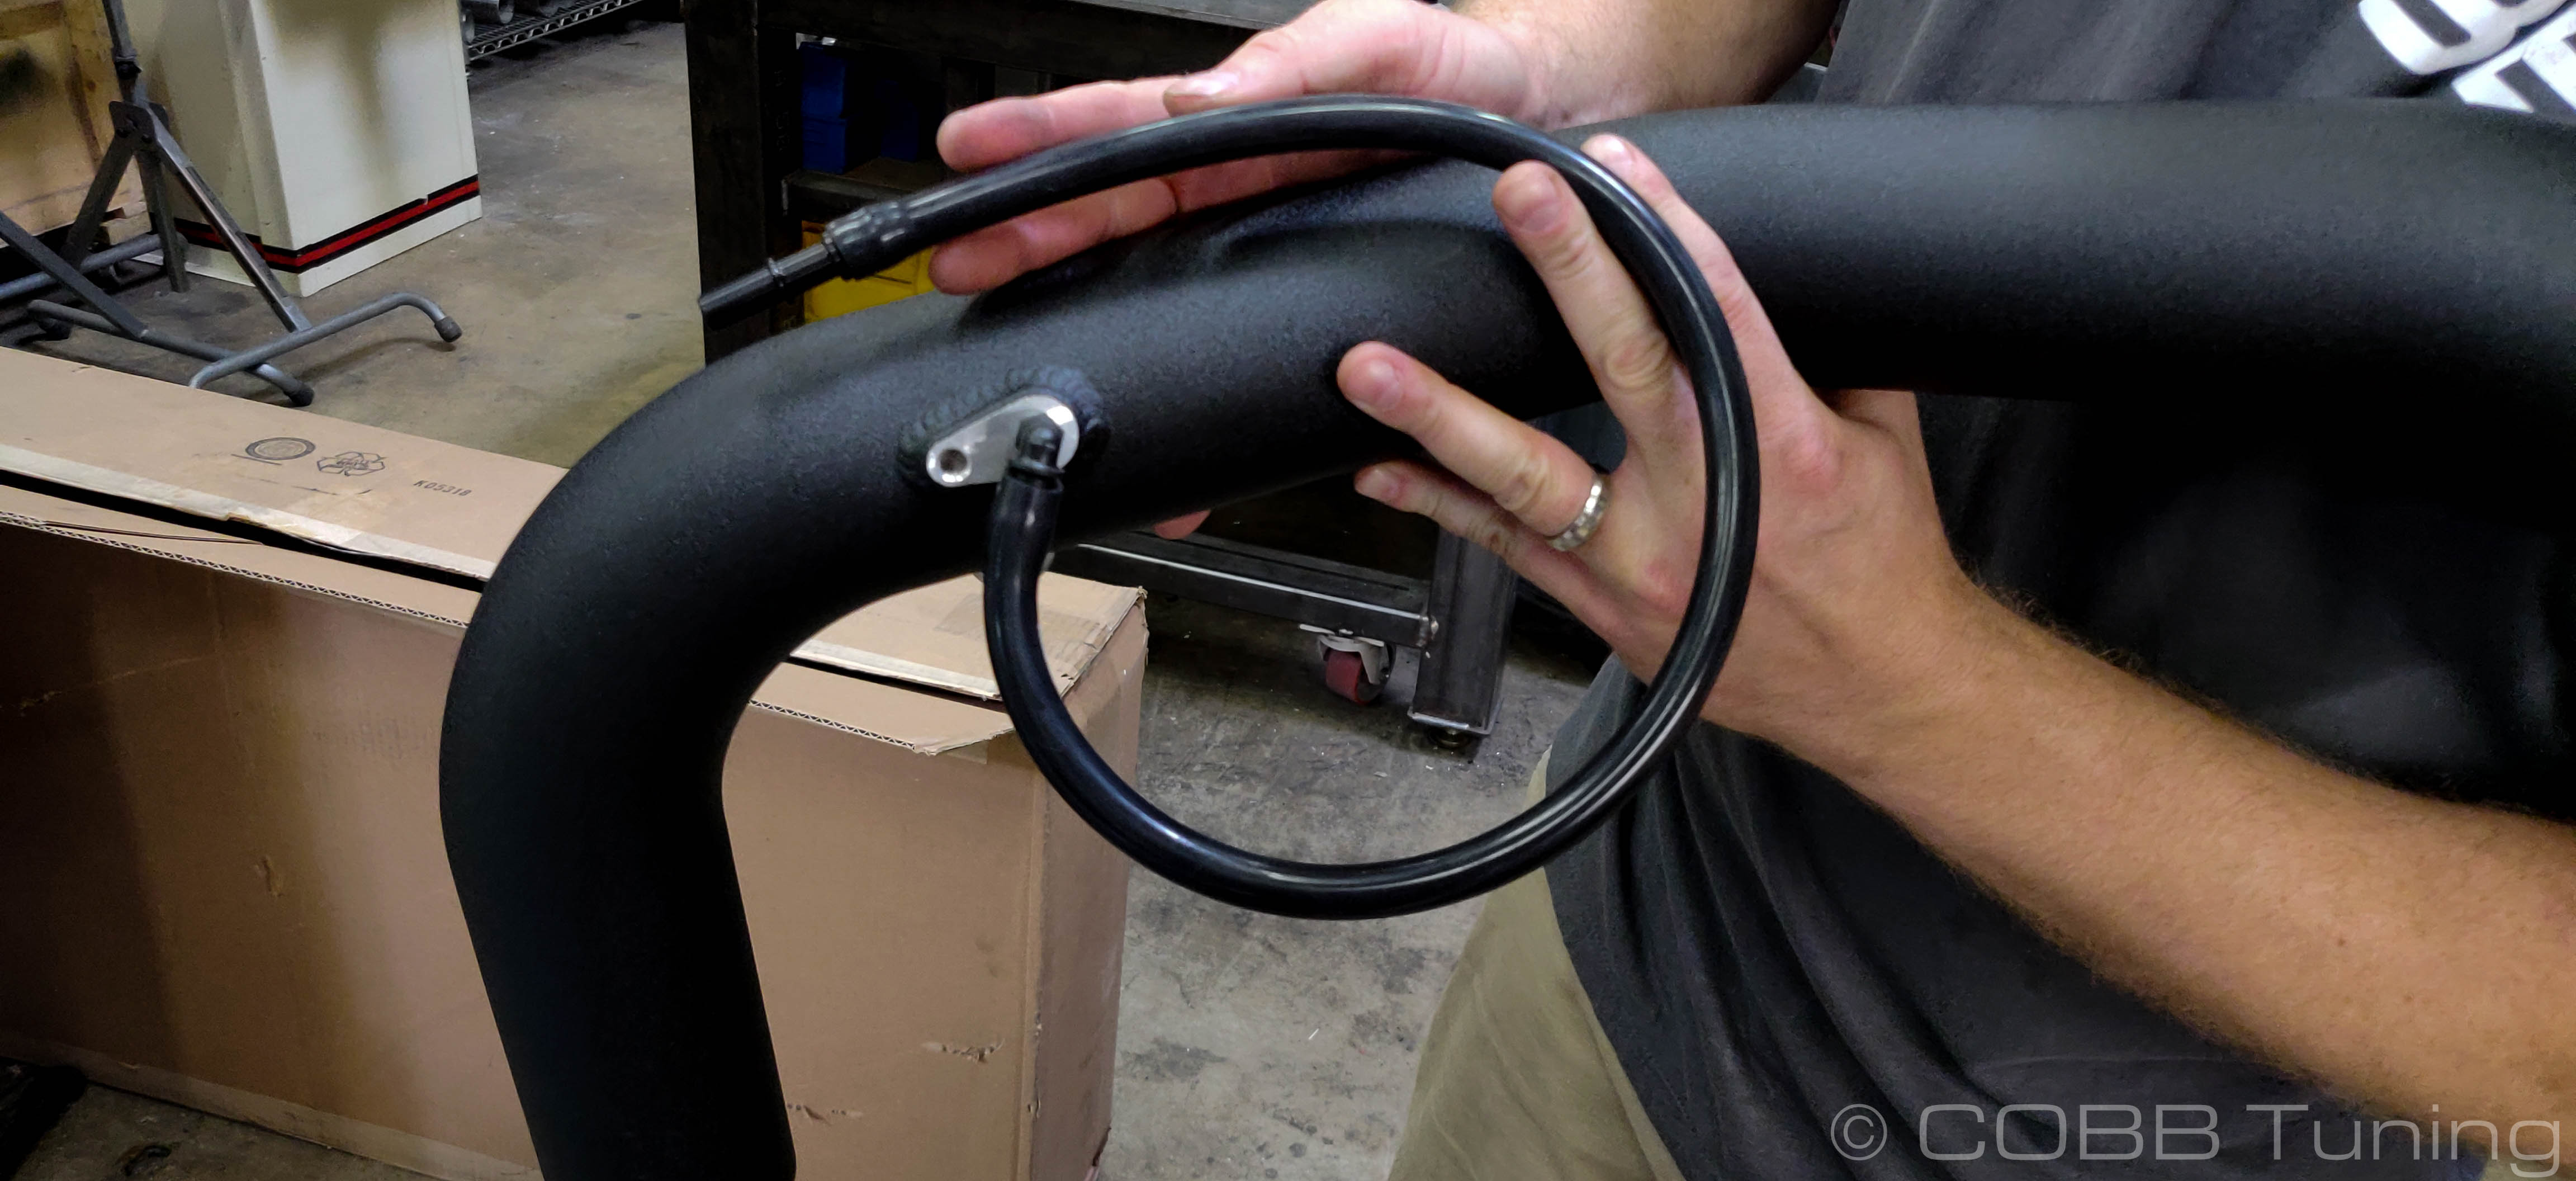
You should have the following parts leftover.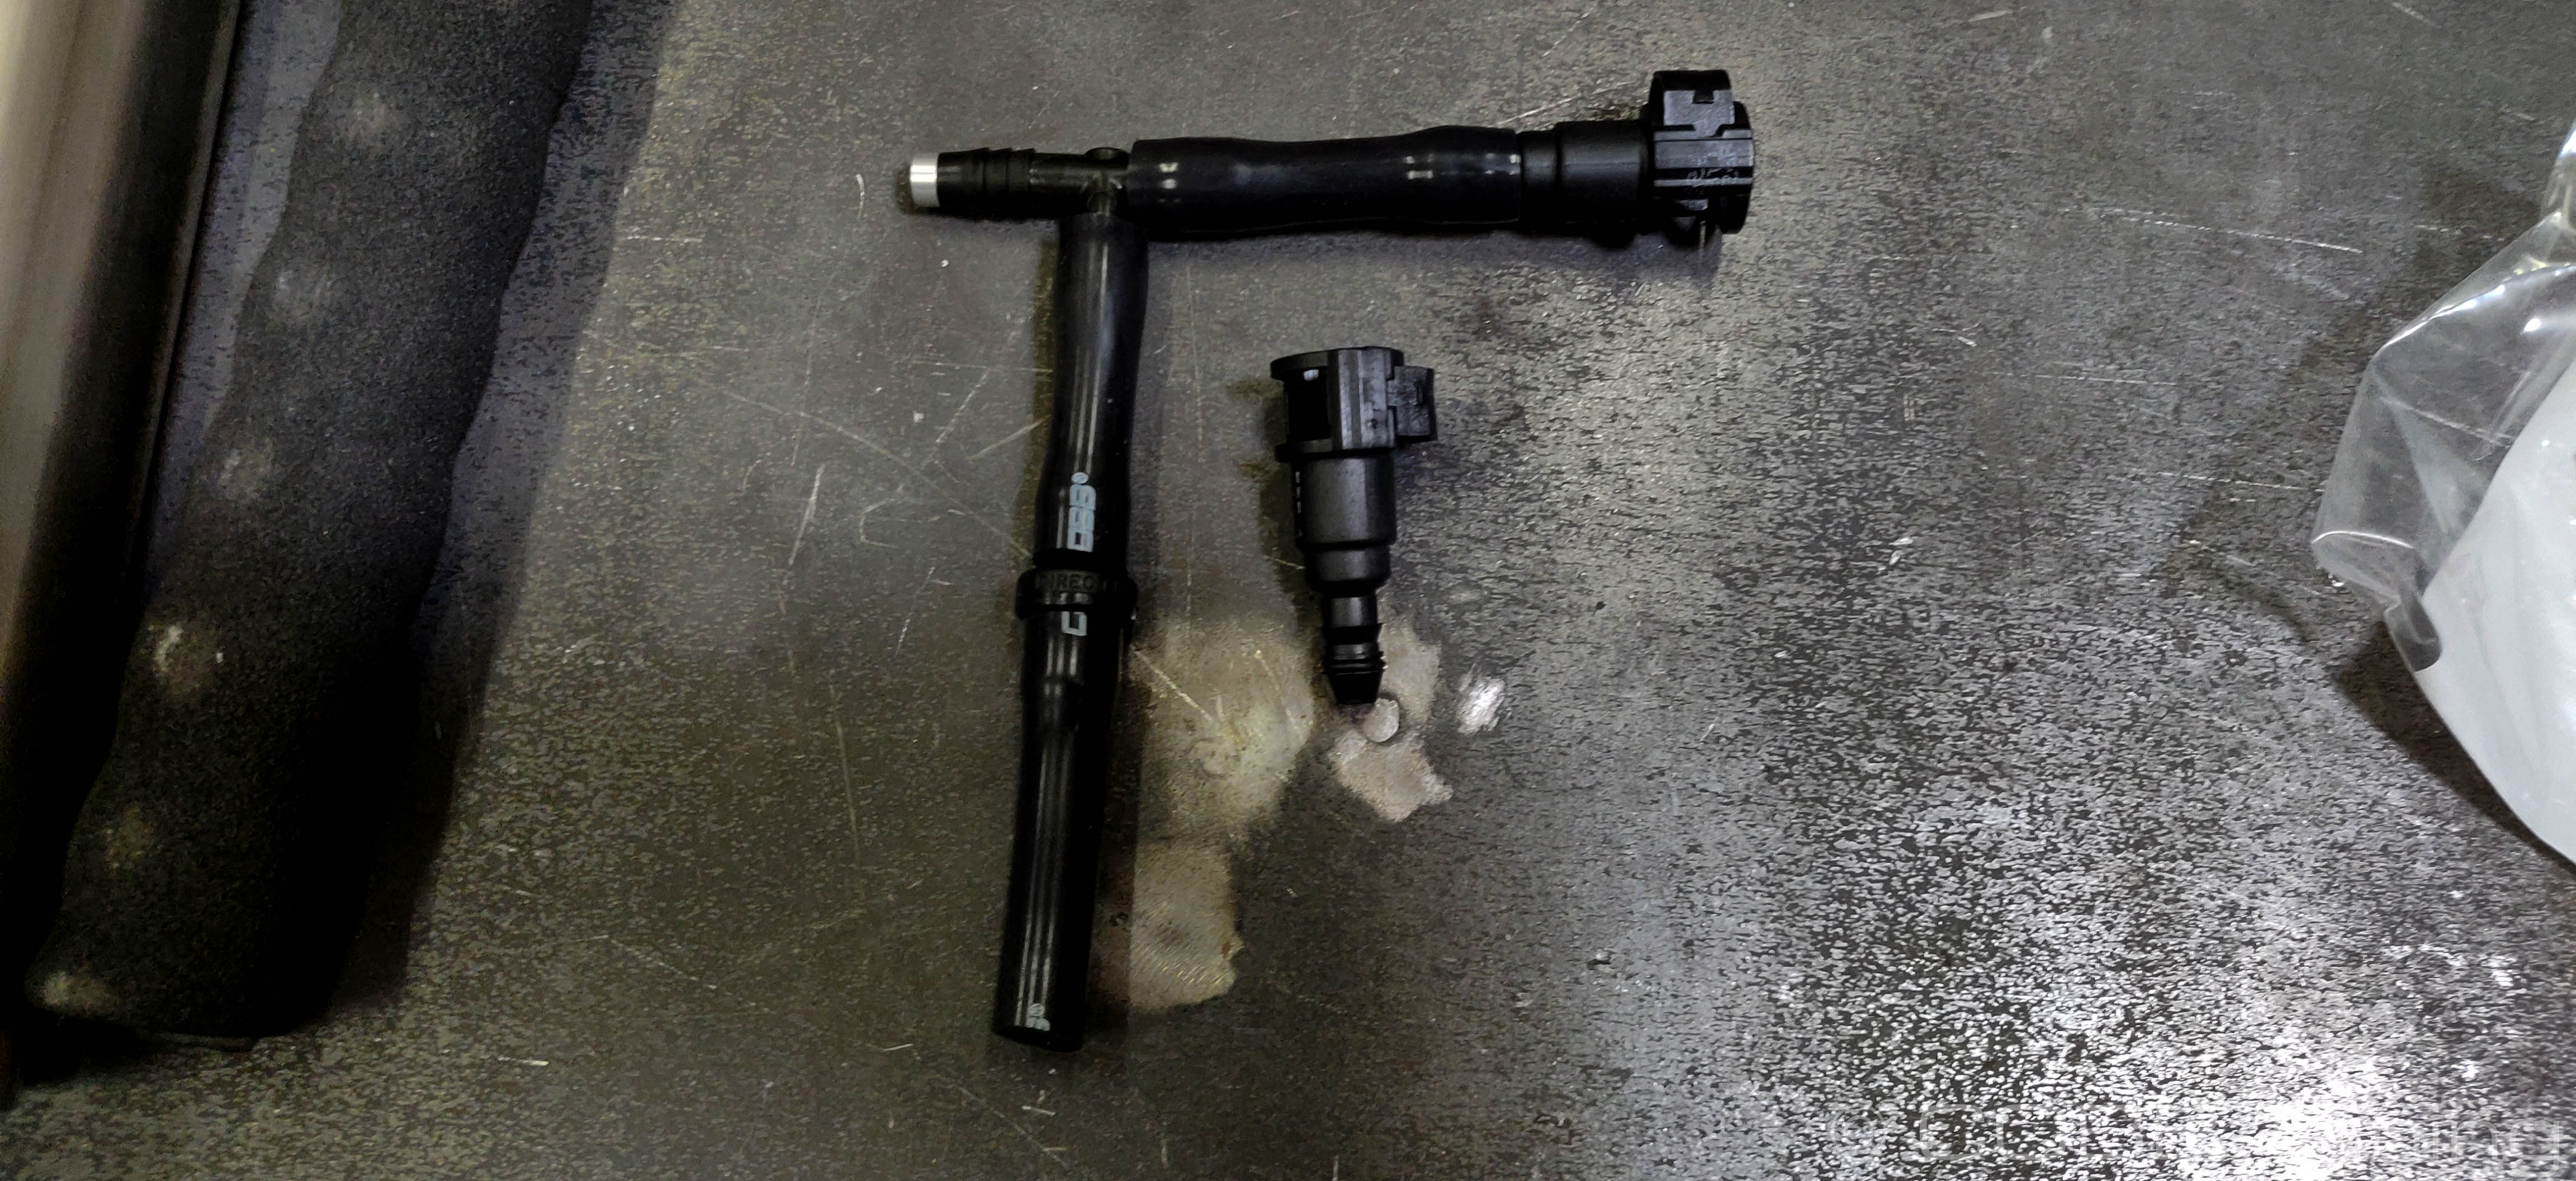
2016-2019
Installing the COBB Intake
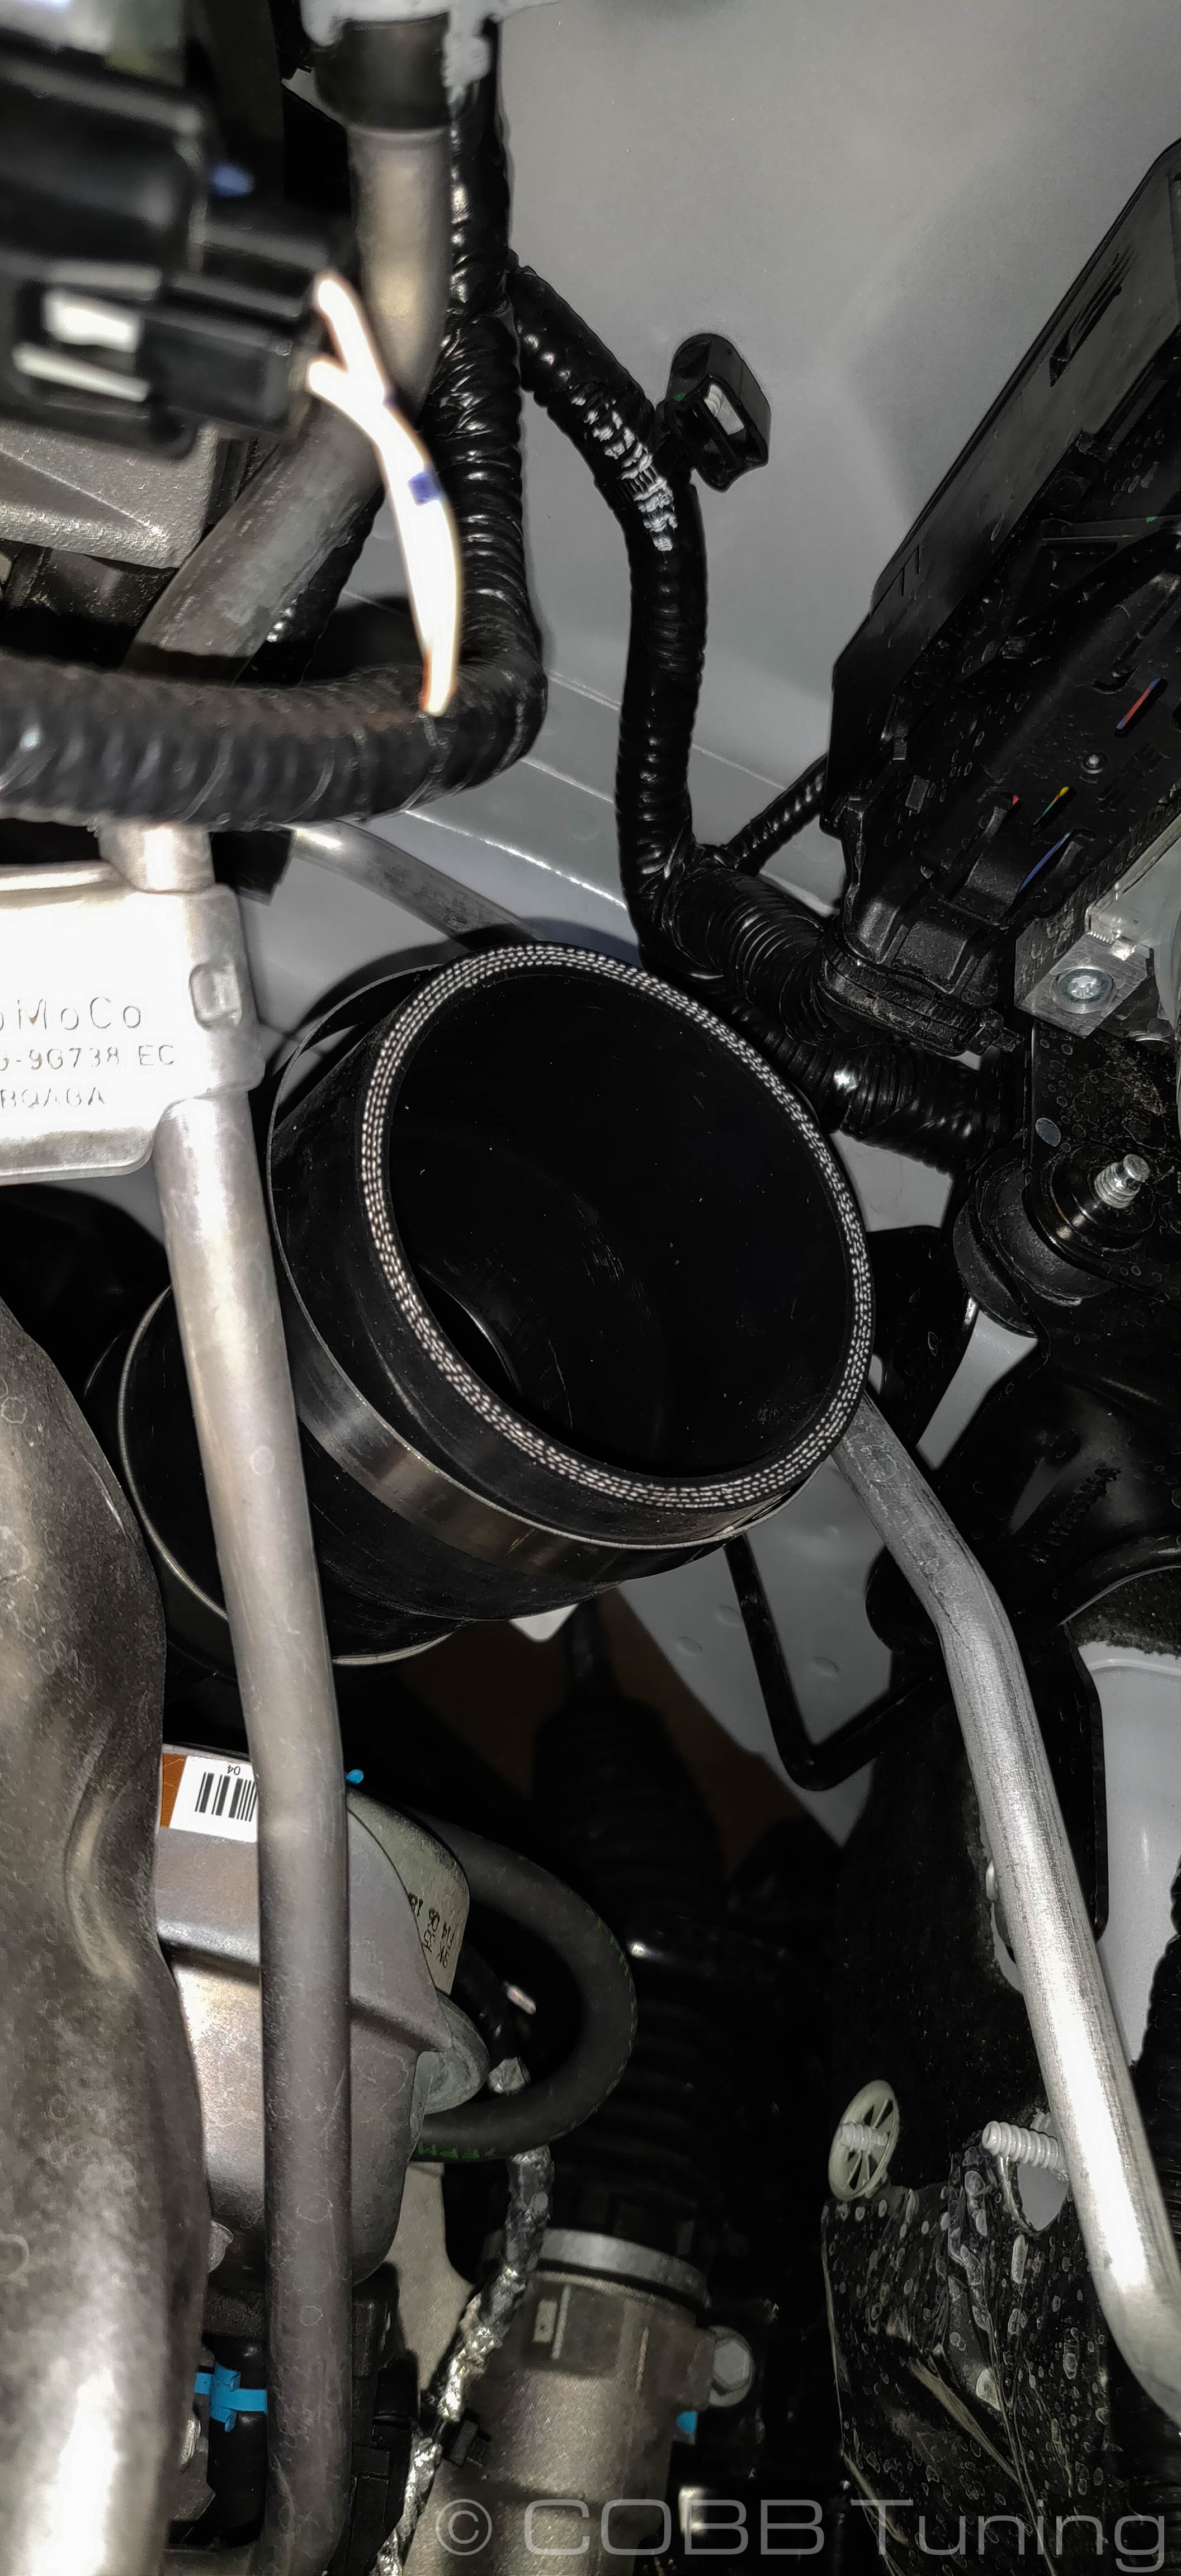
Using the smallest clamp (#40), install the 2.5" - 3" Coupler onto the turbo inlet and slip a #48 clamp over it.
Make sure that your hose clamps are clocked so that they do not rub on anything. The ones on the coupler going to the turbo inlet in particular can be clocked in a fashion that they rub on other components of the engine bay causing damage.
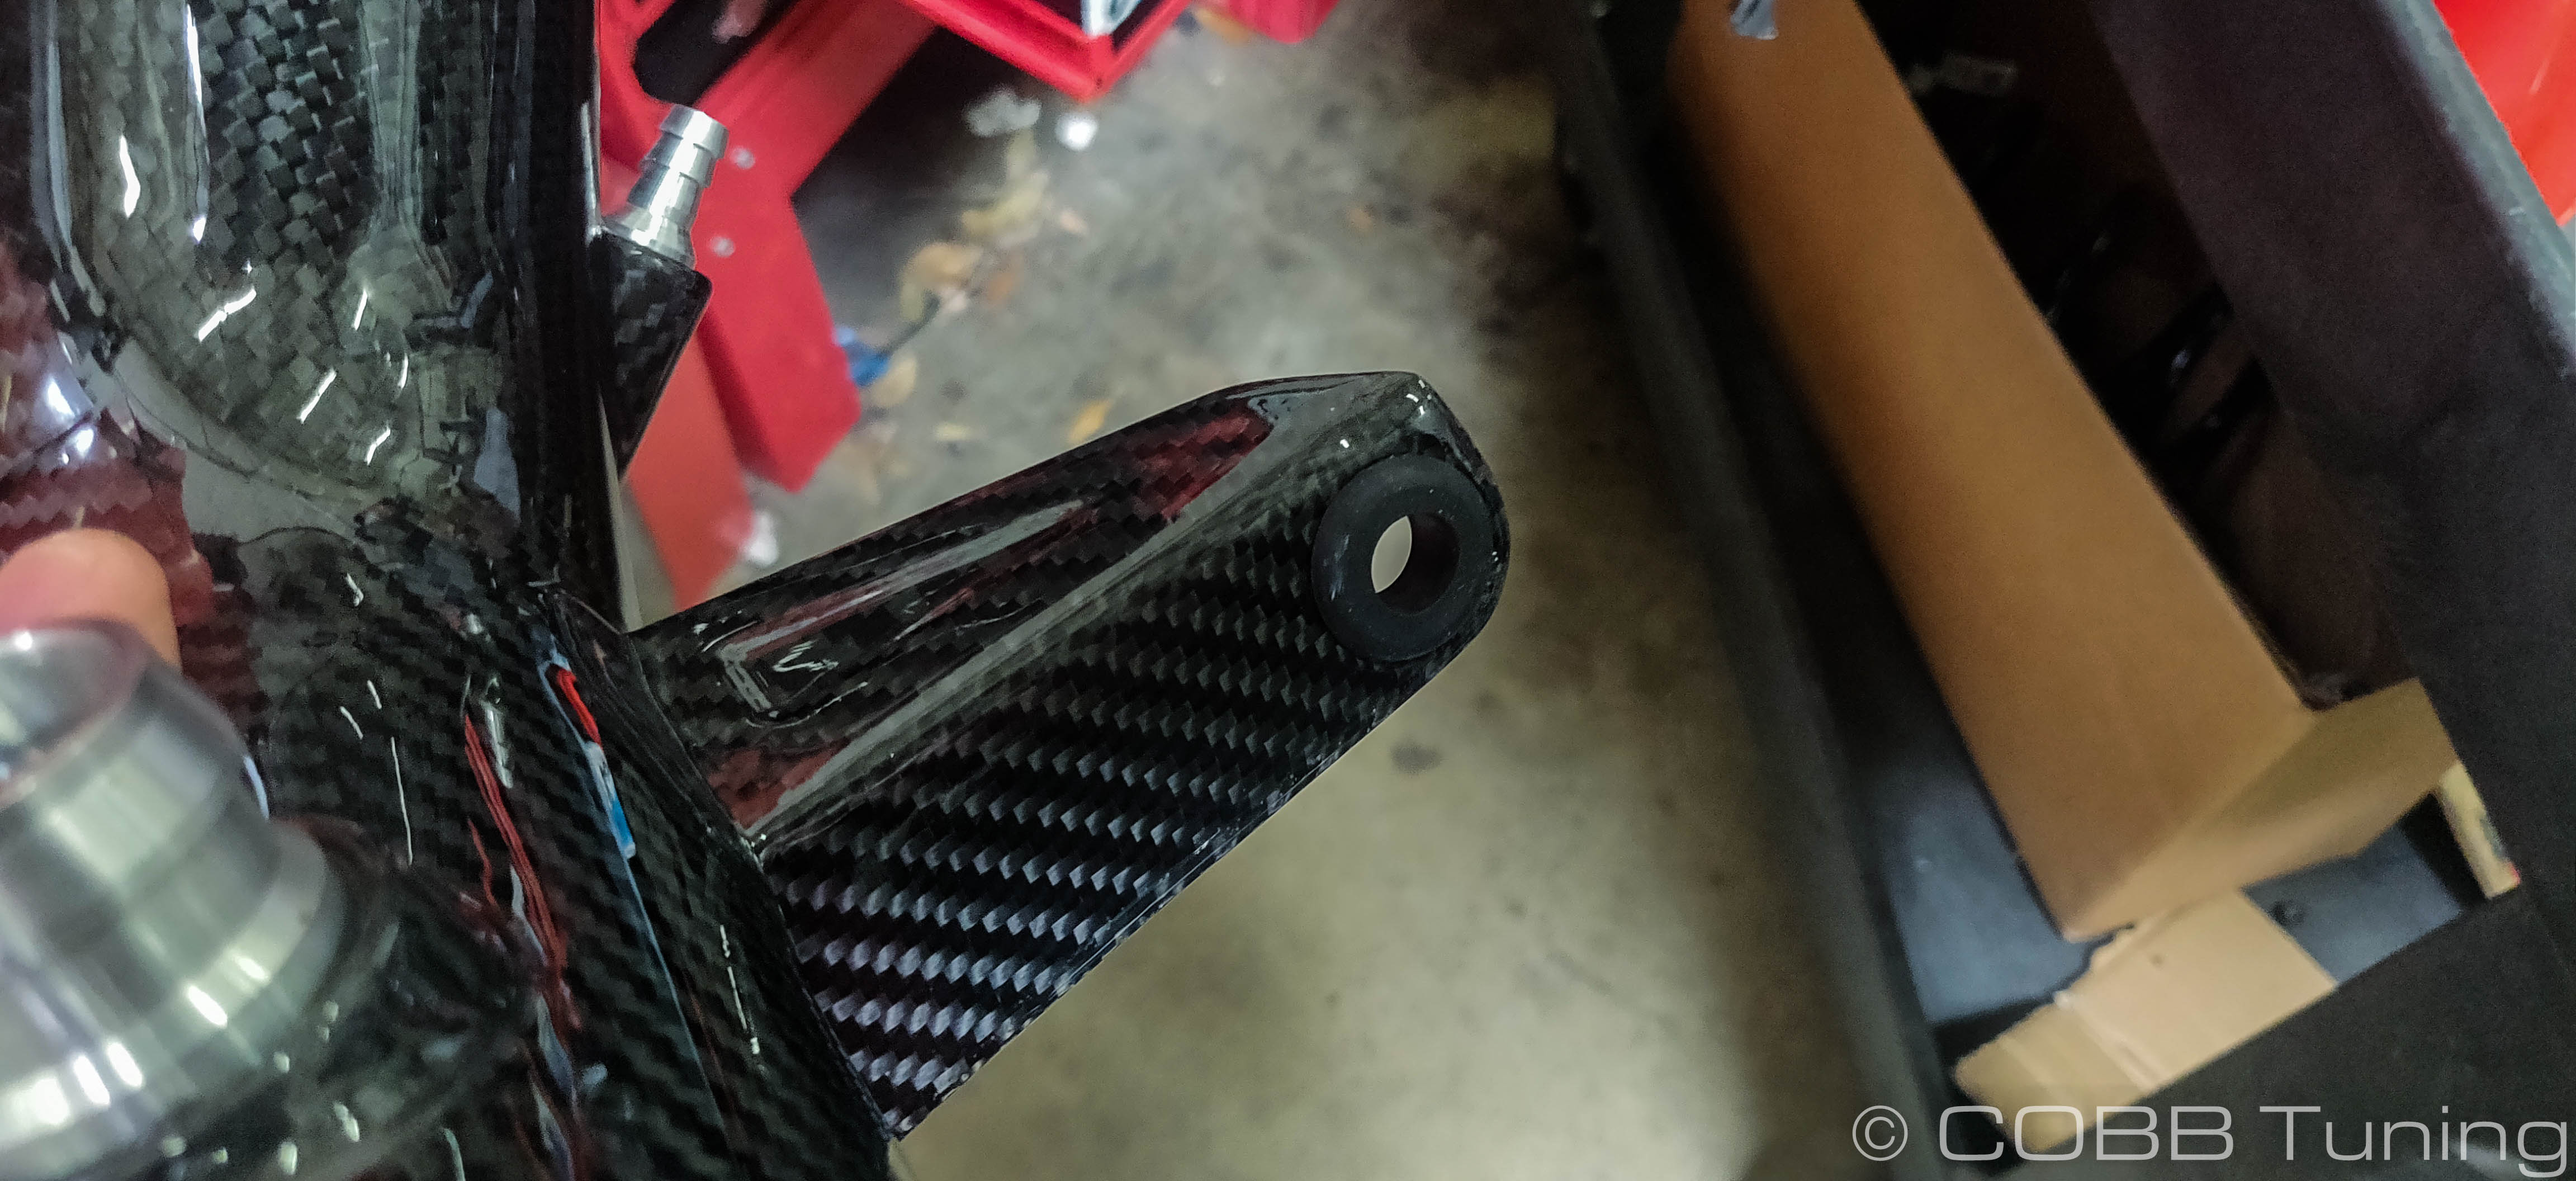
- Insert the provided rubber grommet into the hole in the bottom bracket.
- Loosely fit the tube into the car and make sure the clamp orientation on the turbo inlet is where you'll be able to reach it with a wrench or screwdriver.
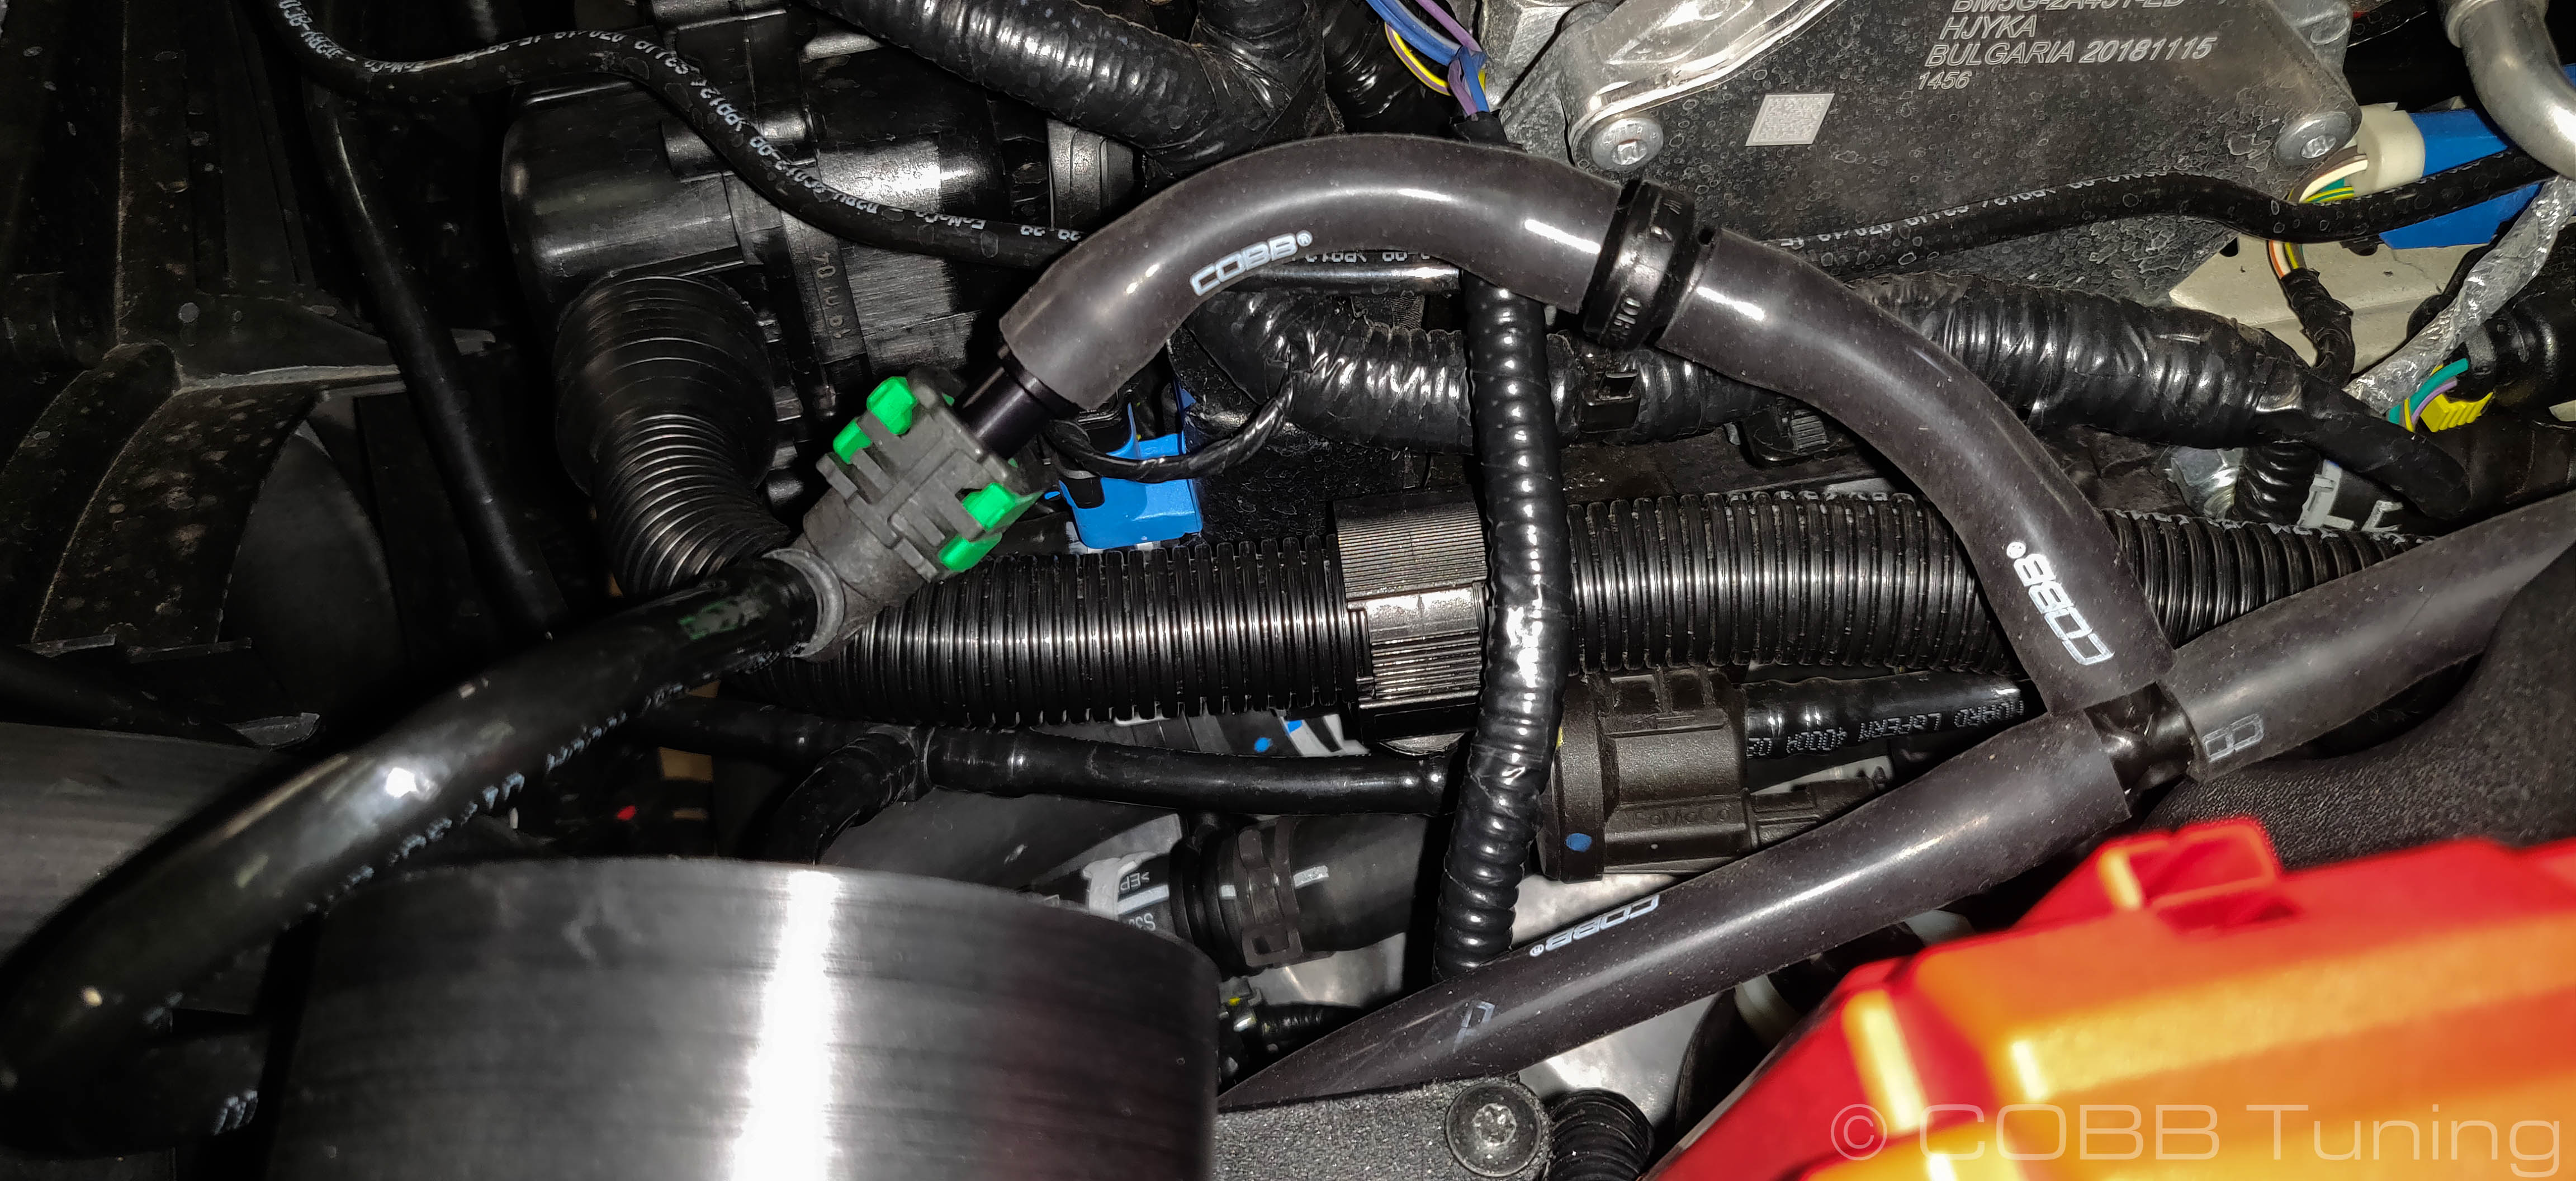
- MY2016-2019 Only.
Lay the hose assembly down in the space below where the stock intake was routed and connect the long end with the quick connect to the manifold, then the side with the male fitting and check valve to the evap system.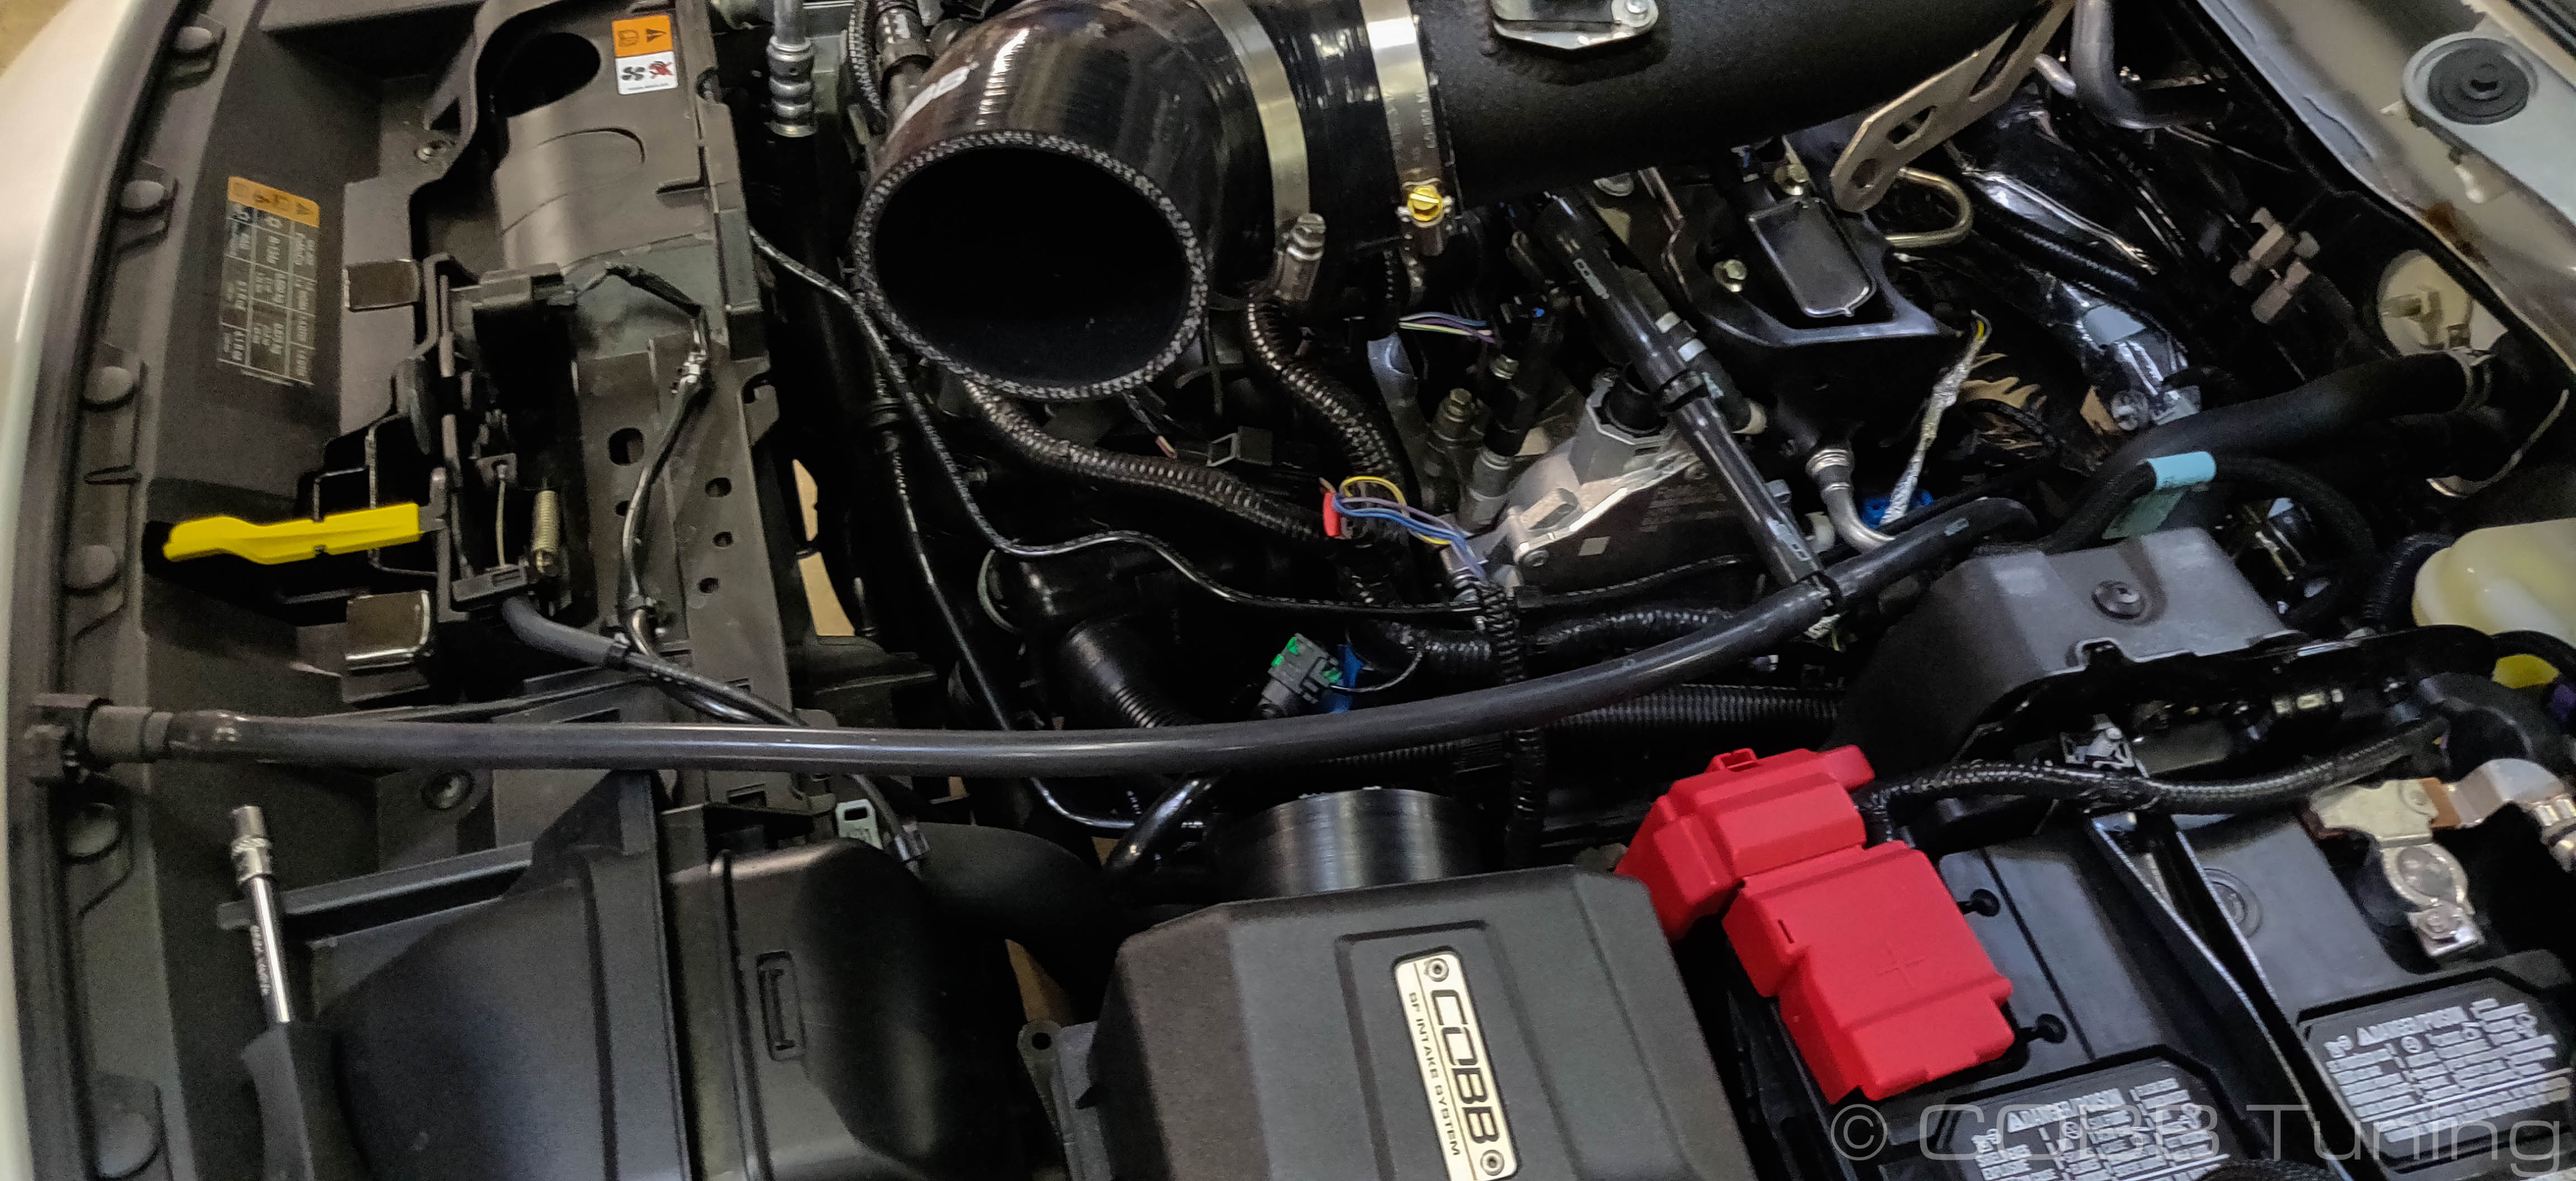
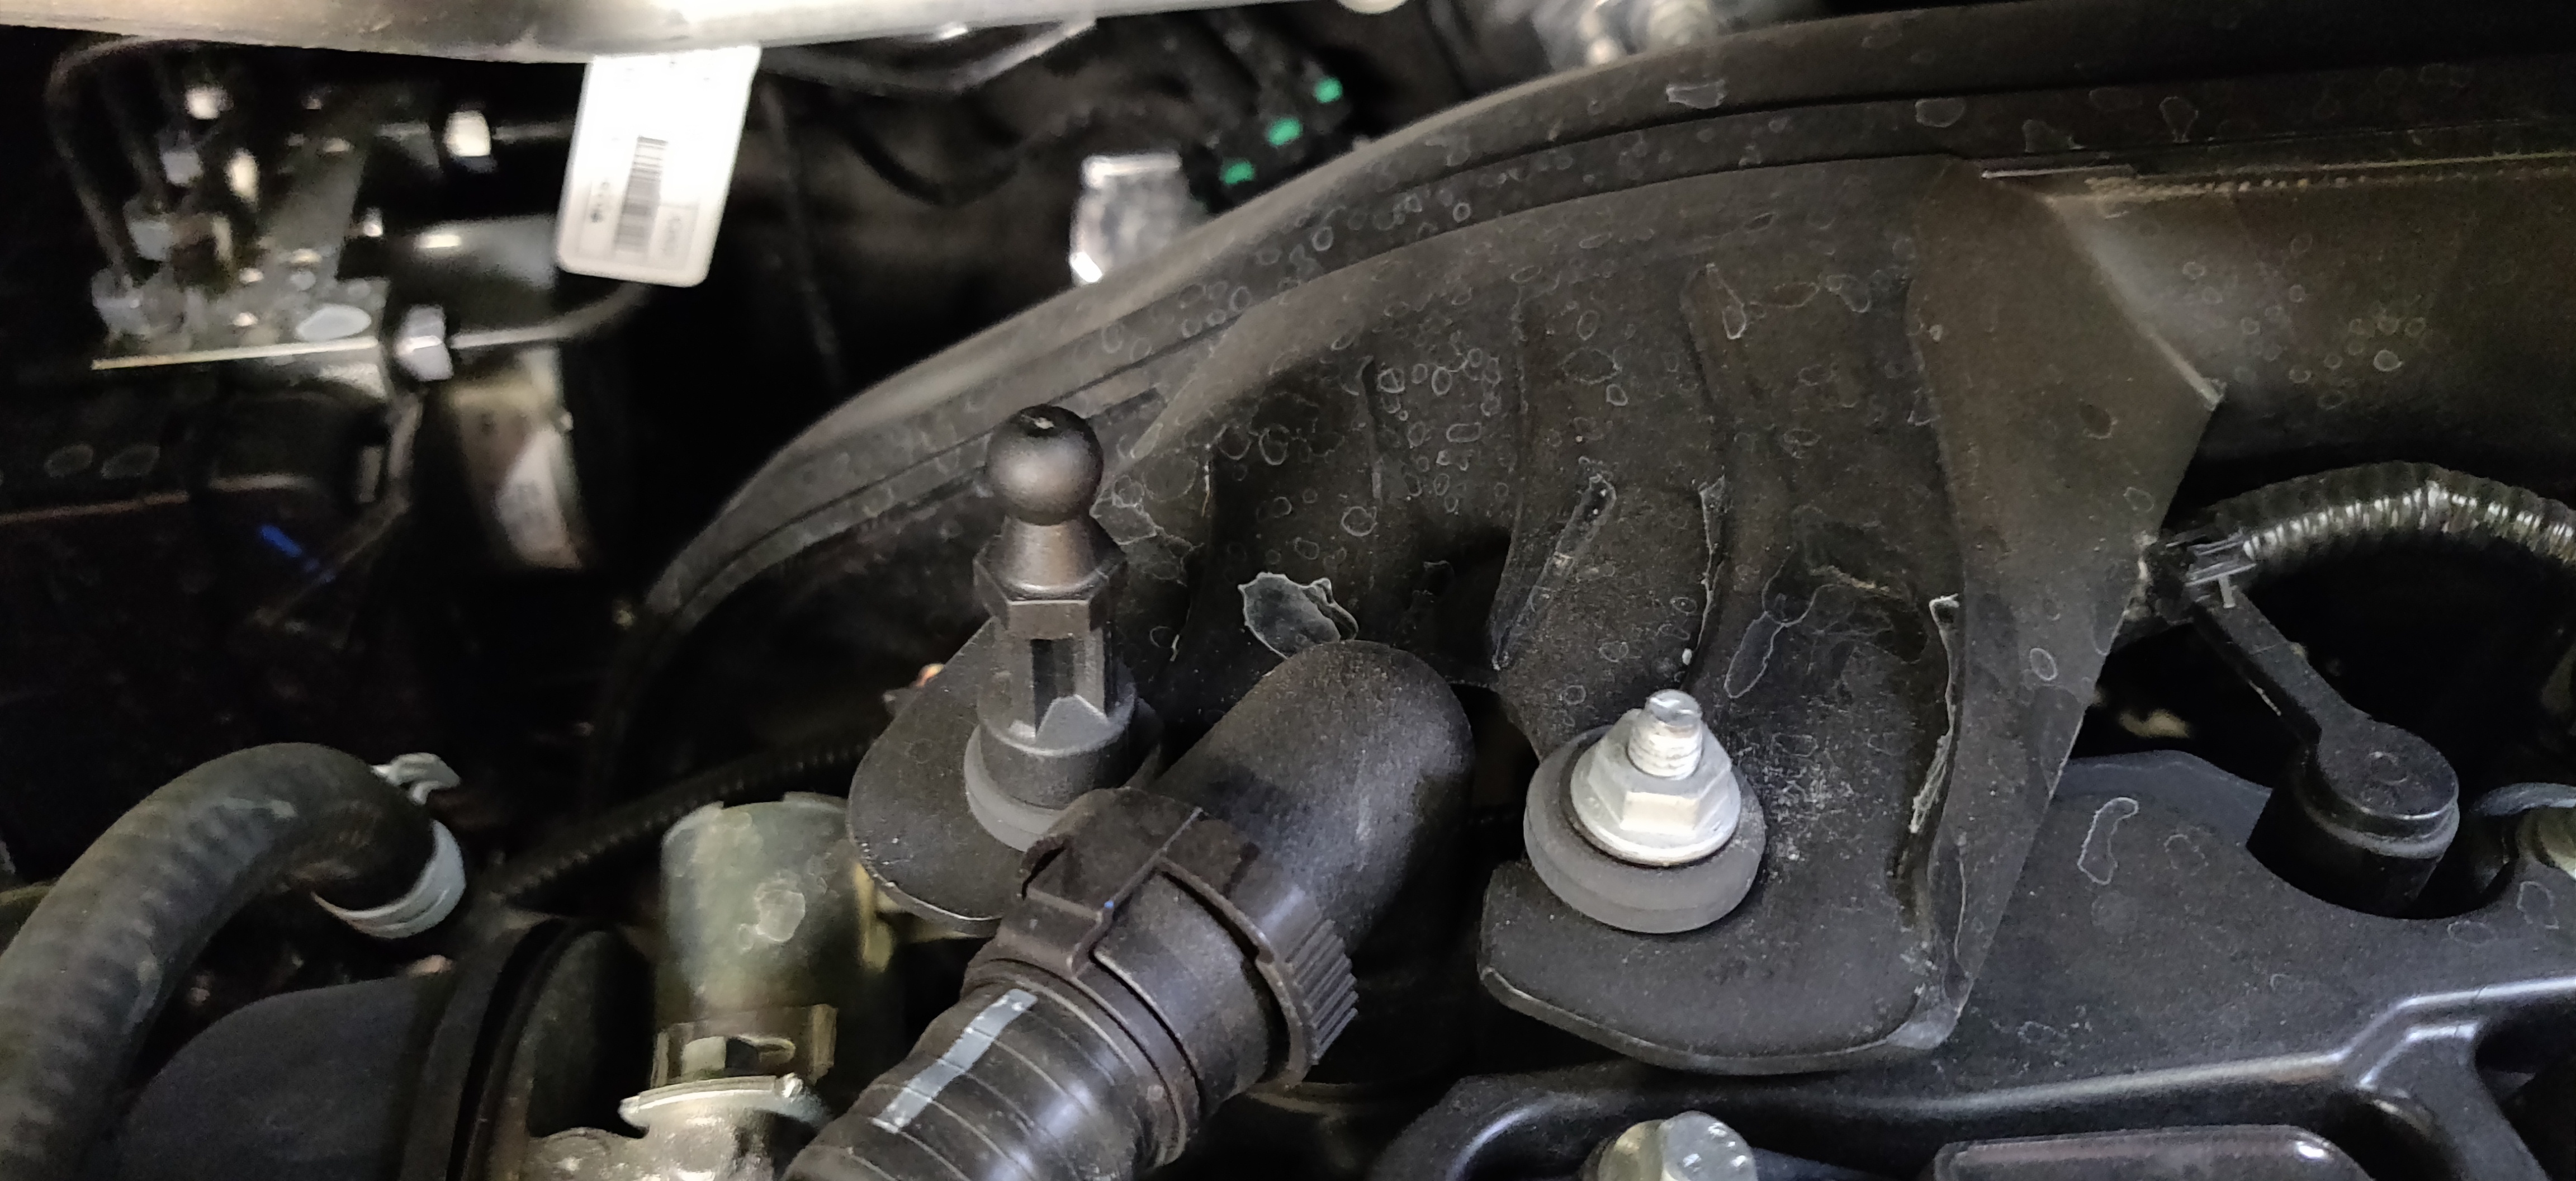
- Snap the valve cover fitting onto the bung on the intake tube.
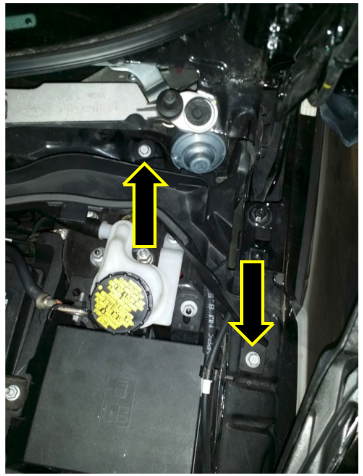
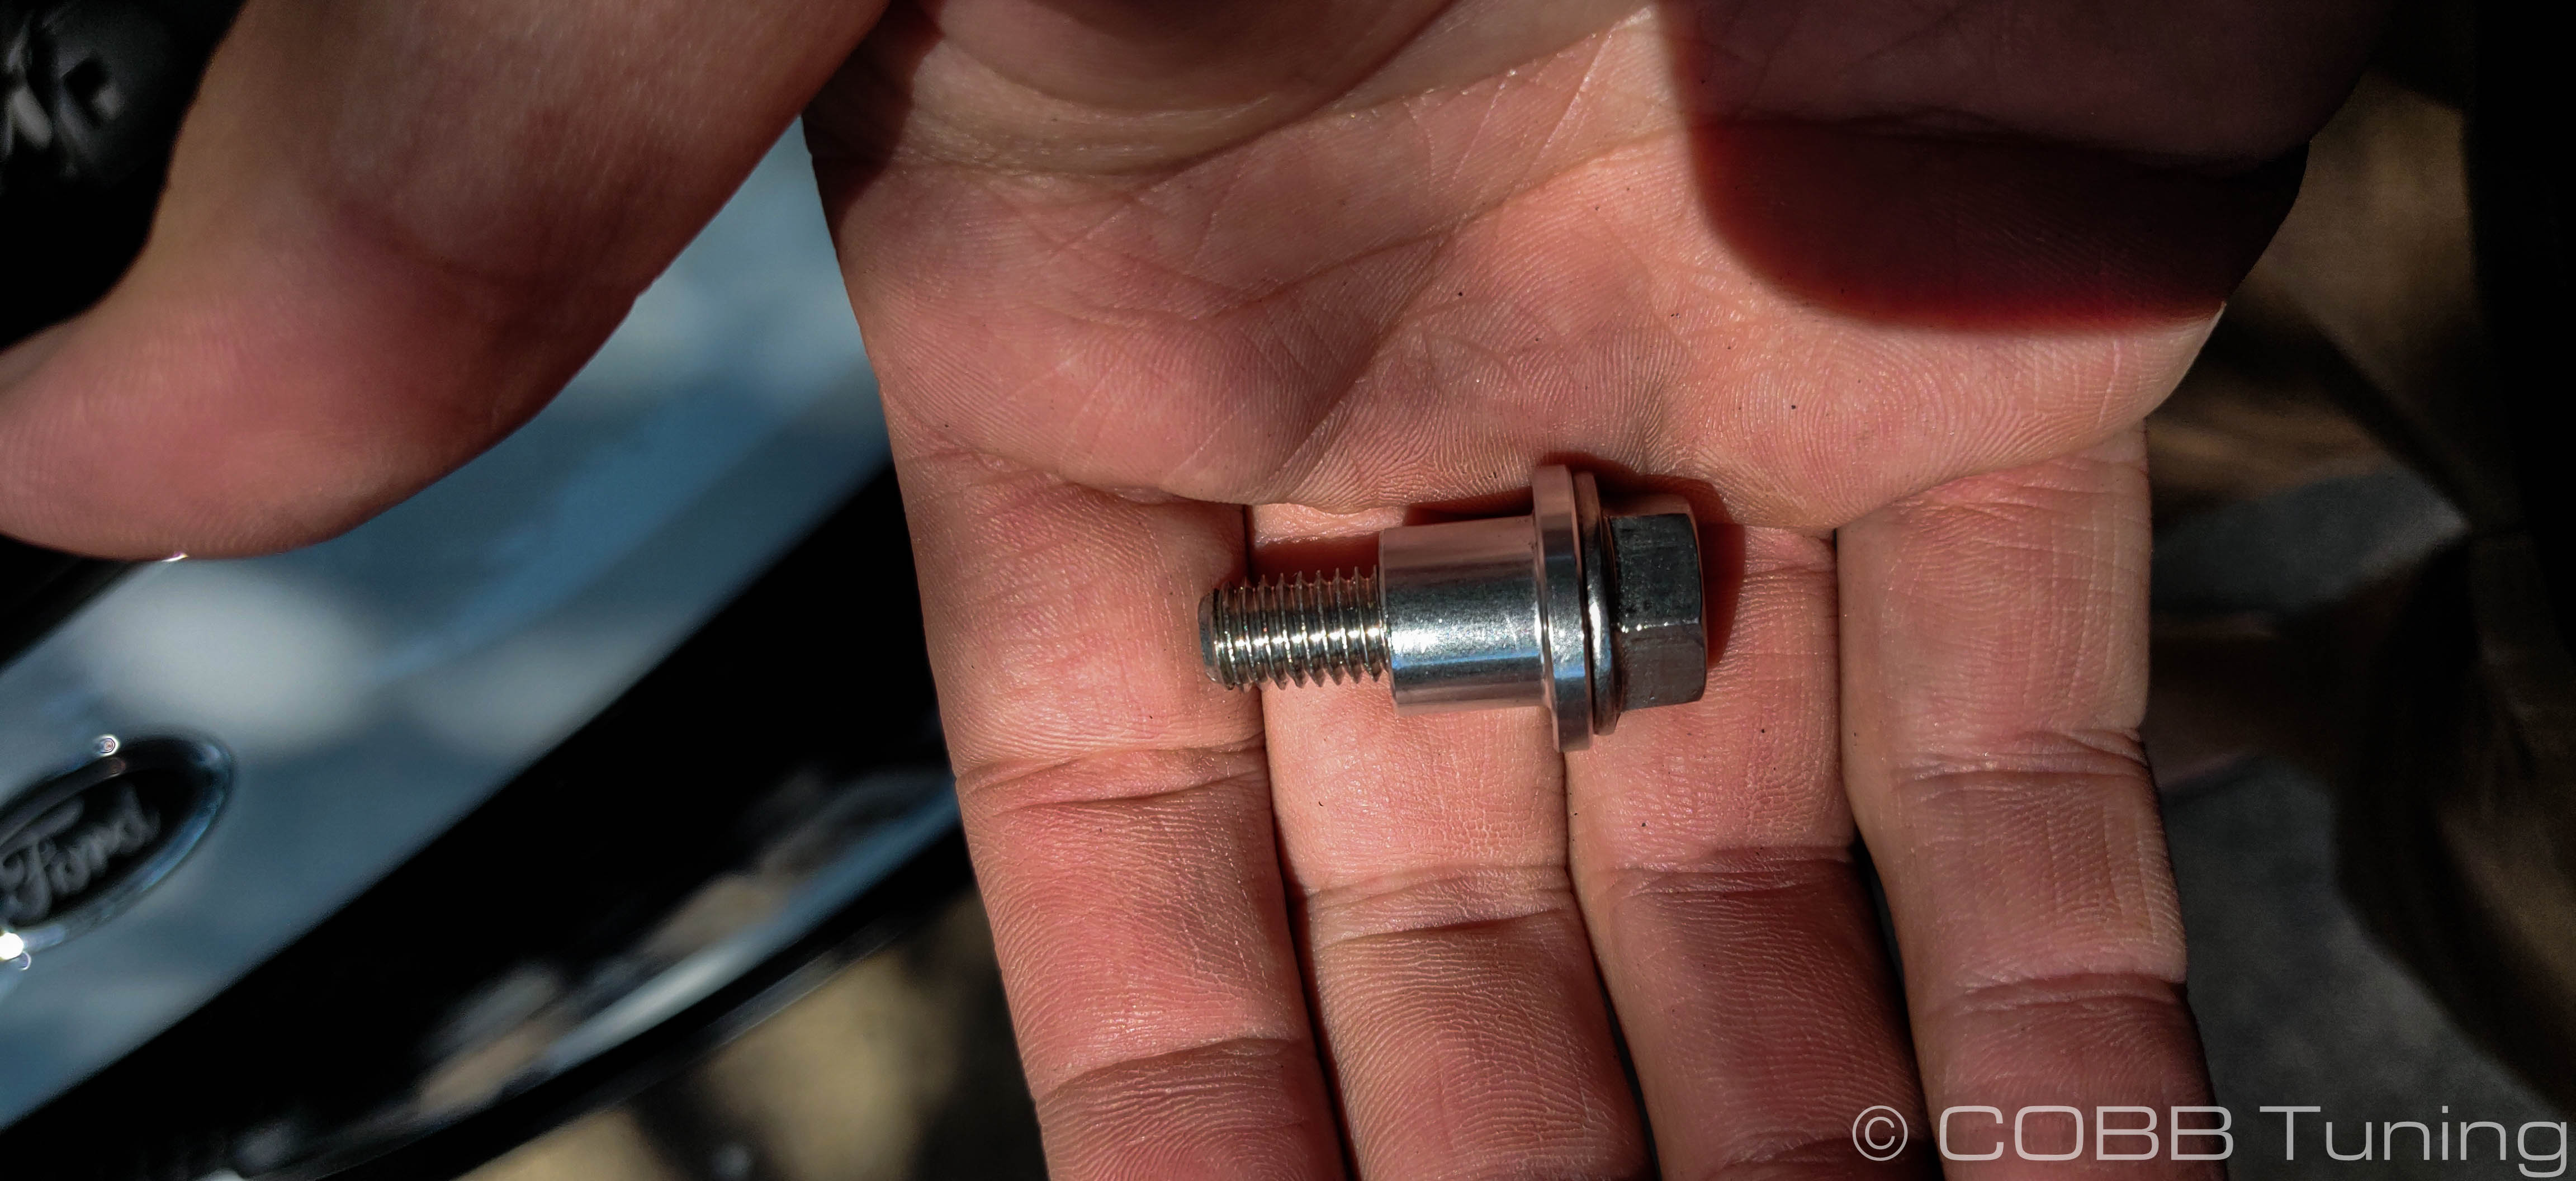
- Using the remaining 8mmx12mm bolt, either install the aluminum spacer into the grommet fat side out, or put the bolt into it.
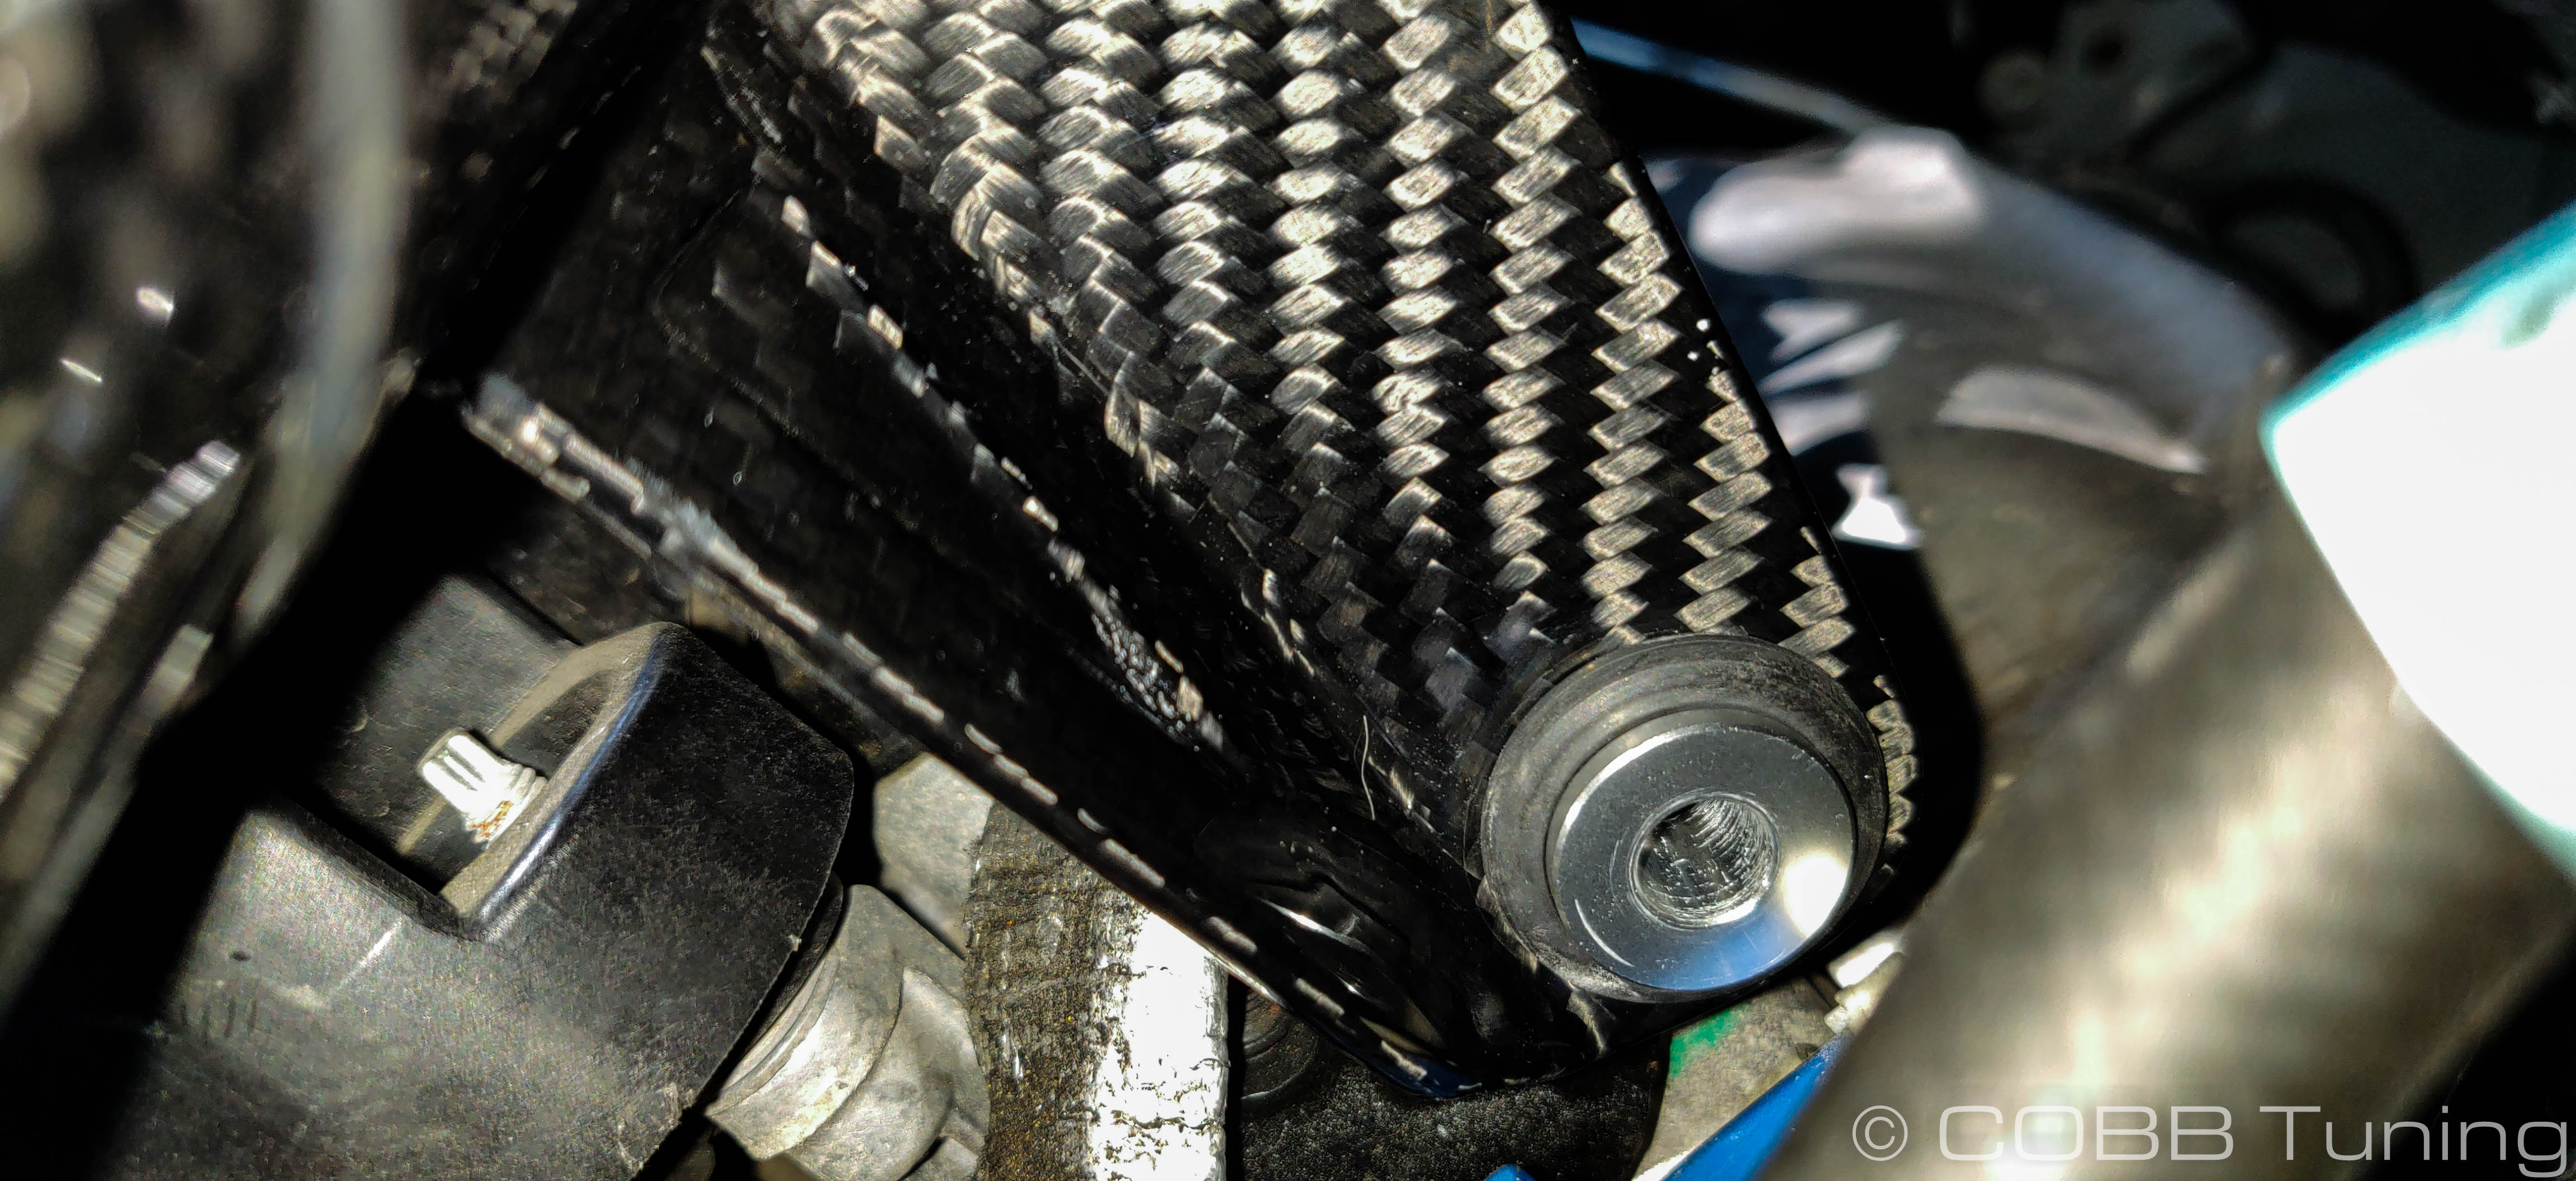
- Install this bolt and spacer through the grommet into the unused bracket sticking off the back of the cylinder head.
(Picture from battery side)
(Picture from above valve cover looking down)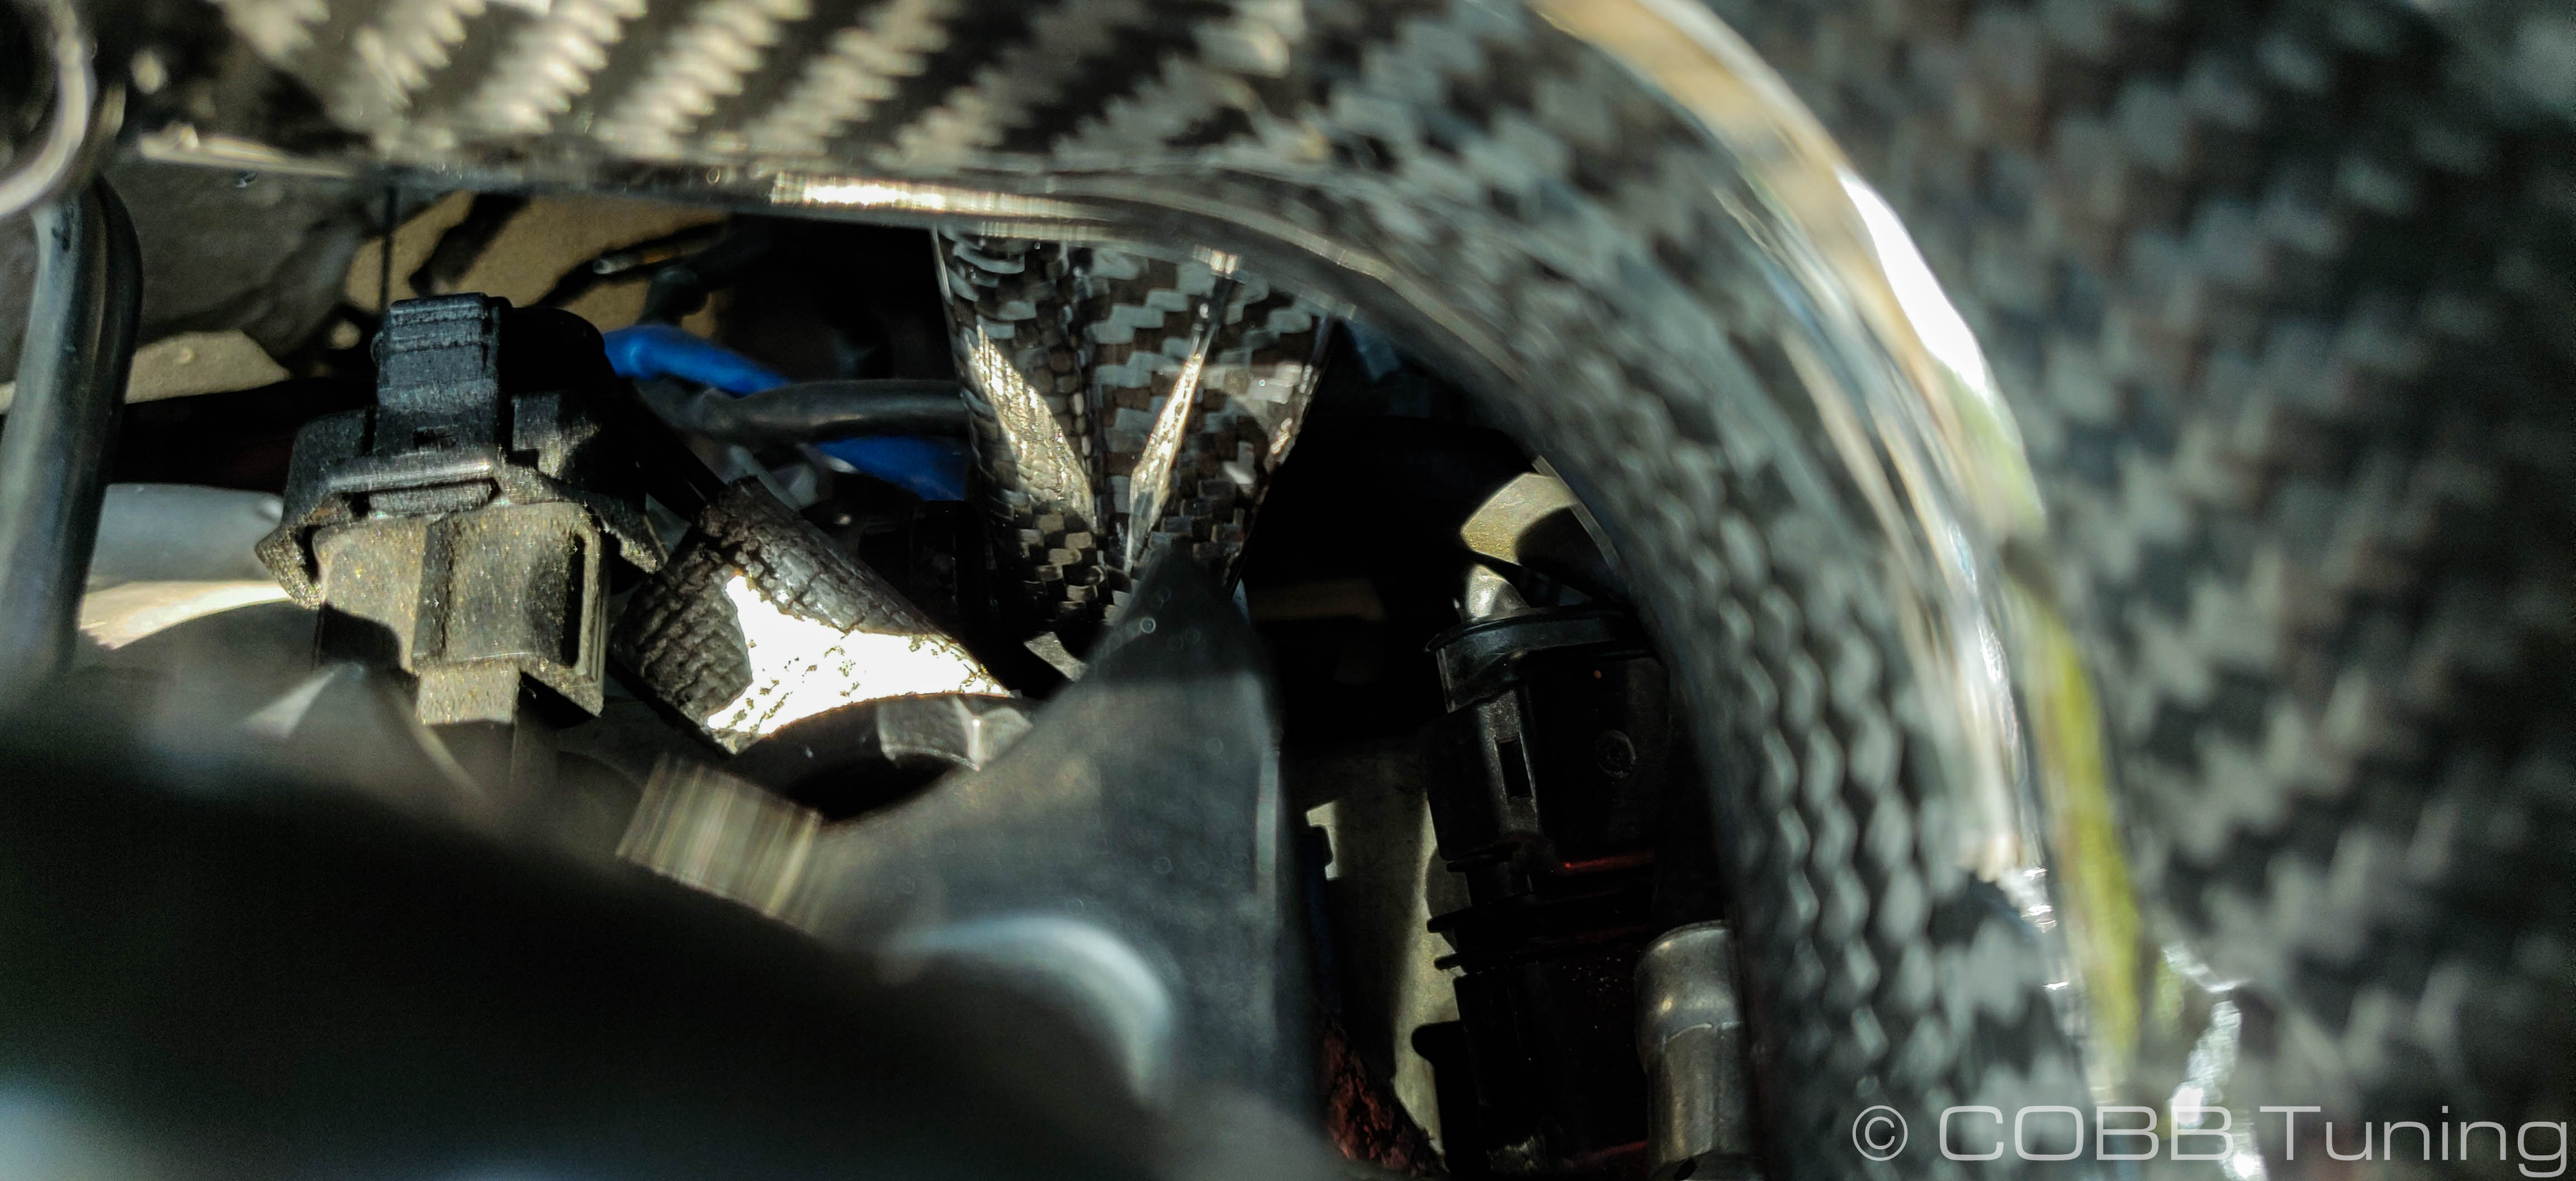
- Using the provided hose clamp. Install the velocity stack into the air filter.
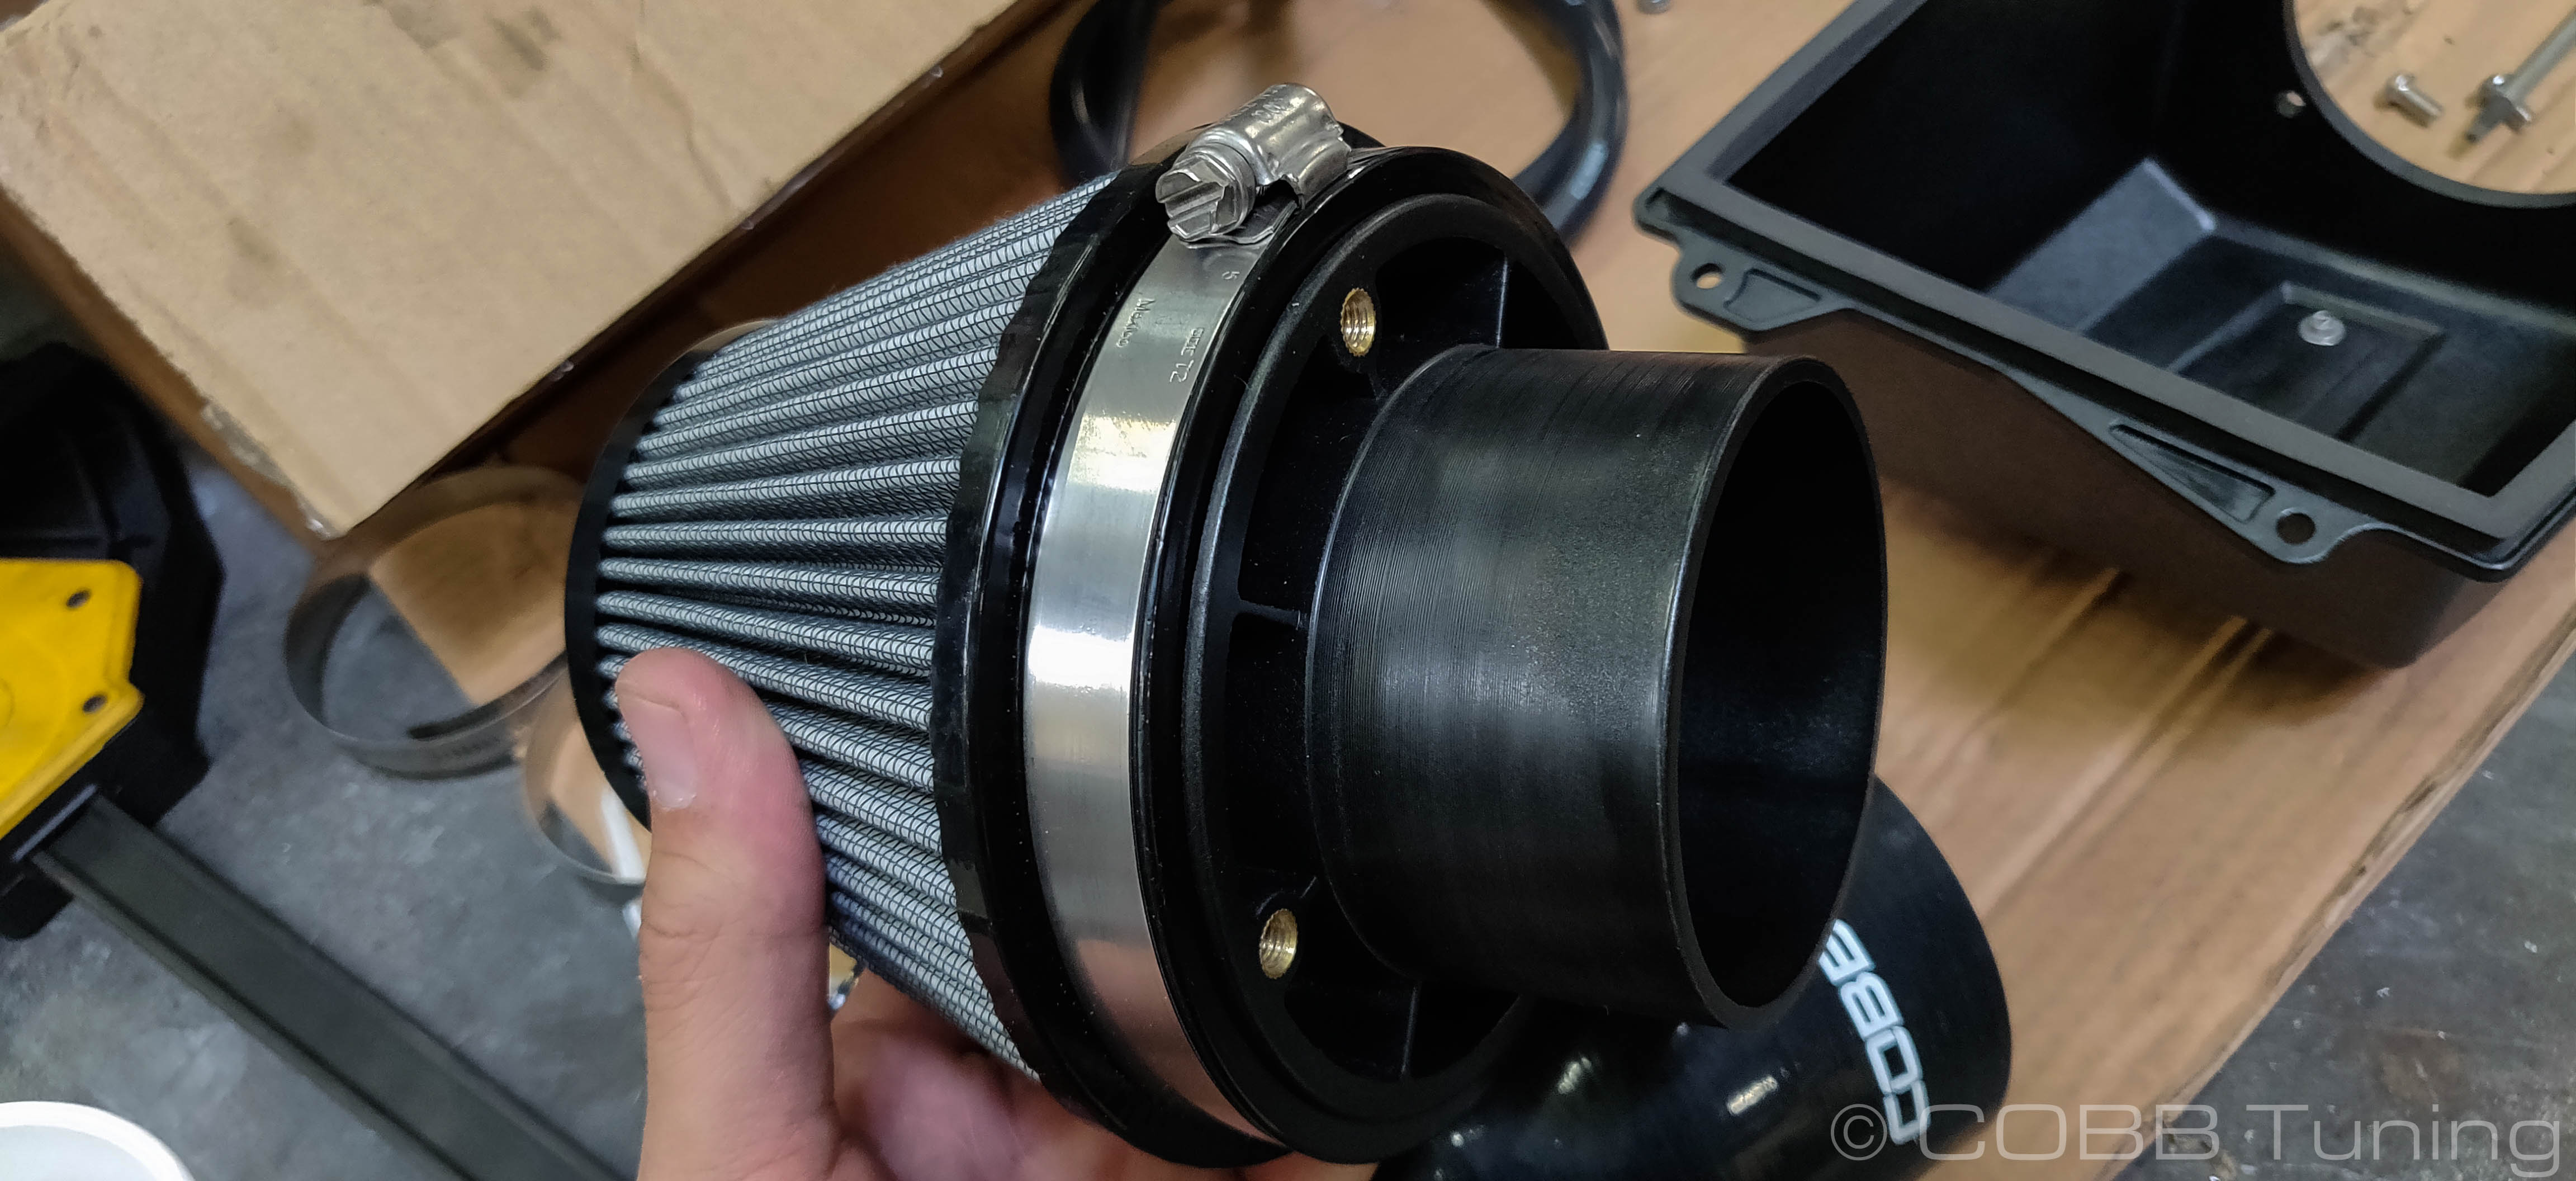
- Using a 4.5mm allen wrench, screw the filter and stack assembly into the COBB Airbox LId using the 4 6mmx12mm screws. (COBB Plastic airbox lid pictured, installation process is identical with the carbon fiber intake)
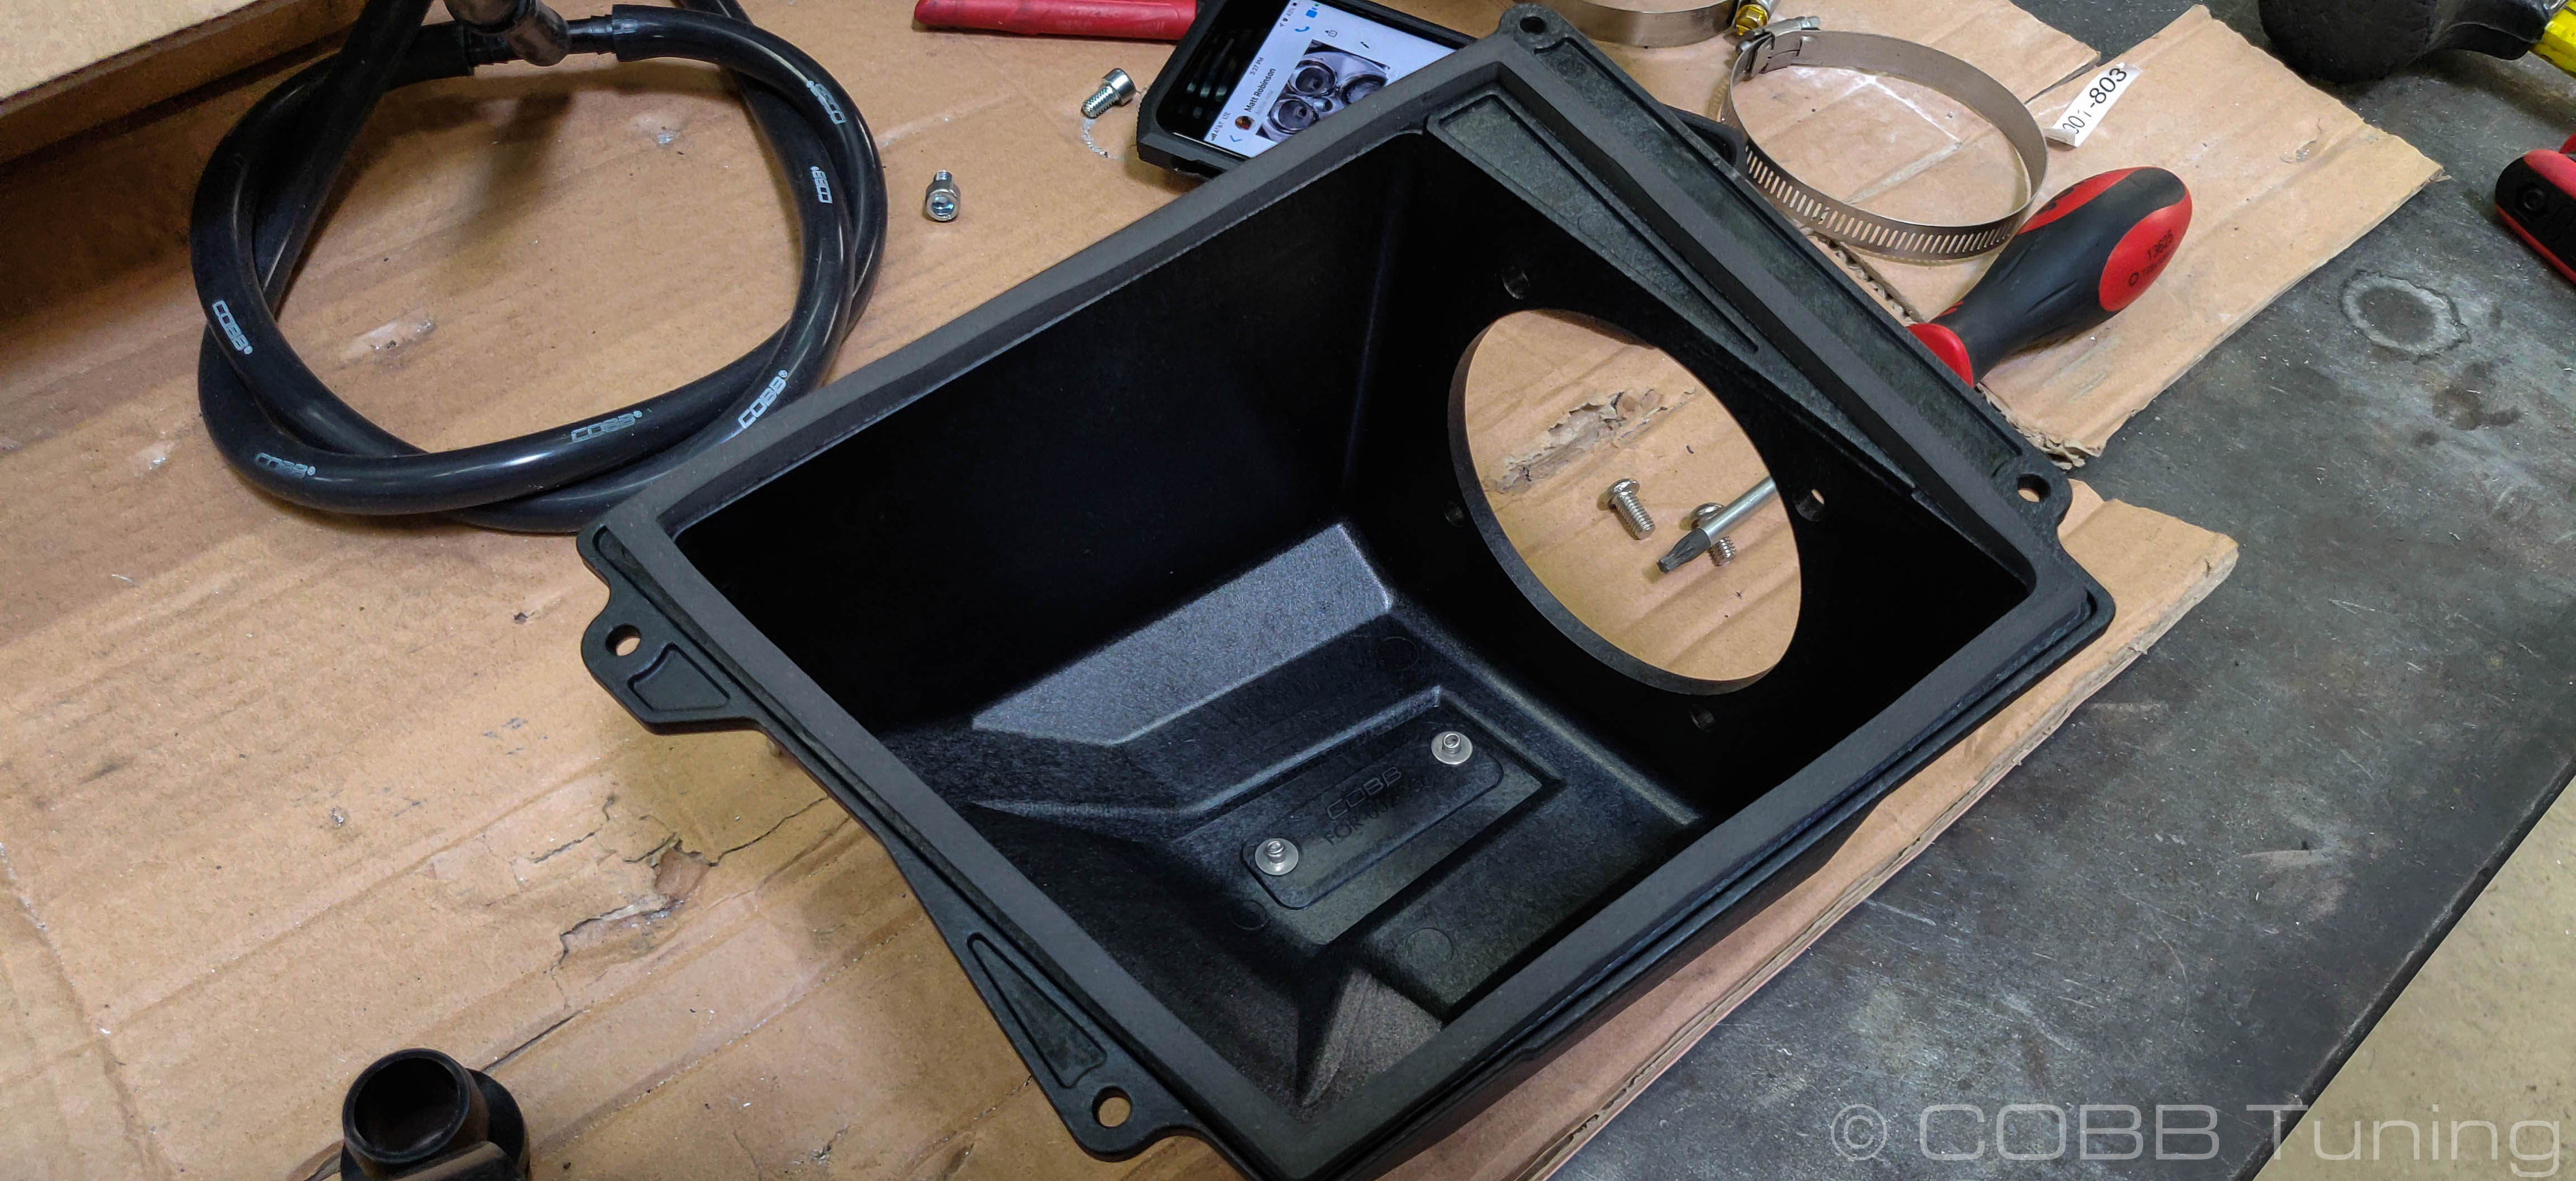
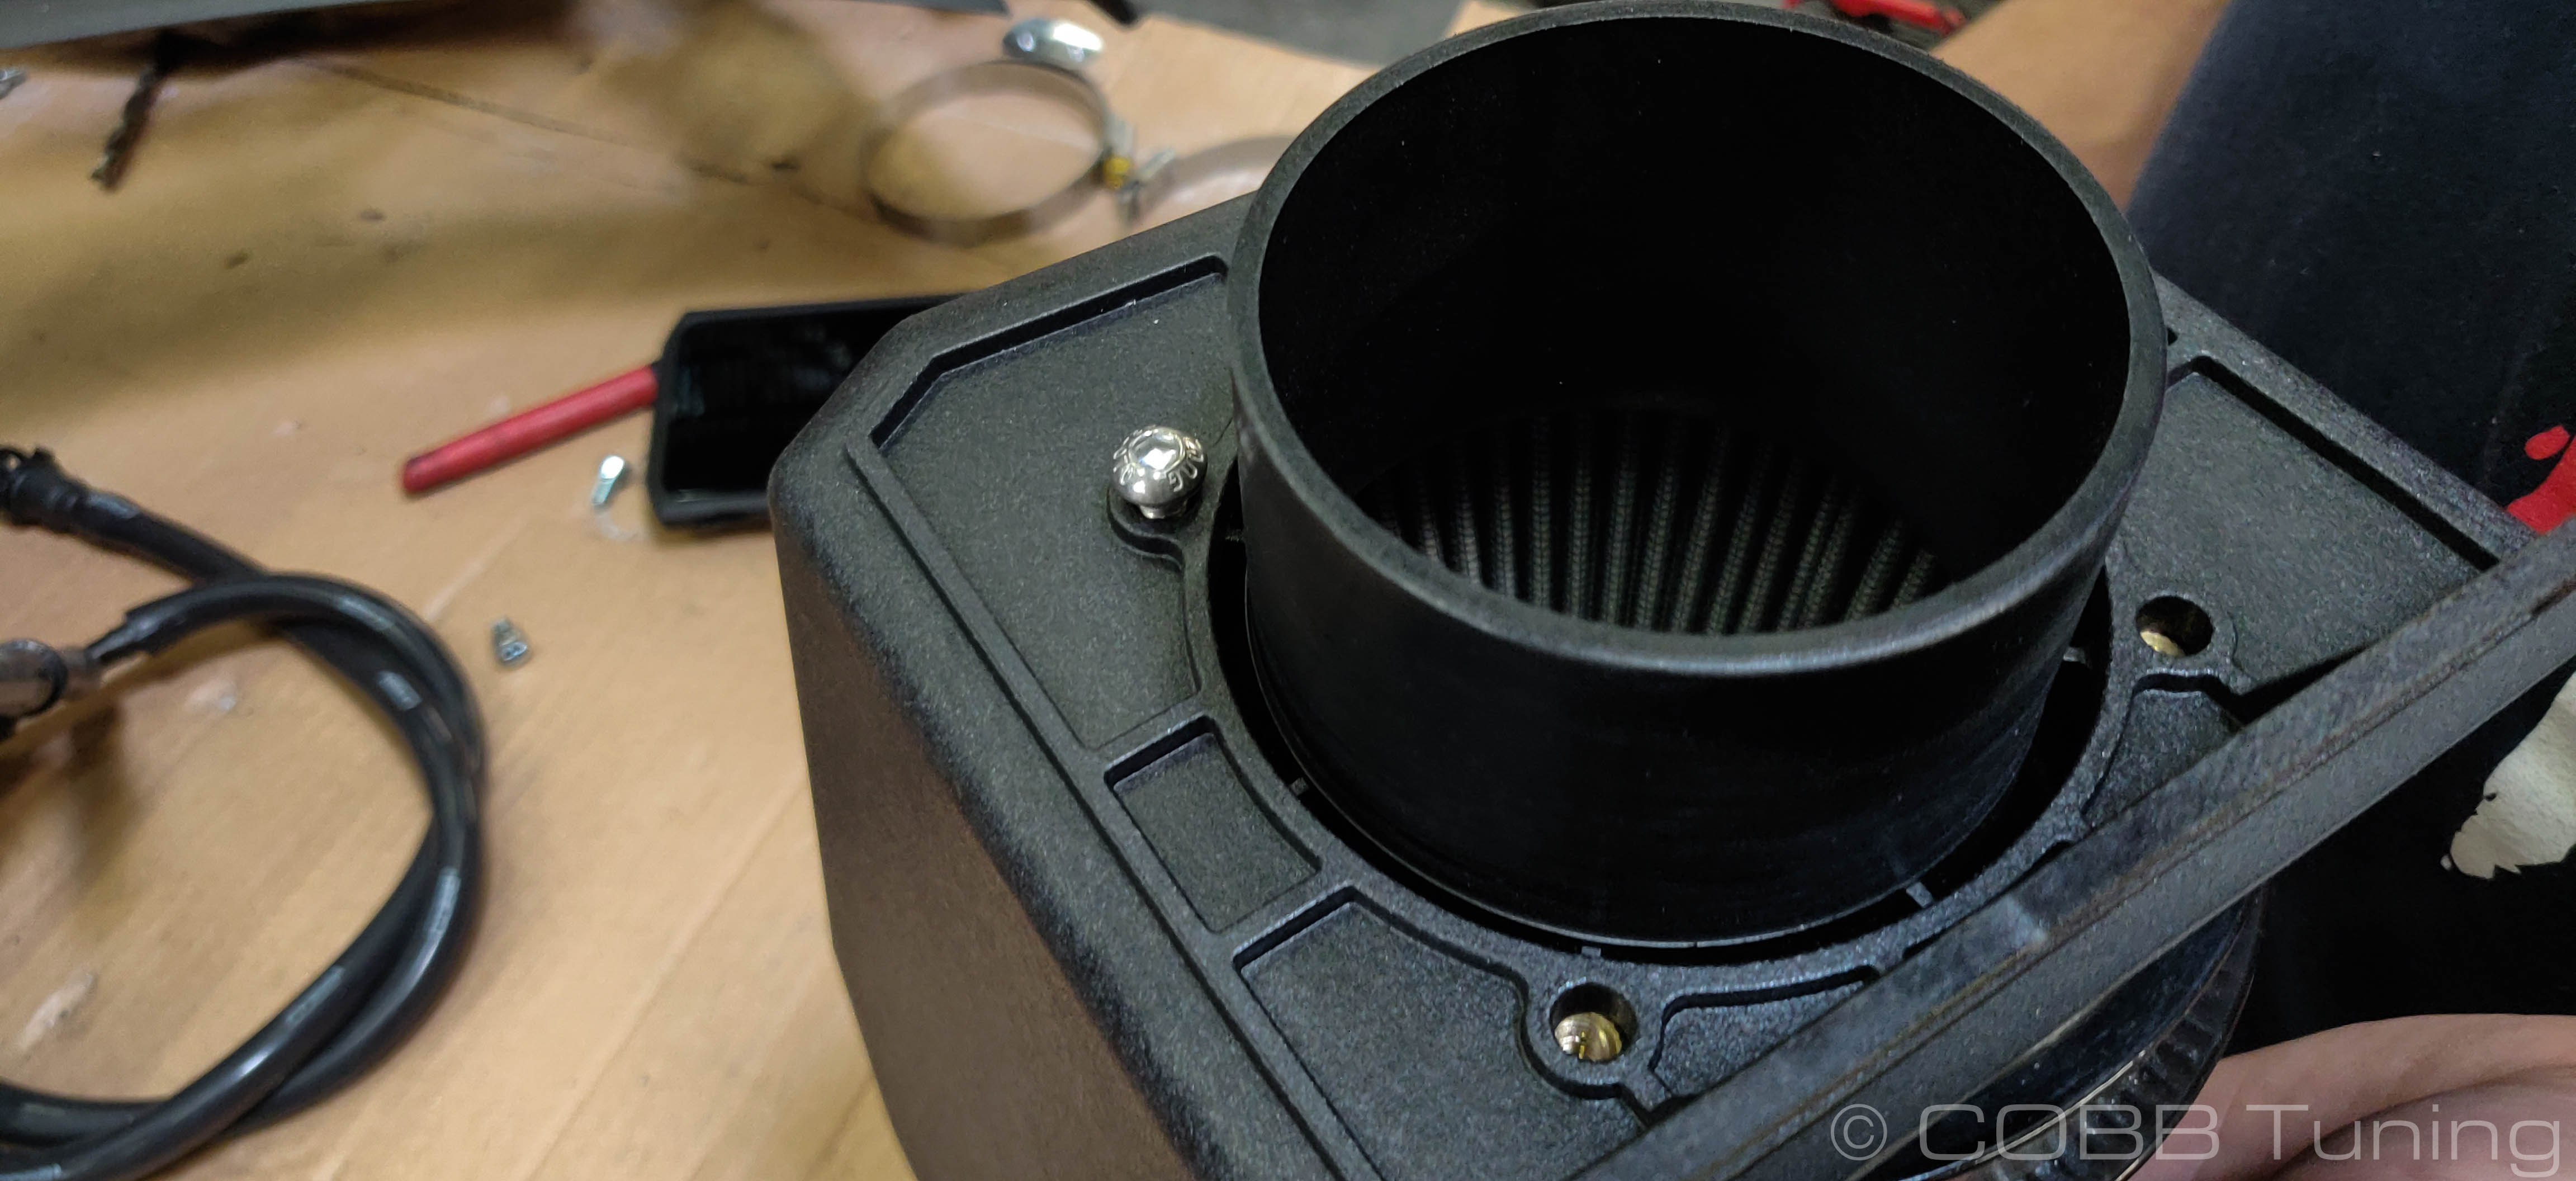

- Install the COBB Airbox Lid and filter assembly into the stock lower airbox using the factory hardware.
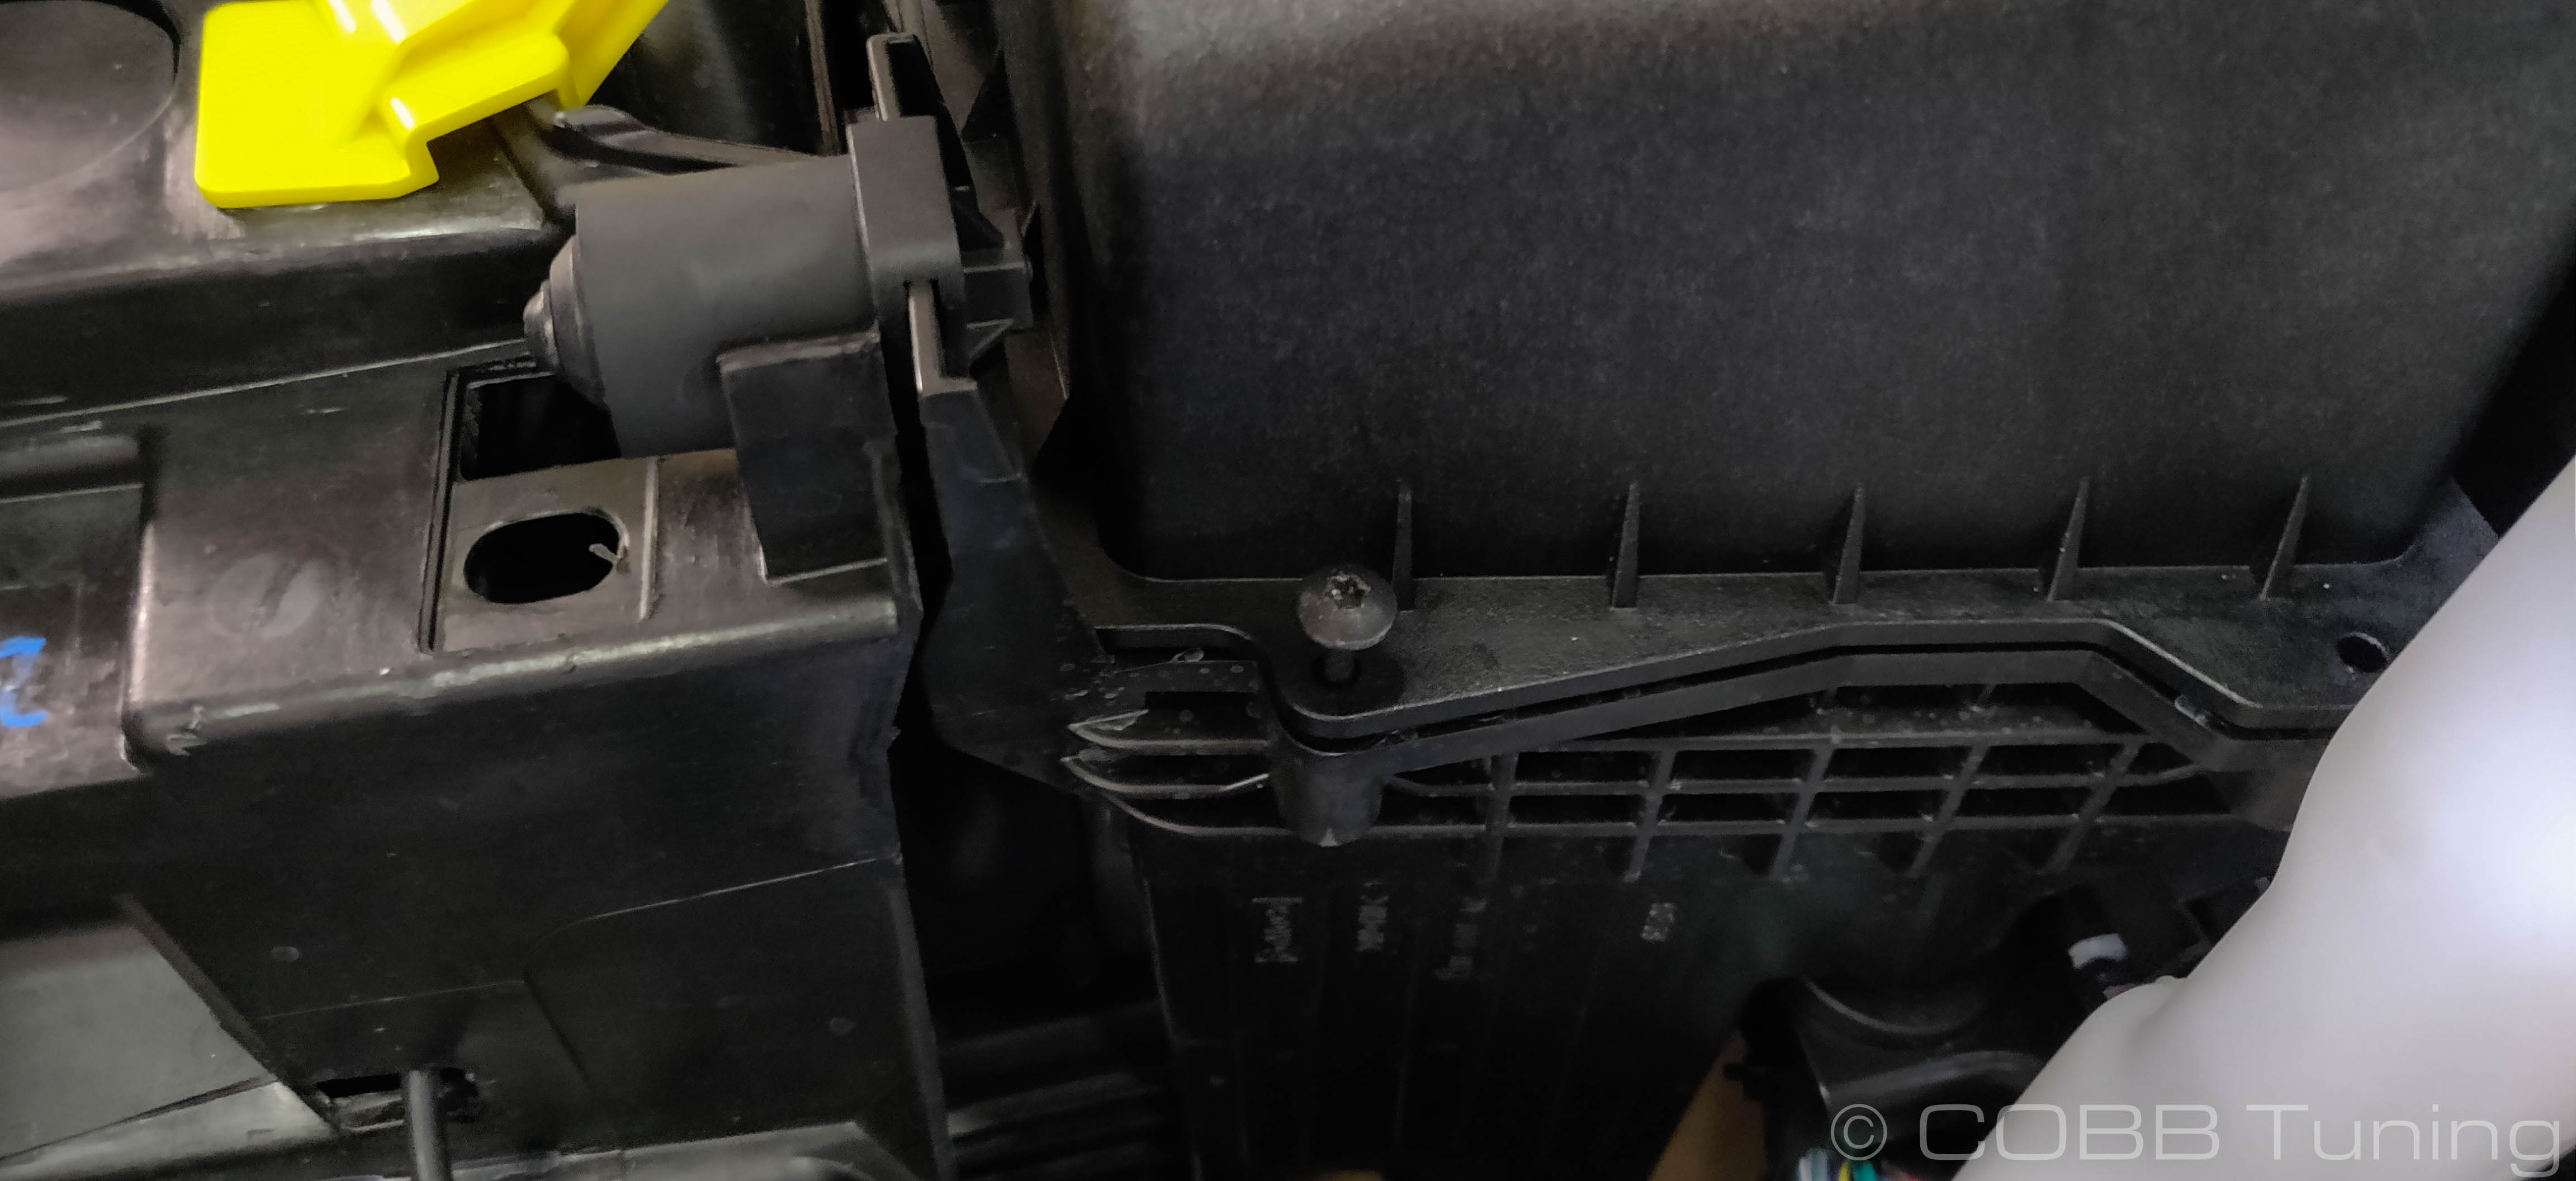
- We've found that the wide range of adjustability in the factory intake can sometimes cause an issue with the fitment of the hood rod. As such we made a small lockout ring. To install, use a T-20 to remove the screw holding the rubber bumper onto the front of the airbox.
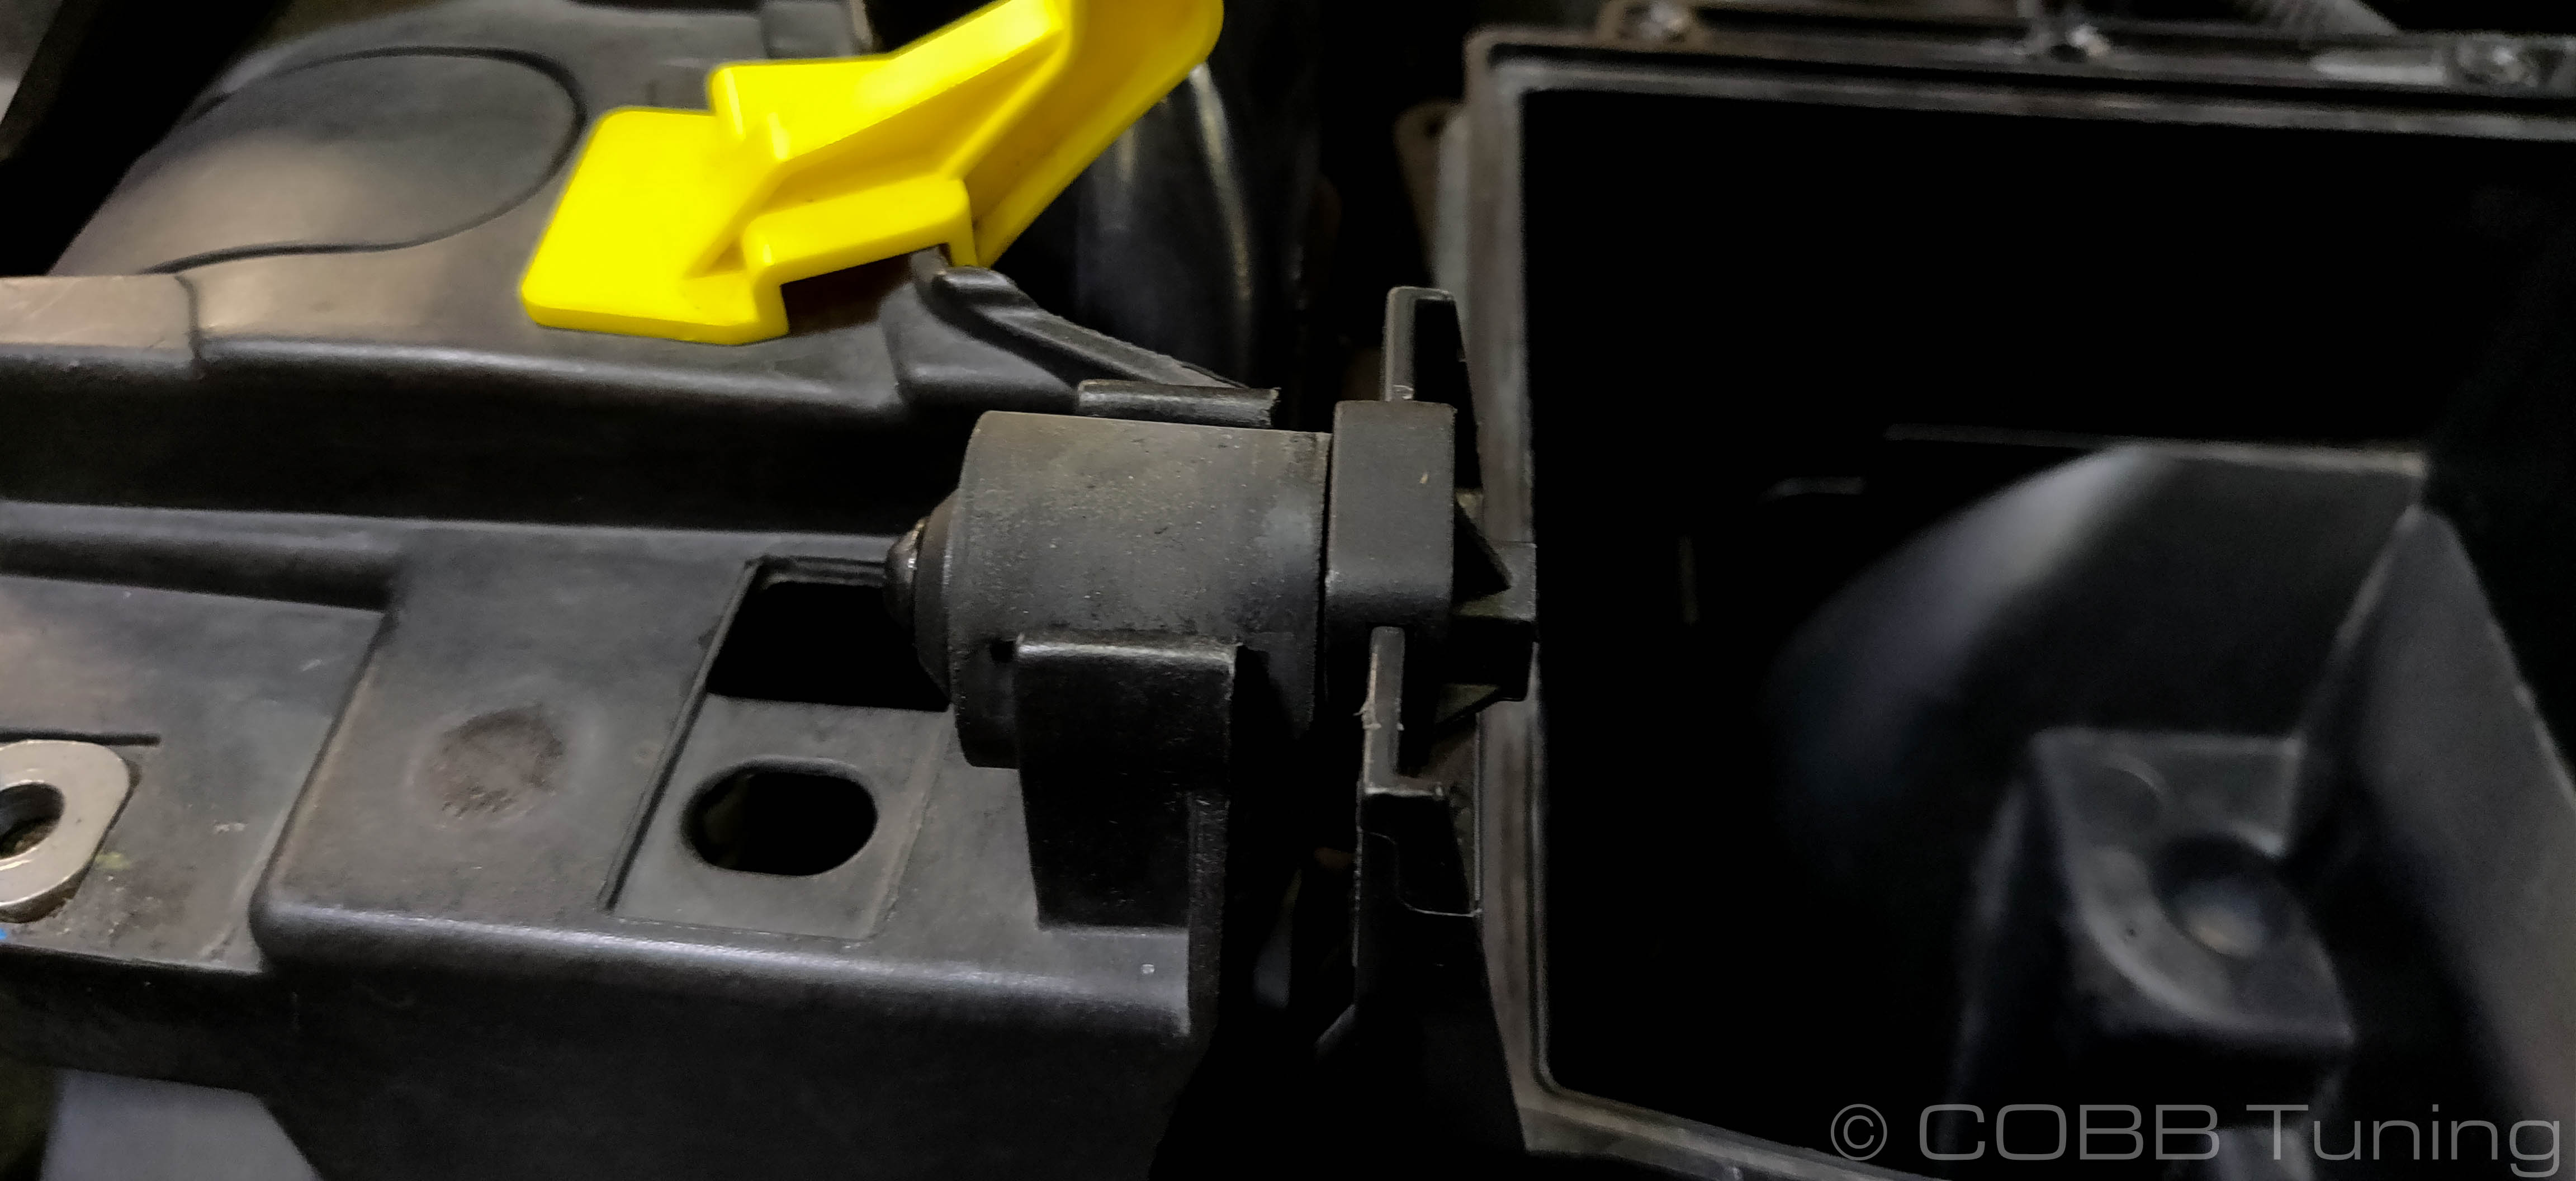
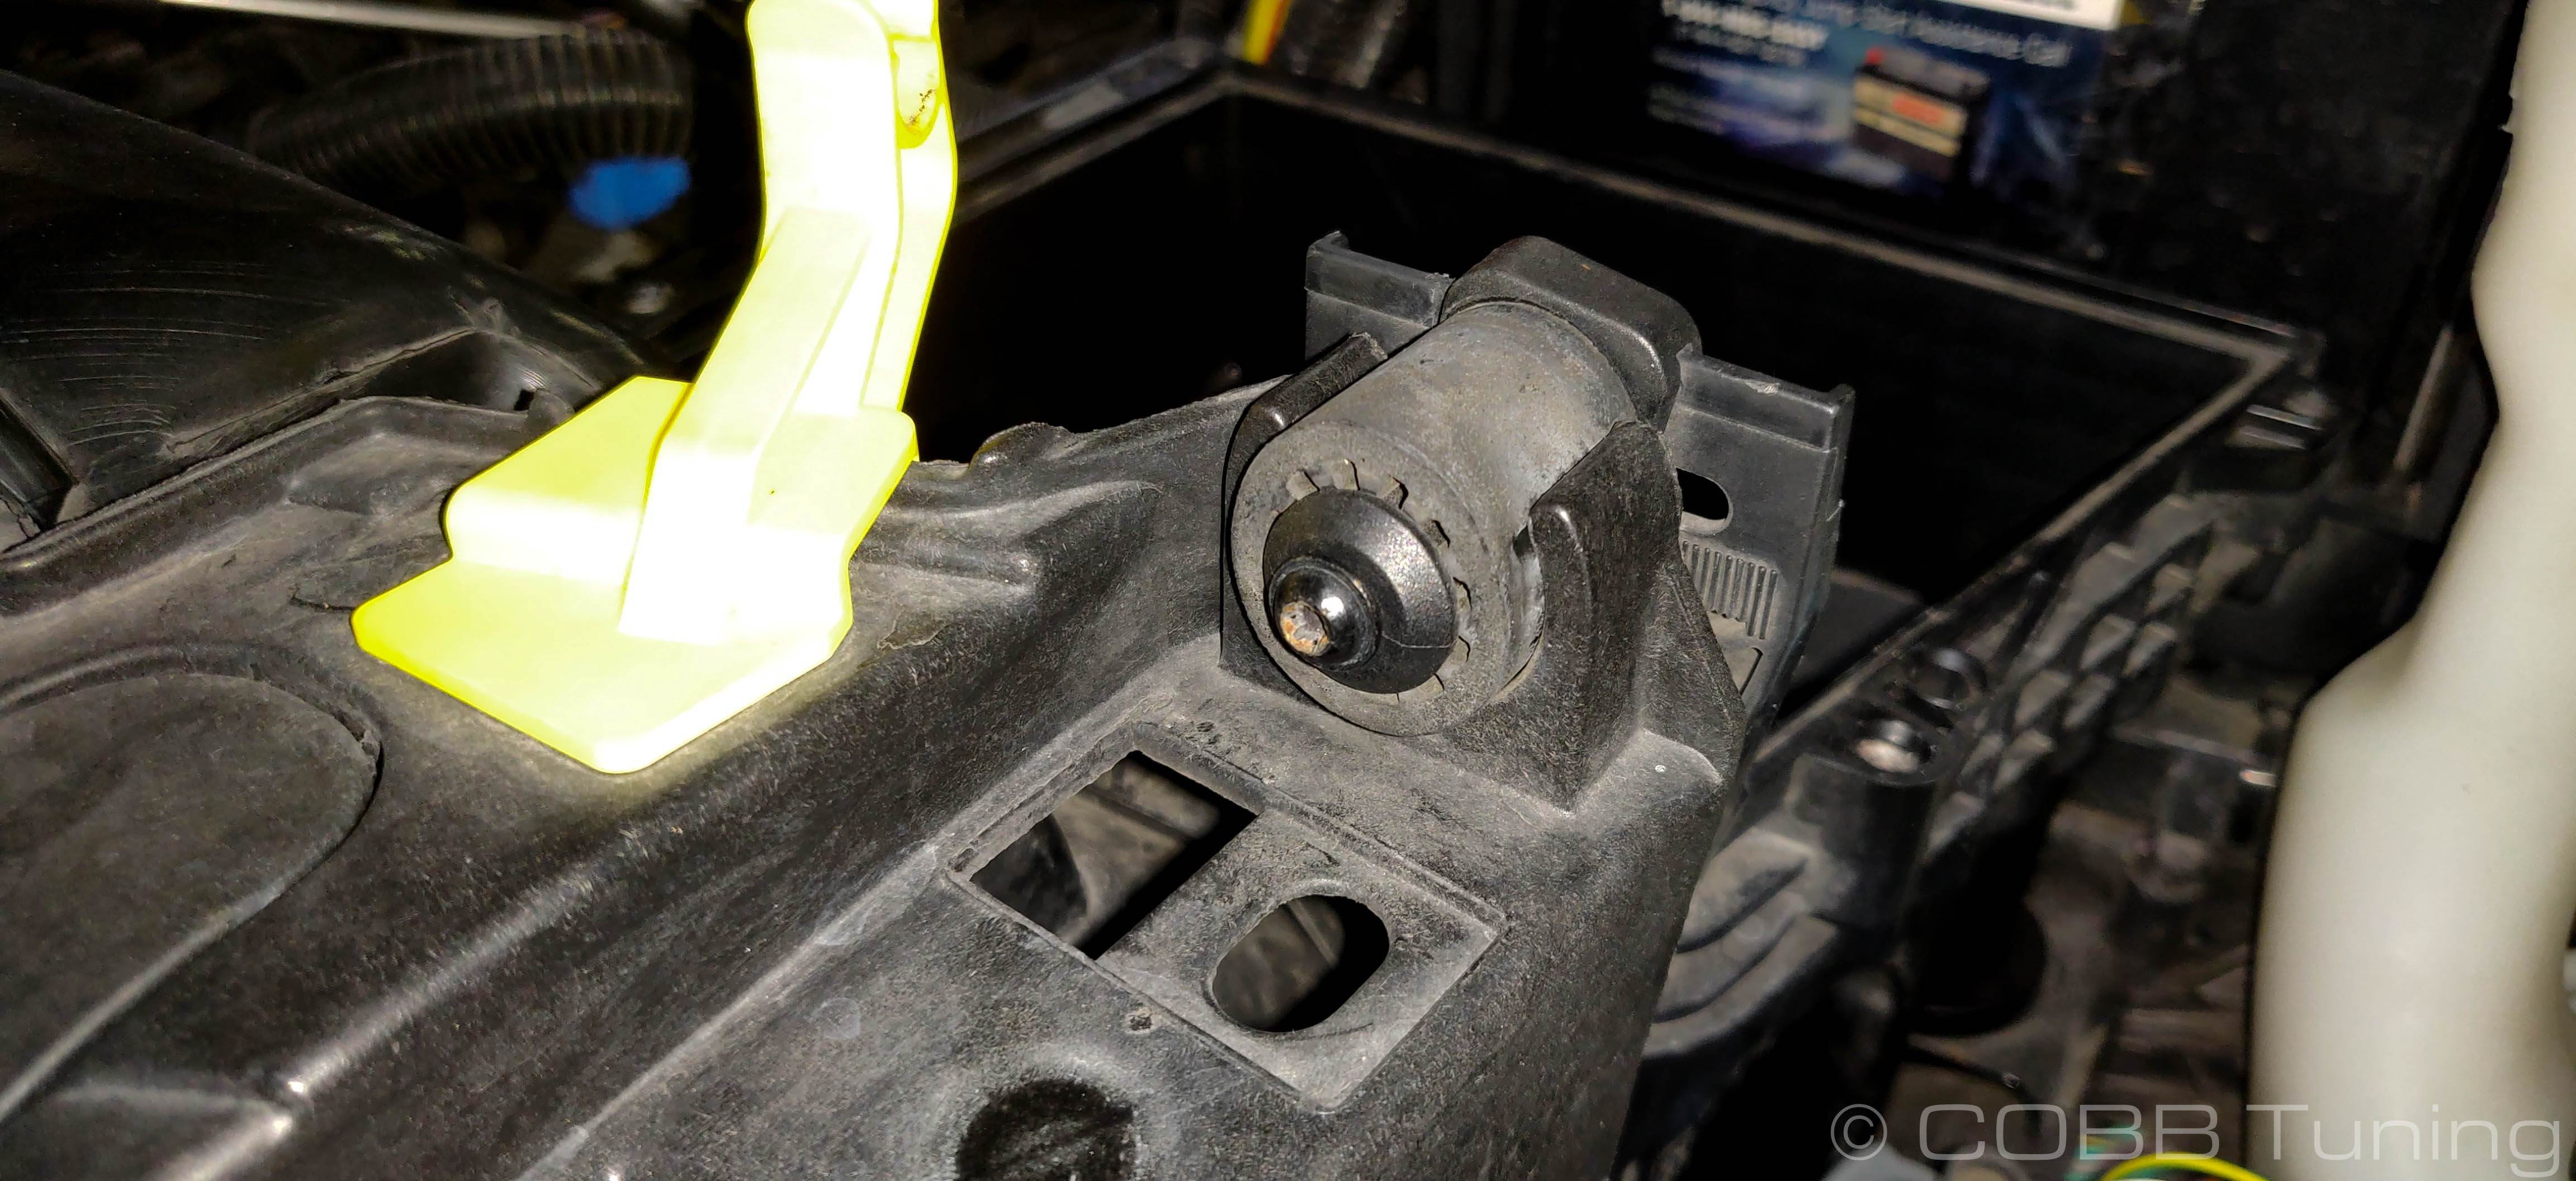
- Once the screw is removed some slight wiggling should free the unit. You may need to gently pull the two halves of the plastic apart where it attaches to the airbox (Not the curved parts gripping the rubber)
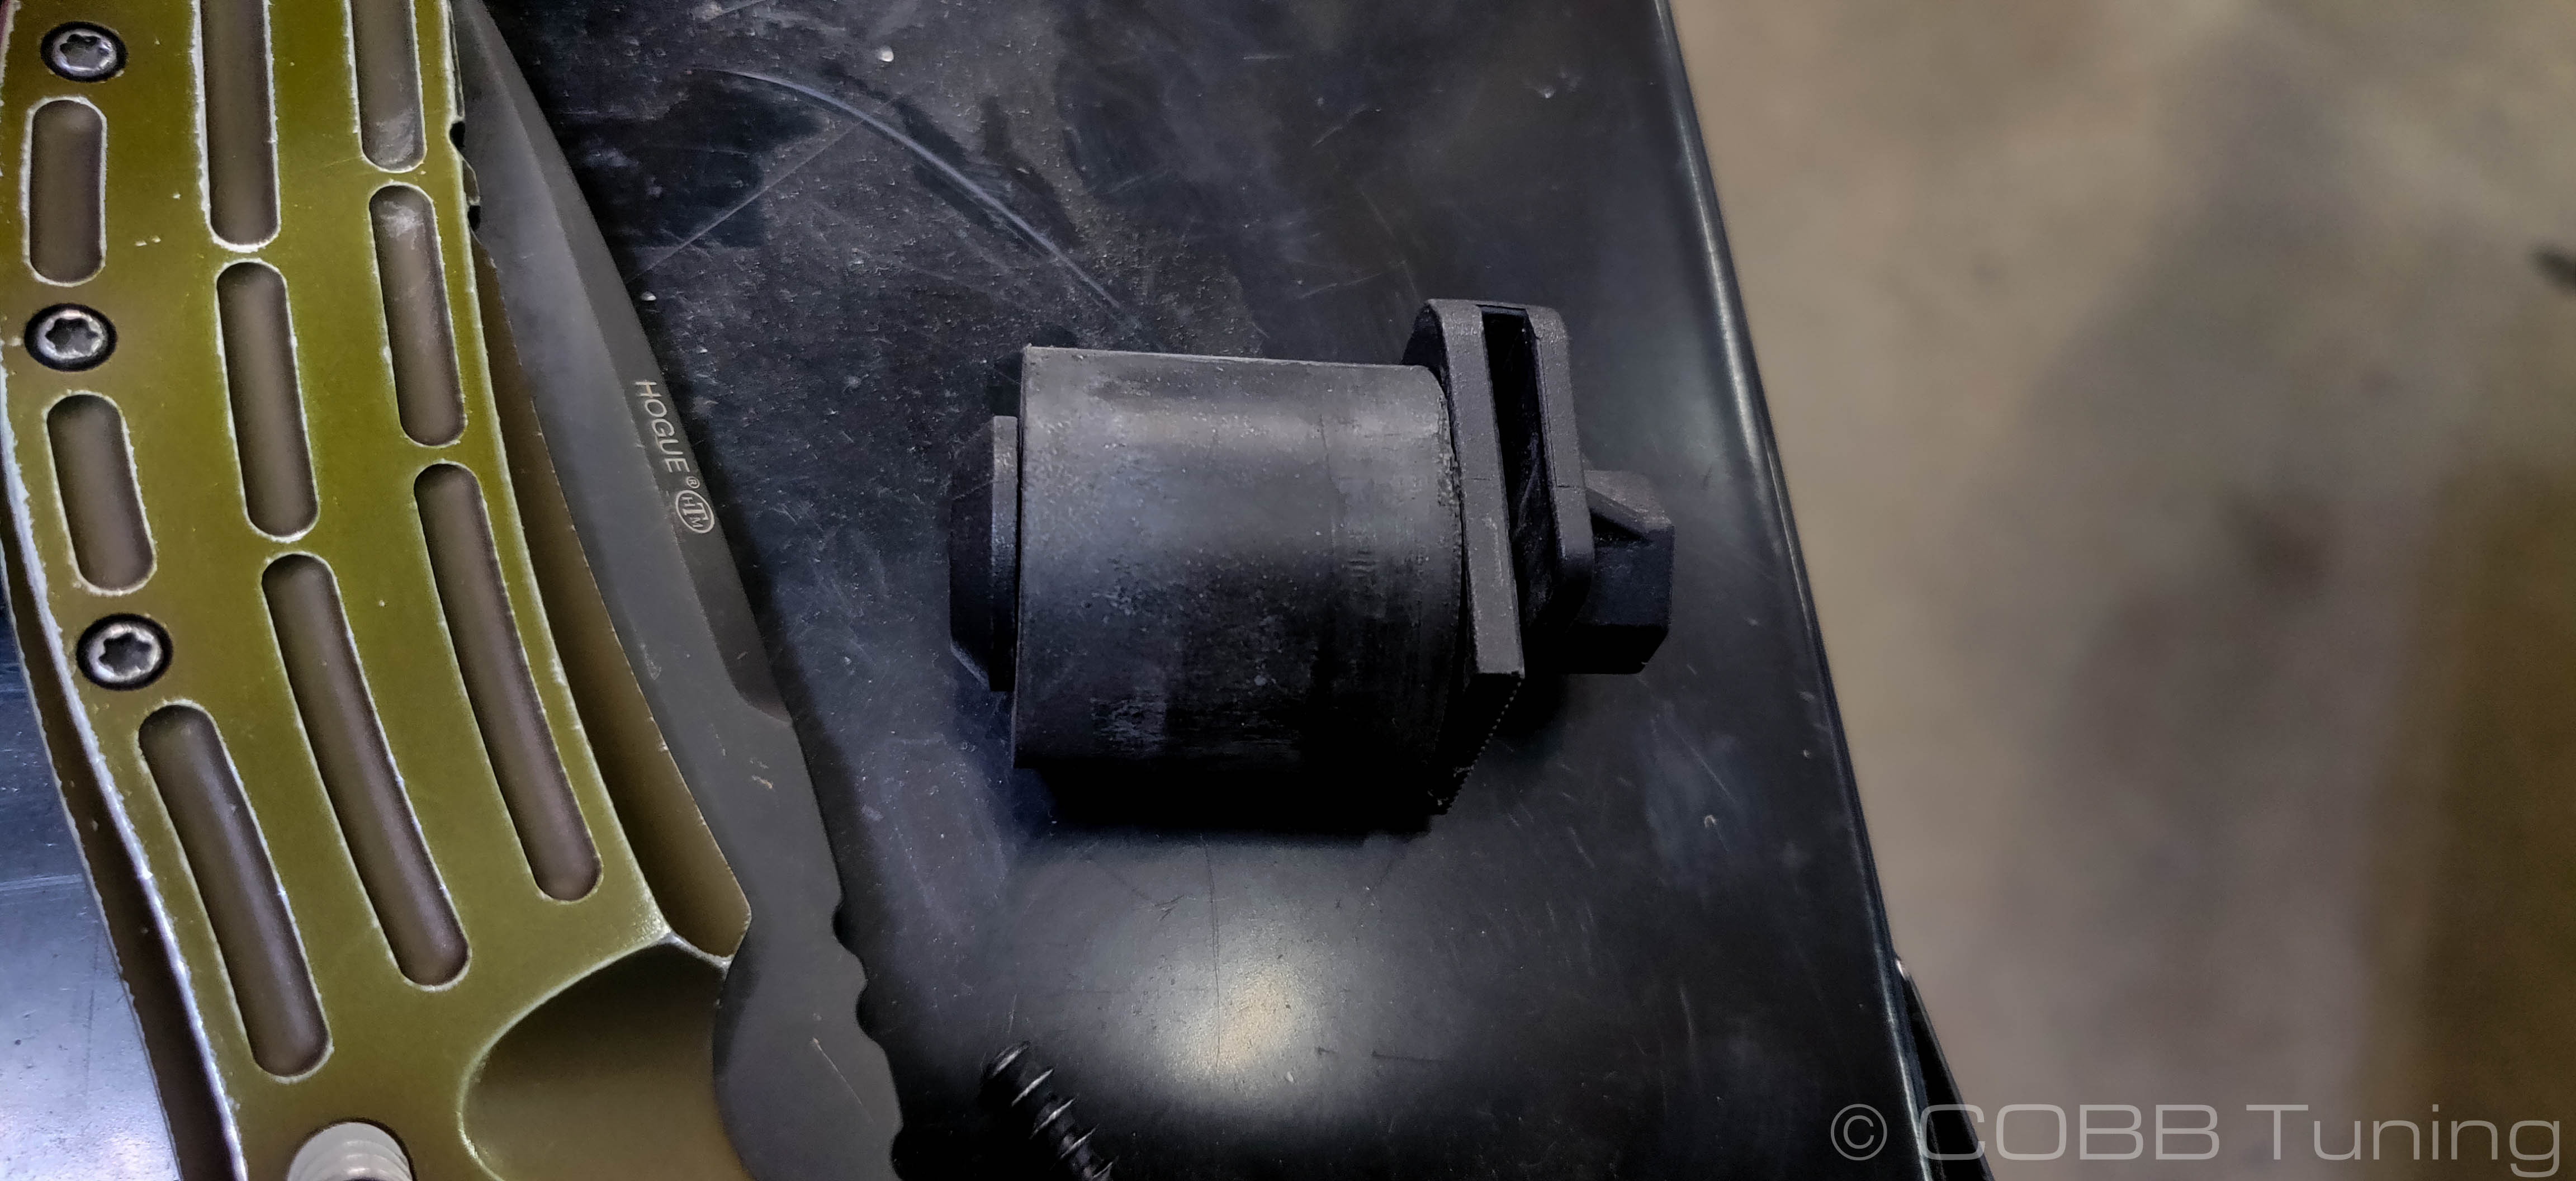
- Slide the supplied delrin lockout over the rubber bumper, and re-install.

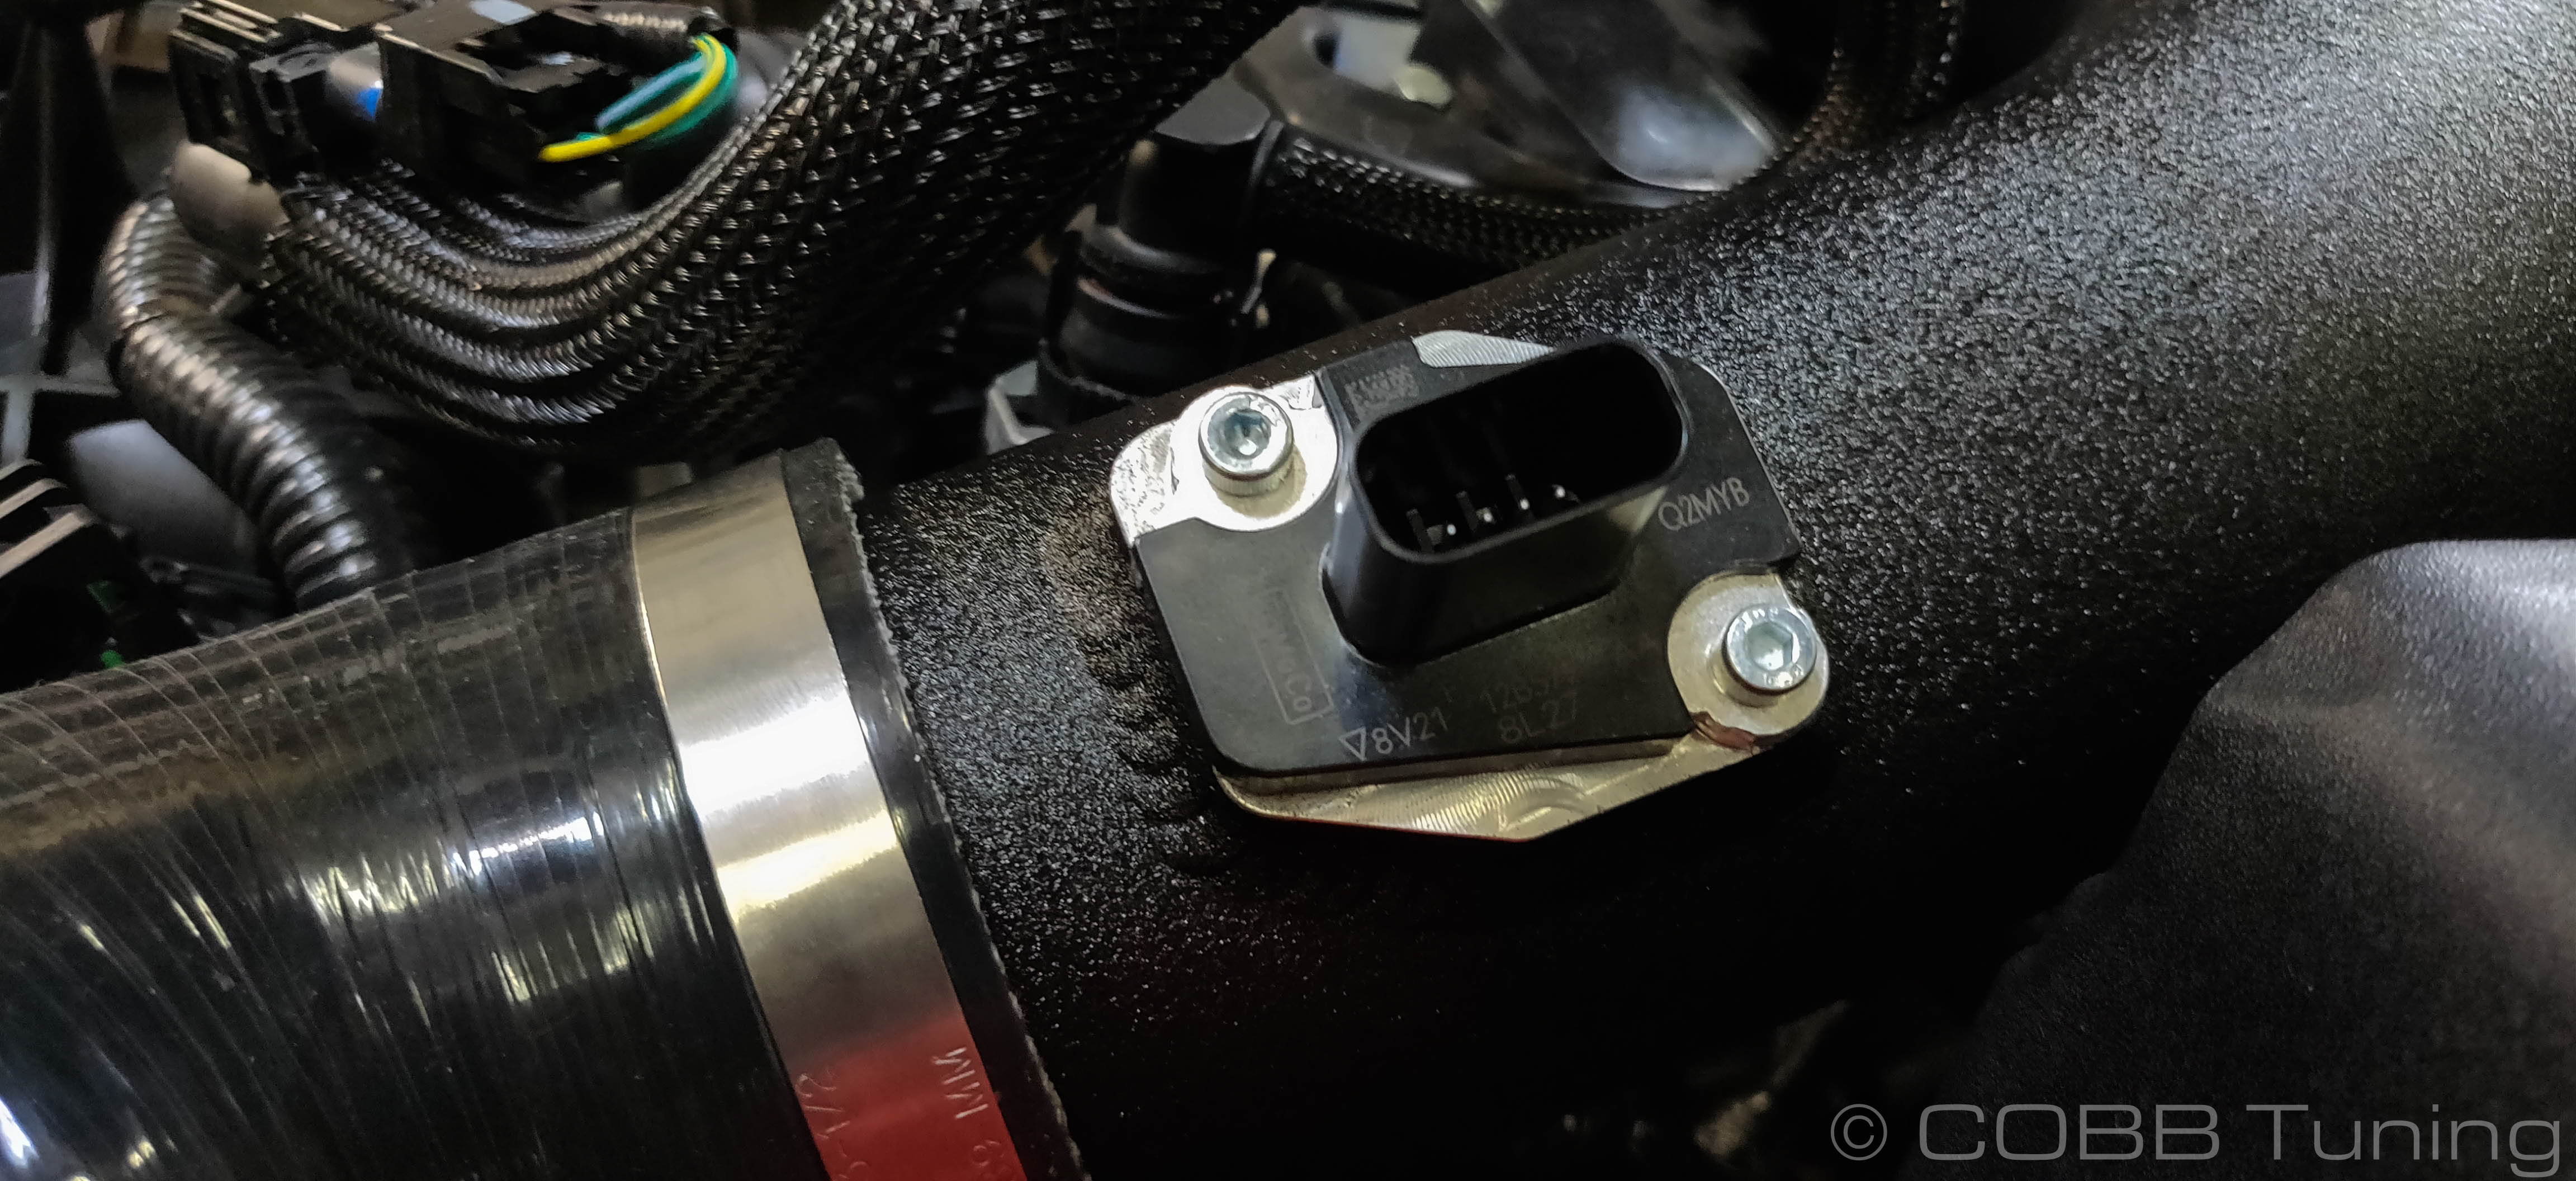
- The stock MAF sensor can go into the tube. Make sure to keep the same direction facing the air filter as it was previously. Use the supplied 4mmx8mm screws
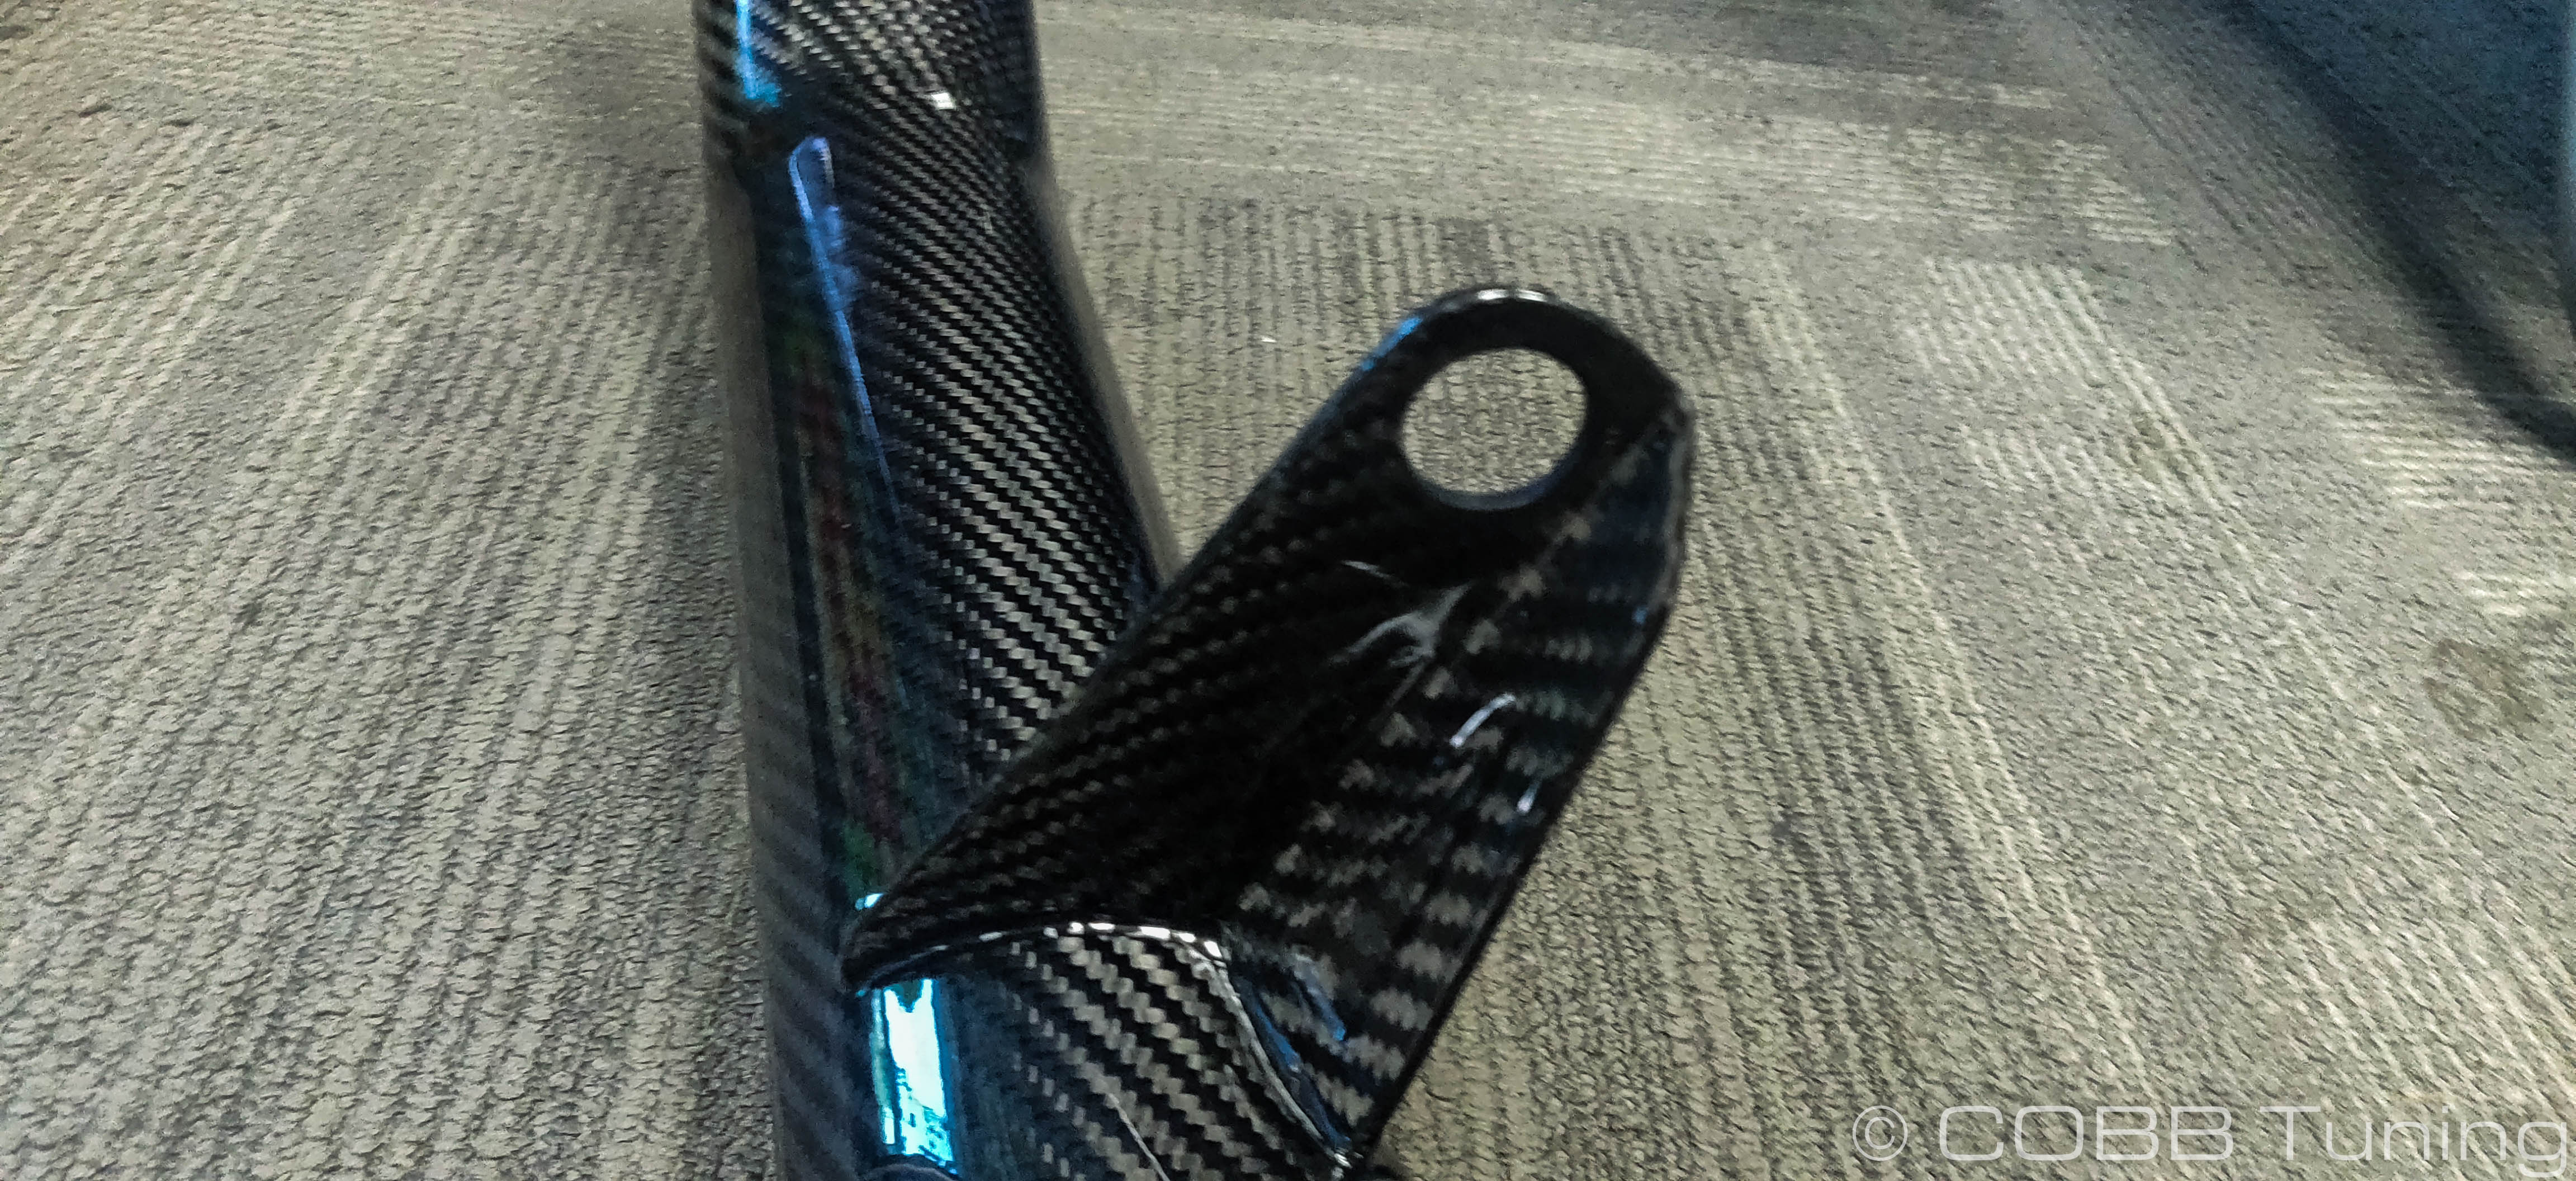
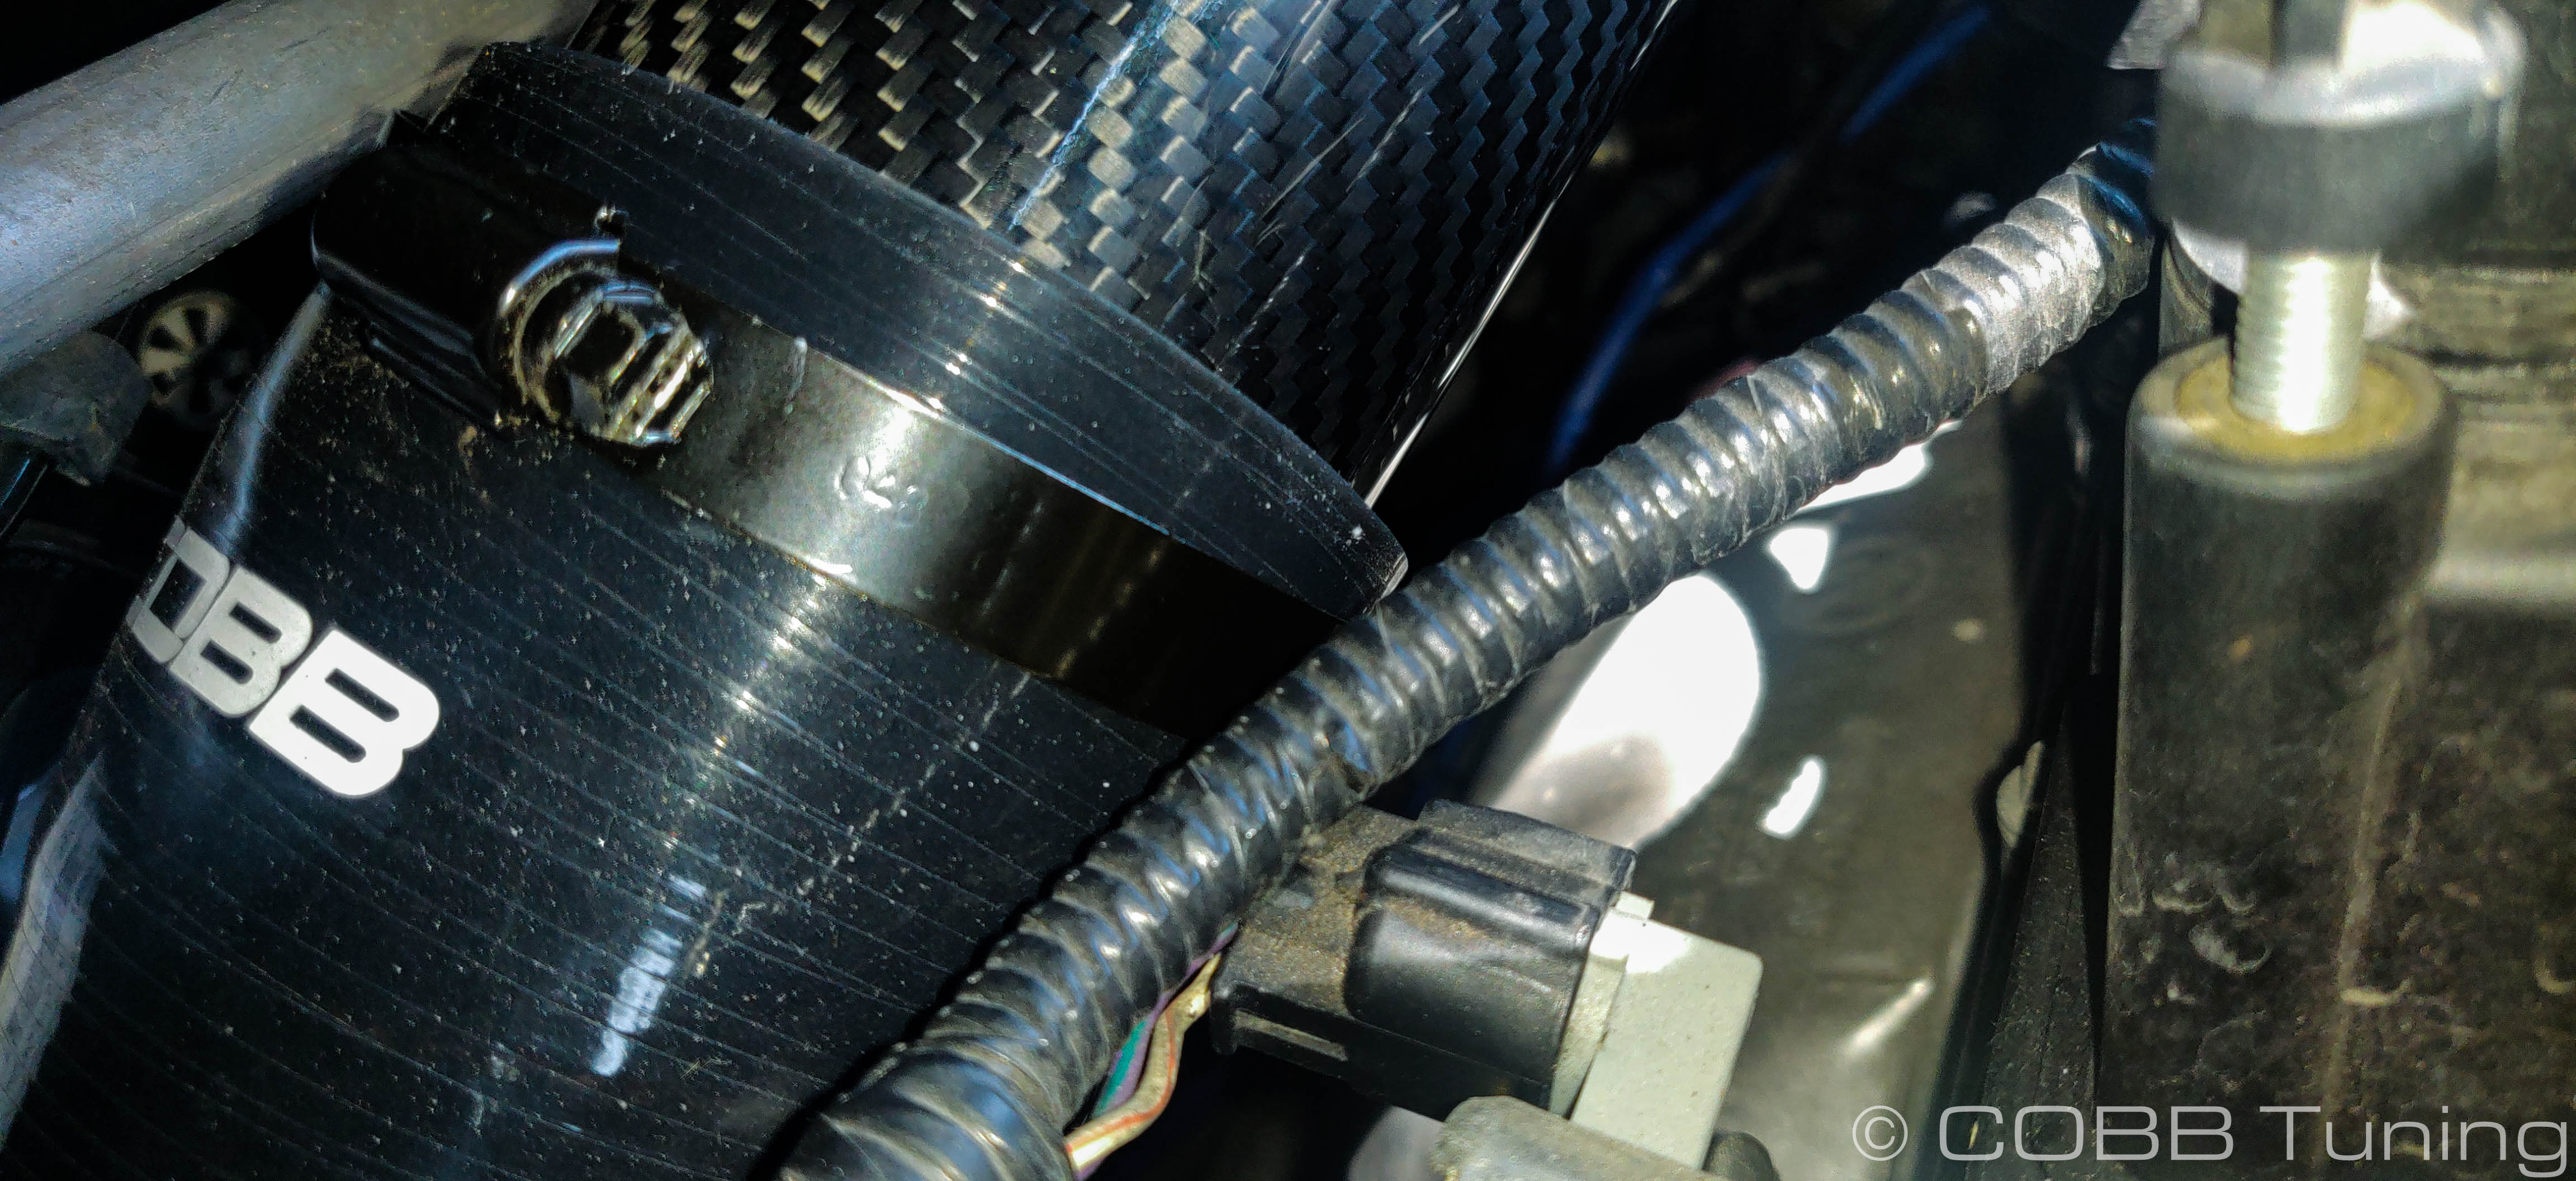
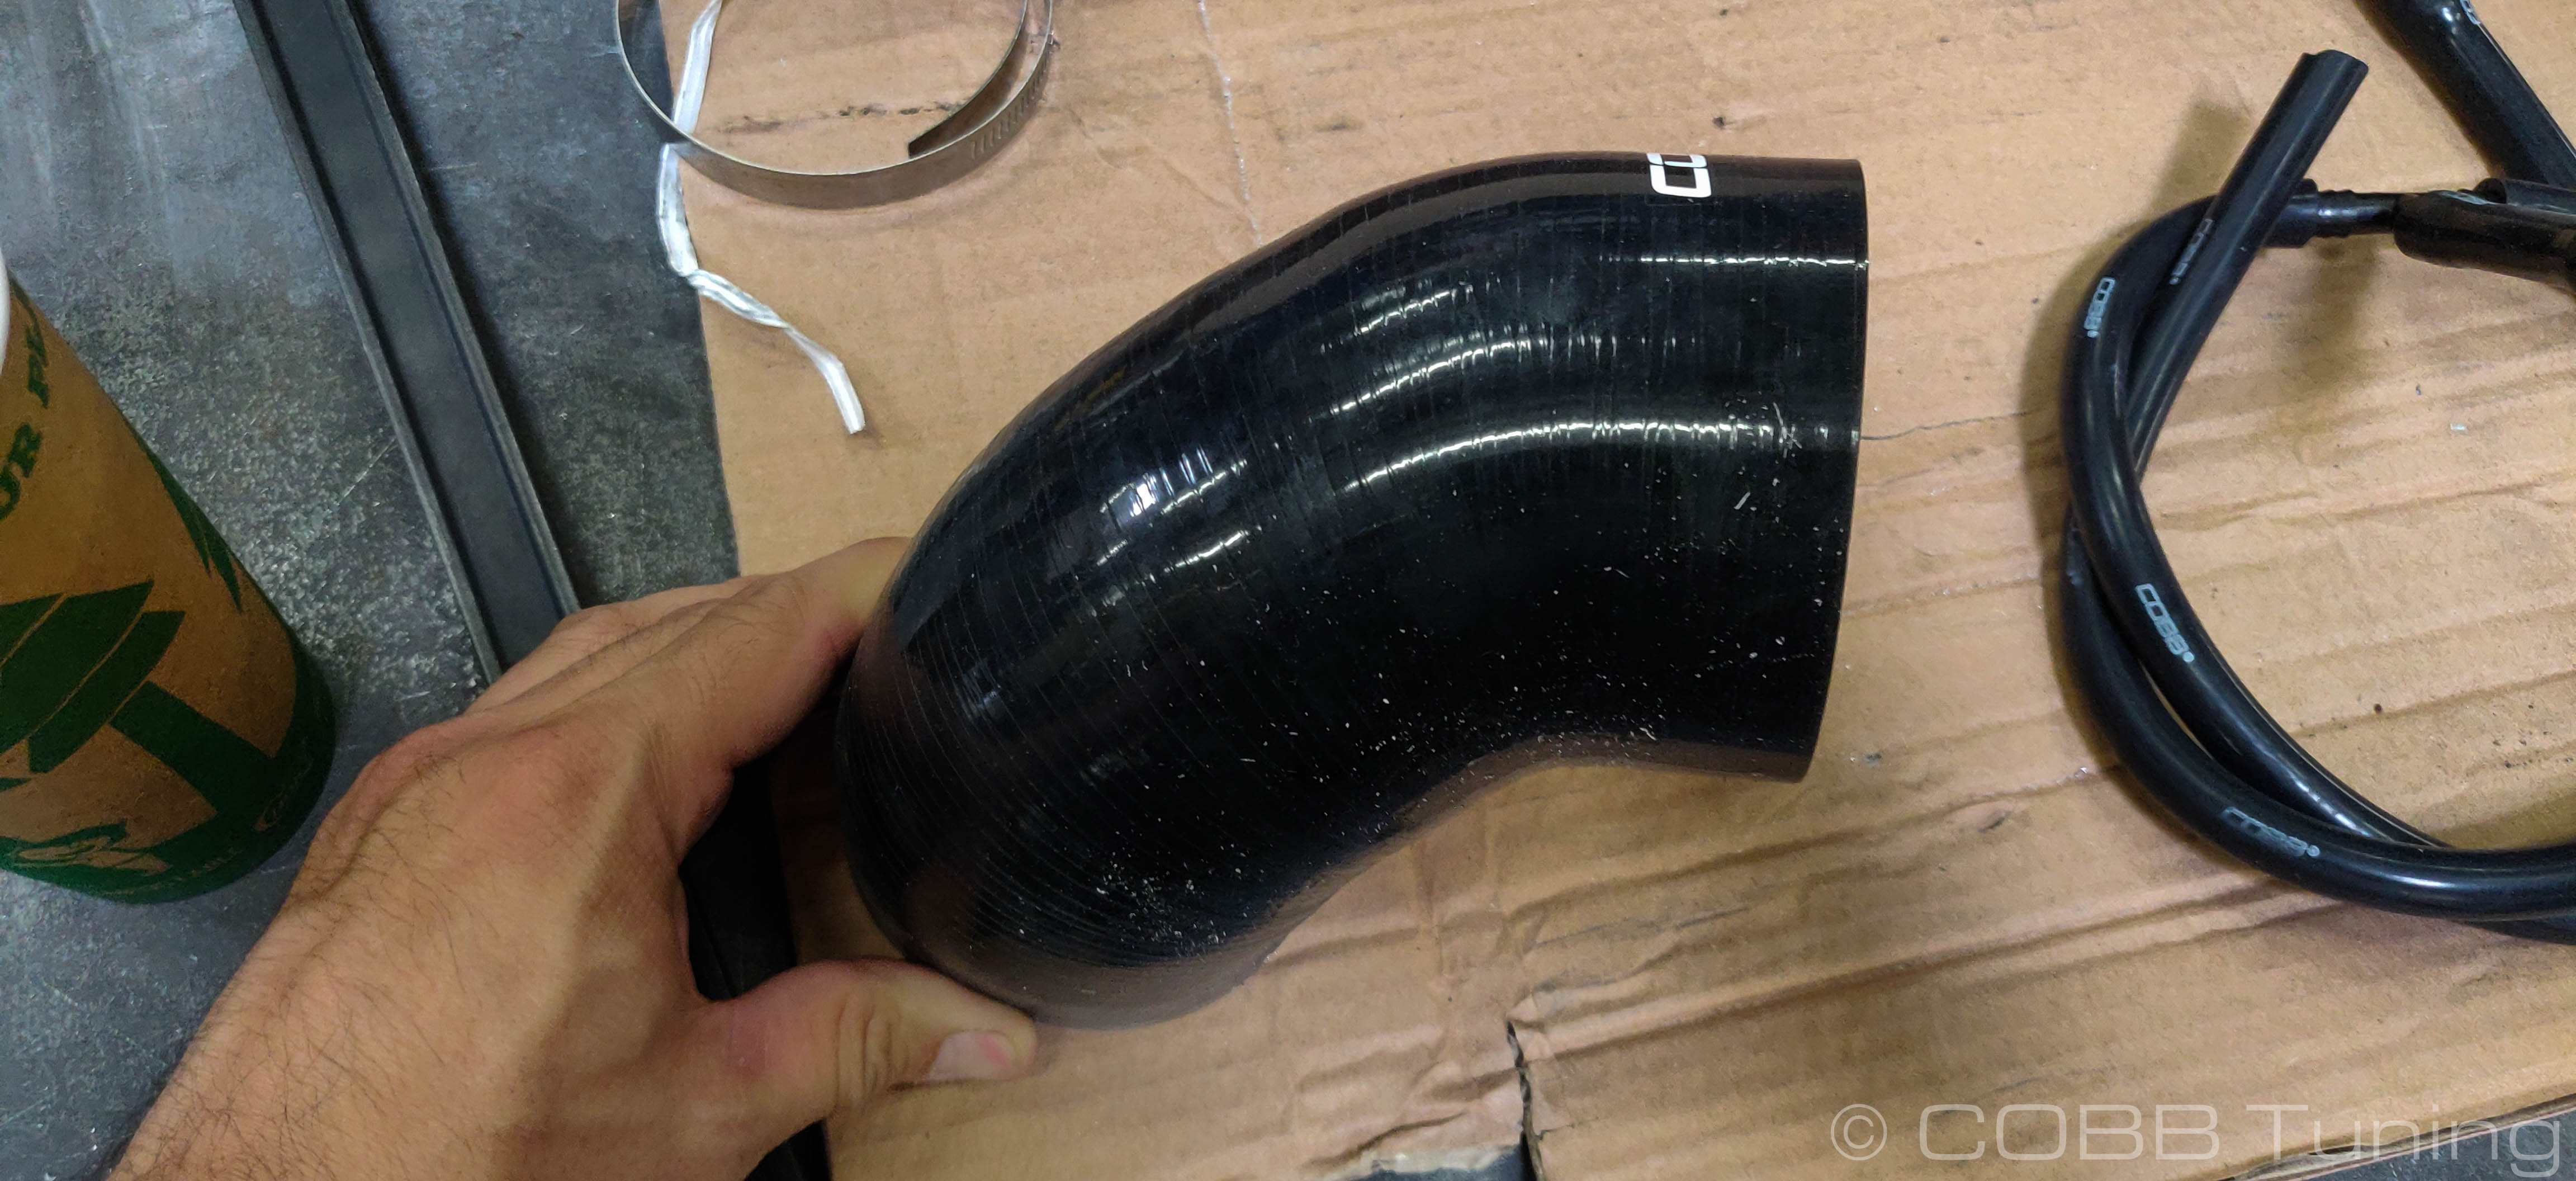
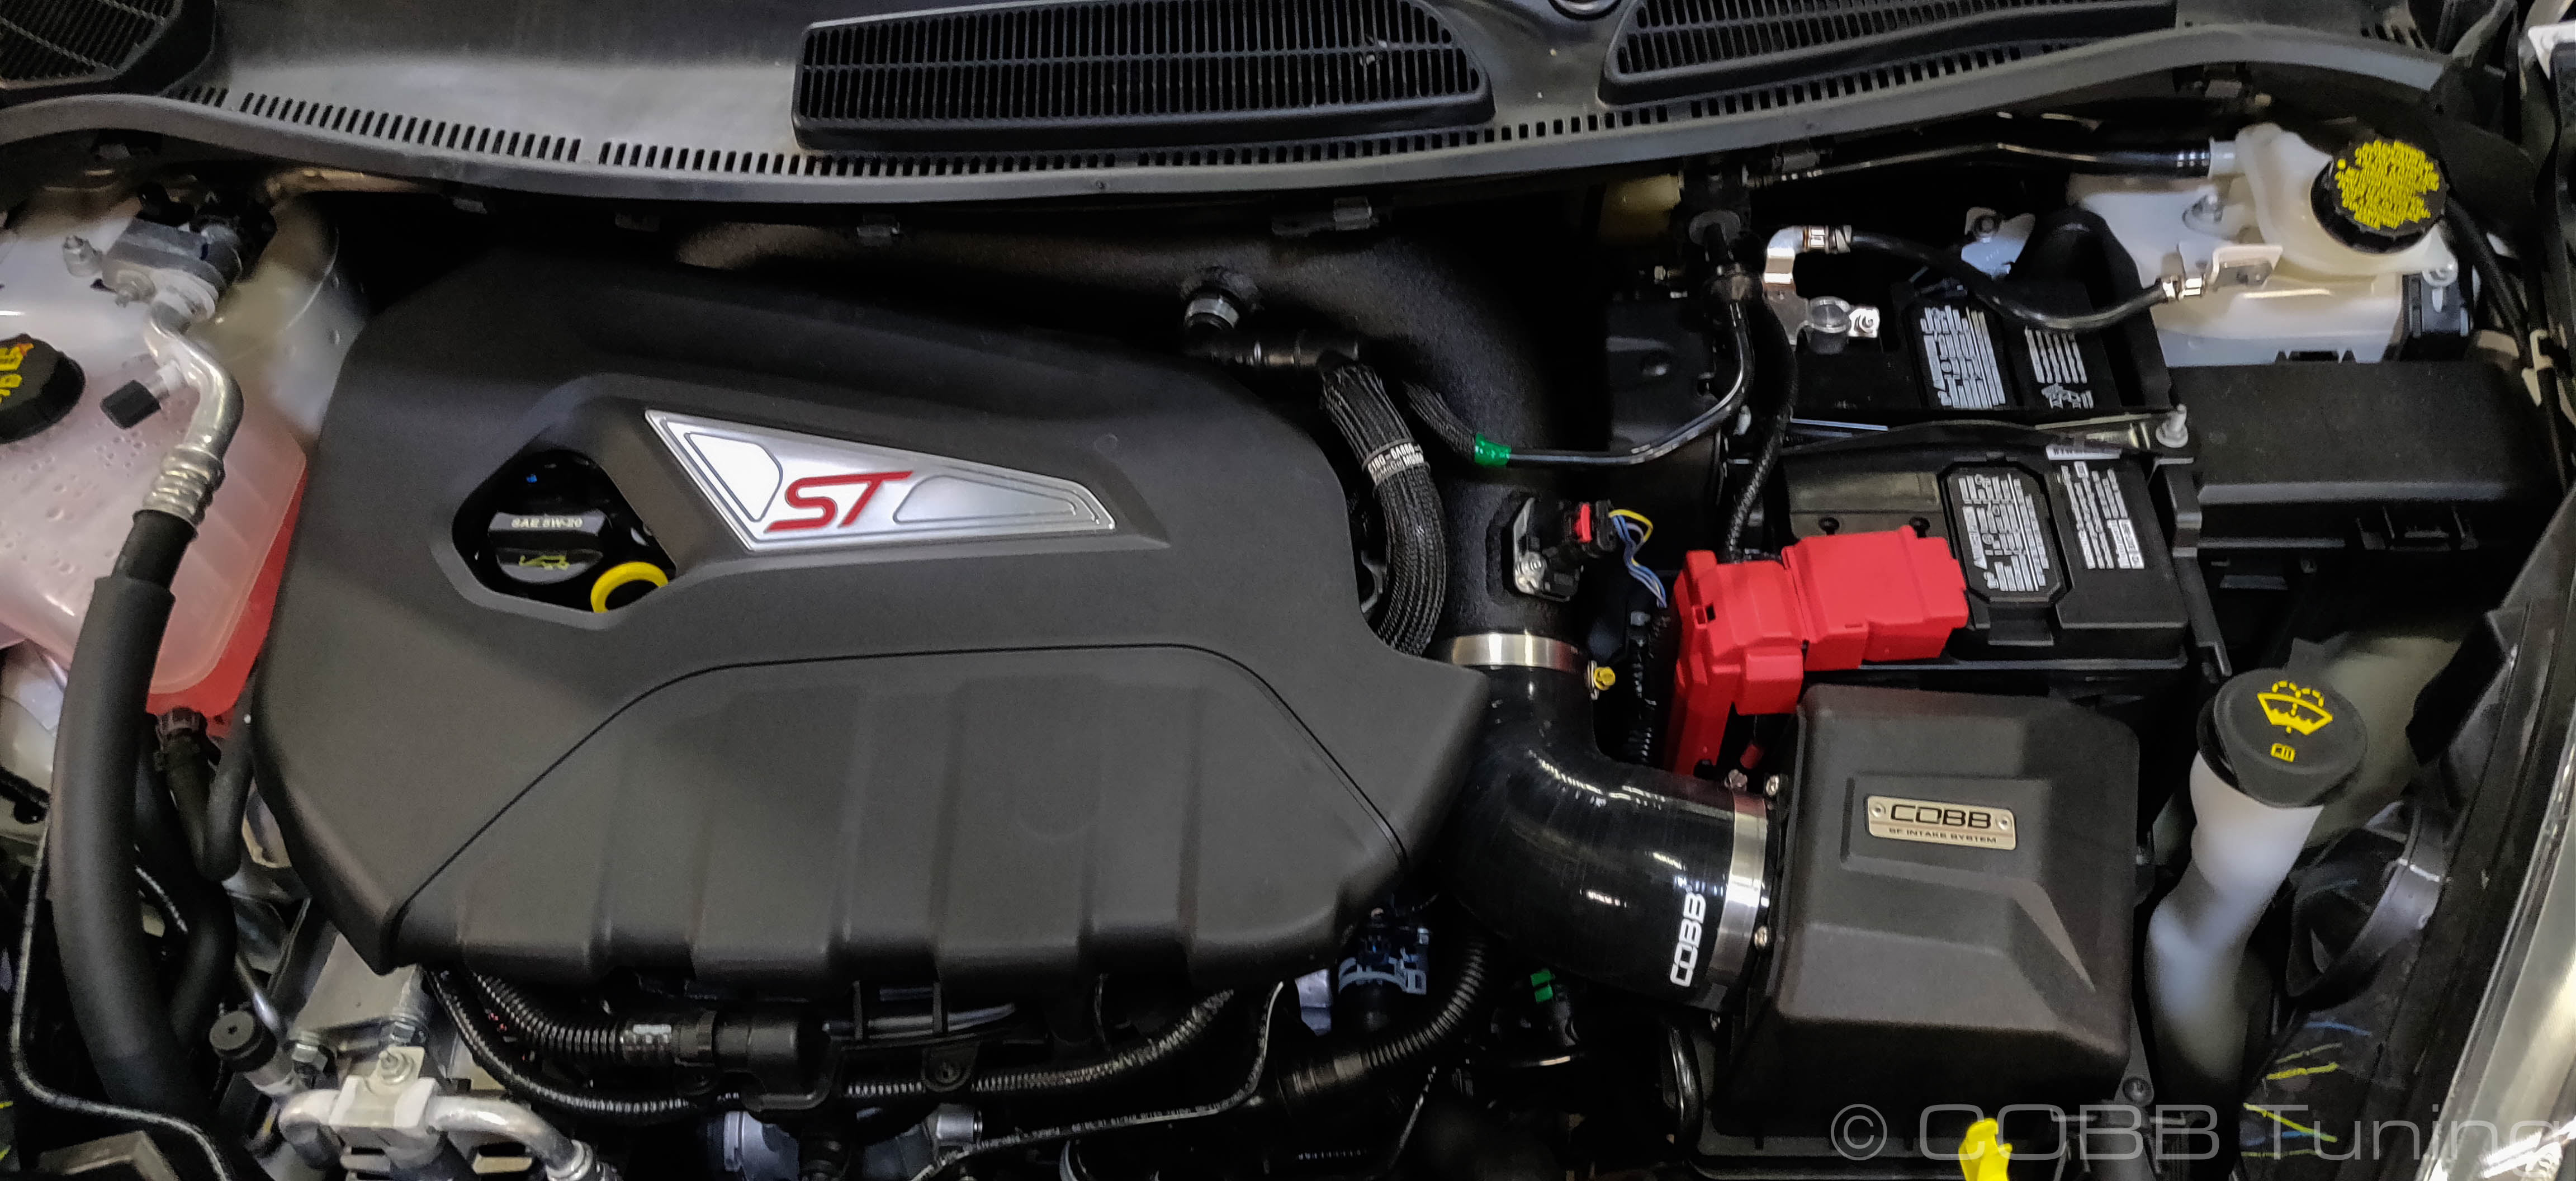
- Install the 90 degree offset coupler onto the pipe. Keep the raised portion (first picture) that has the cobb logo towards the airbox. You'll use a #52 clamp on the pipe side and a #52 clamp on the airbox side.
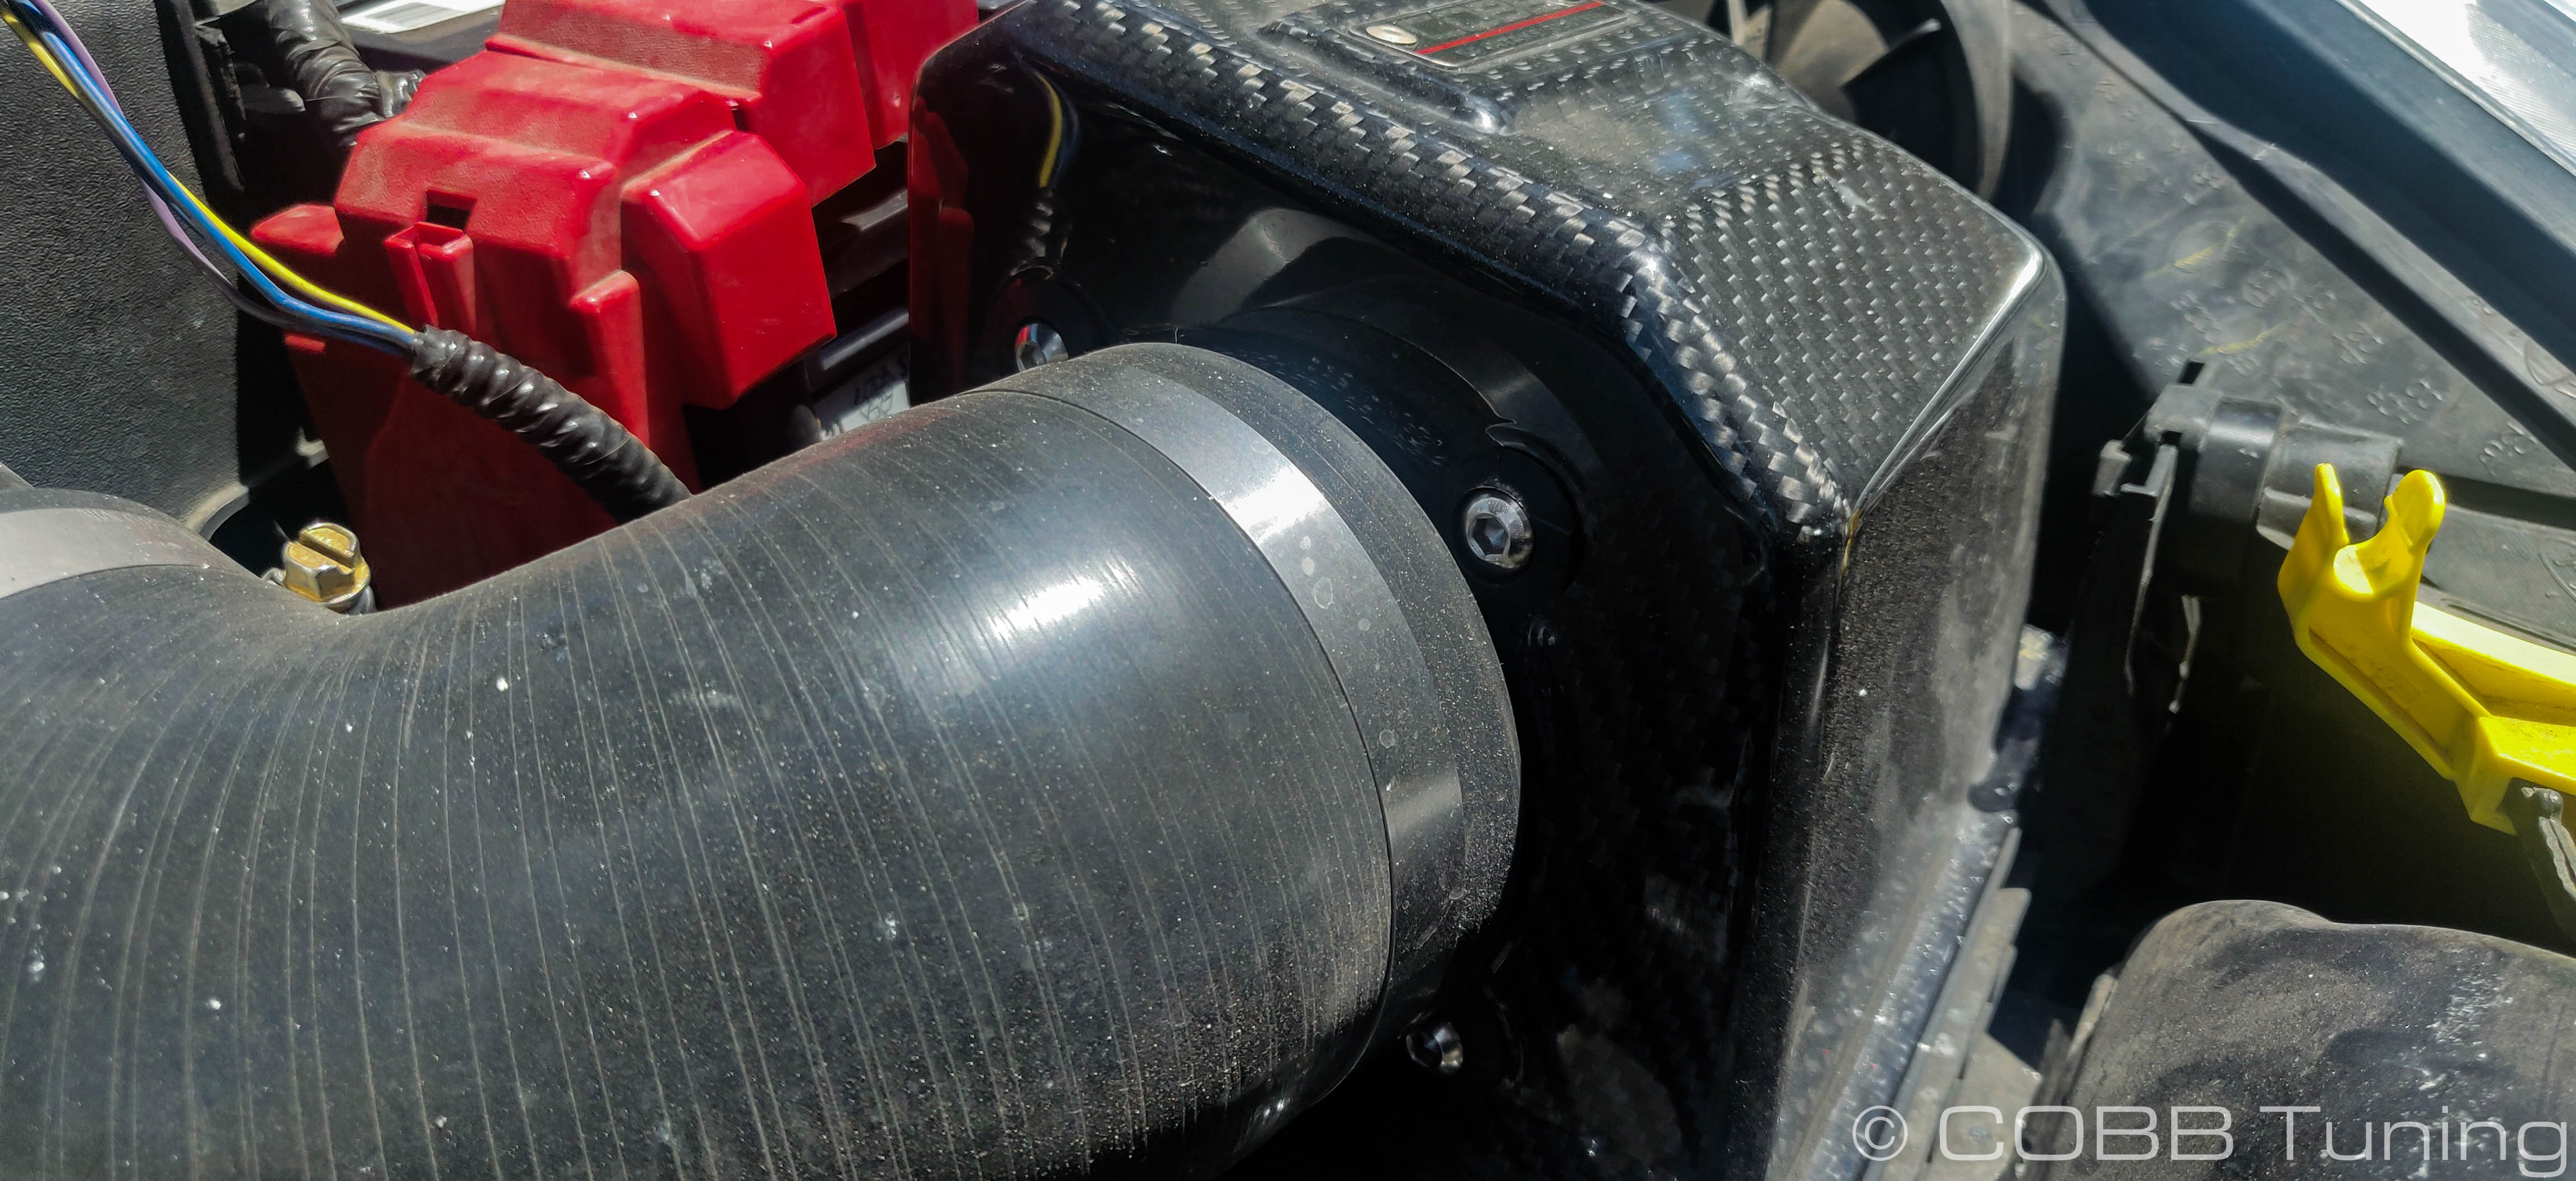
- Install the silicone coupler onto the airbox. Make sure to slide the clamps past the ridge found on both the tube and airbox.
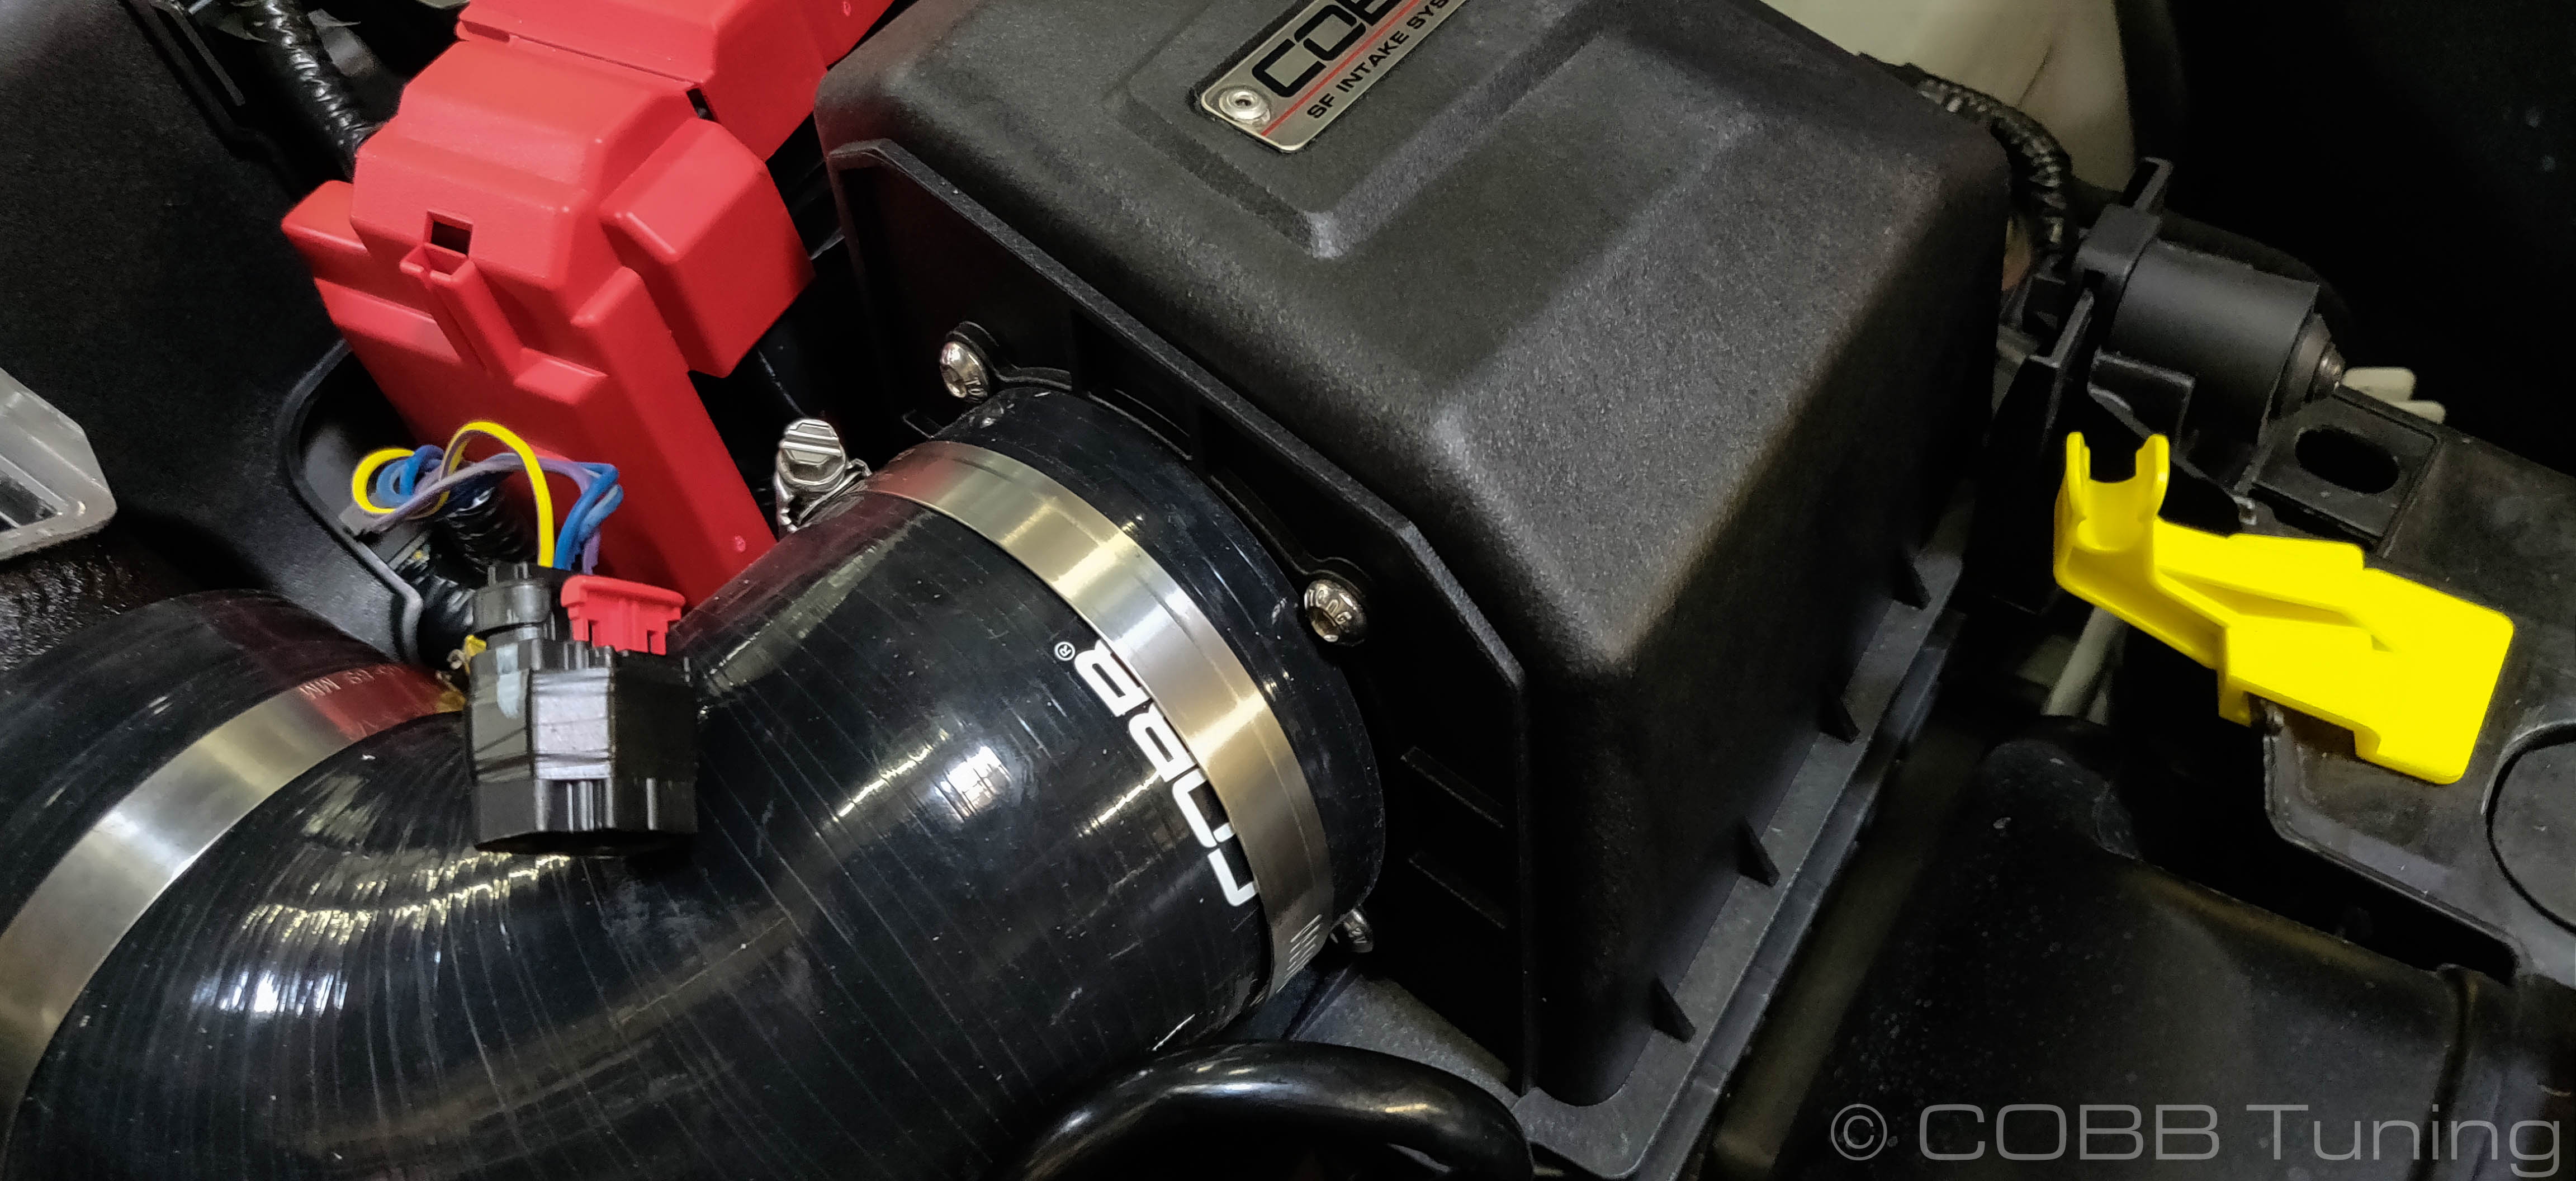
Once you're happy with the position of the tube, tighten down the hose clamps (8mm or screwdriver) followed by the bracket bolts that support the tube on the cylinder head. (12mm).
Make sure that your hose clamps are clocked so that they do not rub on anything. The ones on the coupler going to the turbo inlet in particular can be clocked in a fashion that they rub on other components of the engine bay causing damage.

- Plug the MAF harness back in. You may need to remove the tape found on the battery harness or holding the wiring to the sensor connector in order to reach the new location. make sure to push down on the red release tab to lock it in place.
- Reinstall the rest of the stock components in the reverse order of removal.
- You're all done! Go out and enjoy!
A quick note on closing the hood
We found newer cars were more fairly likely to have the hood prop be in the wrong orientation when you go to install. Make sure it's oriented so that the prop itself fits into the retainer built into the radiator shroud.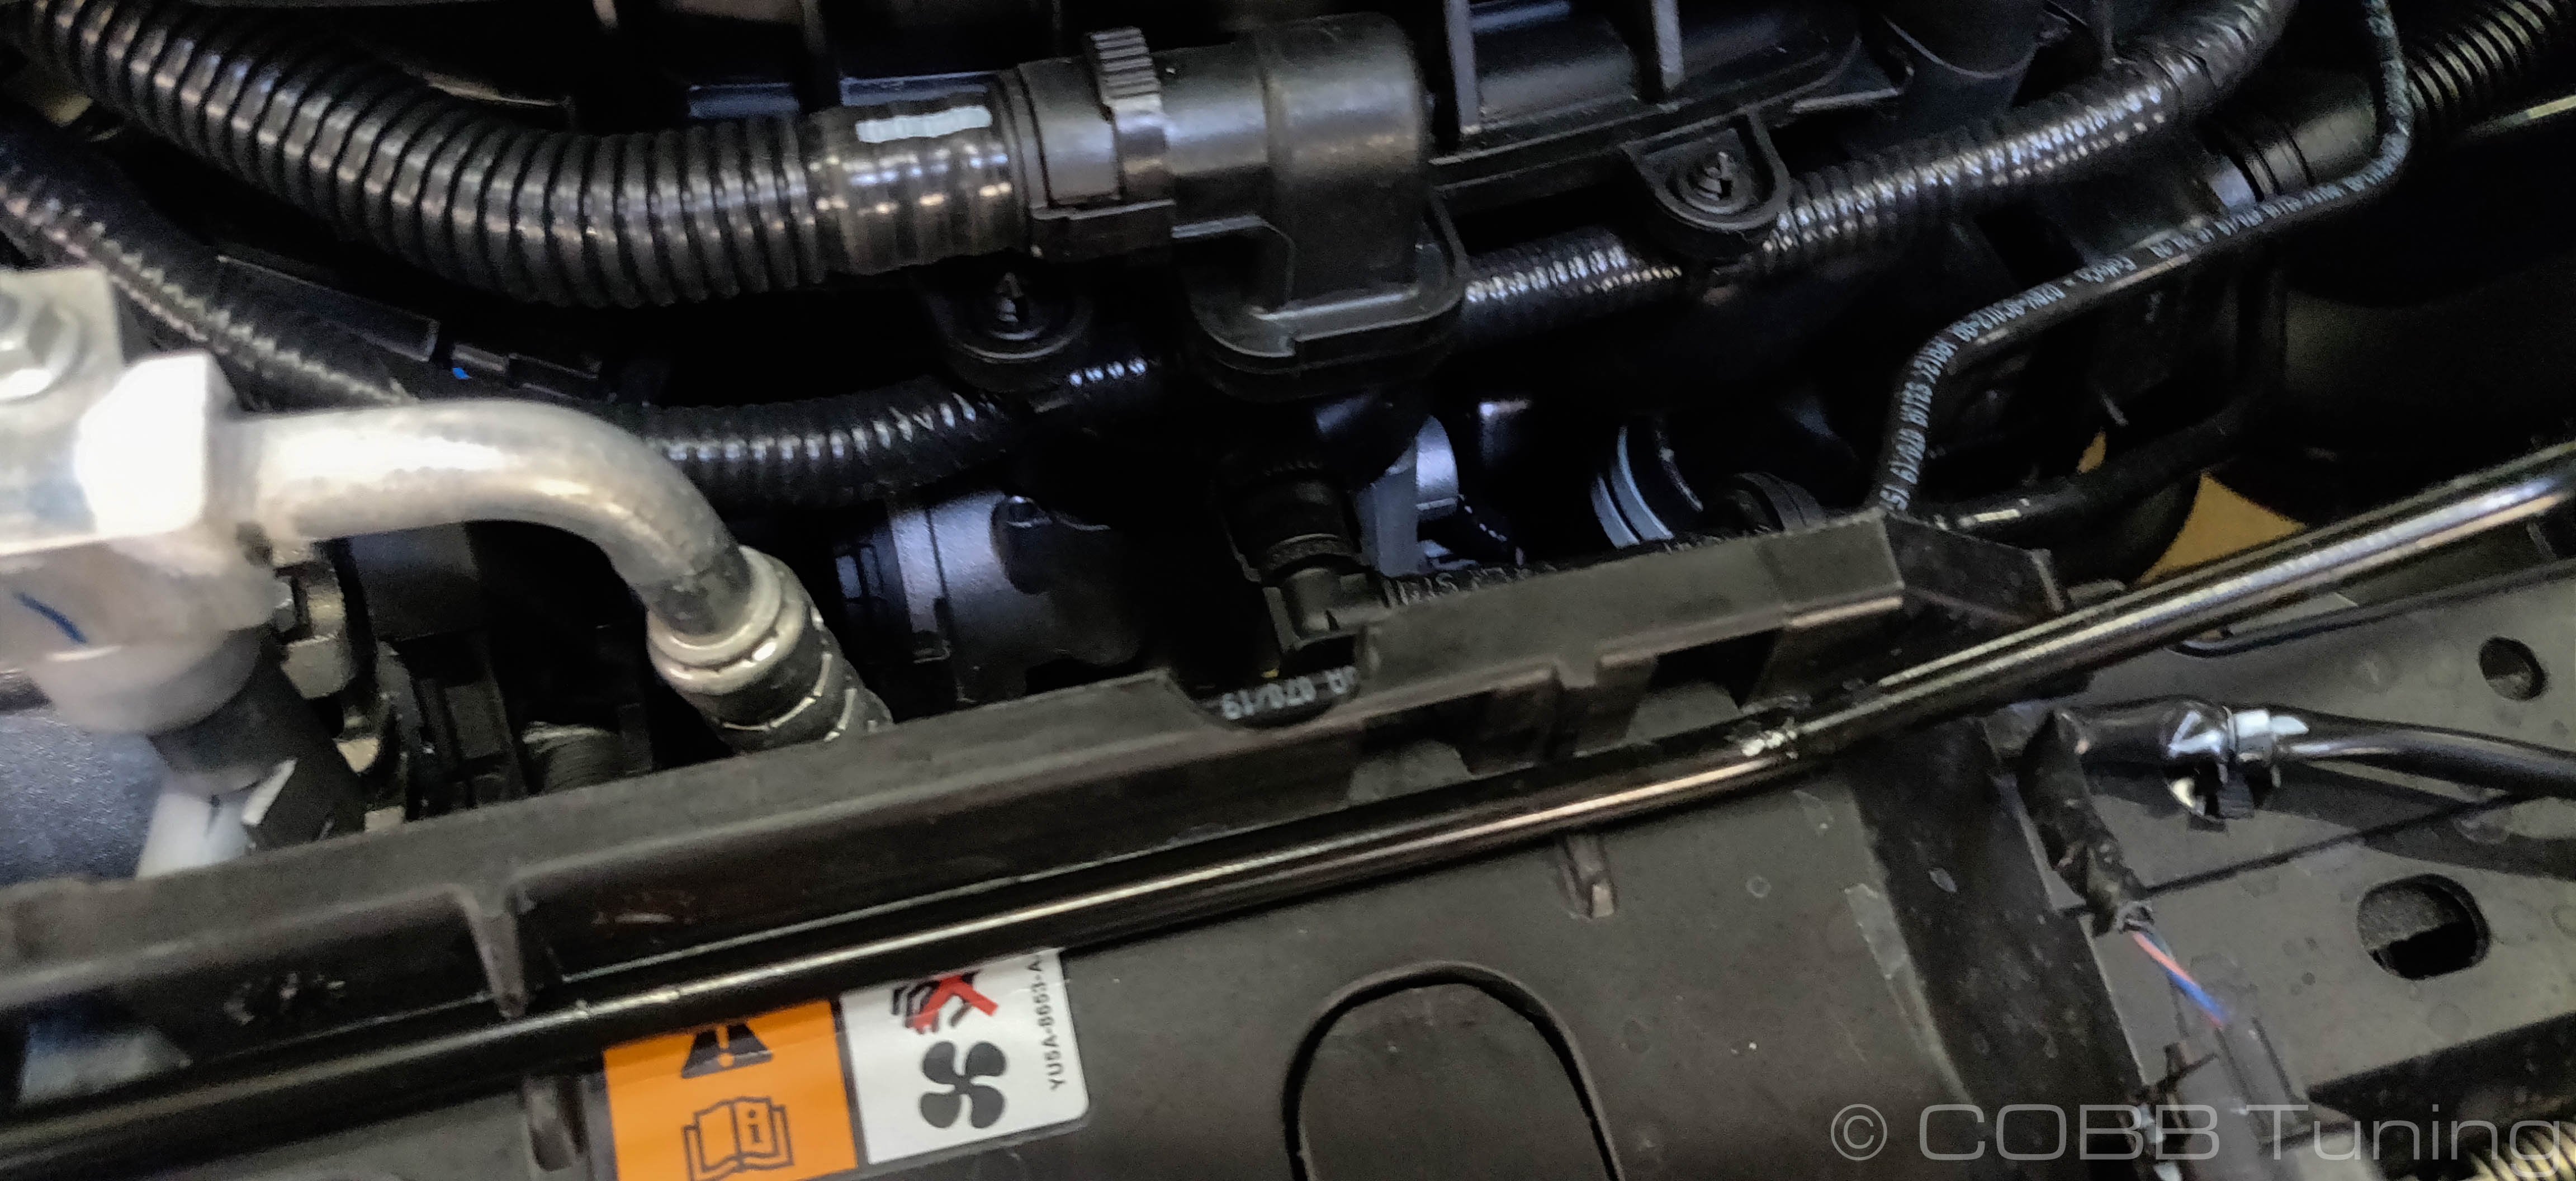
Links
COBB Product Install Instructions for Fiesta ST
Main Installation Instruction Repository for Fiesta Parts
Link to Fiesta Map Notes to see what map you should be on given the parts you've added
COBB Customer Support Web Support and Tech Articles: COBB Tuning Customer Support Center Email: support@cobbtuning.com Phone support available 9am to 6pm Monday-Thursday. 9am to 4pm Friday (CST) 866.922.3059 return to www.cobbtuning.comContact Us:
Related content
Copyright 2025 © COBB Tuning Products LLC. All Rights Reserved. | www.cobbtuning.com