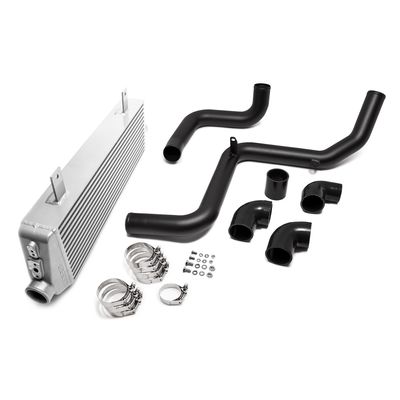
792500 - COBB Ford Focus Front Mount Intercooler
- Former user (Deleted)
- Brandyn Mowat

792500 - COBB Ford Front Mount Intercooler Version 2
2013 - 2018 Focus ST ADM/EDM/USDM
Congratulations on your purchase of the COBB Front Mount Intercooler Kit for your Ford Focus ST. The following instructions will assist you through your installation process. Please read them first BEFORE beginning the install and familiarize yourself with the steps and tools needed. If you feel that you cannot properly perform this installation, we HIGHLY recommend you take the vehicle to a qualified and experienced automotive technician
Tools Needed
Corded Drill or Cordless and Spare Batteries
High Quality Cutting Fluid (Not WD-40!)
Small Flathead Screwdriver
Permanent Marker
Ratchet
Sockets: 7mm, 8mm, 10mm, 13mm, 19mm
Wrenches: 7mm, 8mm, 10mm, 13mm
Several Socket Extensions of Various Lengths
T-30 Torx Bit
Metric Allen Wrenches: 4mm
Initial Prep
The COBB Focus ST Front Mount Intercooler comes with a stencil if you want to have the cobb logo added on to the front mount. If you want to add it on, doing so before starting will help the paint to be dry by the time you get there (or shortly after). Make sure to use a good quality spray paint and tape off any areas not covered by the stencil that you don't want any paint to get on. If you'd like the logo to be visible out of the bumper make sure to paint the lower portion of the intercooler.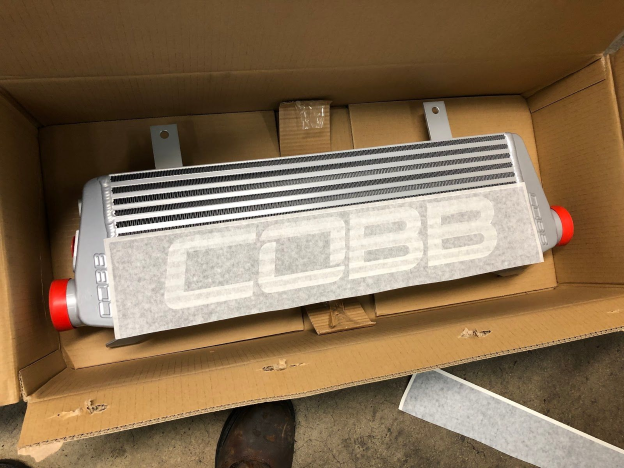
Removal of Factory Intercooler
- Start off by getting the vehicle up on a lift or placing jack stands under the front of the vehicle to get it up in the air and give you some room to work. Make sure the emergency brake is set firmly and you’ve blocked the rear wheels if you’re using jack stands.
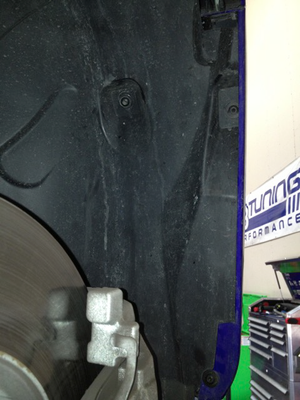
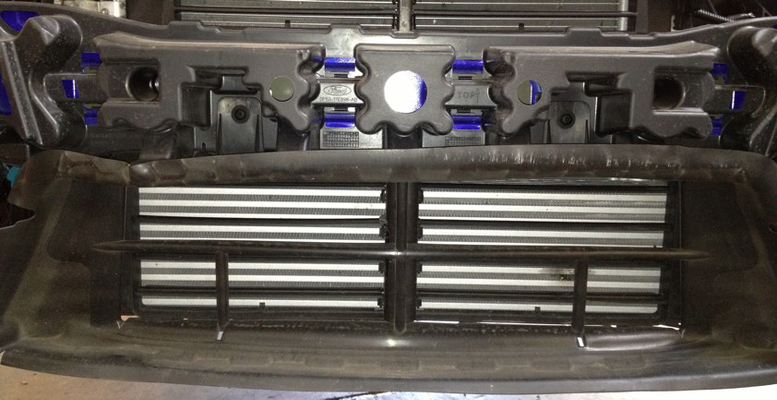
- Using a T-30 Torx bit, remove the undertray by removing the screws (shown below) that hold it in place. You’ll need to first remove the small lip section (top of picture, below) followed by the rest of the undertray.
- Using a 19mm 6-point socket, remove both front wheels and set them aside.
- Using the flathead screwdriver, remove the three (3) plastic fasteners in the driver’s side front fender liner. Then, use the T30 Torx bit to remove the seven (7) Torx fasteners. Remove the fender liner.
- Move over to the passenger fender liner and remove the three (3) Torx fasteners found on the forward lip/area of the liner. Pull it back a bit from the bumper so you have more room to work later on when removing the bumper.
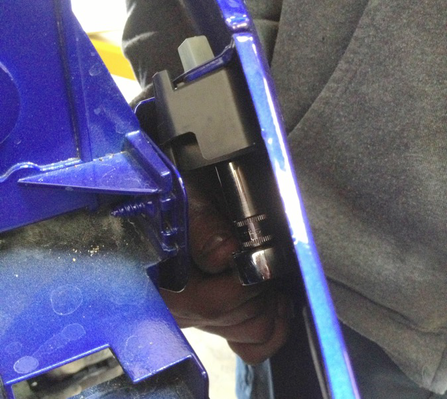
- Using the Torx bit, remove the two fasteners that secure the headlights in place. Use the flathead screwdriver (shown below) to remove the headlight connector.
- Now it is time to remove the front bumper. Up top, above the grill, you’ll find four (4) plastic connectors as well as two (2) silver Torx fasteners. Remove them with the flathead screwdriver and Torx bit. Also use the flathead to carefully remove the hood release latch from the bumper.
- On the driver’s side, you’ll find that where the lip of the bumper meets the front quarter panel, there are two 10mm fasteners that secure the lip into the quarter panel. You’ll want to use a 10mm deep socket and ratchet to loosen but not remove these fasteners. Once loose enough, the lip of the bumper should pop out of the plastic clamp. Do the same on the passenger side. If you push the fender liner out of the way you should have some pretty decent accessibility.
- On the driver’s side, unplug the fog light harness.
- With everything loose, you’ll now need to pop loose the two clips holding the bumper cover to the bumper beam. Once loose, carefully remove the bumper and set aside in a safe place.
- Pull on the upper rubber shroud to remove it. Set it aside.
- There are four (4) clips that secure the plastic cover on the bumper beam. Pull outward on the plastic and it should pop free. Set it aside.
- Use the Torx bit to remove the two fasteners that secure the lower shroud in place. Remove the lower shroud and set it aside.
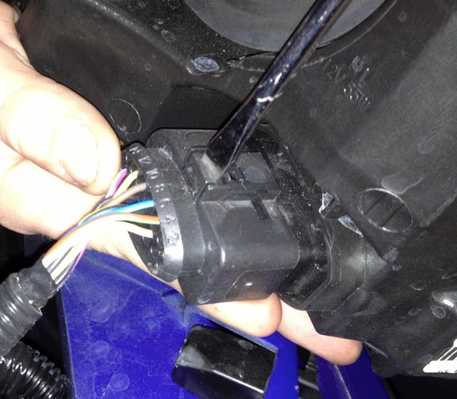
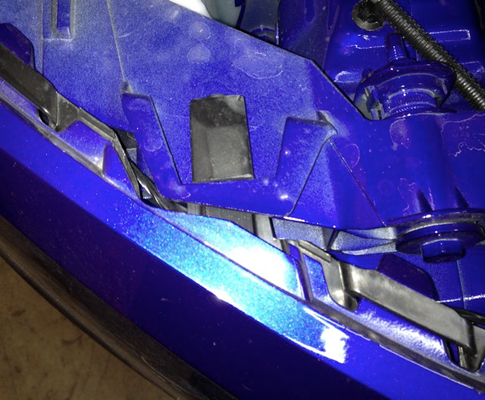
- Disconnect the active grill shutter system on the driver’s side. Plug shown below.
- Using a 10mm wrench or socket, remove the fastener holding the front of the lower charge pipe in place.
- Using a 13mm wrench or socket, remove the fastener holding the rear of the lower charge pipe in place.
- Using a 7mm wrench or socket, loosen the clamps on either end of the lower charge pipe enough so that it can be removed. Do the same for the other charge pipe as well. Set the pipes and clamps aside. Make sure to remove all silicone hose as well leaving only the intercooler core left.
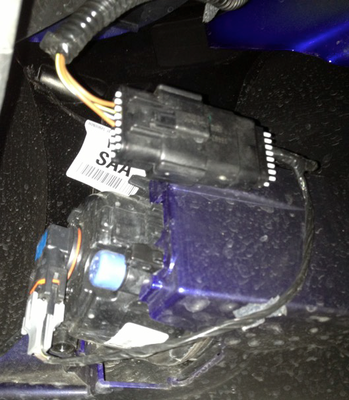
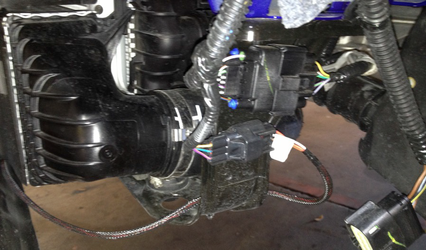
- Disconnect the MAP sensor found on the passenger side end tank of the intercooler.
- Using an 8mm socket, remove the two (2) fasteners that secure the bottom of the intercooler core to the car.
- With the core hanging loosely on the plastic hooks, draw the bottom of the core outward and down to remove it from the vehicle. Set it aside.
- Using a 10mm socket, remove the driver’s side lower radiator support fasteners. This will allow you enough room to wiggle around and remove the grill shutter system. Reinstall the 10mm fasteners once the grill shutters have been removed and tighten them down.
Installing COBB FMIC
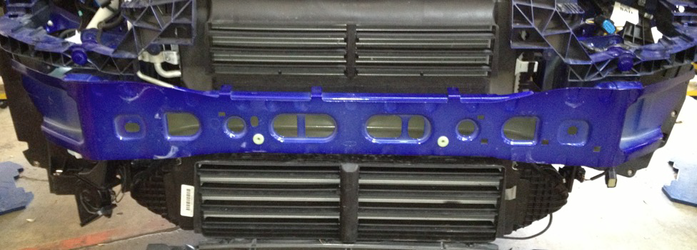
Looking at the crash beam, there are two circular cutouts that are of equal distance from the center of the beam. In the driver’s side hole, on the back wall, there is a dimple. You’re going to want to drill a hole with the ¼” drill bit right into this dimple. Let the drill do the work and keep the bit lubricated with a quality cutting fluid like Tap Magic. Apply steady force to the drill and only drill at about ¼ to ½ speed. If you go full throttle on the drill you’ll ruin the bit and have a bad time. The bumper is tough to drill through so be patient, go slowly, and use plenty of lube.
Once you break through, repeat the process with the larger drill bit. Remember, slow and steady wins the race here. Make sure to reapply cutting fluid as you go.
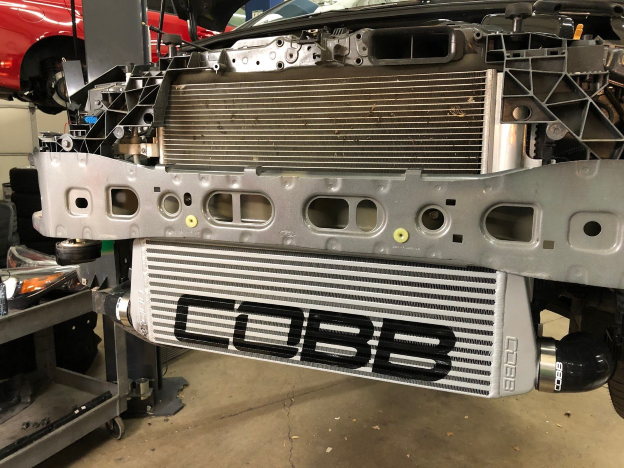
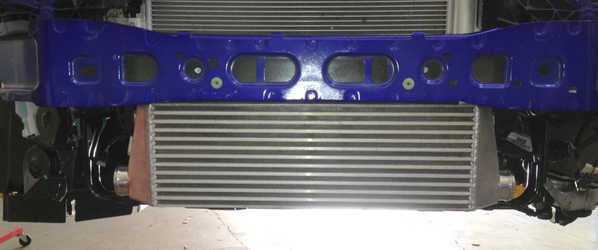
Loosely install the COBB core onto the front of the vehicle. The larger, 90 degree angle brackets rest up against the backside of the crash beam. The thinner, bent brackets on the bottom rest on top of the lower radiator support. Using the supplied 6mm bolt and flange nut and flat washer, loosely locate the lower brackets into the pre-drilled holes in the radiator support. The core should rest easily in place with the mounting holes on the top of the core aligning with the circular cutouts in the bumper beam.
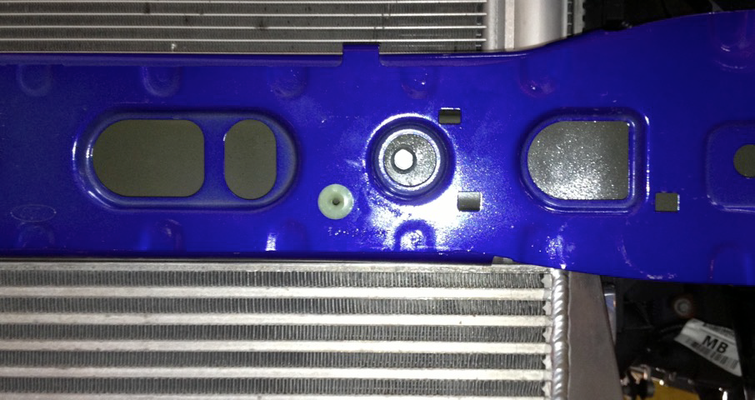
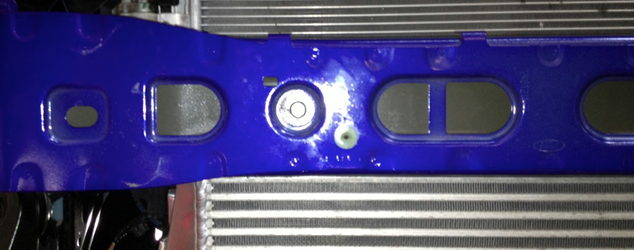
With the core in place, align the hole that was just drilled with the corresponding mounting hole. Loosely install the 8mm hardware through this hole to locate the core in a more defined position. It should look slightly off center if you drilled into the dimple at the back of the cutout. (Shown Below)
Now for the tricky part. Using the permanent marker, you’ll want to mark the inside back wall of the crash beam where you’ll be drilling in relation to where the mounting hole on the intercooler is behind it. This is tricky because other than eyeballing it and gathering a sense of where the hole should be, there isn’t a great way to ensure its correct. If all things are lined up correctly, you should be drilling in the exact center of the opening.
- Using a center punch in order to mark this point can help to allow the drill a bit more initial bite and accuracy.
With the ¼” drill bit, drill your pilot hole through the bumper beam. Once through, you’ll be able to tell if you are close enough to move forward with drilling with the larger drill bit. If not, you now have a better estimate where the hole should be and can re-drill a new pilot hole.
With both holes drilled, you can now fully install the COBB core onto the bumper beam using the supplied 8mm bolt, flat washer, lock washer, and nut.
Remove the MAP sensor off of the factory intercooler core and install it into the endtank of the COBB core using the supplied M5x16 socket head cap screw and 5mm flat washer.
Remove the reducing pipe and silicone mounted on the throttle body to make way from the new COBB charge piping.
Install the 2.5” straight coupler onto the throttle body. Install and tighten a 2.5” T-Bolt clamp to hold it in place.
Install the 2.5” silicone elbows onto either end of the intercooler. The shorter side should connect to the core. Loosely install a 2.5” T-Bolt clamp to hold it in place. You’ll need to be able to rotate the clamp when installing the pipes so don’t tighten them down quite yet.
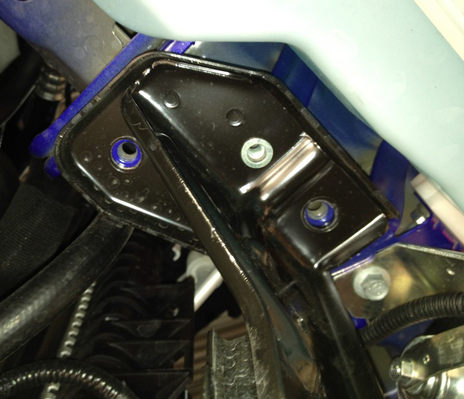
- Using a 10mm socket, remove the two fasteners that hold the passenger side of the radiator support in place. You may also need to drill out a silver rivet to allow it to hang freely. (Some cars have this rivet and others haven’t) Once loose, pull the rubber grommet out of the lower radiator support to allow the support to drop. This will allow you room to install the cold-side charge pipe connecting the passenger side of the core to the throttle body.
Install the cold pipe between the throttle body and the intercooler along with two (2) t-bolt clamps.
Install the silicone reducing elbow onto the turbo with the 2” T-Bolt clamp. Leave it loose for now.
Install the turbo pipe between the turbo and the intercooler along with two (2) 2.5” T-bolt clamps. Leave them loose for now.
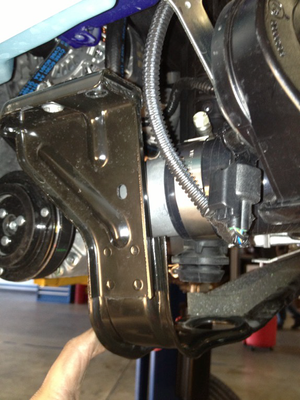
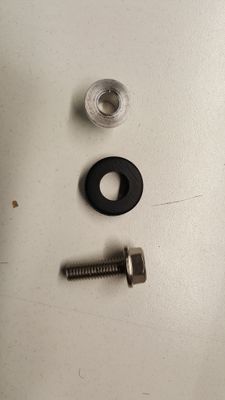
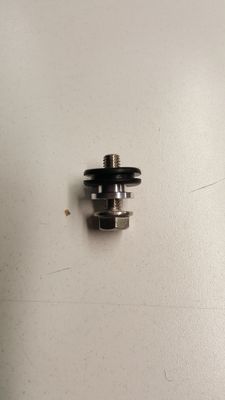
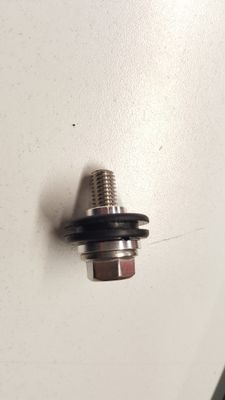
Using the supplied grommets, aluminum bushing spacers, and 6mmx25mm bolts, install the turbo charge pipe to the block.
The order in which these are installed is: Grommet — Aluminum Spacer (flat area facing away from the car) — Bolt.
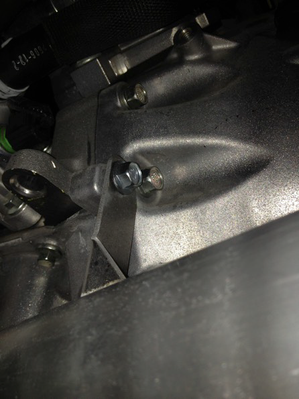
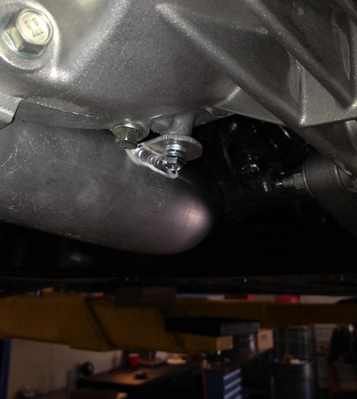
Example pictures of arrangement:
With all the silicone and charge piping in place, go back and tighten down the t-bolt clamps until snug. Some adjustment of the silicone may be necessary to achieve the best fitment.
Reinstall the 10mm fasteners that hold the radiator support in place. Make sure to reinsert the rubber grommet at the bottom.
Tighten the 6mm hardware that secures the lower brackets of the intercooler core to the radiator support.
Use the supplied zip tie to secure the grill shutter connector in place.
Reinstall the bumper in the reverse order you removed it; don’t forget the fog light connector. Make sure to reinstall the rubber shrouds. The lower shroud will now be held in place with only the upper torx bolts.
CARB Sticker Application
(Where Applicable)
- Apply the supplied CARB sticker in a clear, easy to find location. Typically underhood, or on the radiator core support.
Links
COBB Product Install Instructions for Focus ST
Main Installation Instruction Repository for Focus ST Parts
FFordd Focus ST Map Notes Map Notes
Link to Focus ST Map Notes to see what map you should be on given the parts you've added
COBB Customer Support Web Support and Tech Articles: COBB Tuning Customer Support Center Email: support@cobbtuning.com Phone support available 9am to 6pm Monday-Thursday. 9am to 4pm Friday (CST) 866.922.3059 return to www.cobbtuning.comContact Us:
Related content
Copyright 2025 © COBB Tuning Products LLC. All Rights Reserved. | www.cobbtuning.com