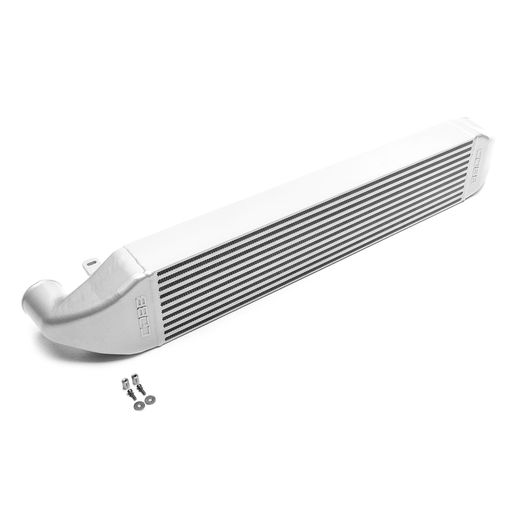
702502 - Fiesta ST Intercooler Upgrade
- Brandyn Mowat

702502 – Fiesta ST Intercooler Upgrade
Fiesta ST 2014 - 2019
Congratulations on your purchase of the COBB Tuning Fiesta ST Intercooler Upgrade! The following instructions will assist you through the installation process. Please read them BEFORE beginning the install to familiarize yourself with the steps and tools needed. If you feel you cannot properly perform this installation, we HIGHLY recommend you take the vehicle to a qualified and experienced automotive technician.
IMPORTANT! Installing this kit will require custom tuning or utilizing an appropriate Stage Power Package map if you have a matching mechanical configuration. Please consult with COBB or an authorized ProTuner in your area if you have any questions!
Table of Contents
Parts List
- Front mount intercooler core
- 2 x M5 Aluminum threaded post
- 2 x M5 Socket head cap screw
- 2 x 5mm Lock washer
- 2 x 5mm Flat fender washer
- COBB FMIC Stencil
- COBB License Plate Frame
- 2 x COBB 6" Stickers
Tools Needed
- Phillips head screwdriver
- Flathead screwdriver
3/8" ratchet
- 3/8" 7mm socket
3/8" 8mm socket
- 3/8" 13mm socket
- 8mm Ratcheting combination wrench (recommended but not necessary)
3/8" T25 Torx Bit
3/8" T30 Torx Socket
3/8" 12" extension
3/8" 6" extension
3/8" Socket Swivel
- M4 Allen Key
- Trim removal tool
- Channel Lock Pliers
- Spray Paint (If using the stencil to apply the logo)
Removing Factory Intercooler
- First thing is first, get the vehicle either up on a lift or get the front end of the car in the air via a floor jack and jack stands. Make sure to block the rear wheels and set the parking brake.
- If you're going to paint the COBB stencil onto the intercooler do so now.
- We're going to start off by removing the headlights. There are two T30 Torx bolts that hold the headlight in place as well as a small plastic Phillips head push pin. Remove all three from each side. Once removed you should be able to carefully pull the headlight up and out. There is a connector in the back that needs to be removed before taking the headlight al the way out.
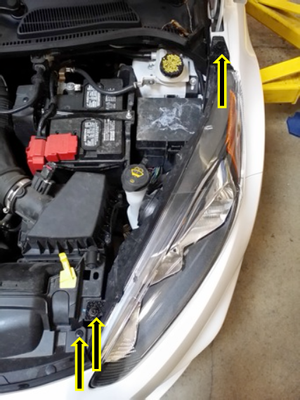
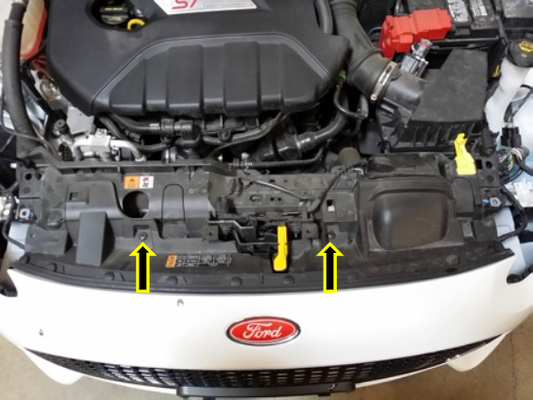
- With the headlights out, use yourscrewdriver to remove the two plastic push pins from the top of the bumper.
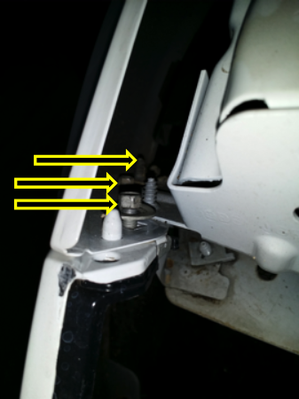
- On each side of the bumper where the bumper meets the front of each quarter panel there are three 8mm bolts. Use a ratchet, extension, universal joint and 8mm socket to remove them from each side.
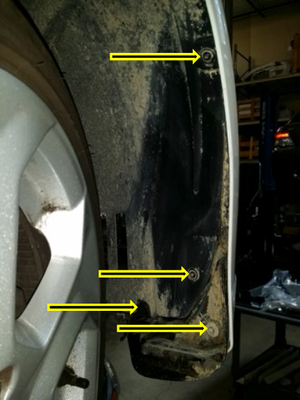
- Moving to the inner fender well, there are a total of four (4) fasteners that need to be removed on each side. Two (2) T25 Torx screws, one (1) plastic Phillips head push pin, and one (1) 7mm hexhead screw. Remove them all. You may need to rotate the steering wheel or push the wheel to get it out of the way for your tools. (Sorry for the muddy car ... sometimes you need to rally!)
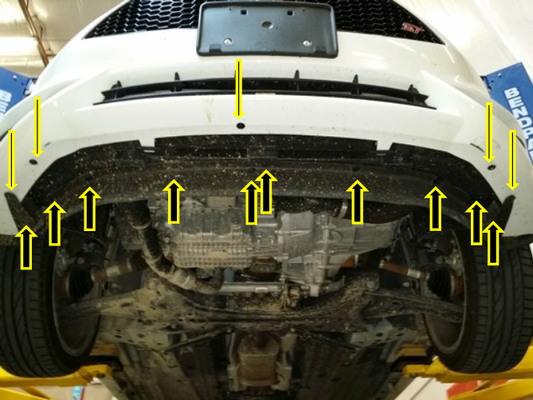
- Now, moving underneath the vehicle, we’ll need to remove the five (5) 7mm hex head screws on the bottom of the bumper cover. When done with that, we’ll need to remove the two (2) 7mm hex head screws that attach the front lip to the bumper located towards the outside of the bumper along with the ten (10) plastic push pins that can be removed with a flat head screwdriver. Remove the front lip and set it aside.
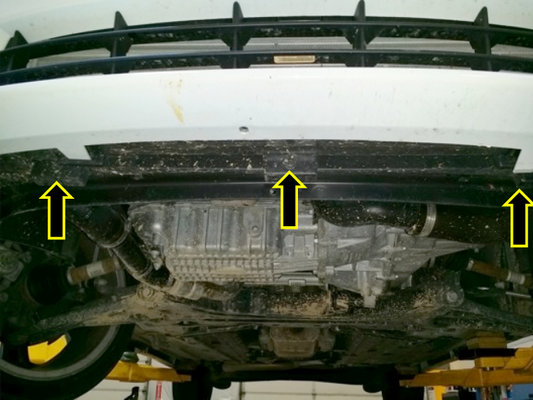
- Now, using an 8mm socket, remove the three (3) hex head bolts from the bottom of the bumper.
- Finally, reach into the bumper cover and unplug each of the fog lights. With those removed, you should now be able to remove the bumper.
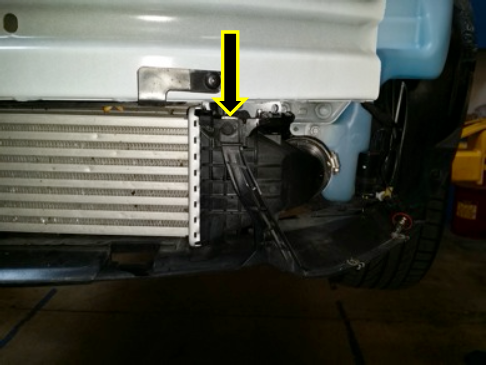
- With the bumper out of the way, remove the two (2) 8mm hex head bolts to hold the lower plastic tray to the vehicle. They are found above each end tank of the intercooler. Remove the tray.
- With the tray out of the way, remove the metal clips where the tray was previously screwed into. This is so we don’t scratch the new intercooler while installing it.
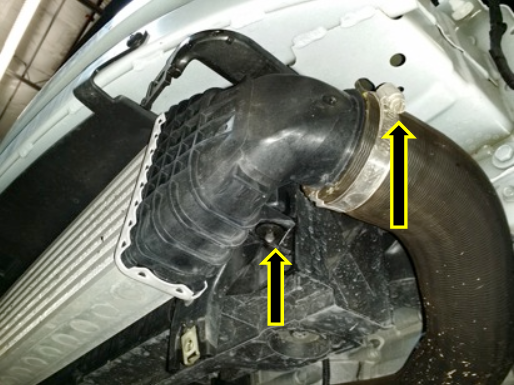
- Now, using a 7mm socket, loosen the two (2) worm-gear clamps holding the piping to each side of the intercooler.
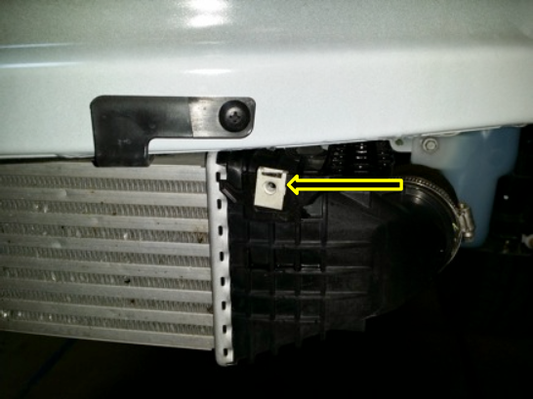
- Using an 8mm socket, remove the 8mm hex head bolt on each side that is securing the intercooler in place. They are located under and behind the endtanks. Once removed, you can now remove the factory intercooler from the vehicle.
Installing COBB FMIC
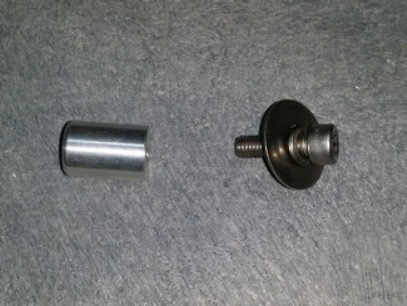
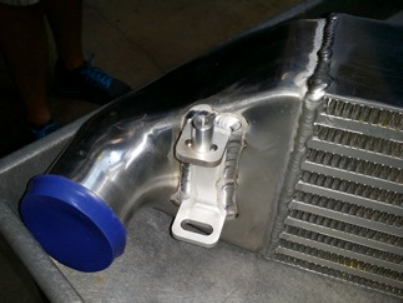
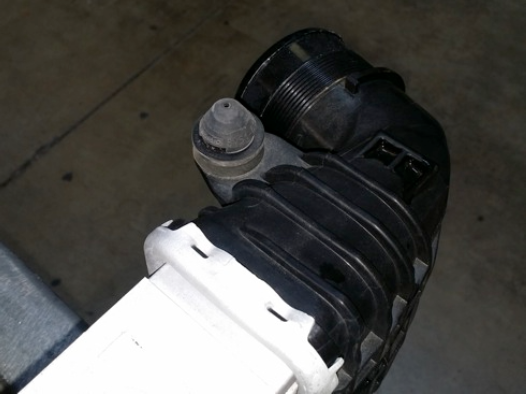
- The first thing we’ll do is install the two (2) threaded posts onto the mounting bracket of the COBB intercooler. Using a 5mm Socket Head Cap Screw, a lock washer, and a flat washer, install a threaded post on top of the smaller slot on the bracket. Center it in the middle of the slot and tighten it down using a 4mm Allen wrench. A pair of pliers may be helpful to keep the post from spinning while you tighten it down. Repeat on the other side.
- On the old intercooler, remove the rubber grommets that are on the posts and install them into the holes on the vehicle where they came from. It’s easier to install the COBB intercooler with the grommets on the car as opposed to on the threaded posts.
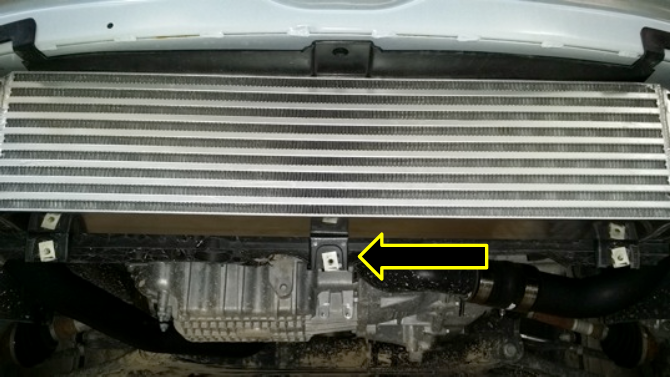
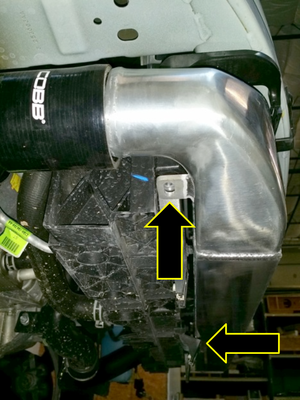
- It’s finally time to install the COBB intercooler. It’s going to be a tight fit so at an angle, shove the threaded posts up into the rubber grommets. You’ll need to make sure the plastic arms from the undertray mounts are out of the way as well as bending down the plastic tab below the center of the intercooler. The intercooler must fit above that middle plastic tab that we removed the 8mm bolt out of. That tab can be bent downward to make it fit. It will hold the intercooler once in place until we install the fasteners. A friend may be help here as it can be a tight fit. See pictures below for how it should fit.
- Install the 8mm hex head bolts that were holding the factory intercooler in place to hold the new COBB intercooler in place.
- Make sure that factory charge piping is fully seated onto the inlet and out of the COBB core and use a 7mm socket to tighten the clamp down on each side.
- Reinstall the metal clips onto the plastic arms in front of each end of the intercooler.
- Now, reinstall the bumper and headlights in the reverse order that they were removed.
- Make sure you use your AccessPort to flash an appropriate tune on your car and go out and enjoy!
Links
COBB Product Install Instructions for Fiesta ST
Main Installation Instruction Repository for Fiesta Parts
Link to Fiesta Map Notes to see what map you should be on given the parts you've added
COBB Customer Support Web Support and Tech Articles: COBB Tuning Customer Support Center Email: support@cobbtuning.com Phone support available 9am to 6pm Monday-Thursday. 9am to 4pm Friday (CST) 866.922.3059 return to www.cobbtuning.comContact Us:
Related content
Copyright 2025 © COBB Tuning Products LLC. All Rights Reserved. | www.cobbtuning.com