Mitsubishi Evolution X Injector Installation
- Brandyn Mowat

Mitsubishi Evolution X
Congratulations on your purchase of the COBB Tuning Fuel Injector Kit! The following instructions will assist you through the installation process. Please read them BEFORE beginning the install to familiarize yourself with the steps and tools needed. If you feel you cannot properly perform this installation, we HIGHLY recommend you take the vehicle to a qualified and experienced automotive technician.
IMPORTANT! Installing this kit will require custom tuning or utilizing an appropriate Stage Power Package map if you have a matching mechanical configuration. Please consult with COBB or an authorized ProTuner in your area if you have any questions!
Table of Contents
Parts List
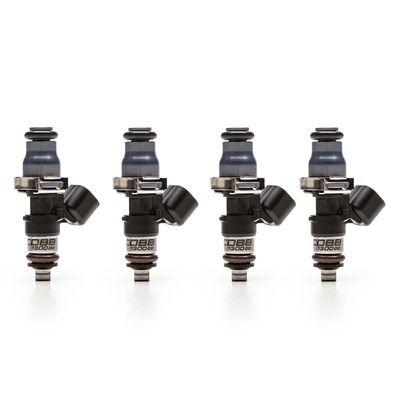
- (4) COBB Mitsubishi Evo X Fuel Injectors
Tools Needed
3/8" ratchet
3/8" 10mm socket
3/8" 12mm socket
Needlenose pliers
Stock Injector Removal
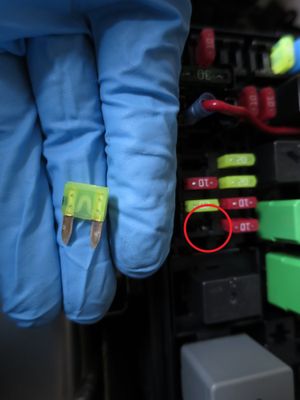
- With the car parked in a flat, level area, start it up and allow it to idle. Pop open the fuse box and remove the fuel pump fuse (20amp yellow one). This should cause the fuel pressure to reduce and the car to die. This way, less fuel will come out when you remove the injectors in a few minutes.
- Once the car dies, turn it off, and remove the gas cap.
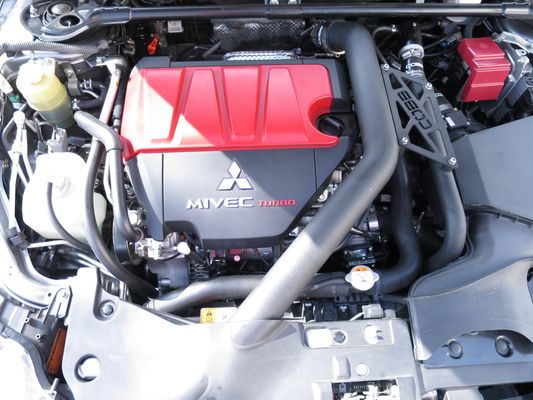
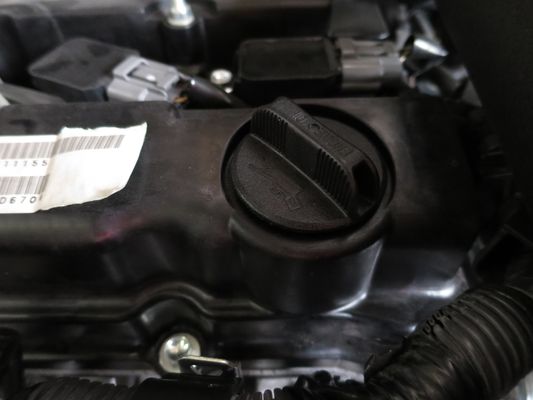
- Moving around to the engine bay of the car, remove the oil cap.
- Once the oil cap is removed, lift up firmly on the engine cover to take it off of the car. Once it's off screw the oil cap back in to prevent anything from falling inside.
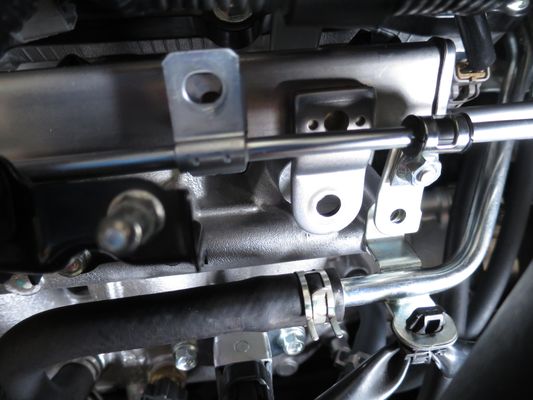
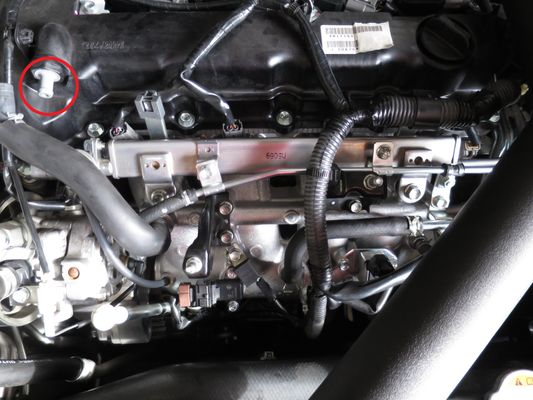
- Remove the two 10mm bolts holding the crossover tube to the fuel rail and the additional bolt holding it to the manifold
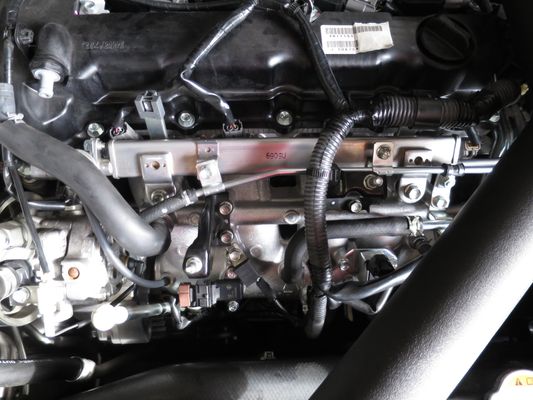
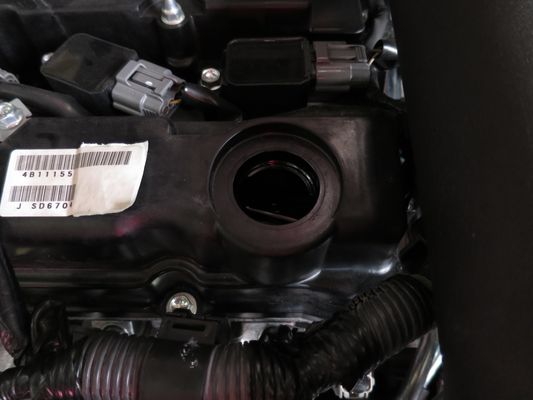
- Unhook the breather line from the valve cover using pliers to loosen the hose clamp
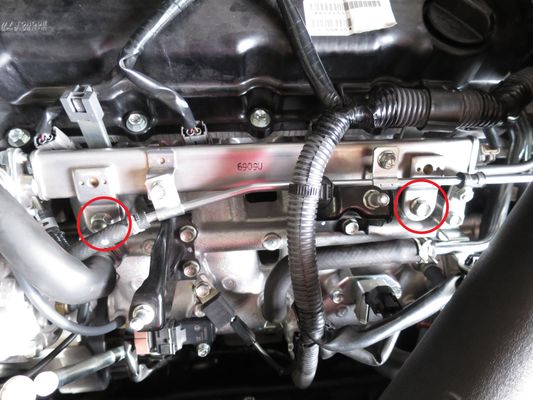
- Now remove the two 12mm bolts holding the fuel rail in place. Once both bolts are removed carefully take out the spacers and put them somewhere safe so that you don't lose them somewhere. Be extremely careful not to lose the fuel rail spacers, they will commonly fall through the manifold and end up caught on something before hitting the skid tray.
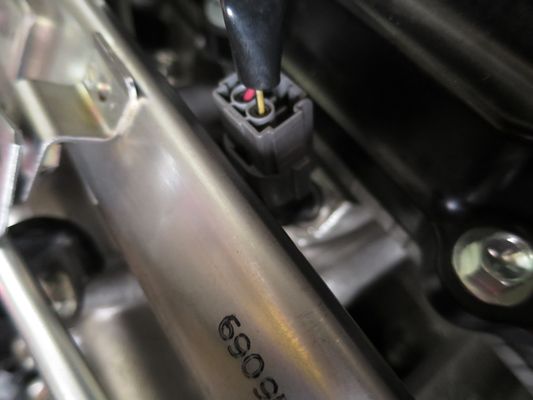
- Now you can go ahead and disconnect the injector wiring from each fuel injector by pressing down on the release tab and gently pulling on the connector to remove it from the injector.
- With the injectors unplugged pull up softly on the rail and carefully pull the injectors out one at a time.
COBB Injector Installation
- After removing the new injectors from the packaging, lubricate the upper and lower o-rings using some super-lube or petroleum jelly.
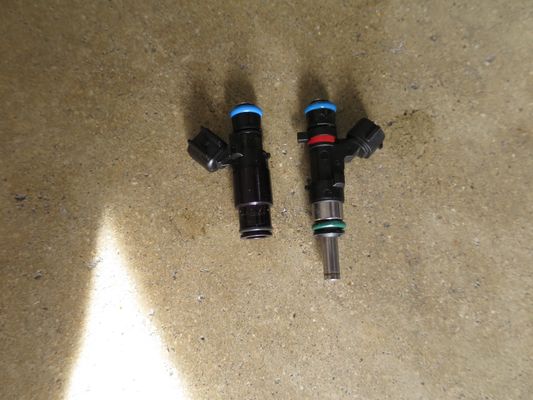
- Carefully insert the injectors back into the rail making sure not to tear any of the o-rings.
- Once all the injectors are in place carefully push the fuel rail down to seat the injectors in the manifold. Make sure they're all in place properly before tightening it down!
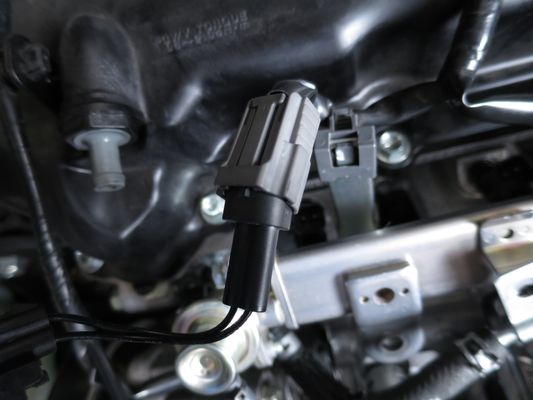
- Attach the injector adapter harnesses and plug in all of your injectors.
- Now you can replace all of the components removed during the tear-down and get your car back together, but leave the engine cover off for now.
- Once you're confident everything is in place, put the fuel pump fuse back in place and turn the car on (but don't start!)
- With the ignition in the on position, the fuel pump should be turned on, take a look for any fuel leaks that may occur.
- If you're leak free, flash a map compatible with the injectors you chose and go out and enjoy!
Links
Calibration Map Notes for Mitsubishi Vehicles
Helps to figure out which map you should be on given the parts installed to your car
Mitsubishi Injector Scaling Information
COBB Customer Support Web Support and Tech Articles: COBB Tuning Customer Support Center Email: support@cobbtuning.com Phone support available 9am to 6pm Monday-Thursday. 9am to 4pm Friday (CST) 866.922.3059 return to www.cobbtuning.comContact Us:
Related content
Copyright 2025 © COBB Tuning Products LLC. All Rights Reserved. | www.cobbtuning.com