891100 - COBB Sound Symposer Delete
- Brandyn Mowat
- Former user (Deleted)

891100 - COBB Sound Symposer Delete
Ford Focus ST 2013-2018
Congratulations on your purchase of the COBB Tuning Focus ST Sound Symposer Delete! The following instructions will assist you through the installation process. Please read them BEFORE beginning the install to familiarize yourself with the steps and tools needed. If you feel you cannot properly perform this installation, we HIGHLY recommend you take the vehicle to a qualified and experienced automotive technician.
Table of Contents
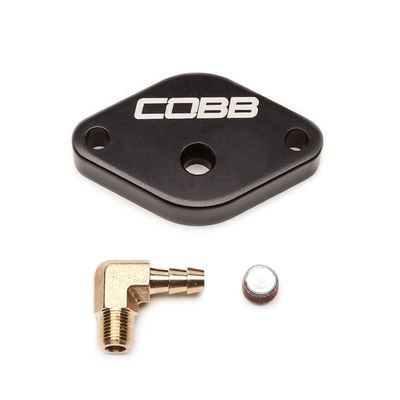
Parts List
- COBB Sound Symposer Delete Plate
- 1/8" NPT Plug
- 1/8" NPT Elbow
- Allen Key
Tools Needed
- Phillips head screwdriver
- Flathead screwdriver
3/8" ratchet
3/8" 10mm socket
- 3/8" 8mm socket
3/8" 10mm deep socket
3/8" T20 Torx Bit
3/8" 12" extension
3/8" 6" extension
3/8" Socket Swivel
- 10mm combination wrench
Removal of Factory Sound Symposer
- The factory sound symposer from Ford can be a bit much, especially once you've upgraded your intake to an aftermarket one. To remedy this we've created a physical block-off plate in order to allow complete or partial removal of the symposer system from your vehicle.
- Starting out, remove the engine cover in order to allow more room to work with, it should simply lift off with no tools required.

- Next you can simply pull the sound symposer tube off of the intake manifold. It also just pulls away on both ends.
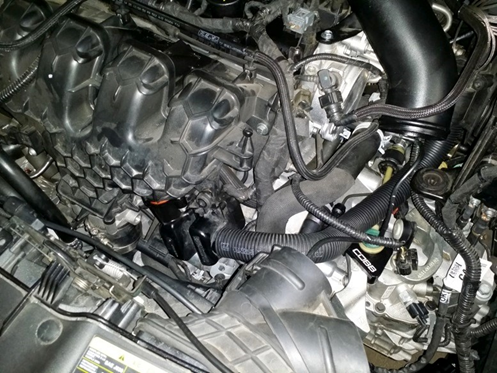
- Now, using a 10mm socket or wrench, remove the three 10mm bolts that secure the sound symposer to the intake manifold. There is one bolt facing outward and the other two are facing downward. With them removed, remove the symposer out of the car and set it aside. Some Later Model Focus ST's come with 8mm bolts instead of 10mm, so use the relevant wrench.
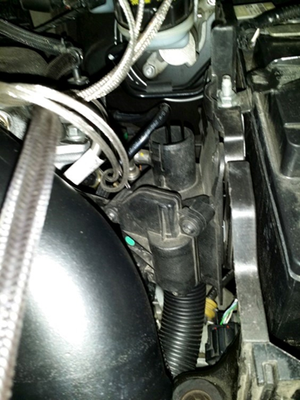
- If you choose to, this is where you would remove the sound symposer valve and the rest of the tubing from the engine bay. It is not necessary to remove this hardware, but it serves little purpose now that the attachment to the intake manifold is gone. To do so, remove the battery cover to allow more room and use a T-20 Torx bit to remove the valve attached to the passenger side of the battery box. Unhook the harness and zip-tie it out of the way. Finally, remove the remaining tubing that makes it's way to the firewall. The hole in the firewall isn't necessary to plug as it goes to a sealed resonating chamber.
Installing COBB Sound Symposer Plate
- Since everyone has different needs, COBB has provided every symposer delete plate with two options, a plug and a boost port. If your vehicle or setup can make use of an accurate boost source off of the intake manifold, install the 90 degree brass elbow and connect it to your gauge or other necessary hardware. If you don't require a boost source, simply install the plug that came with your kit using the supplied allen key.
- Remove the o-ring in the factory symposer and install it into the COBB plate.
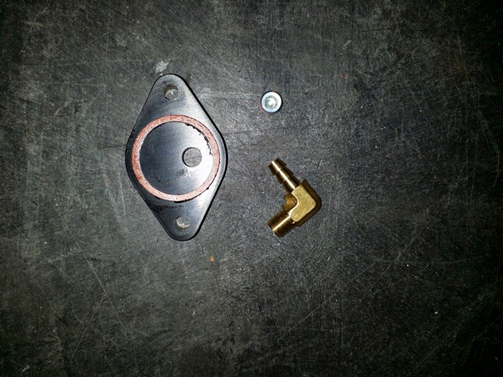
- Using the factory hardware and a 10mm wrench, install the COBB plate onto the intake manifold. If you're using the brass fitting attach the hose at this time to avoid a boost leak.
- Reinstall the engine cover and you're done! Go out and enjoy.
CARB Sticker Application
This product is 50 state legal and has a CARB EO. For details and other carb legal parts check out our page CARB Executive Orders for COBB Products
(Where Applicable) The product information label is required to aid inspection of the vehicle under the California Smog Check Program.
Apply the supplied CARB sticker in a clear, easy to find location. Typically underhood, or on the radiator core support.
Links
COBB Product Install Instructions for Focus ST
Main Installation Instruction Repository for Focus ST Parts
Link to Focus ST Map Notes to see what map you should be on given the parts you've added
COBB Customer Support Web Support and Tech Articles: COBB Tuning Customer Support Center Email: support@cobbtuning.com Phone support available 9am to 6pm Monday-Thursday. 9am to 4pm Friday (CST) 866.922.3059 return to www.cobbtuning.comContact Us:
Related content
Copyright 2025 © COBB Tuning Products LLC. All Rights Reserved. | www.cobbtuning.com