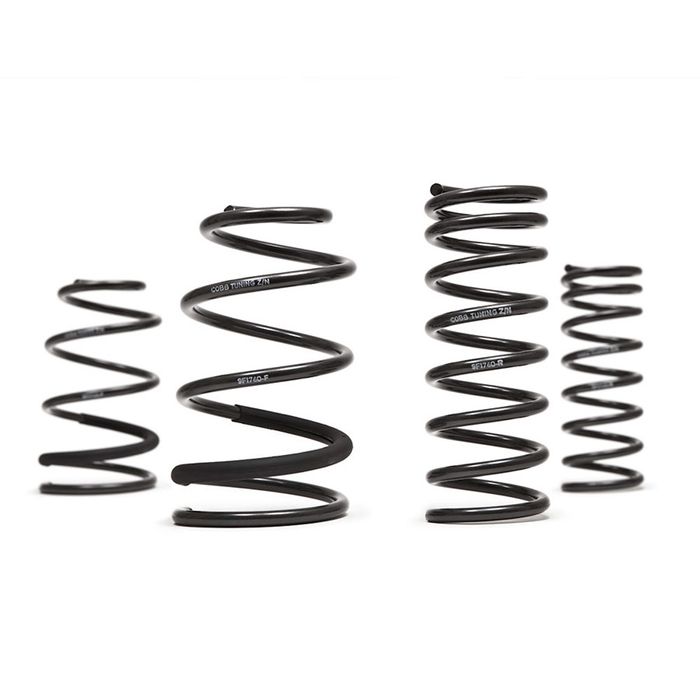
9F1760 or 9F1761 - COBB Ford Focus ST Springs [Discontinued]
- Billy Brooks
- Brandyn Mowat
- Will Trang

9F1760/9F1761 – COBB Sport Springs
2013+ Ford Focus ST
Installation Instructions
Congratulations on your purchase of the COBB Sport Springs for your 2013+ Ford Focus ST. These instructions should only be used as a guide for the install. Please read them first BEFORE you start so you can familiarize yourself with the steps and the tools necessary to complete the installation. If you feel that you cannot properly perform this installation, we HIGHLY recommend you take the vehicle to a qualified and experienced automotive technician to perform the work.
Part List
- (2) Front Springs (9F1760F or 9F1761F)
- (2) Rear Springs (9F1760R or 9F1761R)
Tools Needed
- Jack or Lift
- Jack Stands
- Hammer
- Chisel
- Pry Bar
- Spring Compressors
- 8mm Socket and/or wrench
- 13mm Socket and/or wrench
- 15mm Socket and/or wrench
- 19mm Socket and/or wrench
- Ratchet
- T-55 Torx Bit
- T-30 Torx Bit
- Torque Wrench
- Screwdriver
Pre-Installation Preparation
1. While the car is still on the ground, it is a good idea to break the lug nuts loose using a 19mm socket (stock lug nuts) and breaker bar.
2. With the car on a lift, or supported by four (4) jack stands, remove all four (4) wheels.
Removal of the Stock Front Springs
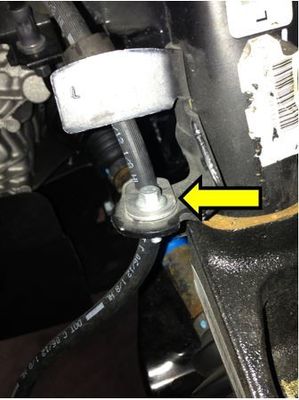
1. Starting on the driver's side of the vehicle, remove the sway bar link at the shock. You will need a 15mm socket to remove the nut.
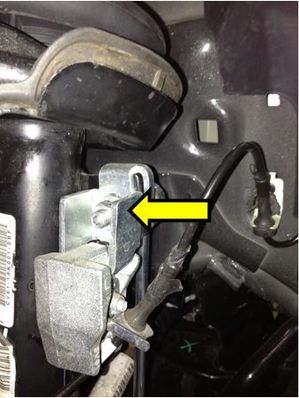
2. Next remove the brake line bracket bolt using an 8mm socket.
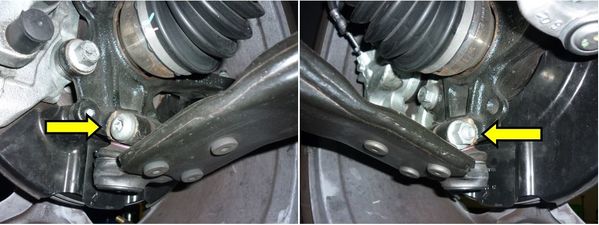
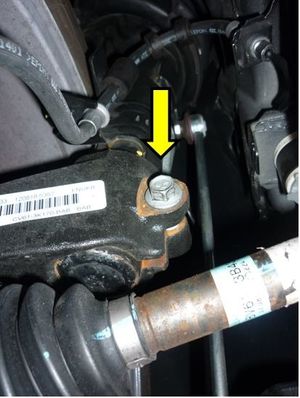
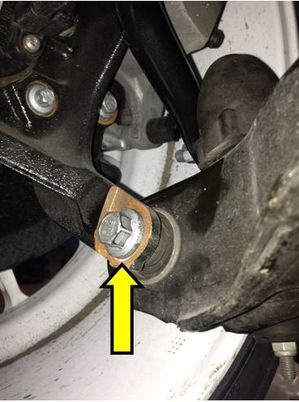
3. Separate the lower ball joint from the spindle by removing the bolt. You will need a 15mm wrench or socket and a T-55 torx key. Once the bolt has been removed you may need a pry bar to separate the ball joint from the spindle. Be careful not to damage the ball joint boot while completing this step.
4. Remove the bolt that holds the lower shock to the spindle using a 15mm socket.
5. At this point, remove the shock from the spindle. You may need to use a chisel and hammer to help separate the clamp holding in the shock.
6. Repeat steps 1-5 for the passenger side of the vehicle.
7. Now move to the top of the vehicle. Start by removing the windshield wipers. Remove the rubber cover off of each windshield wiper to access the 15mm nut underneath. Remove each wiper. Remember which side is which for reinstallation later.
8. Remove the two (2) Torx and four (4) plastic fasteners on the top of the cowl. Remove the upper portion of the cowl and set aside.
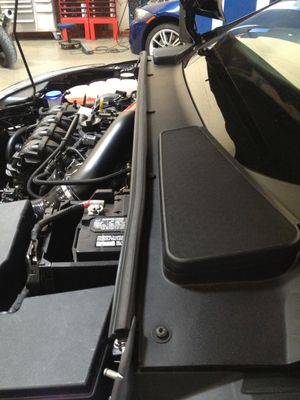
9. Underneath, there are two (2) 10mm fasteners holding the next layer of cowl in place. Remove them and remove the cowl.
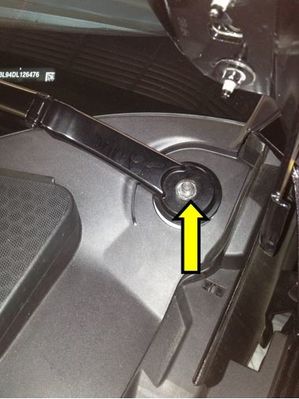
10. You now have access to remove the upper top hat bolts. Starting on the driver's side, remove the three (3) bolts holding the top hat to the chassis using a 13mm socket or wrench. Be careful when doing so as this is the last thing holding the shock assembly to the vehicle.
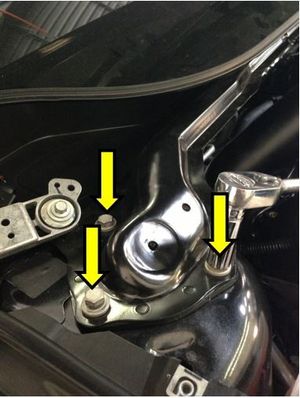
11. Pull the shock assembly out of the car.
12. Repeat for the passenger side.
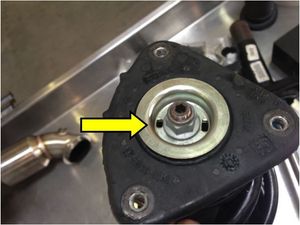
13. Using a spring compressor, compress the spring to release tension from the top hat. Once the spring is compressed, remove the nut holding the top hat using a 19mm socket. Be careful that the spring does not shoot off when removing the nut and hat.
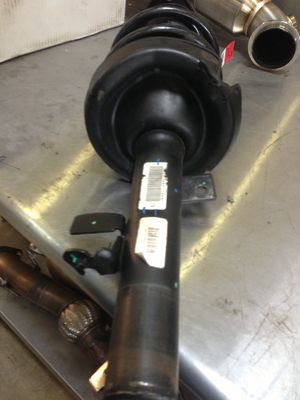
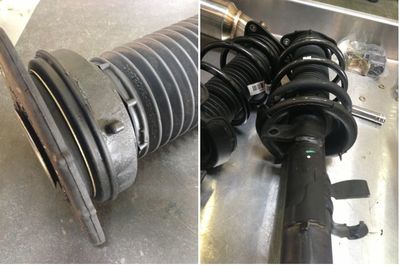
14. Remove the stock spring and repeat for the passenger side.
Installation of the COBB Front Sport Springs
1. Place the COBB Sport Spring (9F1760F or 9F1761F) on the shock and align it in the spring saddle.
2. Install the top hat making sure that the alignment tabs face toward the inside of the shock assembly. Using a 19mm socket torque the nut to 55 Nm (40.5 ft-lbs).
3. Reinstall the shock assembly in reverse order of the disassembly.
4. Torque the three (3) top hat bolts to 35 Nm (26 ft-lbs) using a 13mm socket.
5. Torque the bolt that clamps the spindle to the lower portion of the shock to 80 Nm (59 ft-lbs) using a 15mm socket.
6. Torque the lower ball joint bolt to 83 Nm (61 ft-lbs).
7. Torque the brake line bolt to 11 Nm (8 ft-lbs) using a 8mm socket.
8. Torque the endlink to shock nut to 48 Nm (35 ft-lbs) using a 15mm socket.
Removal of the Stock Rear Springs
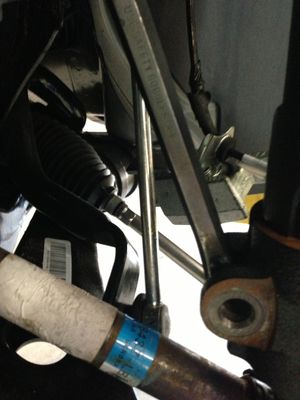
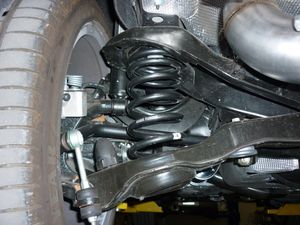
1. Using a floor jack, support the lower control arm.
2. Remove the lower control arm bolt using a 15mm socket.
3. Lower the jack allowing the lower control arm to lower and the stock spring to release tension. Be careful completing this step as the rear spring may pop out.

4. Repeat for the other side of the vehicle.
Installation of the COBB Rear Sport Springs
1. Install the COBB Rear Sport Spring (9F1760R or 9F1761R) in the spring seat.
2. Using a floor jack, raise the lower control arm into the spindle.
3. Reinstall the bolt using a 15mm socket and torque to 115 Nm (85 ft-lbs). You may need to use a pry bar or large screwdriver in order to position the hole.

4. Repeat for the other side of the vehicle.
5. Reinstall all four (4) wheels. Lower the vehicle off the lift or jack stands and torque the lug nuts to 135 Nm (100 ft-lbs).
6. Congratulations! You have completed the installation of the COBB Sport Springs for your 2013+ Ford Focus ST. Go out and enjoy!
Links
Ford Focus ST Map Notes
Helps to figure out which map you should be on given the parts installed to your car
Main Installation Listing
COBB Customer Support Web Support and Tech Articles: COBB Tuning Customer Support Center Email: support@cobbtuning.com Phone support available 9am to 6pm Monday-Thursday. 9am to 4pm Friday (CST) 866.922.3059 return to www.cobbtuning.comContact Us:
Copyright 2025 © COBB Tuning Products LLC. All Rights Reserved. | www.cobbtuning.com