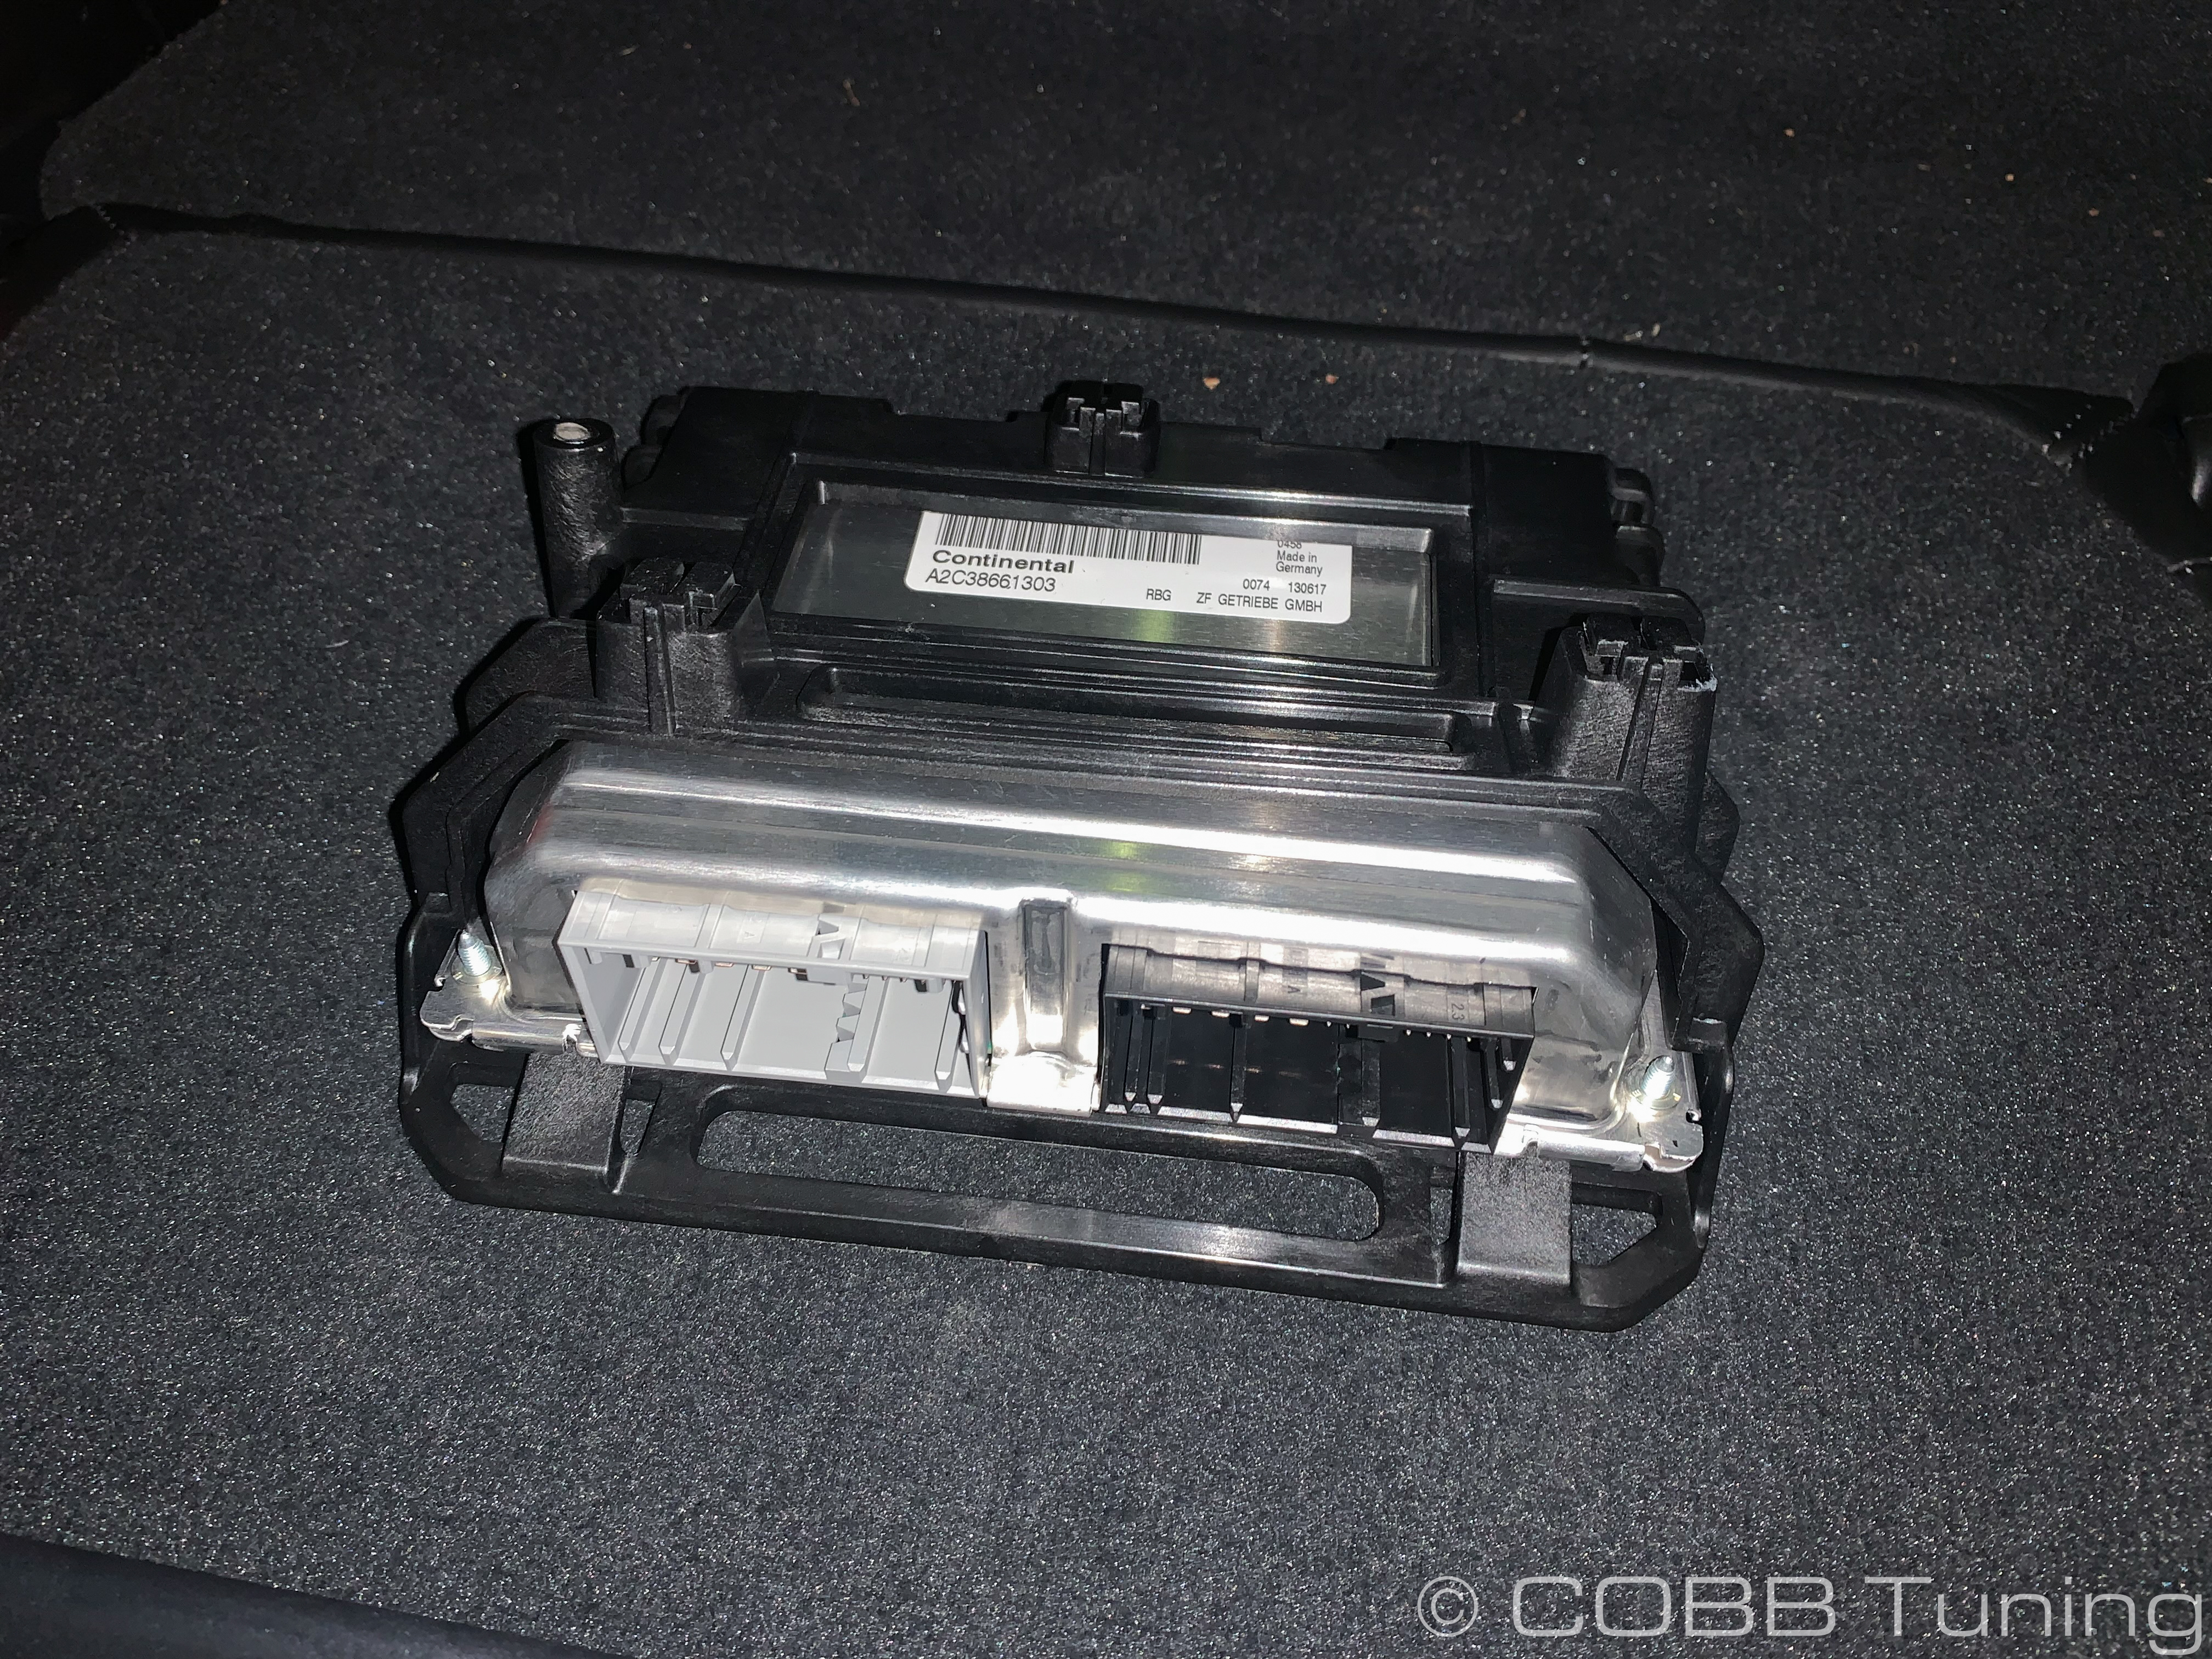
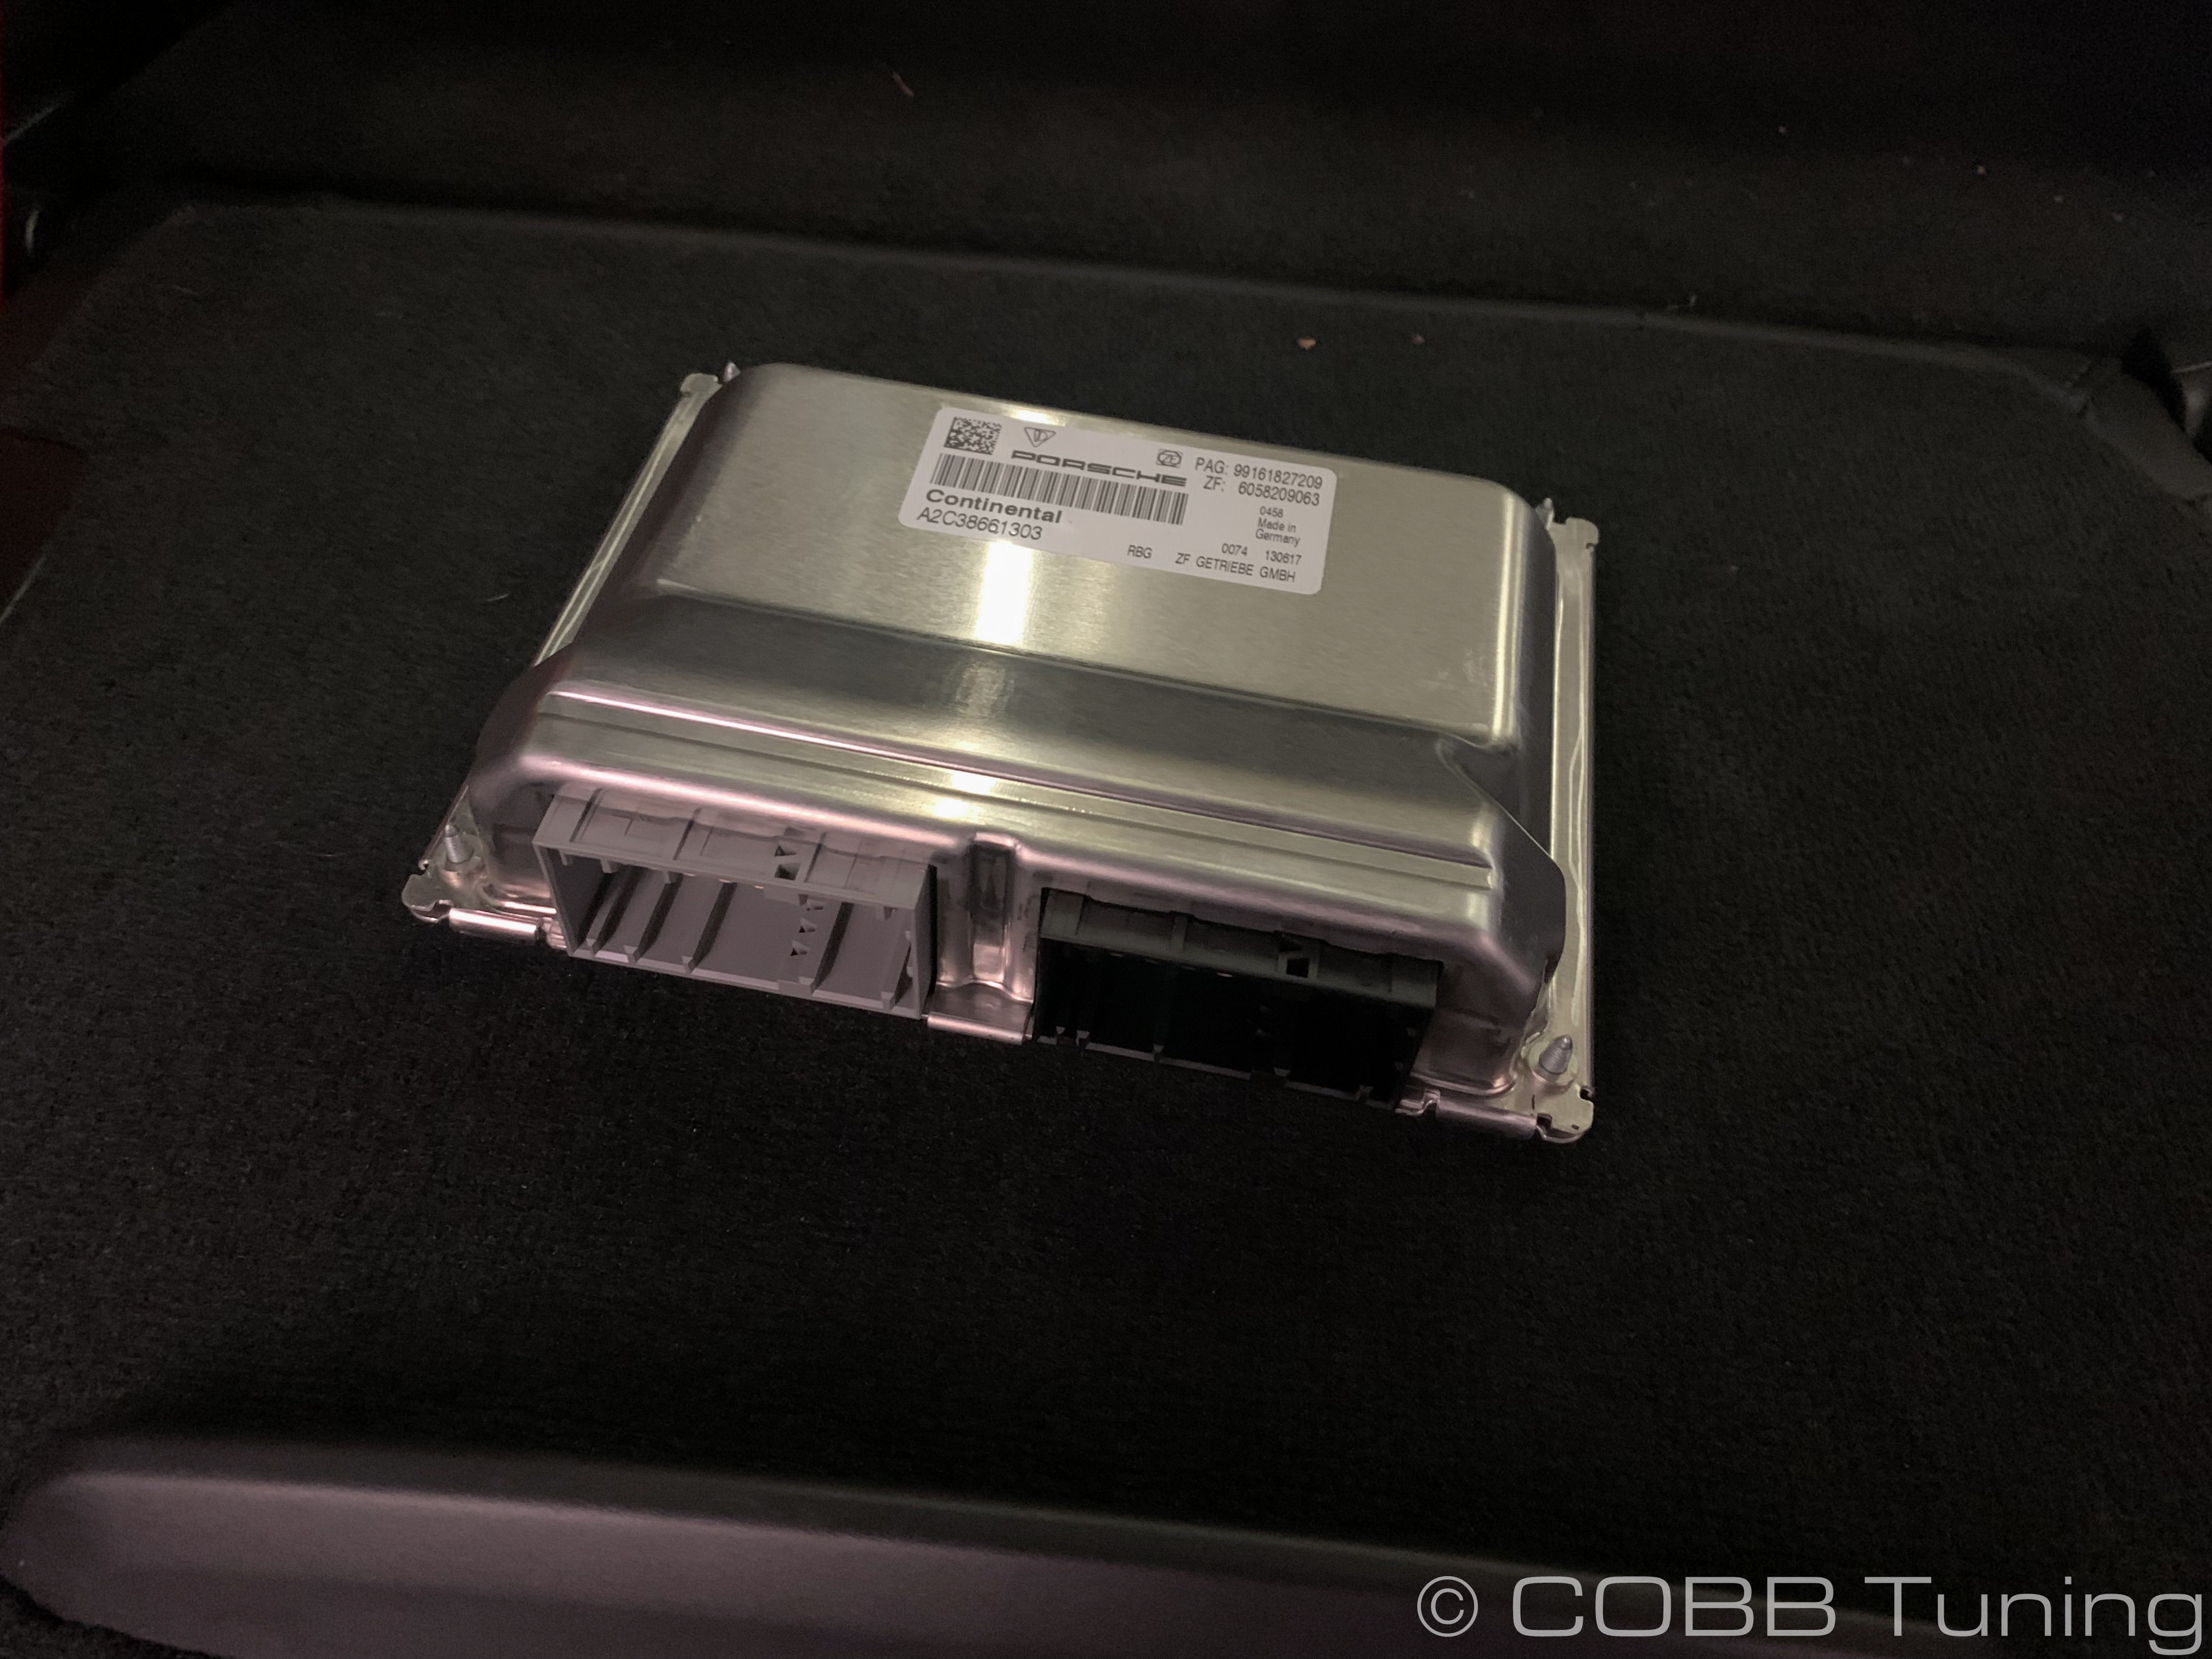
Porsche 991.1 & 991.2 Carrera and Turbo PDK Removal


These instructions will explain the process for removal of the PDK/TCM module on Porsche 991.1 and 991.2 models. Removing the PDK controller (TCM) is required when the Accessport detects that an unsupported ROM has been found during PDK installation. Due to the large number of ROM versions, we unfortunately can only acquire these by saving them directly from the TCM physically in-house. The PDK TCM is located under the rear passenger seat and can be removed using minimal tools and just a little effort! Please review steps and tools needed BEFORE getting started.

If you feel that you cannot properly perform this removal, we HIGHLY recommend you take the vehicle to a qualified and experienced automotive technician.

https://www.cobbtuning.com/dealers


Table of Contents


Tools Needed

Sockets

3/8"

  • 3/8" 8mm socket 

  • 3/8" 10mm socket

  • 3/8" 13mm socket

  • 3/8" 16mm socket

Hand Tools

  • Flathead screwdriver
  • Trim removal tool

Estimated Removal Time: 30 minutes


Instructions for TCM Removal

Preparation

  1. Make sure the car is parked in a location where it can sit until the TCM is reinstalled. If the car needs to be moved or pushed while the TCM is not in the car, leave the car in the "N" Neutral position so you can push it. Failure to put the car in "N" Neutral before you remove the TCM will keep the car stuck in the "P" Park until the TCM is installed again.

  2. Move both front seats to the forward position and lean seats forward to give ample room to work in.

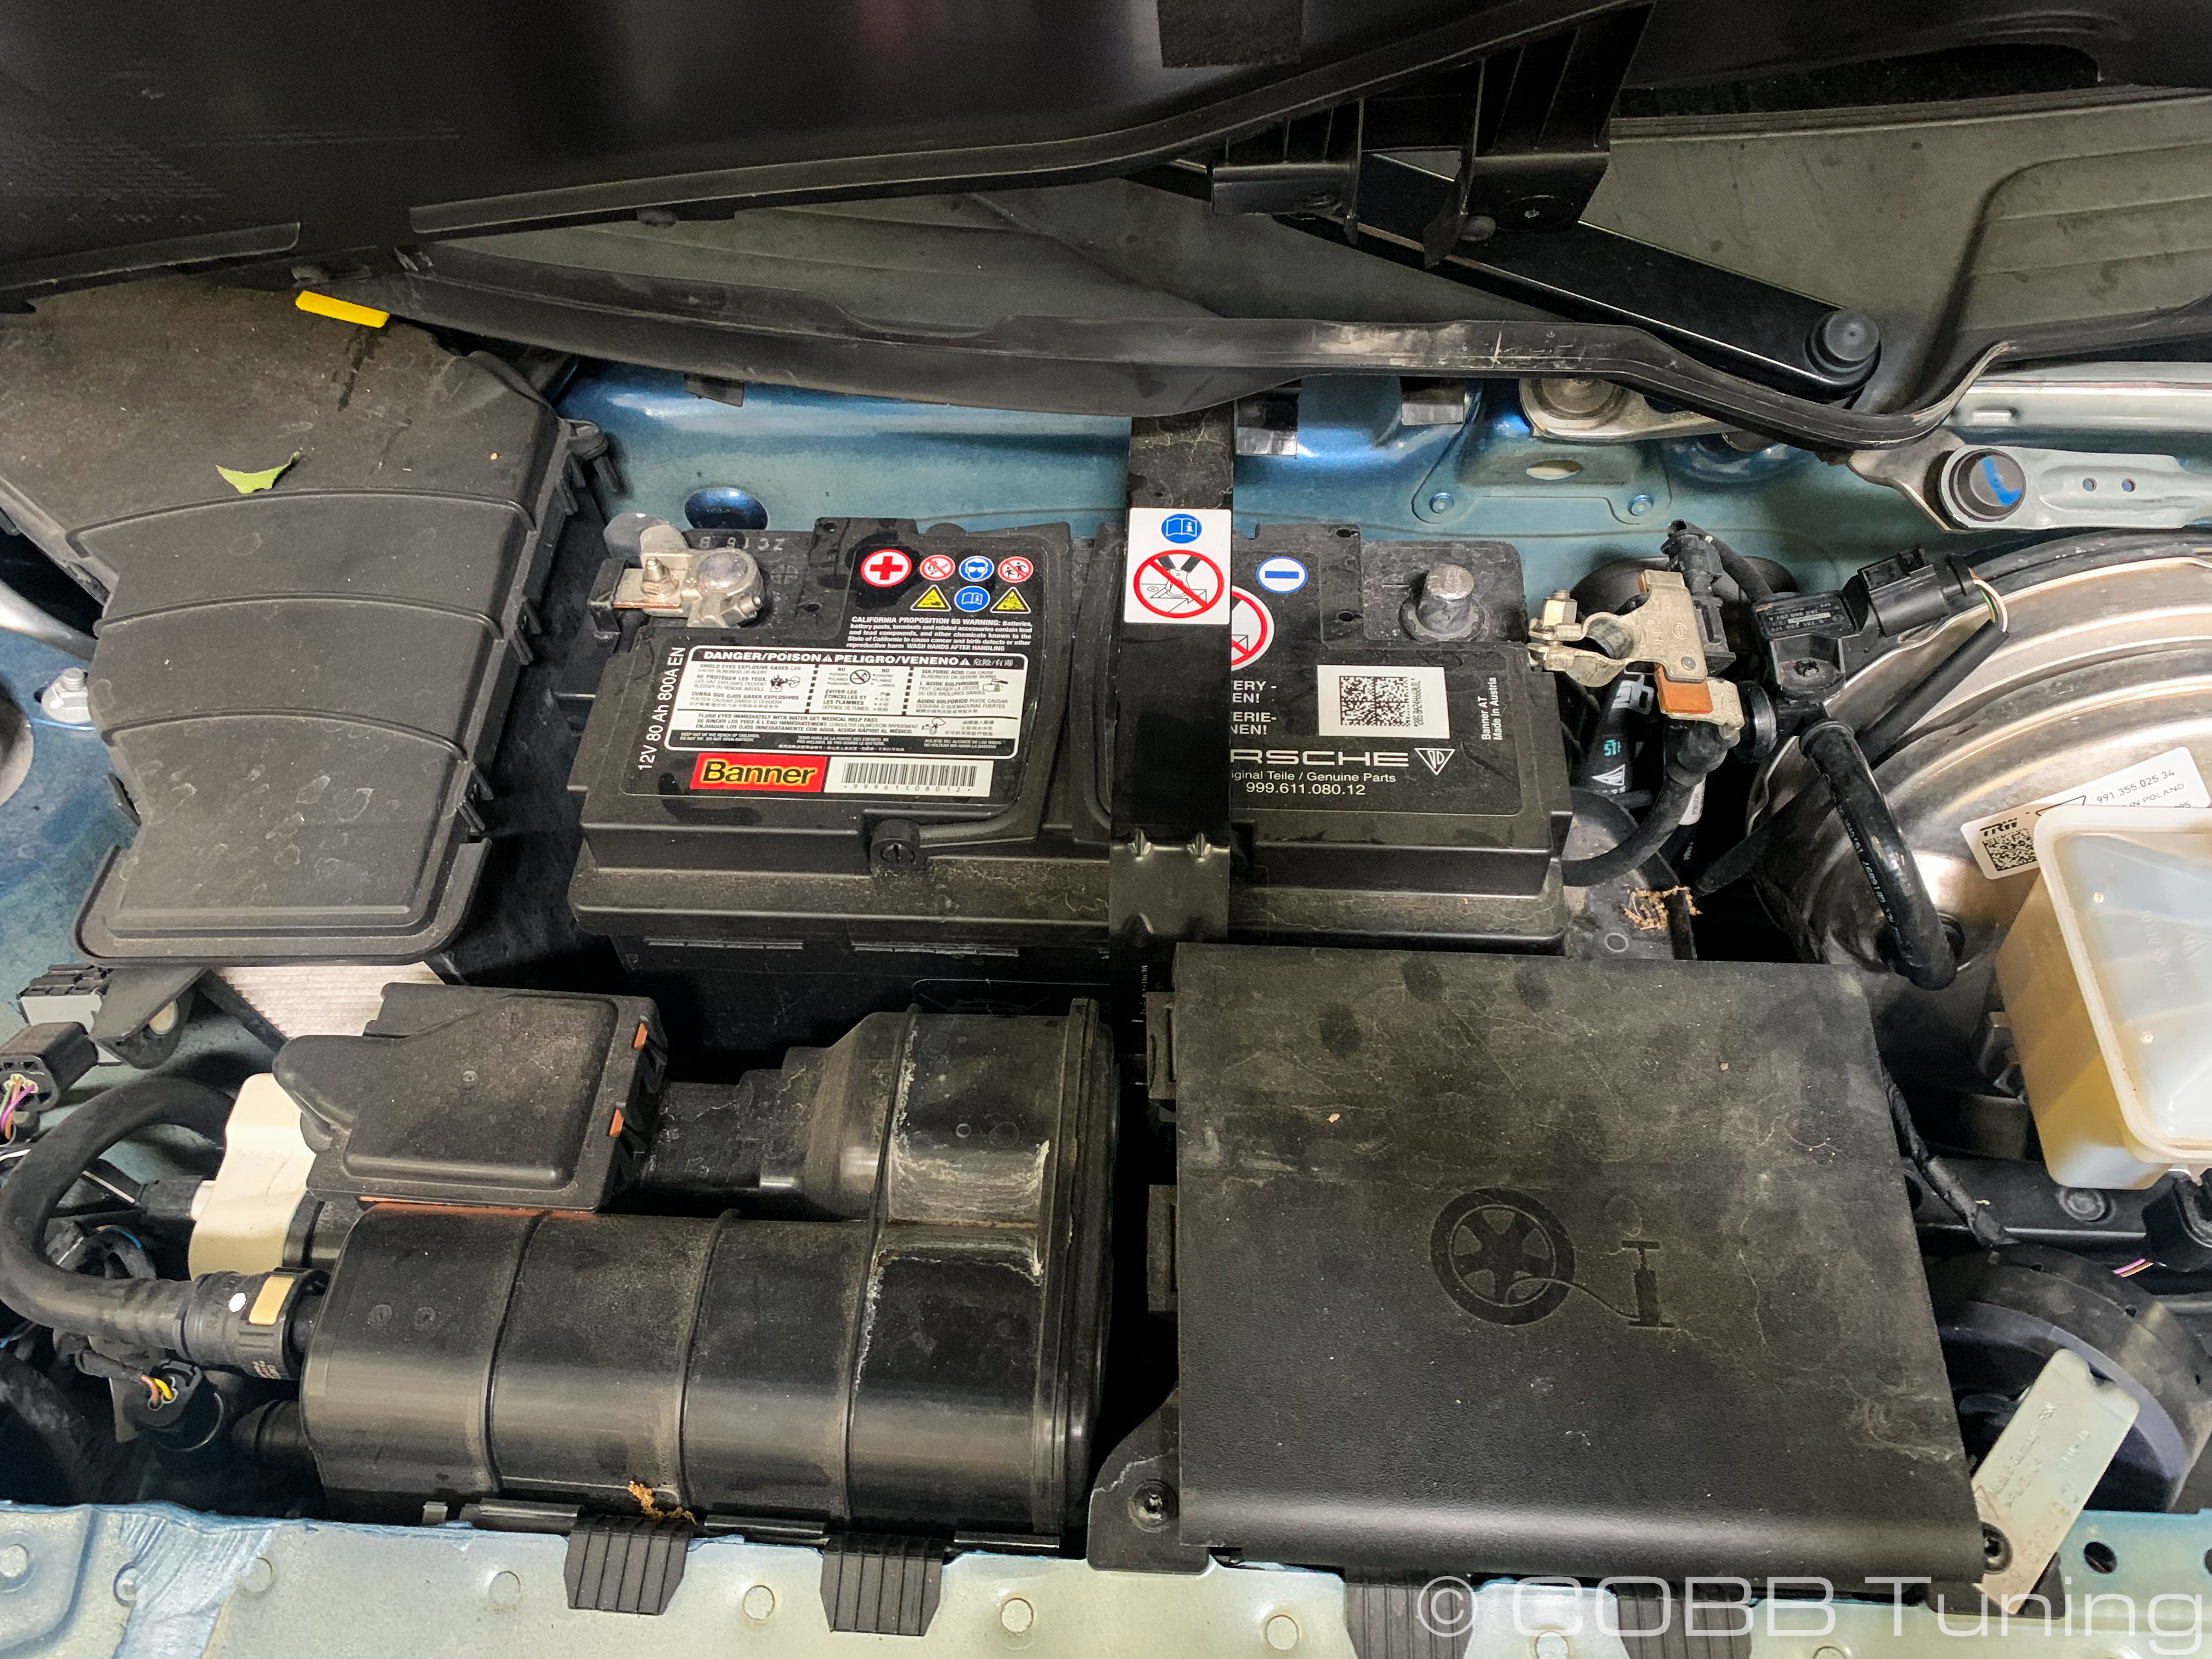
  3. Disconnect the battery terminals under the hood in the frunk.


    Failure to disconnect the battery before removing the TCM can cause significant damage to their delicate circuitry.


Rear Seat Removal

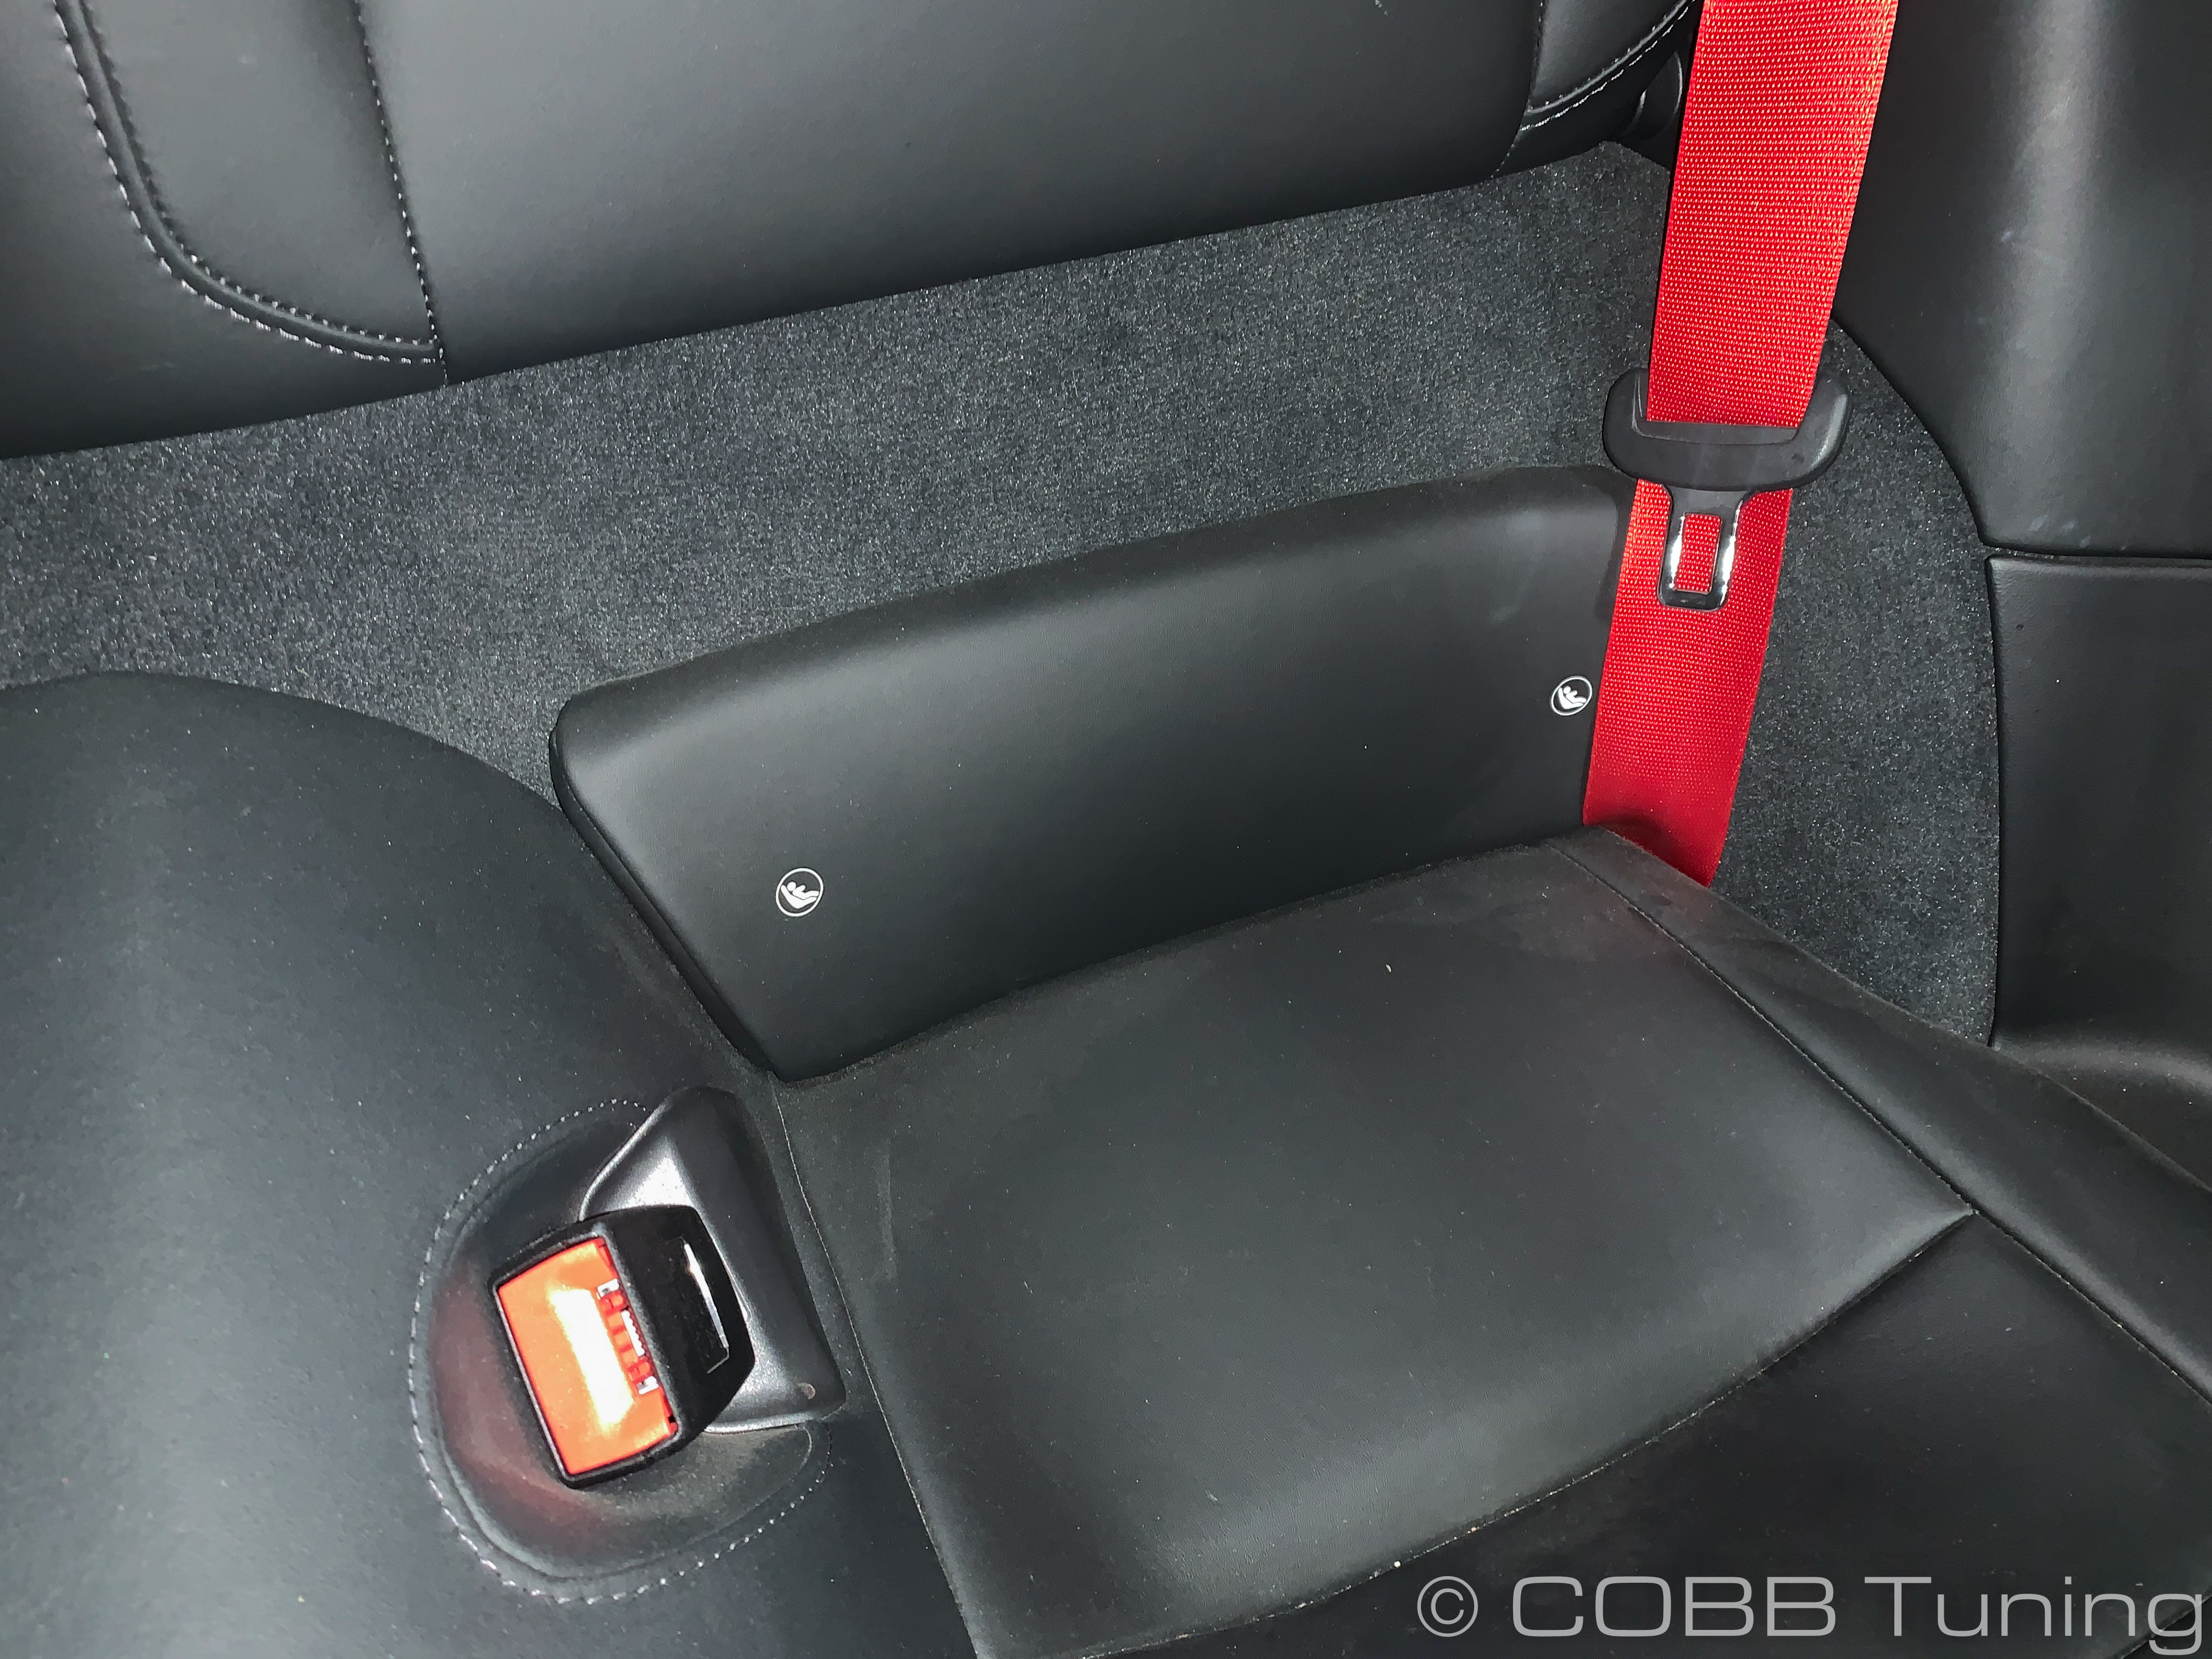
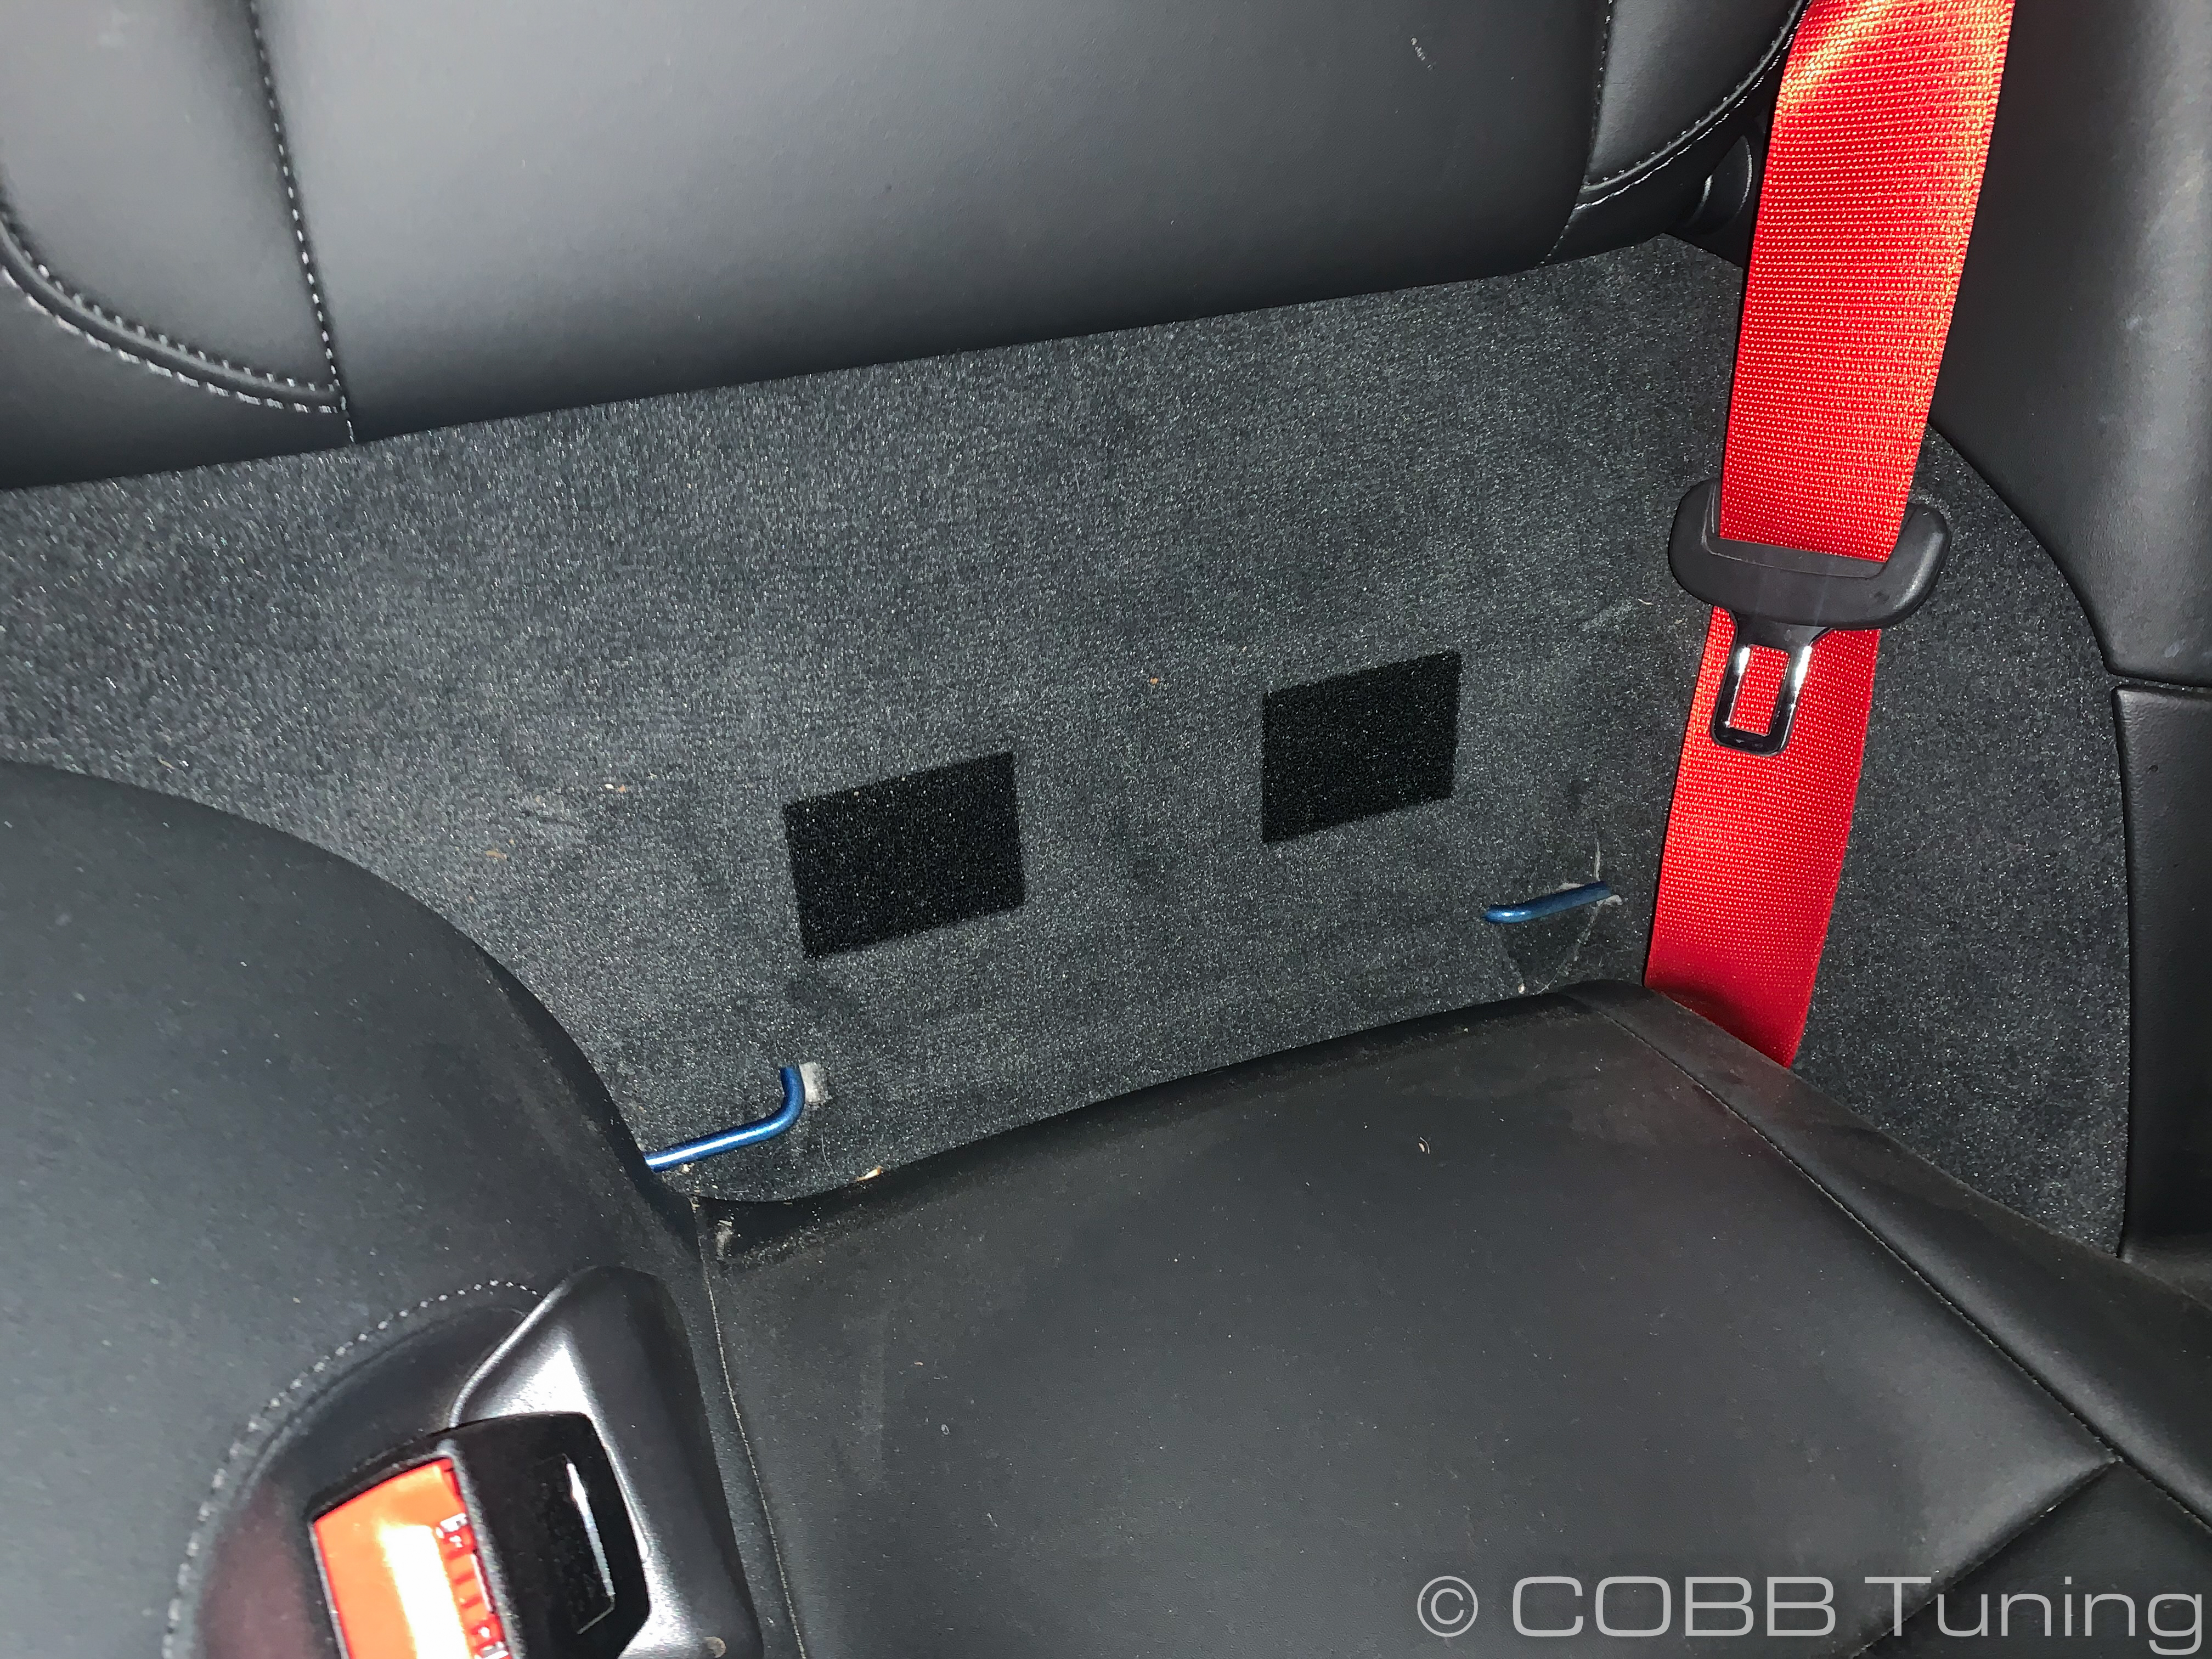
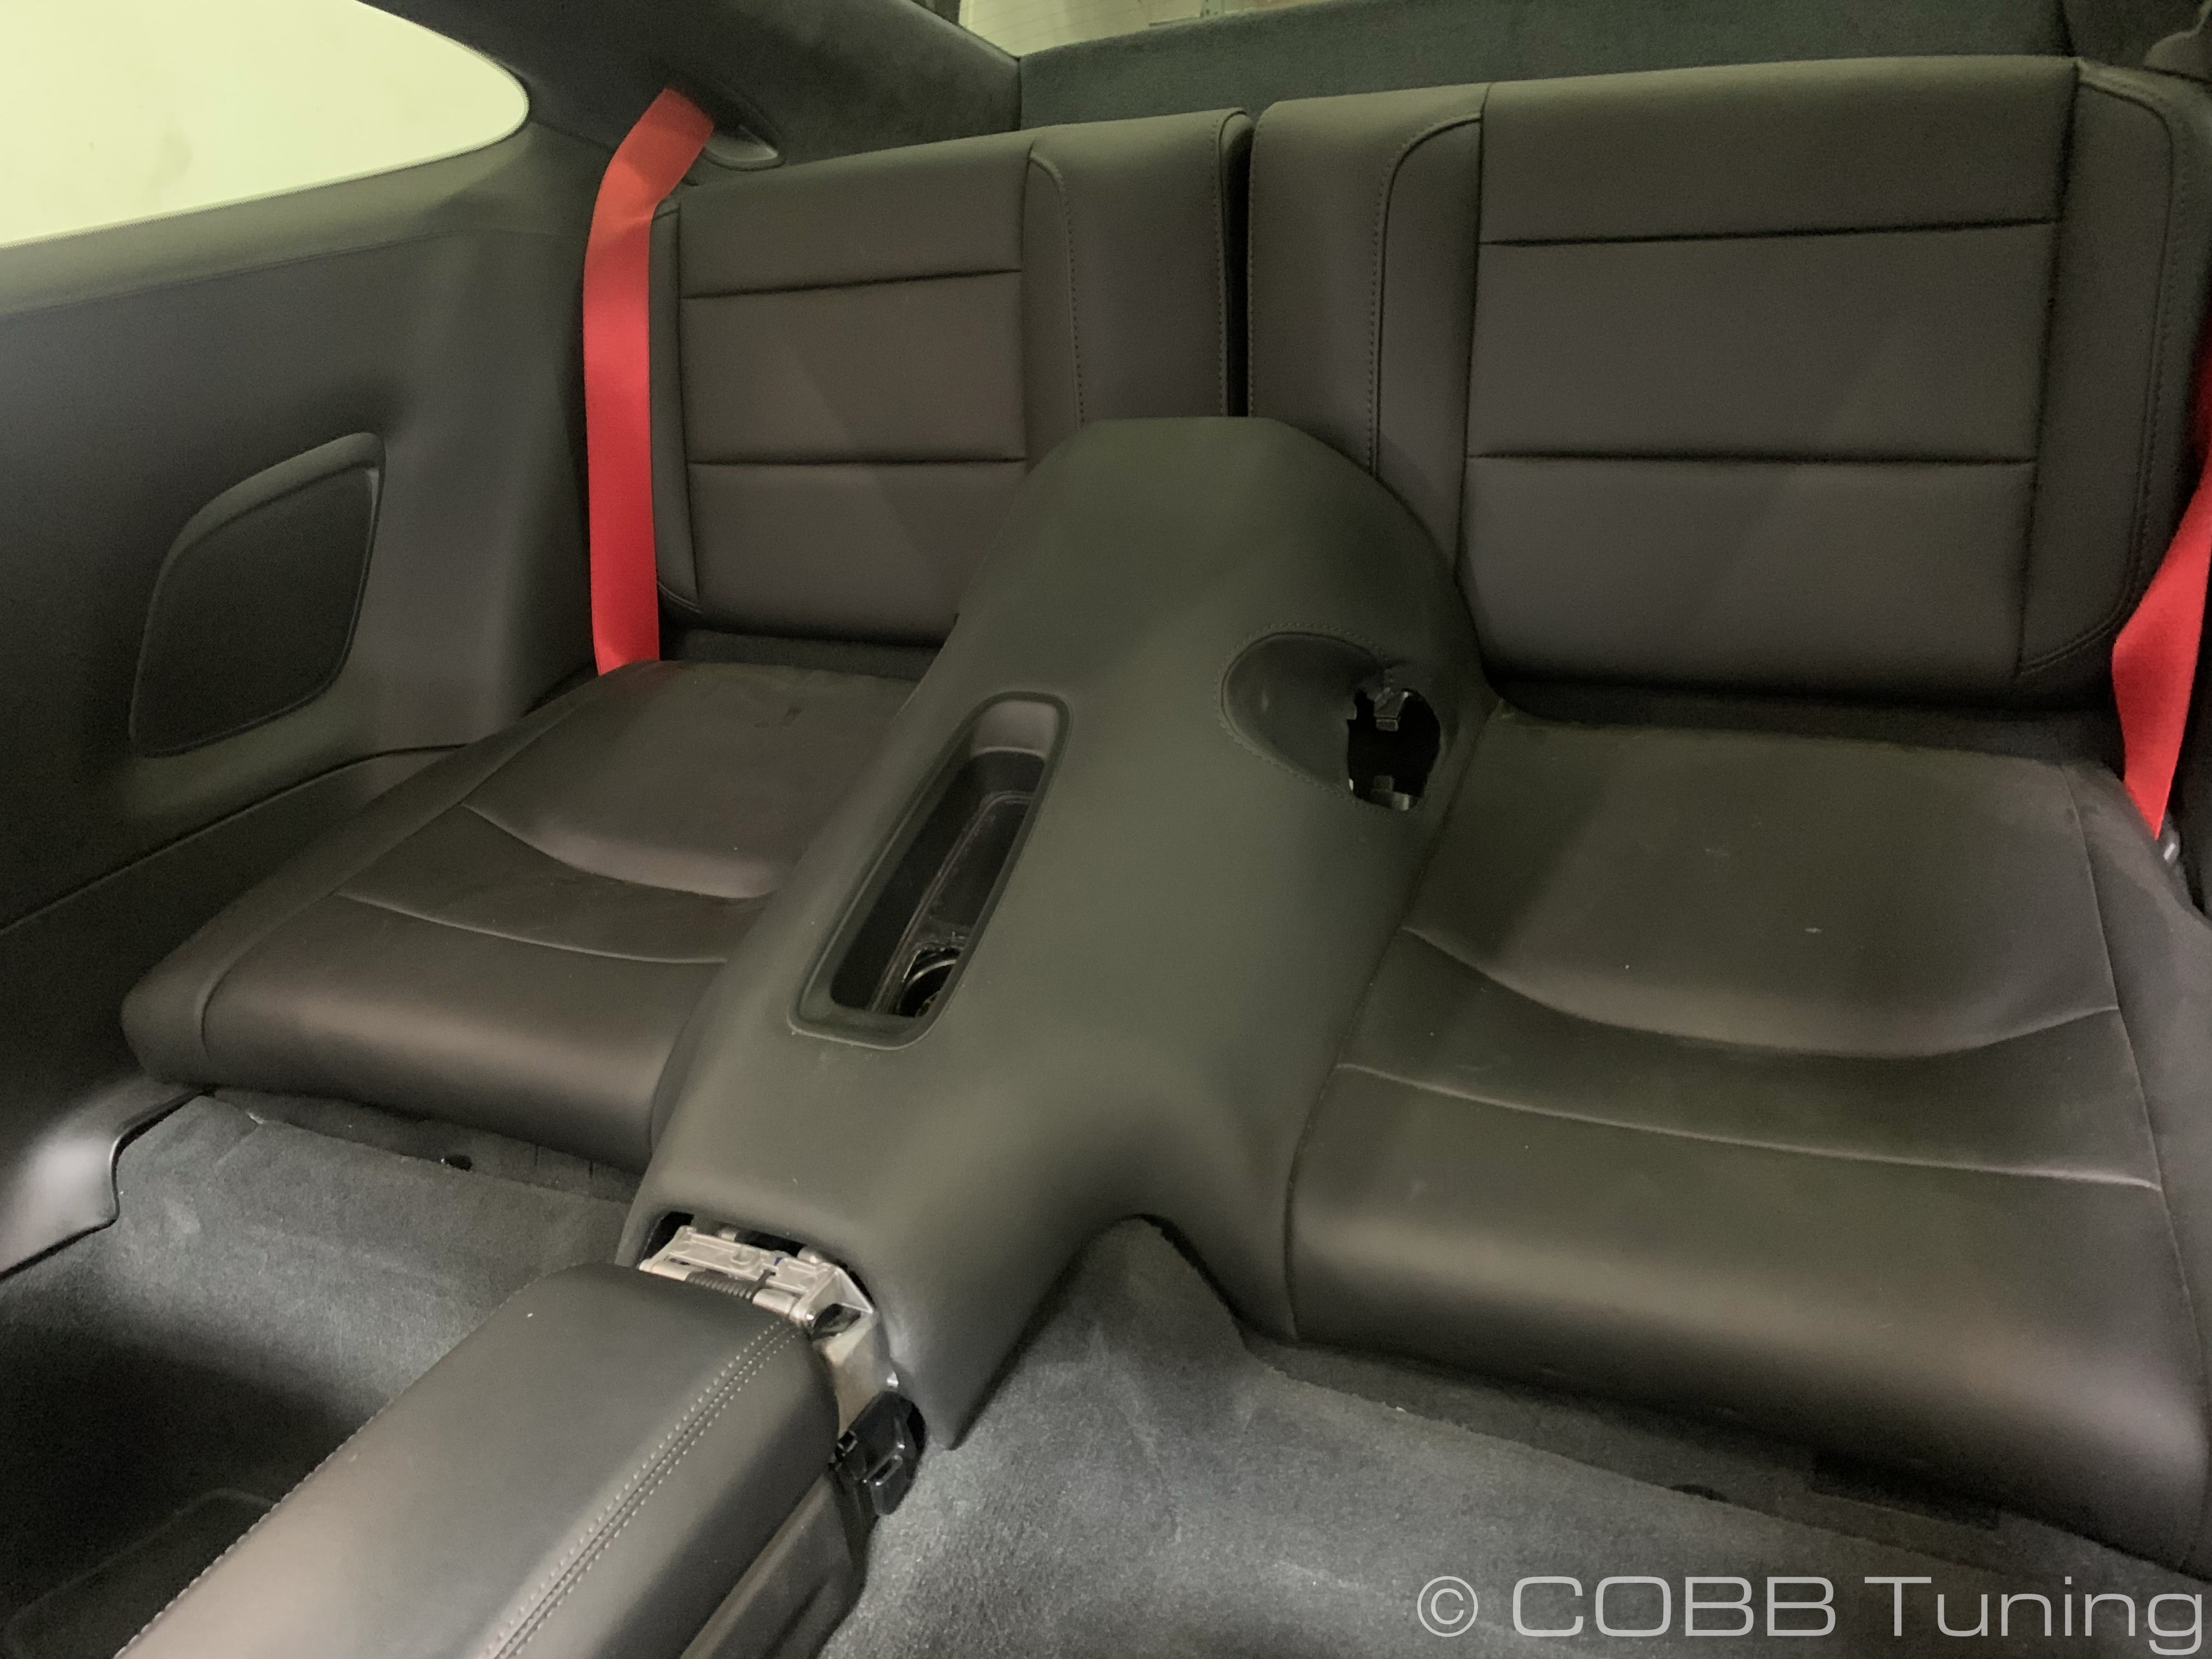
  1. Remove the lumbar pad from the seat. It is held on using Velcro and will pull off quite easily. 


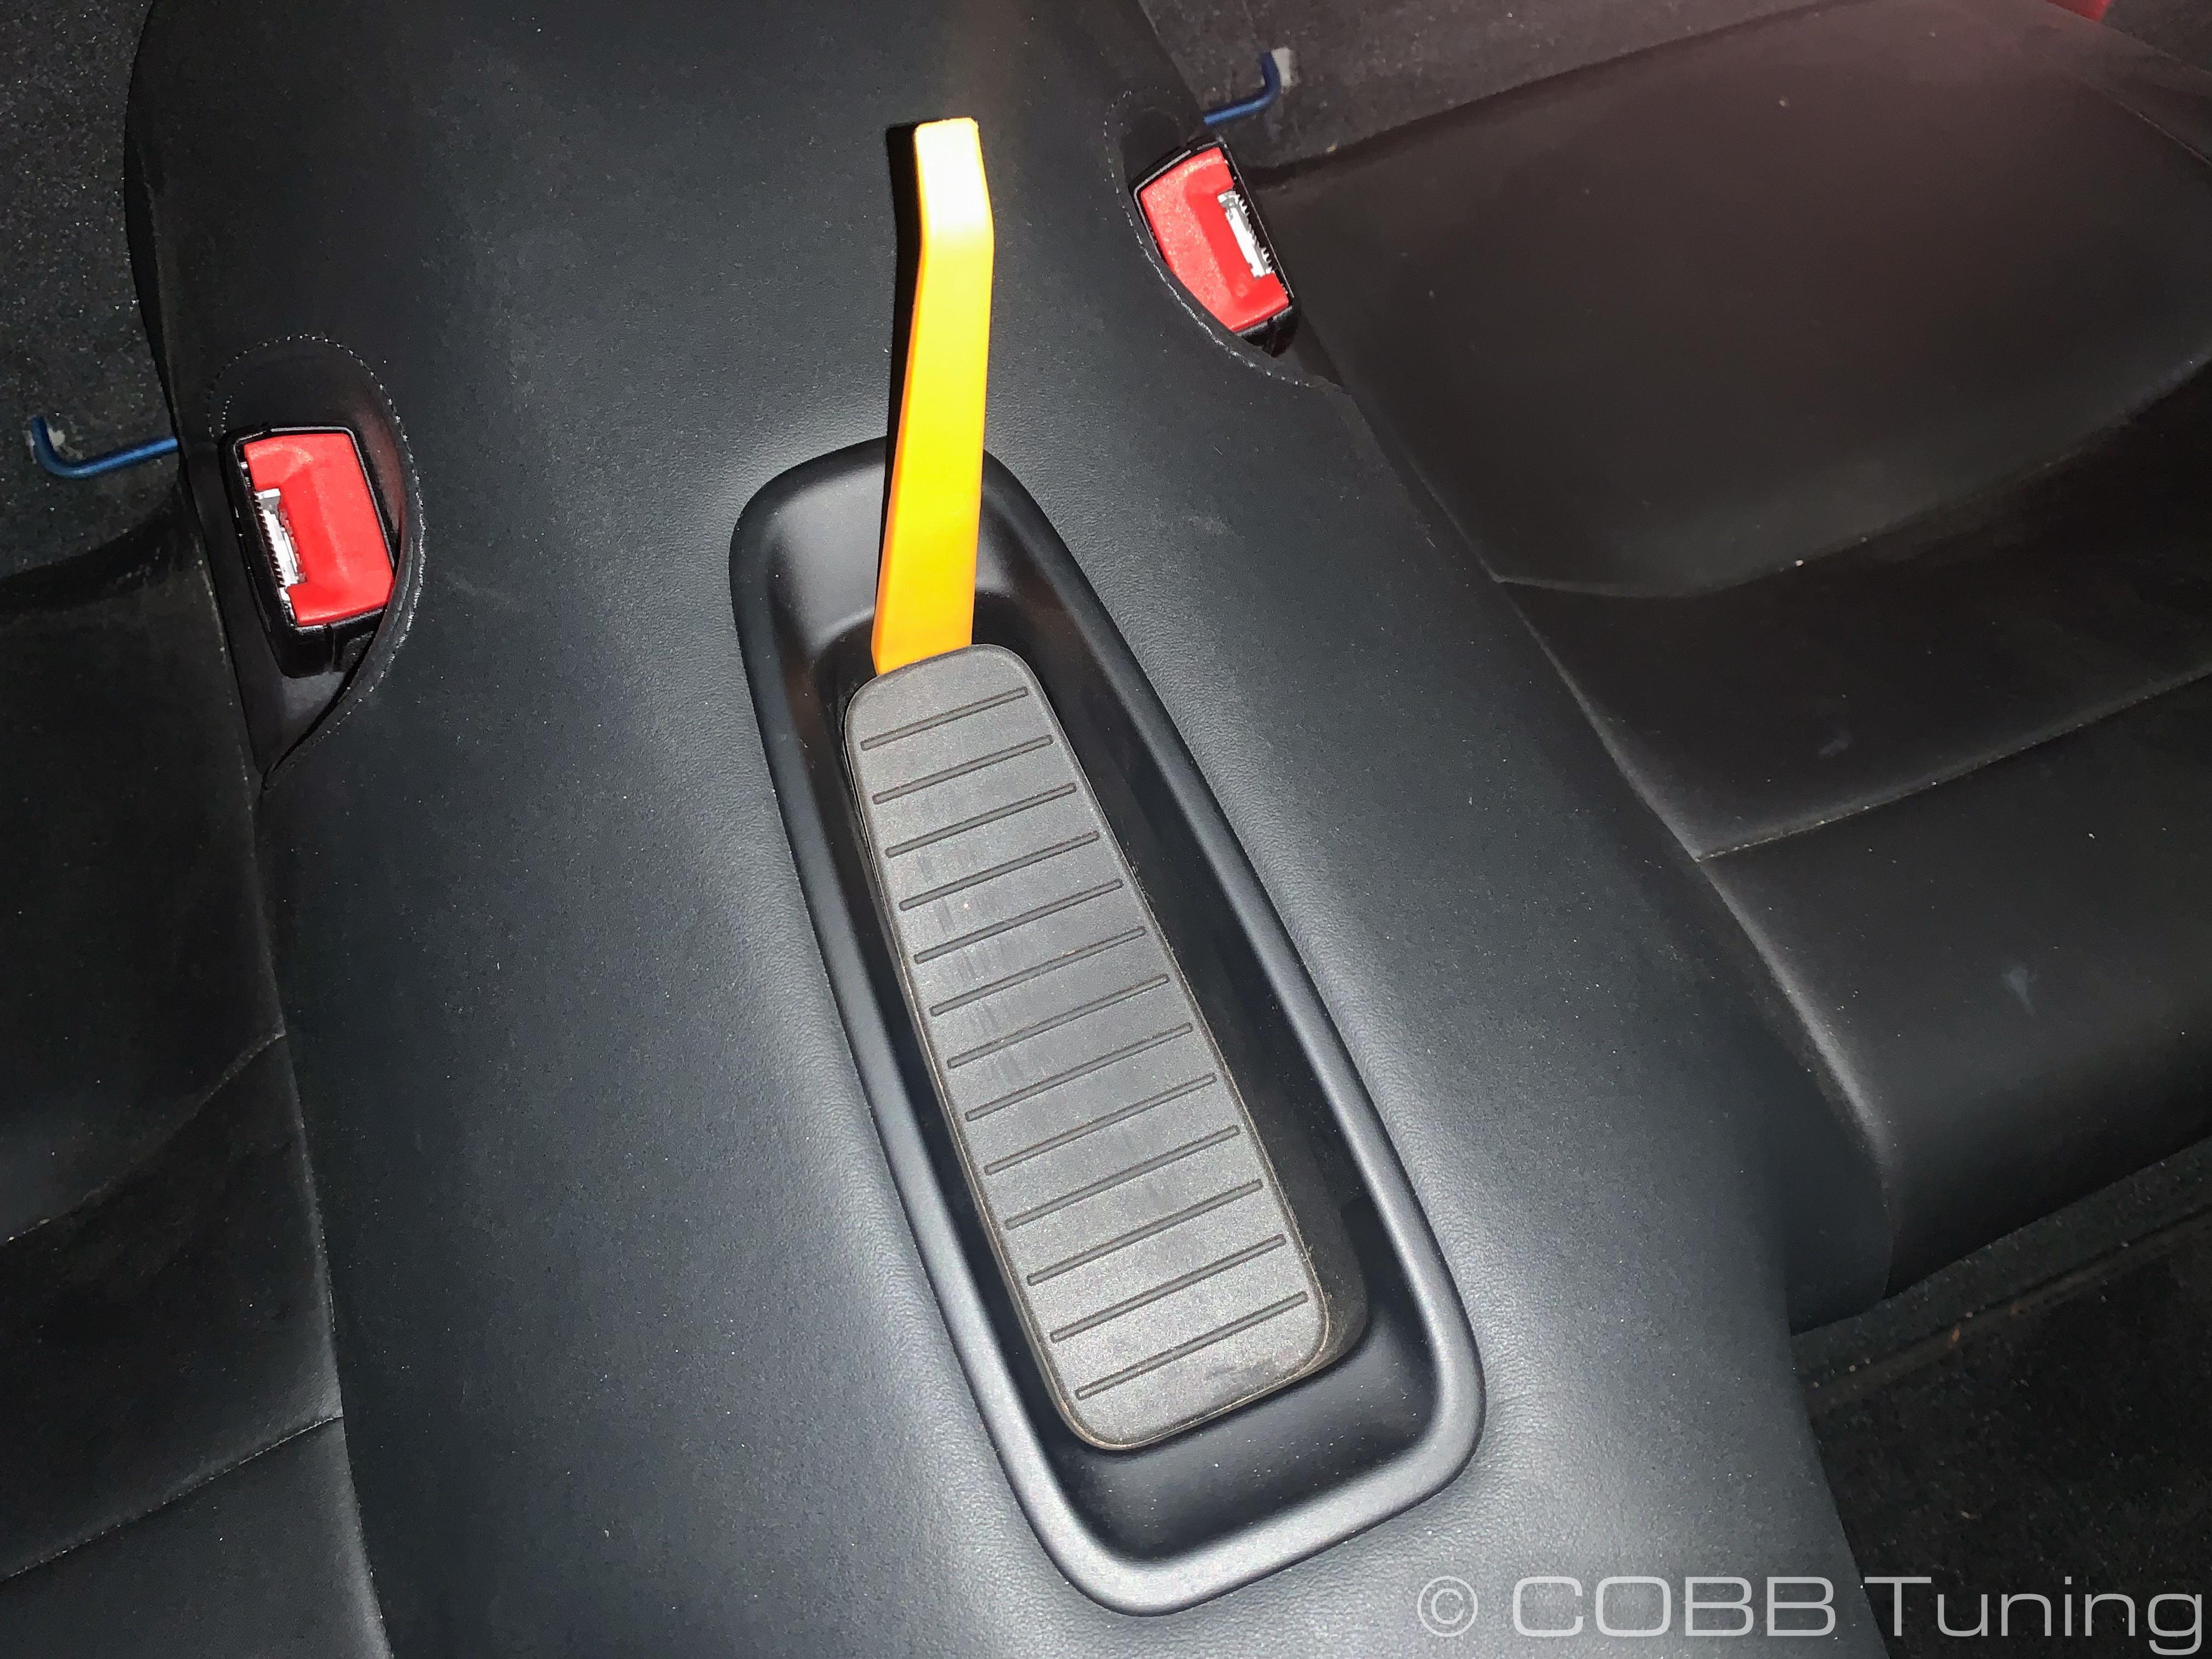
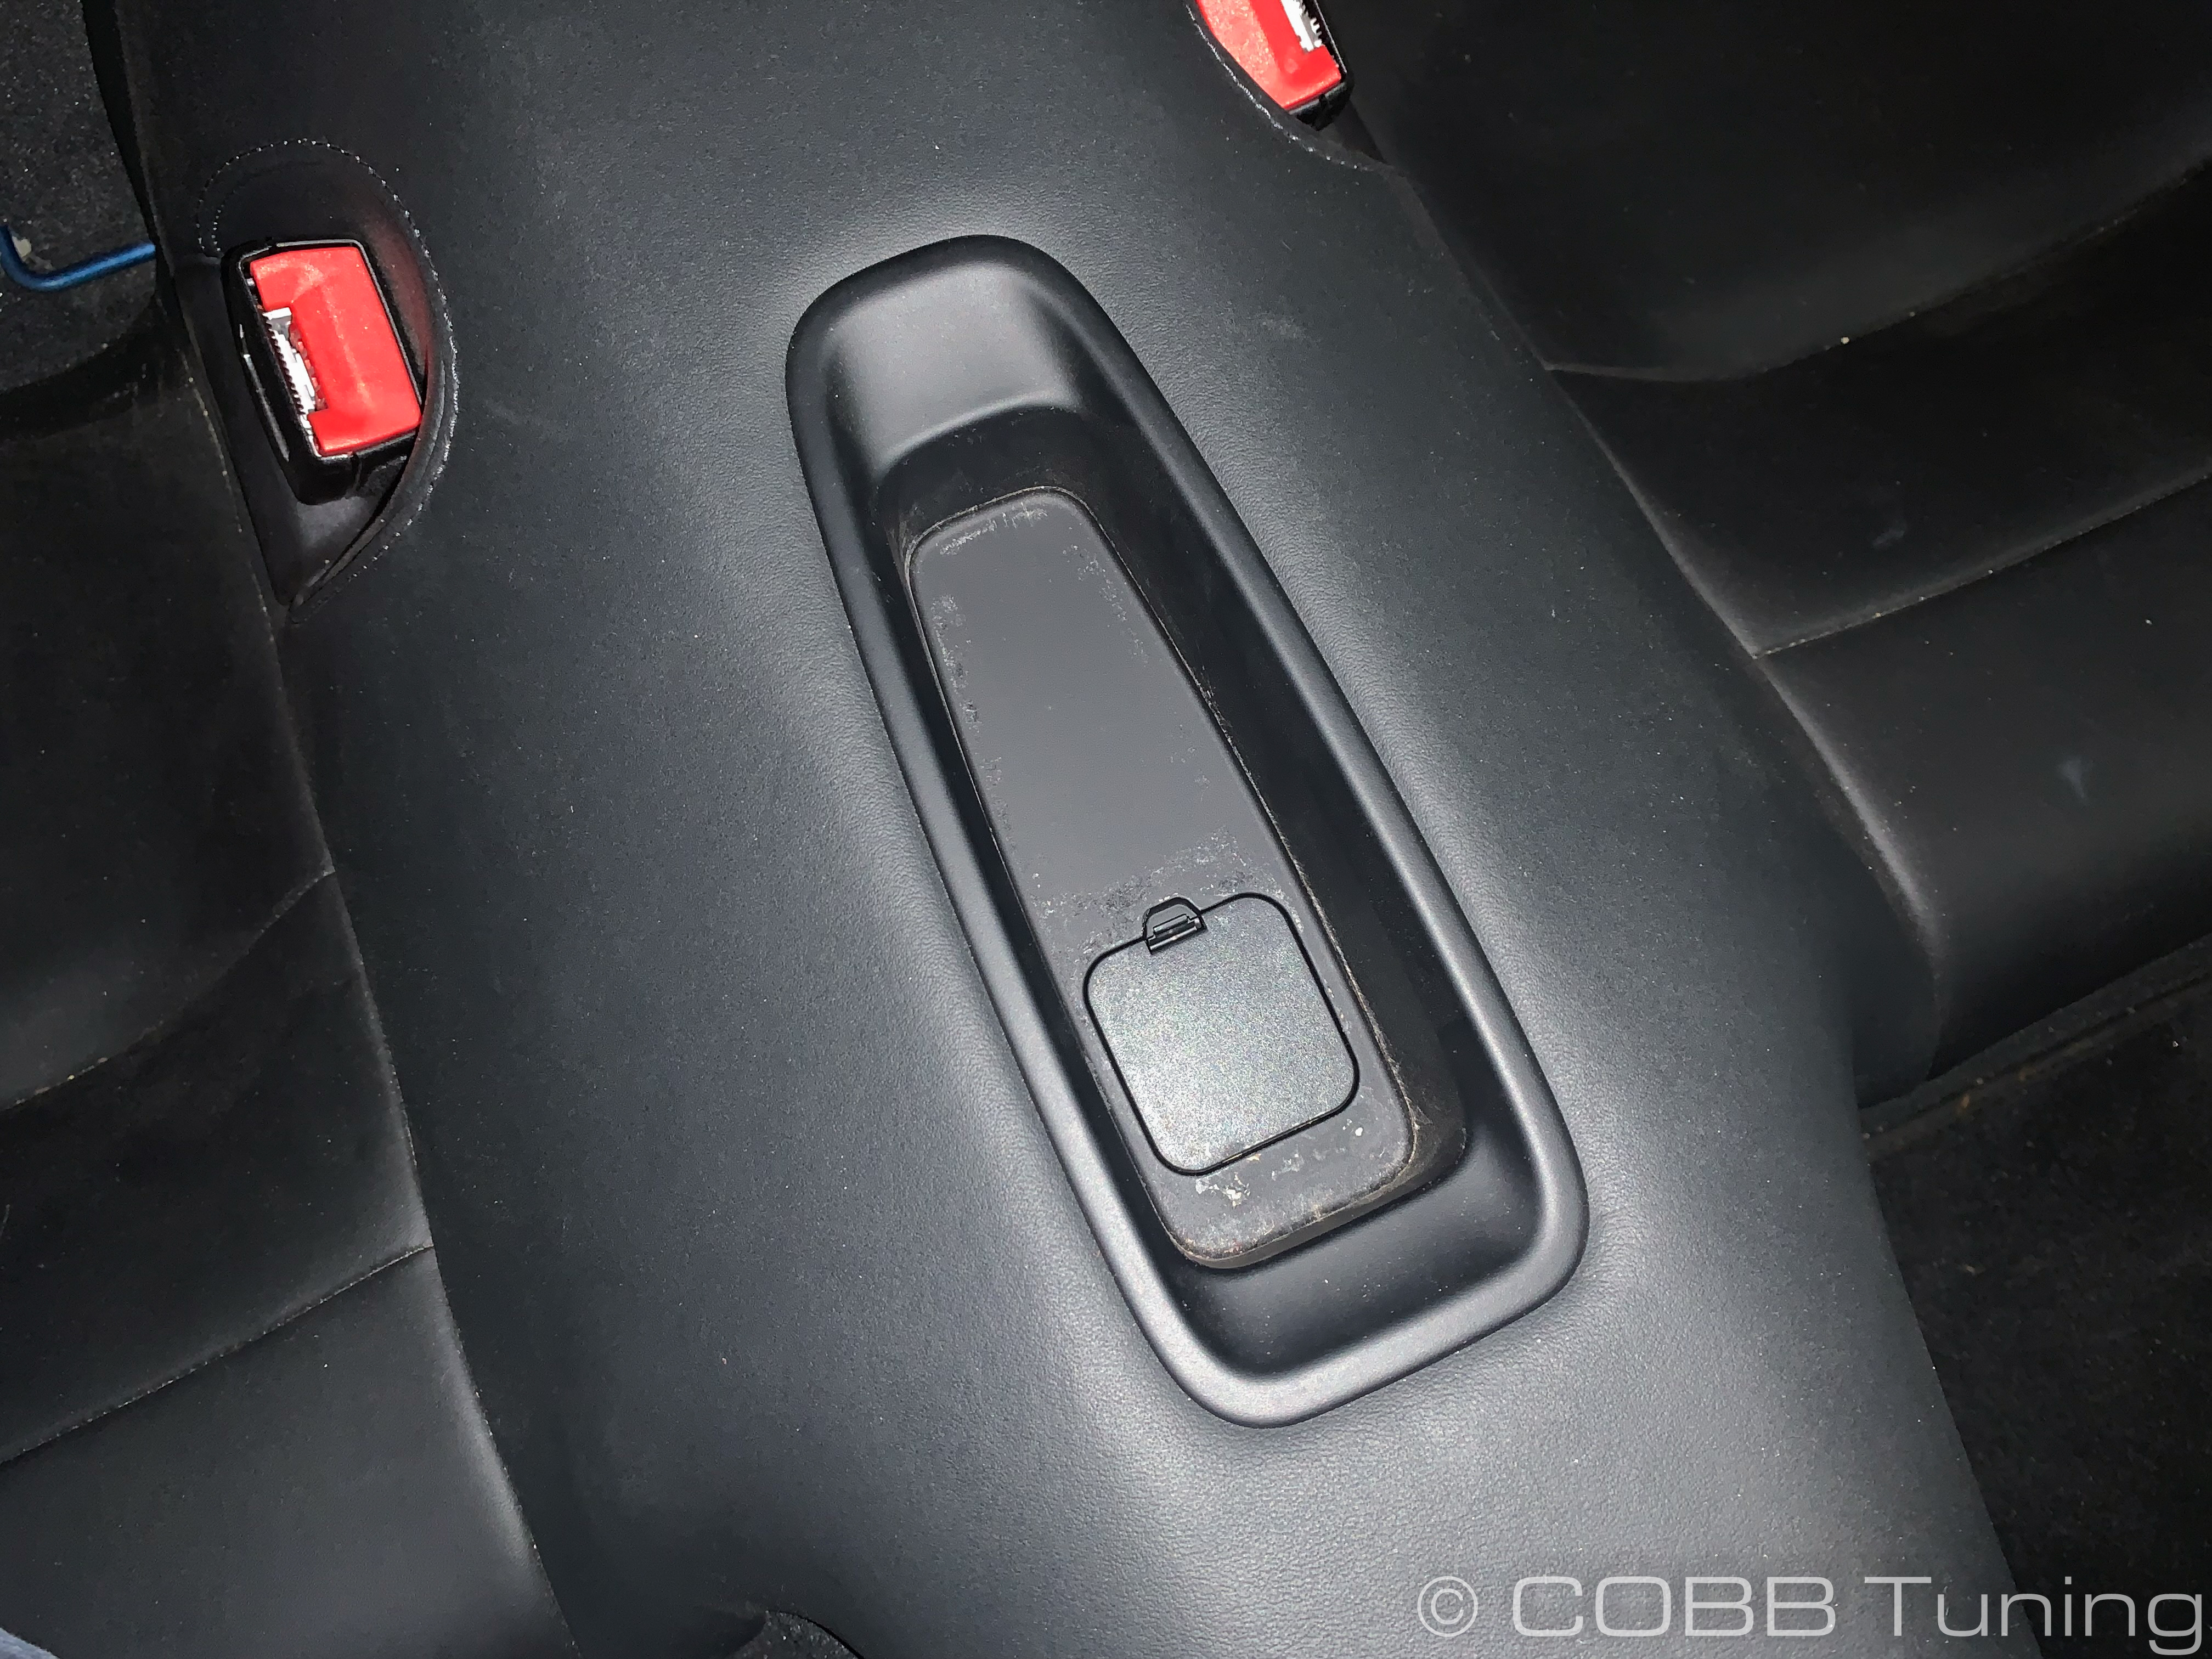
  2. Remove the rubber insert from the rear seat storage tray. You can use a trim tool or dull flat-edge and pull it out from the rear.


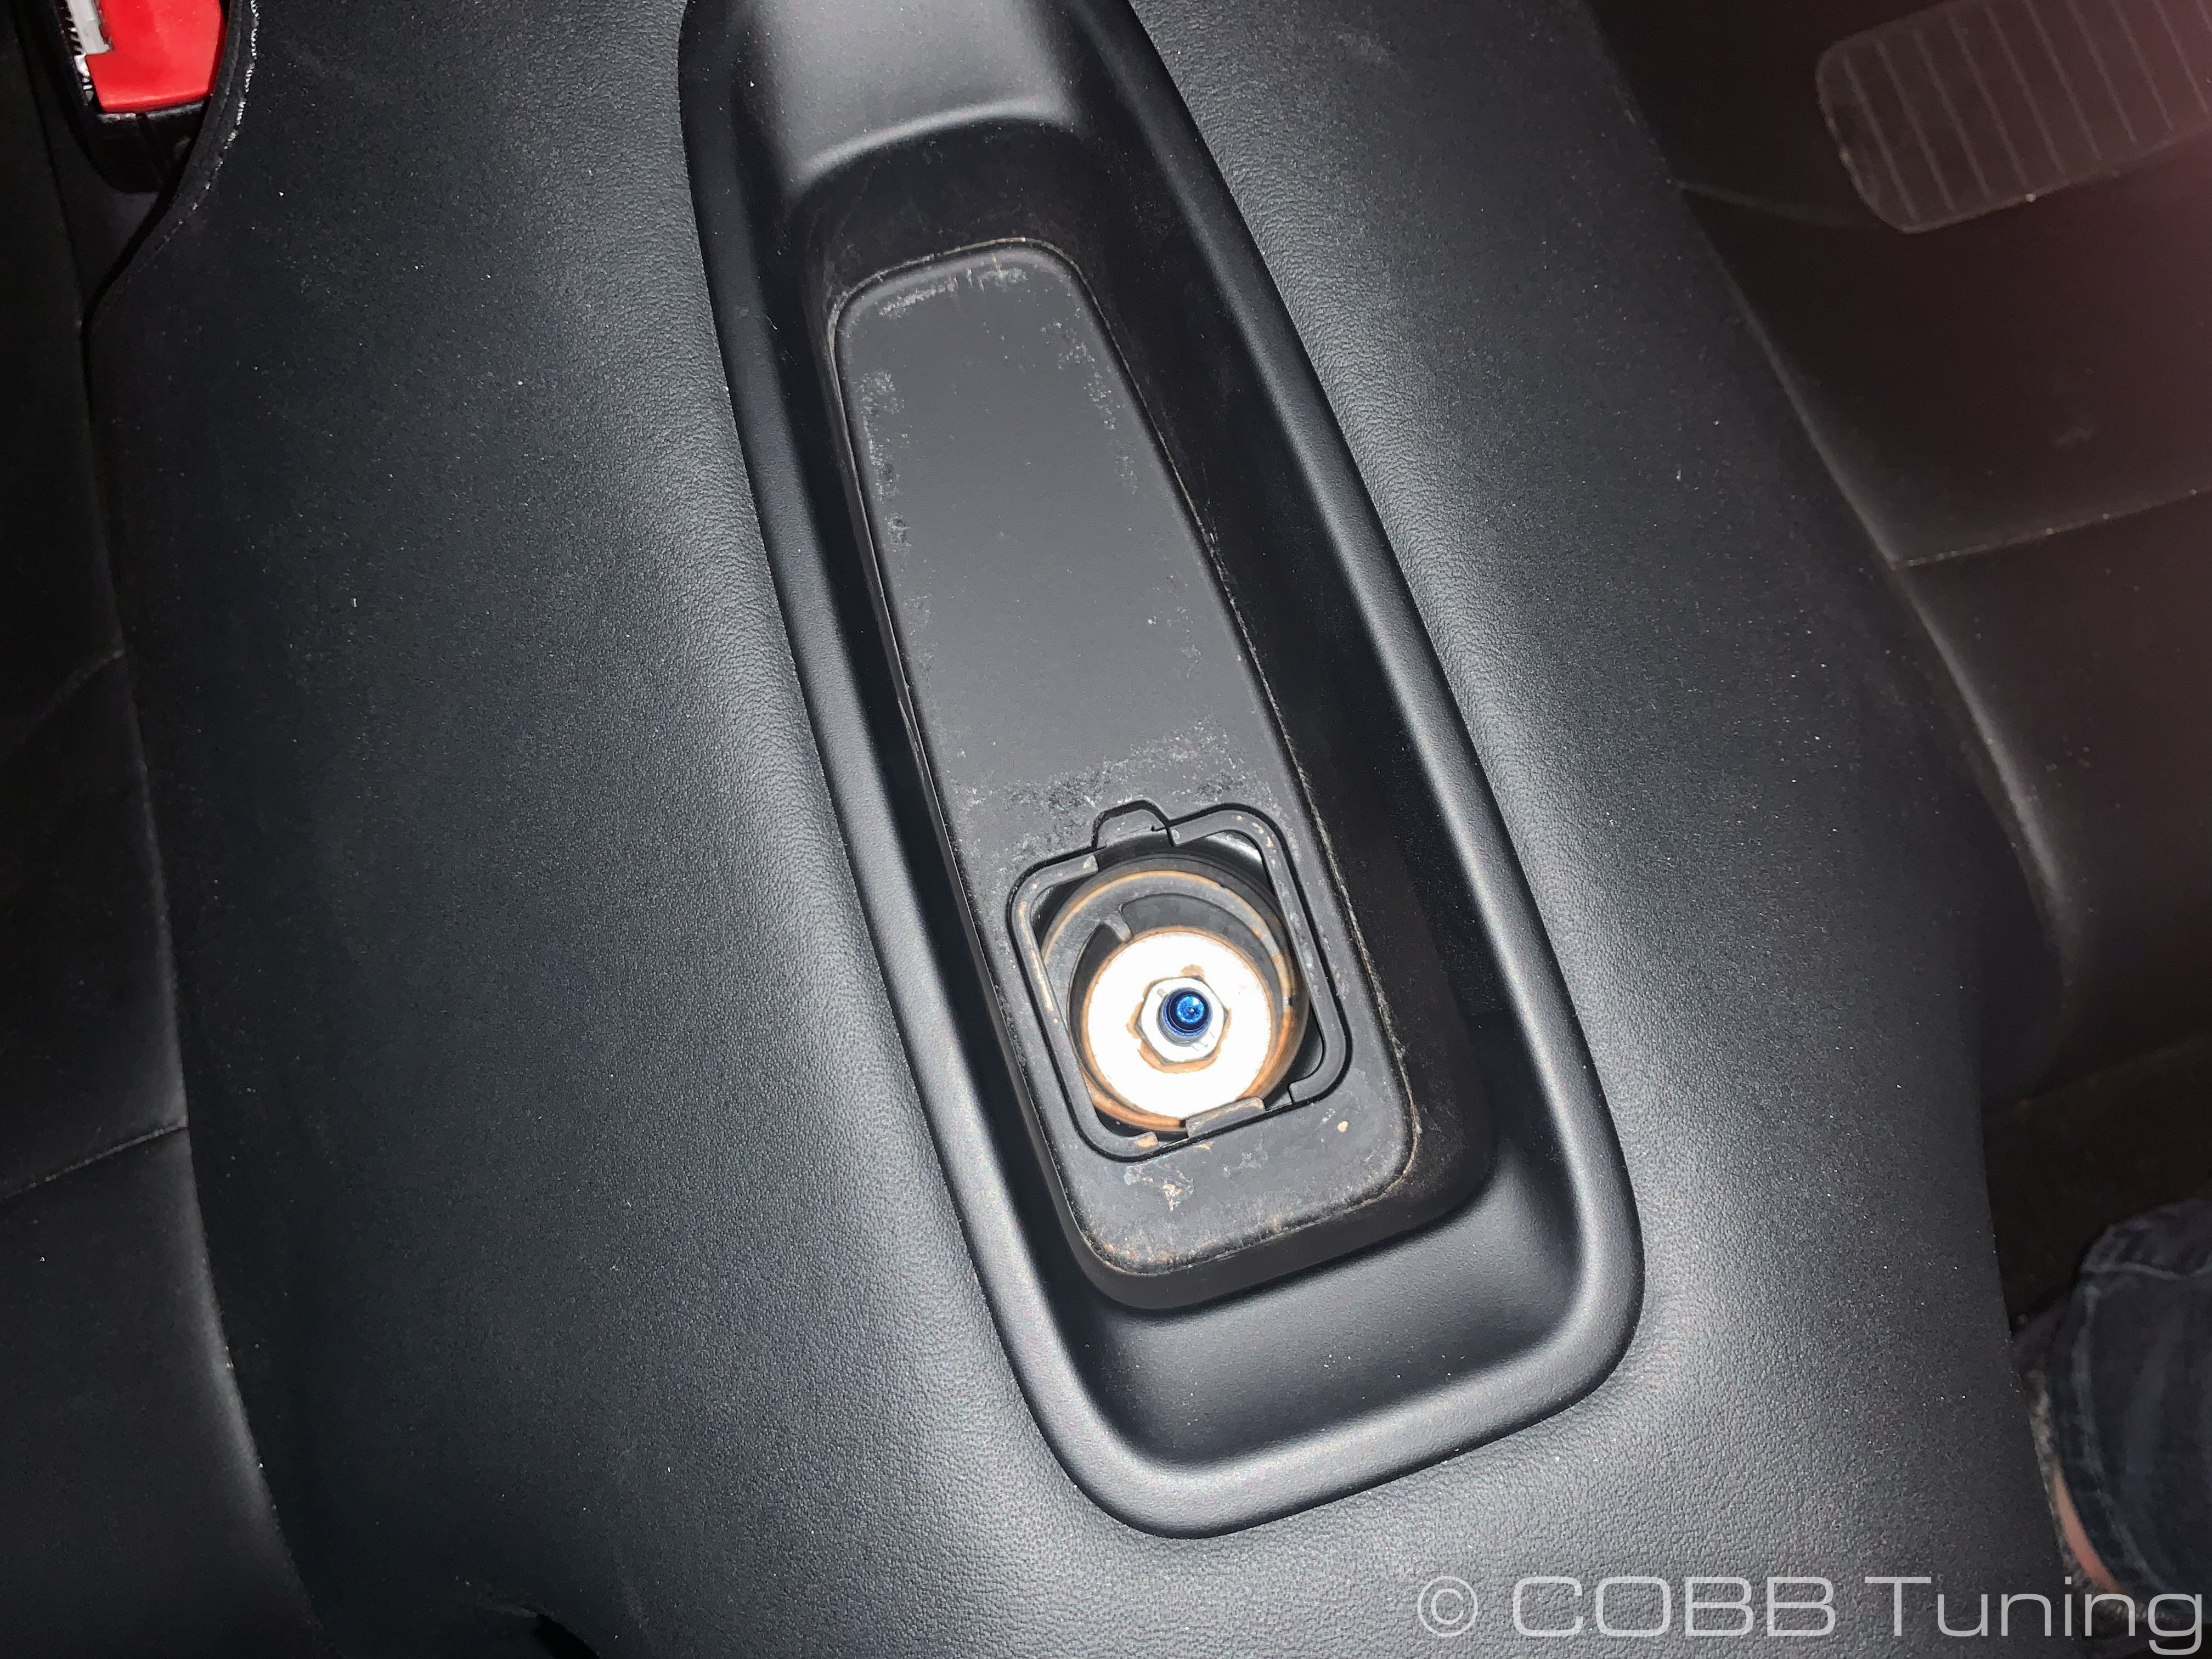
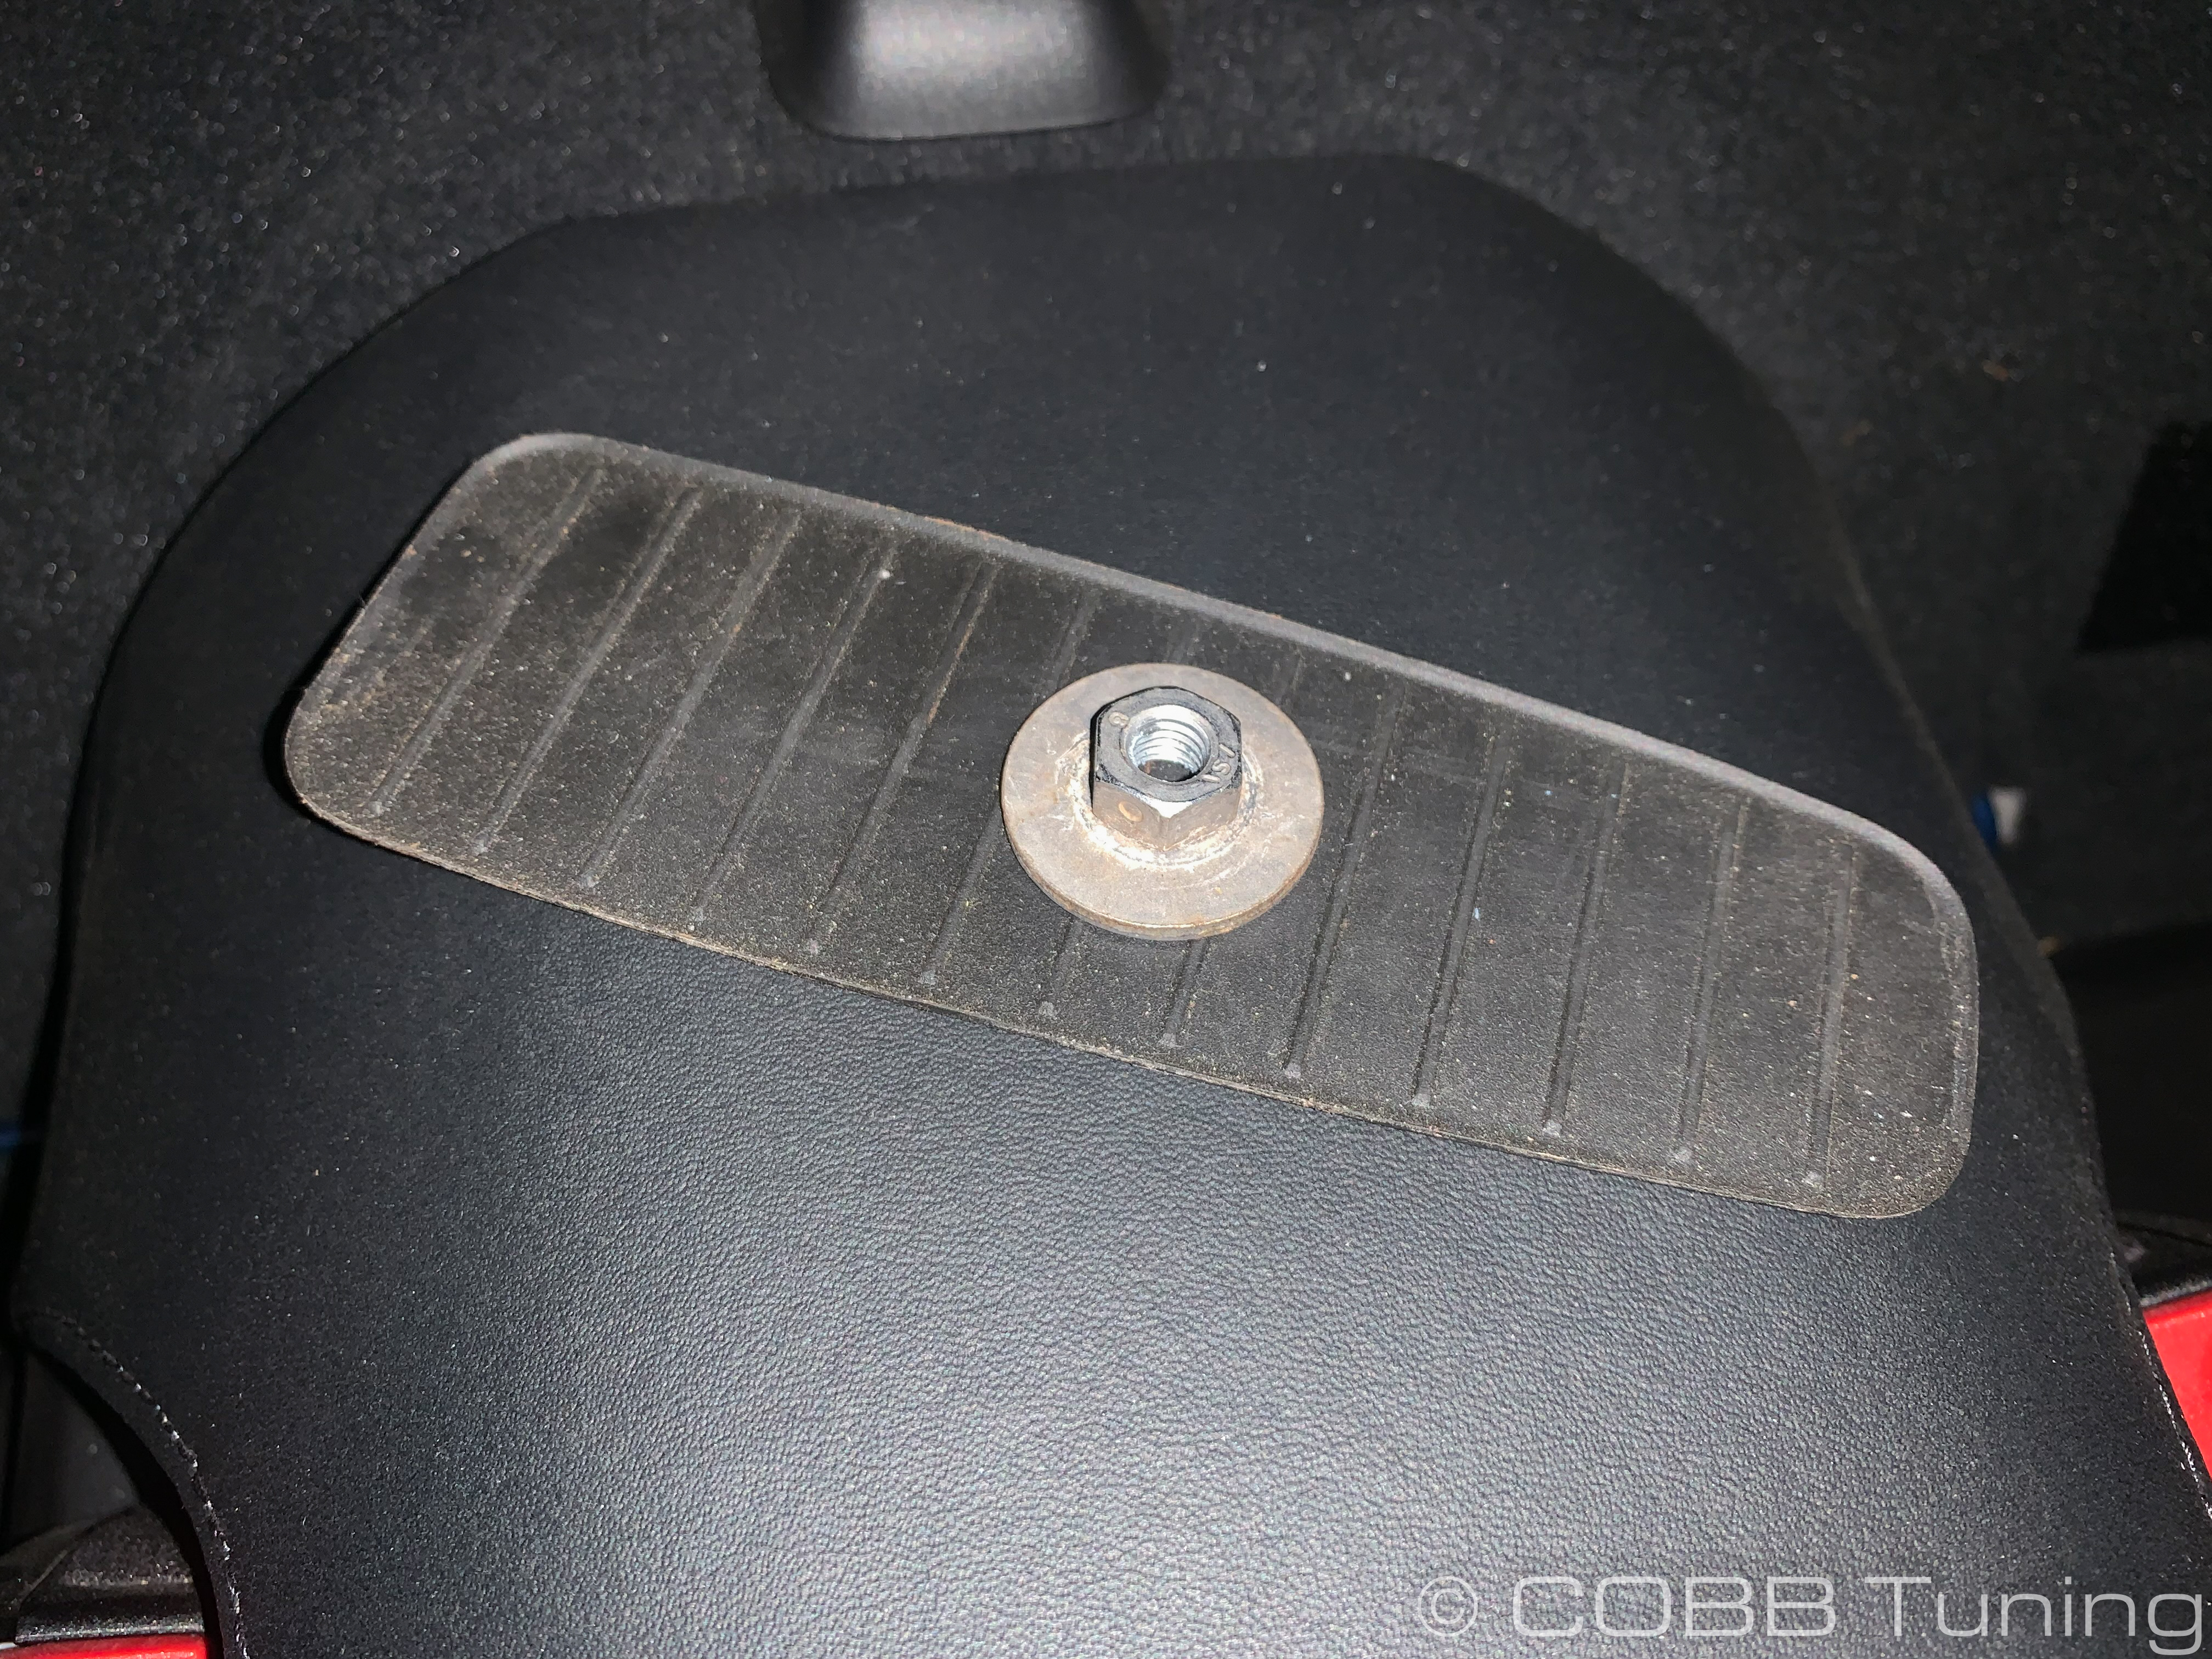
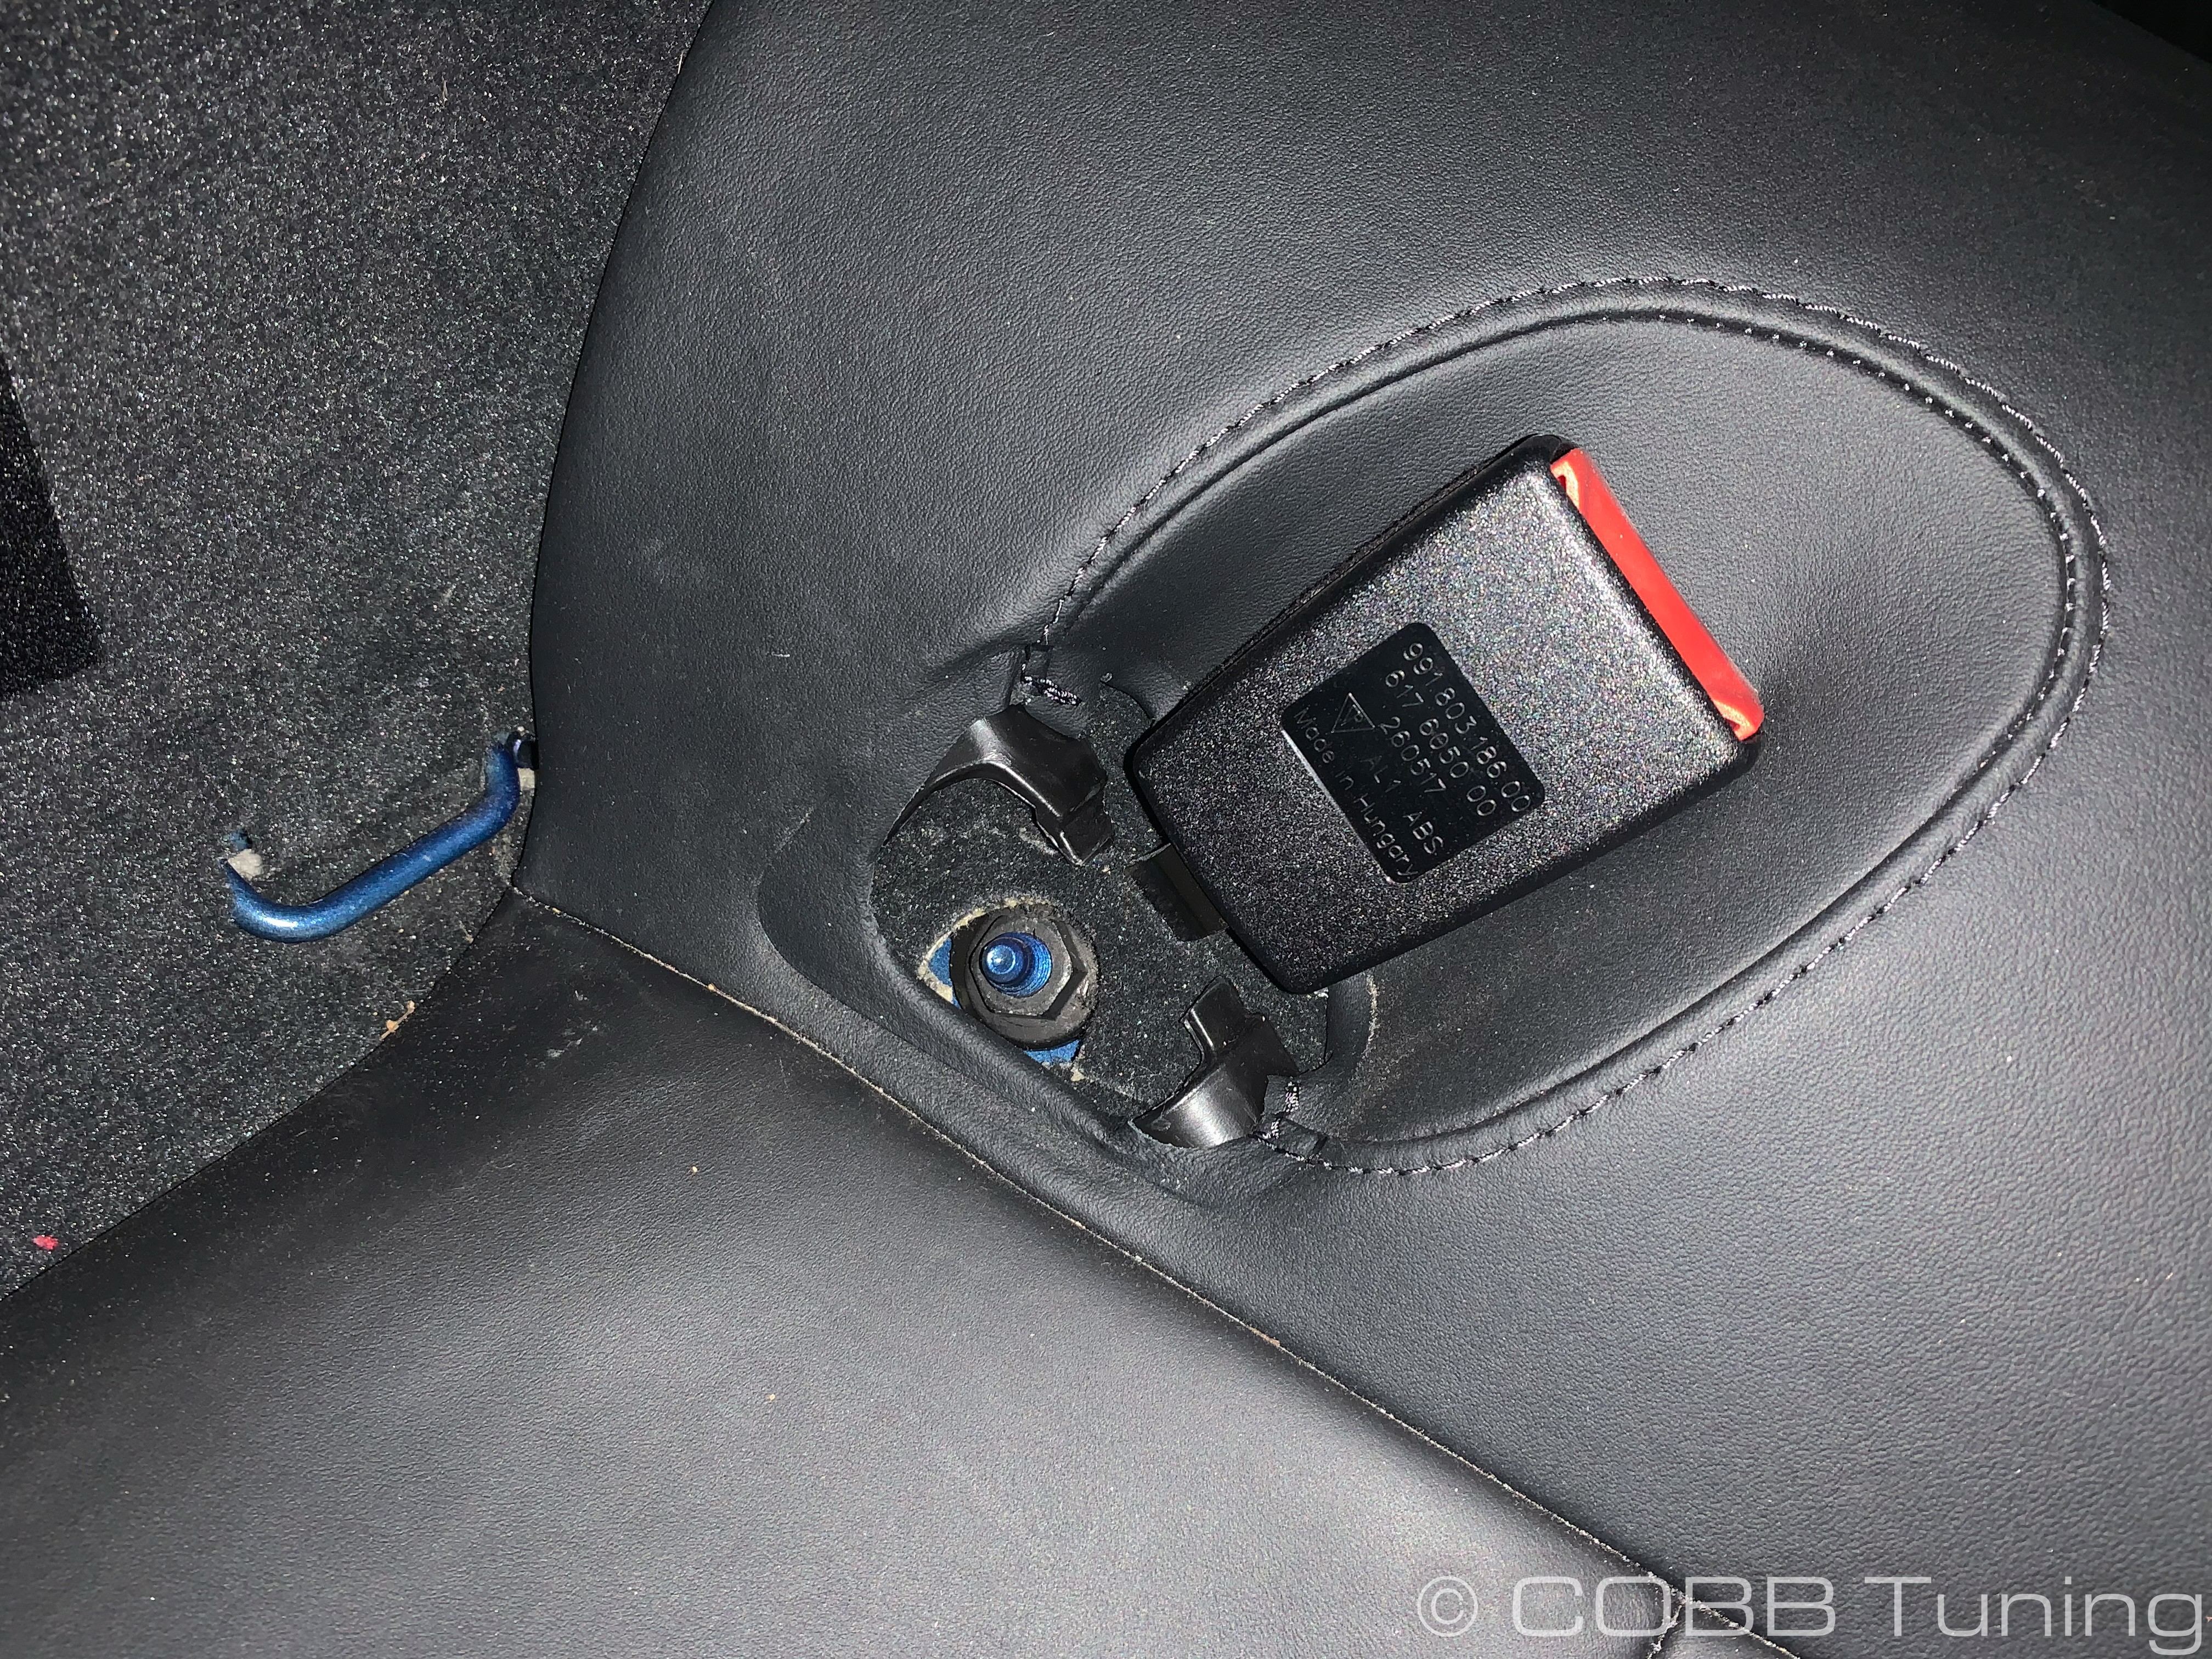
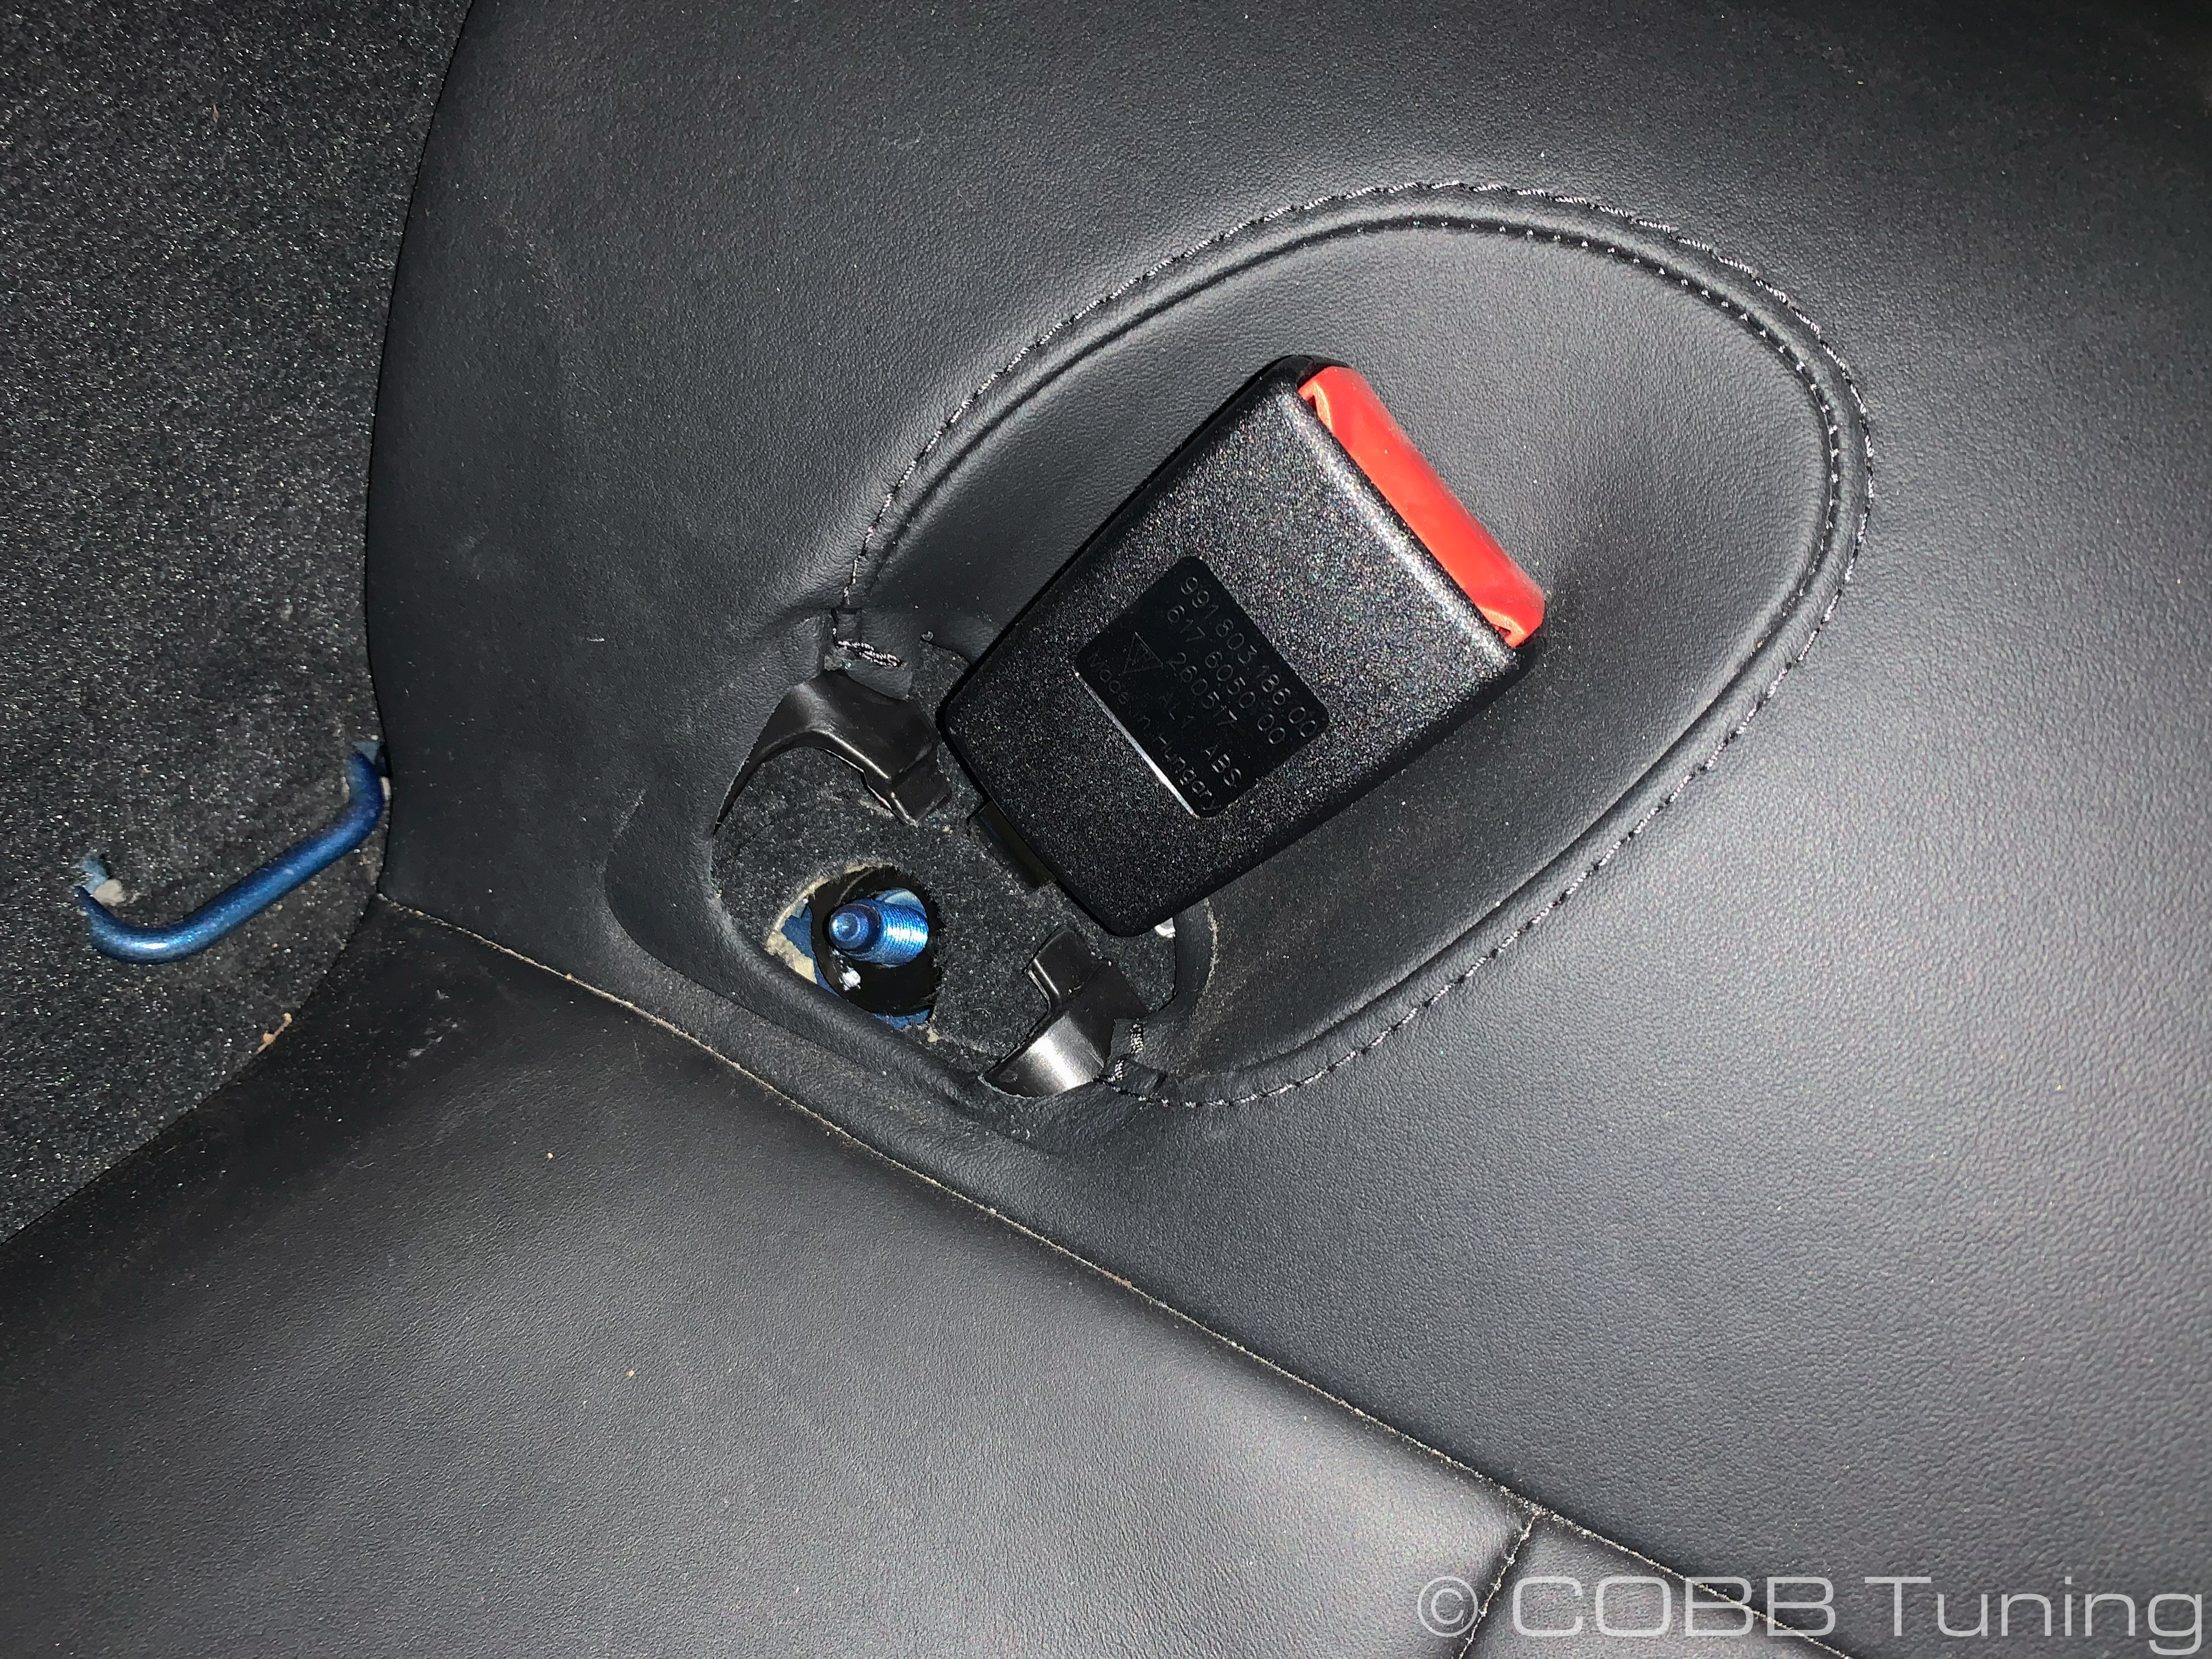
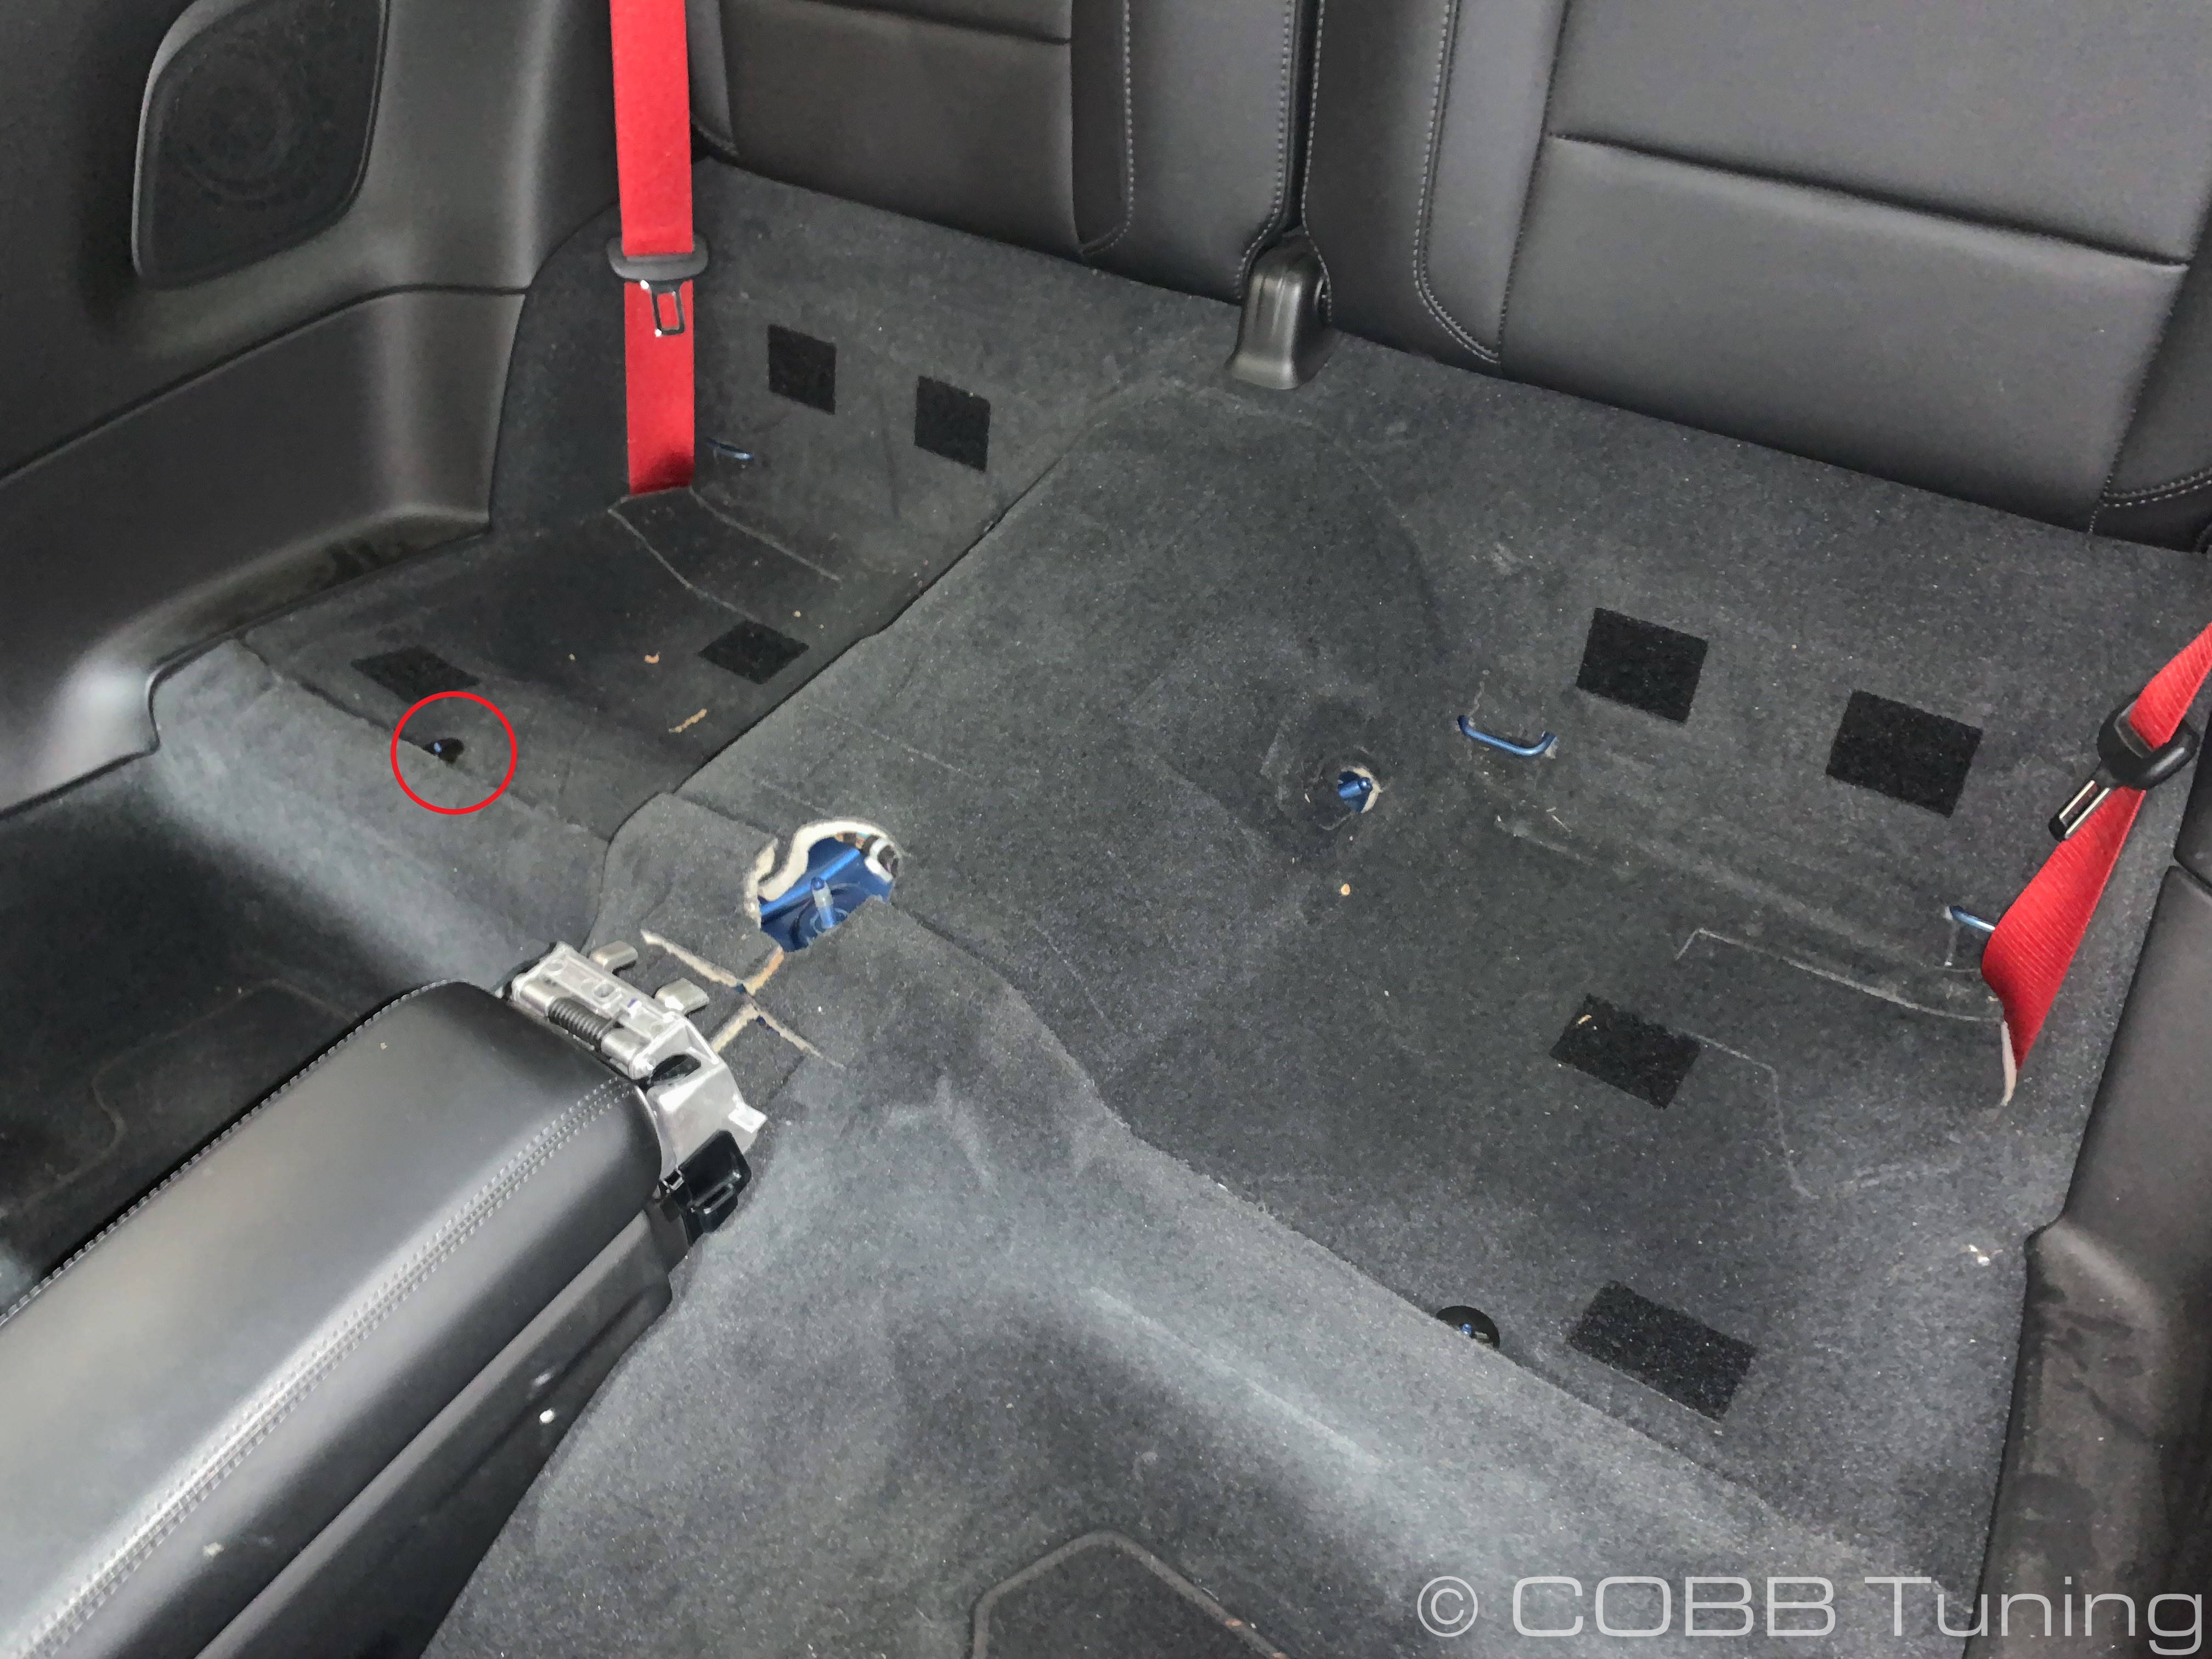
  3. Unclip and remove the plastic covering for the securing bolt. Undo the nut that is now exposed using a 13mm socket.


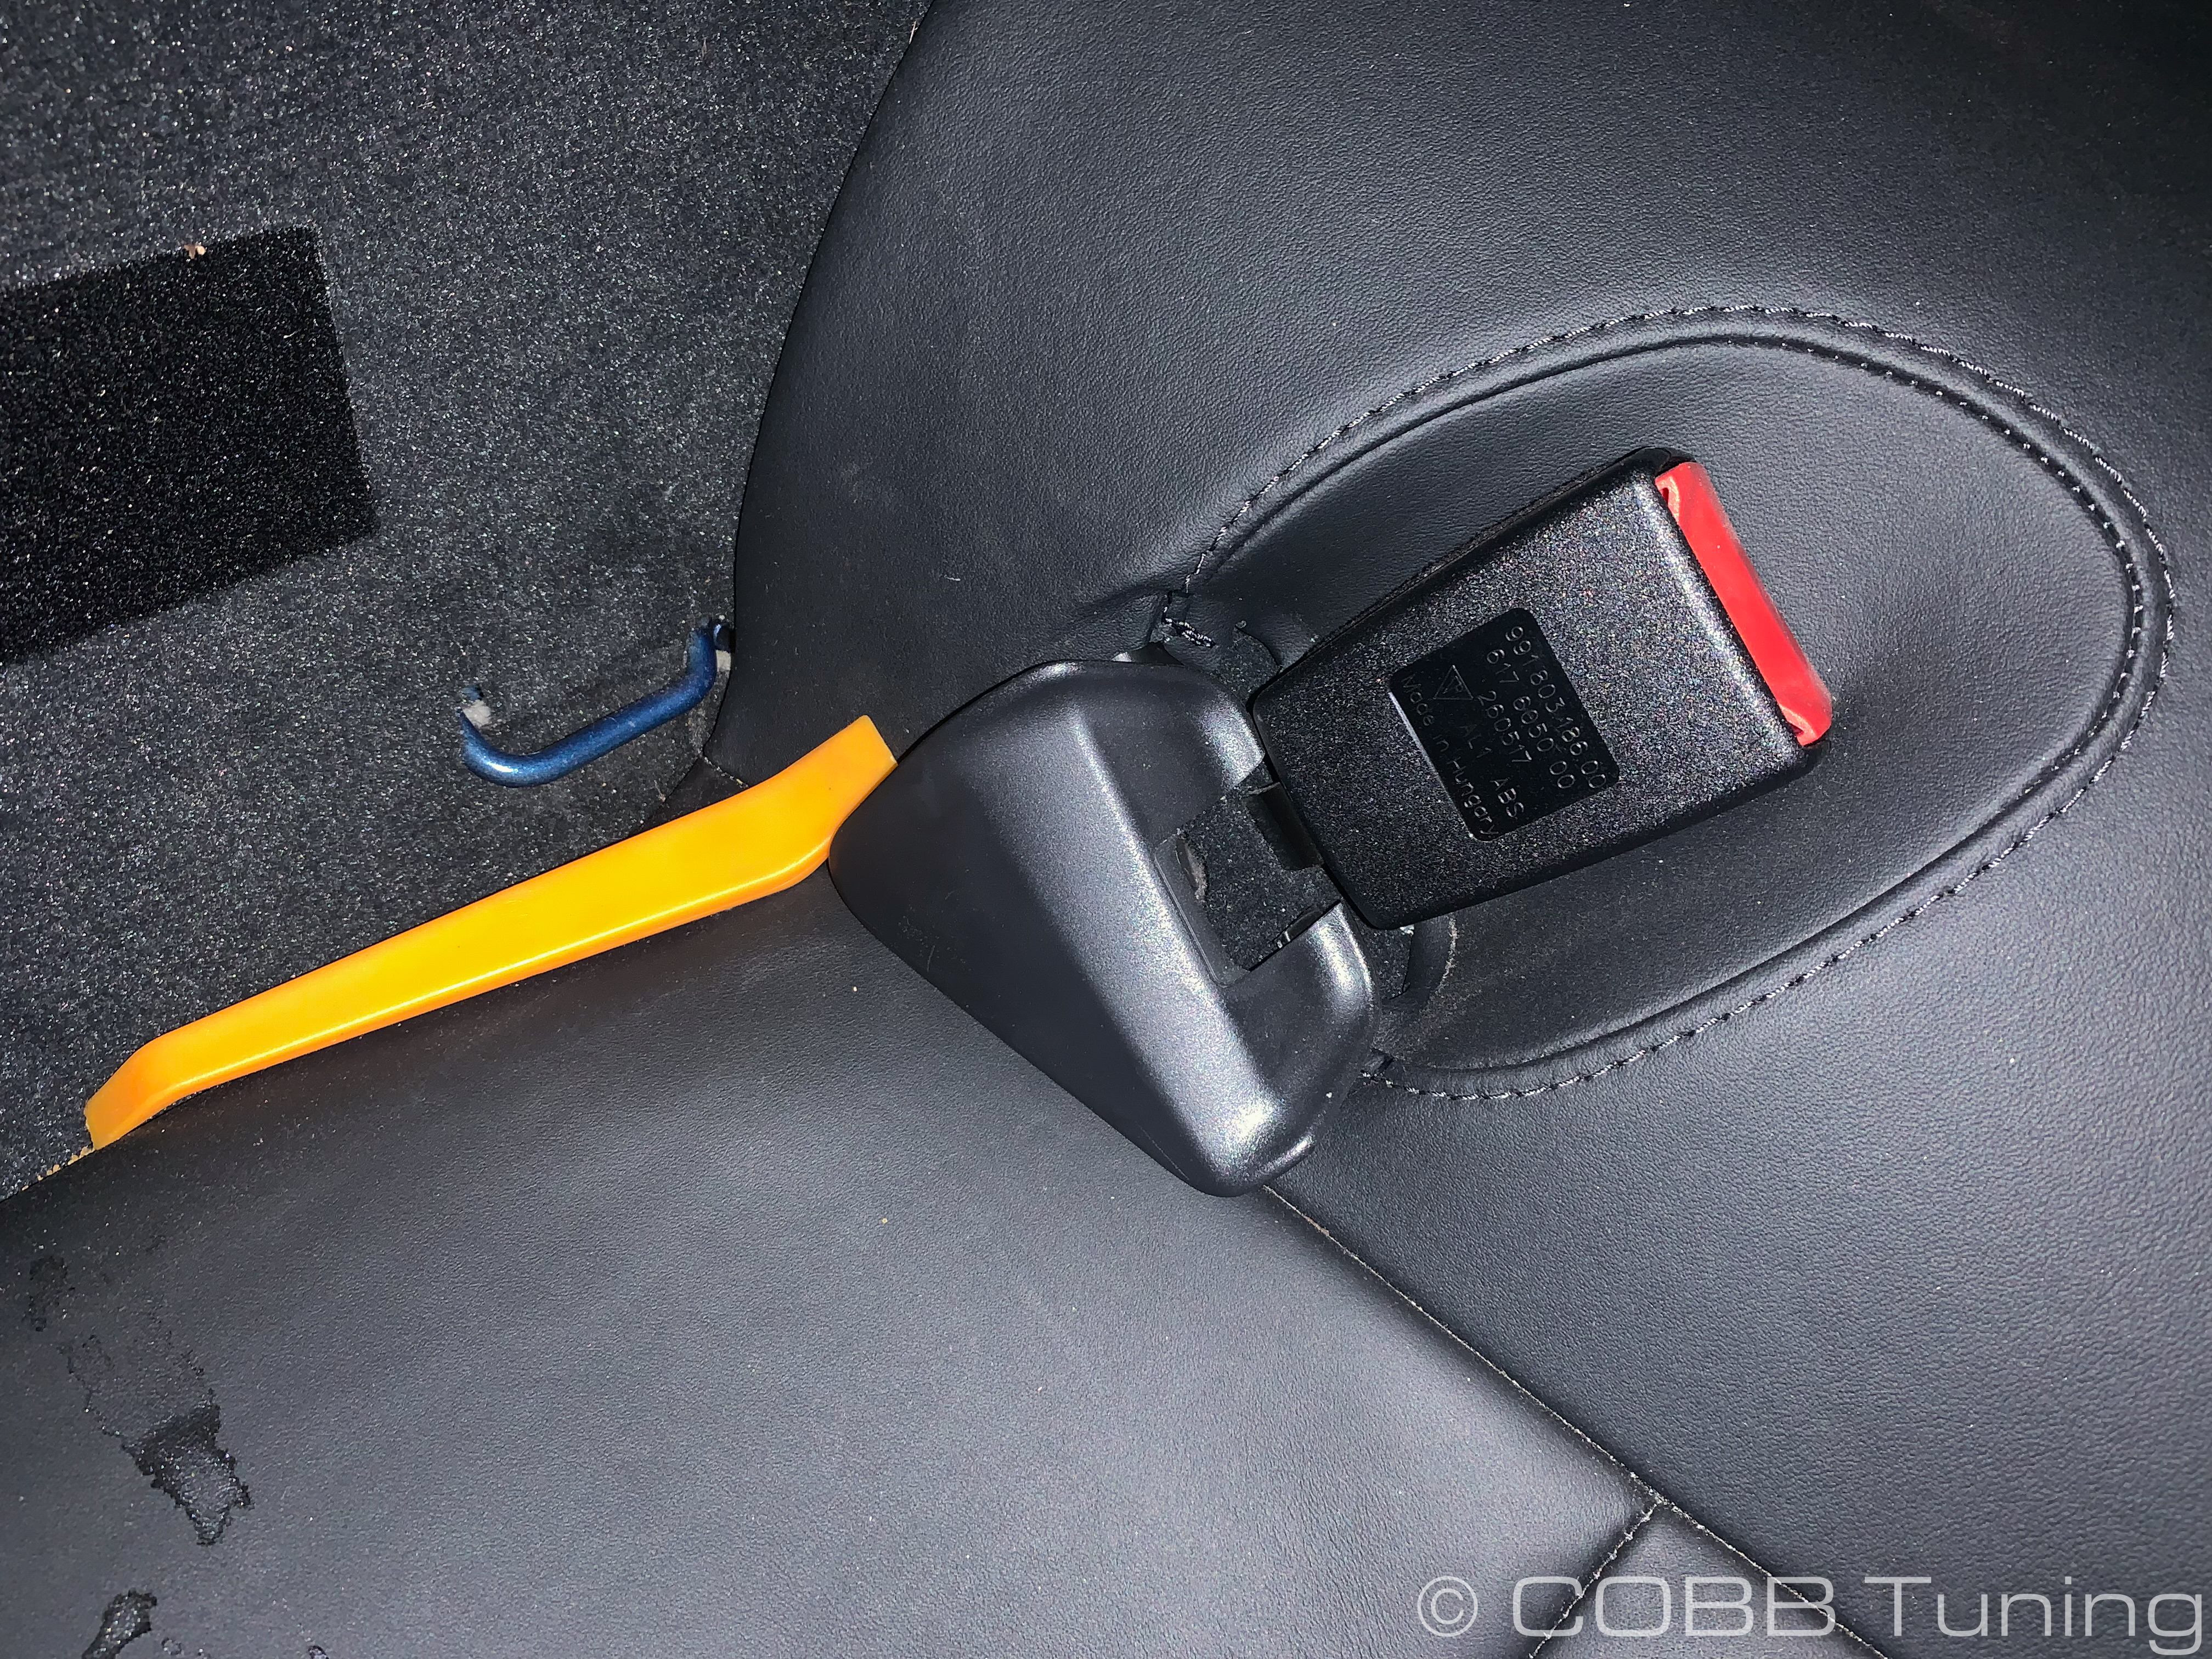
  4. Remove plastic seat belt buckle covers with a trim removal tool.


  5. Remove the seat belt buckles with a 16mm socket.


  6. Remove the rear seat. It is held in with velcro and the lips of trim pieces. It may require some tugging in various directions but will come out. Set aside.


TCM Removal

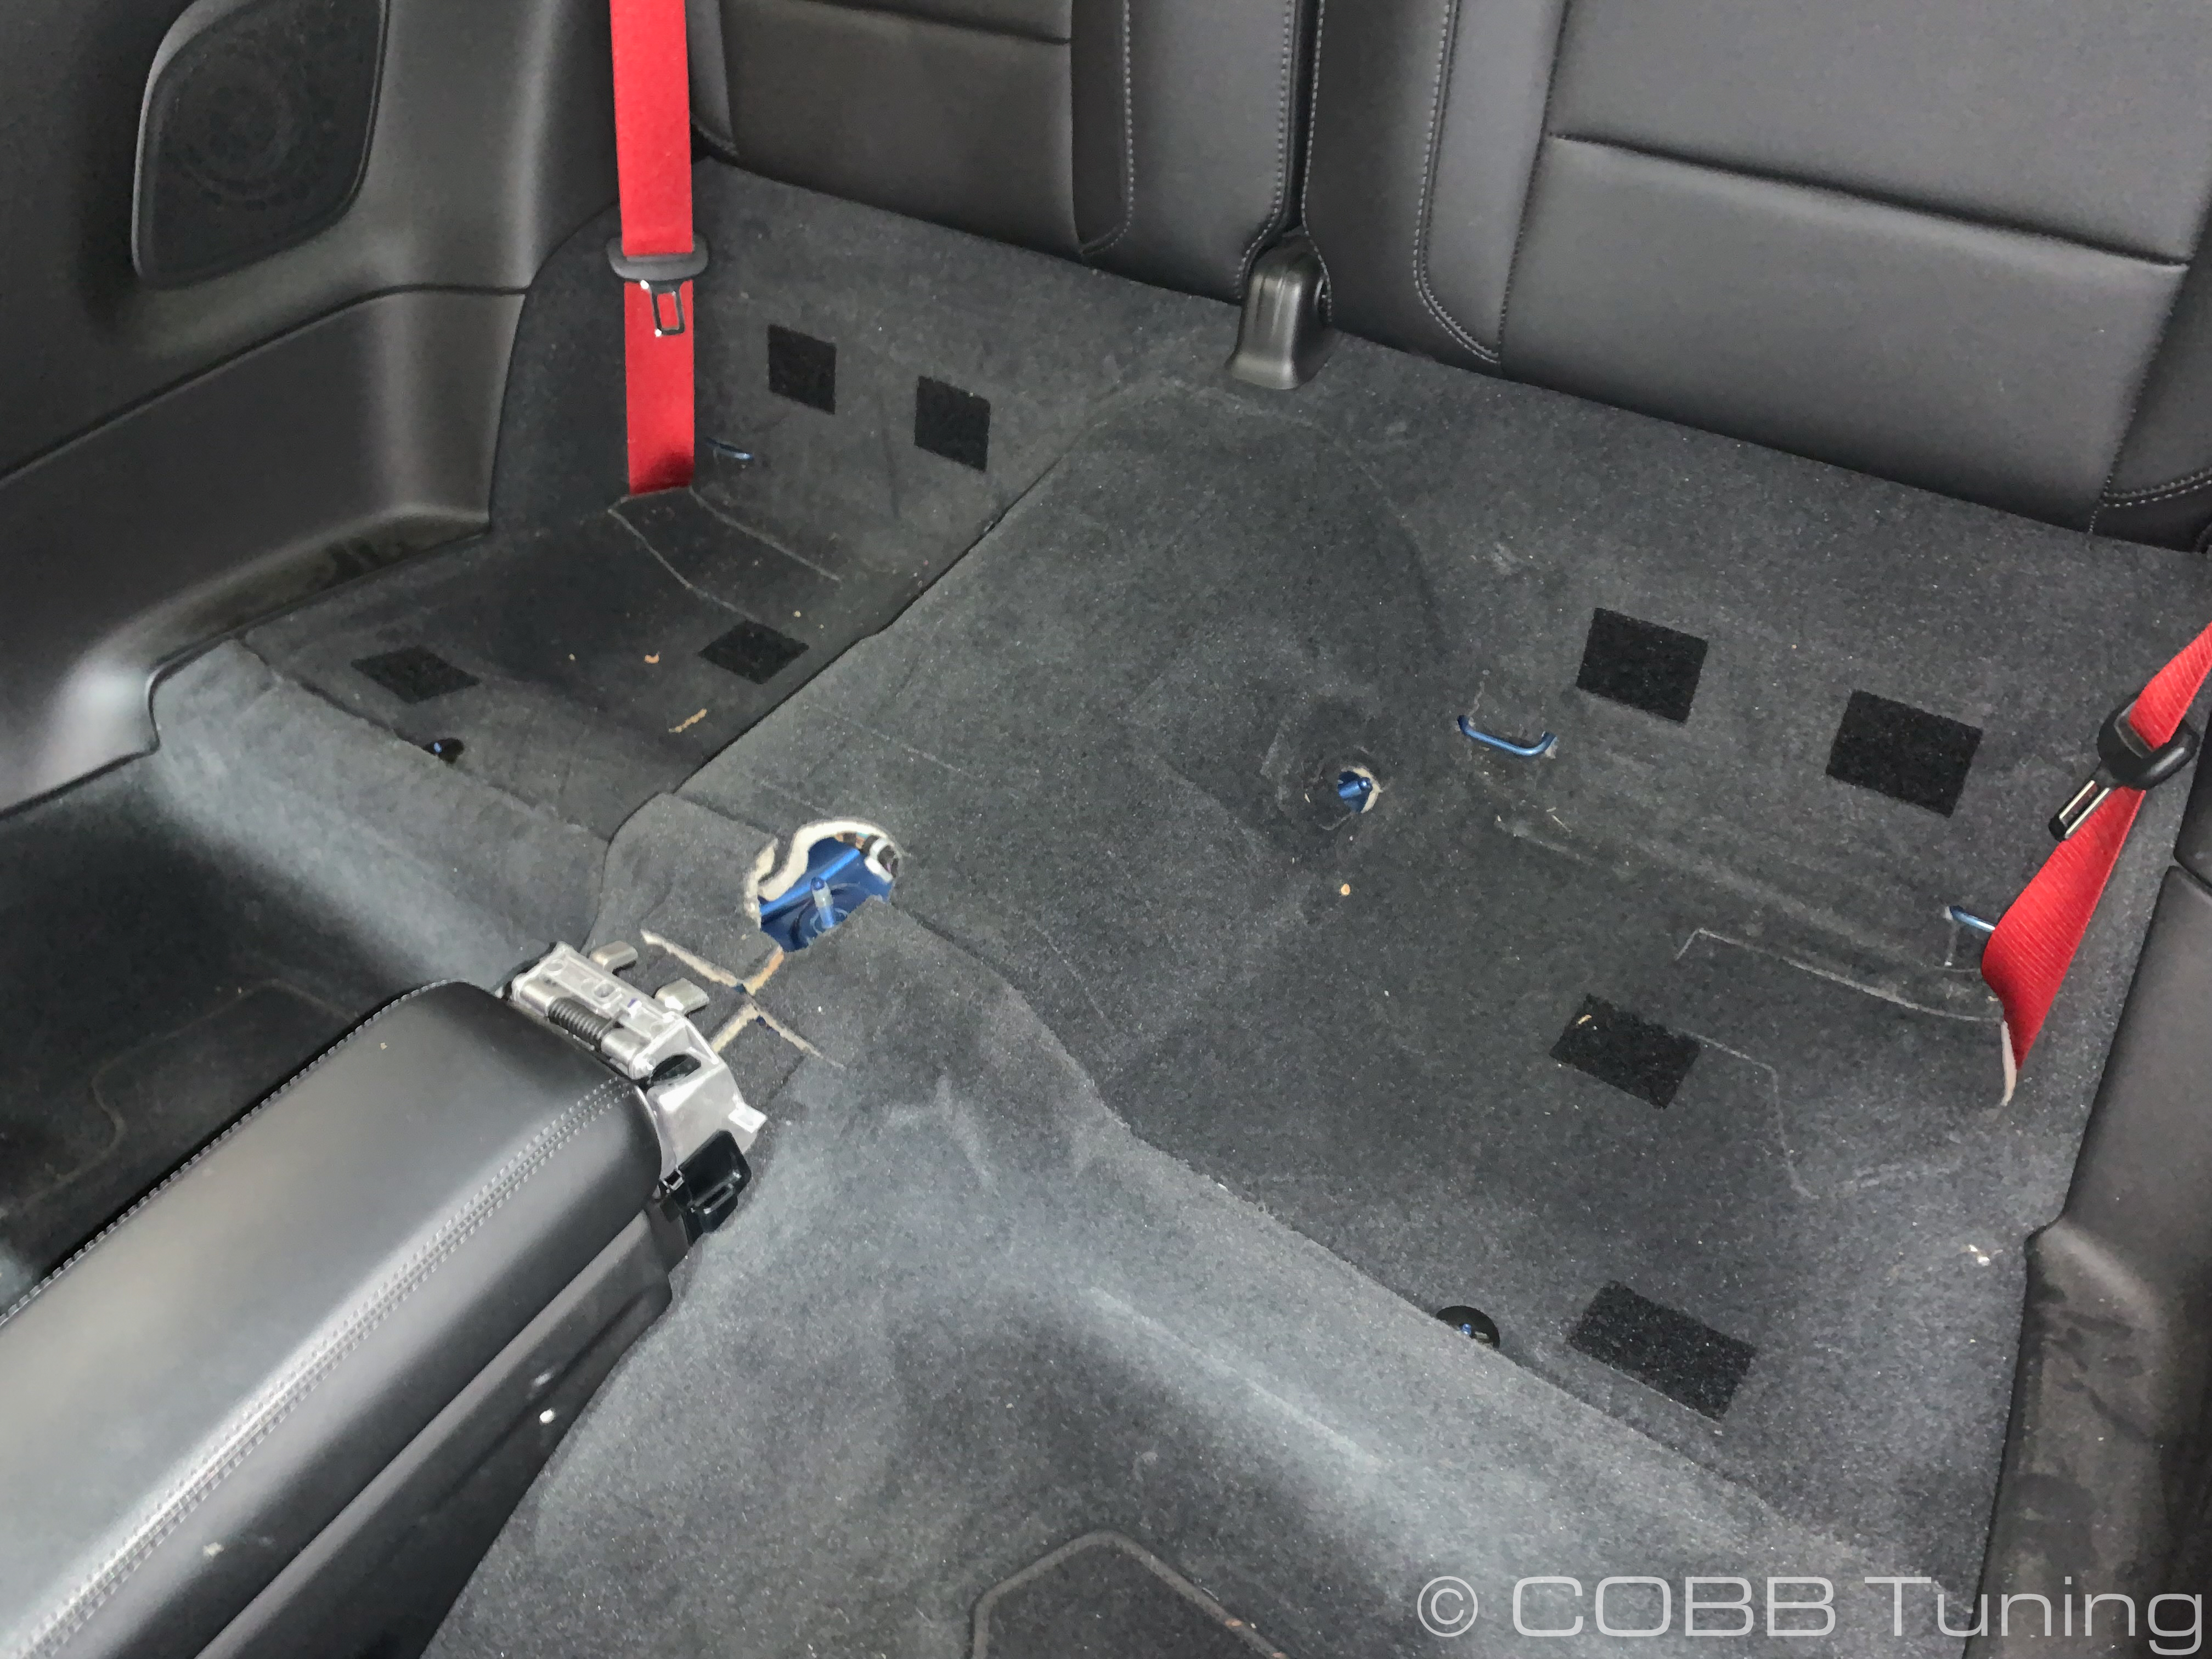
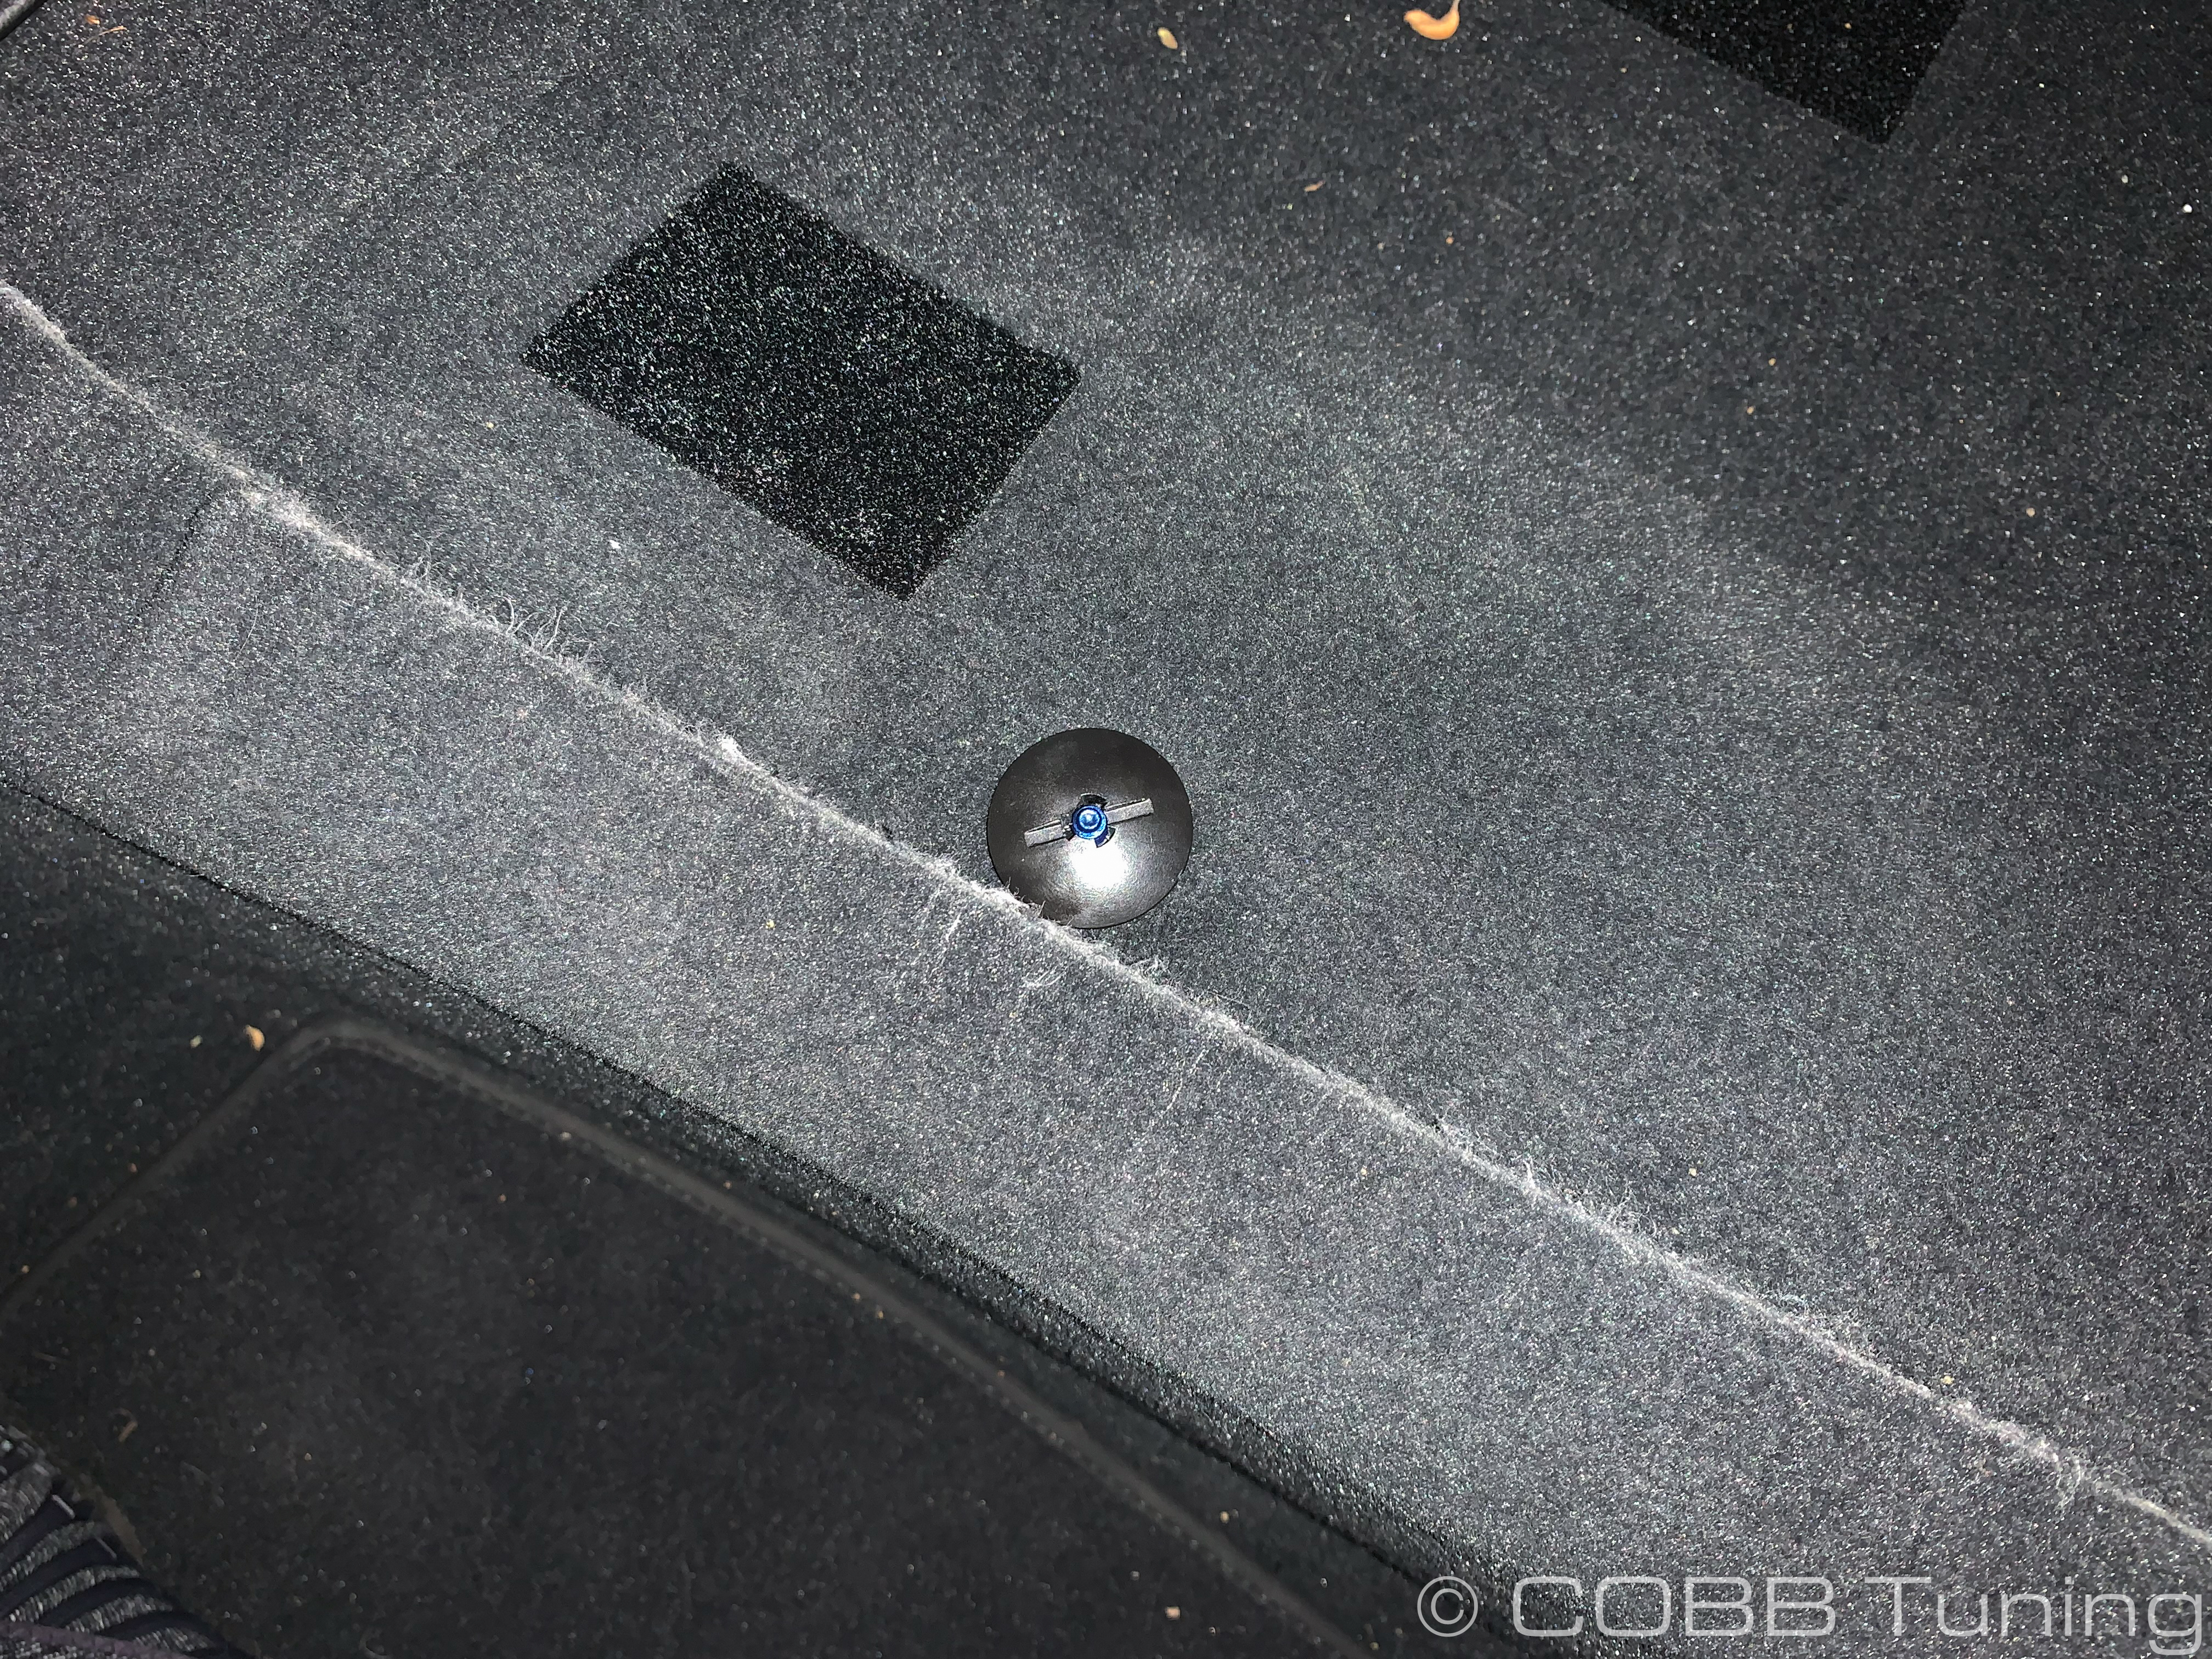
  1. On the passenger side of the rear seat, remove the restraining clip. You can use a flat screwdriver in the notch but may also be able to rotate it using your fingers.


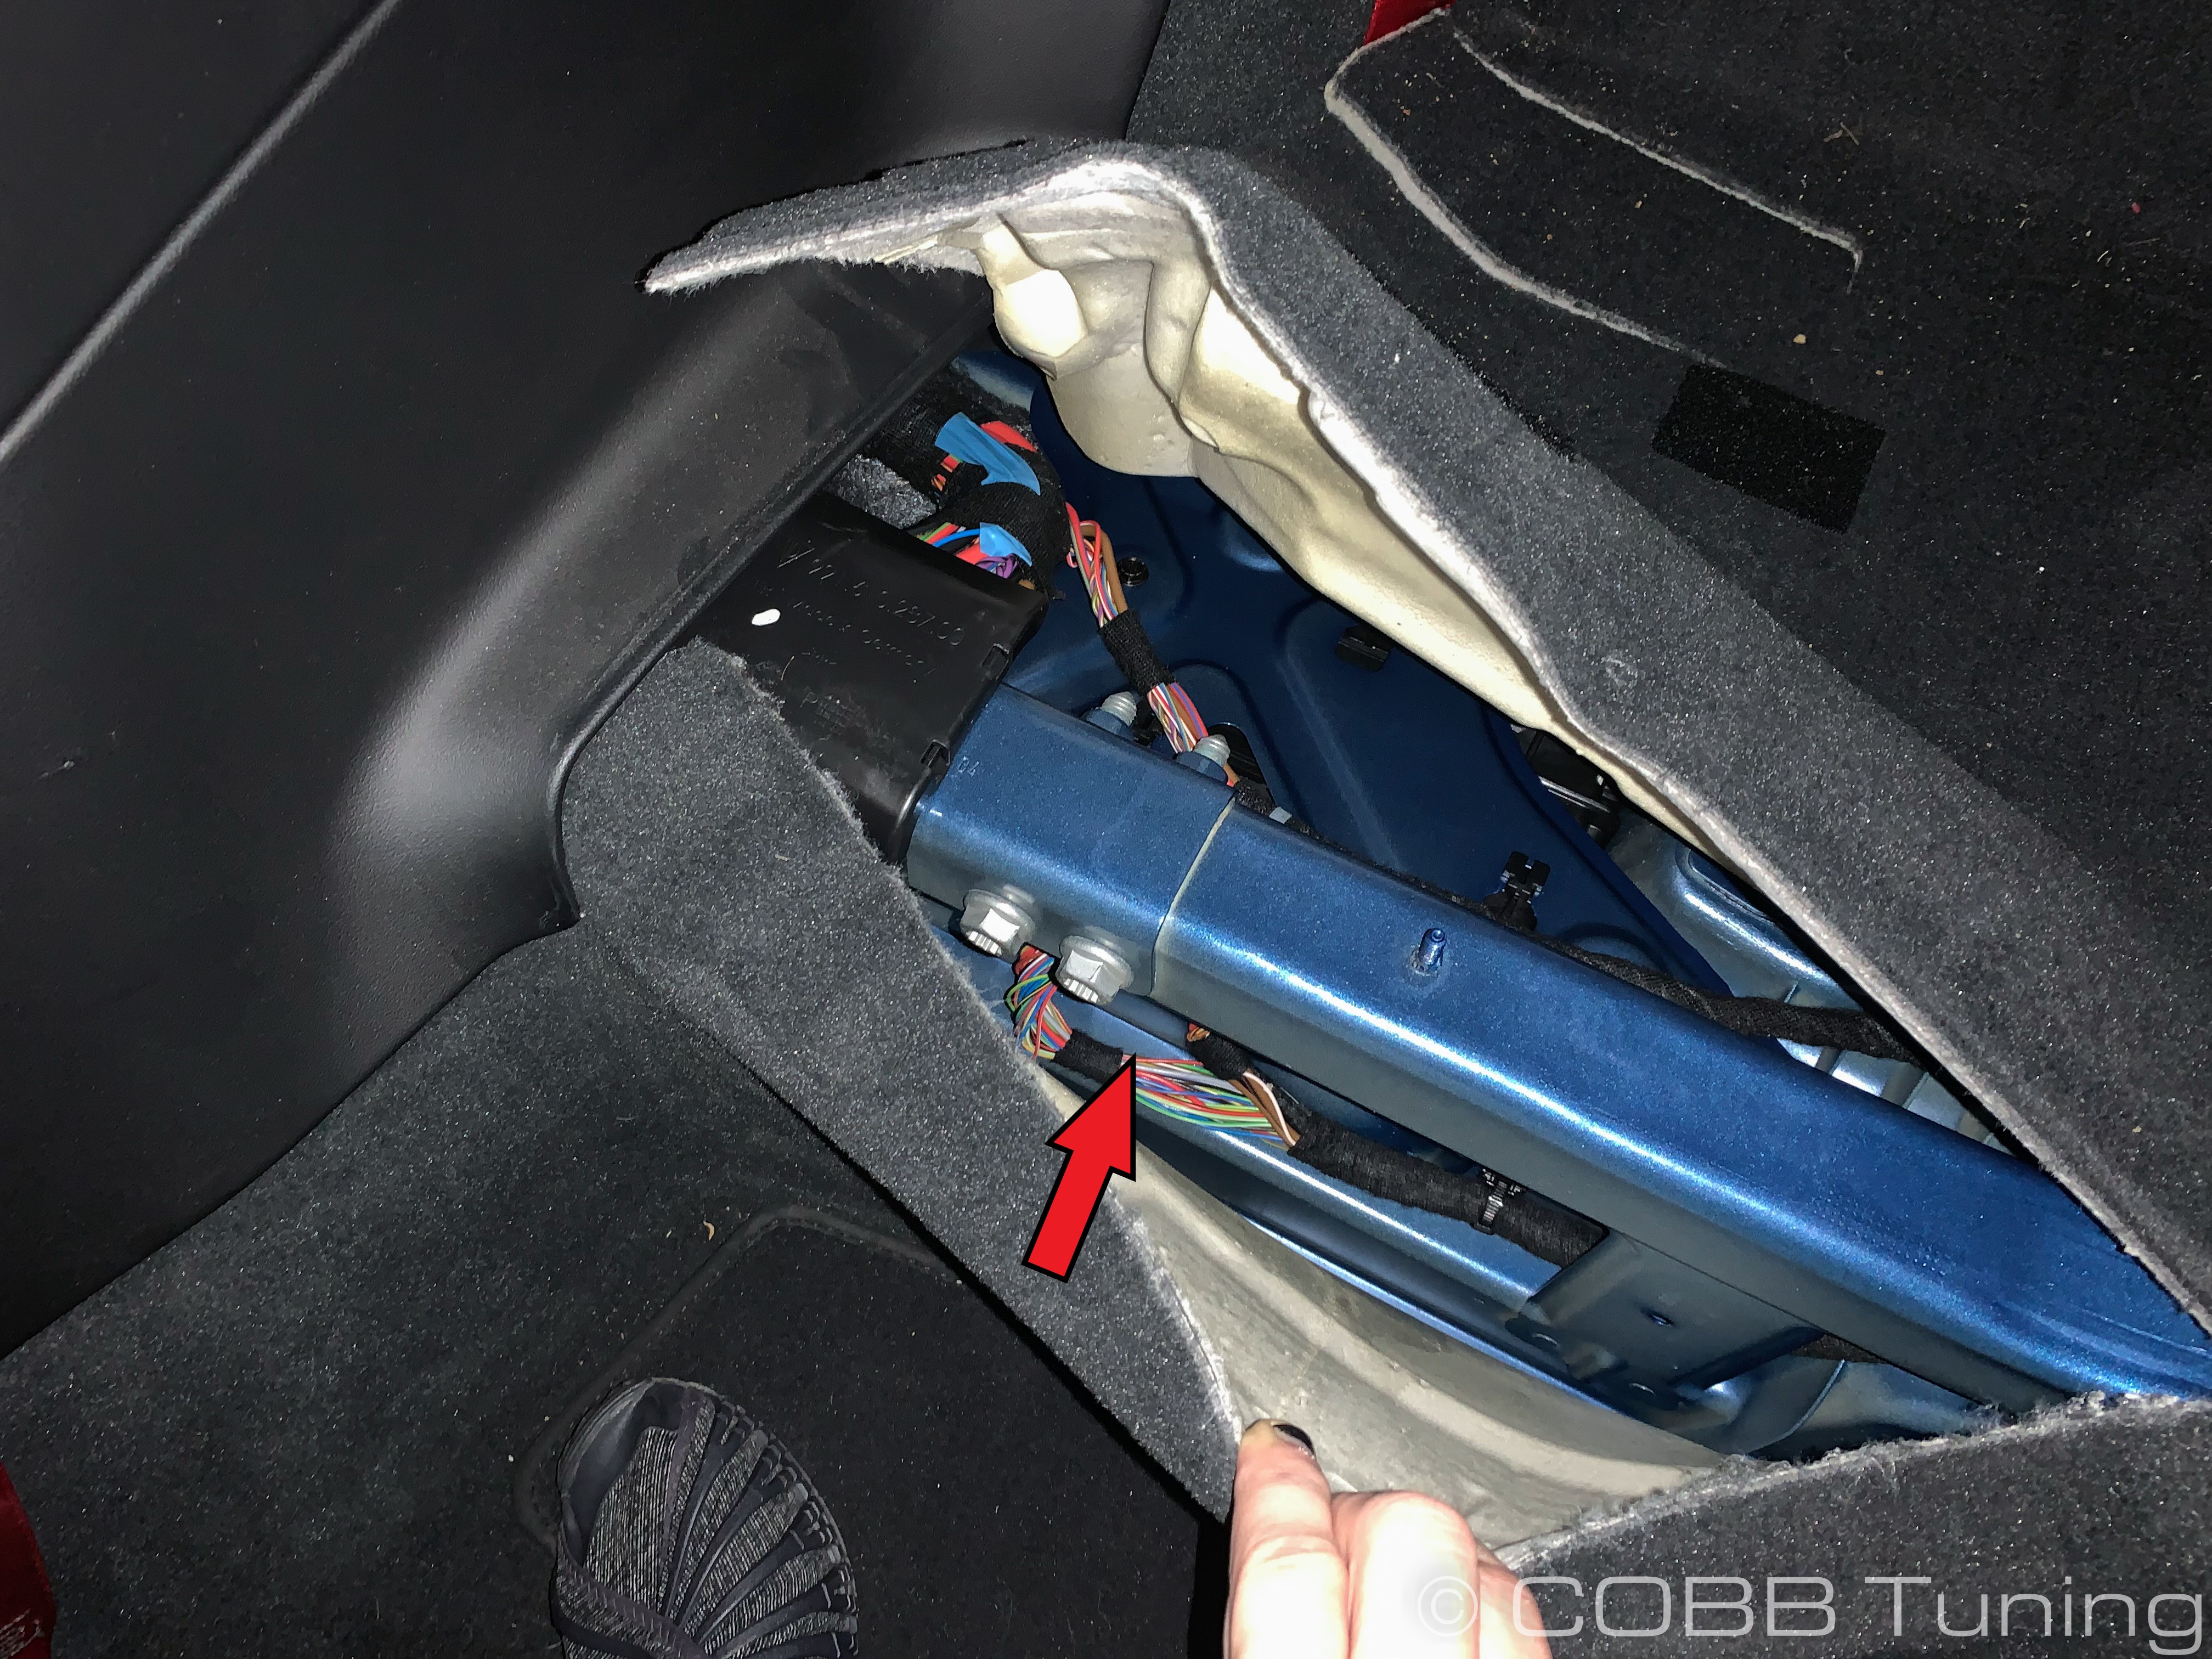
  2. Pull away the carpet under the seat to expose the TCM housing.


  3. Remove the 8mm screw holding the TCM bracket to the car.


  4. The TCM bracket can be pulled forward and down to remove it from the housing. You won't be able to completely remove it quite yet due to the wiring harness. 

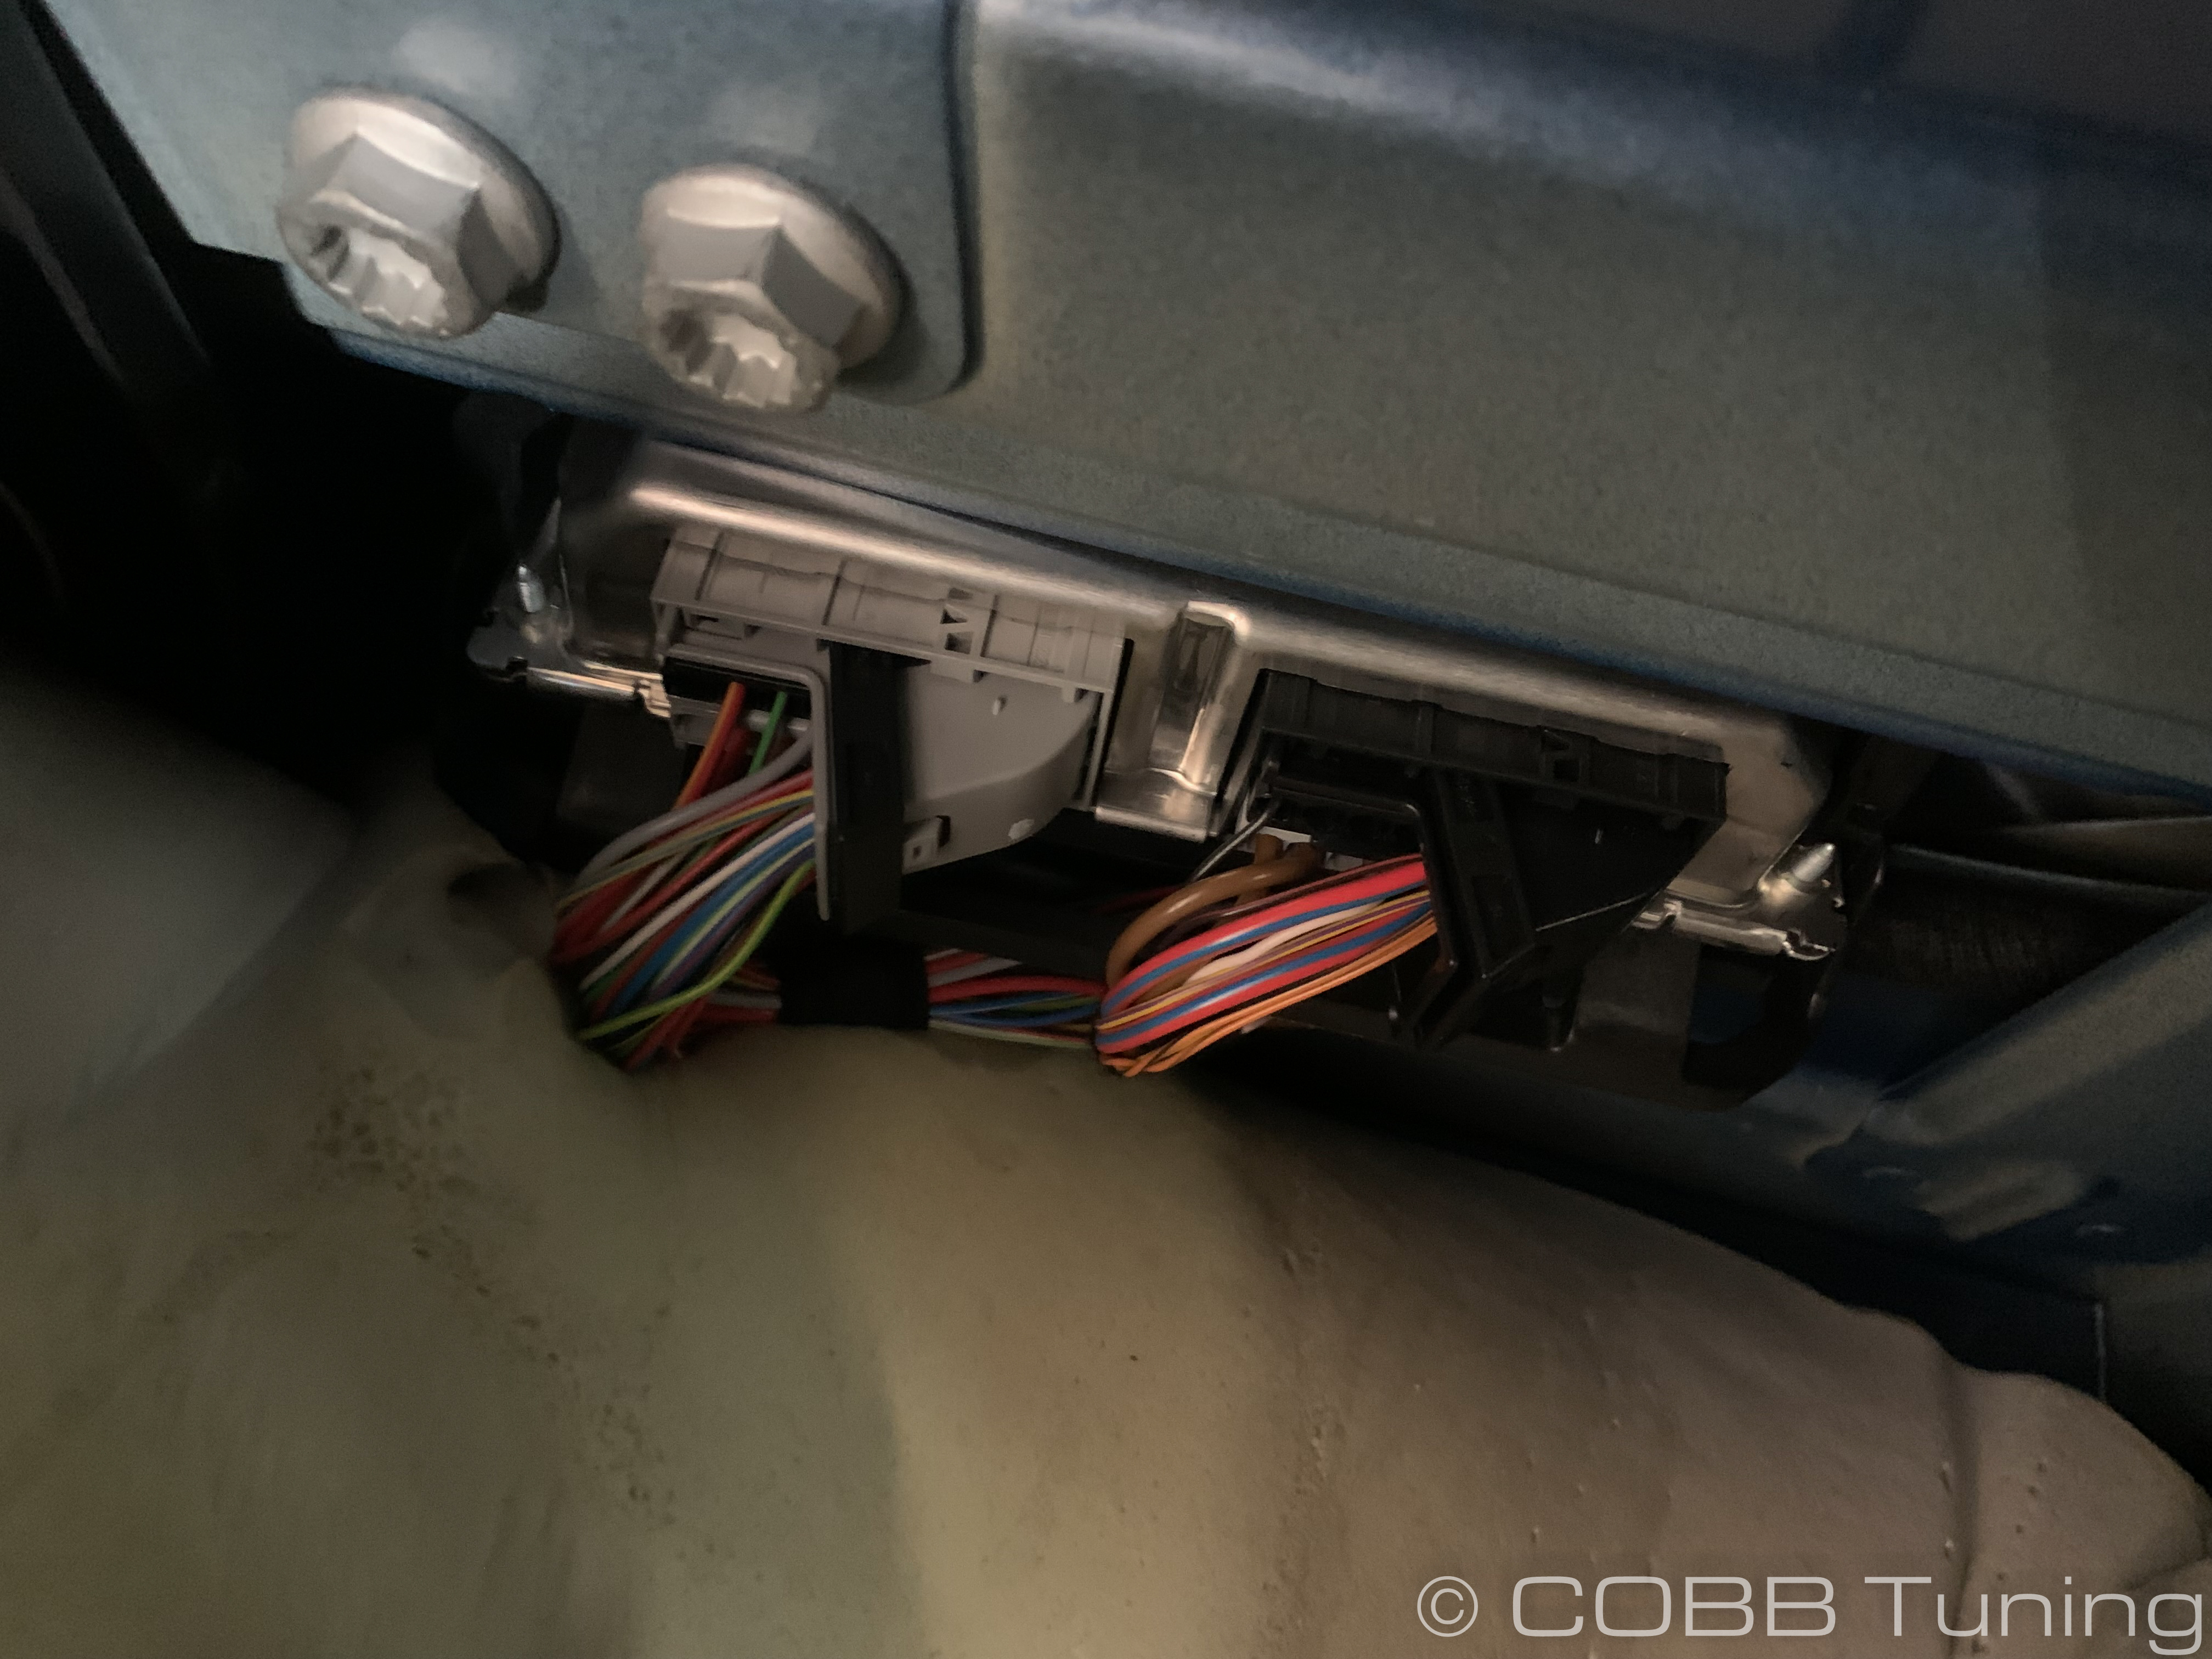
  5. Slide the securing slips toward the base of the plug for both harnesses. This should eject the plug from the TCM.


  6. Pull the TCM out of the car.


  7. The plastic bracket can be removed by depressing the two plastic clips at the front and sliding the TCM out.


Re-Installing the TCM

  1. Follow the removal instructions in reverse order, reattaching parts and connecting the wiring harness.

  2. Be sure to listen for a "click" to indicate the harness has been properly connected.

  3. Reconnect battery terminal leads.

  4. Key-on the car to check for any errors before starting the engine.

    Some PDK faults may appear after reinstalling the TCM. They typically require light driving of the car in order to clear. Try driving the car around your neighborhood at low speeds until the alerts clear. If they do not, contact Customer Support for more information.


Contact Us:

COBB Customer Support

Web Support and Tech Articles: COBB Tuning Customer Support Center

Email: support@cobbtuning.com

Phone support available 9am to 6pm Monday-Thursday. 9am to 4pm Friday (CST)

866.922.3059


return to www.cobbtuning.com

Copyright 2024 © COBB Tuning Products LLC. All Rights Reserved. | www.cobbtuning.com