752150 - Mitsubishi Air Box
- Will Trang
- Brandyn Mowat
- Former user (Deleted)

752150 - Evo X Air box
2008-2015 Mitsubishi Evo X

Congratulations on your purchase of the COBB Tuning Evo X Intake System. The following instructions will assist you through your installation process. Please read them first BEFORE beginning the install and familiarize yourself with the steps and tools needed. If you feel that you cannot properly perform this installation, we HIGHLY recommend you take the vehicle to a qualified and experienced automotive technician.
Part List
Sheetmetal Airbox
- Mounting Bracket
- (4) M6x16 Bolt
- (4) M6 Nylon Washer
- (6) M6 Flange Nut
- (2) M6x12 Flange Bolt
- M8x12 Flange Bolt
Tools Needed
- Ratchet
- 6-Point Sockets: 10mm, 12mm
- 10mm Wrench
- Socket Extensions
- Flathead Screwdriver
Removal of Stock Intake
Start by removing the two plastic Phillips head fasteners from the factory intake duct.
- With the fasteners removed you may now remove the intake duct by pulling it straight out of the front of the air box.
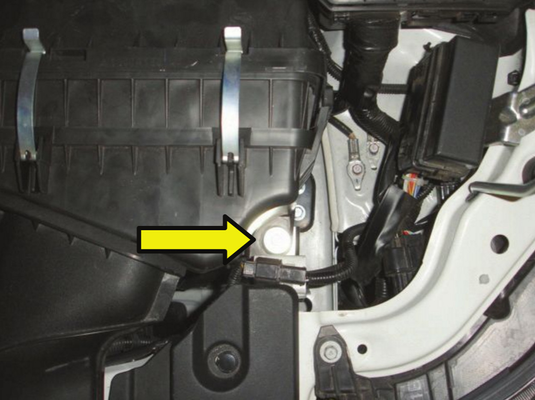
To remove the factory air box you will now need to remove the 10mm bolt located on the lower front side of the box.
4. Now unclip the MAF sensor connector and the two plastic clips that secure the MAF sensor harness to the air box using a pair of needle nose pliers.
5. Now loosen the 10mm bolt on the hose clamp that secures the turbo inlet tube to the MAF sensor housing and you should be able to lift the factory airbox and MAF sensor housing up and out.
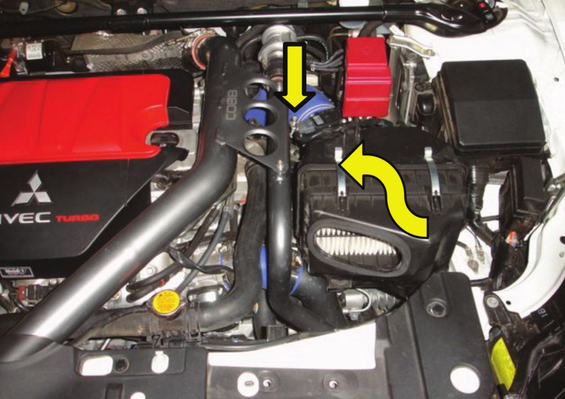
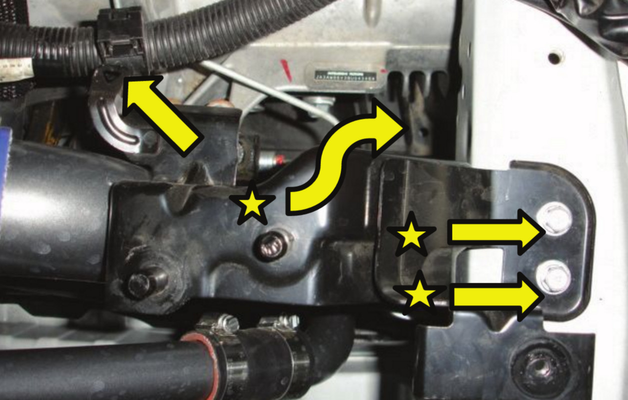
6. At this point using a small flat head screwdriver you will want to unclip the wire harness from the factory air box bracket as it will contact the COBB intake bracket. You also have to remove the entire factory air box bracket (two 12mm bolts as shown) as it is would interfere with the COBB intake.
Removal of Original COBB Intake
- Begin by opening the hood of your Evo X and locating the intake on the driver side of the engine bay.
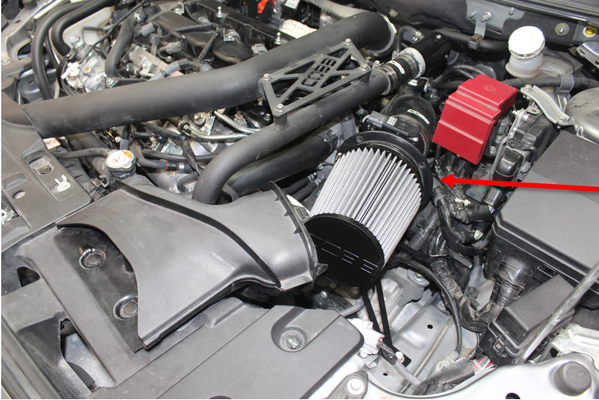
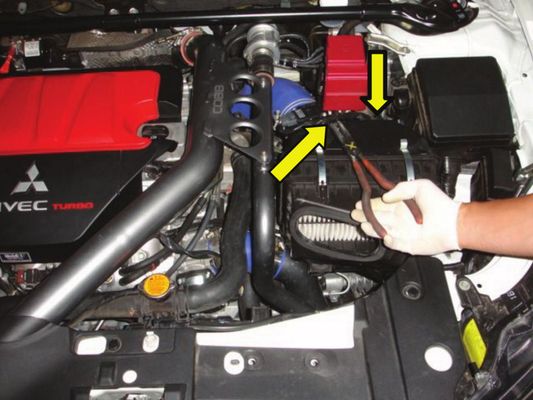
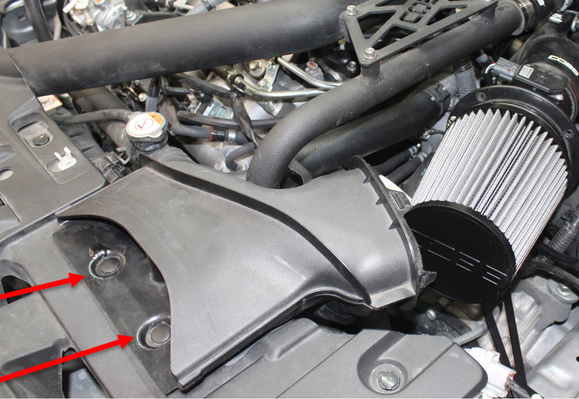
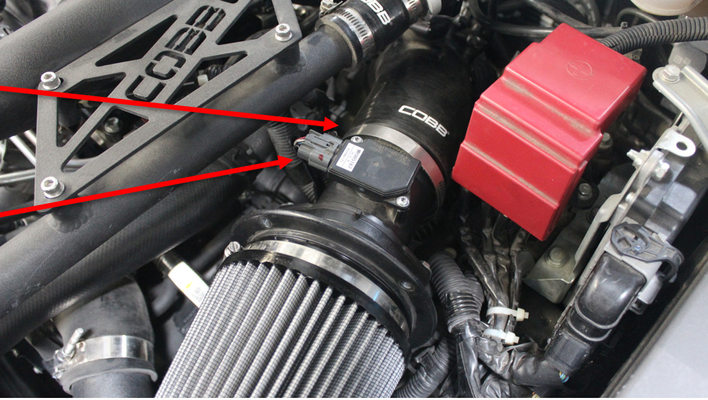
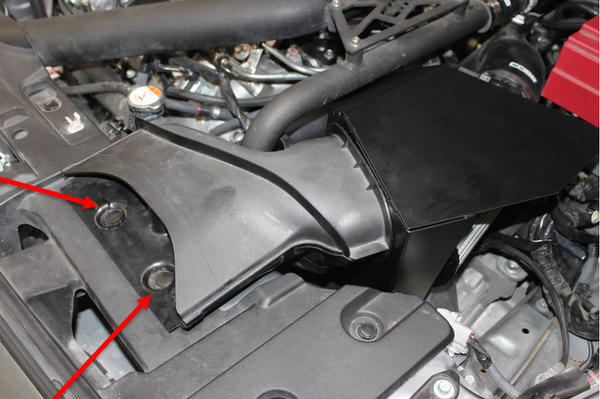
- Now time to uninstall the stock snorkel that feeds air into the intake. To do this you first need to remove the two push pins that are located near the front of the engine bay. Pop these up with a flathead screwdriver and pull out. Keep these push pins for when you need to reinstall the snorkel. Once the push pins are out you should be able to slide the snorkel out of the stock airbox. Keep the snorkel, this will be used with the COBB Evo X Airbox.
- Unattach the MAF sensor that is connected. Do this by pinching the insert in till you are able to slide the sensor out. Also, loosen the clamp located next to the MAF sensor.
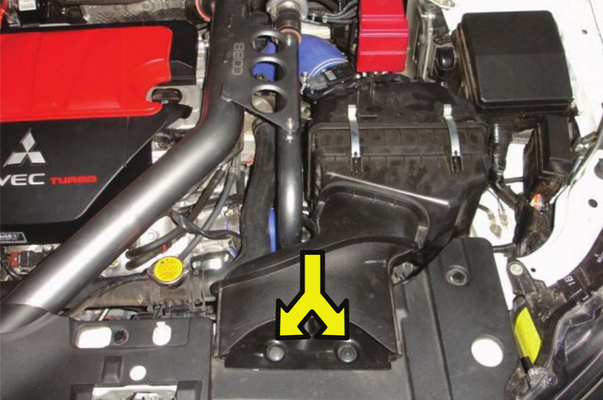
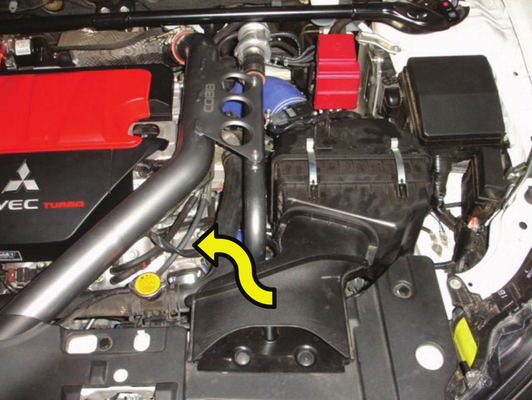
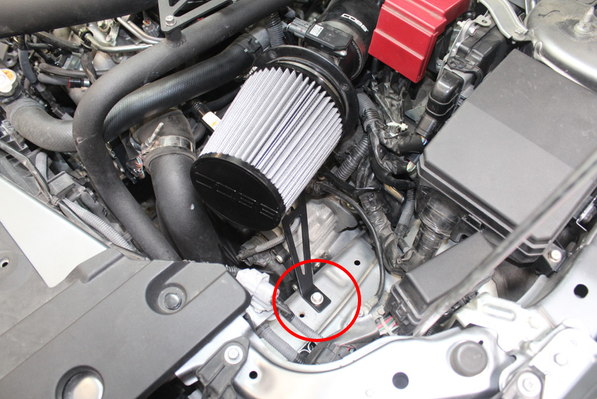
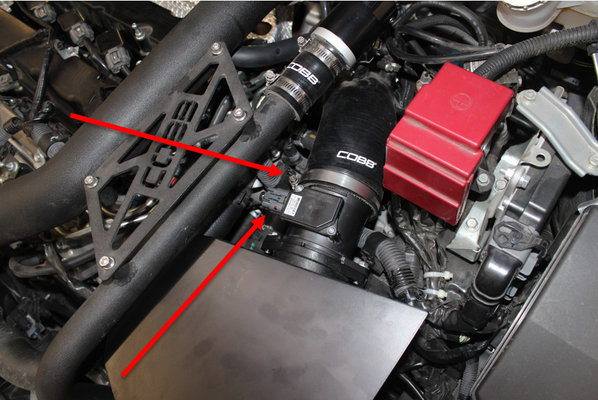
- In order to take out the COBB intake, you first need to locate the mounting bolt that holds the bracket in place. Use a 12mm socket and extension to remove this bolt and remove the intake from the car.
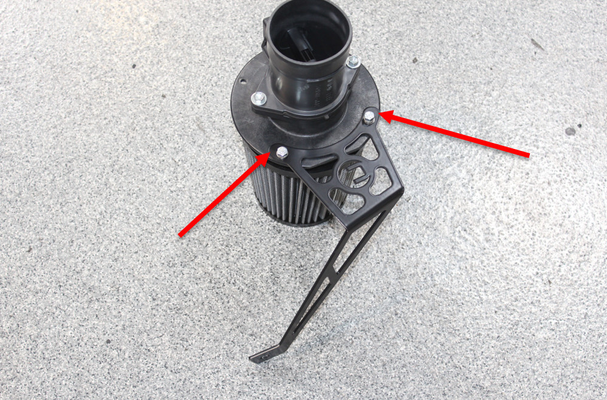
- With intake removed, use a 10mm socket to remove the two bolts that hold the COBB bracket to the intake housing and separate them.
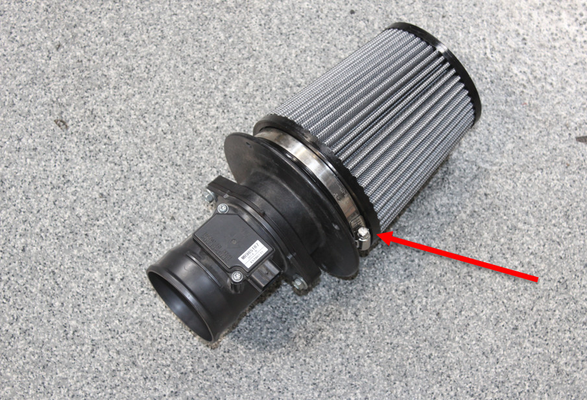
- With the bracket removed, remove the COBB filter by unscrewing the clamp located at the base of the filter.
Installation of COBB
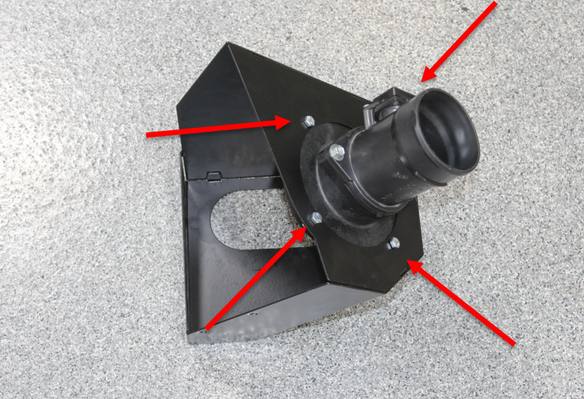
- Once you have removed the COBB Filter, take the COBB Evo X Airbox and insert the intake housing through the large opening, using the supplied 10mm bolts and washers to secure it to the airbox. (Note: There is a total of four bolts that secure the intake housing. One is behind the housing in the supplied picture)
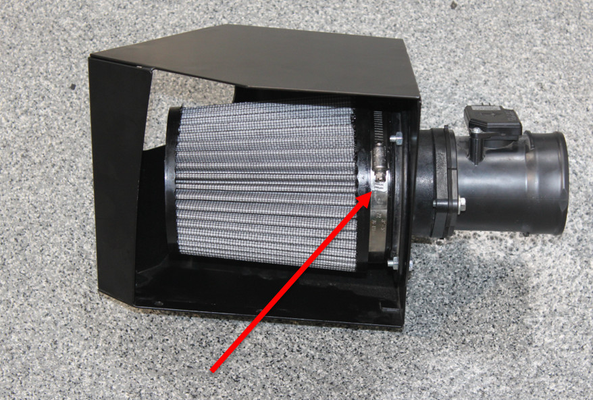
- Next, insert the COBB filter into the airbox and place it onto the intake housing, securing it with the clamp that you just removed. Be sure to position the clamp so that is easily accessible in the future should you need to remove it!
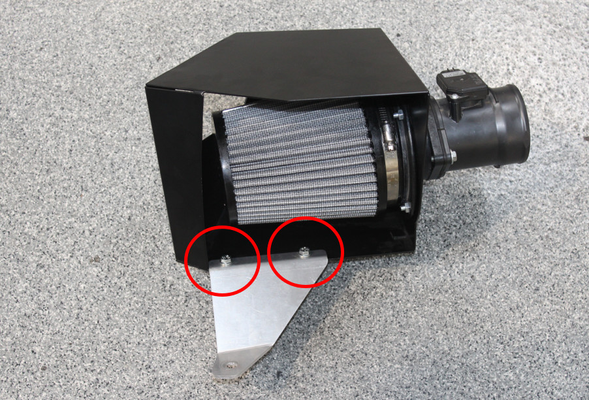
- Now that the intake and airbox have been assembled, we can attach the bracket that will be used to mount it to the car. Using the supplied M6x12 bolts and M6 nuts, attach the bracket to the bottom portion of the airbox as indicated in the picture.
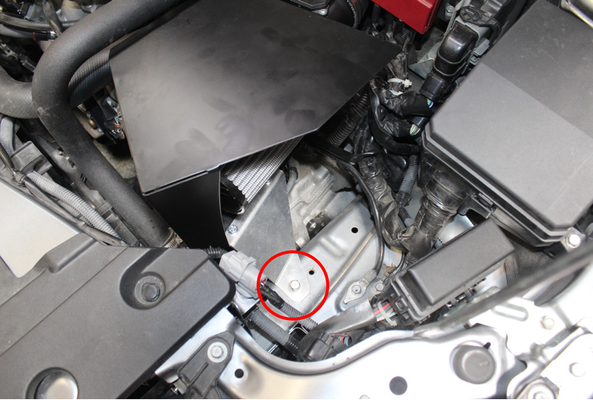
- Take the assembled parts to the car. Start by inserting the intake into the turbo inlet hose and then lining up the hole on the mounting bracket with the corresponding hole on the body of the car. Using a 12mm socket and an extension if needed, use the 12mm bolt provided to secure the bracket to the car.
- With the bracket secured, tighten down the clamp to for the intake where it meets the turbo inlet. You can now plug in the MAF sensor as well.
- With the intake and airbox secured and the MAF sensor plugged in, you can reattach the air snorkel and push the clips back into place. In order for the snorkel to clip inside the airbox, you may need to remove the foam surrounding the clips. If your intake filter is hitting the bottom tab of the snorkel, it is recommended that you dremel or cut off the tab so that it appears flush. You can now enjoy your new COBB Evo X Airbox!
CARB Sticker Application
(Where Applicable)
- Apply the supplied CARB sticker in a clear, easy to find location. Typically underhood, or on the radiator core support.
COBB Customer Support Web Support and Tech Articles: COBB Tuning Customer Support Center Email: support@cobbtuning.com Phone support available 9am to 6pm Monday-Thursday. 9am to 4pm Friday (CST) 866.922.3059 return to www.cobbtuning.comContact Us:
Copyright 2025 © COBB Tuning Products LLC. All Rights Reserved. | www.cobbtuning.com