752540 - Mitsubishi Evo X Lower Intercooler Pipe Kit
- Brandyn Mowat

752540 - Lower Hard Pipe Kit for EVO X
Mitsubishi Evo X GSR, MR, FE 2008-2015
Congratulations on your purchase of the COBB Tuning Mitsubishi Evo X Lower Hard Pipe Kit! The following instructions will assist you through the installation process. Please read them BEFORE beginning the install to familiarize yourself with the steps and tools needed. If you feel you cannot properly perform this installation, we HIGHLY recommend you take the vehicle to a qualified and experienced automotive technician.
Table of Contents
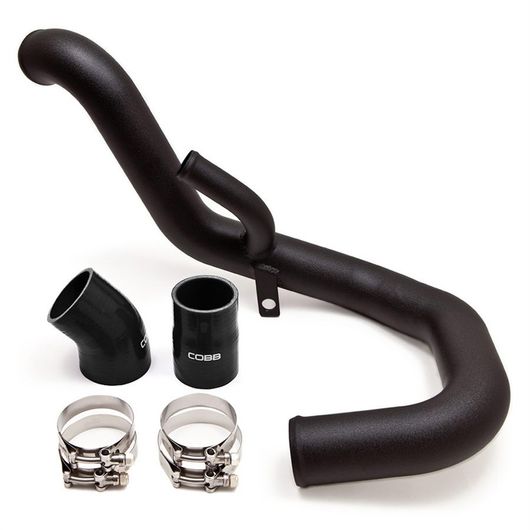
Parts List
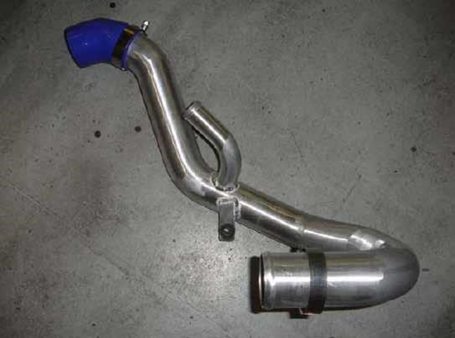
- Lower Intercooler Pipe
- (3) 2793 T-Bolt Clamps 70-78mm
- 2794 T-Bolt Clamp 73-81mm
- 60-63mm Silicone Reducer
- 45 Degree Silicone Reducer
Tools Needed
- Phillips head screwdriver
- Flathead screwdriver
3/8" ratchet
3/8" 10mm socket
3/8" 12mm socket
- 3/8" 5mm Hex Key or Hex Socket
3/8" 12" extension
3/8" 6" extension
Needlenose pliers
Removal of Stock Lower Intercooler Pipe
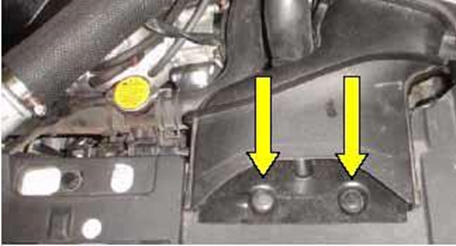
- Remove the factory air intake duct by removing the two Phillips head plastic fasteners
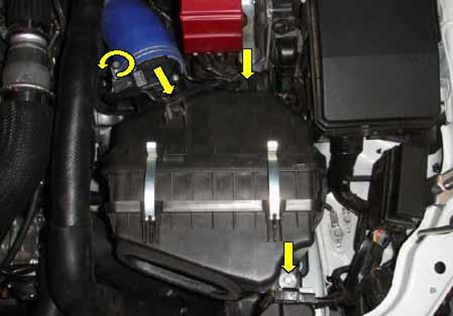
- 2. To remove the air box, disconnect the MAF connector and the two plastic clips that secure the MAF sensor harness to the air box. Now remove the 10mm bolt on the front of the air box. Finally, loosen the 10mm hose clamp that secures the turbo inlet to the MAF housing and lift the air box up and out of the car.
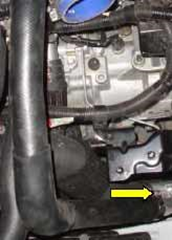
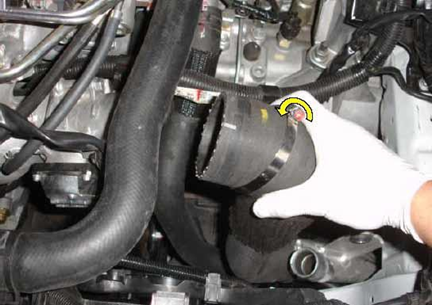
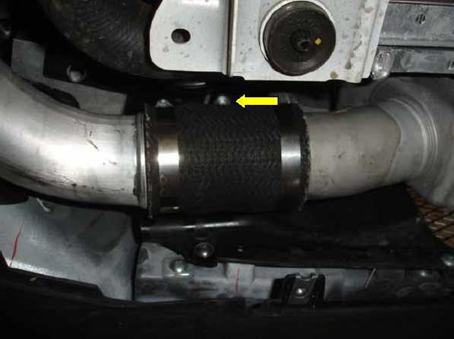
- 3. Loosen the lower 10mm hose clamp that secures the long rubber BPV hose to the lower intercooler pipe.
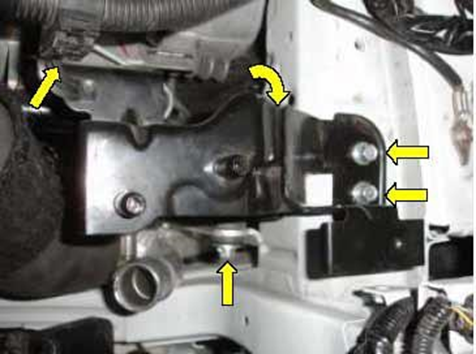
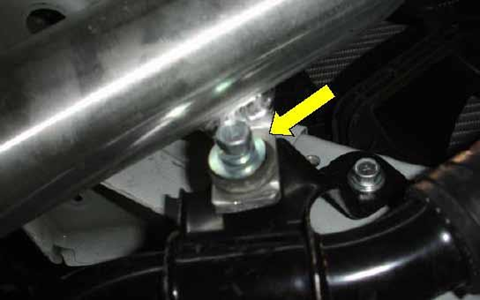
- To make the removal and installation of the intercooler pipe easier, remove the air box support bracket. Start by removing the three 12mm bolts that secure the bracket to the chassis. Now remove the 12mm bolt that secures the factory lower intercooler pipe and unclip the wire harness from the bracket.
- Loosen the 10mm hose clamp that secures the lower intercooler pipe to the throttle body. Before you move underneath the car to remove the rest of the intercooler pipe, pull the tube off of the throttle body to make it easier to remove once underneath the car.
- Move underneath the car and remove the combination of plastic fasteners and 10mm bolts that will allow you to remove the left portion of the plastic undertray. You may also want to remove a few extra clips to help with ease of installation.
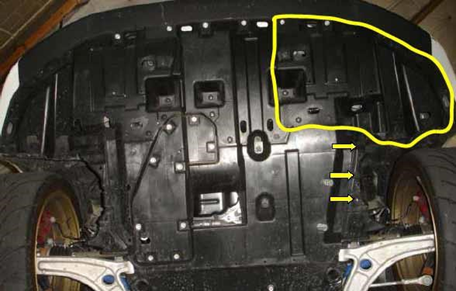
Note: While not necessary it may help to remove the two plastic fasteners that secure the fender liner, making removal of the intercooler piping simpler.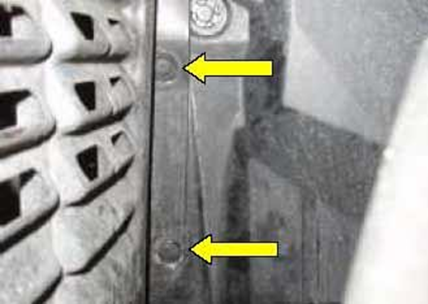
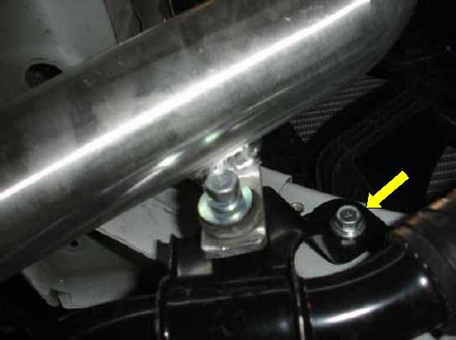
- With the undertray removed, you will need to remove the remaining 12mm bolts that secure the lower intercooler pipe bracket to the chassis.
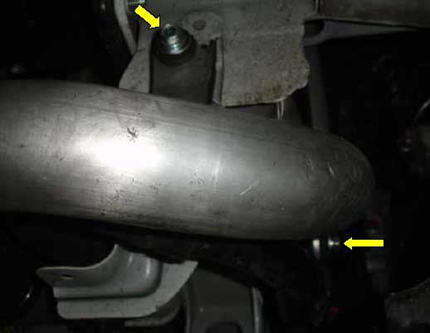
- Loosen the 10mm hose clamp that secures the lower intercooler pipe to the intercooler outlet, and remove the pipe from the bottom of the car.
Installation of COBB Tuning Lower Intercooler Pipe.
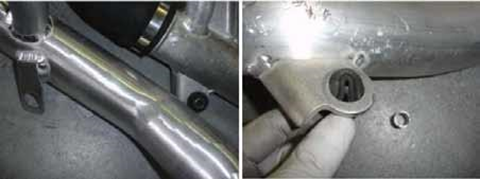
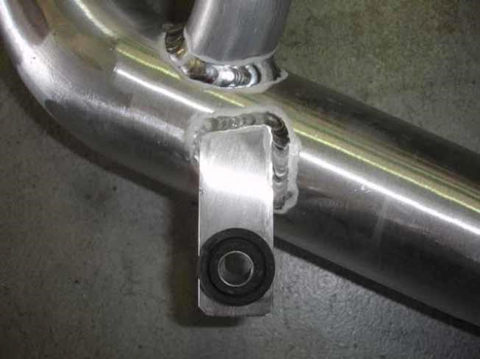
- Remove the rubber bushings from the stock lower intercooler pipe by pushing the metal sleeve out and then pushing the rubber grommet out and reinstall it in the COBB Hard Pipe.
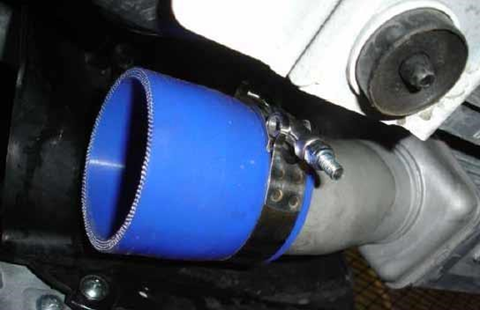
- Slide the 2793 T-bolt clamp over the end of the intercooler outlet followed by the 60mm to 65mm silicone reducer (60mm side on the intercooler outlet) and tighten the T-bolt clamp.
- Slide a 2793 T-bolt clamp over the top end of the COBB hard pipe and loosely install the 45 degree 65mm to 70mm silicone reducer. Loosely install the 2794 T-bolt over the 45 degree silicone. Slide another 2793 T-bolt clamp over the lower side and install the lower intercooler pipe.
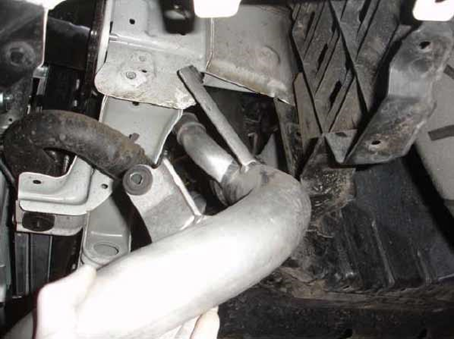
- Loosen the radiator hose support bracket to the chassis to allow for more freedom with the piping installation.
- Reinstall the 12mm bolt to the support bracket and the lower intercooler pipe.
- Reinstall the BPV hose by sliding it over the tube on the lower intercooler pipe and tightening the hose clamp.
- Recheck the torque on all of the bolts/nuts removed during the installation.
- Congratulations, you have successfully installed your COBB Tuning Evo X Lower Intercooler Pipe. Now go out and enjoy!
CARB Sticker Installation (On CARB Certified Applications)
This product is covered under CARB EO D-660-111
For additional information on CARB EO options for your Mitsubishi, check out our page CARB EO numbers for COBB Mitsubishi Products
Install the supplied CARB sticker on an easily viewable space that won't be susceptible to large amounts of heat. We recommend on the radiator core support, or the underside of the hood.
Links
Calibration Map Notes for Mitsubishi Vehicles
COBB Customer Support Web Support and Tech Articles: COBB Tuning Customer Support Center Email: support@cobbtuning.com Phone support available 9am to 6pm Monday-Thursday. 9am to 4pm Friday (CST) 866.922.3059 return to www.cobbtuning.comContact Us:
Related content
Copyright 2025 © COBB Tuning Products LLC. All Rights Reserved. | www.cobbtuning.com