5B1130 - COBB Cat-Back Exhaust E9x BMW 335i
- Brandyn Mowat

5B1130 – COBB Cat-Back Exhaust E9x BMW 335i Coupe & Sedan
2007-2013 335i
2007-2013 335xi
2007-2013 335is

Congratulations on your purchase of the COBB Tuning 5B1130! The following instructions will assist you through the installation process. Please read them BEFORE beginning the install to familiarize yourself with the steps and tools needed. If you feel you cannot properly perform this installation, we HIGHLY recommend you take the vehicle to a qualified and experienced automotive technician.
IMPORTANT! Installing this kit will require custom tuning or utilizing an appropriate Stage Power Package map if you have a matching mechanical configuration. Please consult with COBB or an authorized ProTuner in your area if you have any questions!
Table of Contents
Parts List
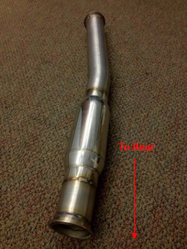
- (1) Merge Pipe
- (1) Resonator Pipe
- (1) Mid-pipe
- (1) Muffler Section
- (2) 4” Slip fit Exhaust Tips
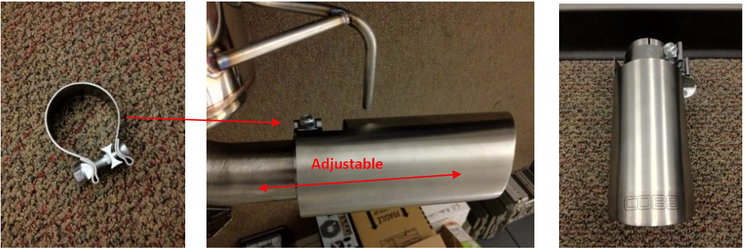
- (2) 2.5” Slip Fit C-Clamps
- (3) V-band Clamps
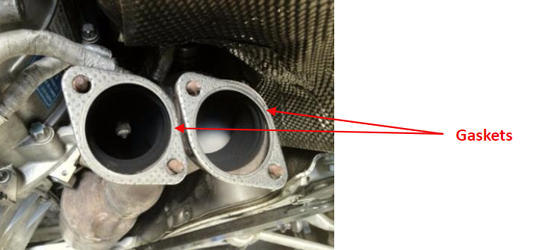
- (2) 2.5” Exhaust Gaskets
- (1) 1/8” Nylon Connector
- (1) 1/8” Rubber Cap
Tools Needed
- Phillips head screwdriver
- Flathead screwdriver
3/8" ratchet
3/8" 10mm socket
3/8" 12mm socket
3/8" 8mm socket
3/8" 12" extension
3/8" 6" extension
- Jack or Lift
- Jack Stands
- E10 Torx Socket
- T50 Torx Socket
- Silicone Lubricant (optional for removal of stock exhaust hangars)
- Exhaust Hanger Pliers (optional for removal and installation)
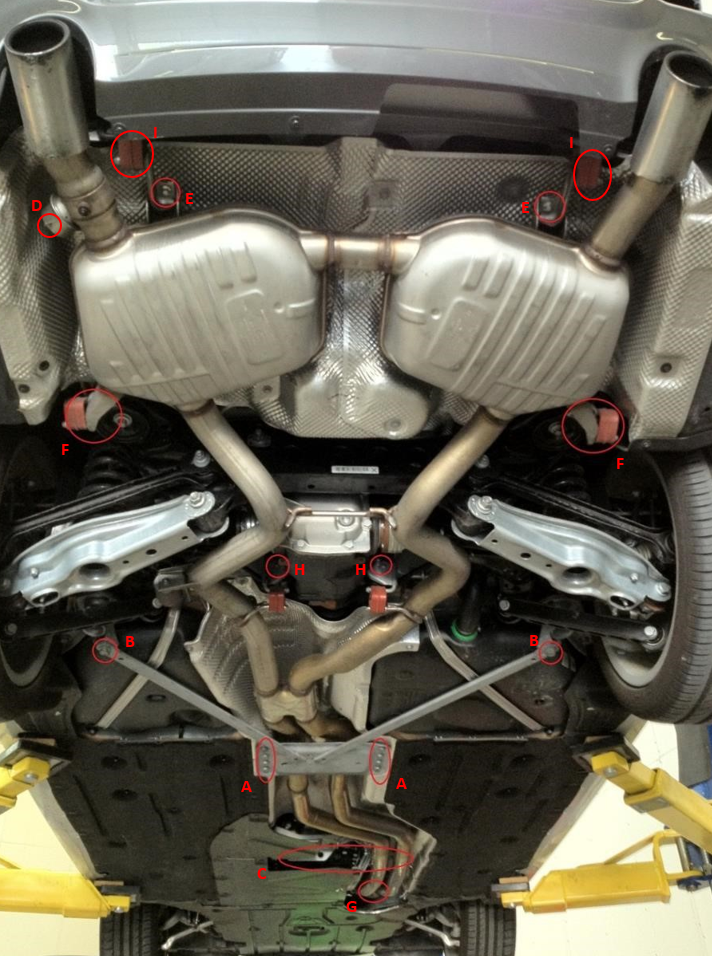
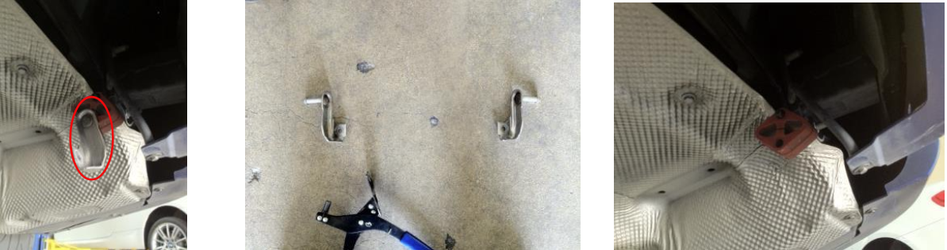
Key
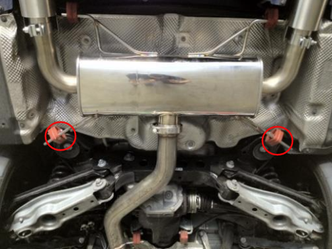
Please use the image below as a reference guide for key locations during the installation.
Stock Exhaust Removal
!!!CAUTION!!!
- Support the exhaust in the rear and in the front of the car and carefully remove. The stock exhaust is heavy and weights approximately 77lbs! We highly recommend a second person to assist with the removal of the exhaust.
- Remove the chassis brace. There will be 8 x T50 TORX bolts (A) on all vehicles and an additional 2 x 18mm (B) for the coupes/convertibles.
Note: Sedans do not have the X brace and therefore do not require moving the 2 x 18mm Bolts(B)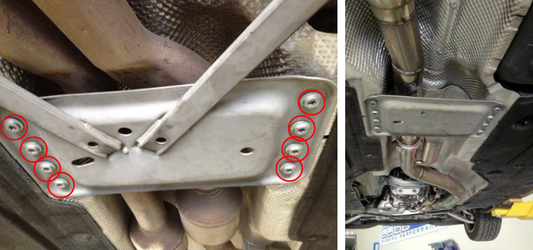
- Remove the transmission mount (C) using an E10 TORX socket and 13mm Socket.
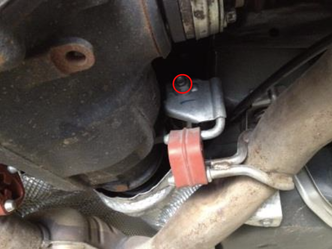
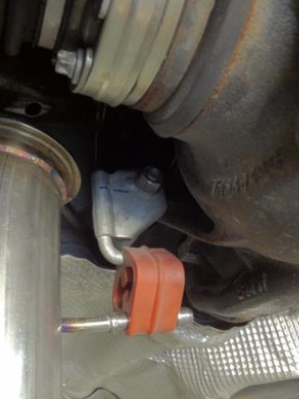
- Unplug the vacuum valve (D) behind the driver side exhaust tip.
- Plug the vacuum line with the supplied plug and tuck it away.

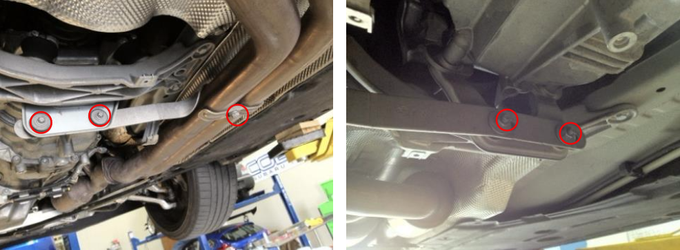
- Remove the rear muffler hangers using E10 TORX socket (E)
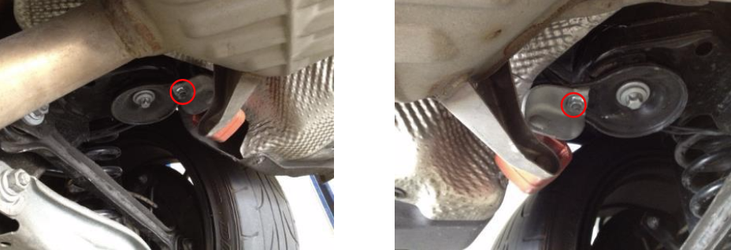
- Remove the rear sub-frame hangers with a 12mm socket (F)
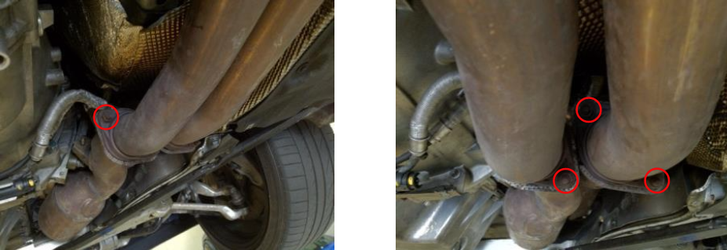
- Loosen and remove 2 x 18mm bolts holding the hangers to the differential (H)
Installation of the COBB 3-Series Cat-Back Exhaust:
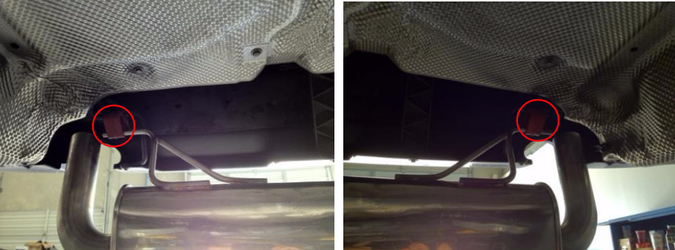
- Remove hangers and bushings from the stock exhaust with the exhaust hanger pliers. The hangers that will be reused are circled in red.
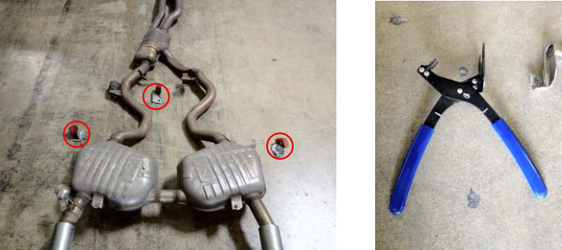
- Remove the rear muffler hangers from the bushings (I) with the exhaust hanger pliers.
- Install the driver side differential hanger (H) using an 18mm Wrench.
- Lubricate all the hangers with sillicone spray. (This step is optional but will help with the installation.)
- Install the muffler section into the rear muffler bushings (I) by the sliding rod into one bushing at a time. Check to make sure the muffler is centered in the hangers.
- Swap the driver side (USDM) and passenger side hangers (F) that mount onto the subframe and install the bushings onto the muffler section.
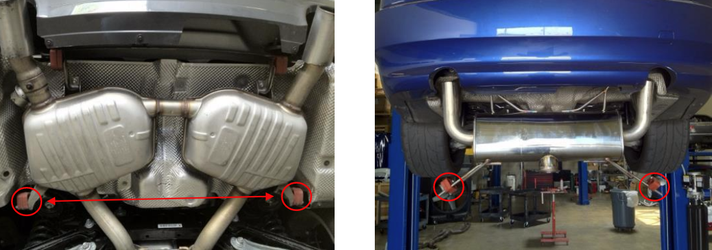
- Swing the muffler section up and secure the hangers (F) using a 12mm socket.
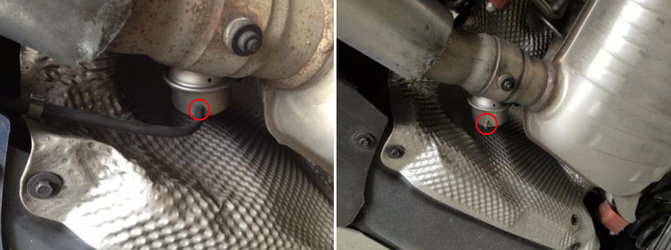
- Install both exhaust gaskets onto the downpipes (G)
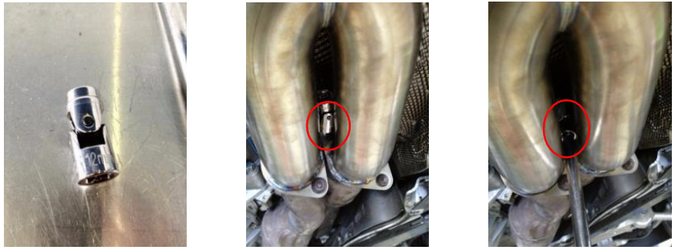
- Install the merge pipe onto the downpipes using a 12mm swivel socket. For the top middle nut, remove the socket from the extension. Put the extension between the merge and reattach the socket to tighten.
- Next, install the mid-pipe onto the car. Begin by attaching the hanger on the mid-pipeto the differential hanger bushing(H). Next secure a v-band between the muffler section and the mid-pipe using a 13mm deep socket. Tighten the v-band clamp but keep it loose enough to allow the mid-pipe to spin.
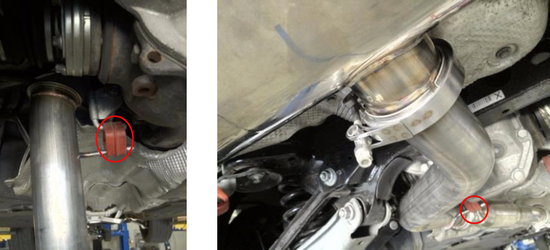
- Install the resonator pipe between the merge pipe and the mid-pipe. Once again use a 13mm deep socket to tighten the v-band clamps. The resonator is supposed to be located closer to the rear of the car. Tighten the clamps to the point where this section of exhaust can still spin. Now that all sections are on the car, loosen and tighten the clamps until the exhaust is aligned to your liking.
- Slip the C-clamps and exhaust tips onto the Muffler section. Using a 15mm deep socket, slowly tighten the clamp while adjusting the tip length and position.
- Once the tips are in place, torque down all bolts, clamps, and hangers starting from the front of the car to the rear. Double check all bolts and hangers so that they are torqued down properly. Do not over tighten the v-band clamps.
- Reinstall the under brace(A).
- Congratulations! You have completed the installation of the COBB Cat-Back Exhaust for your BMW. Go out and enjoy!
Links
Main Installation Instruction Repository for Subaru Parts
Link to Subaru Map Notes to see what map you should be on given the parts you've added
COBB Customer Support Web Support and Tech Articles: COBB Tuning Customer Support Center Email: support@cobbtuning.com Phone support available 9am to 6pm Monday-Thursday. 9am to 4pm Friday (CST) 866.922.3059 return to www.cobbtuning.comContact Us:
Related content
Copyright 2025 © COBB Tuning Products LLC. All Rights Reserved. | www.cobbtuning.com