7V2150 - VW MQB Intake Installation Instructions
- Former user (Deleted)
- Brandyn Mowat

7V2150 – COBB VW MK7 GTI / Golf R SF Intake
A7 Jetta GLI 2020
Golf 2015-2018
Golf Sportwagen 2015-2019
Golf Sportwagen 4Motion 2017-2018
Golf Alltrack 2017-2019
Golf R 2015-21
GTI 2015-21
Congratulations on your purchase of the COBB Tuning VW MK7 SF Intake! The following instructions will assist you through the installation process. Please read them BEFORE beginning the install to familiarize yourself with the steps and tools needed. If you feel you cannot properly perform this installation, we HIGHLY recommend you take the vehicle to a qualified and experienced automotive technician.
IMPORTANT! Installing this kit will require custom tuning or utilizing an appropriate Stage Power Package map if you have a matching mechanical configuration. Please consult with COBB or an authorized ProTuner in your area if you have any questions!
Table of Contents
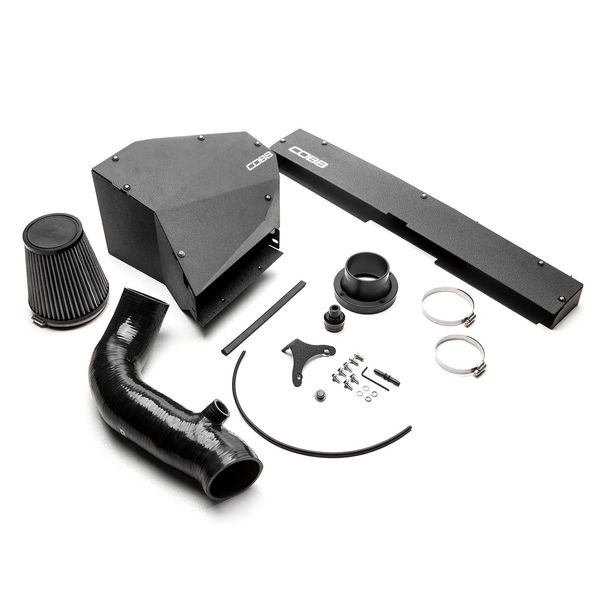
Parts List
- Airbox Body
- Airbox Lid
- Snorkel Body
- Snorkel Lid
- Silicone Intake Tube
- Velocity Stack
- Velocity Stack Bracket
- Air Filter
- Air Pump Plug
- Air Pump Adapter
- 1/4" Fitting
- 11x SS Button Head M4 x 10mm Screw
- 11x 4mm Black Nylon Washer
- 5x Flange Bolt M6 x 12mm
- 2x SS Socket Head M6 x 12mm Screw
- 2x M6 Lock Washer
- 2x M6 Flat Washer
- #048 Worm Clamp
- #044 Worm Clamp
- 12" Edge Trim
- 16" Edge Trim Low Profile
- 2.5mm Hex Key
Tools Needed
- 3/8" Ratchet
- 3/8" 7mm Socket
- 3/8" 8mm Socket
- 3/8" 10mm Socket
- T20 Torx Screwdriver
- Hose Clamp Pliers or traditional pliers
- 6mm Hex Key
Remove the OEM Volkswagen MK7 Intake
Before removal of factory intake, it is recommended to remove the engine cover by pulling it off of its grommets.
- Inspect the new components included with the COBB kit. If anything appears out of place, please contact COBB immediately and do not proceed with the installation.
- Using the hose clamp pliers, take off the clamp holding the stock intake tube to the turbo. Then pull the tube off of the turbo inlet housing.
- Take a T20 Torx screwdriver and remove the screws holding the stock snorkel in place.
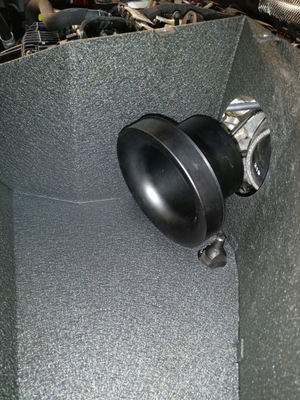
- Pull the 1/4" rubber hose off of the stock airbox. This may require some strength! Just be careful not to bust your hand when it finally comes off!
- Unclip the air pump from the stock airbox.
- Now you should be able to pull the stock airbox and intake tube out of the car by popping the box off of the grommets that hold it in place.
- Once the airbox and tube are out of the car, you can remove the stock snorkel.
Install the COBB Volkswagen MK7 SF Intake System
- Begin by placing the snorkel body in the stock snorkel location with the lid already attached. Attach the lid by placing (3) M4 button head screws with (3) 4mm black nylon washers in the top 3 threaded PEM nuts. Use a 2.5mm hex key to loosely thread in the screws. The easiest way to install the snorkel is by sliding the snorkel into the correct location at an angle shown in the following picture. Make sure that the snorkel fits under the plastic lip on the car.
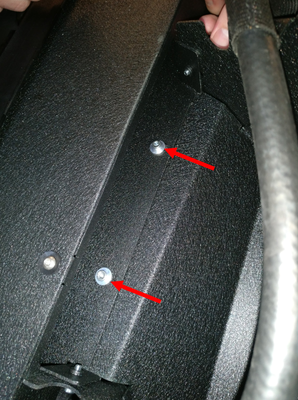
- Using (2) M4 button head screws and (2) 4mm black nylon screws, install the airbox to the car in the stock snorkel mounting locations. Use a 2.5mm hex key to tighten the screws. Once the two mounting screws are in place, you can now tighten all of the screws holding the snorkel lid to the snorkel.
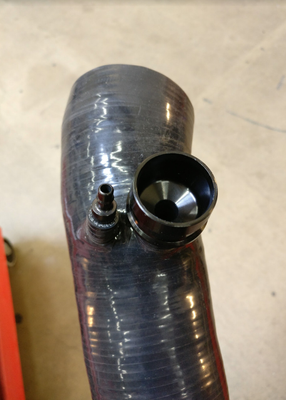
- Install the fittings onto the intake. Start with the barbed vacuum fitting, then depending on if you have the Golf R or GTI, you will either use the provided air pump adapter or air pump plug:
- For the GTI:
- Take the air pump adapter and place it onto the air pump.
- Take the air pump adapter and place it onto the air pump.
- For the Golf R:
- Insert the provided air pump plug into the silicone hose.

- Insert the provided air pump plug into the silicone hose.
- For the GTI:
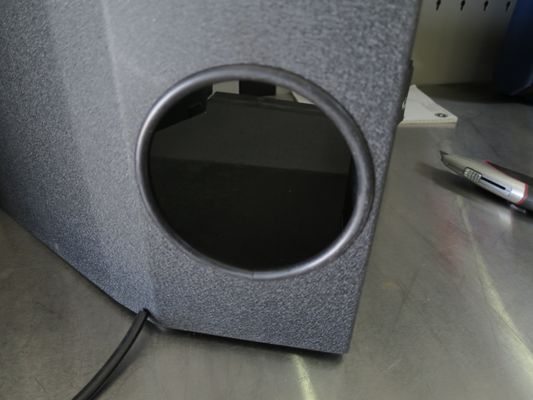
- Cut a piece of trim to about 12" and put it around the hole the intake tube will go through.
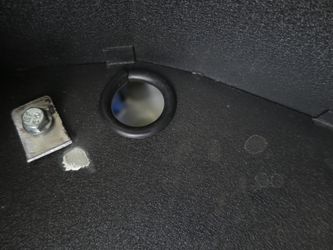
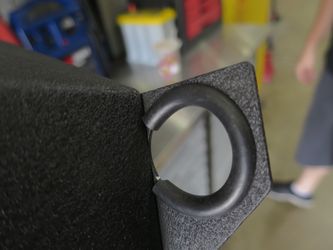
- Cut two pieces to around 4" long and fit them to the holes in the bottom and side tab of the airbox. In order to get the one to sit in the side tab neatly, you may need to trim it slightly.
- Cut two pieces to 2" and add them into the slot cutouts where the radiator hose will rest.
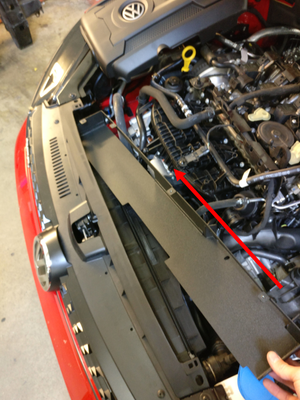
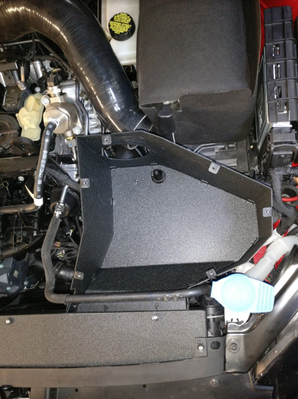
- Now, place the airbox in the car. Make sure that the stock grommet mounts go through the hole cutouts on the base of the box and that the airbox inlet goes around the snorkel outlet. You will need to install the airbox at an angle to where the side mounting tab first goes underneath the ECU harness. The airbox mounting tabs should fit on the exterior of the mounting tabs on the snorkel.
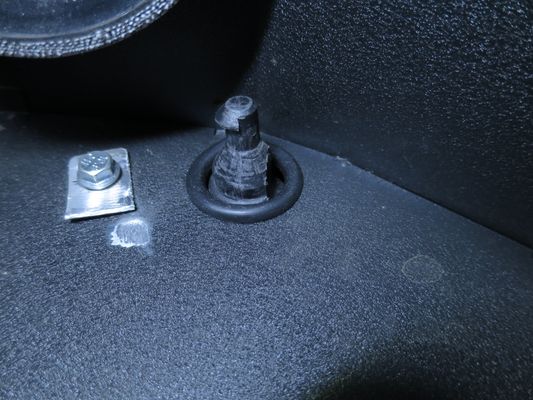
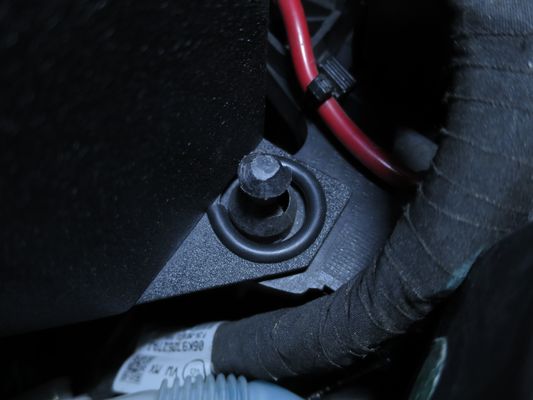
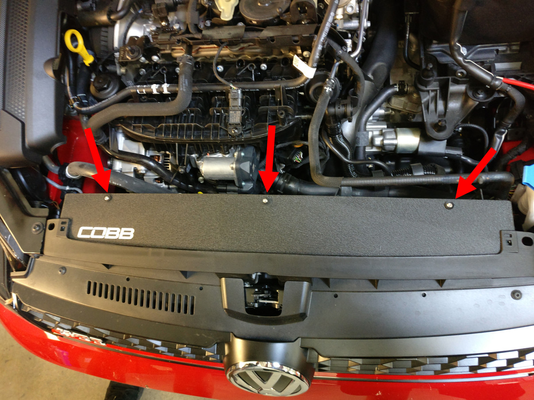
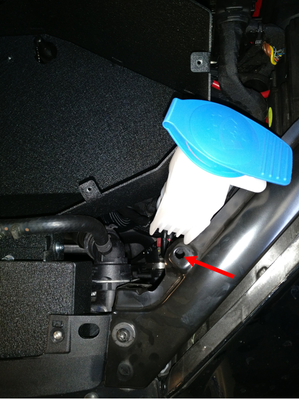
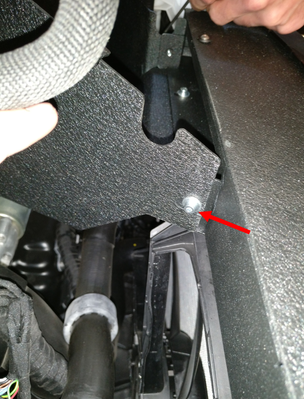
- Take (4) M6 flange bolts and thread them into the PEM nuts shown to secure the airbox to the snorkel. To ease installation, remove the wiper fluid reservoir by popping it out of the hole shown and by unclipping it from the car. Use a 10mm wrench or socket to tighten the flange bolts. (NOTE: The hardware depicted in this step are incorrect! You should have fancier hardware!)
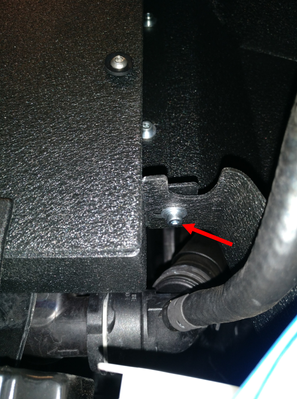
- Install the velocity stack bracket to the base of the airbox using an M6 flange bolt. Tighten in the orientation shown. (NOTE: The hardware depicted in this step are incorrect! You should have fancier hardware!)

- Now take (2) M6 lock washers and the (2) M6 button head cap screws and connect the velocity stack to the bracket. Use a 6mm hex key to tighten the screws.
- Place the silicone tube into rear cutout of the airbox. Then, insert the velocity stack into the silicone tube. Make sure that a #048 worm clamp is placed on the silicone before installation so that you will be able to tighten the silicone onto the velocity stack. Use an 8mm socket to tighten.

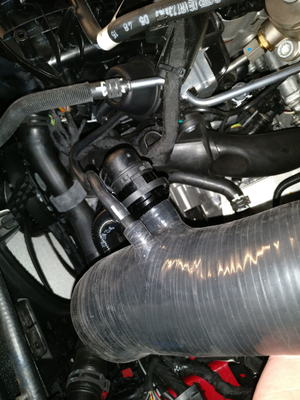
- Using a #044 worm clamp, secure the silicone intake tube to the turbo inlet. Use an 8mm socket to tighten.
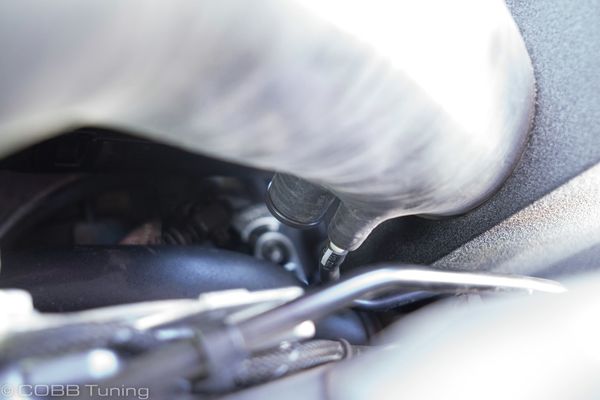
- Attach the vacuum line to the fitting on the intake tube. For MK7 GTi install the PCV hose to the fitting as well.
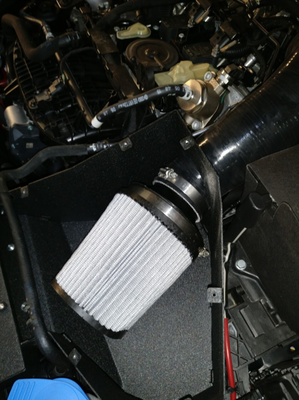
- Install the air filter provided by placing it on the velocity stack and tightening the worm clamp using a flathead screwdriver.
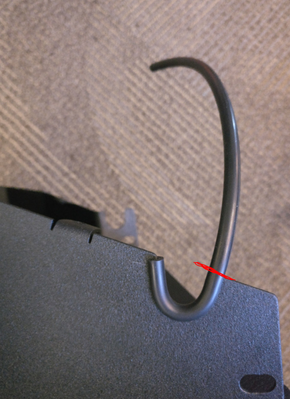
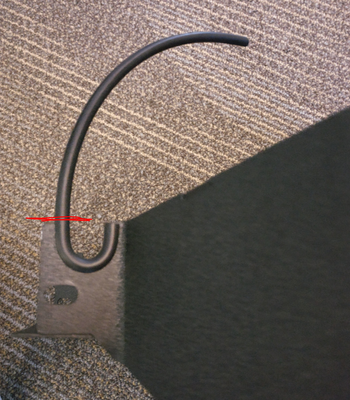
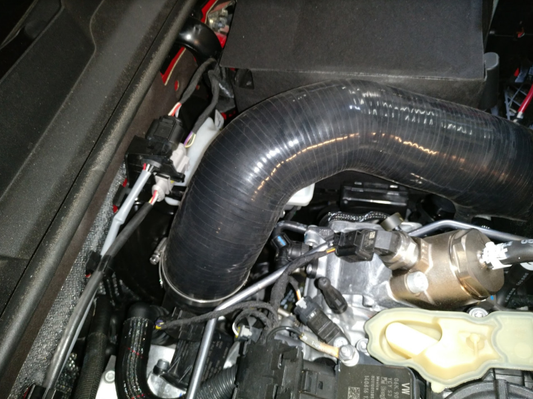
- Now, take the radiator hose and place it in the slot cutouts on the airbox.
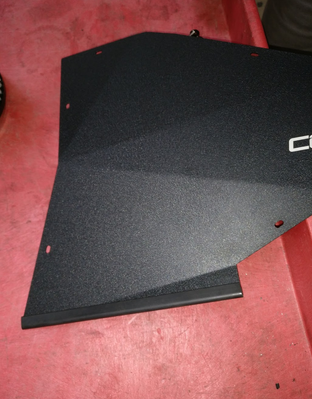
- Cut the edge trim provided to match the length of the front of the lid.
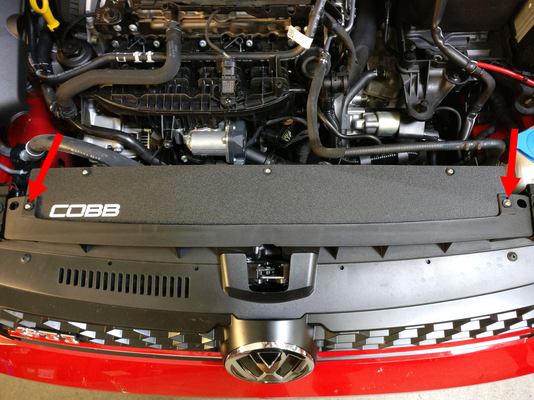
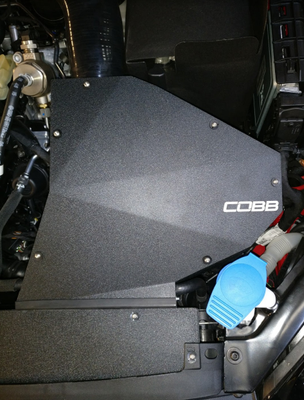
- Now you can install the lid onto the airbox using (6) M4 button head cap screws and x6 4mm black nylon washers. Lightly thread in the screws until you are able to line the lid up with the edges of the airbox. Once everything is in line, tighten using a 2.5mm hex key.
- Check to make sure all nuts and bolts are tight along with ensuring no steps were skipped. Enjoy your COBB Tuning Volkswagen MK7 SF Intake!
CARB Sticker Installation (On CARB Certified Applications)
Install the supplied CARB sticker on an easily viewable space that won't be susceptible to large amounts of heat. We recommend on the radiator core support, or the underside of the hood.
This product is covered under CARB Exemption Order
2.0T vehicles D-660-50
1.8T vehicles D-660-103
COBB Customer Support Web Support and Tech Articles: COBB Tuning Customer Support Center Email: support@cobbtuning.com Phone support available 9am to 6pm Monday-Thursday. 9am to 4pm Friday (CST) 866.922.3059 return to www.cobbtuning.comContact Us:
Related content
Copyright 2025 © COBB Tuning Products LLC. All Rights Reserved. | www.cobbtuning.com