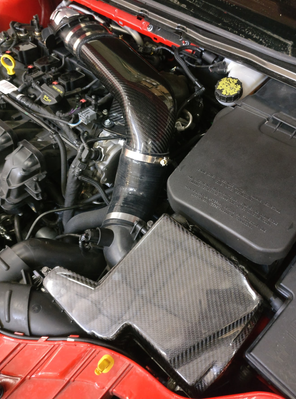
Congratulations on your purchase of the COBB Tuning Carbon Fiber Intake System! The following instructions will assist you through the installation process. Please read them BEFORE beginning the install to familiarize yourself with the steps and tools needed. If you feel you cannot properly perform this installation, we HIGHLY recommend you take the vehicle to a qualified and experienced automotive technician.
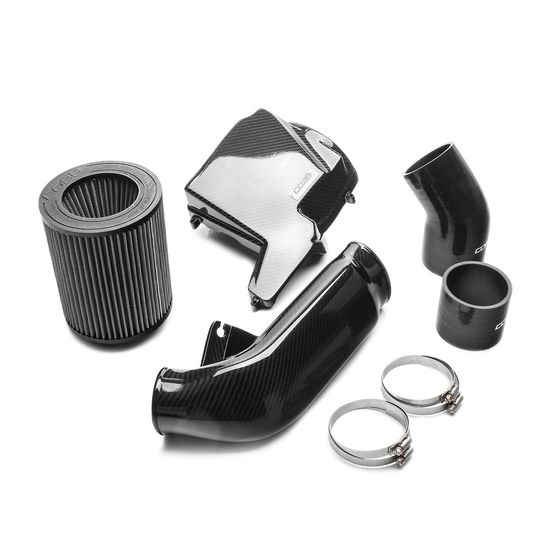
Parts List
- Intake Lid
- Intake Tube
- COBB Filter
- 3.25" Straight silicone
- 3.25"-3.00" silicone 45° Reducer
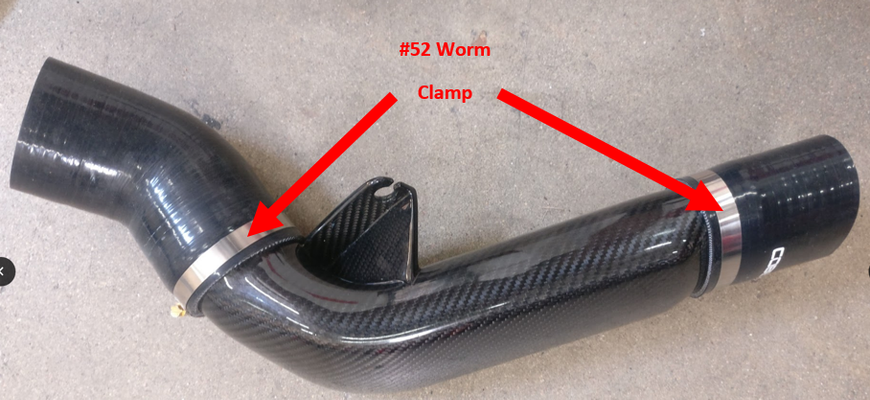
- (2) #52 Worm Clamp
- (2) #48 Worm Clamp
Tools Needed
- Ratchet, with extensions
- Sockets: 7mm, 8mm, 10mm, 15mm
- Flathead Screwdriver
- T27 Torx
Removal of Stock Intake System
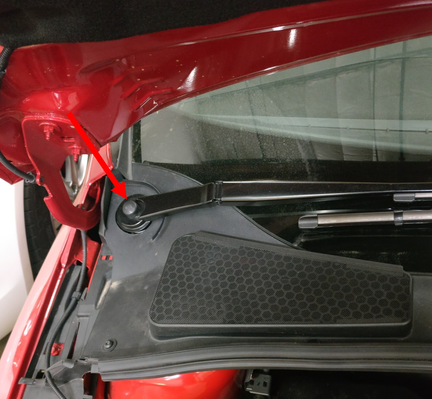
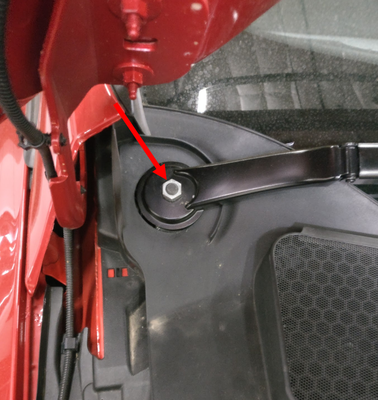
- Begin by removing the wipers. To do this, take off each rubber cover so that you can use a 15mm socket to remove the nuts holding each wiper in place. With each nut removed, rather use a wiper removal tool or gently loosen the wipers off of the stud with your hands and remove.
NOTE: Keep this hardware, it will be used again during re-installation!
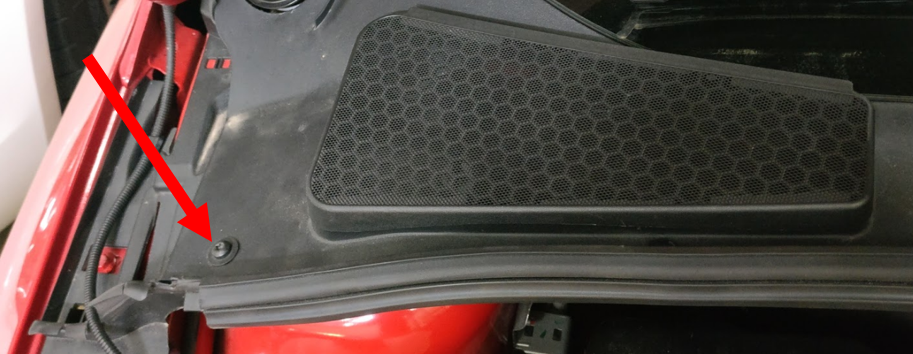
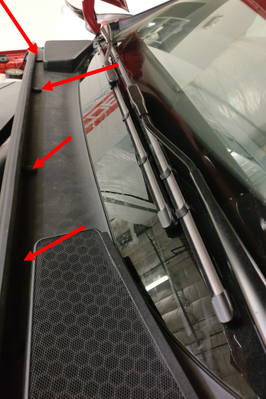
NOTE: You may want to use blue painters tape to mark where each wiper was so that when reinstalling, each wiper is clocked correctly. - Use a T27 Torx to remove the two screws holding the cowl in place (only one screw shown in pictures below), and a flathead screwdriver to pop the push pins out of place. You can now remove the upper layer of the cowl.
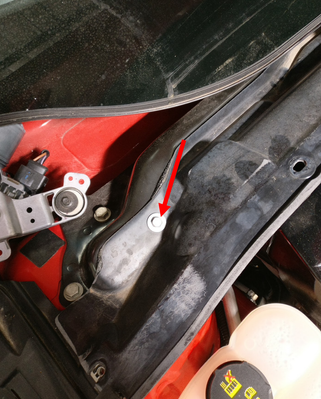
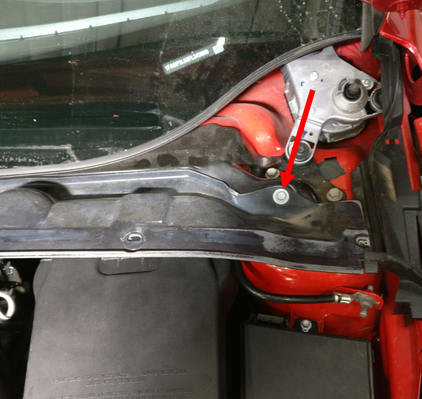
NOTE: Keep this hardware, it will be used again during re-installation! - Use a 10mm socket to remove the two bolts holding the second layer of the cowl in place. You can now remove the second layer of the cowl.
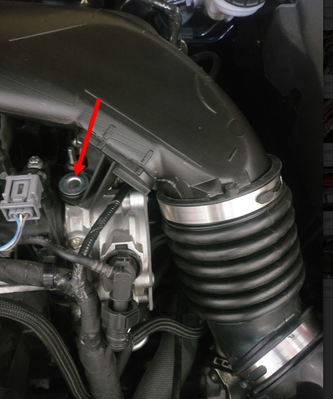
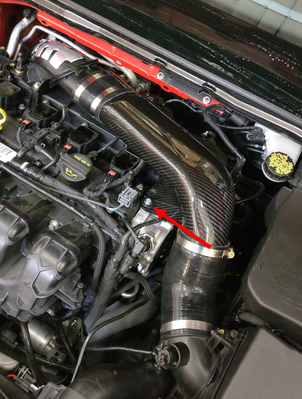
NOTE: Keep this hardware, it will be used again during re-installation! - With the cowl removed, you can now begin removing the stock intake system. Begin by using a socket to remove the bolt mounting the intake tube to the motor.
NOTE: DO NOT REMOVE THE TUBE SECTION ATTACHED TO THE TURBO!
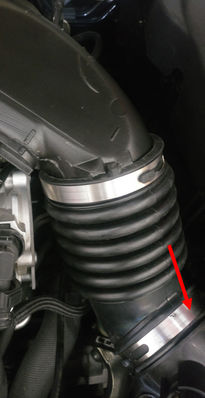
Once this step is complete, remove the rubber grommet from the stock intake tube and place on the new COBB Intake tube. - Remove the silicone connecting the intake tube to the airbox. Use a 8mm socket to loosen the worm clamp closest to the airbox.
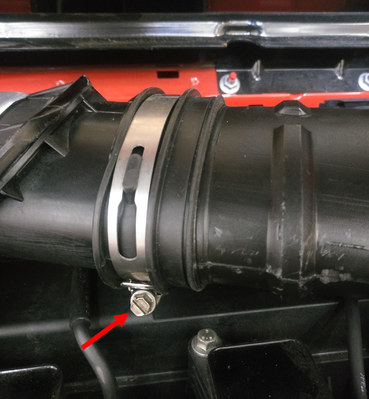
- Loosen the worm clamp connecting the two sections of intake tube using a 7mm socket.
- With the worm clamps loose and the mounting bolt removed, pull the section of stock intake tube from the car.
Installation of COBB Tuning Carbon Fiber Intake
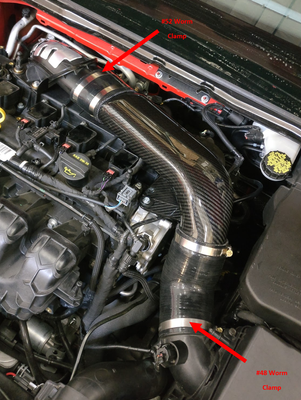
- Begin the installation by placing the provided silicone onto the COBB tube. The straight silicone will use two #52 worm clamps. The angled reducer will use a #52 worm clamp to connect to the COBB tube and will use the #48 worm clamp to connect to the stock airbox. Use a 8mm socket or flathead screwdriver to tighten the clamps.
- With the silicone in place, install the tube onto the stock tube's oval section and the stock airbox. Use the clamps discussed in the previous step to secure the silicone.
- With the stock grommet in place on the mounting hole of the COBB tube, use the provided M6 bolt and washer to mount the tube to this location. Use a 10mm socket to tighten.
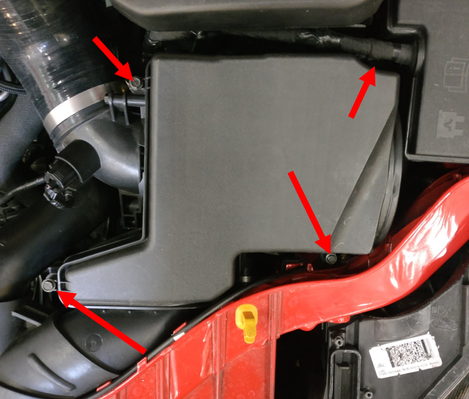
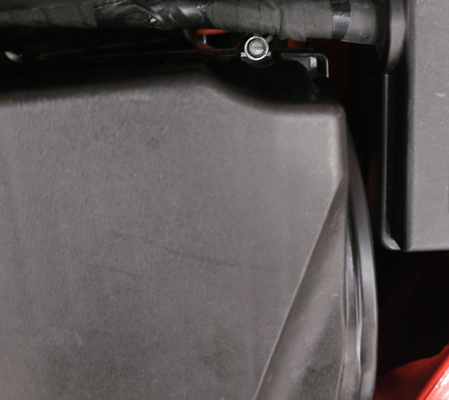
- Use a 8mm socket to loosen the 4 screws holding the stock airbox lid in place. You will need to use an extension to reach the back right screw.
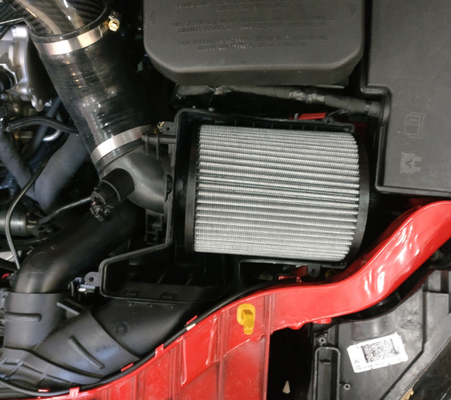
NOTE: Retain the 4 screws as they will be resused to attach the airbox lid. - Once the screws are all loose, you can remove he stock airbox lid. Replace the stock filter with your new COBB filter. This goes on the same way the stock filter did.
- To install the COBB carbon fiber airbox lid, begin by placing the 4 stock screws in each of the mounting holes on the lid. Now, place the lid onto the stock airbox and tighten all 4 screws using an 8mm socket.
NOTE: Do not over-tighten the screws as you can strip the plastic threads. With your new intake system completely installed, check to make sure all clamps and bolts are tight. Now you may begin to put the cowl back on the car and eventually the windshield wipers. To do this, reference steps 3, 2, and 1 from the "Removal of Stock Intake System" section in this order. For reference, the driver side wiper should go above the passenger side!
Installation of your new COBB Tuning Carbon Fiber intake is complete! Enjoy!

