
Part Number – Part Name
Vehicle Coverage
[placeholder]
Congratulations on your purchase of the COBB Tuning xxxxxxxxxxxxx! The following instructions will assist you through the installation process. Please read them BEFORE beginning the install to familiarize yourself with the steps and tools needed. If you feel you cannot properly perform this installation, we HIGHLY recommend you take the vehicle to a qualified and experienced automotive technician.
IMPORTANT! Installing this kit will require custom tuning or utilizing an appropriate Stage Power Package map if you have a matching mechanical configuration. Please consult with COBB or an authorized ProTuner in your area if you have any questions!
Table of Contents
Parts List
Tools Needed
Sockets
3/8"
- 3/8" 7mm socket
- 3/8" 16mm socket
- 3/8" 17mm socket
- 3/8" 18mm socket
- 3/8" 19mm socket
- 3/8" 21mm socket
- 3/8" 14mm deep socket
- 3/8" 15mm deep socket
- 3/8" T50 Torx Bit
- 3/8" E10 inverted Torx
- 3/8" E12 inverted Torx
- 3/8" E14 inverted Torx
- 3/8" E18 inverted Torx
- 3/8" 4mm Allen Socket
- 3/8" 5 mm Allen Socket
- 3/8" 10 mm Allen Socket
1/2"
Hand Tools
- Phillips head screwdriver
- Flathead screwdriver
- 3mm Allen Key
- 7mm Nut Driver
- Trim removal tool
- Deadblow Hammer
Misc.
Wrenches
- 8mm Ratcheting combination wrench
- 10mm combination wrench
- 11mm combination wrench
- 12mm combination wrench
- 13mm combination wrench
- 14mm combination wrench
- 15mm combination wrench
- 16mm combination wrench
- 17mm combination wrench
- 18mm combination wrench
- 19mm combination wrench
- 21mm combination wrench
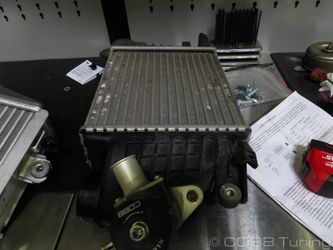
Remove the Top Mount Intercooler
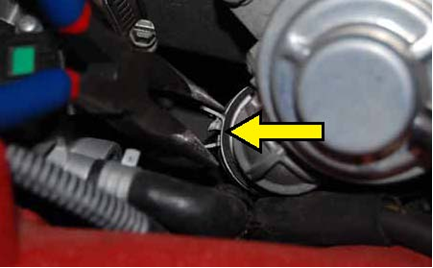
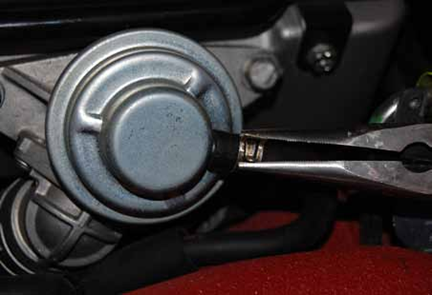
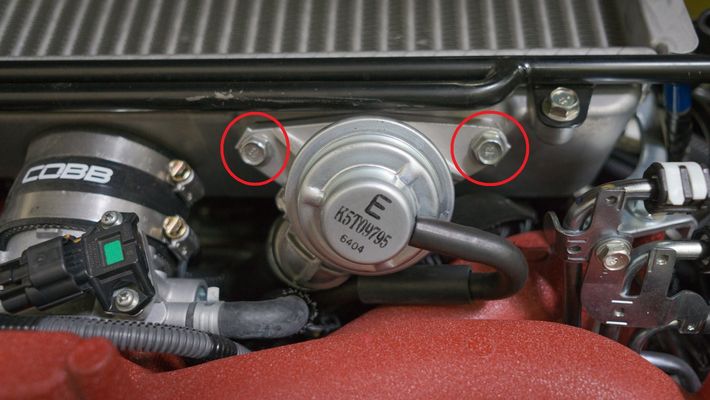
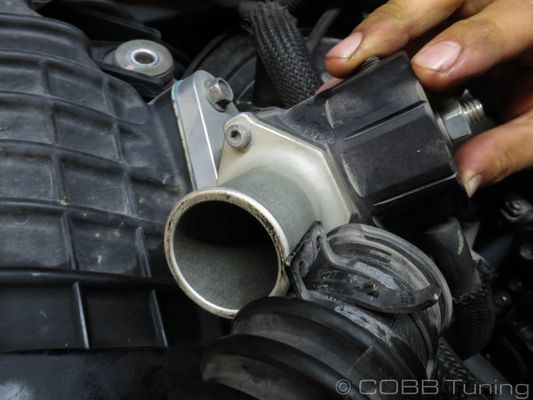
Using a 12mm socket with ratchet, remove the 2 bolts that hold the bypass valve in place and remove it from the car.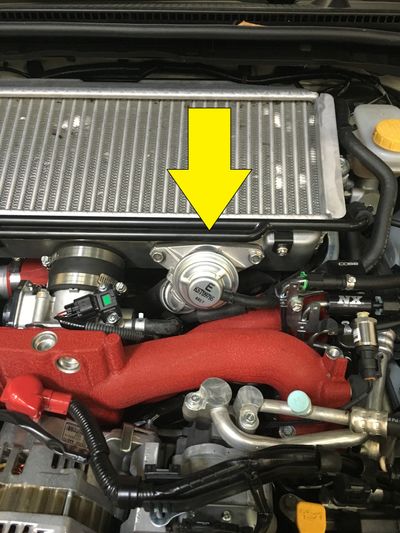


This removal applies to the following vehicles
- 2008 - 2014 WRX
- 2005 - 2009 Legacy GT
- 2005 - 2009 Outback XT
- 2008 - 2013 Forester XT
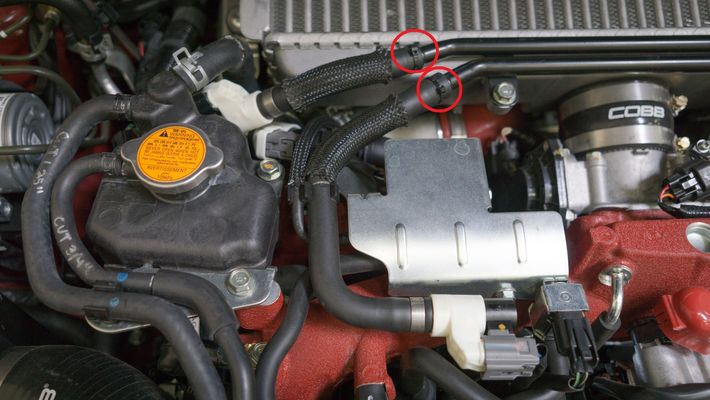
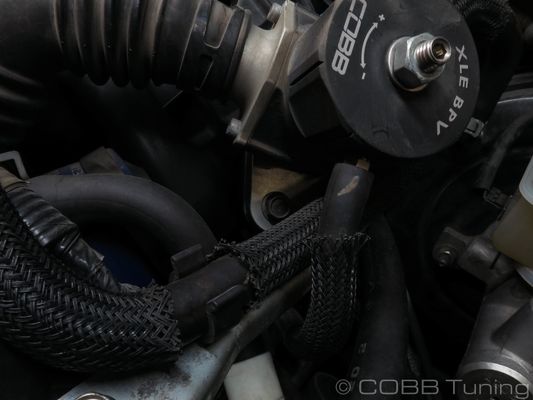
- Locate the factory BPV and remove the recirculation hose by squeezing down the hose clamp with your pliers.

- Remove the vacuum reference line from the rear port of the BPV
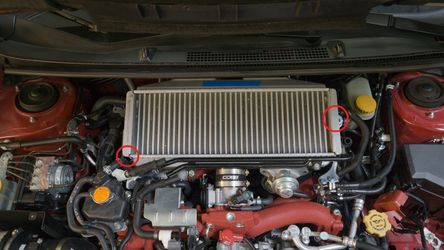
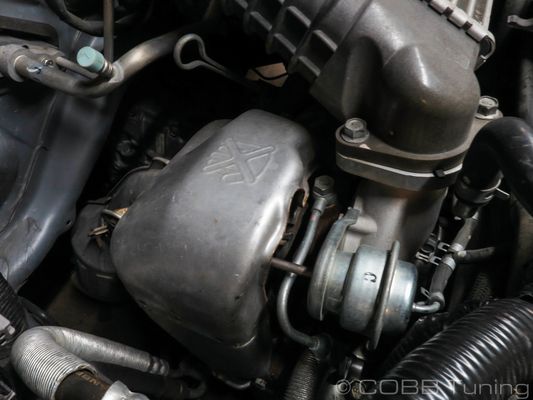
- Moving to the other side, unbolt the flange where it meets the turbo using a 12mm socket.

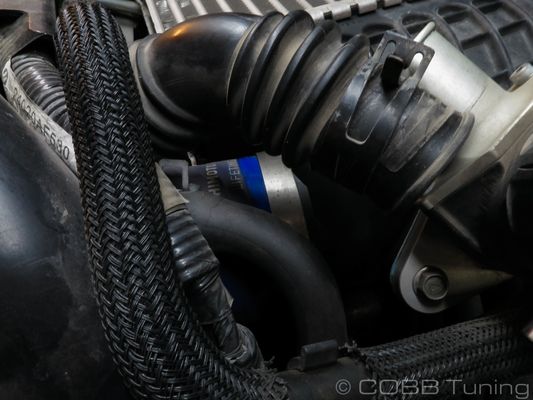
- Undo the hose clamp attaching the throttle body coupler to the intercooler. This will typically require a phillips screwdriver, 7 or 8mm socket.
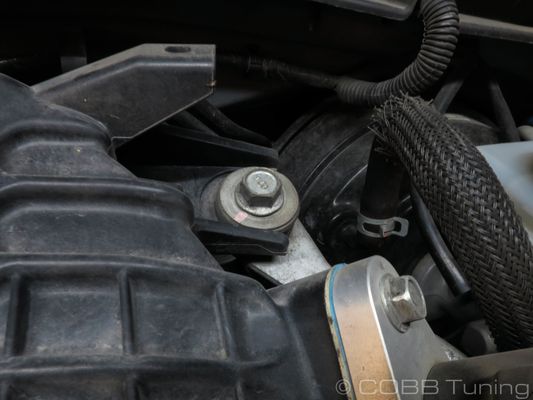
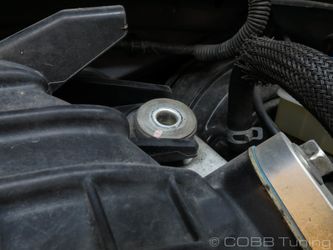
- Unbolt the remaining 12mm bolt going to the intercooler support bracket and remove the intercooler from the car.
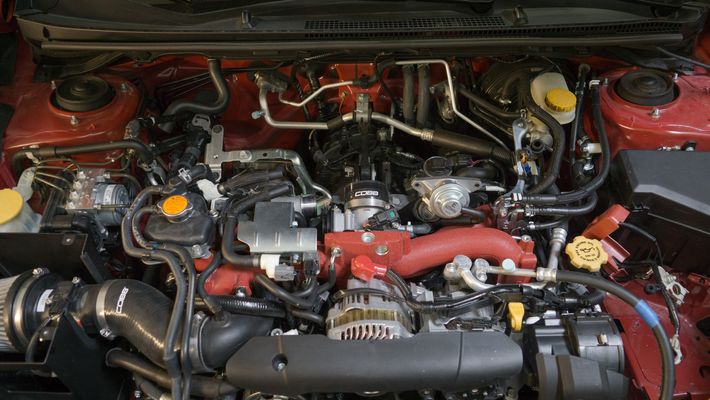
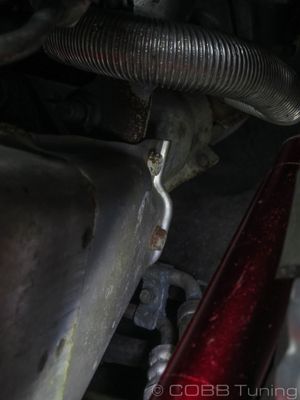
Remove Factory Heatshield
It may be worth spraying down the bolts with a penetrating oil and allowing them to sit for a little while in order to allow them to come lose more easily without any breakage.
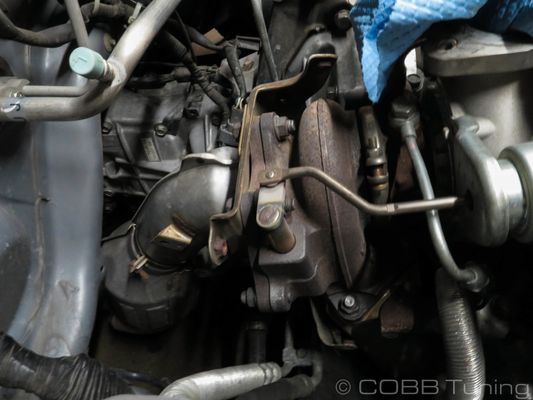
- Using your 10mm socket remove the two bolts from the driver's side of the heat shield.
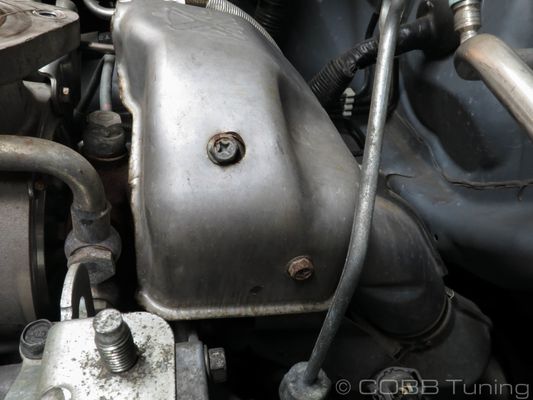
- Followed down by the one on the rear passenger's side.
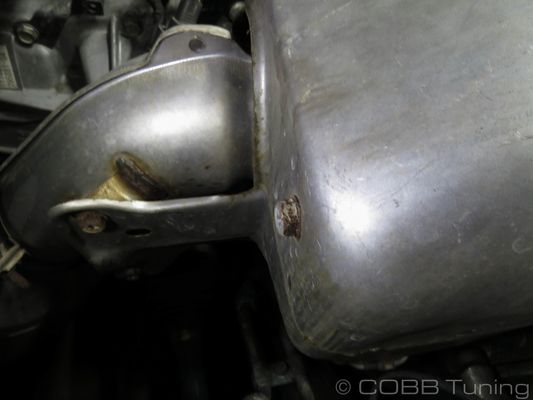
- And the two low down near to the passenger's side frame rail.
With those items removed you can now remove the heatshield from the car.
It may require re-clocking the transmission dipstick in order to have the clearance needed to remove the heatshield easily.
- Now is a good time to check out the heat shield bracket as the factory units are quite prone to cracking and damage. Replace yours as needed.
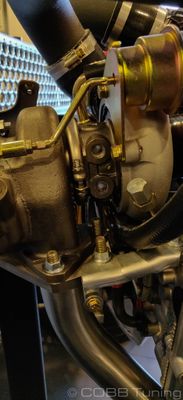
Turbo Heat Shield Installation
- Hand install one of the supplied 10mm bolts along with a washer into the lower up-pipe/turbo support bracket.
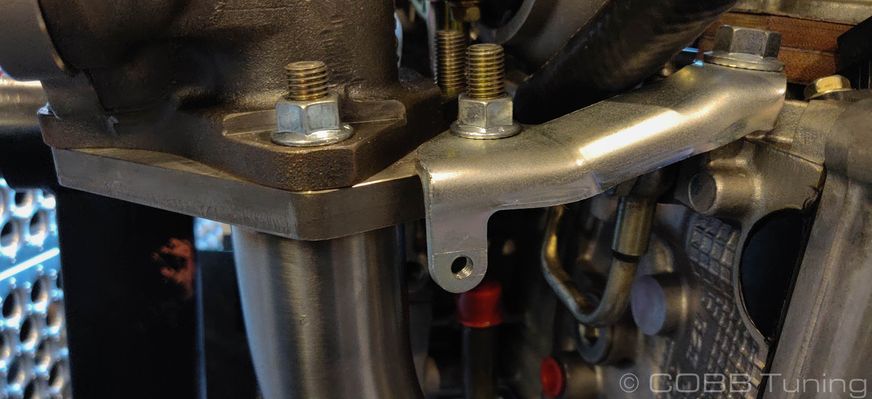
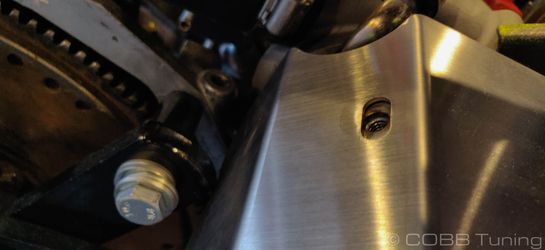
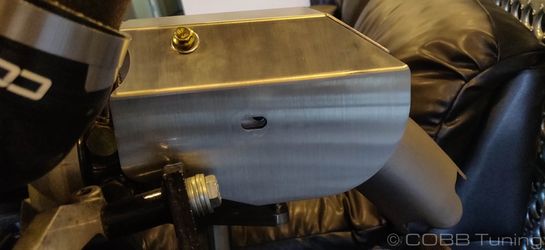
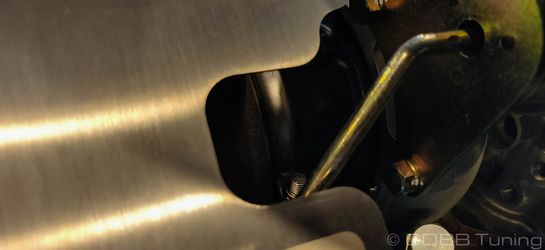
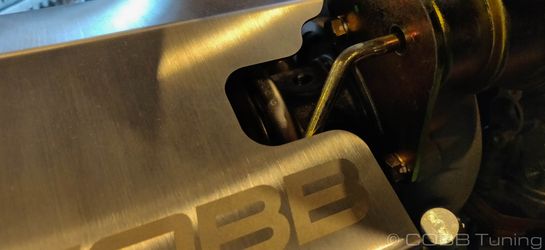
- Slide the heat shield into place with the cutout over the loosened bolt on the lower mount.
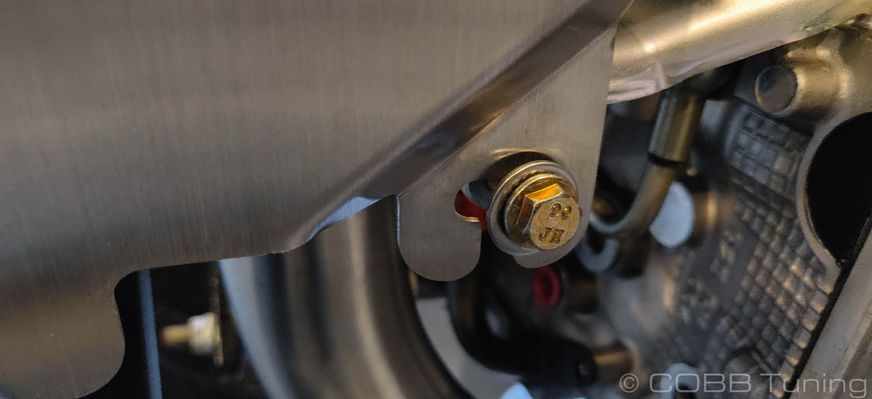
- Loosely install the other two bolts on the top and inside of the heat shield.

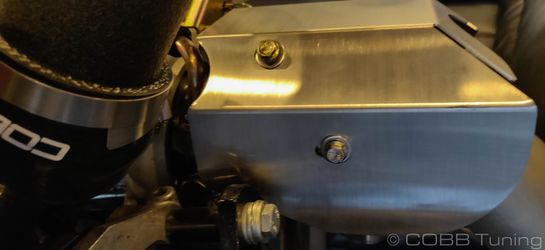
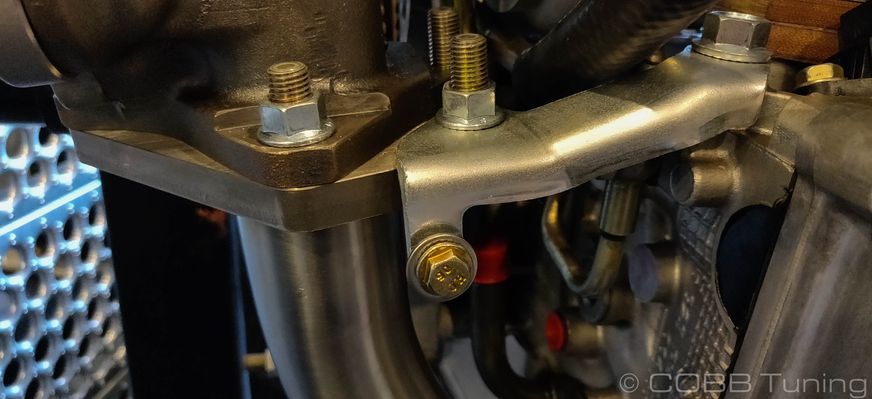
- Slide the heat shield around a little bit to make sure the wastegate arm isn't hitting the bracket and then tighten down each bolt with a 10mm socket.
- Reinstall the intercooler in the reverse order of removal.
- Go out and enjoy!
Links
MAP Notes
Helps to figure out which map you should be on given the parts installed to your car
Links for related parts
COBB Customer Support Web Support and Tech Articles: COBB Tuning Customer Support Center Email: support@cobbtuning.com Phone support available 9am to 6pm Monday-Thursday. 9am to 4pm Friday (CST) 866.922.3059 return to www.cobbtuning.comContact Us: