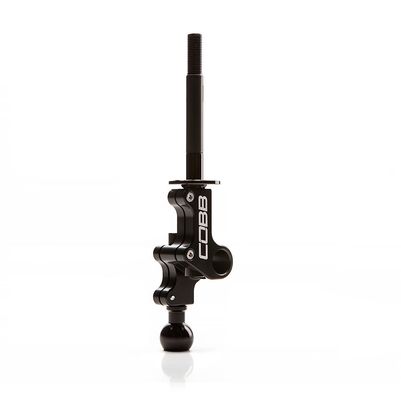
215315, 224316 - COBB Subaru 6-Speed Double Adjustable Short Throw Shifter

215315, 224316 - 6-Speed Double Adjustable Short Throw Shifter
Subaru WRX STI 2004 - 2021
Legacy GT Spec B 2006 - 2009
215315
224316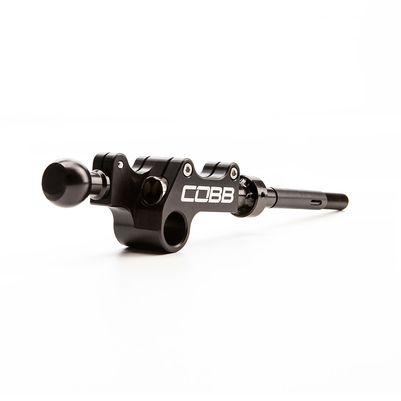
Congratulations on your purchase of the COBB Tuning Double Adjustable Short Throw Shifter for your Subaru Impreza WRX STi or Subaru Legacy Spec-B. The following instructions will assist you through your installation process. Please read them first BEFORE beginning the install and familiarize yourself with the steps and tools needed. If you feel that you cannot properly perform this installation, we HIGHLY recommend you take the vehicle to a qualified and experienced automotive technician.
Part List
- Instructions
- Double Adjustable Short Shifter
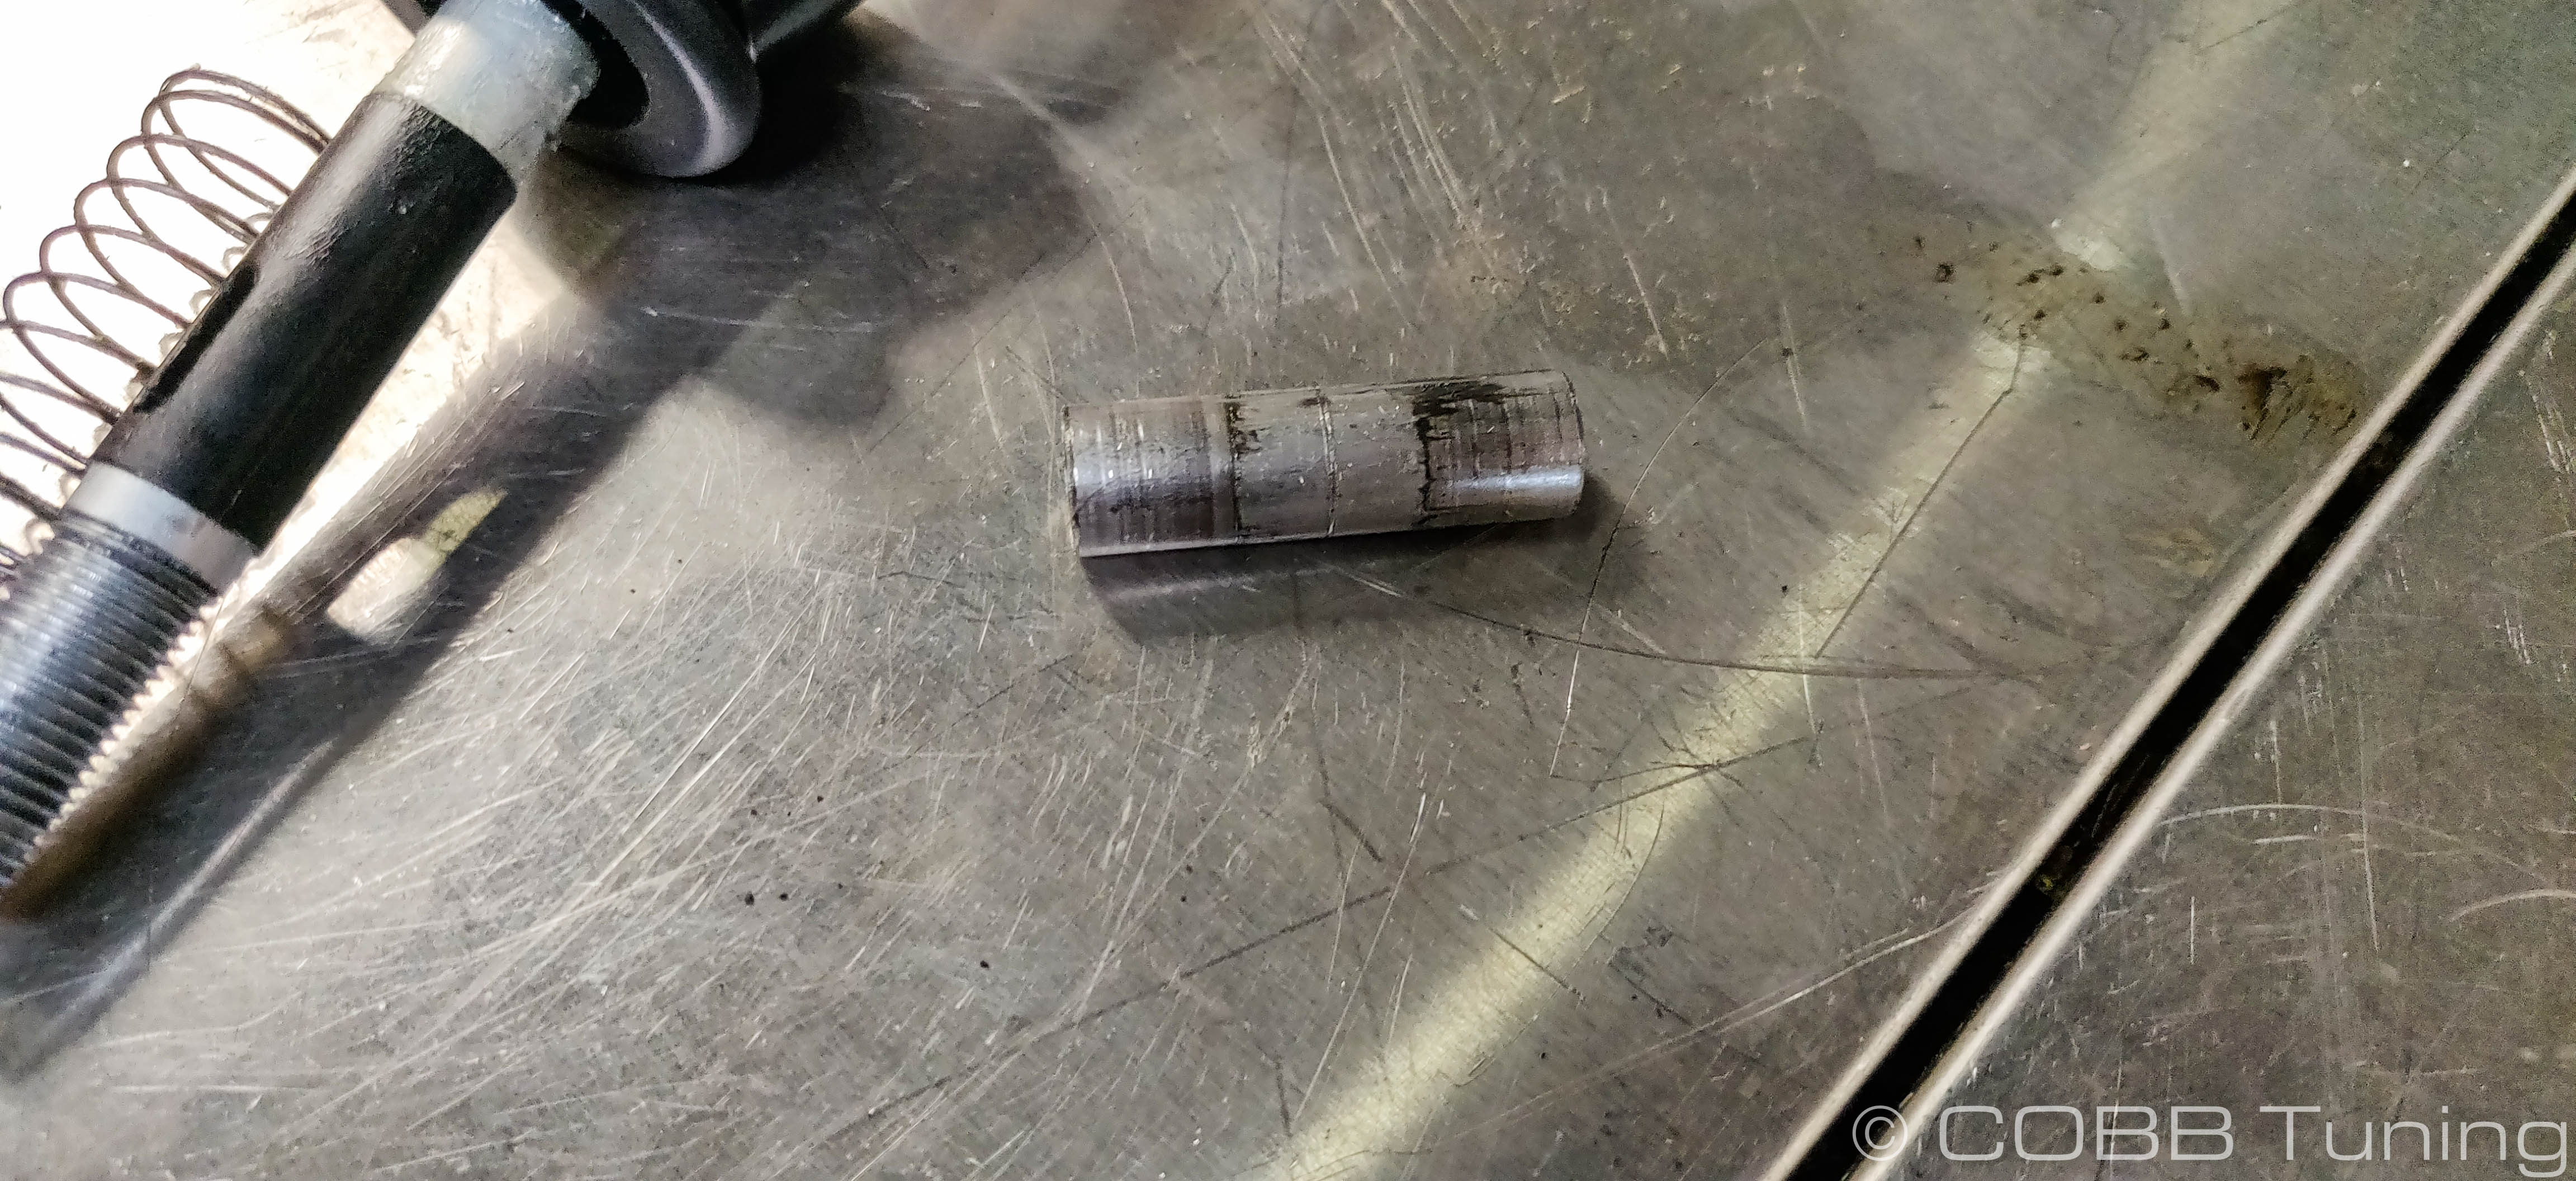
- (2) Bushing Adapters (Only used on March '07+ build date STi’s)
- 3mm Allen Key
Tools Needed
- Phillips Screwdriver
- Ratchet (3/8” Drive Recommended)
- 10mm Socket
- 10mm Wrench
- (2) 12mm Box End Wrenches
- 3mm Allen Key
- Small Punch or Drill Bit
- Hammer
- ~3mm-4mm Pin or Allen Key (To Hold
- Reverse Lockout Cable)
- C-Clip Pliers
- Scissors
- Moly Based Grease
Notes: Make sure all components are clear of manufacturing residue and packing materials before installation.
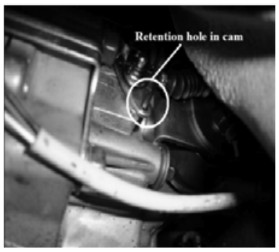
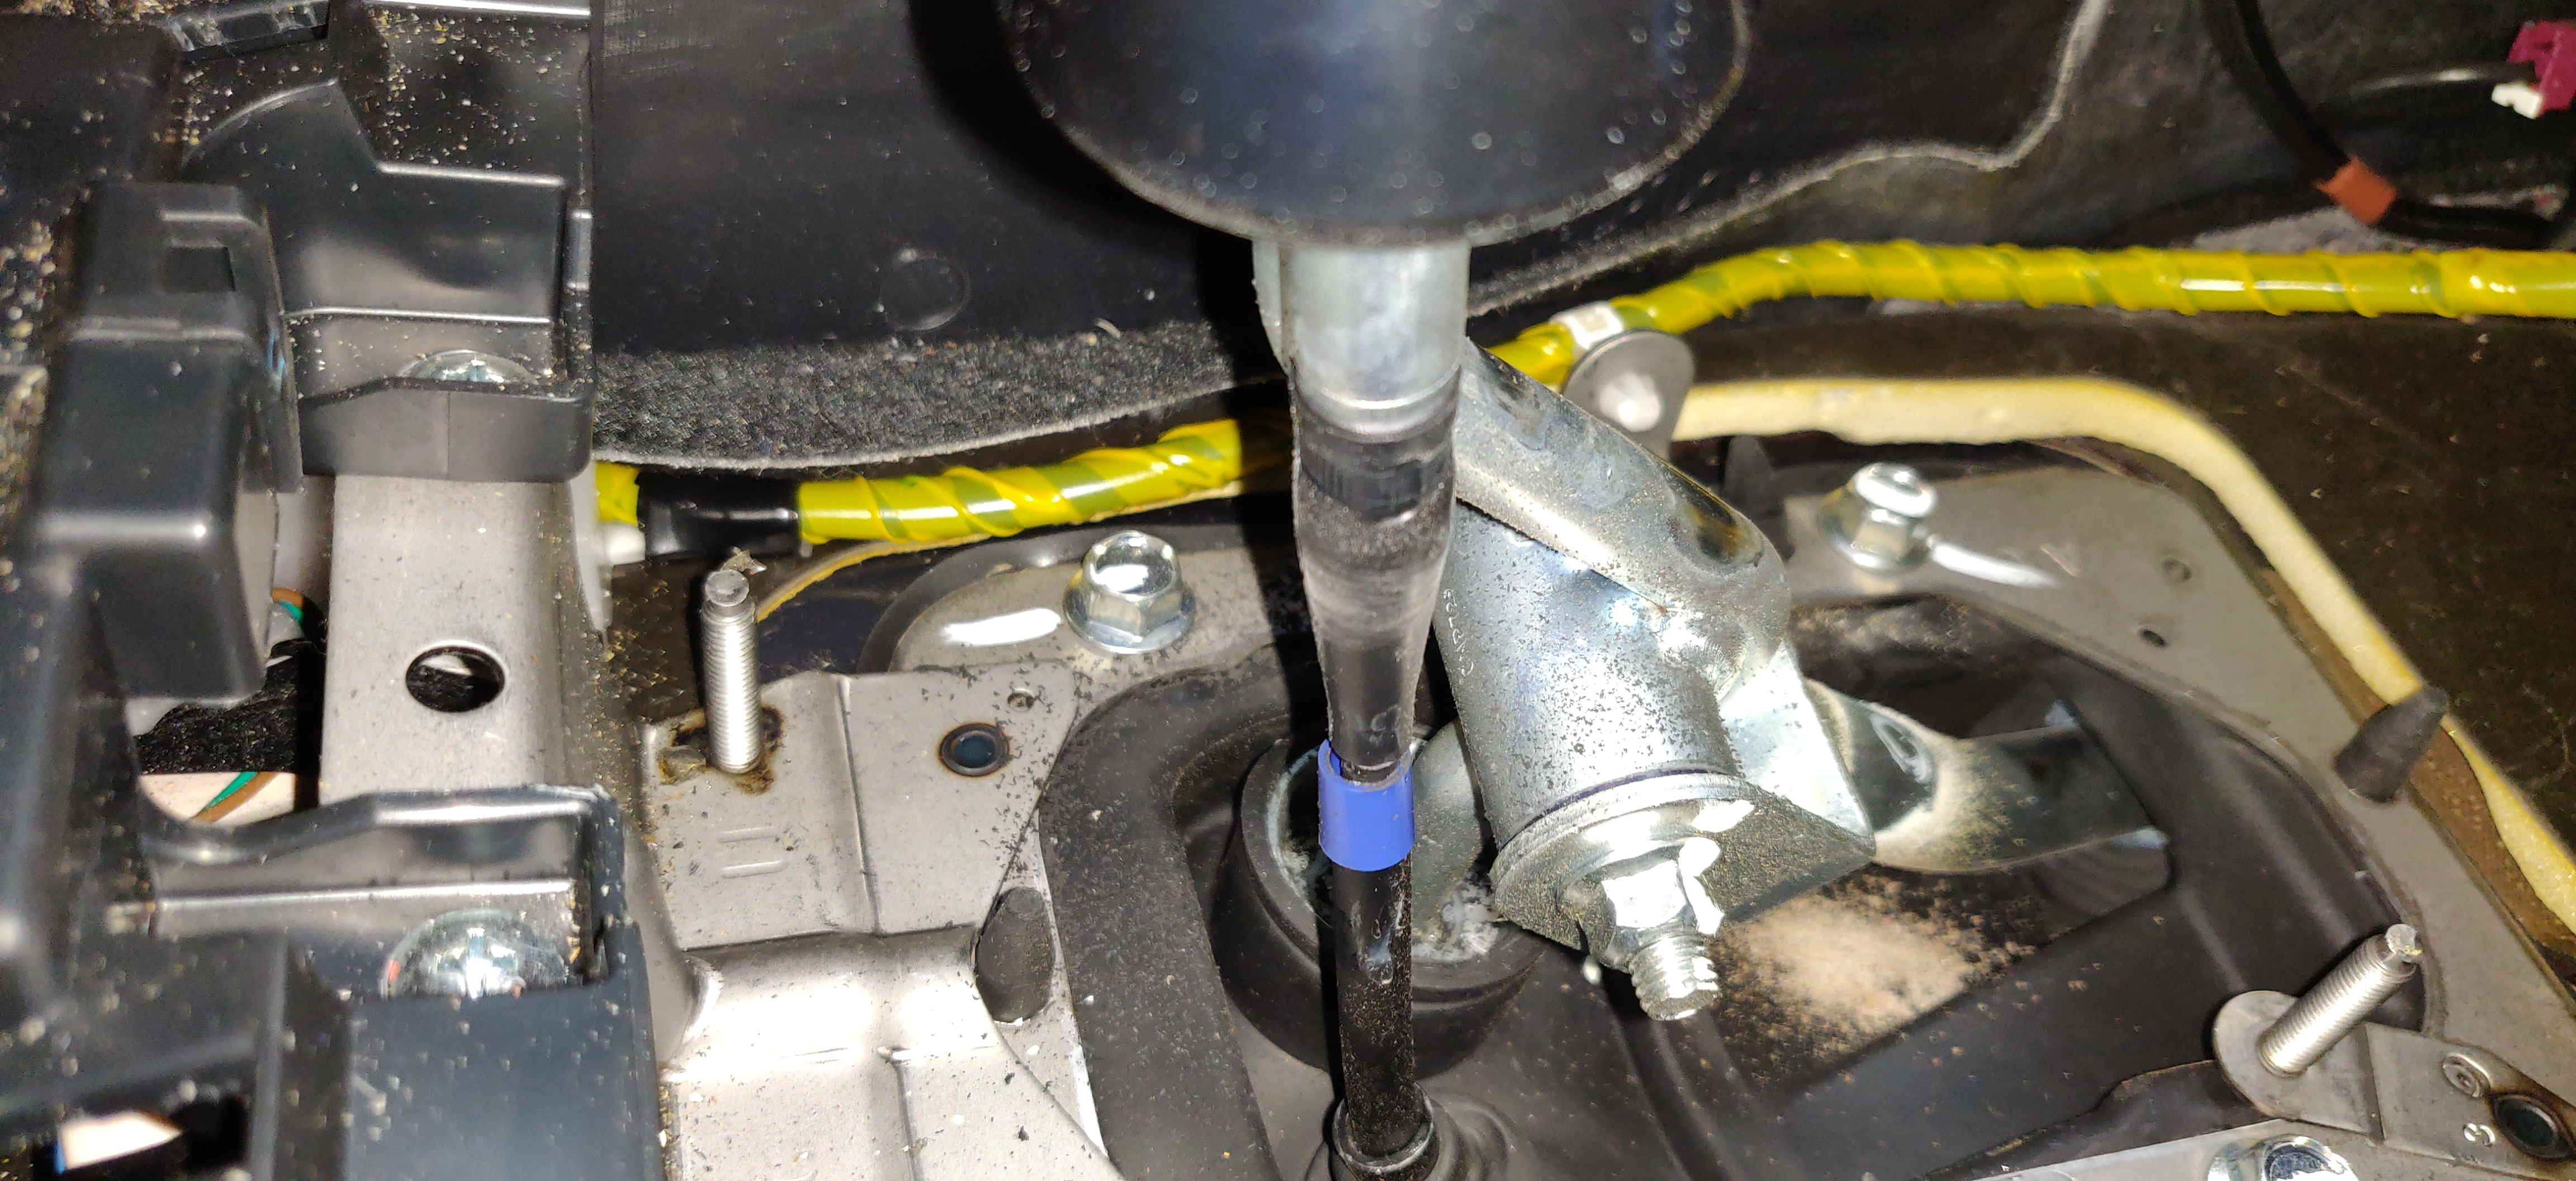
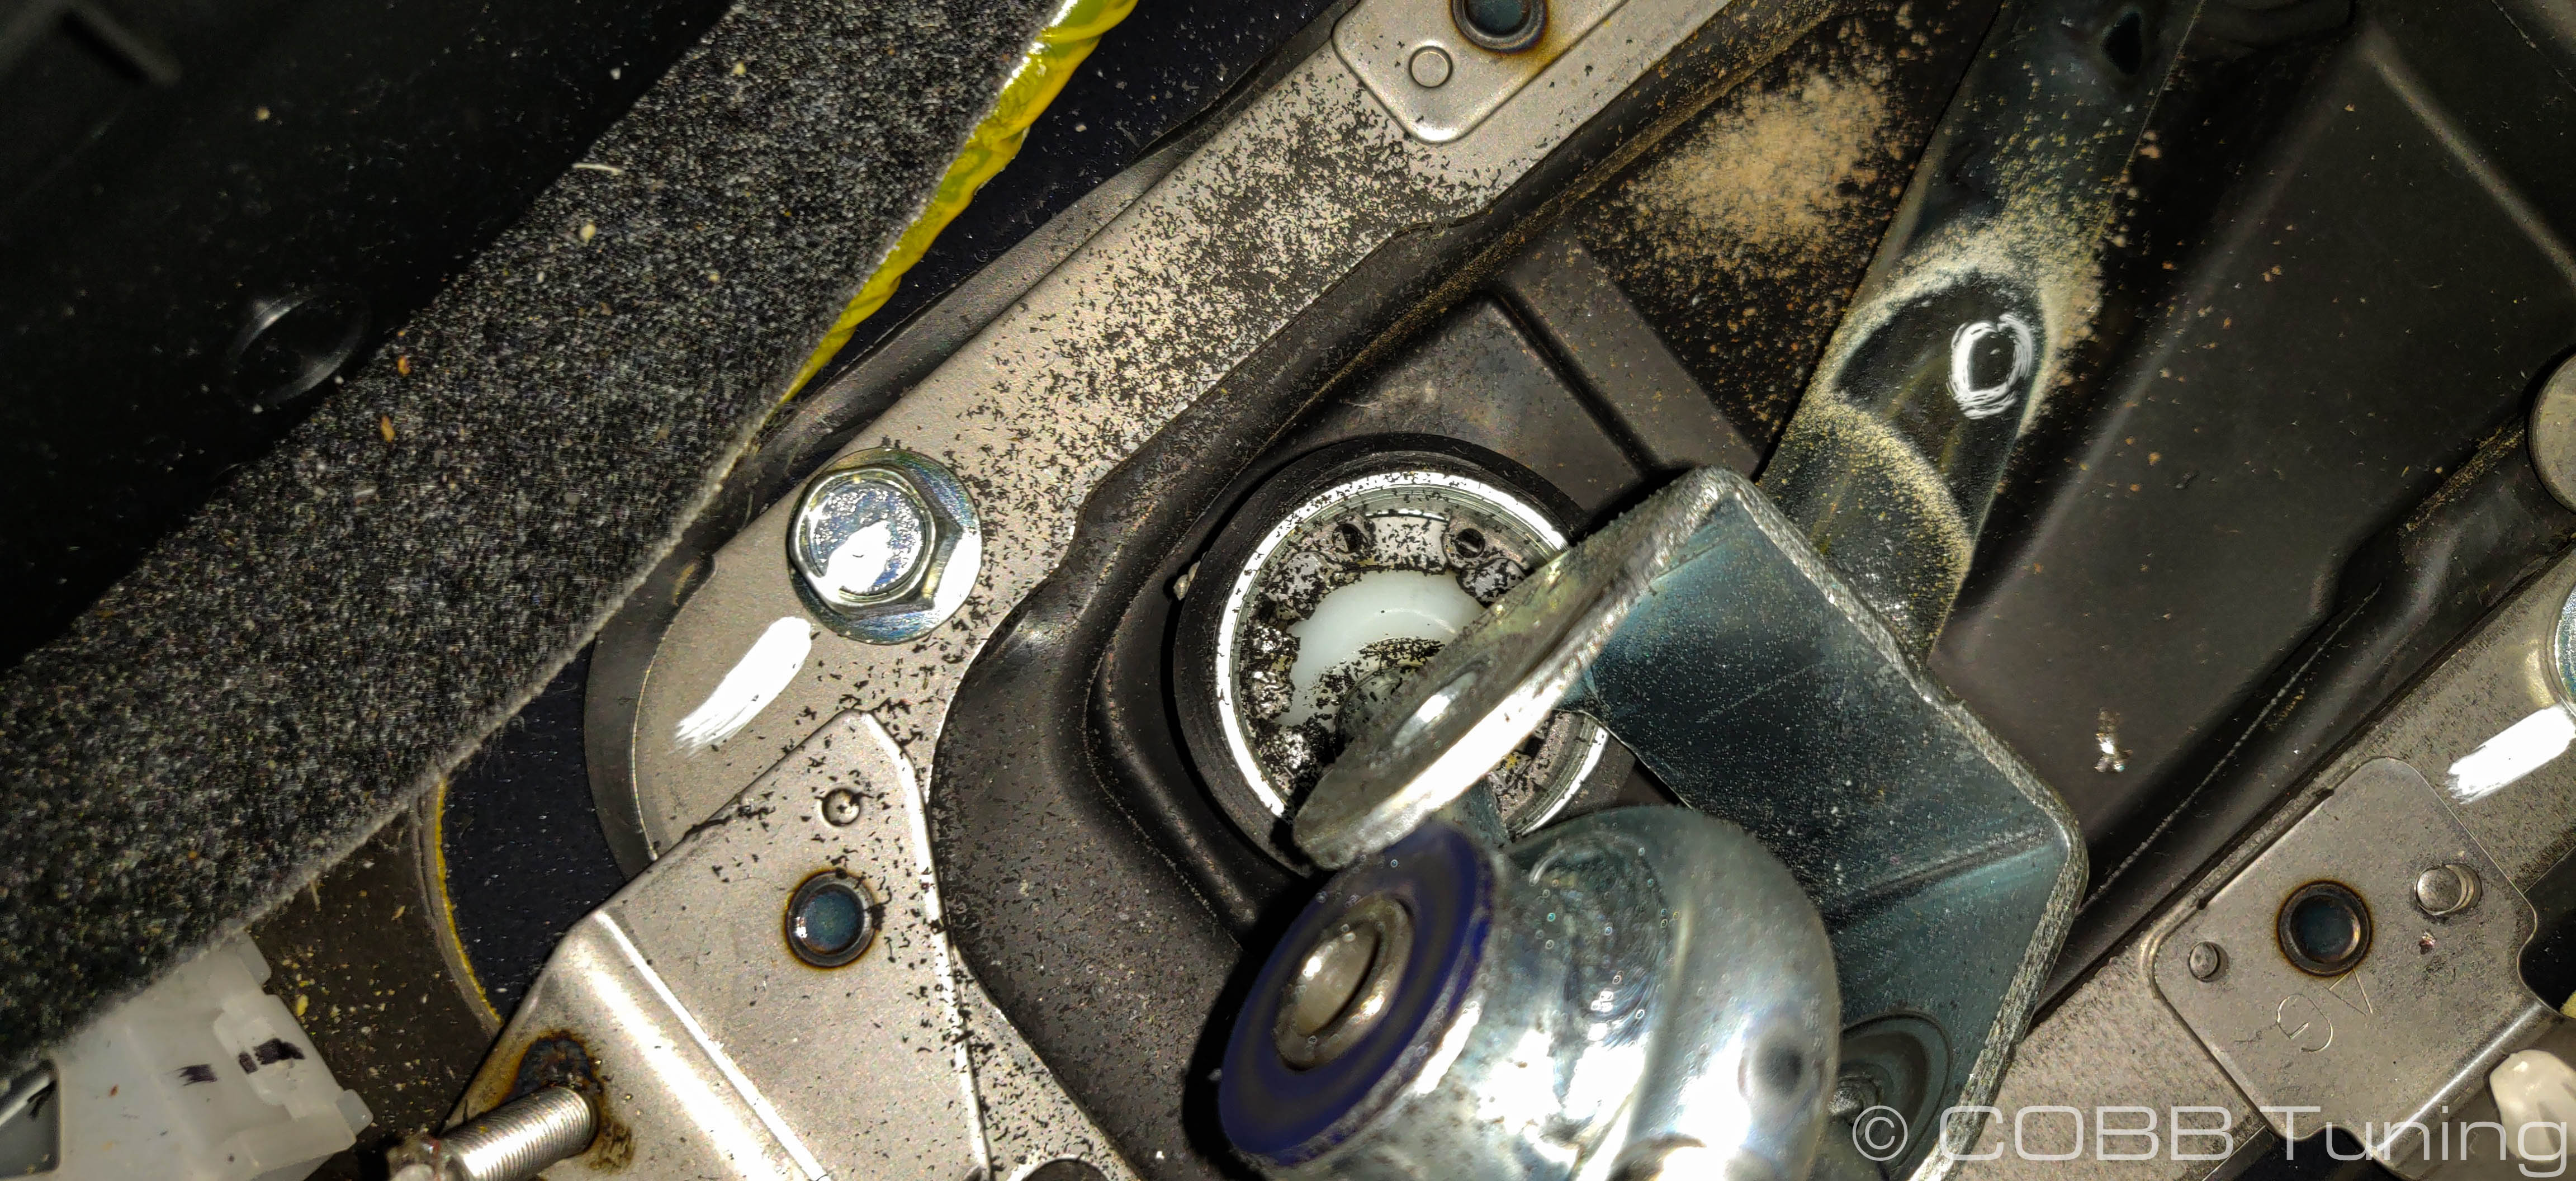
- To keep the reverse lockout cable in place, the easiest option is to put the car in reverse. Optionally you can support the car on jack stands or a lift. Part of the procedure for installing the new lever is to retain the reverse lockout in its unlocked position from underneath the car. Find where the reverse lockout cable connects to the cam on the transmission. The cam has a hole in it that you can use to retain the cable in its unlocked position with a pin or Allen wrench. The picture below illustrates the cam, its position, and how to retain it in the unlocked position. It is recommended that you usually retain it behind the transmission rather than in the hole in the transmission. This gives you more cable to work with when installing the COBB Tuning Short Shifter. Leave this here until the install is done.
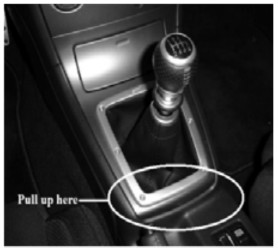
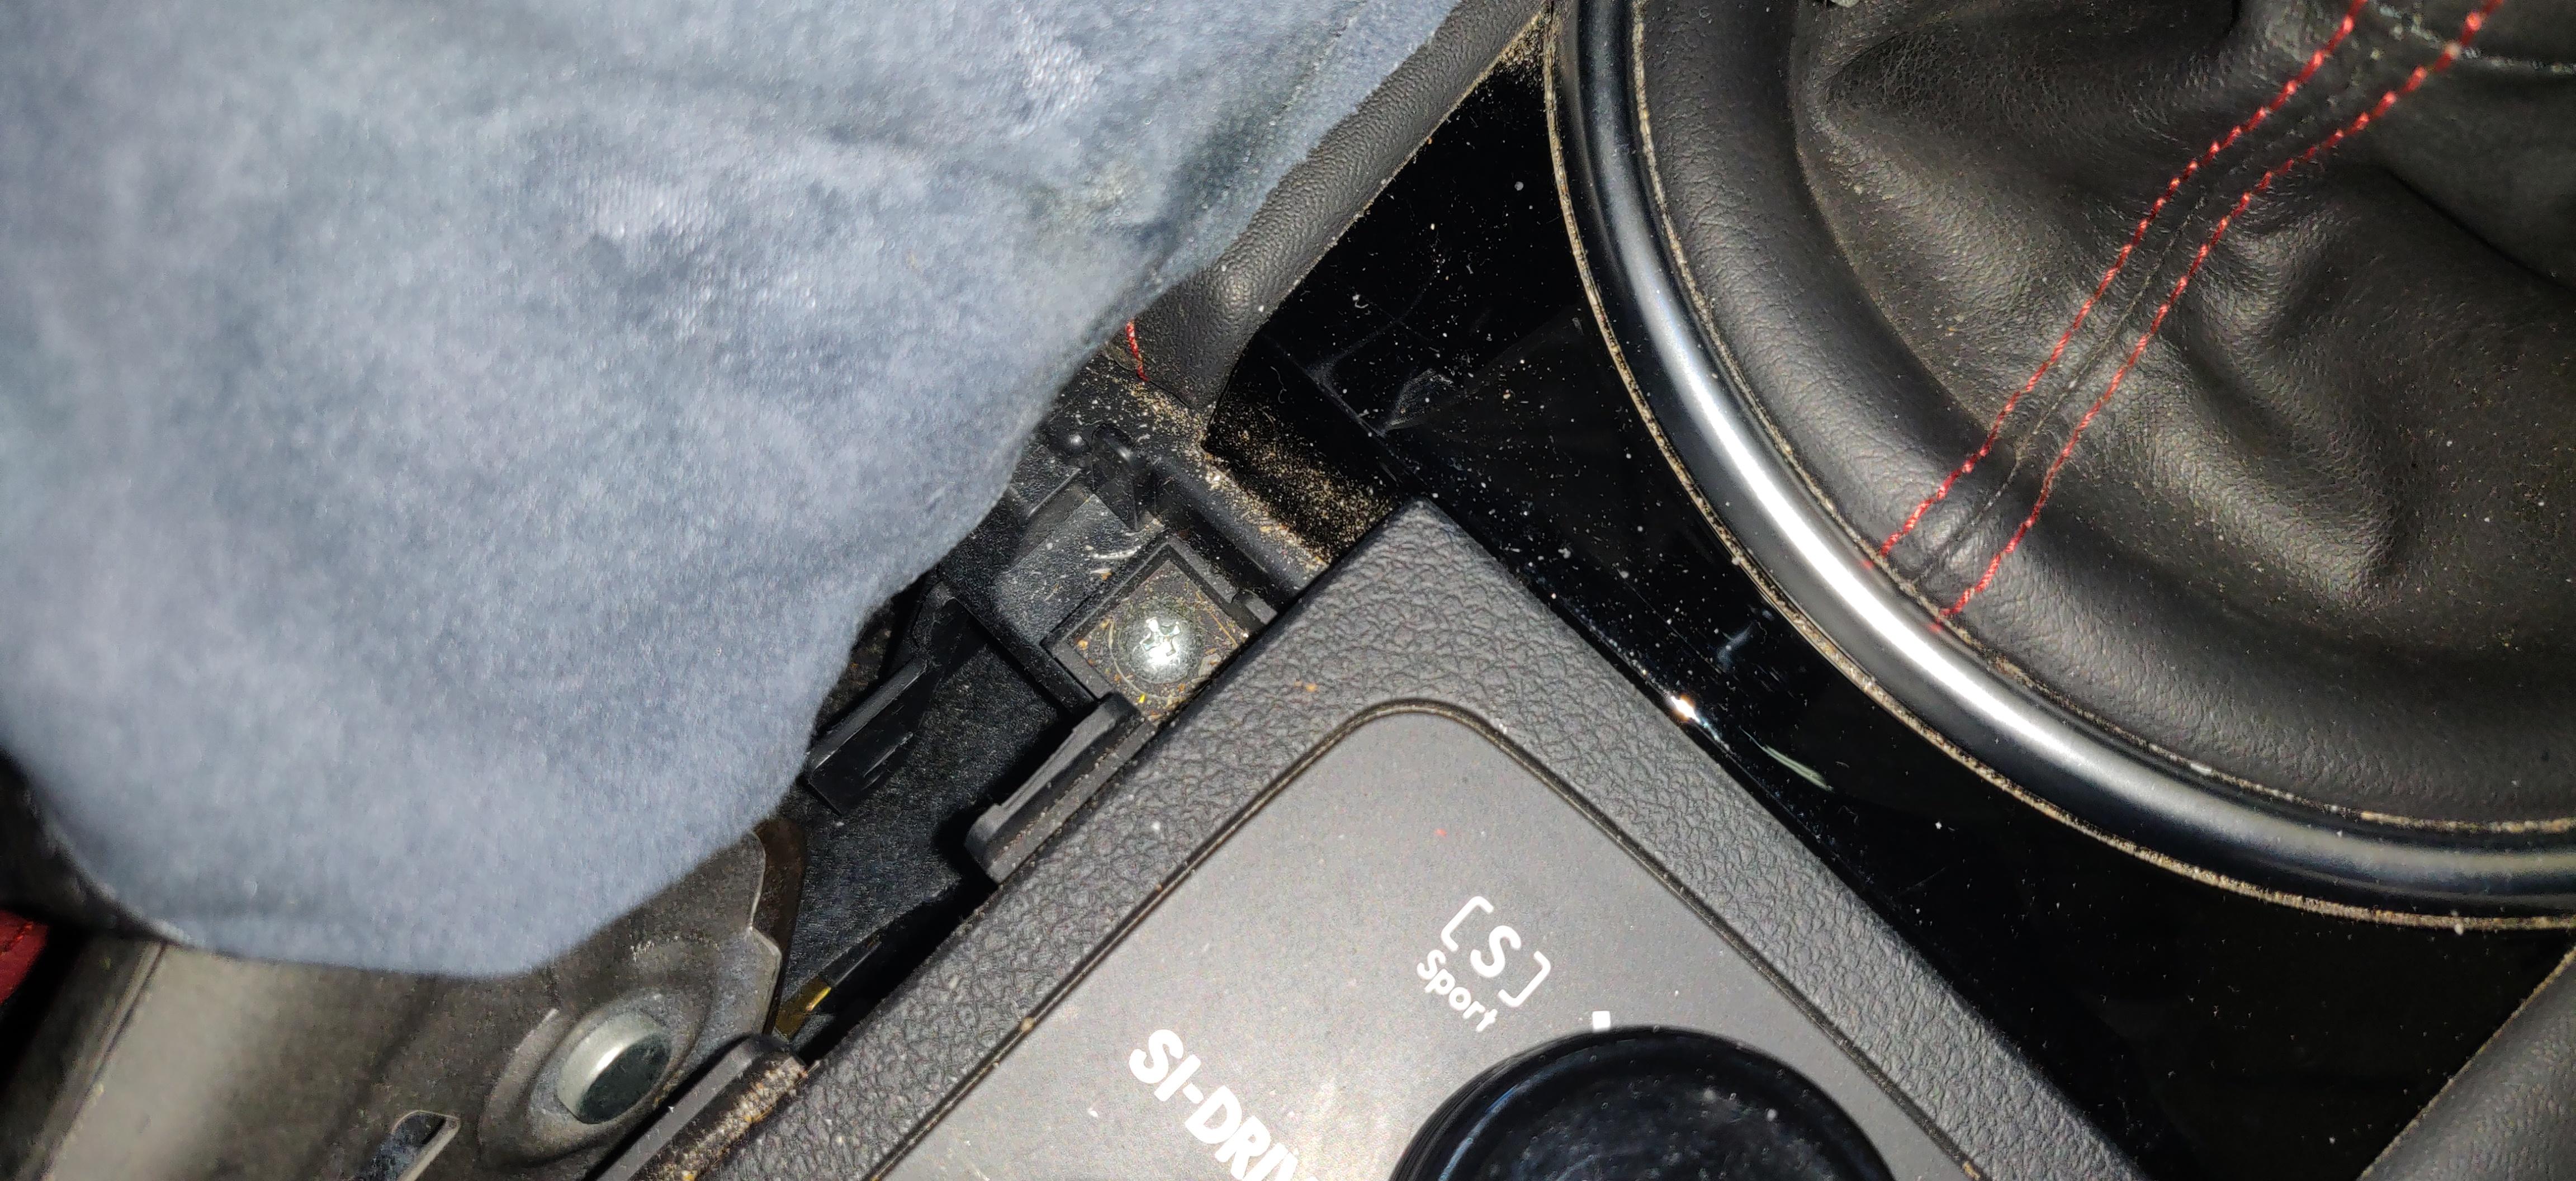
- (08+ STi owners proceed to step 4) Pull up on the rear of the center console shifter surround trim piece to remove it from the center console.
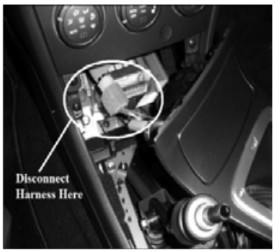
- Disconnect the wiring harness for the lighter so that the surround can be placed aside. This will make it easier to work, without scratching the center console or the center console shifter surround trim piece.
- (08+ STi Only) To remove the center console shifter surround, start by removing the (2) 10mm bolts in the arm rest storage.
- (08+ STi Only) Pull up on the e-brake boot and the surround to remove it. Unscrew the Phillips head screw that is now visible.
- (08+ STi Only) Lift up on the rear of the shifter surround and slide it back towards the rear of the car. Unclip the wire underneath this piece in order to be able to set the trim piece aside.
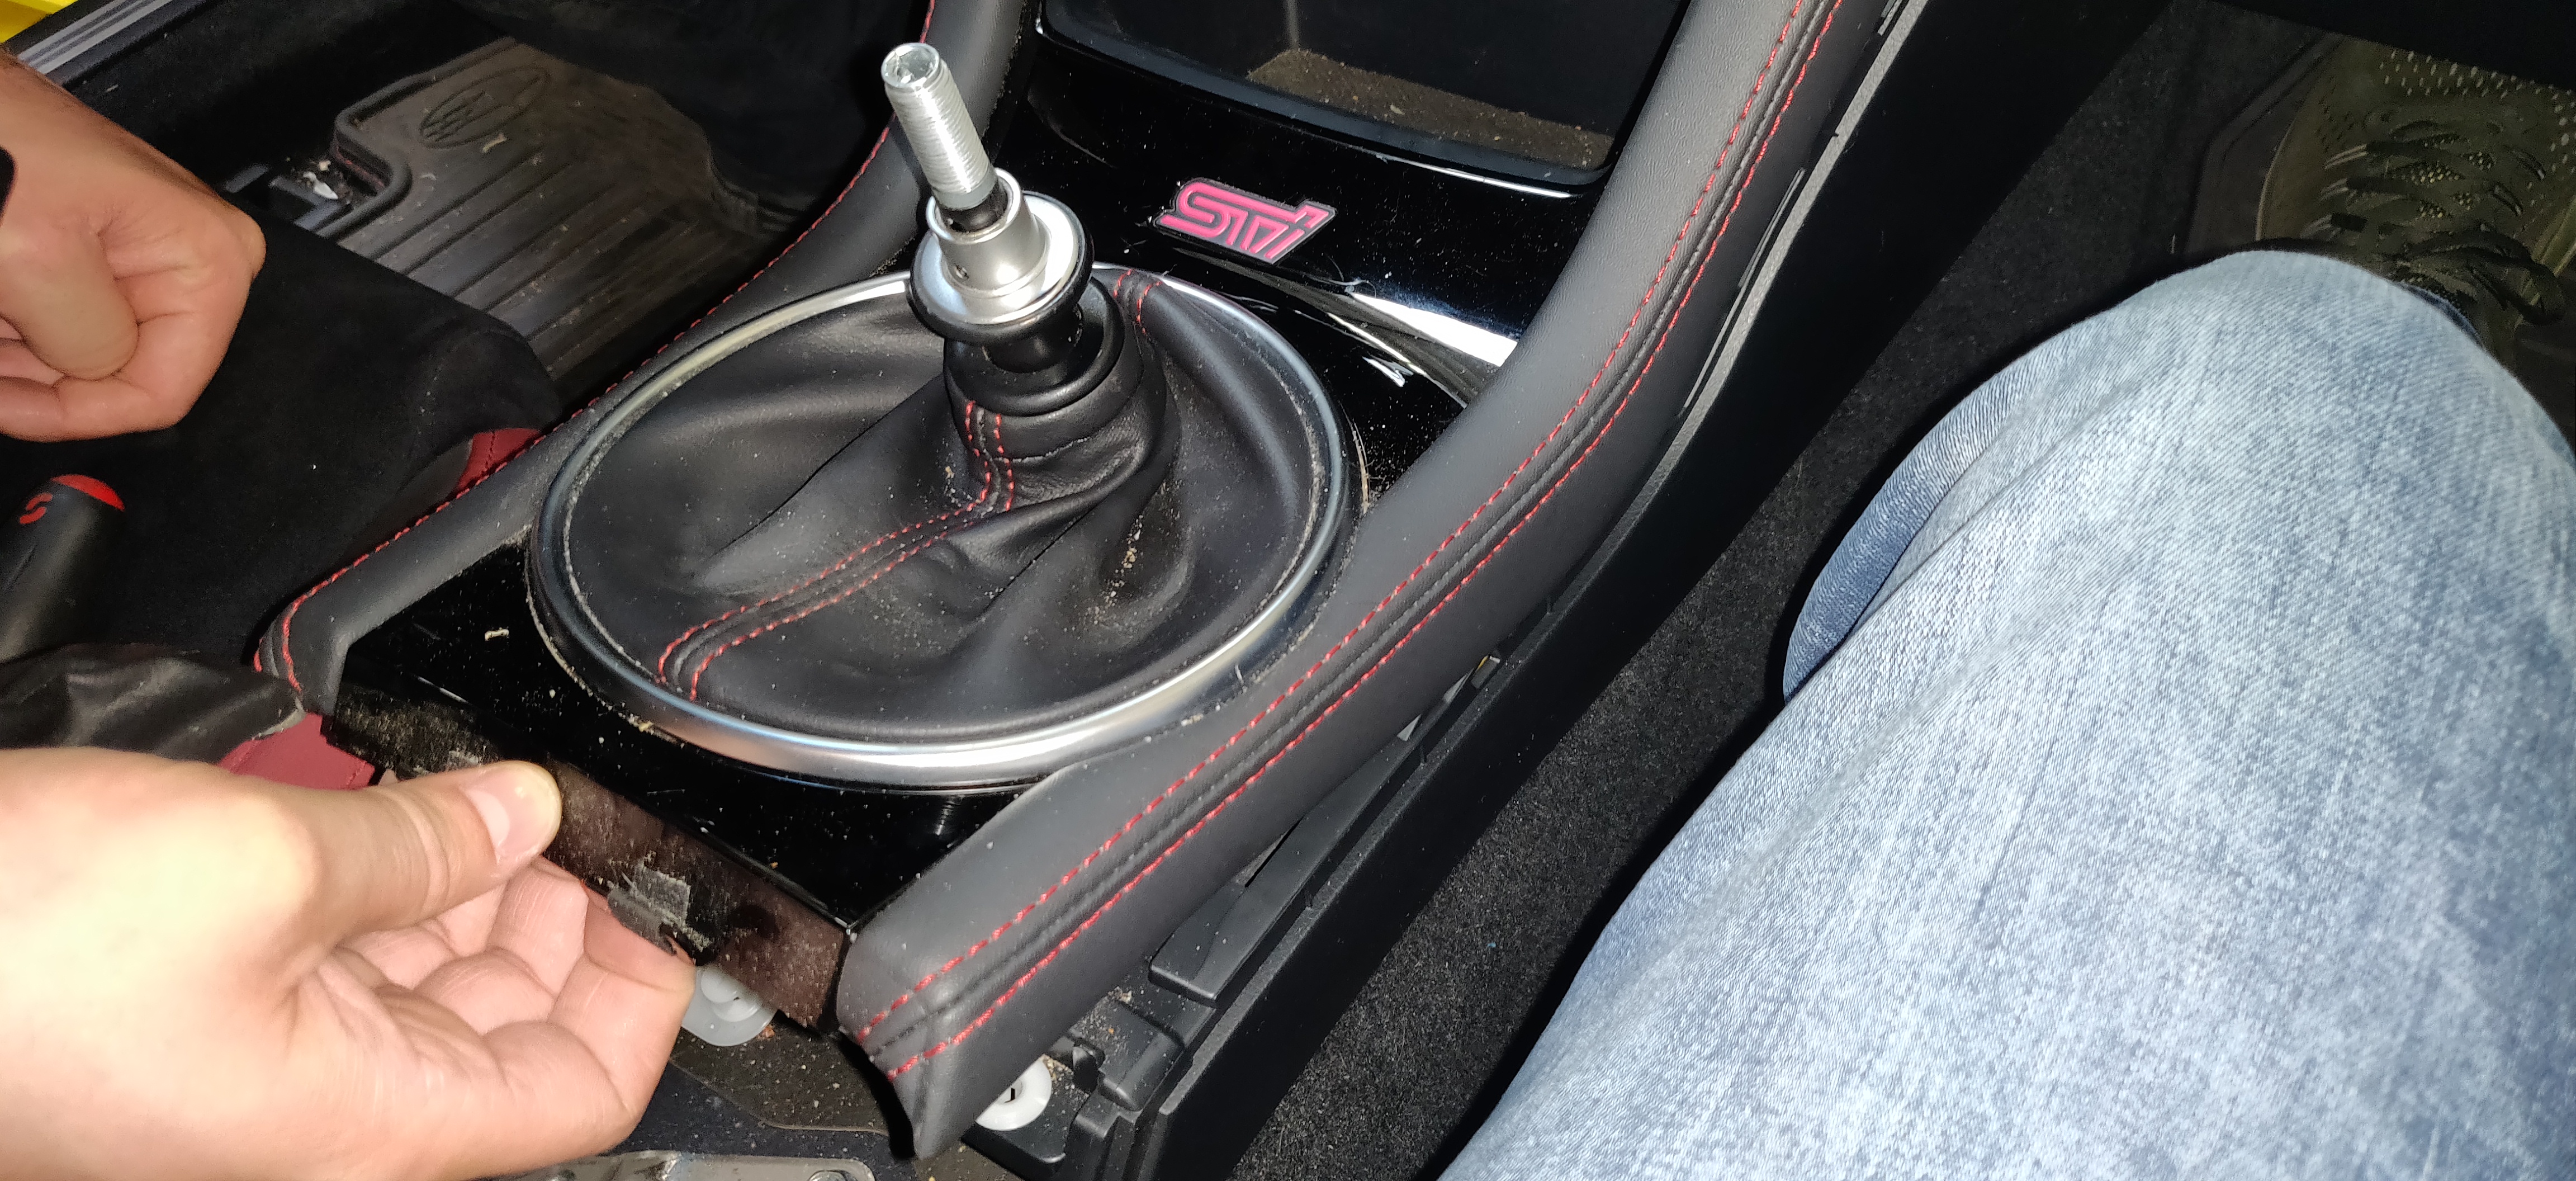
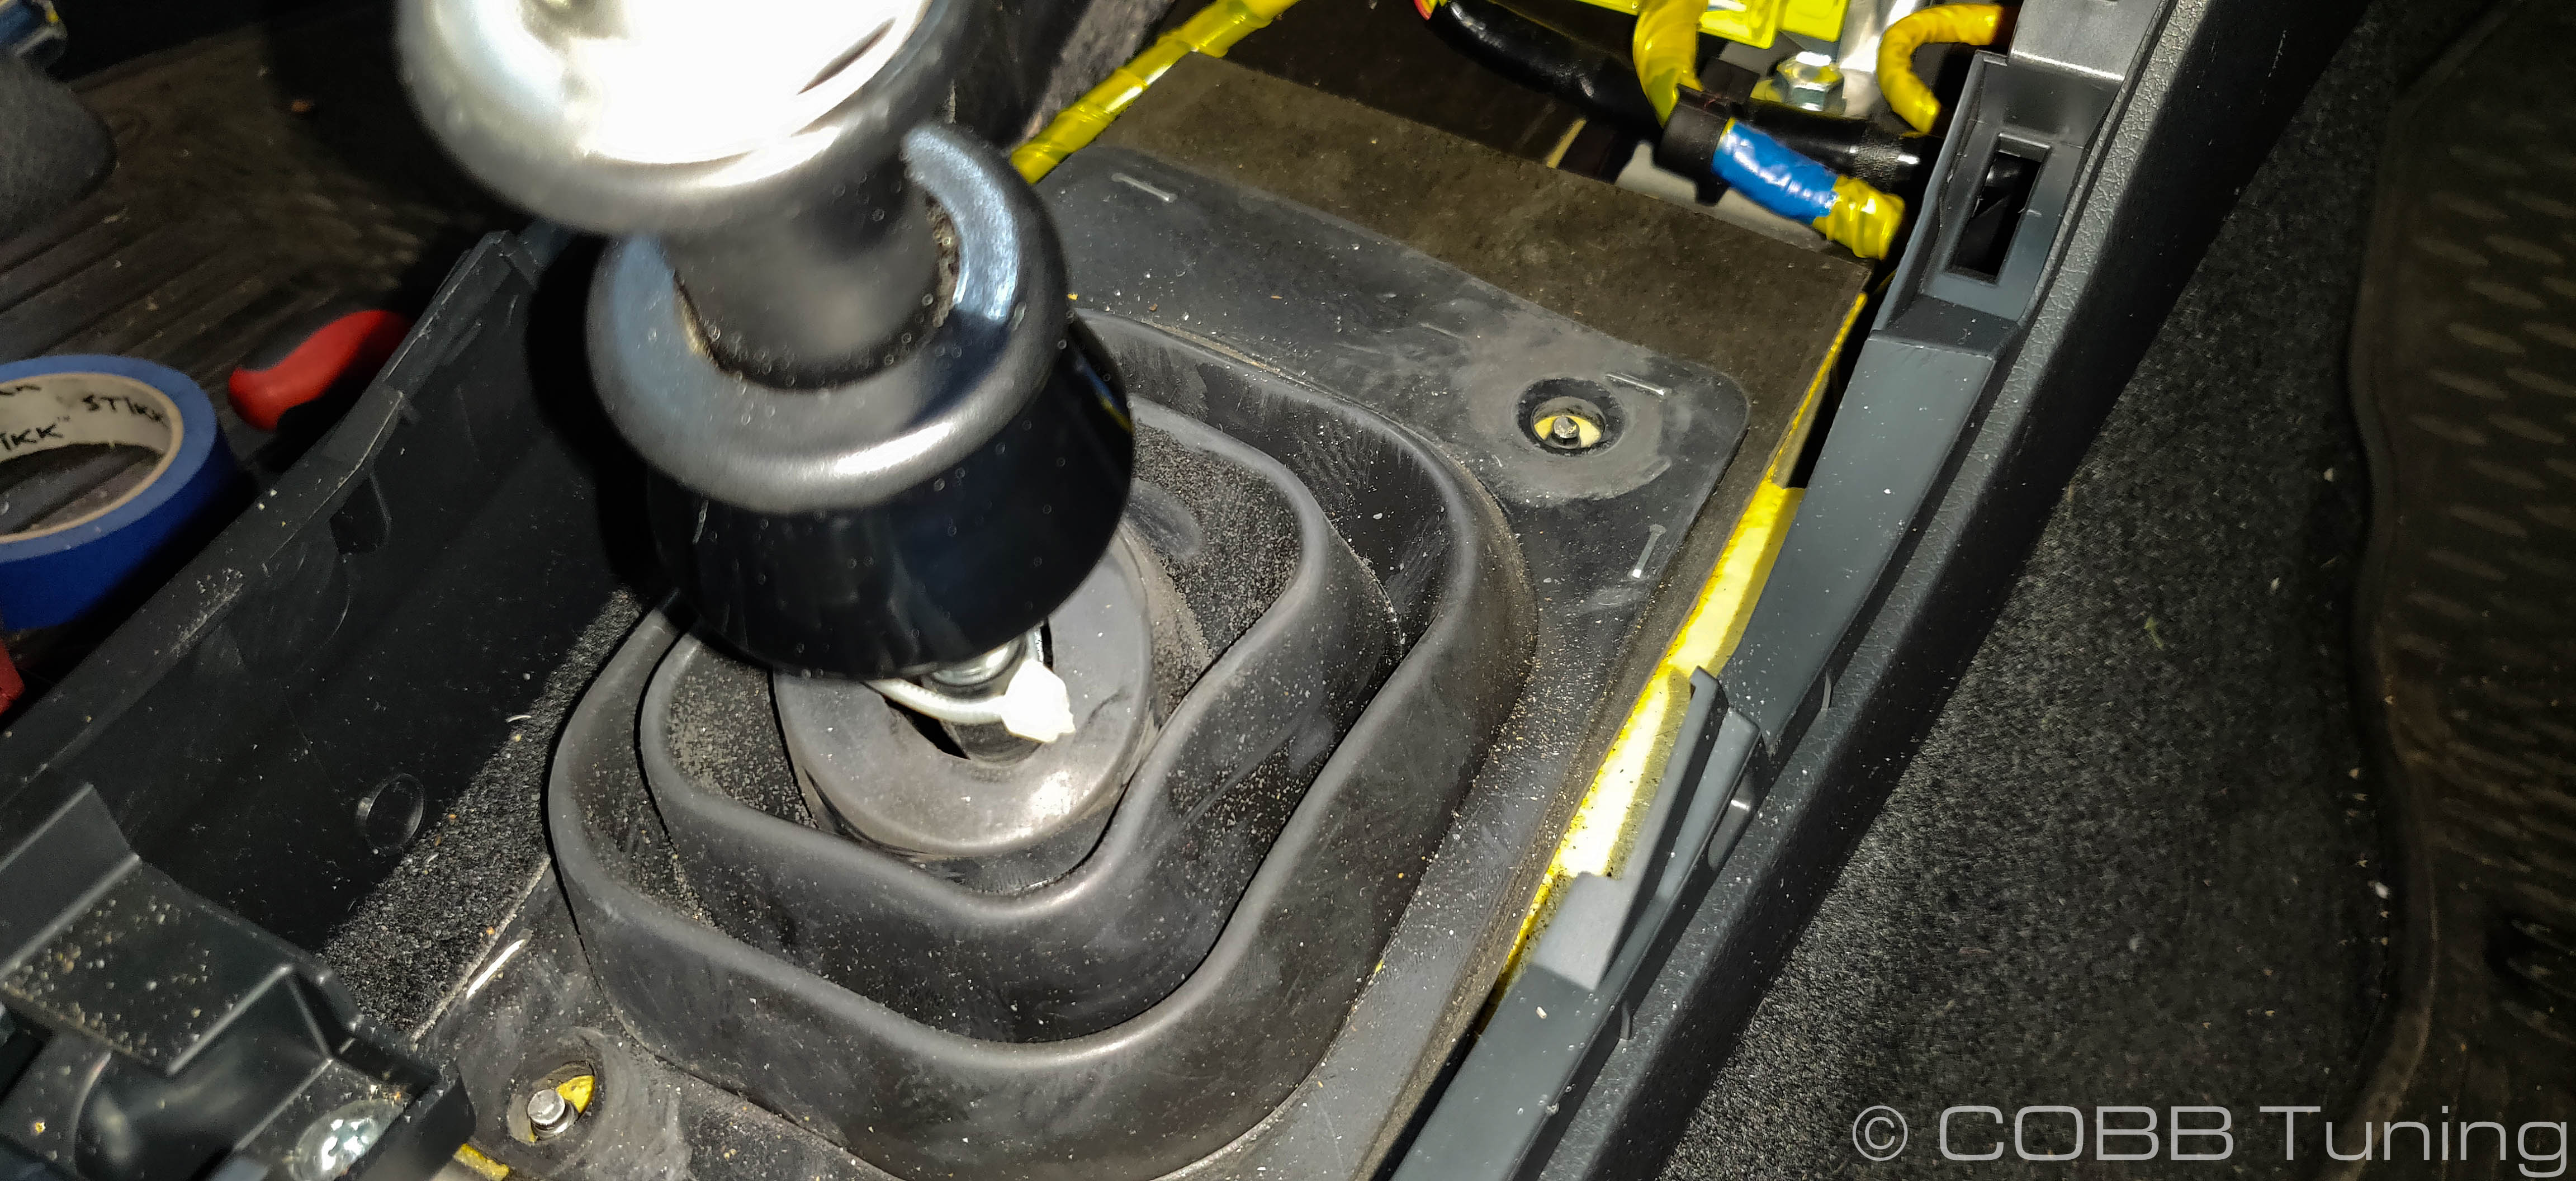
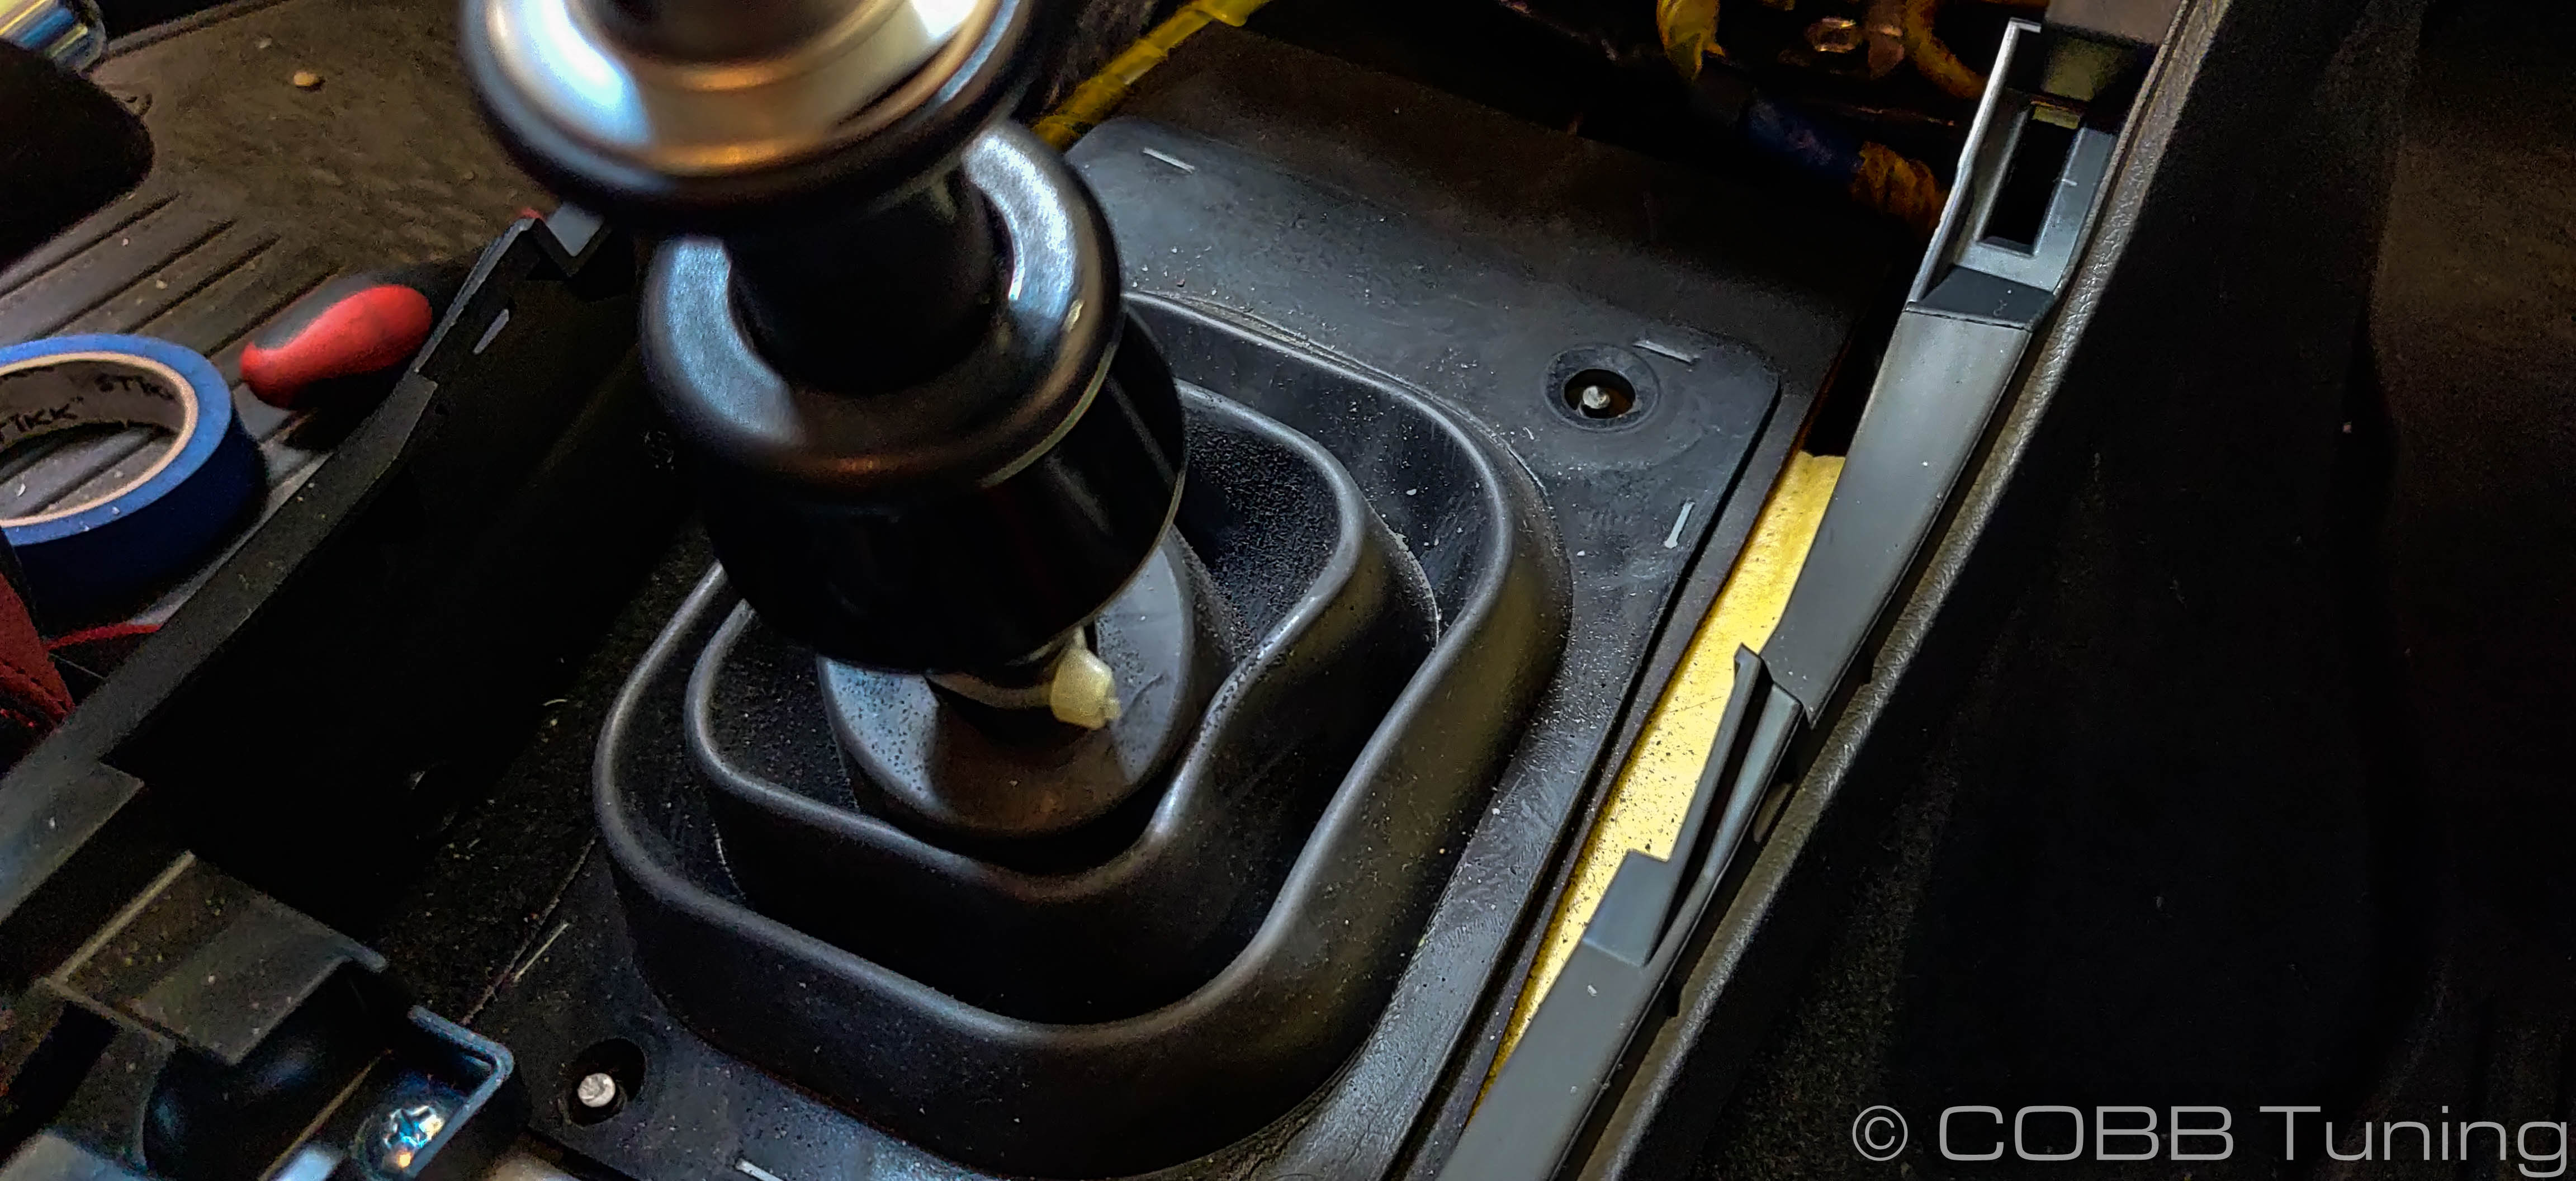
- Unscrew the two plastic clips using a flat blade screwdriver and remove the shift boot bellows
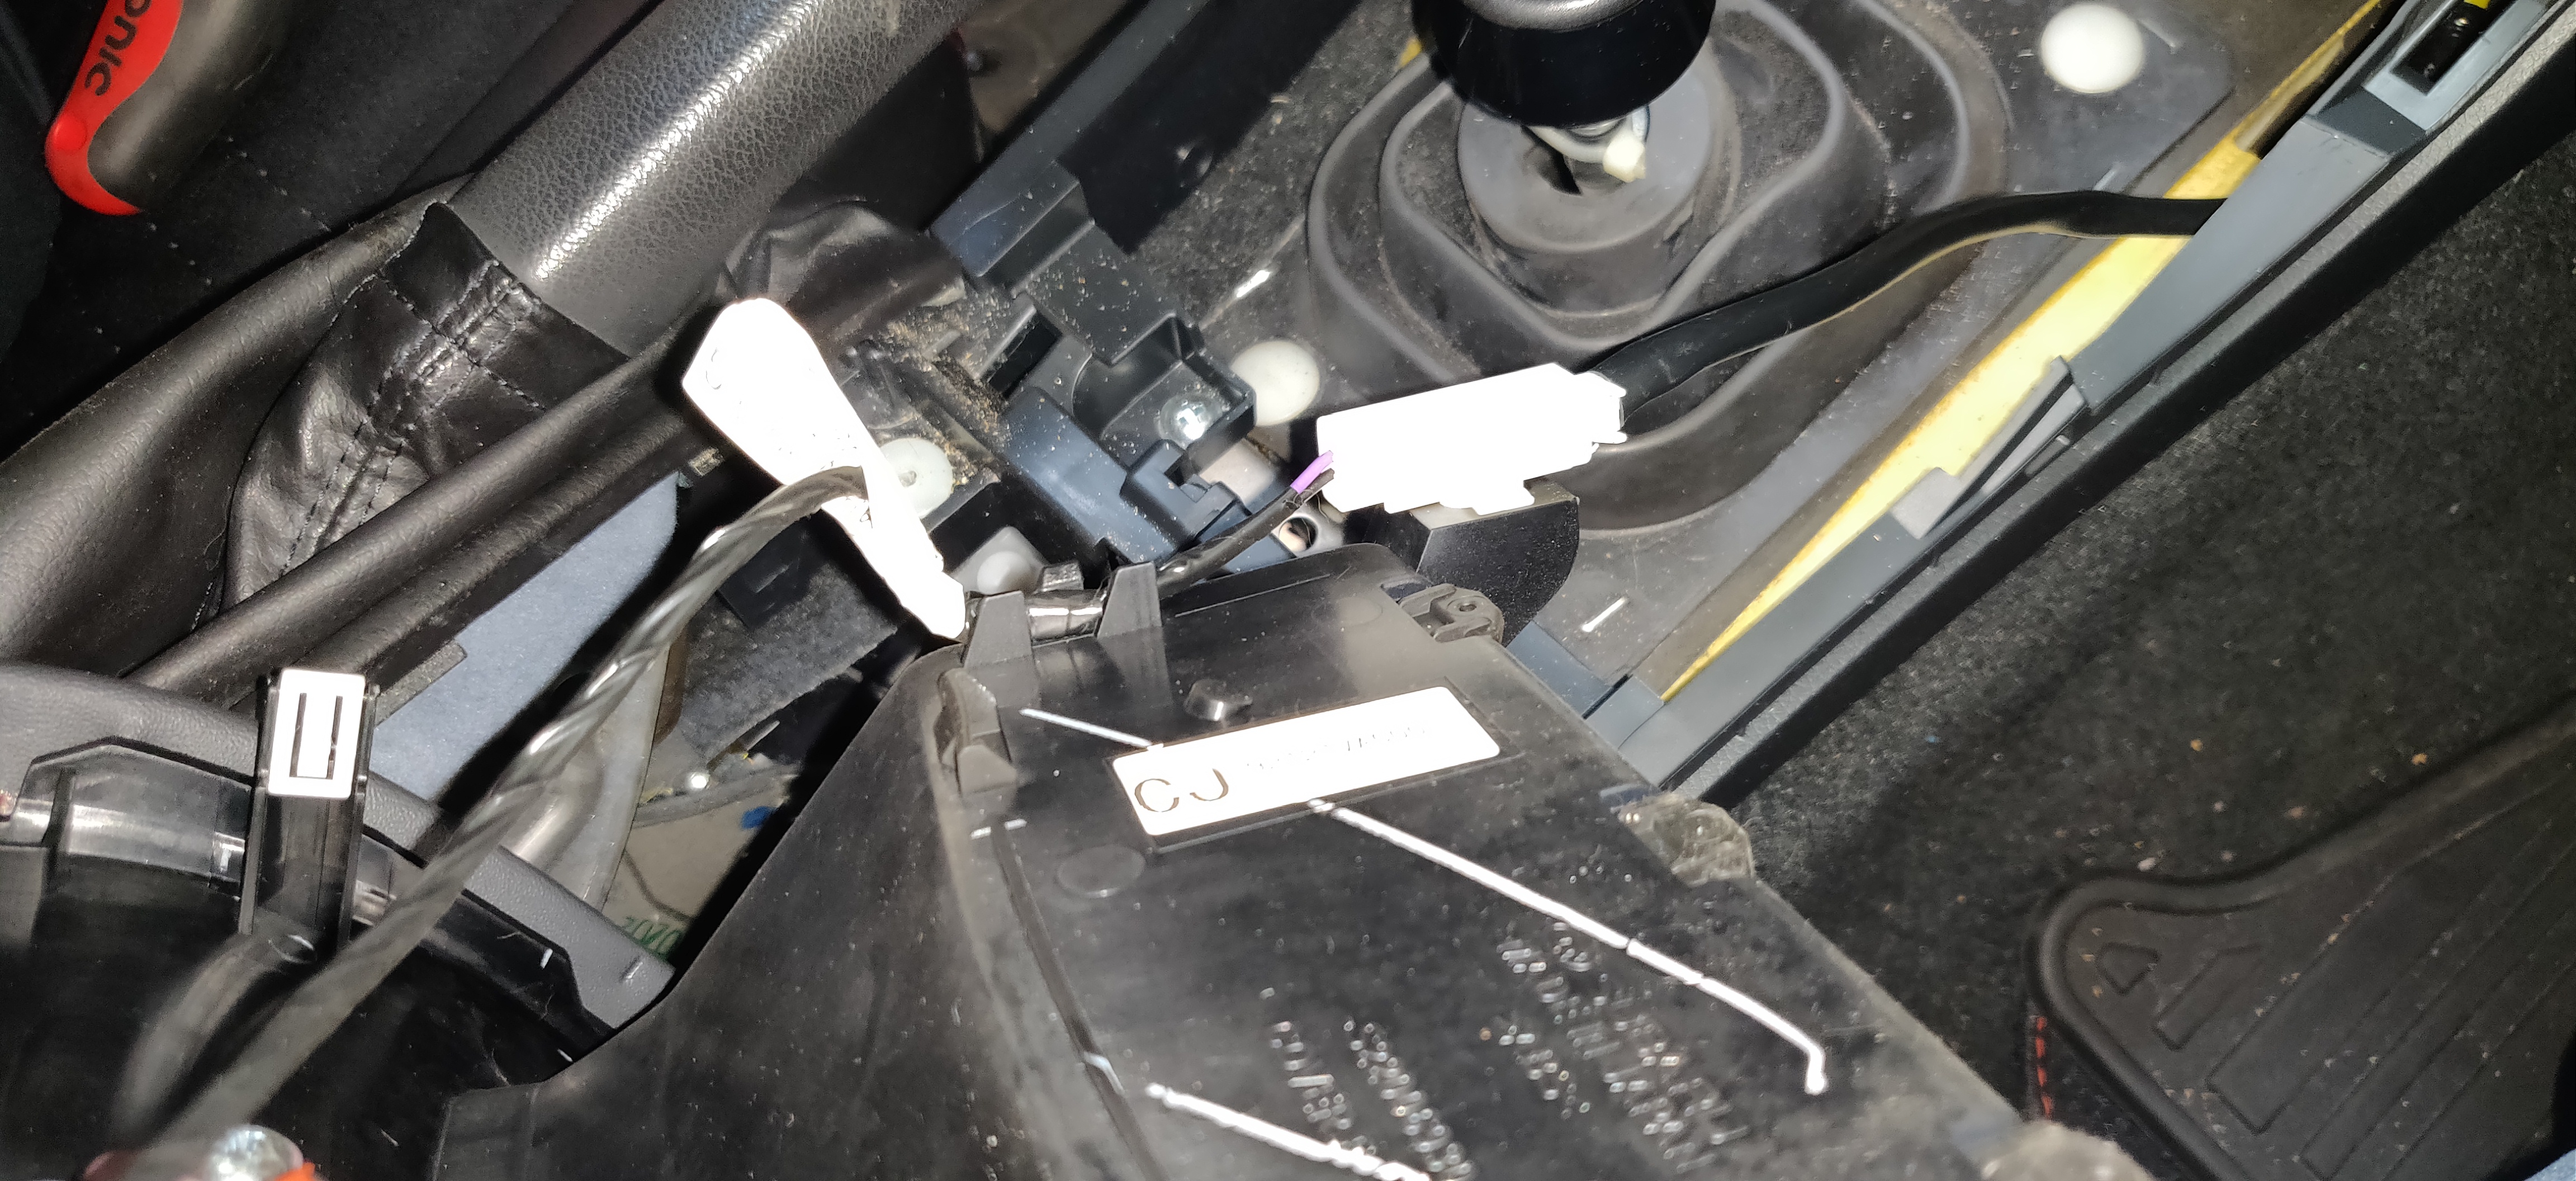
- Cut the zip tie holding the reverse lockout cable to the shift lever.
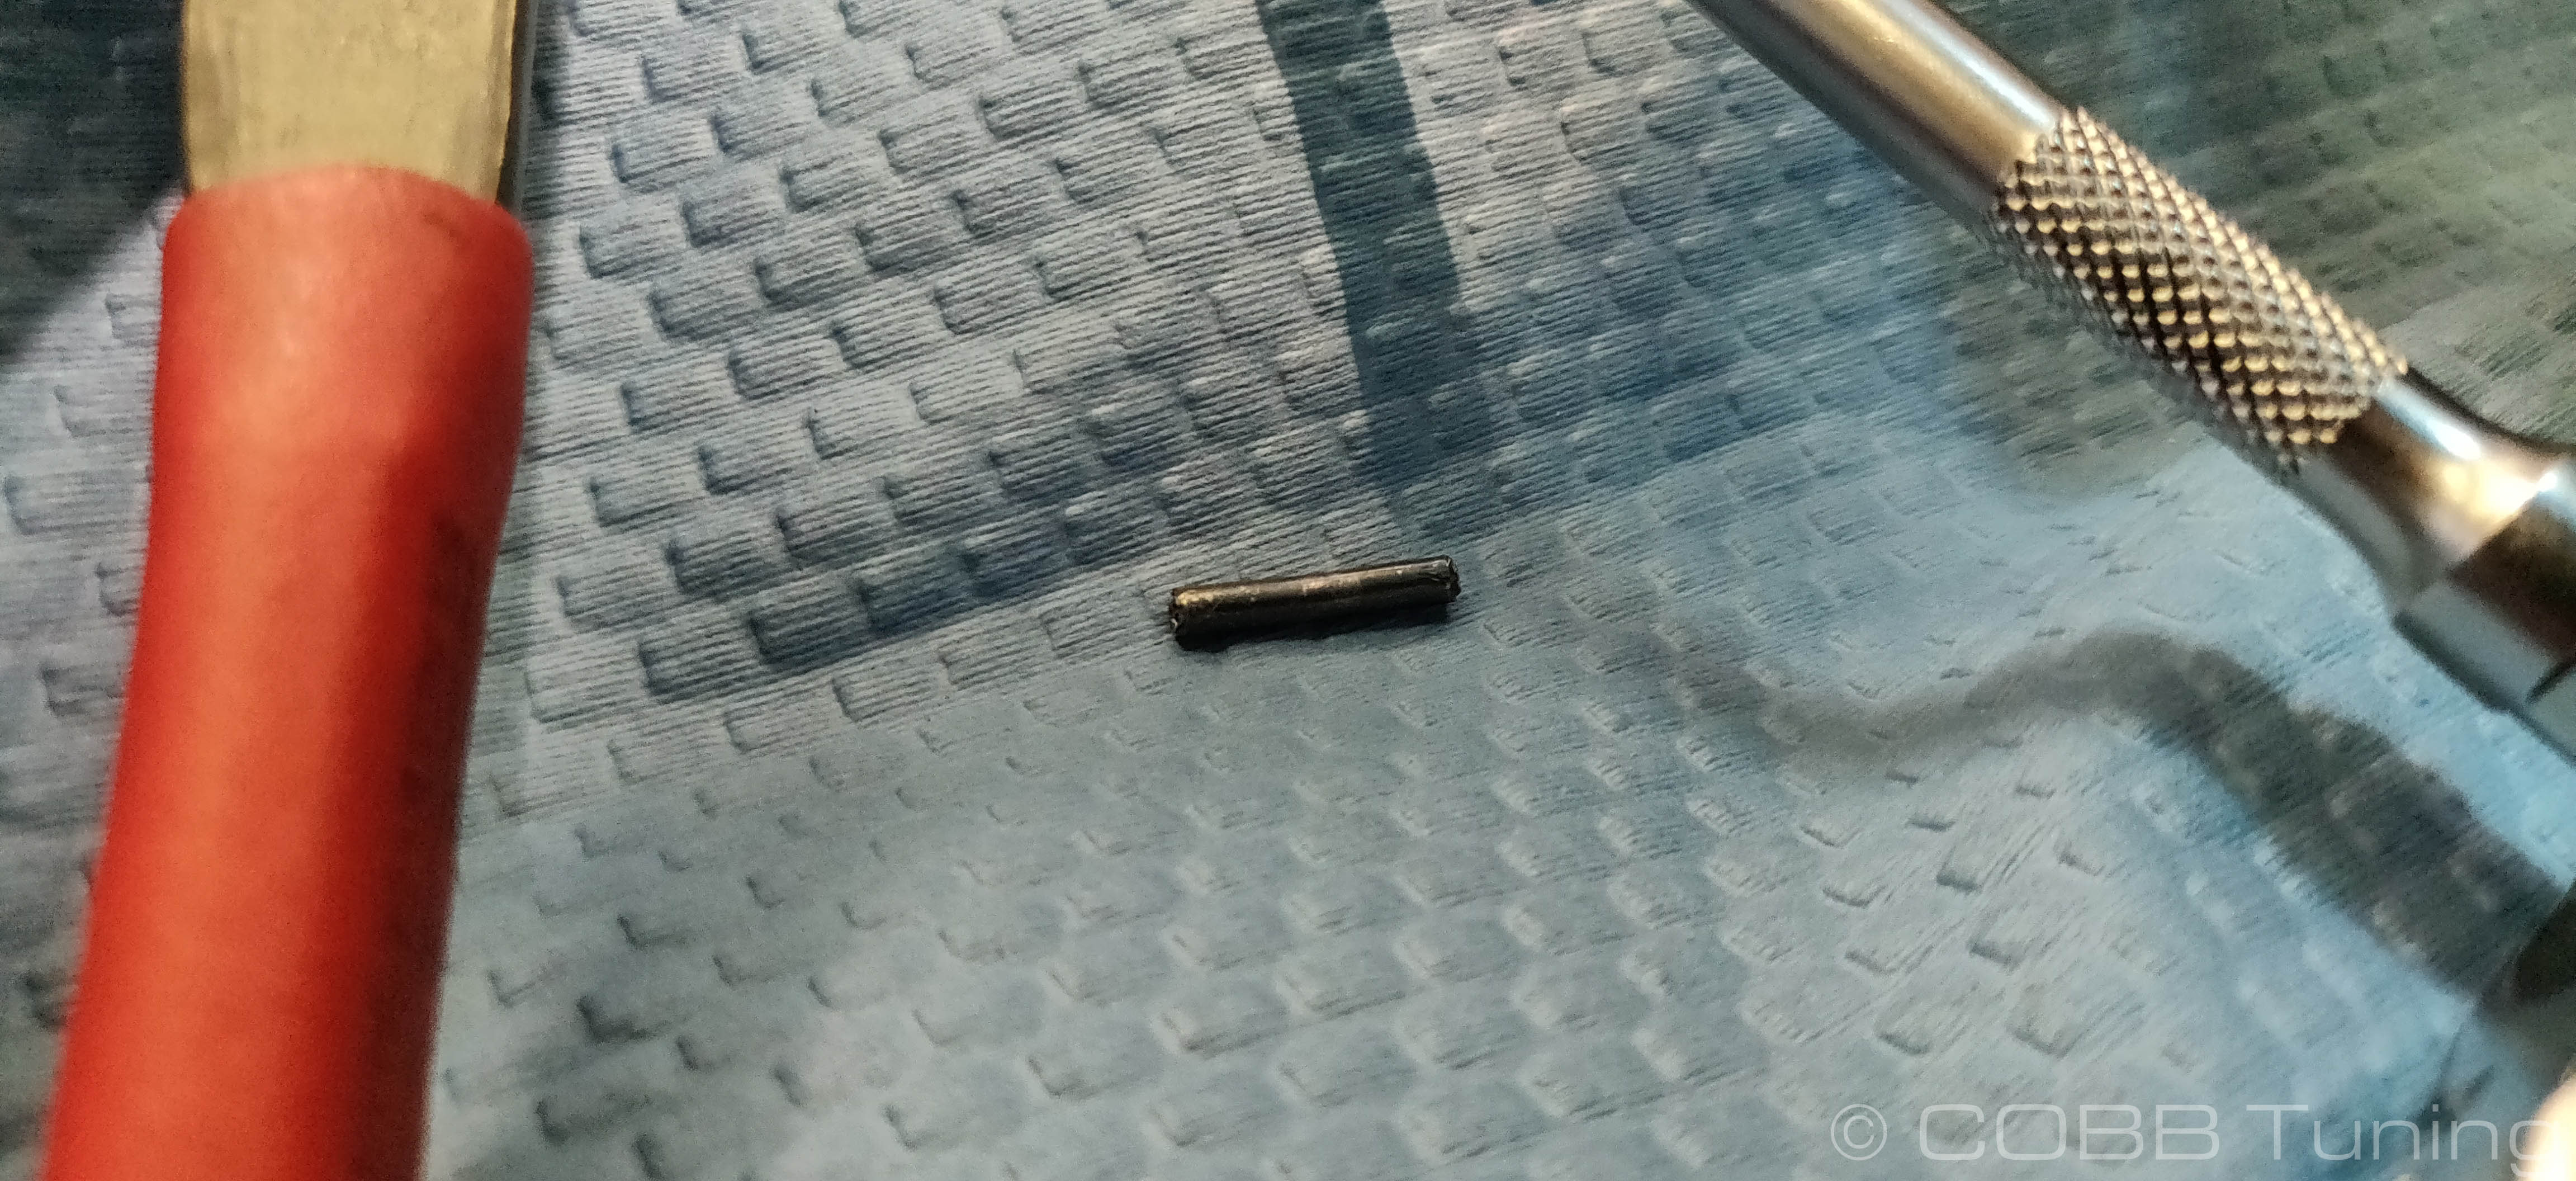
- You will have to drive out the retaining pin that connects the reverse lockout slider to the cable and lever. The best option is to find a small pointed end punch. If you do not have one around, you can use an appropriately sized drill bit. You will also want to protect the center console with rags, or with a leather glove as in the picture, as you tap the pin out with the punch and hammer. When the pin is out, the handle and its spring will be loose. Retain all of these pieces for reuse with the COBB Tuning Short Shifter and pull the cable out of the lever.
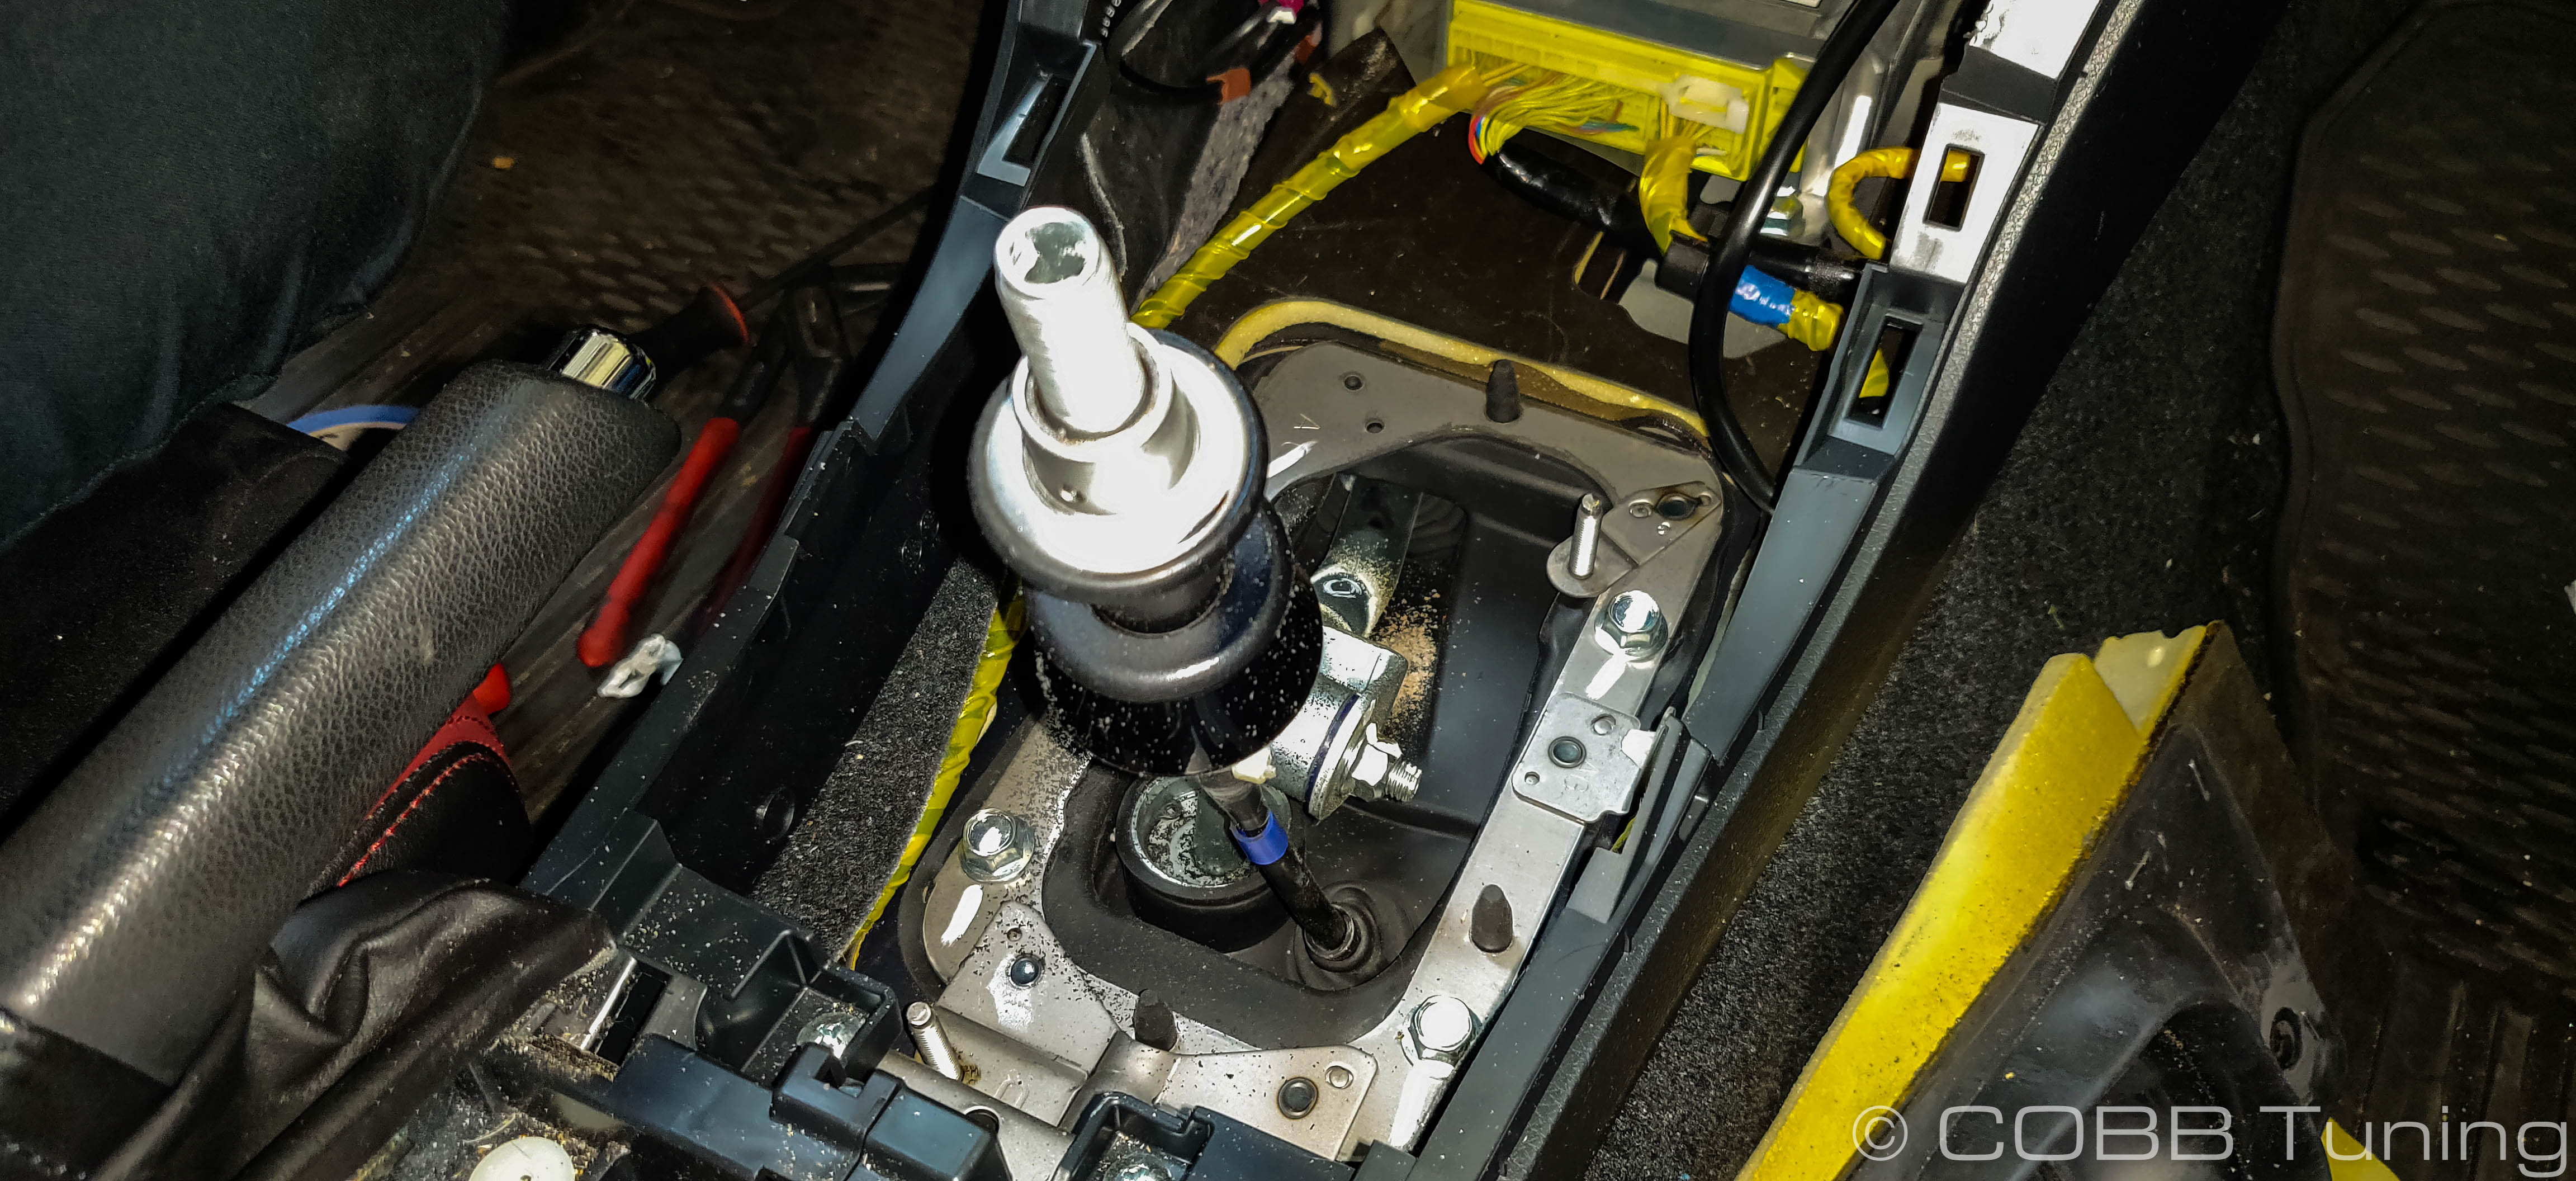
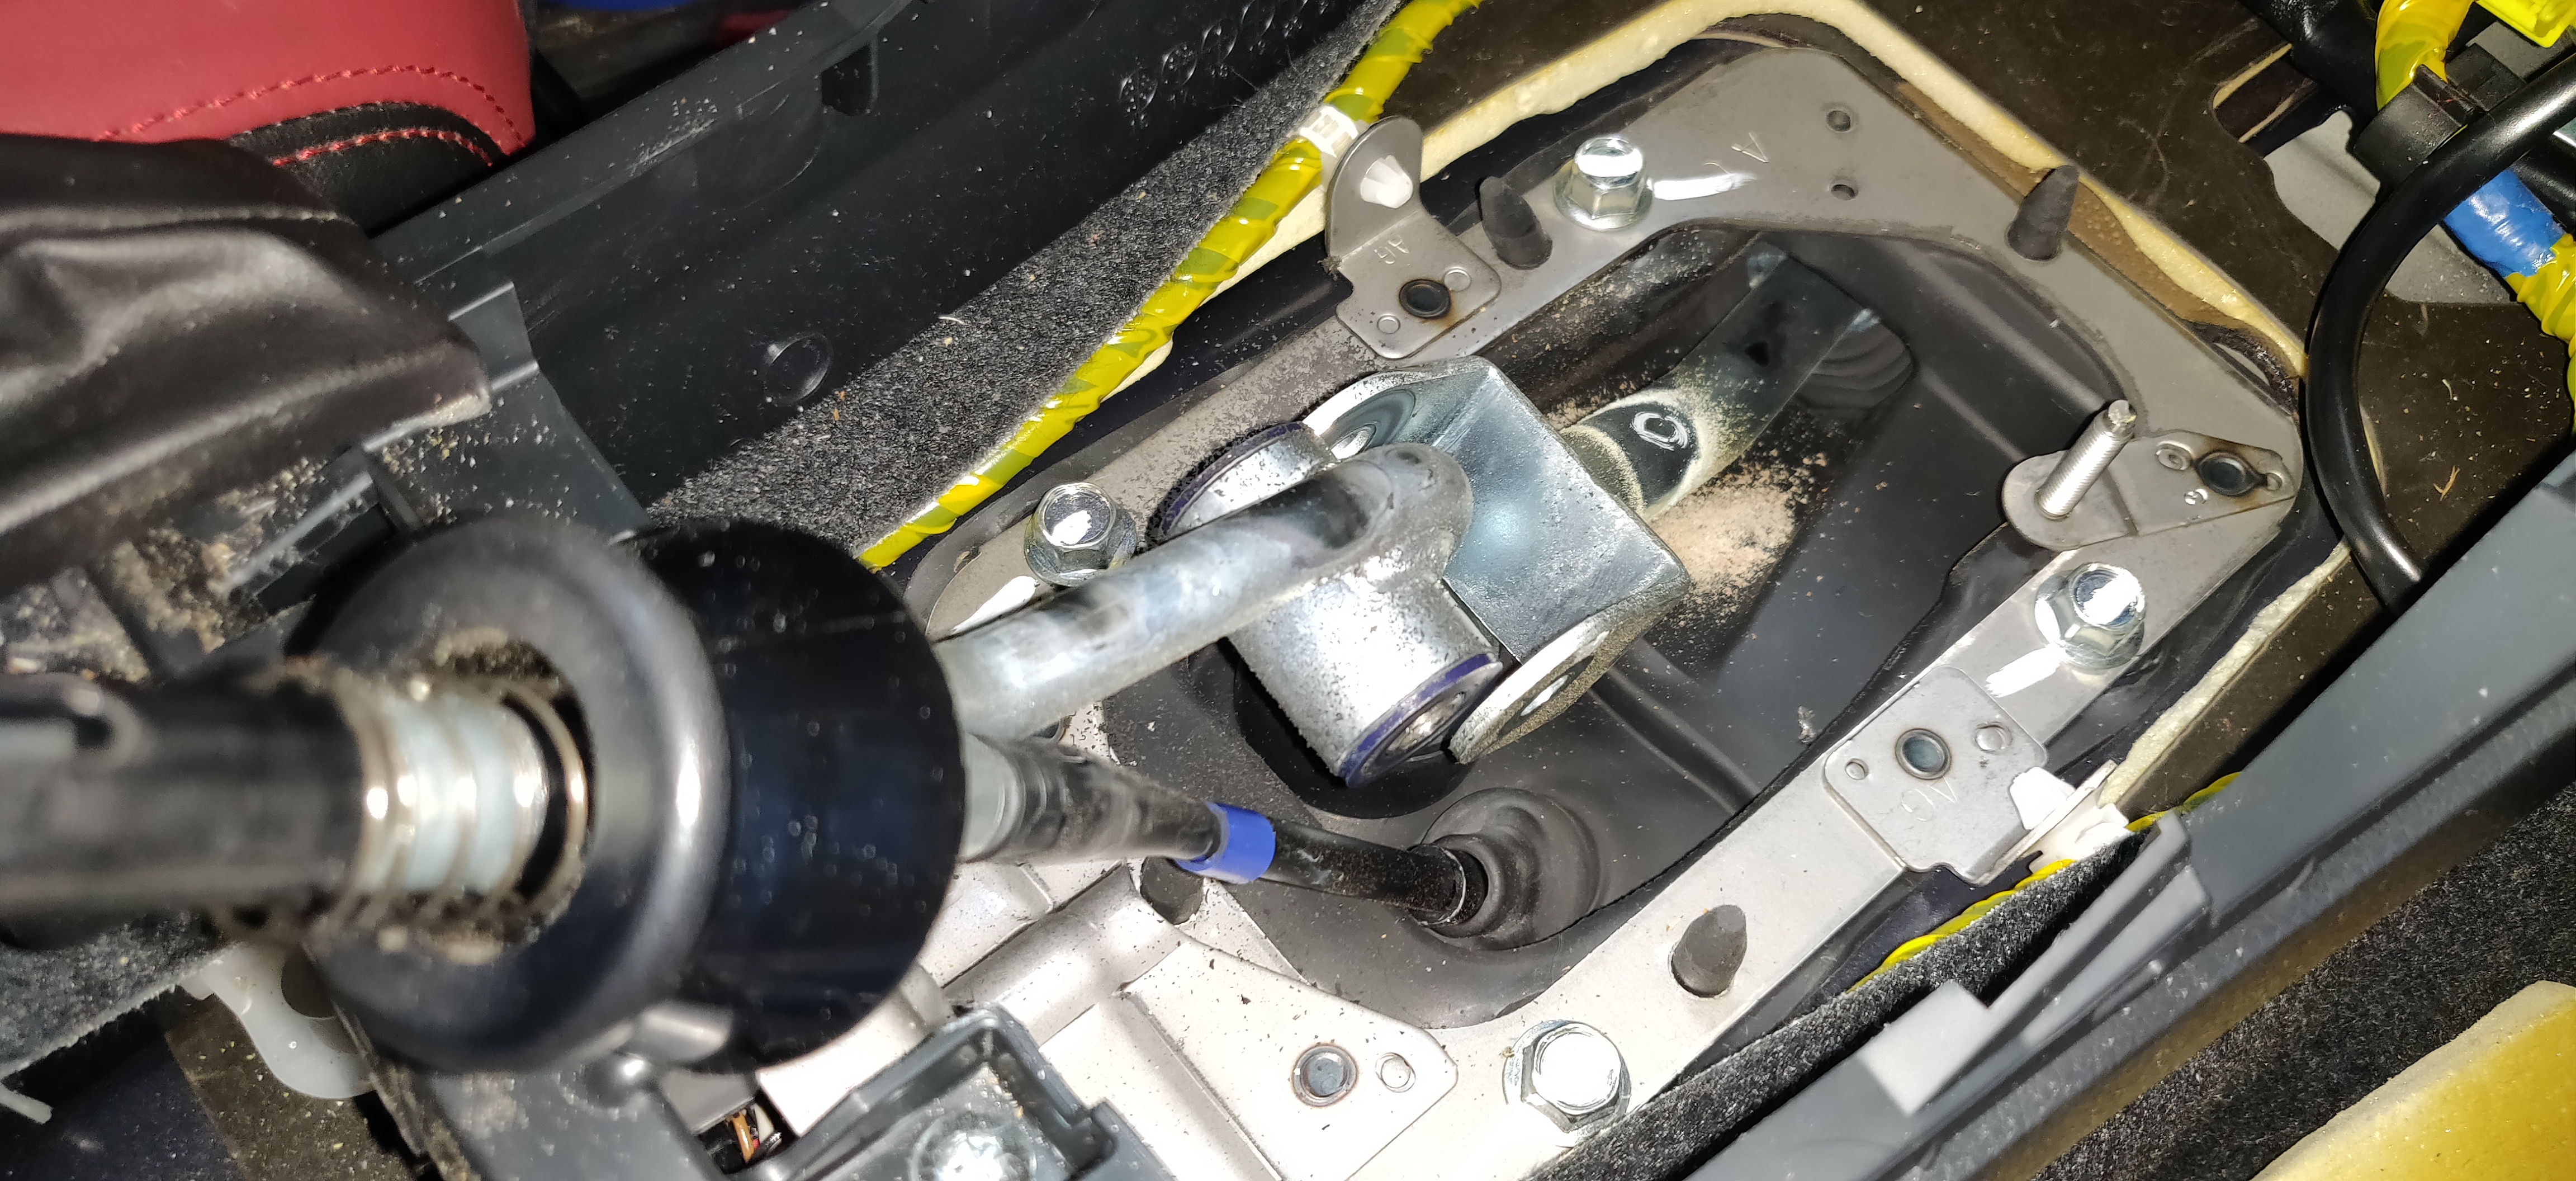
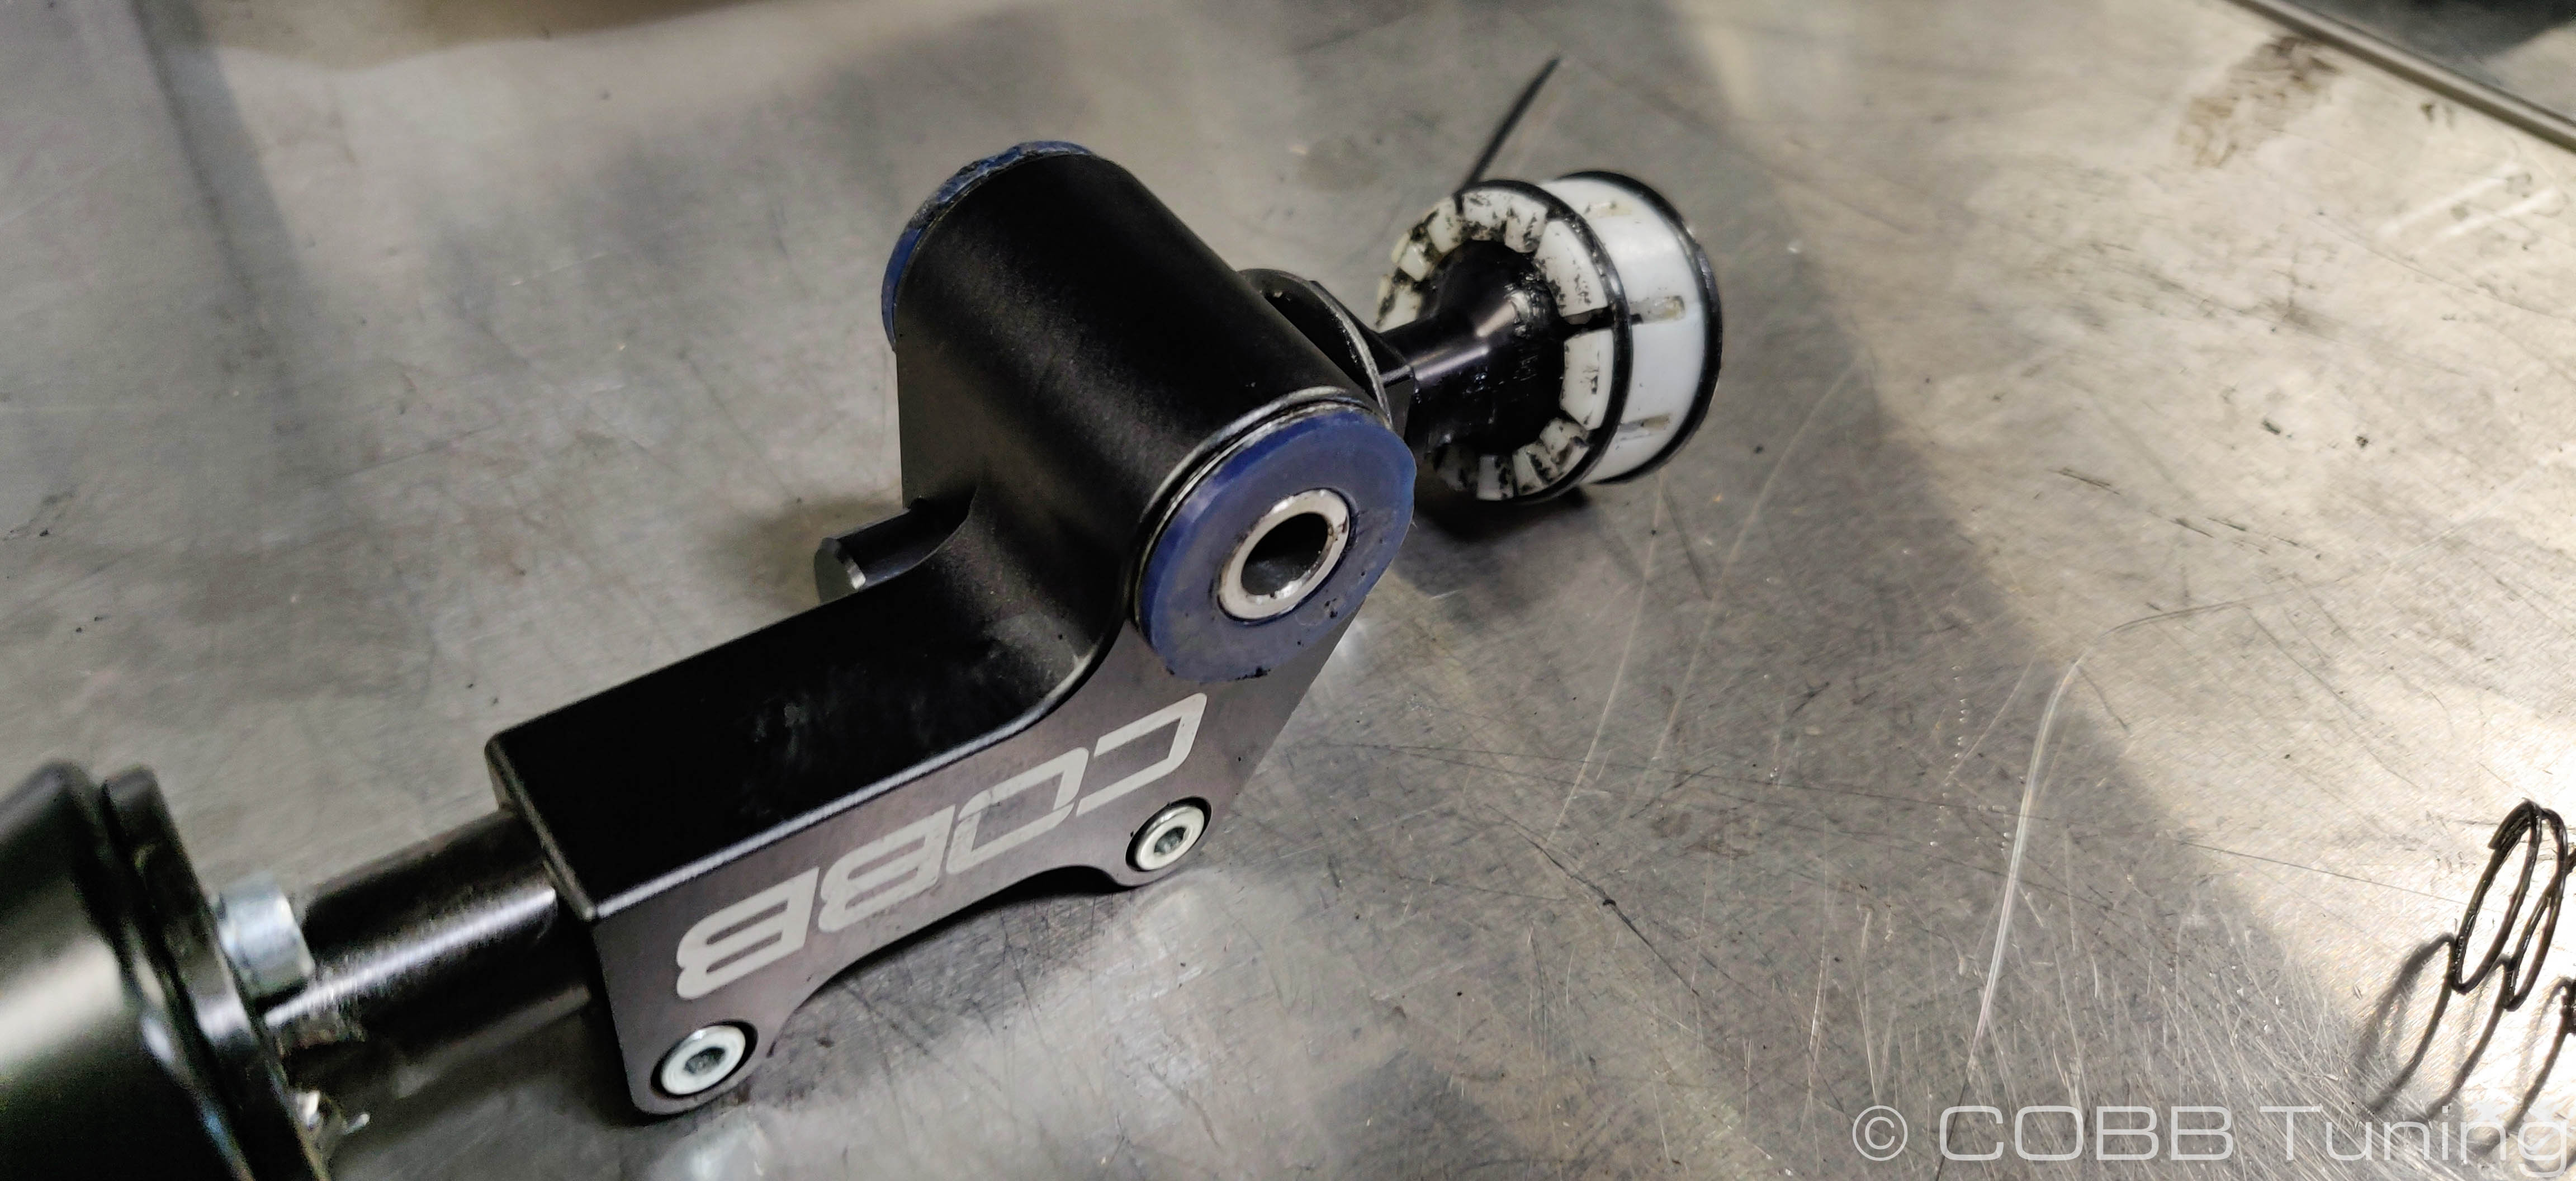
- Use (2) 12mm boxed end wrenches, one on either side, to remove the bolt that holds the shift lever to the shift linkage as shown in the picture below. DO NOT misplace the nut and bolt, as they will be reused with the COBB Tuning Short Shifter.
- Next, using snap ring pliers remove the c-clip that holds the bottom cup in.
- You will need to move over the boot collar (held in place by two screws), the bushings, pin, plastic cup (with o-rings) and spring from the old shifter. It's also a good time to upgrade to the COBB Reverse Lockout if you're doing so. (STi’s built in March of 2007 and later, including 2008+ STi) If your factory bushings are loose in the shifter barrel without the spacers, you will need to install the (2) COBB Tuning supplied steel bushings into the shifter barrel before you install the bushings.
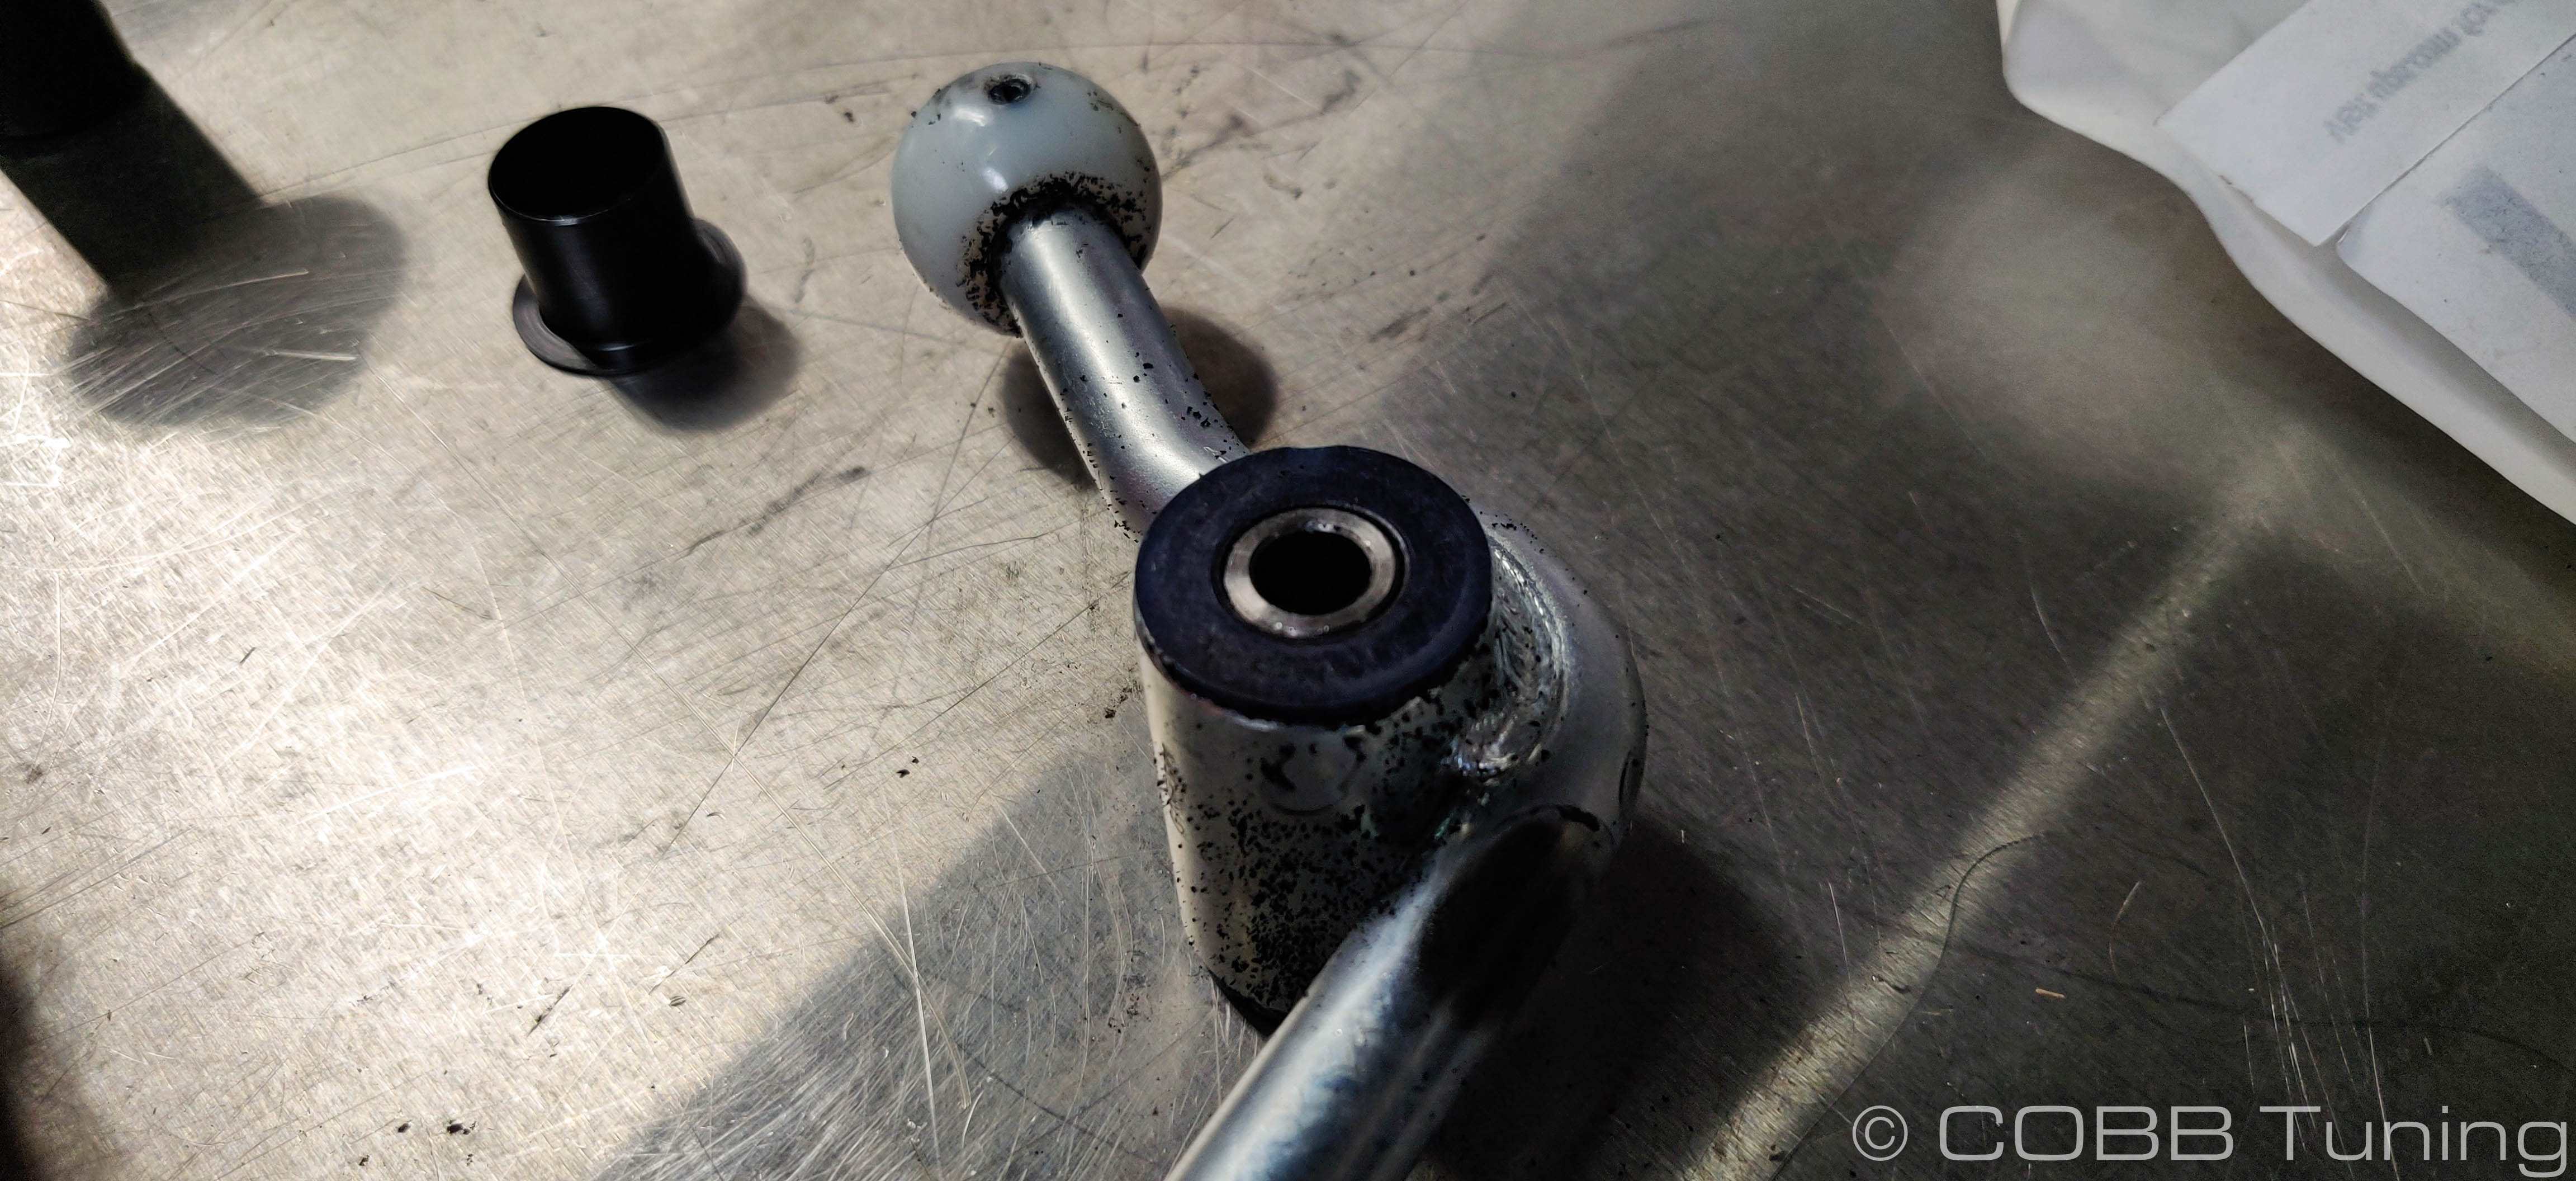
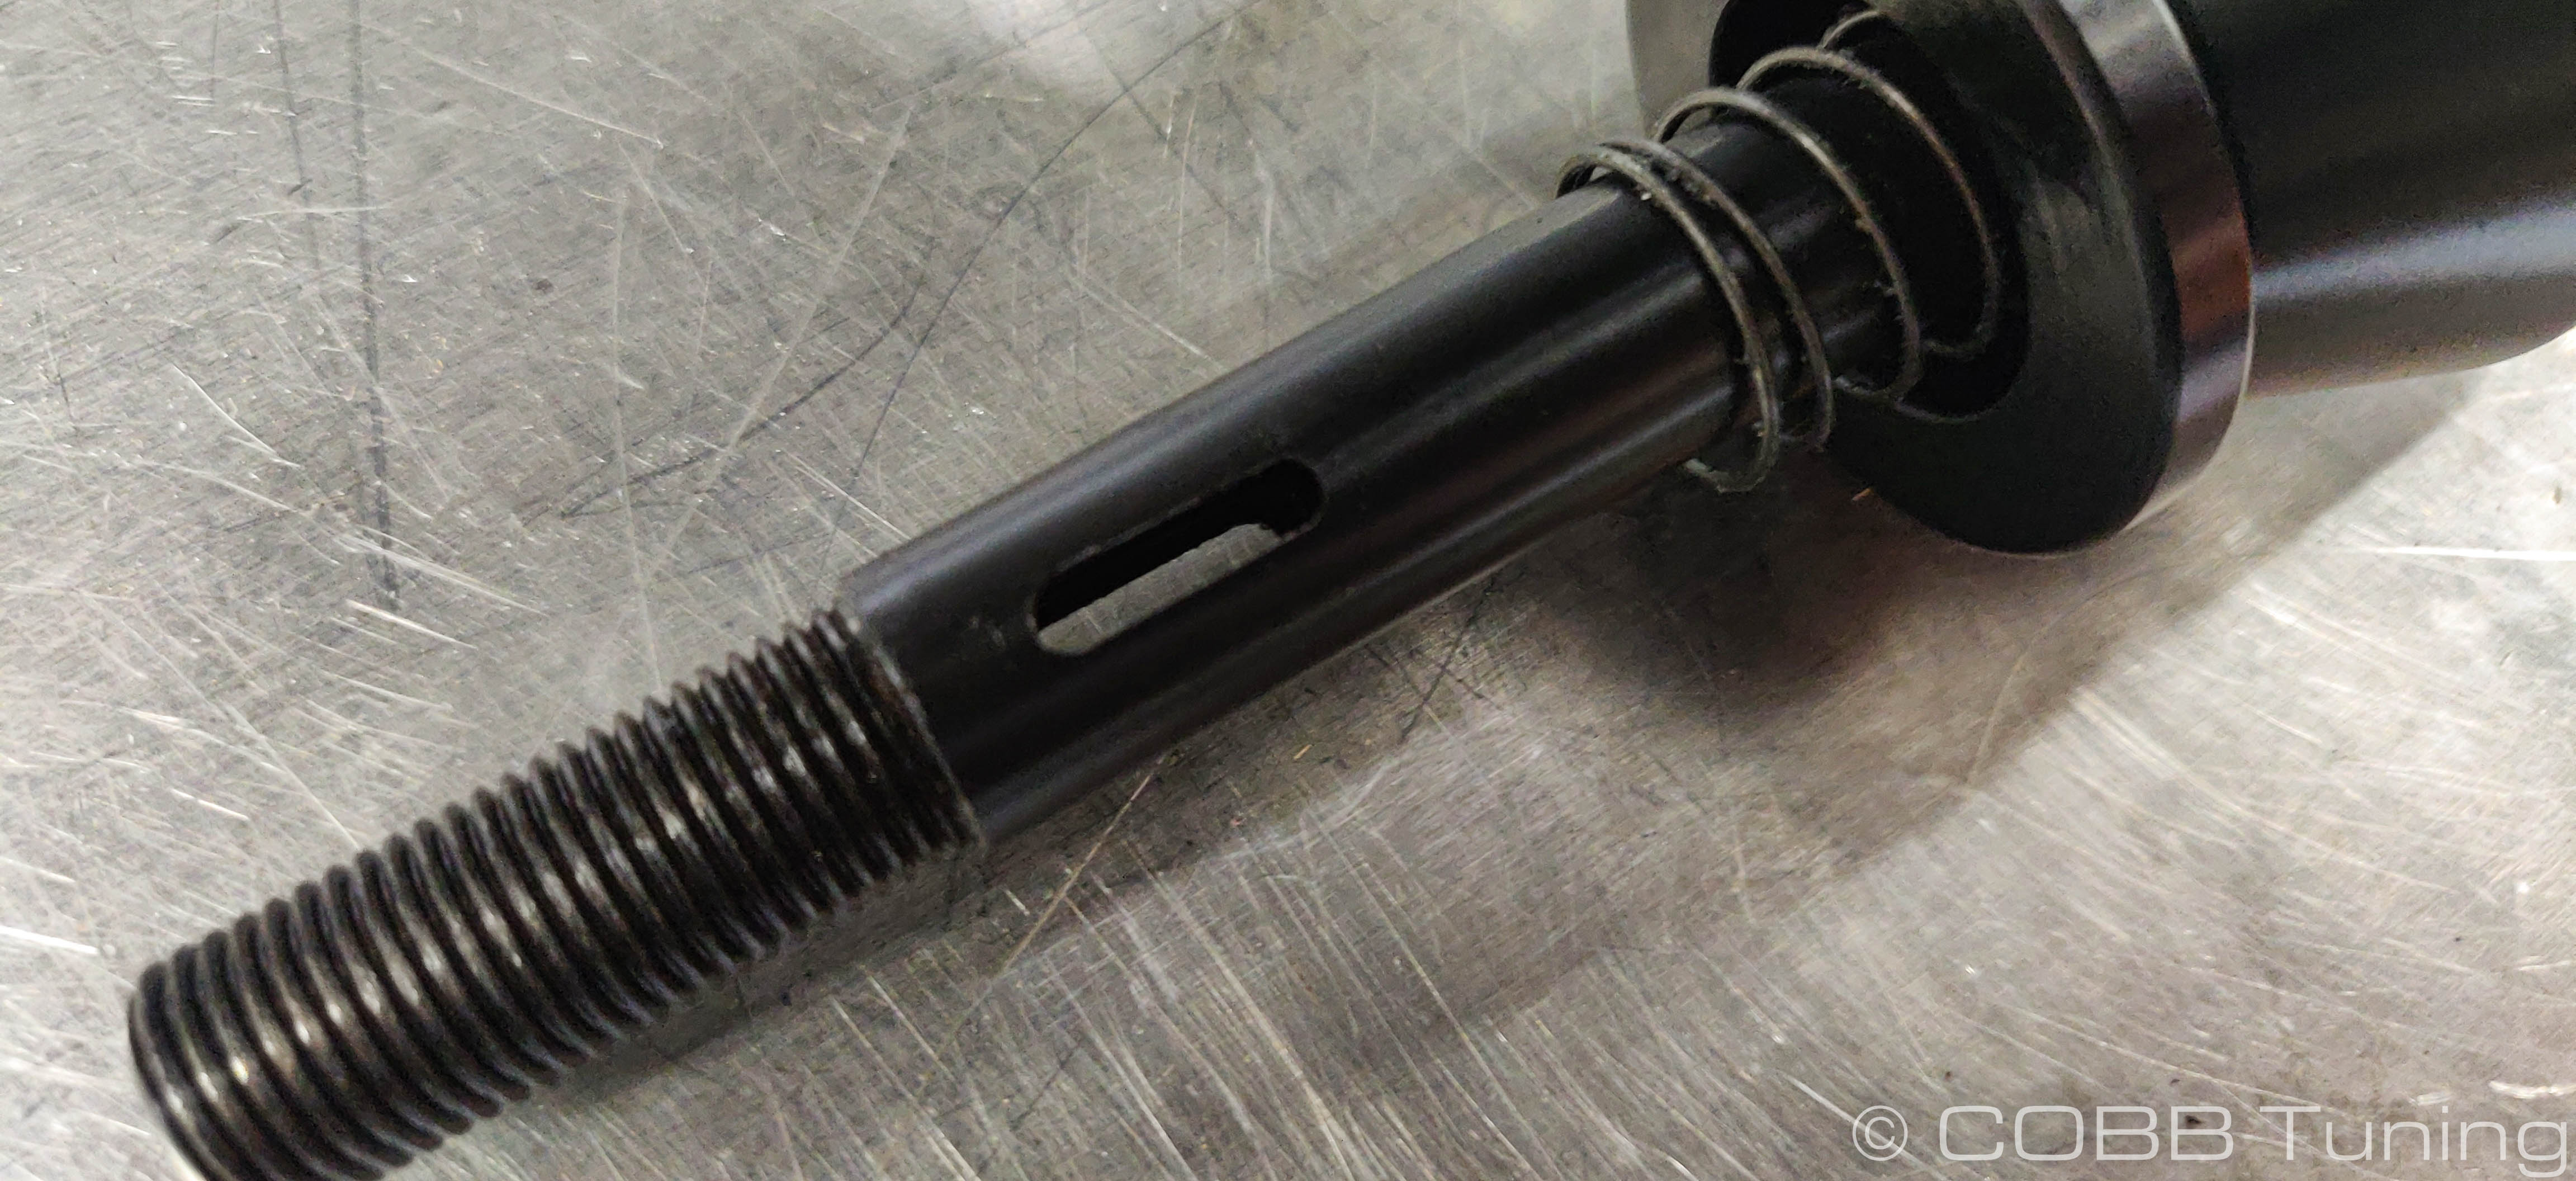
- Once removed, apply grease from the original lever’s ball or molly based grease to the new shift lever’s ball. This will ensure a smooth operation. You will also need to apply grease to the tip of the reverse lockout cable and the area where the reverse lockout slider rides. Make sure that anything that slides or rotates has grease.Before attaching the shifter to the shift linkage, apply a small amount of grease to both sides of the bushings used in the new shifter. There may be extra on the ball or socket to use.
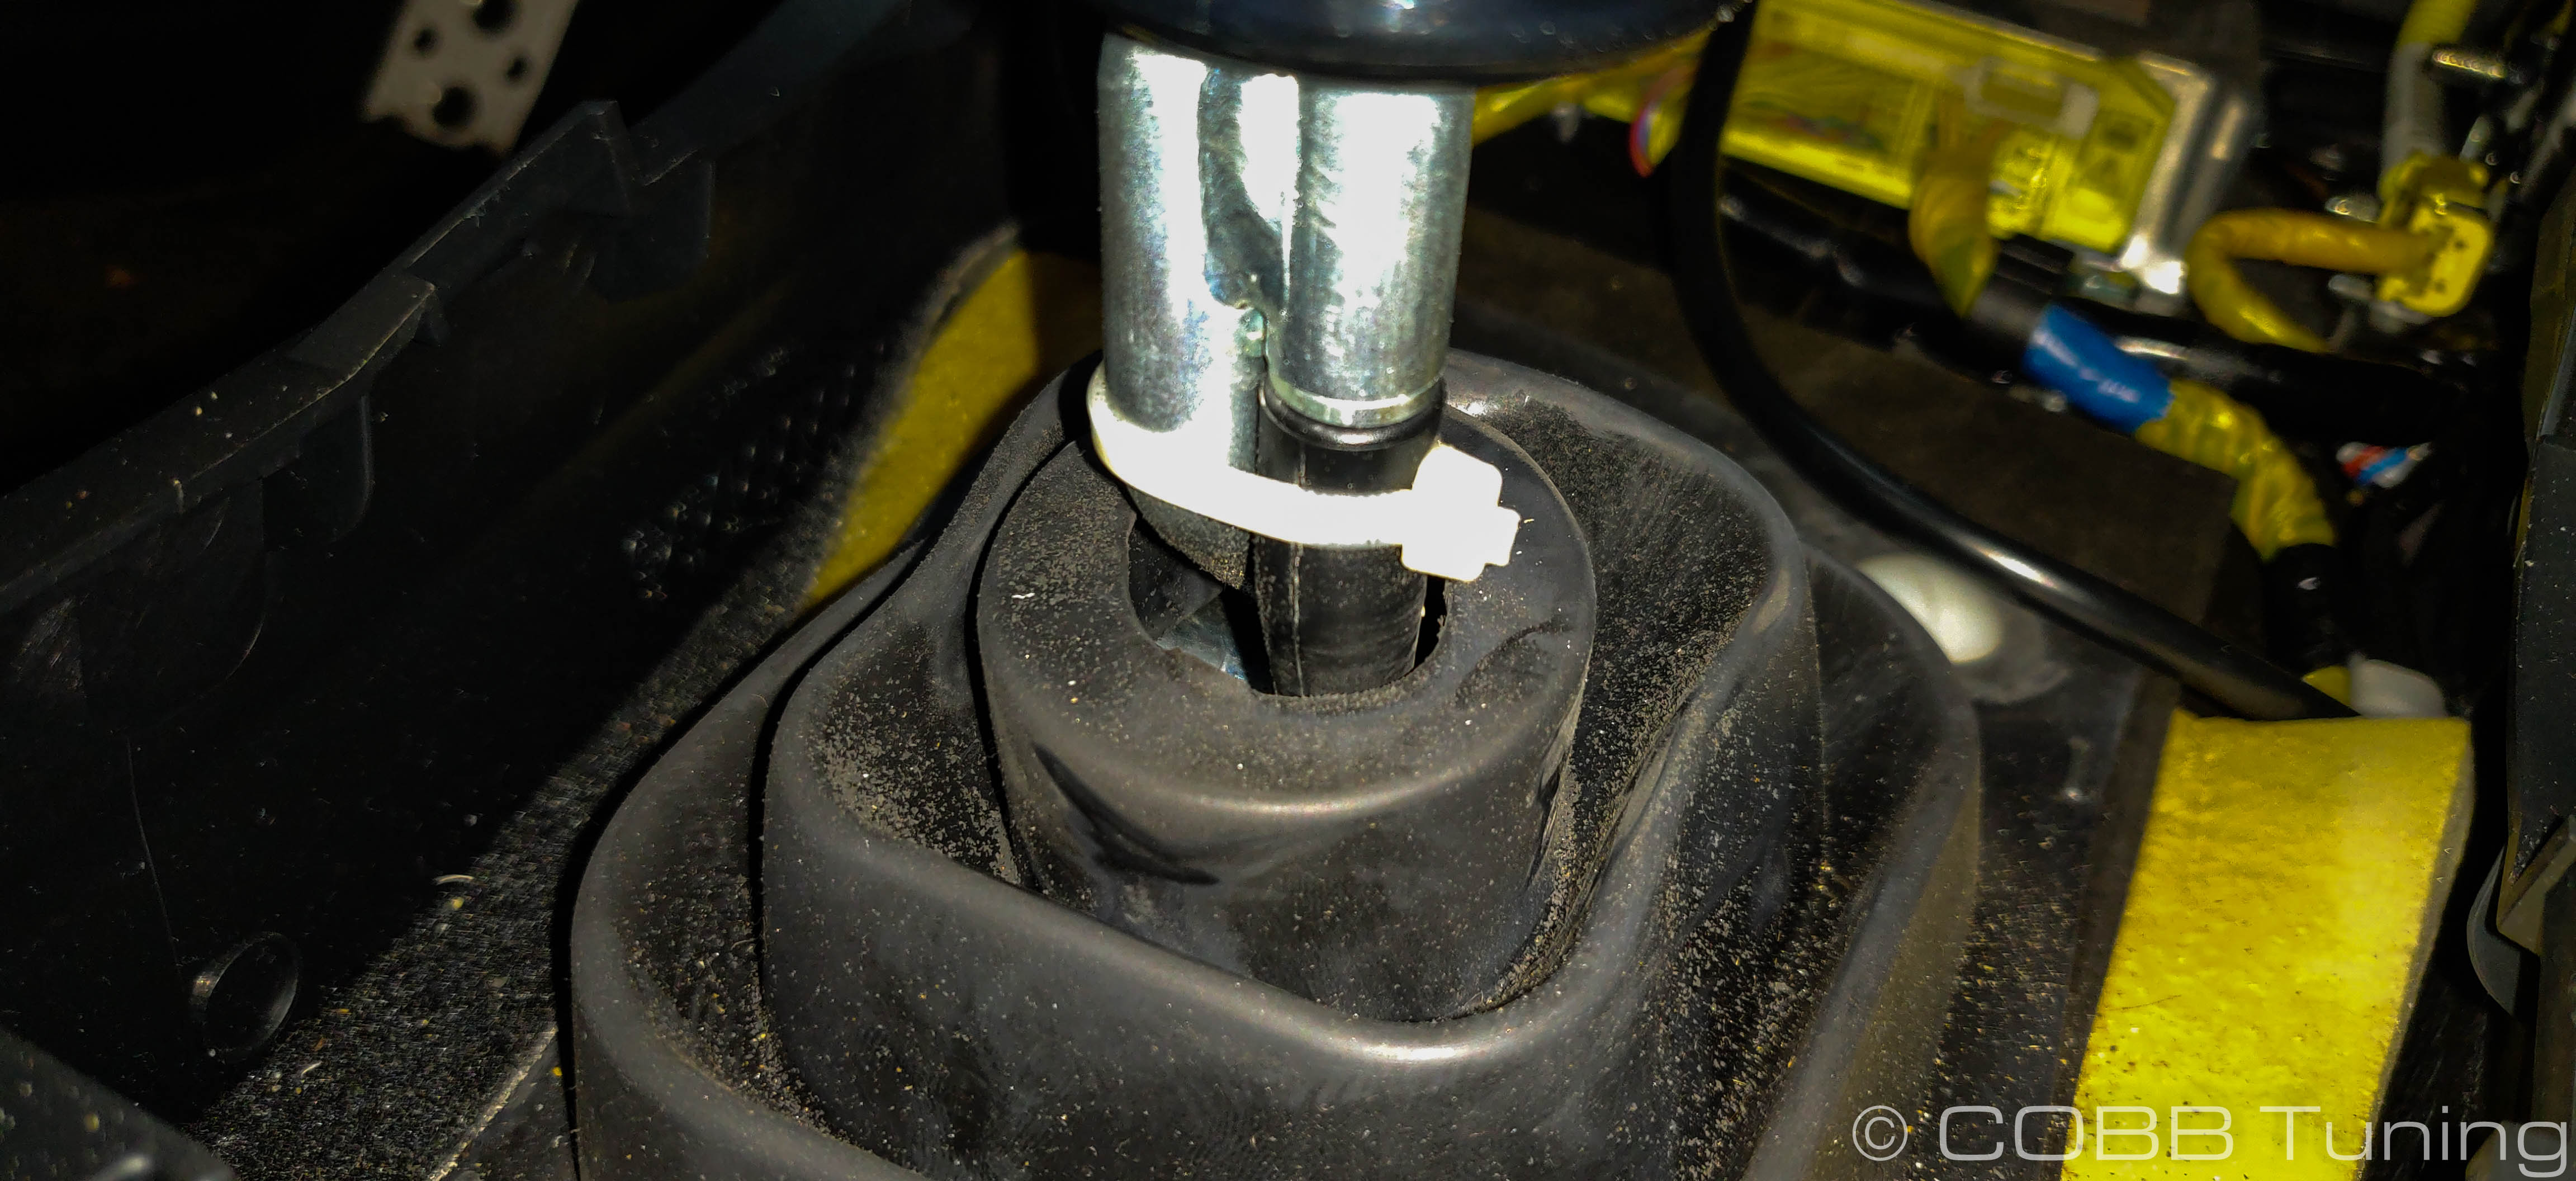
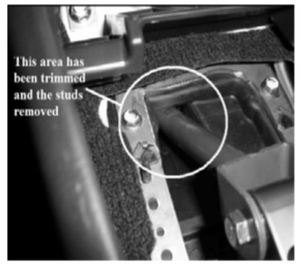
- While only needed if you set the shifting extremely short, you may want to take the time at this point to remove the metal surround that holds down the rubber gasket and trim it for more adjustability with the shifter. Remove the four 10mm bolts and maneuver it out of the car. Trim the upper left edge where the linkage goes by to allow for more clearance for the linkage, as it will be slightly higher to get the geometry for a shorter throw. After trimming, reinstall the surround.

- Place the new shifter and bushing in place as it was from the factory. Getting it in should not take much effort. If it gets tough, then try again and make sure the bushing is going in straight.
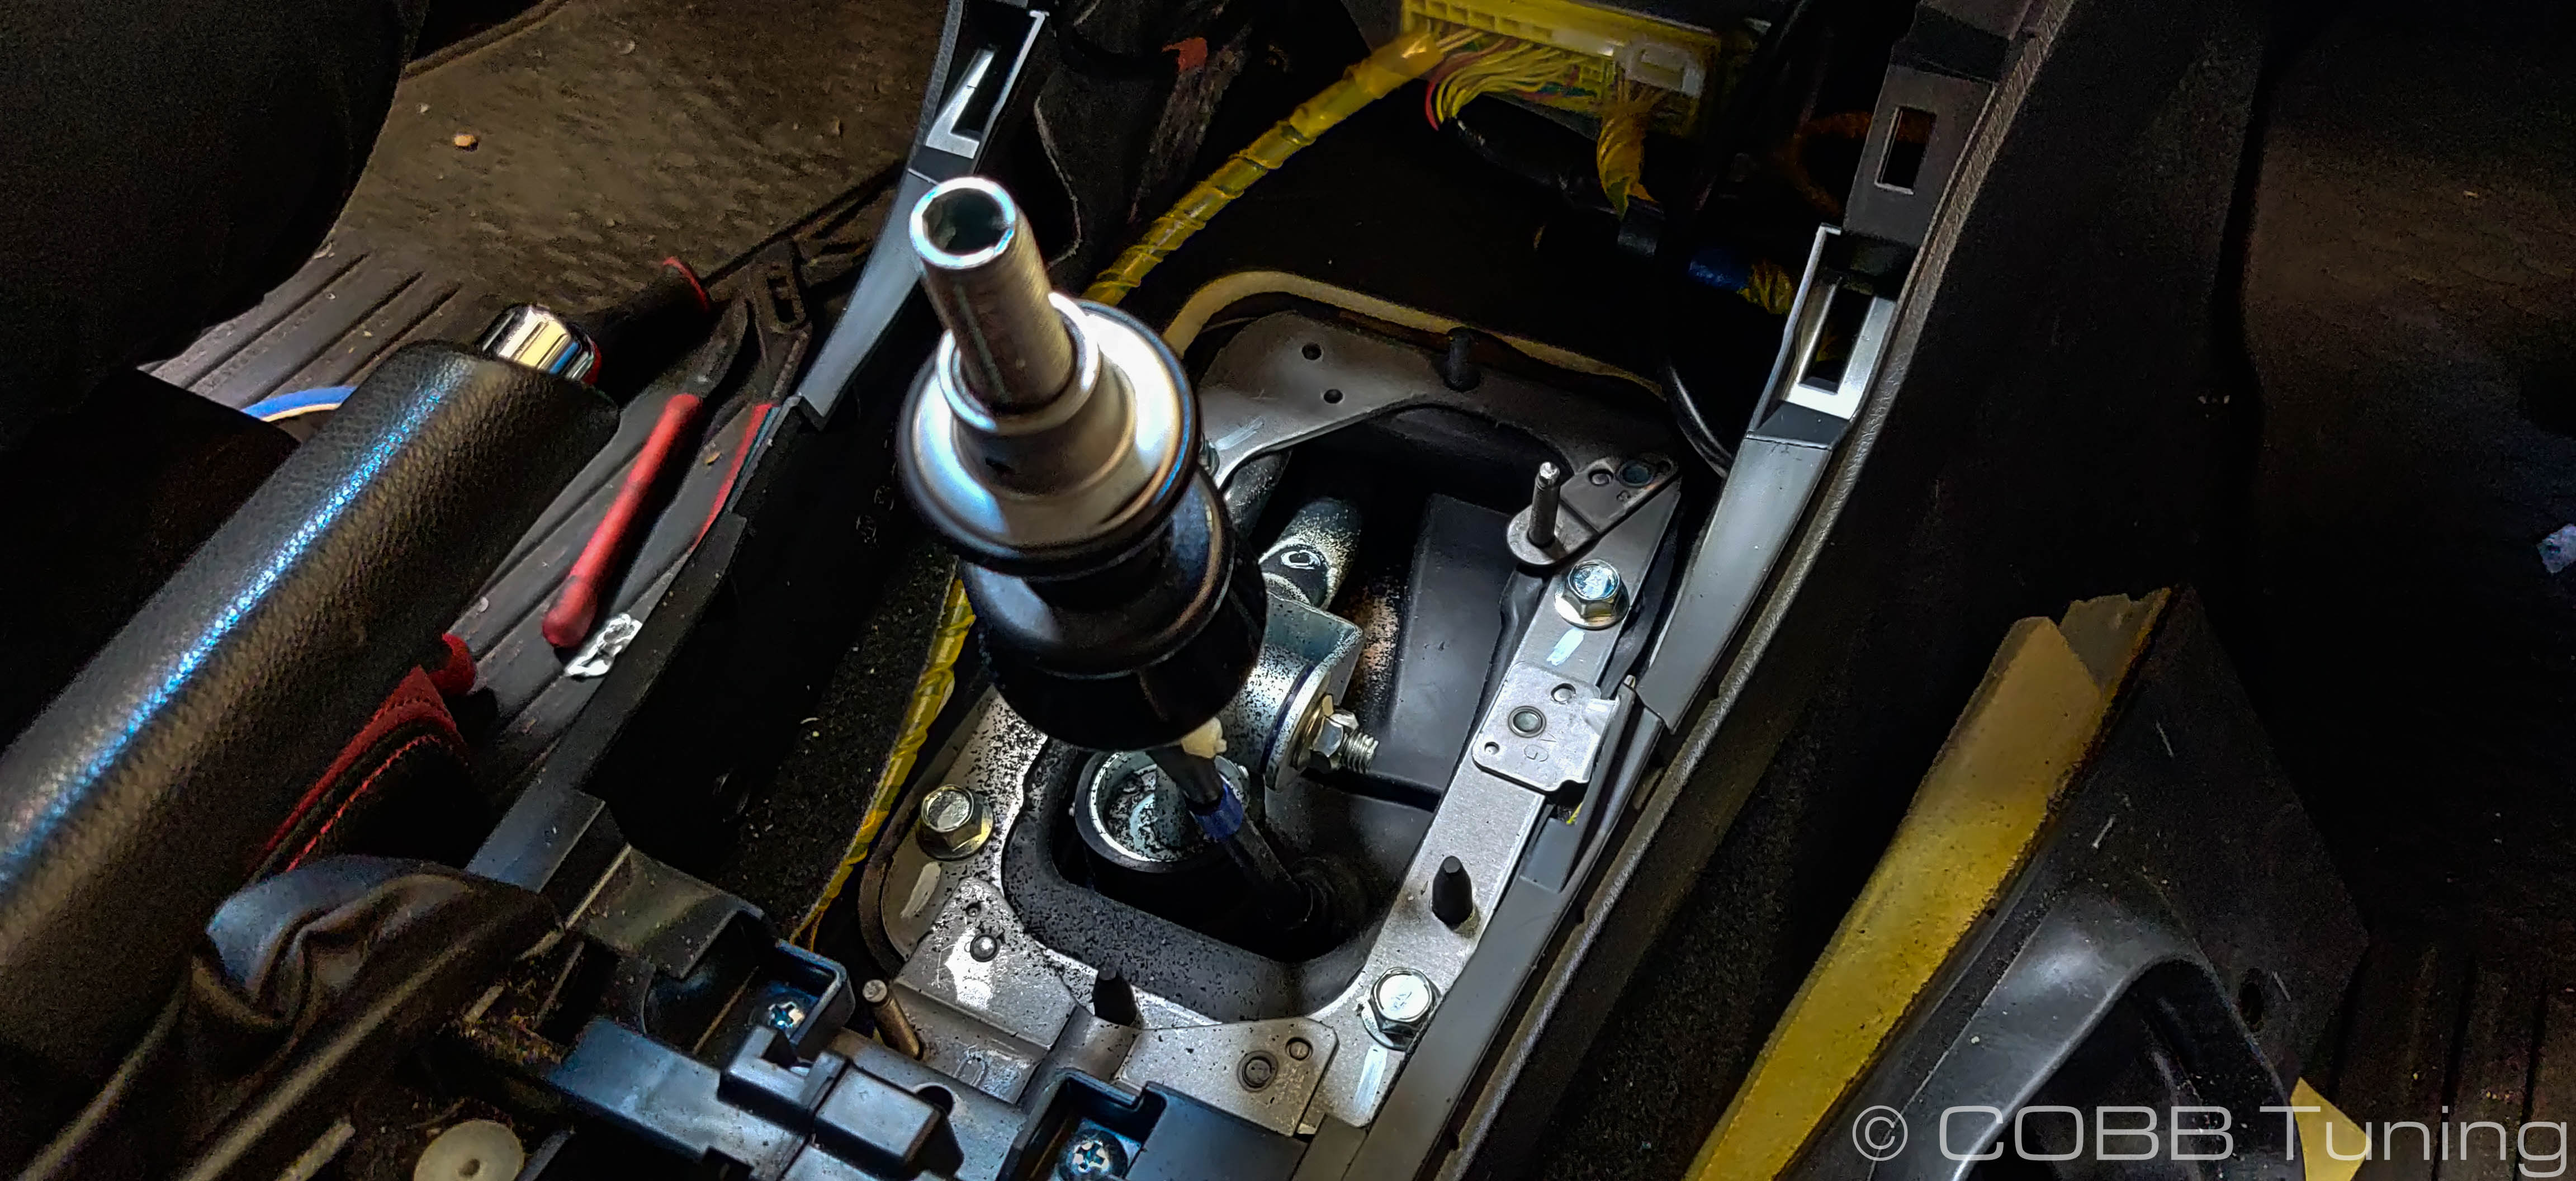
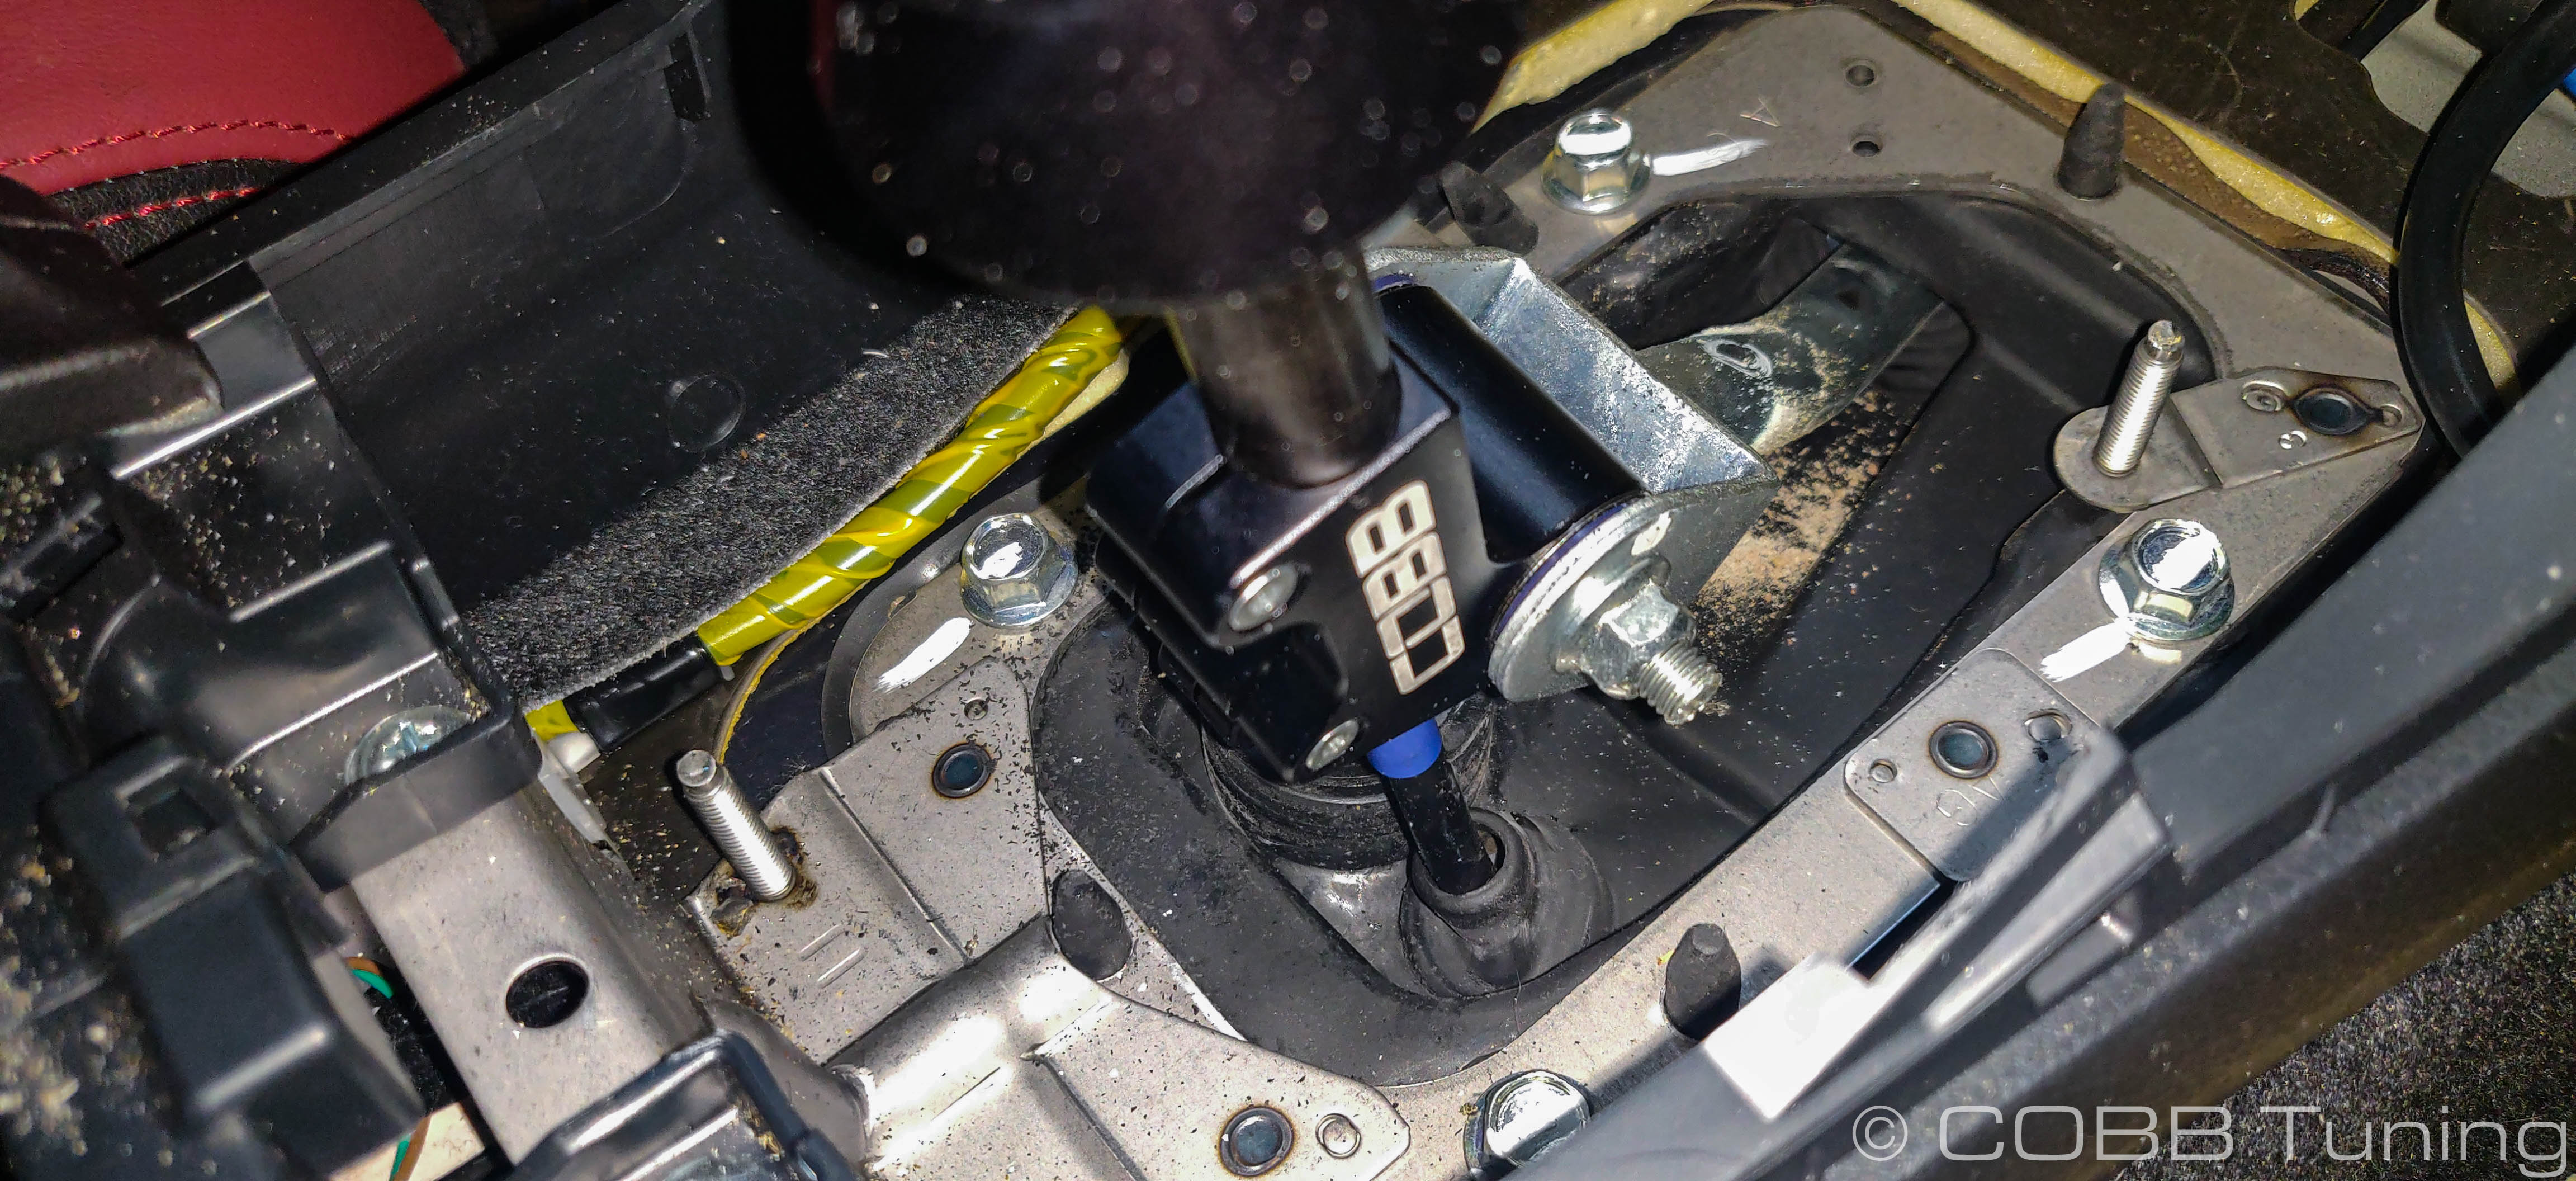
- Attach the linkage to the shift lever using the factory hardware that was removed previously and the(2) 12mm wrenches. This should be hand tight (approximately 12-15 ft/lbs of torque). The following pictures show the linkage attached. Note that the barrel is oriented towards the front.
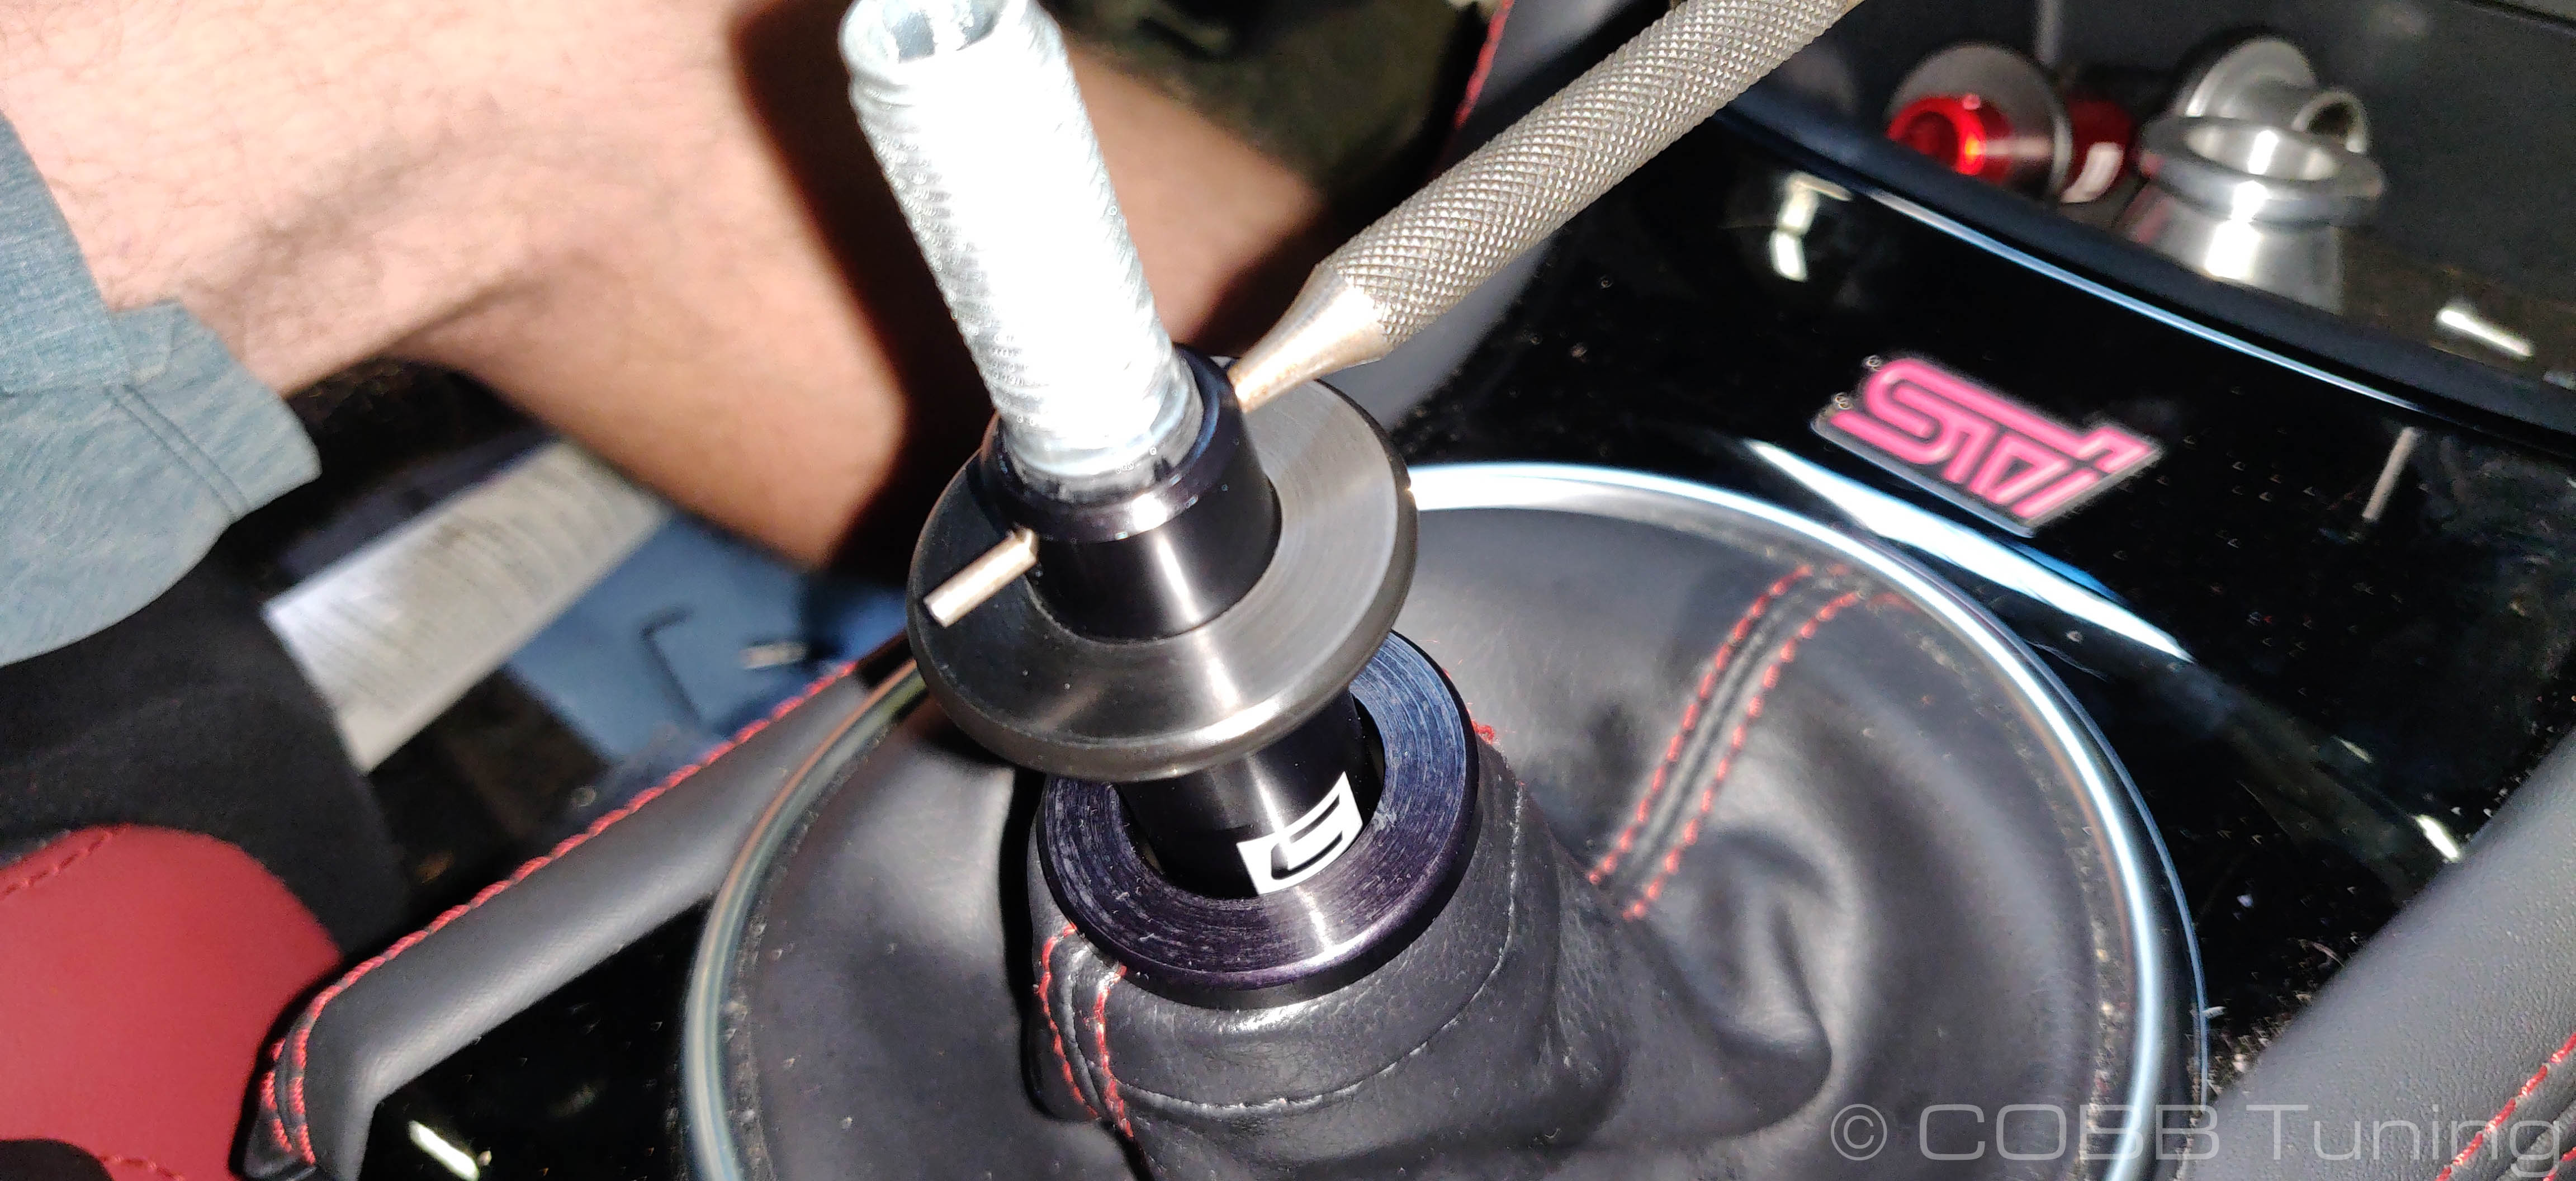
- Thread the reverse lockout cable into the shifter’s center section and into the top section. It may be easier to do this while the upper portion of the shifter is in its lowest position. You should be able to see the hole in the top of the reverse lockout cable thru the notch in the upper portion of the lever.
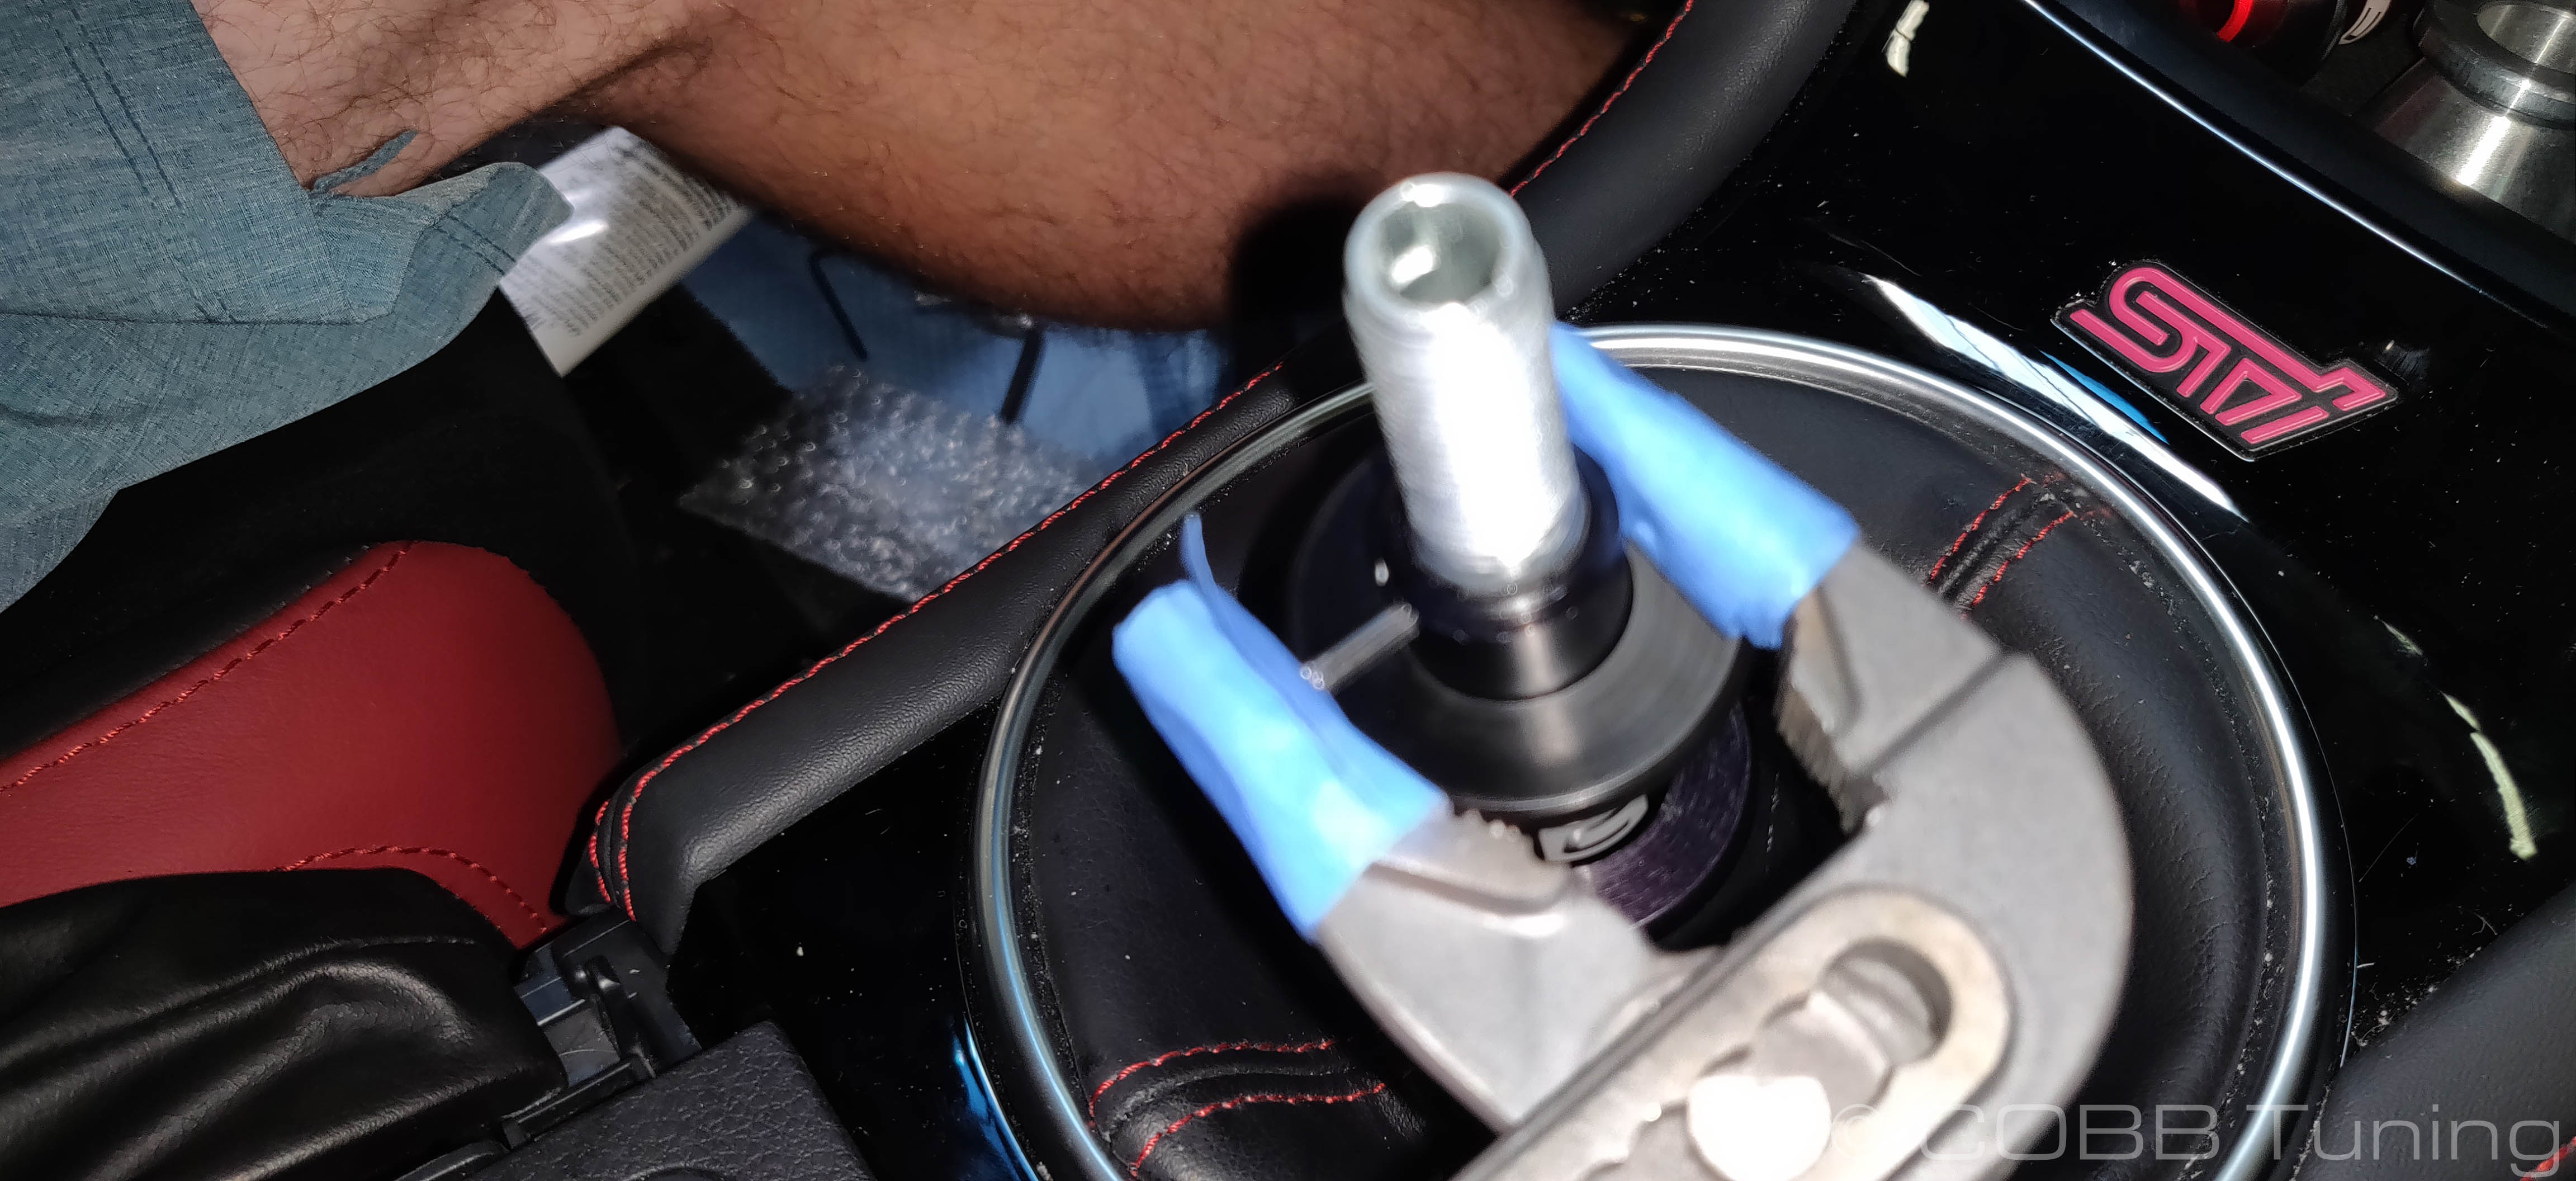
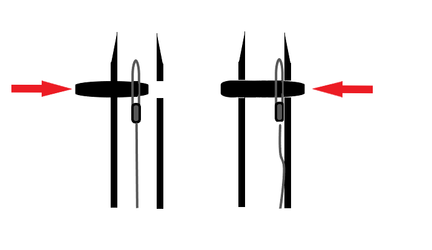
- Slide the reverse lockout spring over the top portion of the lever followed by the slider. Make sure that the slider is oriented so that the pinhole is on top of the lip. Line up the holes of the slider and cable, and reinstall the pin. It may be easier if the top portion of the lever is loose in the center section so that you can rotate it to line them up. Make sure the pin is not sticking out either side too much.
- With the holes lined up between the lockout and cable. Use a set of channel-lock pliers with either tape or a rag on the jaws to keep from marring the surface of the lockout and press the pin into place slowly. It's a good idea to get it started with the punch in place and slowly move the punch back.
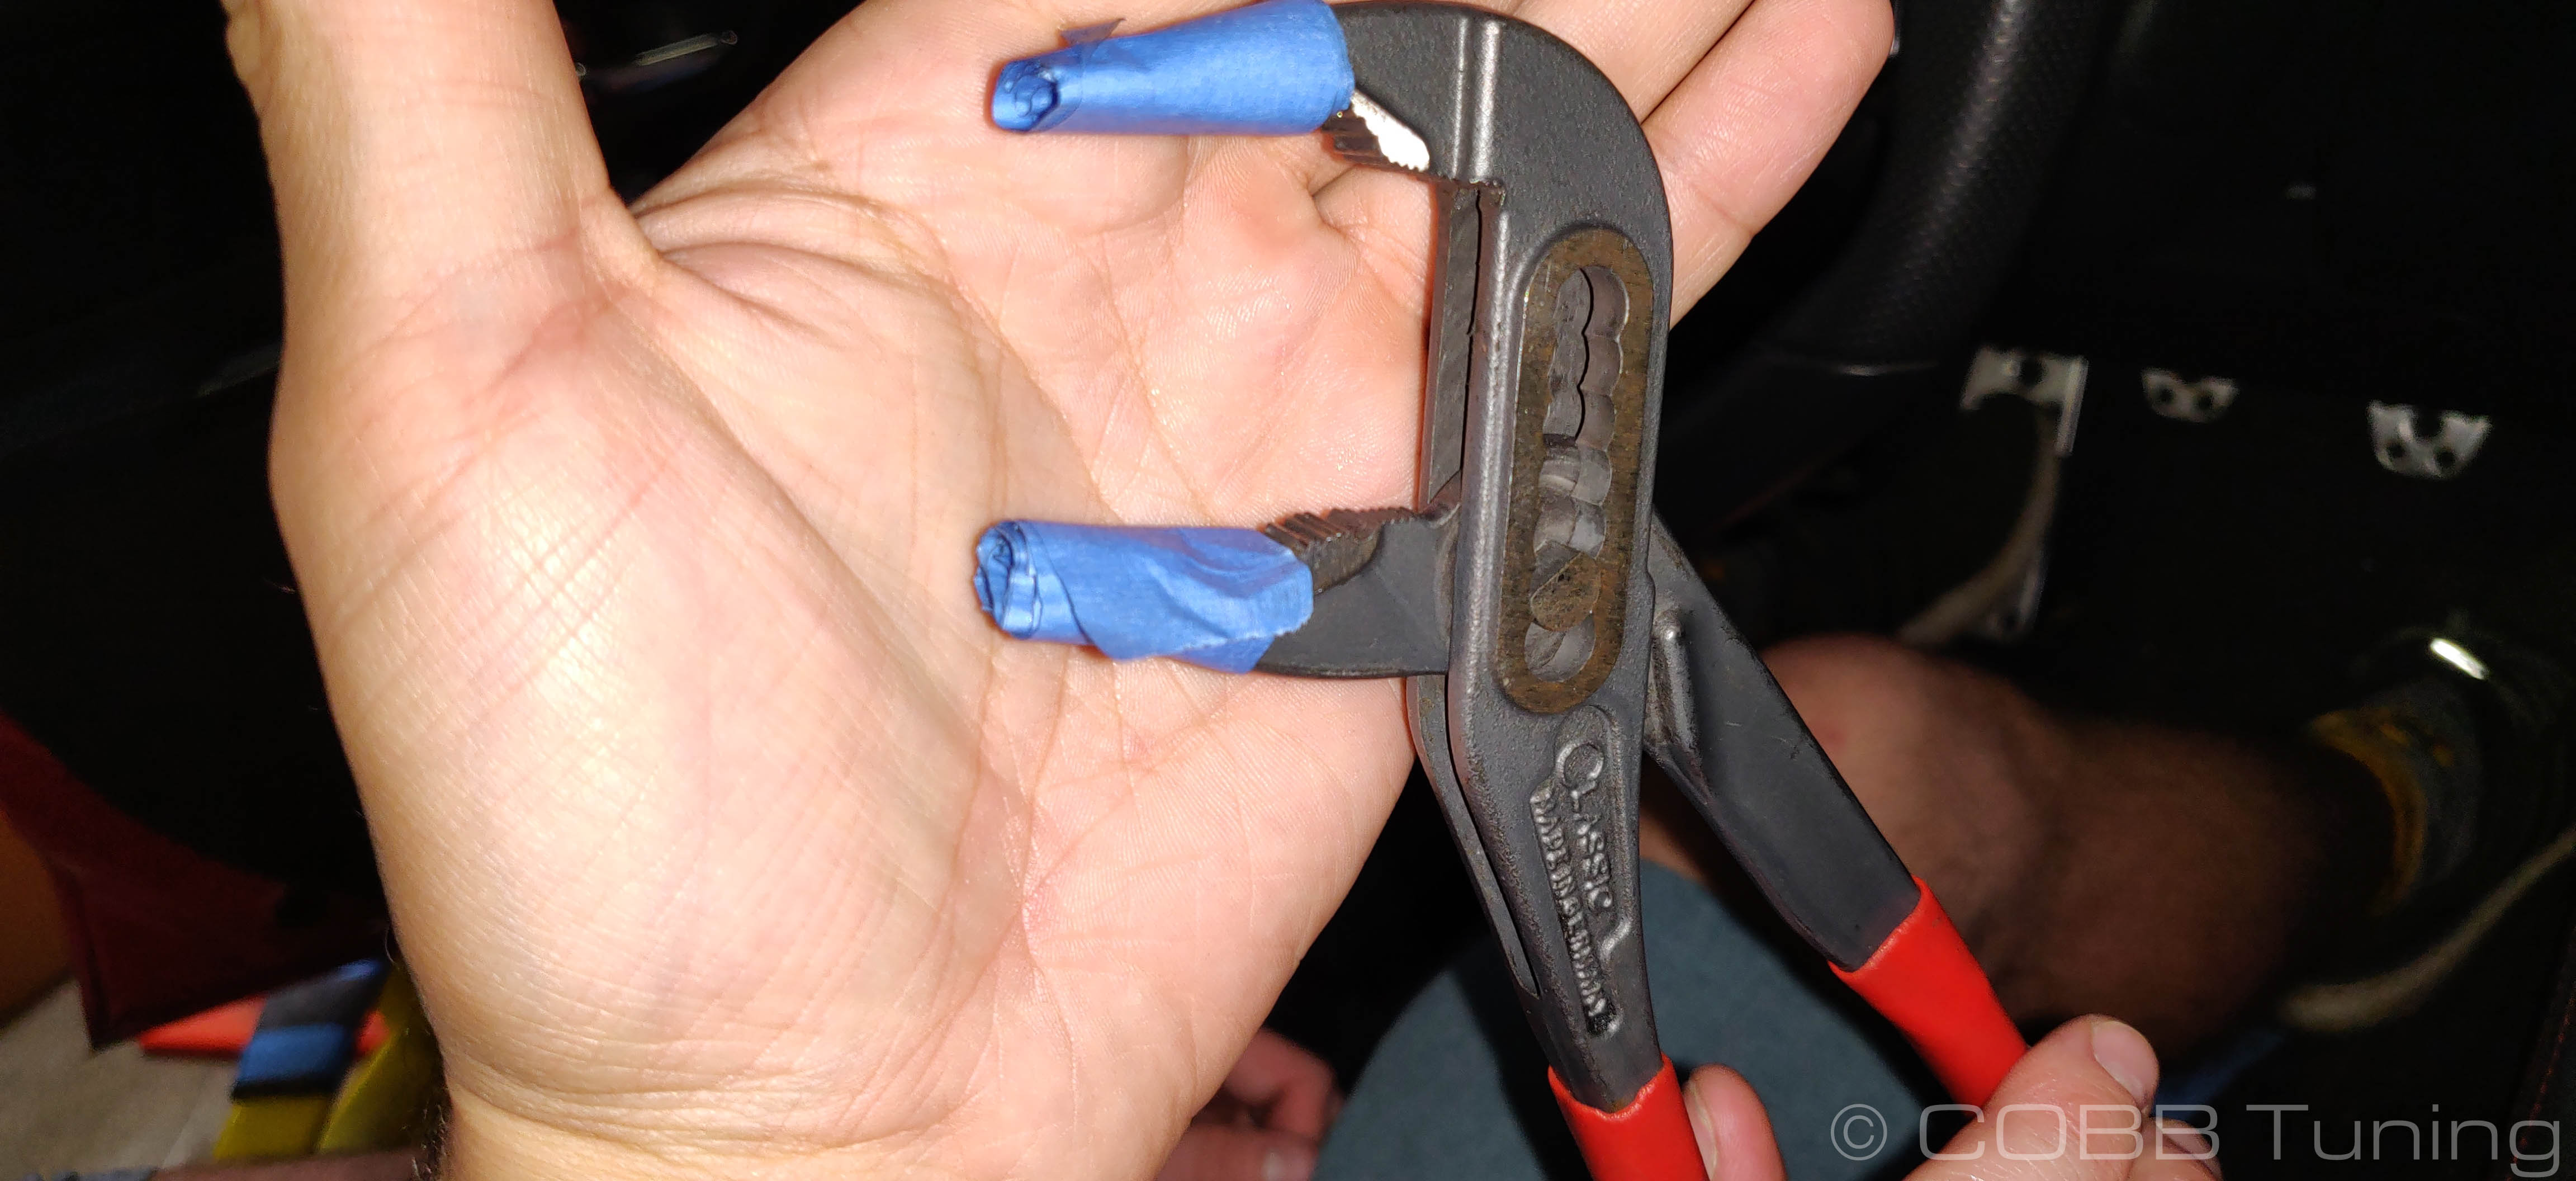
- Sometimes as you tap the pin into place it can push the reverse lockout cable up against the side of the shifter. To avoid this happening, tap the pin slightly too far, then tap it back the other way to even it out back into the middle.
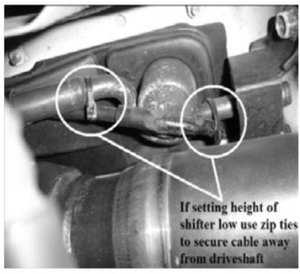
- Make sure the reverse lockout operates properly and prevents shifting in to reverse. If you find that it will still go into reverse even when the lockout is not pulled, double check that the cable isn't binding inside the shifter. If you're using a COBB Short Shifter make sure the overall length isn't so long that it puts a constant amount of tension on the cable. If you will be setting the height of the shift lever short, you will have to use zip ties to keep the reverse lock-out cable from contacting the drive shaft as it did on the test car in the below picture. Setting the height in the higher ranges may not make this a requirement. Due to the geometry changes and how they may affect this cable, COBB Tuning is not responsible for any damages to the cable or driveshaft if you do not check the clearance and secure the cable if necessary.
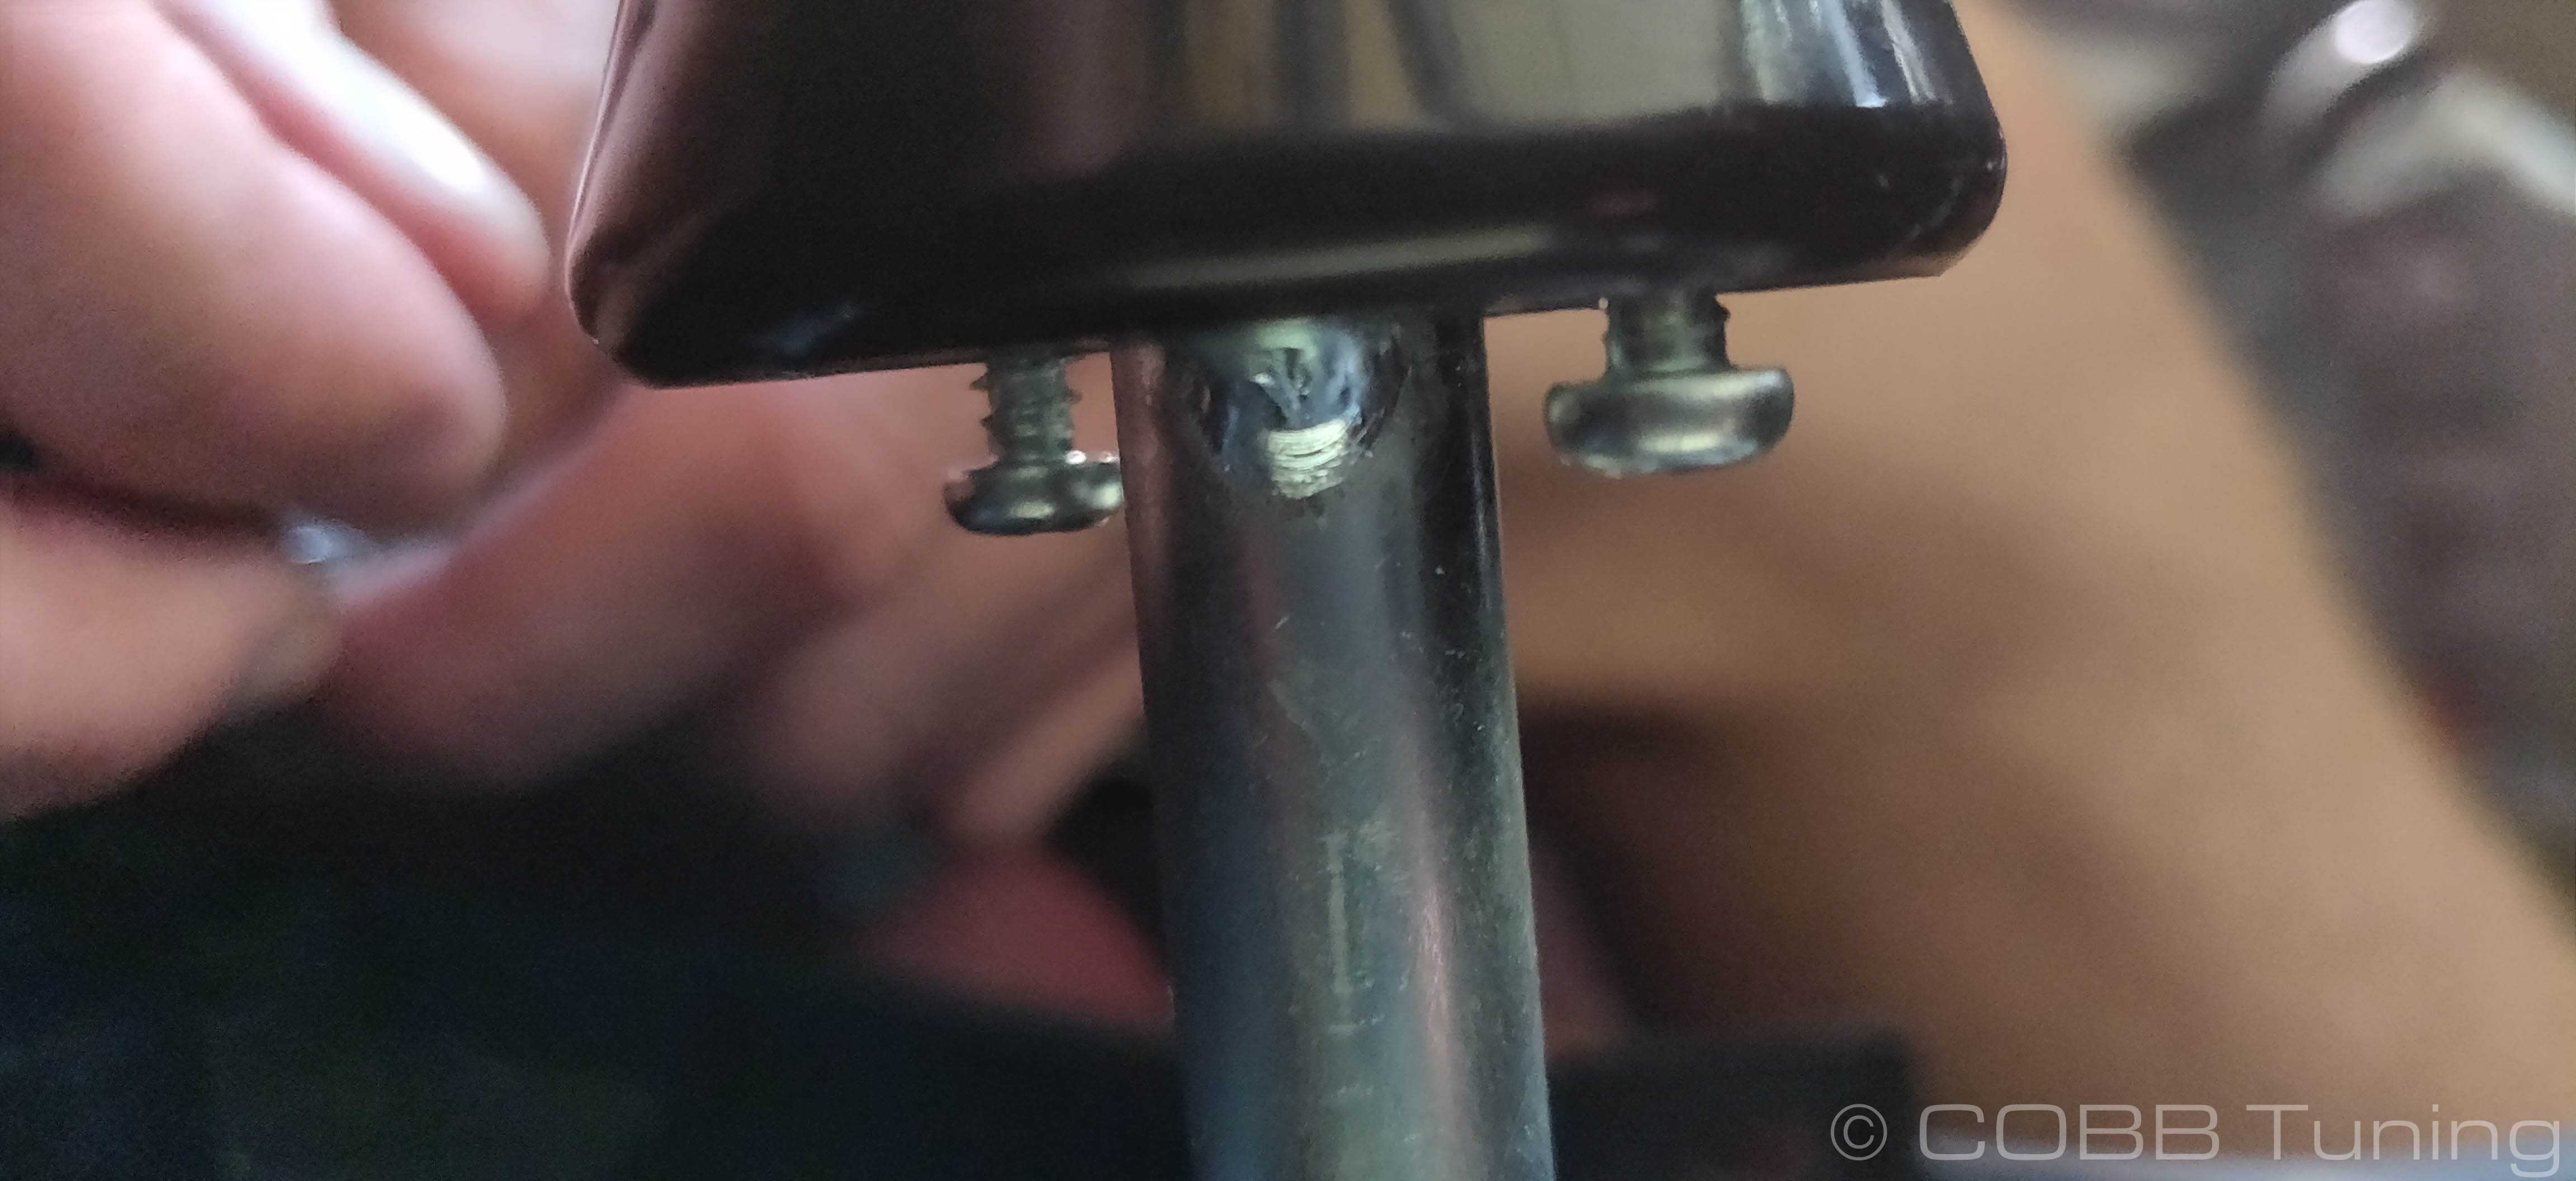
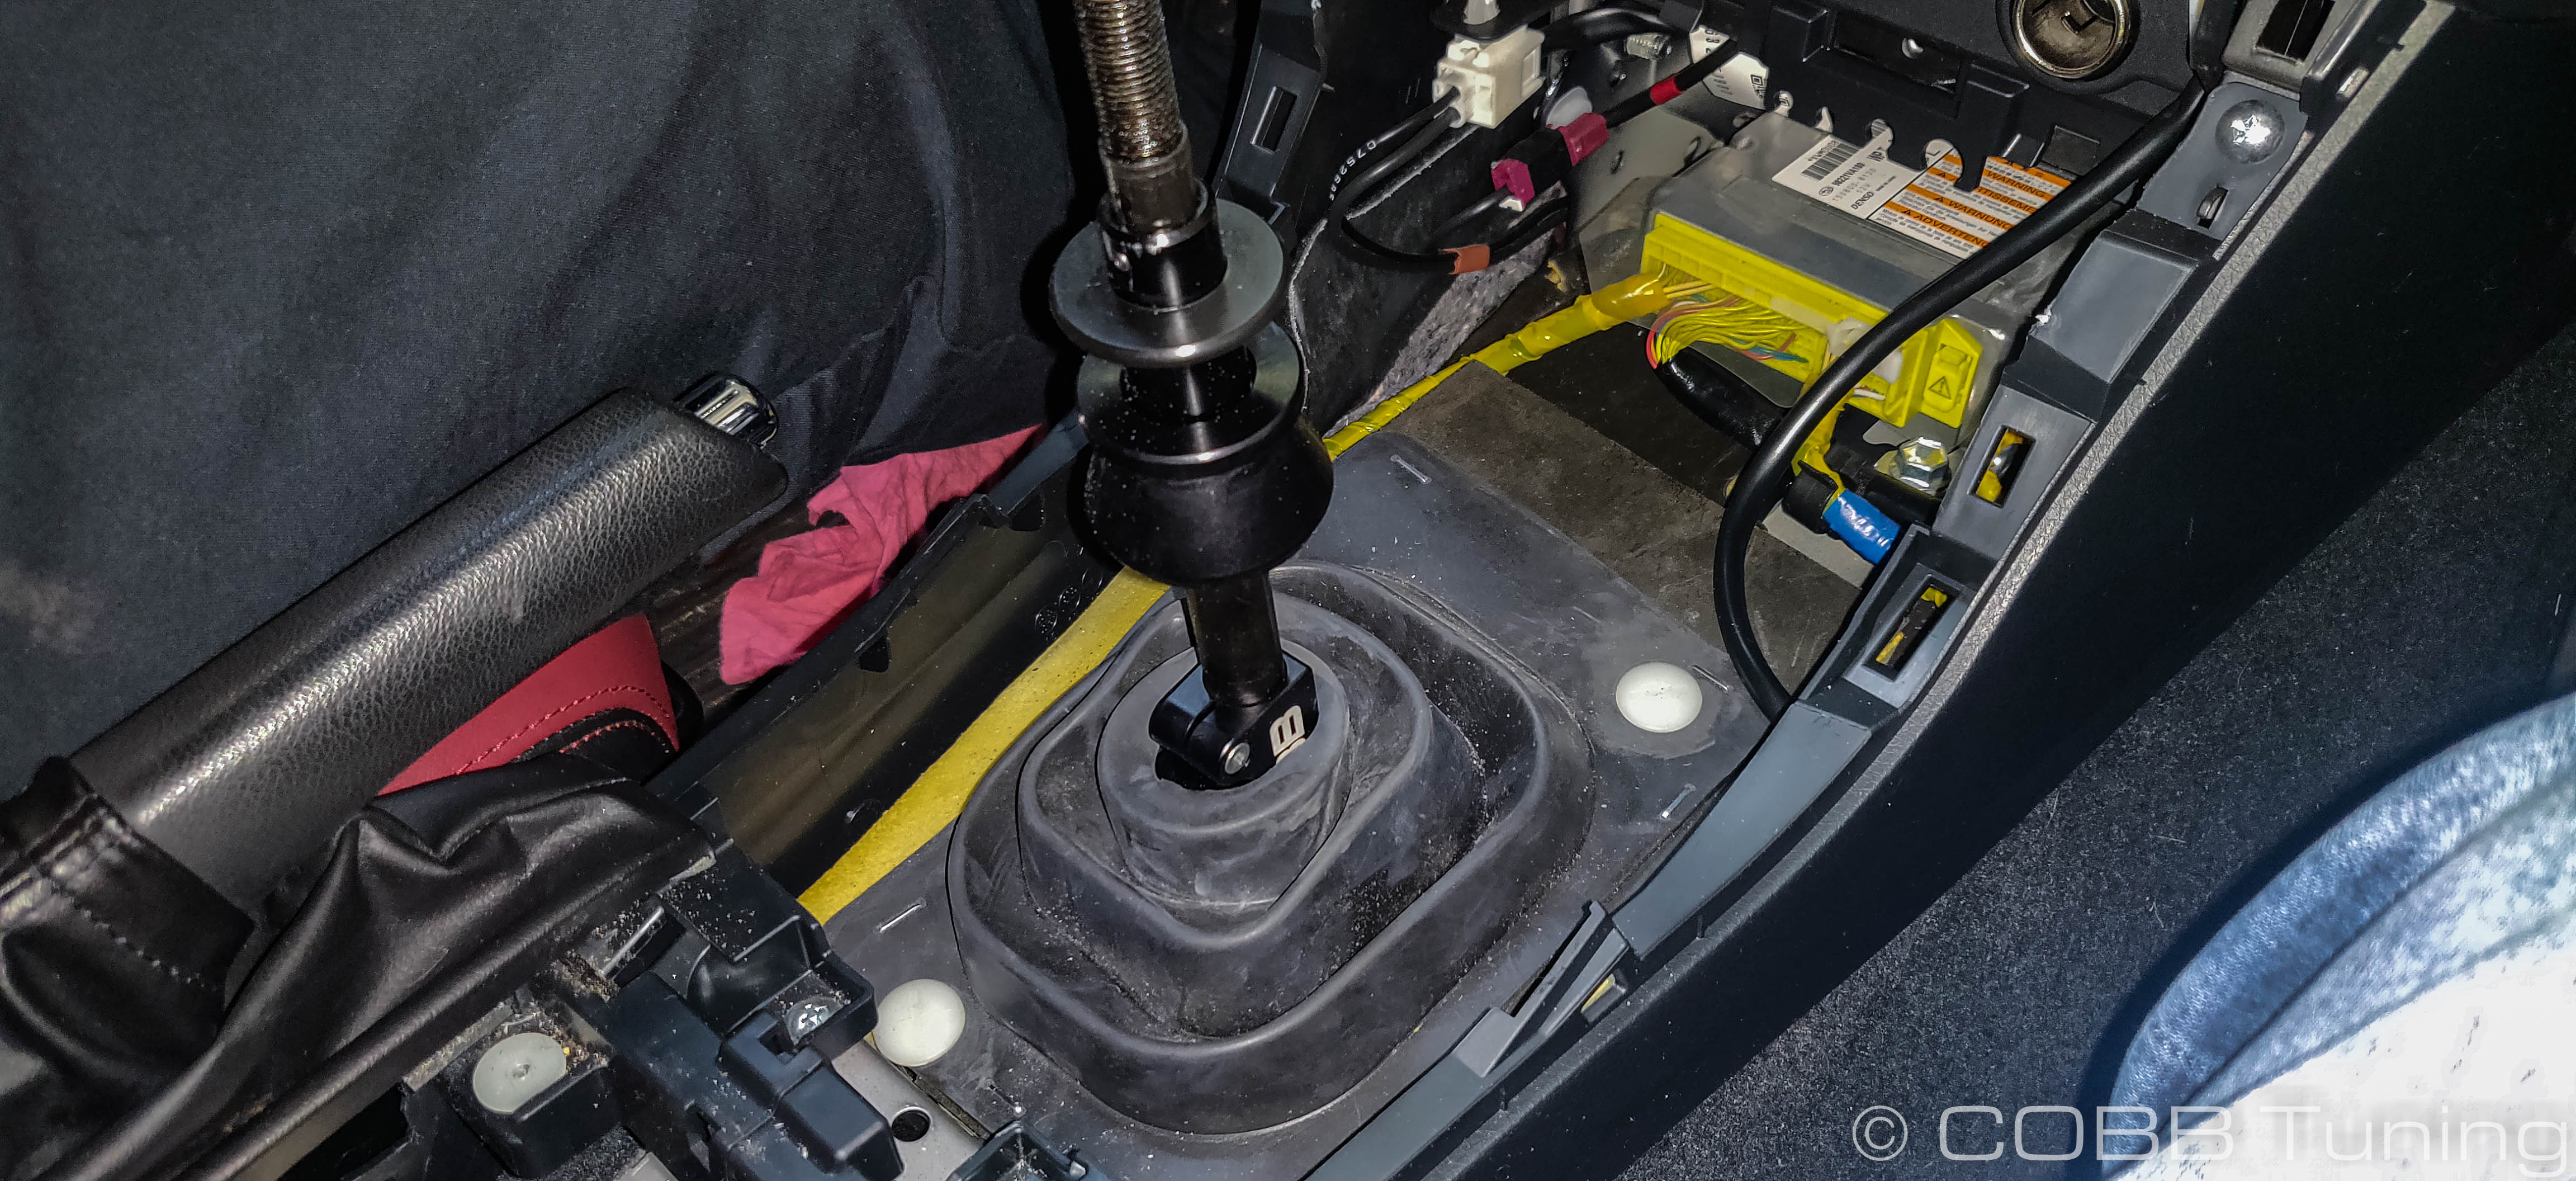
- This is a good time to set the throw and height of the shift lever, as the shift boot will cover the clamp screws. If you want to adjust the throw of the lever, the lower portion needs to be adjusted using the lower 3mm socket head screws. If you desire the shortest throw, you will want to have the lower section as long as possible. However there are space limitations in the chassis and shift linkage. If you go too long on the bottom section, the linkage will sandwich the rubber gasket in between the chassis and the shift linkage. This can increase shift effort, causing you to not be able to go into first or third, and wear a hole in the rubber gasket. We usually set it so that there is the slightest amount of clearance so the throw can be as short as possible without causing issues. To set the height of the shift knob, simply adjust the top portion of the lever using the upper 3mm socket head screws. Again when tightening the clamp screws, do not over tighten them, torque to 41 in-lbs. If you over-tighten the screw it may strip the threads on the aluminum center section. COBB Tuning is not responsible for damage due to over-torquing the screws.
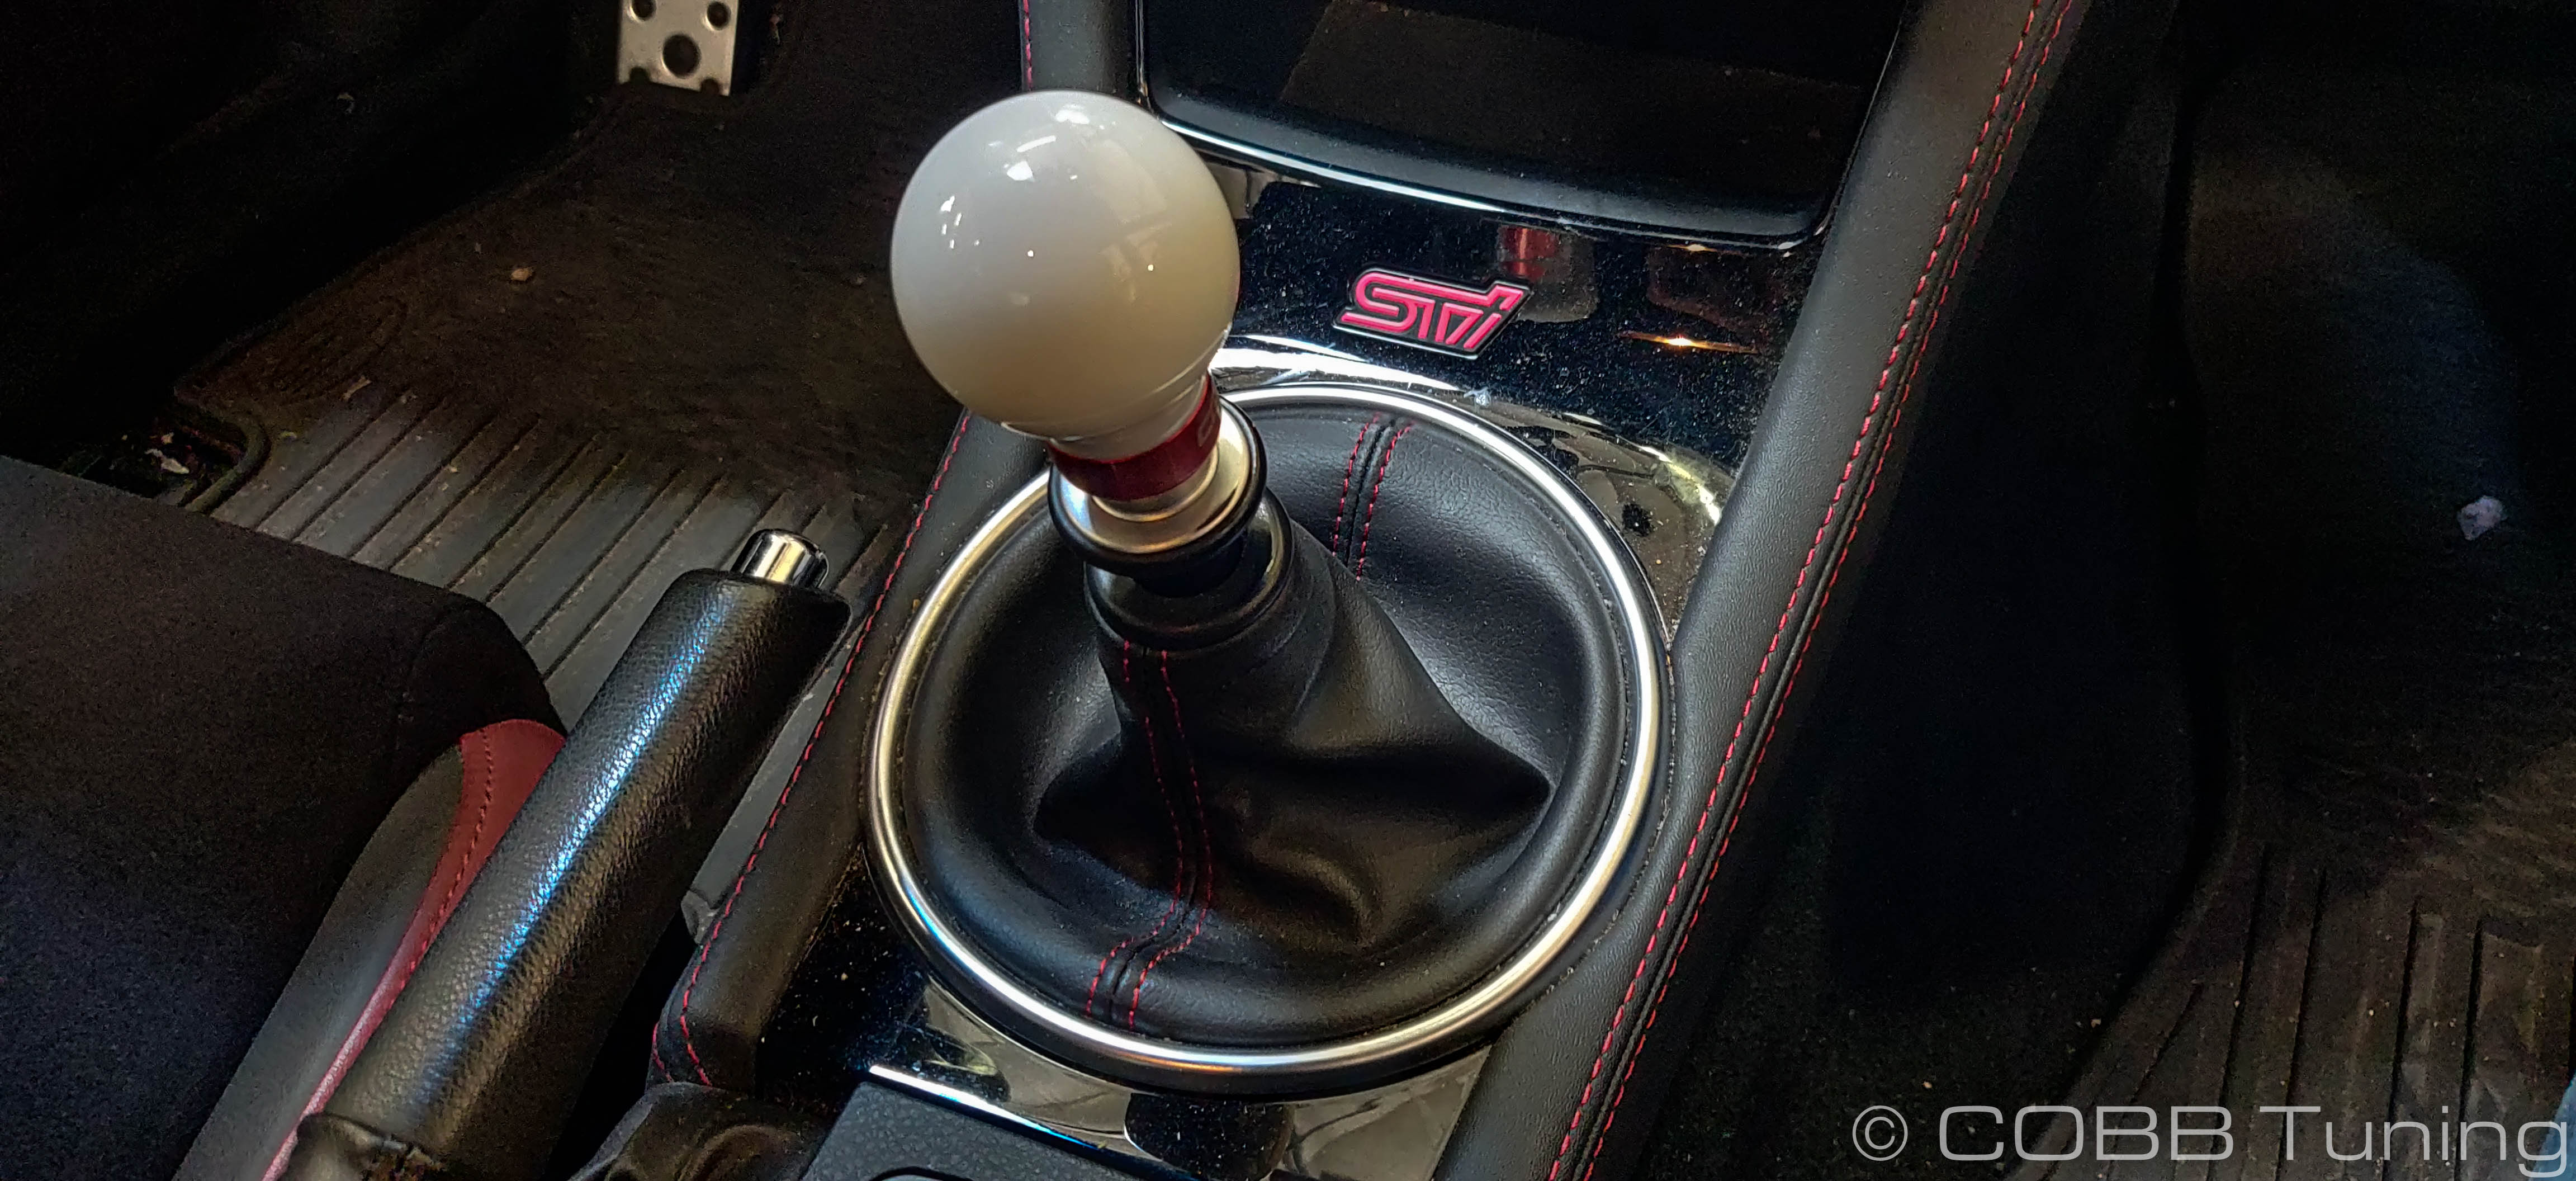
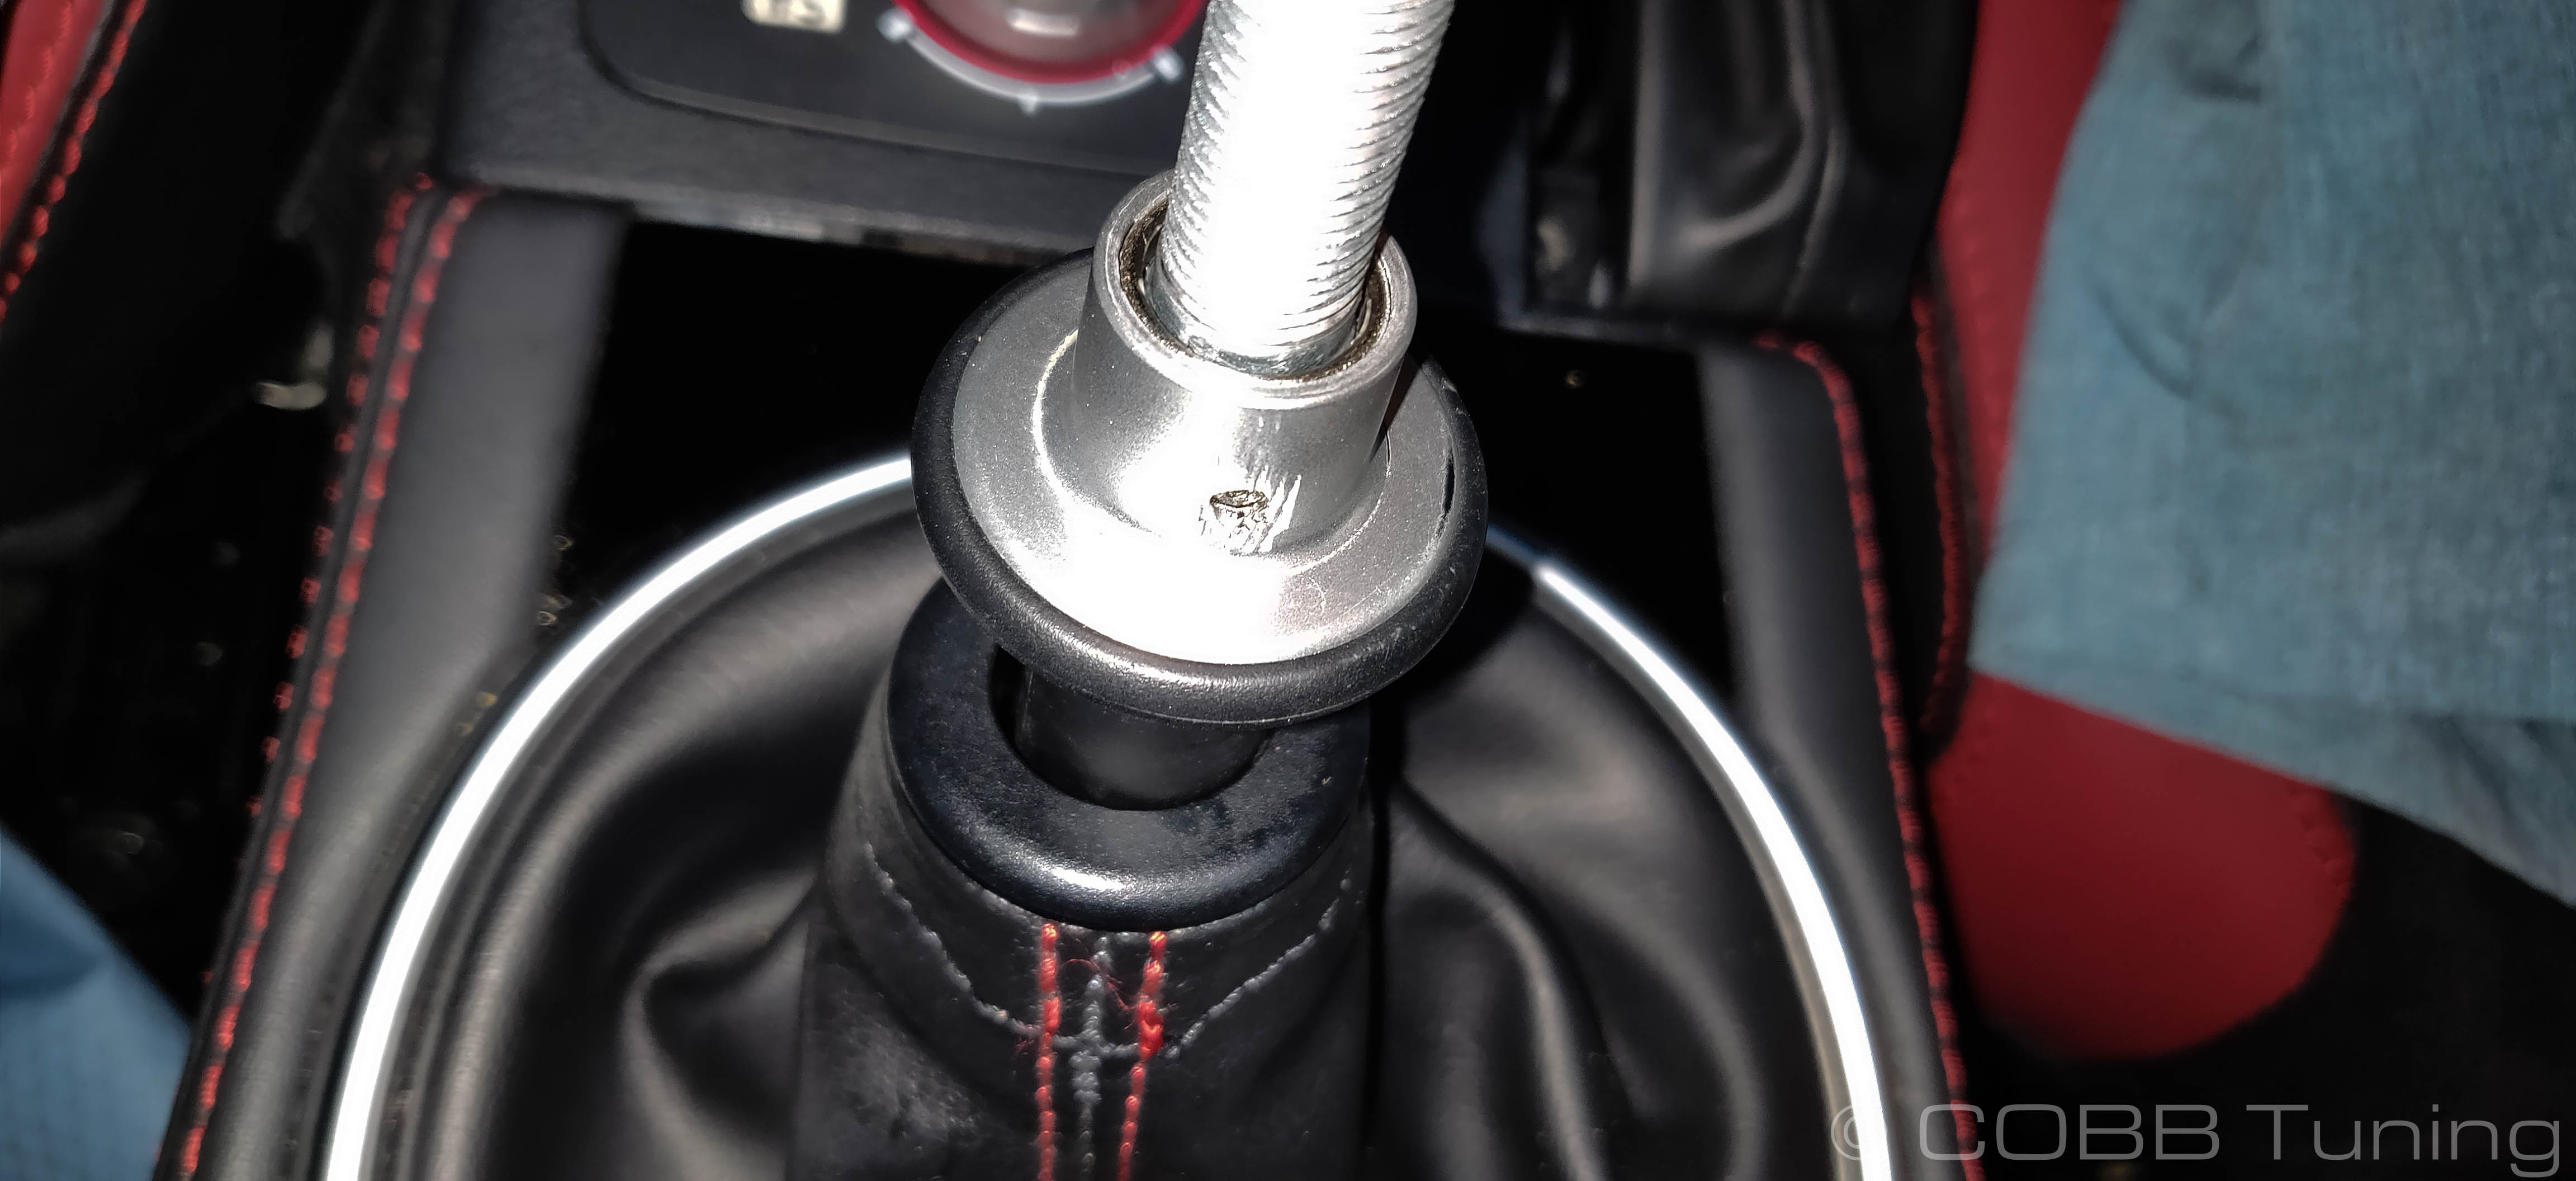
- Reinstall the center console shifter surround trim piece making sure to reattach the wiring harness for the lighter and screw the shift knob back into place making sure it is tight. Make sure the shift boot is reattached around the trim piece.
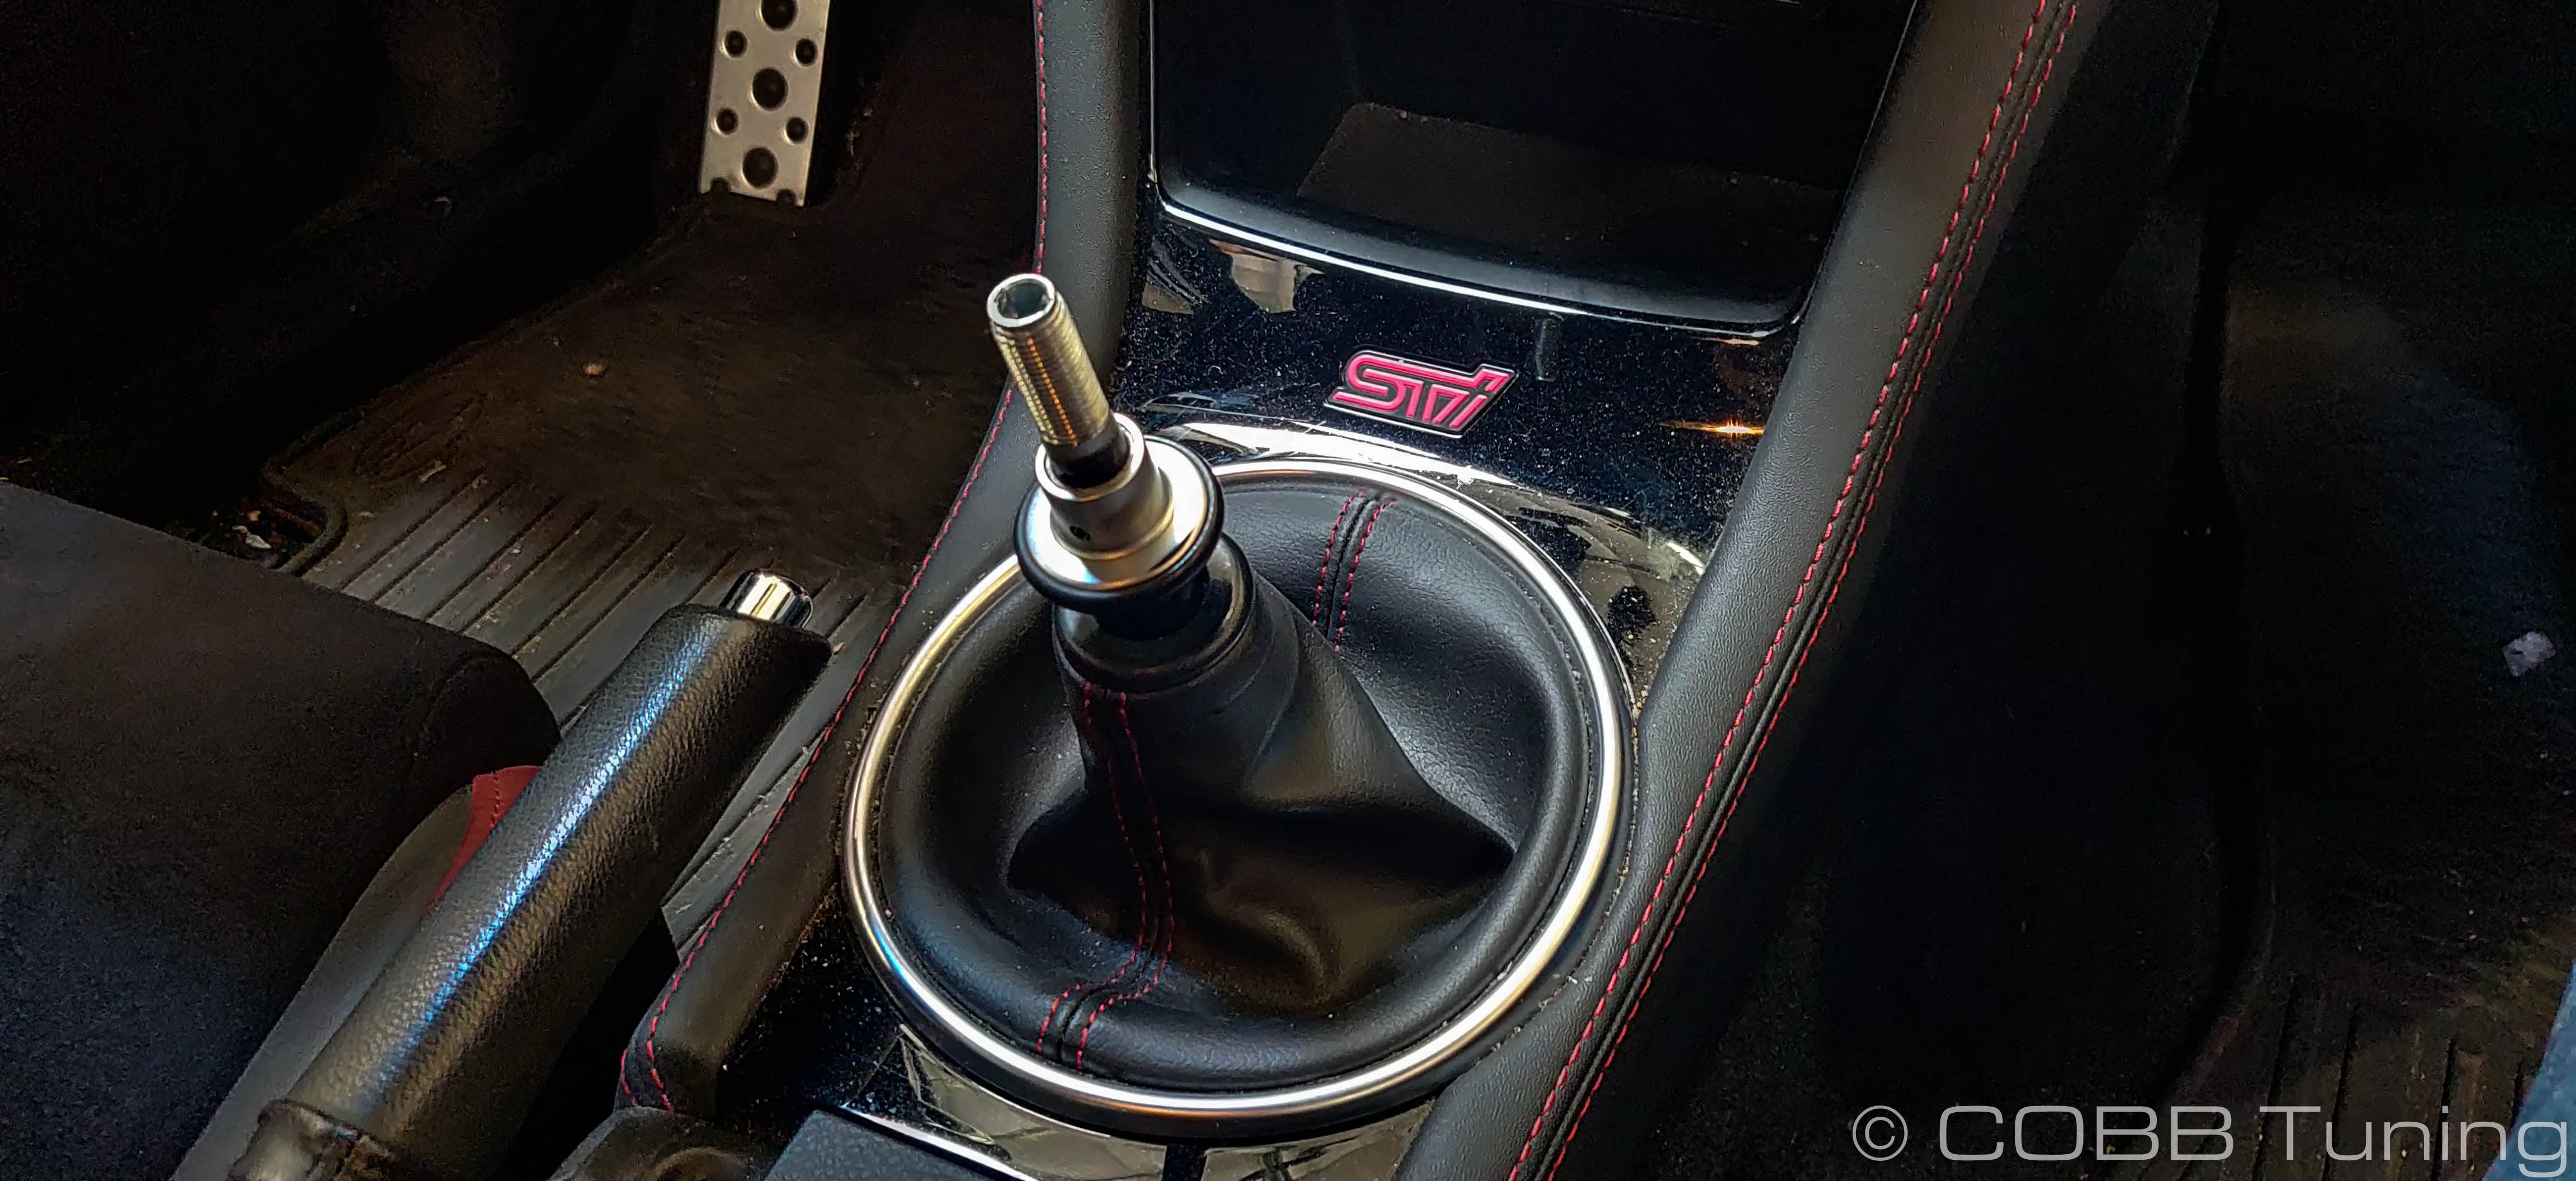
- Congratulations and enjoy your shifting with your new COBB Tuning 6-Speed Double Adjustable Short Throw Shifter. Future adjustments can be made very easily by just removing the center console shifter surround trim piece as the clamp screws are easily accessible.
Links
COBB Product Install Instructions for Subaru Vehicles
Main Installation Instruction Repository for Subaru Parts
Copyright 2023 © COBB Tuning Products LLC. All Rights Reserved. | www.cobbtuning.com