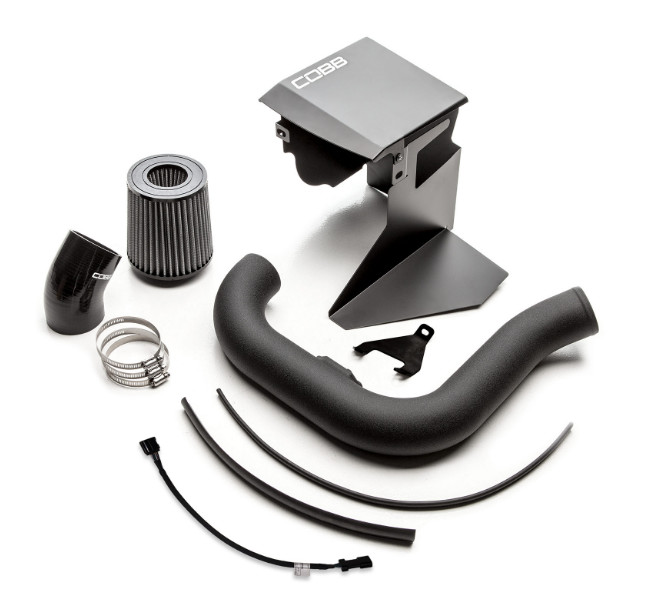
Installation of COBB SF 3” Intake and Filter
1. Begin by checking to make sure you have all the parts needed to install the COBB 3” SF Intake System. If not please contact COBB customer service!
2. Take the 3” intake pipe and place in the correct position in the car, make sure the side where the MAF will be installed is on the left side of the vehicle and is vertical.
3. The next step can be done in two methods. Method “A” is an easier way to connect the intake pipe to the turbo using the 45° coupler only if you have access to a car lift or can jack up the front end
of the car. Method “B” is possible to do but difficult to get the coupler on all the way.
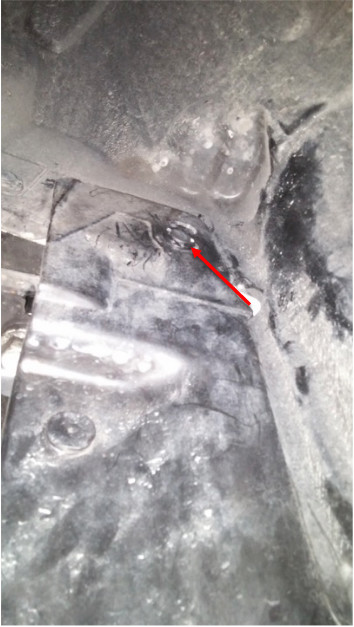
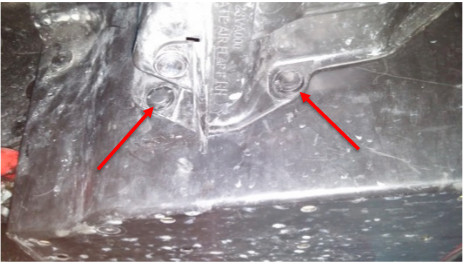
A) 1. If using a car jack, make sure you block the back wheels so the car doesn’t move on you. When looking under your car, take a flathead screwdriver and take off a few push pins so that
you can push the plastic guard away and access the turbo from the bottom.
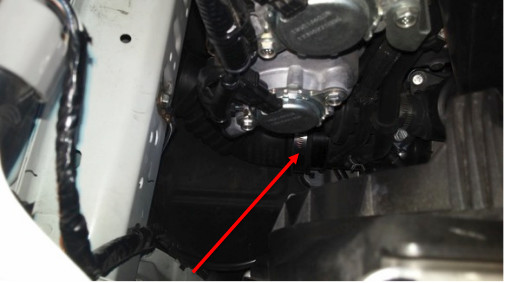
2. Once the push pins are out and you can access the COBB intake pipe and the turbo,place the 45° coupler on the pipe and position at the correct angle where it will also fit onto the turbo.
Once you feel it is in the right position, tighten the clamp down using an 8mm socket or screwdriver.
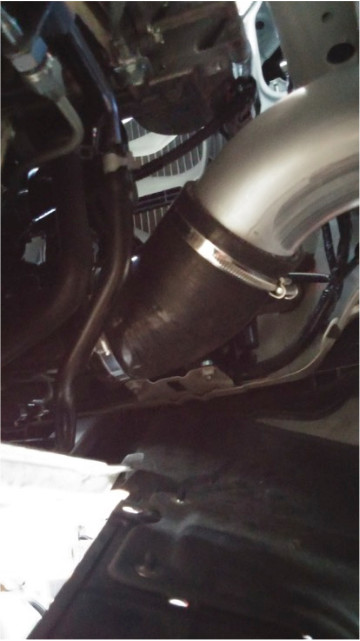
3. Place the open end of the silicon coupler on the turbo. Make sure it is all the way on the turbo and tighten the clap around it using an 8mm socket or screwdriver.
4. Once the pipe is securely attached to the turbo, reinstall each push pin to their original location making sure the guard on the bottom is back in place. The rest of the install can be done
without the car jacked up.
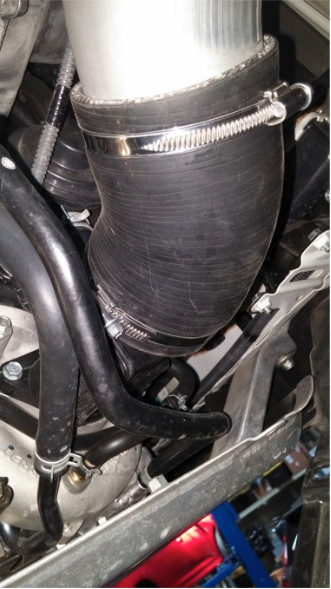
B) 1. From the top of the car and the intake pipe already placed in the car, place the 45° silicon coupler on the end of the pipe. Once the coupler is in the right position to also be able to
connect to the turbo, tighten the clamp using an 8mm ratchet or screwdriver.
2. Once the silicon is secured on the intake tube place the other side of the silicon on the turbo and once secure tighten with an 8mm ratchet or screwdriver.
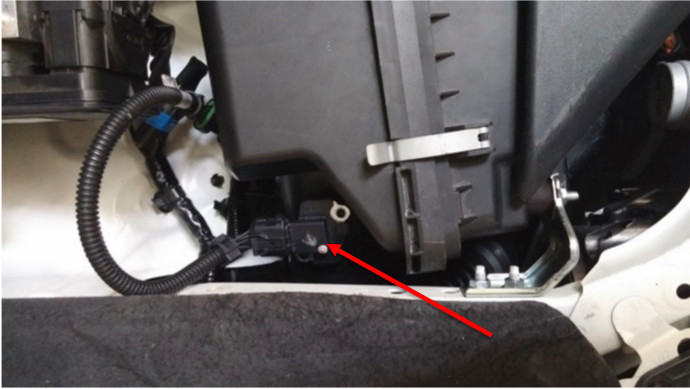
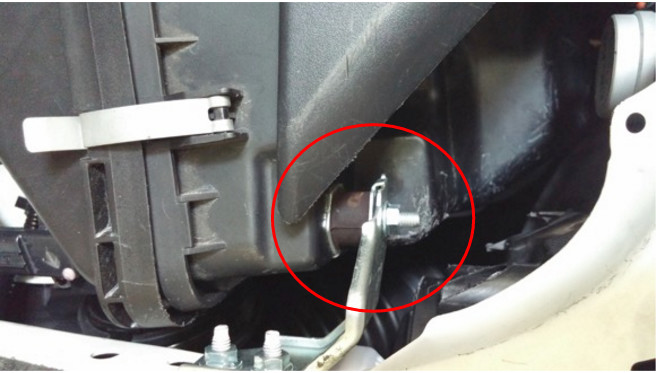
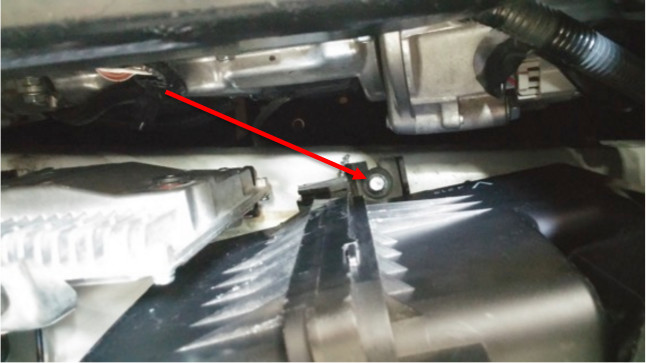
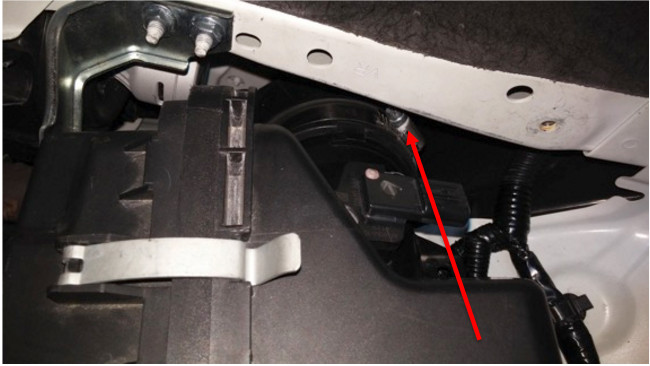
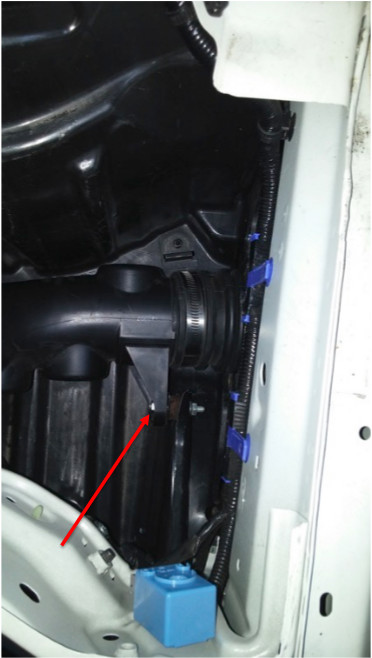
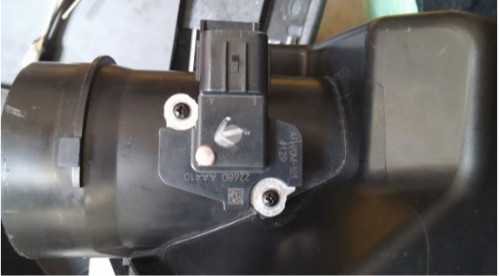
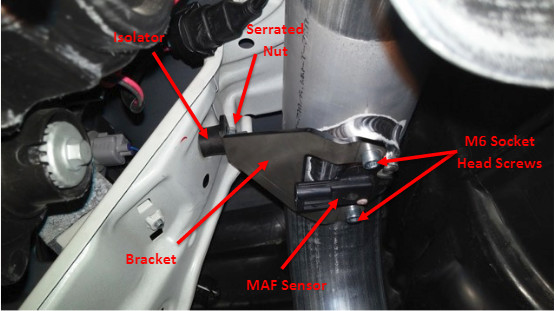
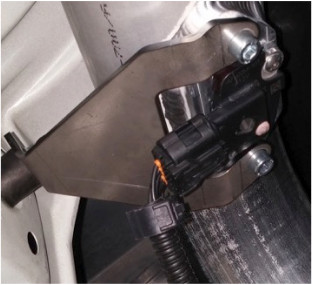
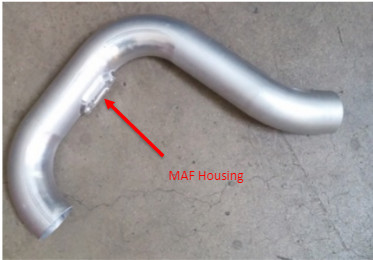
4. Now with the COBB Intake Pipe secured to the turbo, place the stock MAF sensor inside the slot provided on the intake pipe. Make sure the sensor is facing the front of the car. Using the two
M4 x 10mm socket head screws, bolt down the MAF to the pipe. Now take the M6 isolator provided and place in the mounting hole shown. Then place the bracket onto the isolator and thread
on the M6 serrated nut, but do not tighten. Place the other side of the bracket to the mounting holes on the pipe. Thread in both M6 x 12mm socket head screws with a lock washer on each and
tighten. Now tighten the serrated nut securing the bracket to the isolator.
5. With the intake pipe secured to the bracket and the turbo, it is time to plug in the MAF sensor before the filter and airbox is installed. Install the MAF Extension Harness between the sensor and the
factory harness. The MAF sensor should just click right in!
6. Take the Green Filter along with its corresponding worm clamp and place on the end of the intake pipe. ONLY PLACE THE FILTER ABOUT 1 INCH FROM THE END OF THE PIPE. To do this I
recommend measuring an inch from the end of the pipe and marking with a pencil. Then line up the edge of the filter with that mark. Once the filter is on, tighten the worm clamp using an 8mm
ratchet or screwdriver.
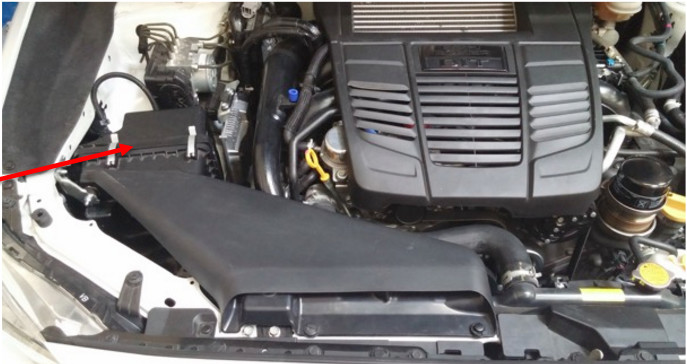
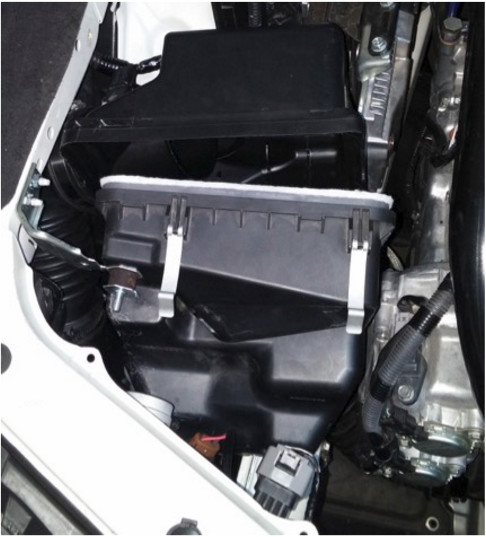
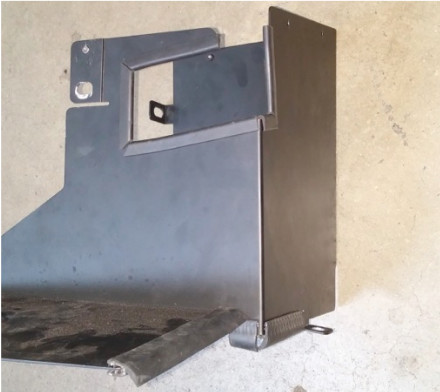
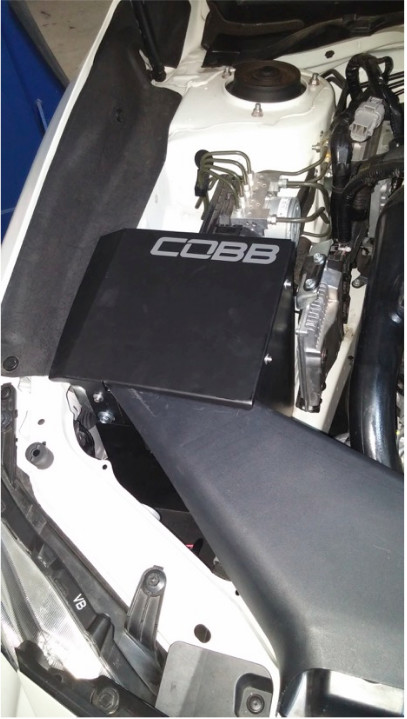
7. With the filter in place and MAF plugged in, you can now begin installing the airbox. Before you do this be sure to place the edge lock and edge trim on the airbox and in the correct position.
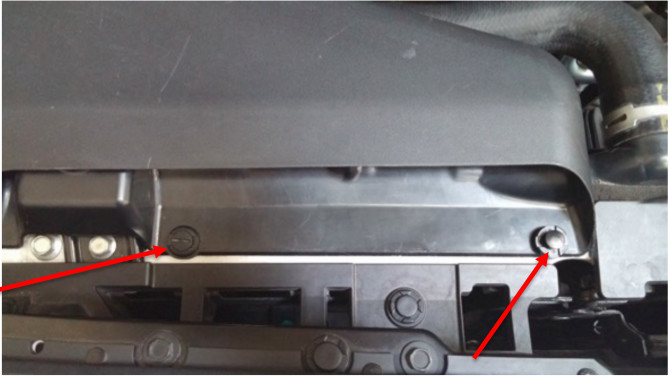
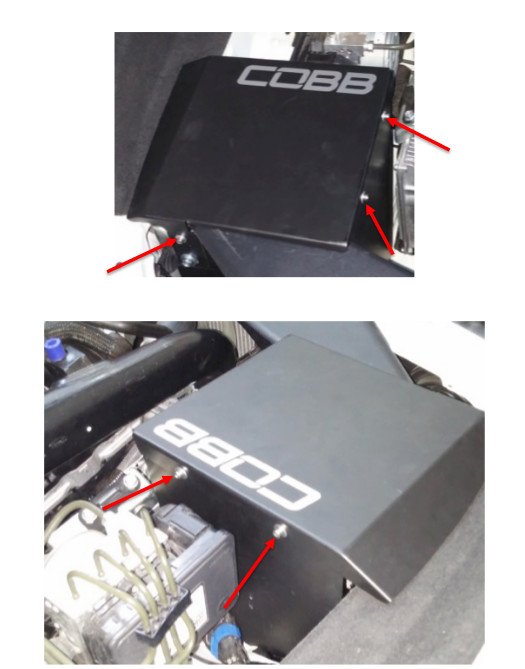
8. Now you can place the airbox in the car. For correct fitment, LEAVE ALL BOLTS LOOSE ONCE THREADED. Once all of the mounting holes are lined up, begin to thread in the following bolt. Make
sure each bolt has first a lock washer followed by a fender washer before threading in. DO NOT TIGHTEN!
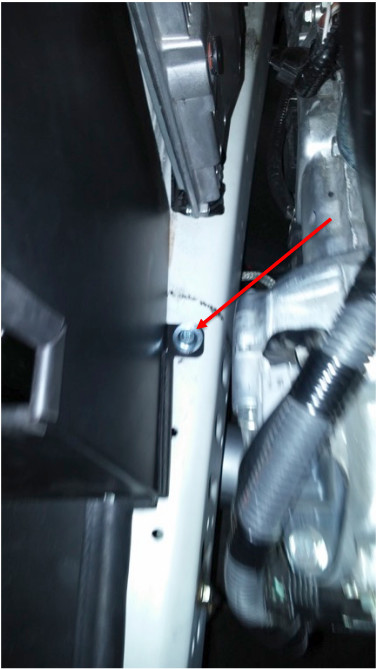
9. Moving on to the other mounting points, begin by placing another M6 x 12mm bolt with a lock washer and a fender washer at the location labelled “1.” DO NOT TIGHTEN! The last mounting
location is located on the stock bracket. For this you first need to insert an M6 x12mm bolt with a fender washer on it. Once it is through the airbox and the bracket hole, place a lock washer
followed by the 6mm nut on the end of the bolt. This mounting location is labelled “2.” DO NOT TIGHTEN! Once ALL bolts are threaded in loosely, use a 10mm ratchet with an extension if
needed to tighten down the bolts. For location “3” you will need to use a 10mm wrench to secure the bolt and use the 10mm ratchet to tighten the bolt.
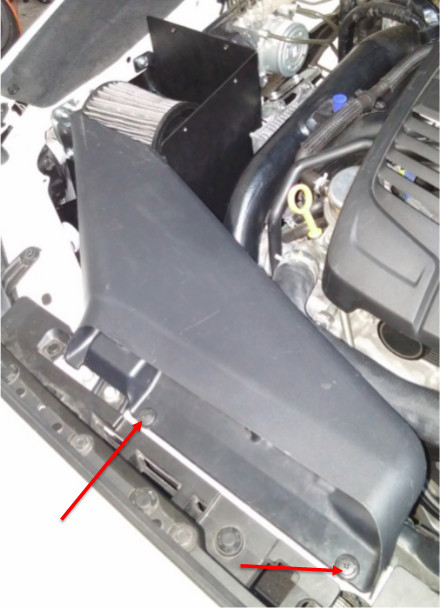
10. Now it is time to reinstall the stock snorkel. First slide the snorkel through the cutout in the COBB airbox. Once the snorkel is in position
,place the stock push pins back into their original position securing the snorkel.
11. Take the airbox lid and place on top of the airbox. Using the five M4 x 10mm button head cap screws and the five 4mm nylon washers, thread in each screw to a mounting hole. Once all screws are
threaded in you may begin to tighten.
12. Finally, double check all steps and make sure all bolts are tight, then turn on your vehicle to ensure all connections are good. Installation of your new COBB 3” SF INTAKE SYSTEM is now
complete!