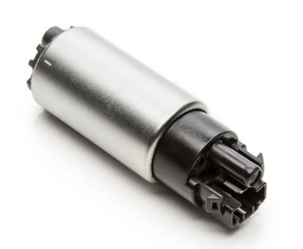
315400 - COBB TUNING HIGH FLOW FUEL PUMP

315400
COBB Tuning High Flow Fuel Pump Install Instructions
2008-2016 Subaru STI, 2008-2014 Subaru WRX, 2005-2009 Legacy GT
Part List
- COBB High Flow Fuel Pump
- Replacement O-ring
- Fuel Pump Filter
- Filter Push-Nut
- Synthetic Grease
Tools Needed
- Phillips Head Screwdriver
- (2) Small Flat Head Screwdrivers
- Pick
- Ratchet
- 8mm Socket
- 6" Extension
- Pliers
- Disposable Baking Pan or Something Similar
Removal of Stock Fuel Pump
- Start by relieving any pressure in the fuel system. It is best if your fuel level is low and the vehicle has been sitting overnight. Alternatively, you can pull the 15A fuel pump fuse and allow your car to run until it dies. At this point it is recommended that you disconnect the negative battery terminal.
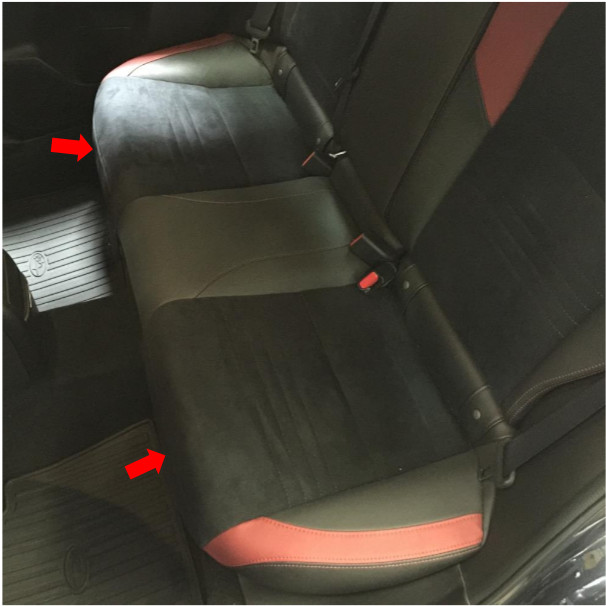
2.Pull the retaining tabs on each side to release the seat cushion. Once both release tabs have been pulled, lift the seat bottom by the center to remove it from the vehicle.
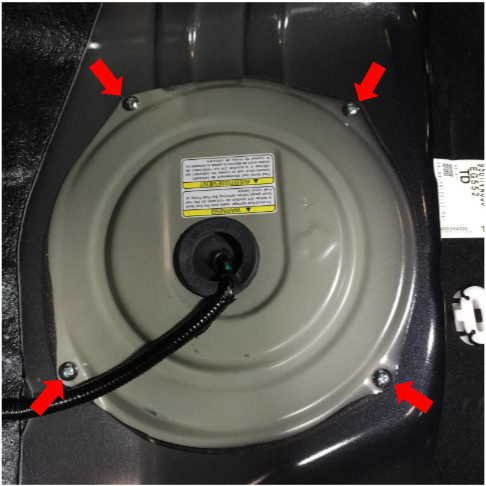
3. With the seat out of the way, the silver fuel cover will be visible. Remove the four Phillips head screws and unplug the wiring harness from the fuel pump assembly. Place the cover out of the way.
4. While not required, the foam gasket can now be removed.
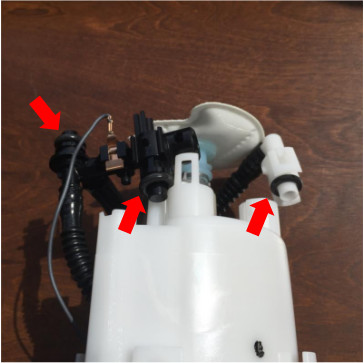
5. The fuel lines can now be disconnected. It is a good idea to place paper towels or rags under each line to absorb any fuel that may leak. Pinch the retaining clips together and slowly pull the line off of the fitting. Remove all three lines the same way.
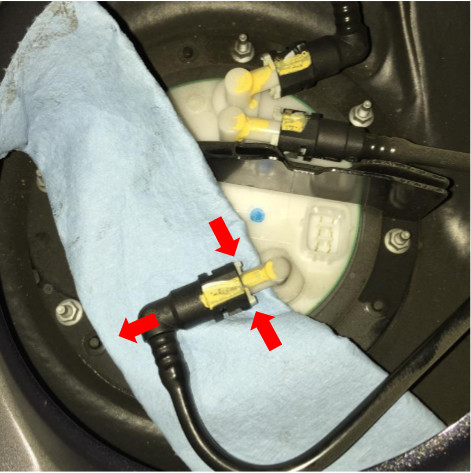
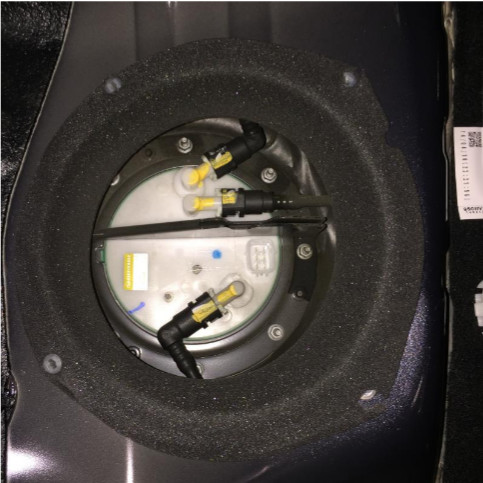
6. Loosen the (8) 8mm nuts that secure the black ring in place. The fuel pump assembly is sprung and will begin to lift as the nuts are loosened. It is recommended that you do not remove all of the nuts completely at first.Make note of the orientation of the black ring and fuel pump assembly for re-installation. While holding the ring down by the center cross brace you can remove the remaining nuts.
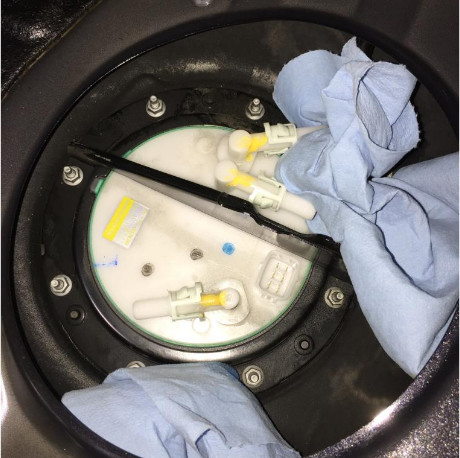
7. At this point, you will need to ready your baking pan, pie dish, or similar receptacle to catch fuel as you remove the assembly. While holding the 3 fuel lines out of the way, carefully lift the assembly out of the tank. Be careful not to damage the fuel level float. You may have to tilt the assembly slightly so that it will clear the edge of the tank. Be careful not to spill any fuel.
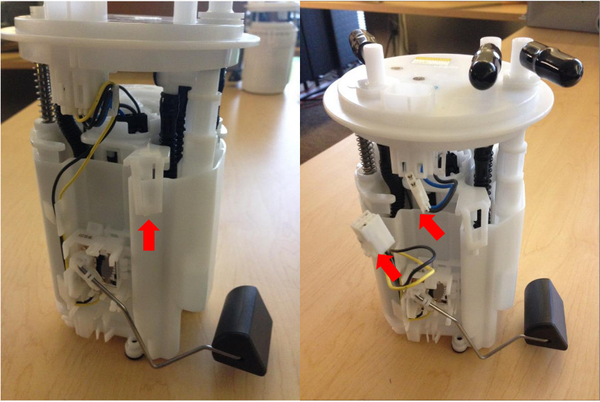
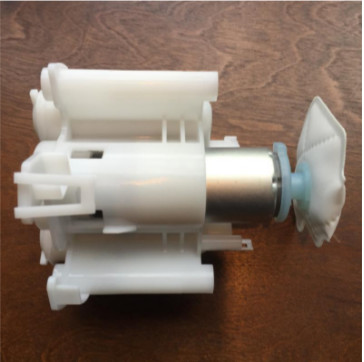
8. Unclip the four tabs around the circumference of the housing using a flat head screwdriver and unplug the harness. Having an additional set of hands will make this step much easier! There will be fuel in the bottom half of the assembly, be careful not to spill it while prying the two halves apart.
9. Disconnect the two plastic plugs securing the fuel lines to the bottom of the assembly. There is one O-ring for each plug. It is likely that the O-rings will not come out with the plug so you will need to remove them using a pick or similar tool. There is also one O-ring in the bottom half of the assembly. Reinstall the O-rings on the male end of each plug.
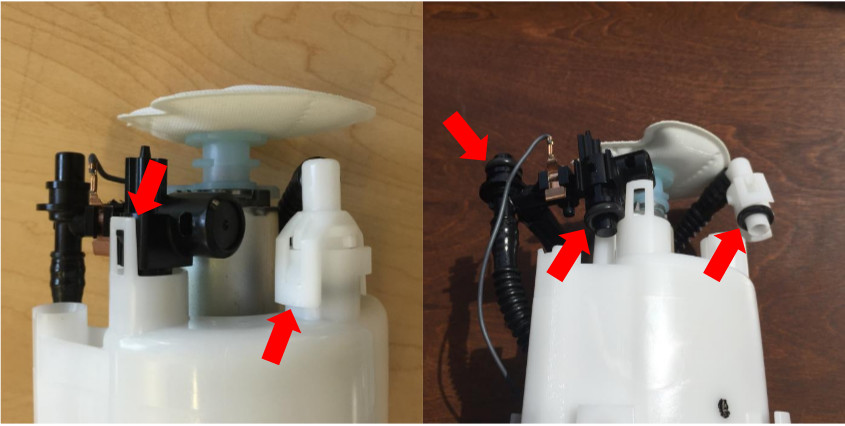
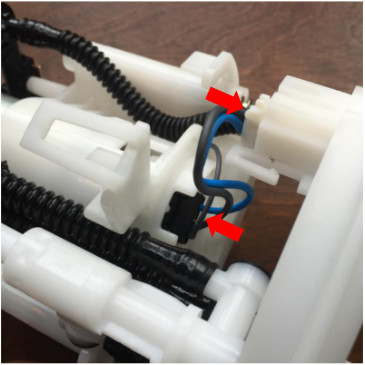
10. Next separate the upper and lower halves by compressing them to reveal the c-clip. Remove the clip with pliers or a flat head screwdriver. DO NOT LOSE THIS CLIP.
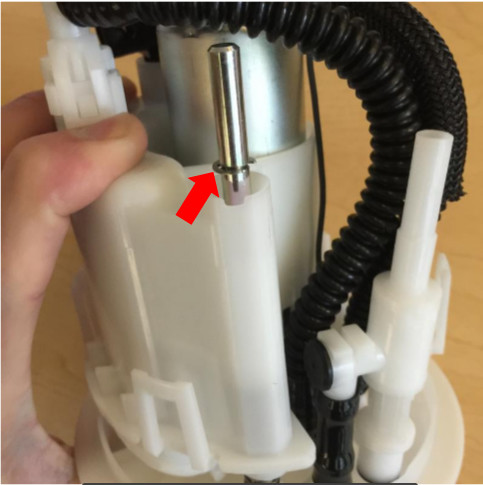
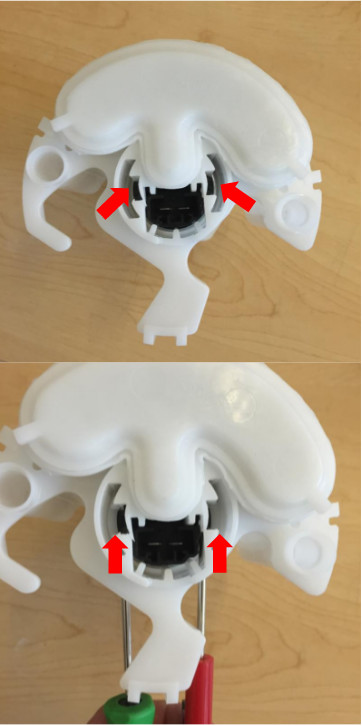
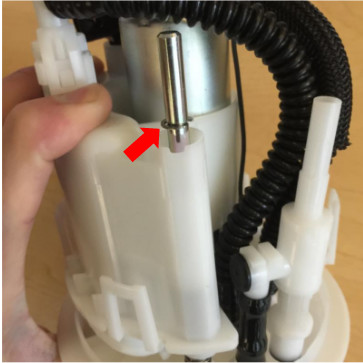
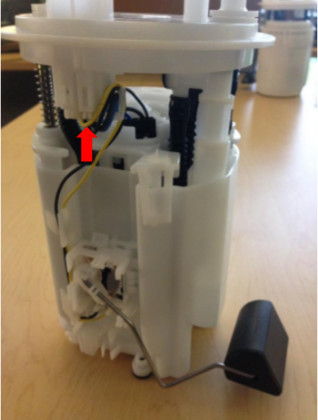
11. To remove the fuel pump from the housing carefully pry the white retaining clips apart using two small flat head screwdrivers. It is easiest to fully insert both screwdrivers at the same time while pulling down on the body of the pump or pushing down on the connector plug from the top.
Installation of the COBB Tuning Fuel Pump
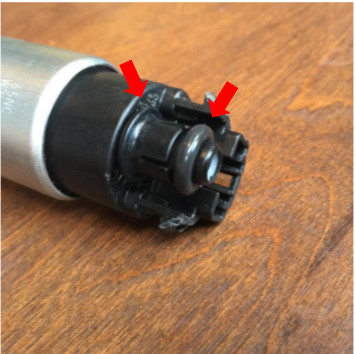
1. Transfer the black plastic spacers from the old pump and install the new O-ring on the outlet of the new pump.
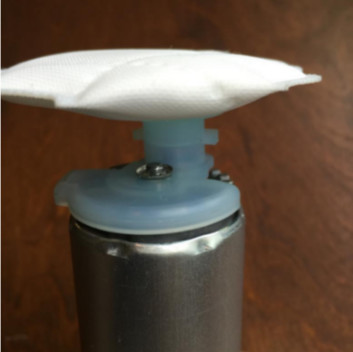
2. Install the new filter on the bottom of the pump. Using a flat-head screwdriver, secure the filter to the pump with the included push-nut. Significant force may be required to fully seat the push-nut.
3. Lightly grease the O-ring and reinstall the pump into the housing. You will hear the clips click as the pump seats.
4. Reattach the pump housing to the sprung top section by sliding it back over the dowels. Reinstall the c-clip in the notch of the longer dowel using pliers if need be.
5. Grease the remaining O-rings and reconnect the lines to the bottom of the assembly.
Links
COBB Product Install Instructions for Subaru Vehicles
Main Installation Instruction Repository for Subaru Parts
Calibration Map Notes for Subaru Vehicles
Link to Subaru Map Notes to see what map you should be on given the parts you've added
COBB Customer Support Web Support and Tech Articles: COBB Tuning Customer Support Center Email: support@cobbtuning.com Phone support available 9am to 6pm Monday-Thursday. 9am to 4pm Friday (CST) 866.922.3059 return to www.cobbtuning.comContact Us:
Copyright 2023 © COBB Tuning Products LLC. All Rights Reserved. | www.cobbtuning.com