971760 - Mazdaspeed3 Sport Springs [Discontinued]

971760 - Mazdaspeed Sport Springs
Mazdaspeed3 2007-2012
Congratulations on your purchase of the COBB Tuning Mazdaspeed3 Sport Springs! The following instructions will assist you through the installation process. Please read them BEFORE beginning the install to familiarize yourself with the steps and tools needed. If you feel you cannot properly perform this installation, we HIGHLY recommend you take the vehicle to a qualified and experienced automotive technician.
Table of Contents
Parts List
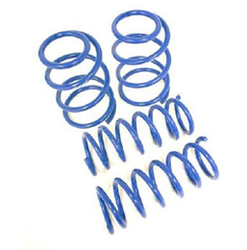
- Front and Rear Sport Springs
Tools Needed
- Phillips head screwdriver
- Flathead screwdriver
3/8" ratchet
3/8" 14mm socket
- 3/8" 17mm socket
3/8" 5mm Hex Key or Hex Socket
3/8" 12" extension
3/8" 6" extension
- M5 Allen Key
- M6 Allen Key
- 14mm combination wrench
- 17mm combination wrench
Deadblow Hammer
- Torque Wrench
Front Spring Installation
- Securely raise the car on jack stands or a lift in a flat level area.
- Remove the wheels that you will be working on. We recommend doing one side at a time so you have a reference on how to put things back together.
- Spray some penetrating lubricant into the area between the strut and the spindle. This will make removal much more simple later.
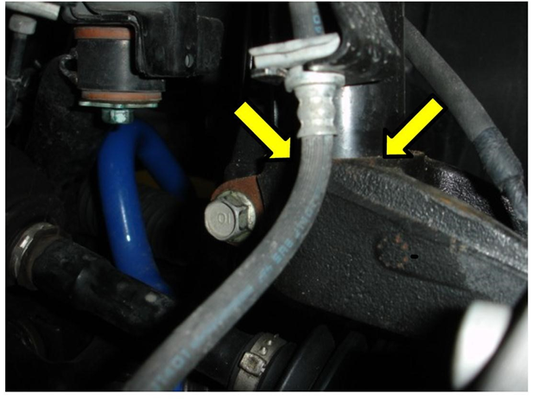
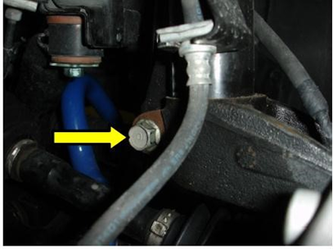
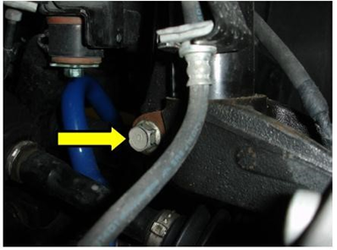
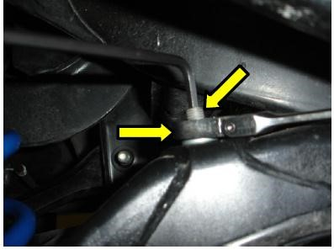
- Remove the 14mm nut that holds on the ABS sensor wire bracket and swaybar endlink. You will have to use the 5mm Allen head wrench to keep the stud in the endlink from rotating.
- Unclip the wire from the ABS wheel speed sensor and move it and the endlink to the side so that they do not get damaged later.
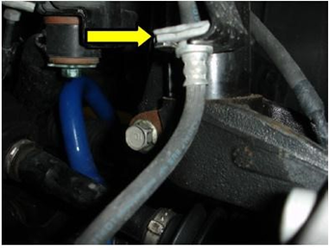
- Use a small flat head screwdriver to remove the clip holding the brake line on to the strut.
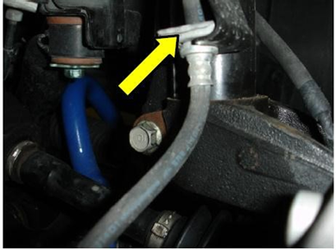
- Make sure the endlink and ABS sensor wire are removed aside and out of harm's way.
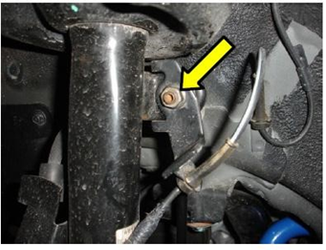
- Use a 17mm wrench to remove the bolt retaining the strut to the spindle. It must be completely removed to release the spindle from the strut.
- At this point it would be helpful to make a mark at the point where the top of the spindle is on the strut. This will help you determine if you have the strut inserted all the way to the mark during reinstallation.
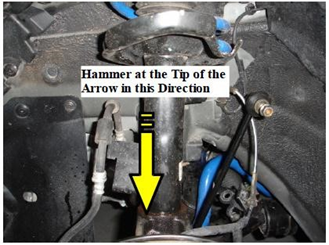
- Using a deadblow mallet, separate the strut from the spindle. Make sure that anything that can be damaged has been set out of the way. The best area to apply force with your mallet or hammer is the area shown below. THis may take quite a bit of force, be careful not to let the spindle hit anything as it comes down when it's released from the strut.
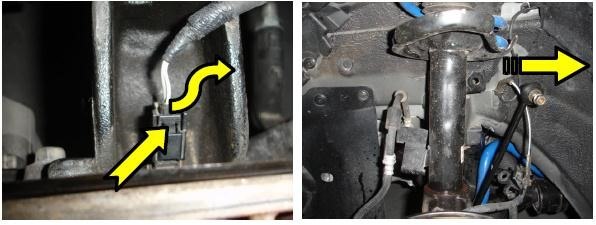
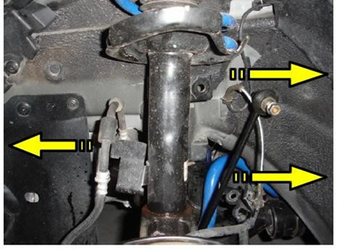
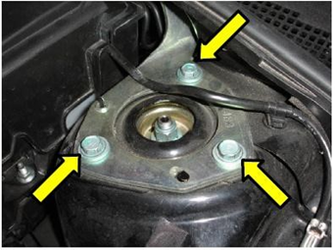
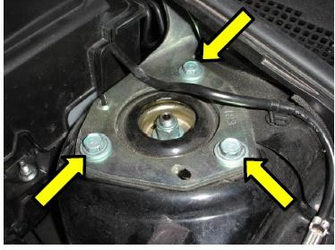
- From the engine bay, remove the 3 bolts holding the top of the strut assembly to the chassis using a 14mm wrench of socket.
- Remove the strut assembly from the chassis. Be careful not to damage anything such as the brake line, abs sensor wire, or the fender itself.
- Place the strut assembly on a spring compressor and compress the spring. Please do so using a good spring compressor and know how to use it properly to avoid injury and or damage.
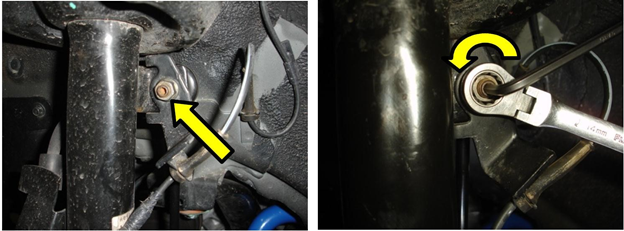
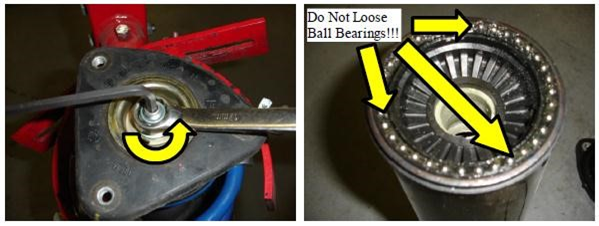
- With the spring properly compressed, use a 17mm boxed end wrench and a 6mm allen head wrench to remove the nut holding the strut assembly compressed. Place the top hat/bump stop/shaft cover assembly aside with the top up and the top hat in place if possible. Try not to separate the assembly. Be careful with the assembly as the top hat, bump stop and shaft cover assembly has loose bearings in it, make sure not to install them dirty or otherwise lose or damage them.
- Remove the spring from the strut.
- Set the COBB springs into the strut oriented with the end of the bottom coil int it's receiver groove.
- Place the strut assembly on a spring compressor and compress the spring. Please do so using a good spring compressor and know how to use it properly to avoid injury and or damage.
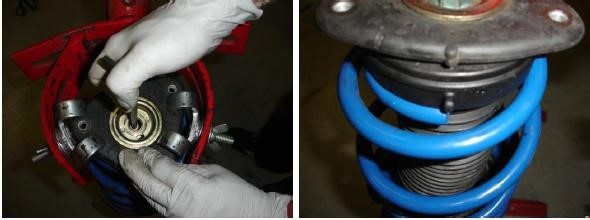
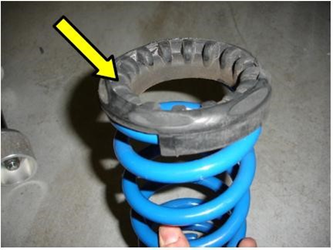
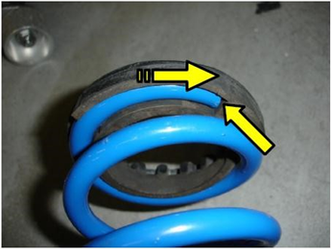
- Taking care not to separate the pieces, place the top hat/bump stop/shaft cover assembly over the top portion of the shaft. Guide the threaded portion of the shaft up through the hole in the top hat. Yo ucan use your Allen wrench to help guide the shaft into the hat. Line the top end of the spring with the alignment mark on the rubber and top hat as seen in the picture before torquing down the top to 60 ft/lbs of torque.
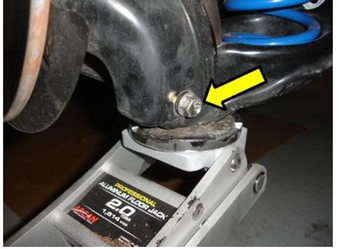
- Place the strut assembly back into position on the car and install the three top hats bolt torqued to 34 ft/lbs.
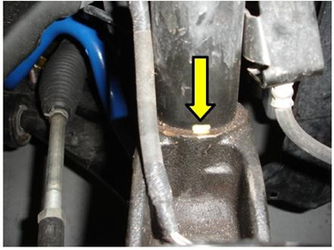
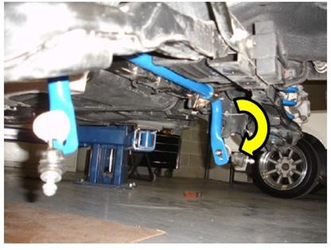
- Place the bottom of the strut into the receiver in the spindle. Align the tab in the back of the strut to the groove in the spindle as seen in the picture below. You may have to rotate the strut to get the tab and the groove to line up and use a jack to raise the spindle over the strut. Make sure that the strut slides all the way into the spindle with this tab in the groove.

- Reinstall the 17mm bolt retaining the strut to the spindle. Torque it down to 70 ft/lbs
- Reinstall the brake line to the tab on the strut along with it's retention clip.
- Reinstall the endlinke and the ABS line bracket. Tighten the nut to 30ft/lbs. You may have to use the 5mm Allen head wrench to keep the stud in the endlink from spinning.
- Recheck the torque on all the nuts and bolts you were loosened, and then repeat on the opposite side.
Rear Springs
- Securely raise the car on jack stands or a lift in a flat level area.
- Remove the wheels that you will be working on. We recommend doing one side at a time so you have a reference on how to put things back together.
- Disconnect both rear sway bar end links from the rear lower control arms using a 14mm box end wrench and a 5mm allen wrench to keep the stud from spinning.
- Swing the swaybar down and out of the way.
- Remove the 17mm bolt that holds the lower control arm to the spindle. Make sure that you are clear of the area as possible as the control arm may swing down. You may want to put a jack under the arm, but isn't likely to move unexpectedly.
- Swing the lower control arm down until the spring can easily be removed from the spring cups. This may take some force with a rubber or deadblow mallet.
- Remove the upper spring perch from the factory spring and put it onto the COBB springs. Make sure that the end of the spring is all the way up to the stop on the spring perch as shown.
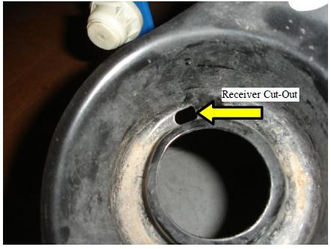
- Reinstall the upper part of the spring into the cup on the chassis and swing the lower control arm up making sure that the lower part of the spring is properly seated in the cup and rotated so that the end of the spring is in the receiver cutout in the cup that is shown below.
- Reinstall the bolt that holds the lower control arm to the spindle, you may want to use a jack to help hold it up and in position, then make sure to torque it down to 70 ft/lbs
- Swing the rear swaybar back into position and make sure that both of the endlinks slide up into their holes in the control arm and torque to 32 ft/lbs
- Recheck the torque on all of the bolts and nuts that were removed or loosened during the installation.
COBB Customer Support Web Support and Tech Articles: COBB Tuning Customer Support Center Email: support@cobbtuning.com Phone support available 9am to 6pm Monday-Thursday. 9am to 4pm Friday (CST) 866.922.3059 return to www.cobbtuning.comContact Us:
Copyright 2023 © COBB Tuning Products LLC. All Rights Reserved. | www.cobbtuning.com