271316 - Mazdaspeed3 Short Shift Lever [Discontinued]

271316 - Mazdaspeed3 Short Shift Lever
Mazdaspeed3 2007-2009

Congratulations on your purchase of the COBB Tuning Double Adjustable Short Shift Lever! The following instructions will assist you through the installation process. Please read them BEFORE beginning the install to familiarize yourself with the steps and tools needed. If you feel you cannot properly perform this installation, we HIGHLY recommend you take the vehicle to a qualified and experienced automotive technician.
Table of Contents
Parts List
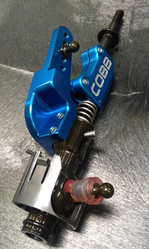
- Double Adjustable Shifter (pre-assembled)
Tools Needed
- Phillips head screwdriver
- Flathead screwdriver
3/8" ratchet
3/8" 8mm socket
3/8" T20 Torx Bit
3/8" 12" extension
3/8" 6" extension
- 10mm combination wrench
- Trim removal tool
Pick
Needlenose pliers
- 3 Paper clips
- Long zip tie
Interior Removal
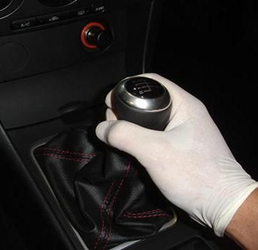
- Start by removing the shift knob.
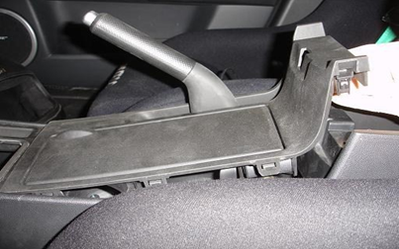
- Now open the lid of the center console and pull up on the back of the center trim in order to remove the cup holder portion of the center console.
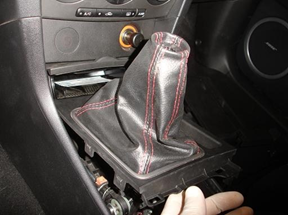
- Now lift the shifter trim and boot up and out
- Remove the change holder and power outlet trim by taking out the two 8mm bolts from the lower portion and the trim should pop out. You can either disconnect all four connectors from the power outlet trim to remove it completely, or just leave it hanging next to the lower portion of the console.
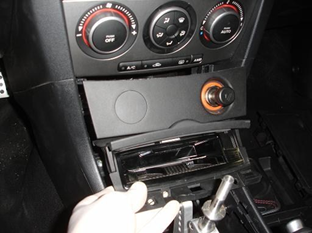
- You will now need to disconnect the big white foam covered connector in order to remove the lower portion of the center console in the next step.
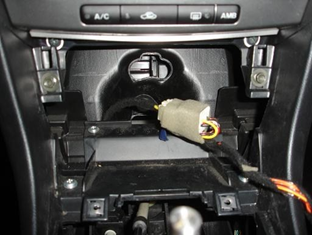
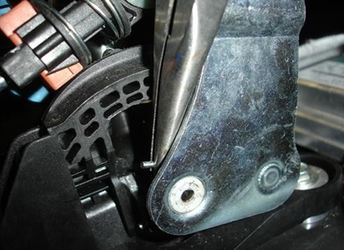
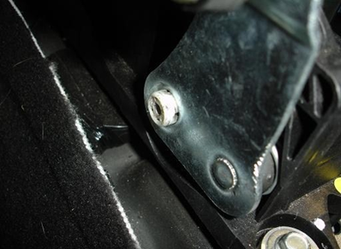
- To remove the lower portion of the console start by removing the two 8mm bolts located behind the out let trim.
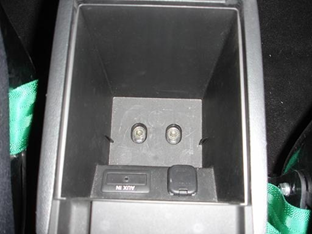
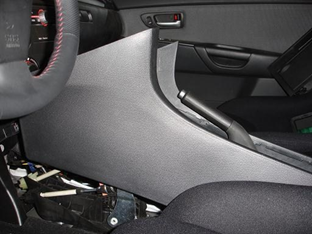
- Now open the lid on the center console and remove the rubber mat at the bottom to find the two 9mm bolts you'll need to remove next. Once removed you can pull the entire console up and out of the car.
Shifter Removal
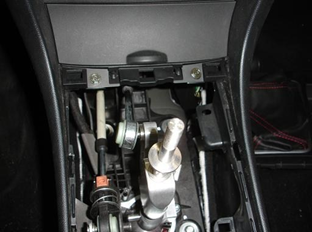
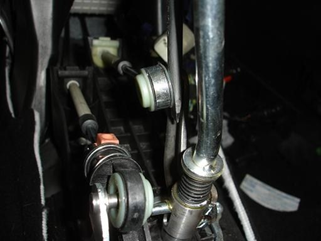
- Remove the shift linkage cable from the shifter by inserting a screwdriver or trim tool in between the plastic cup on hte linkage and the metal tab on the shifter.
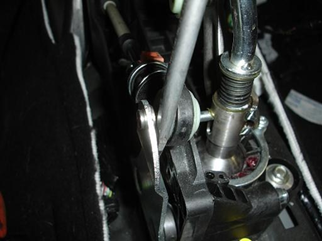
- Now go ahead and remove the other linkage cable in the same way.
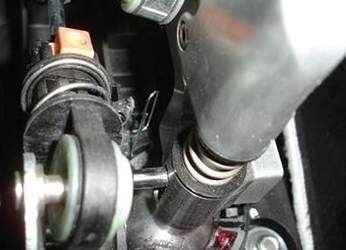
- With both linkages removed, you will now need to remove the retaining ring holding the lower plastic portion of the shifter in place. To do so use your T20 Torx bit , once loosened remove the ring and set them both aside to be reinstalled later.
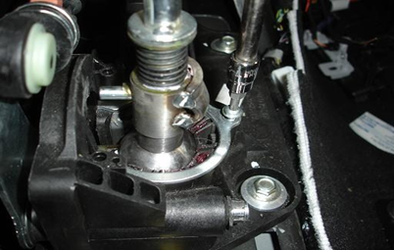
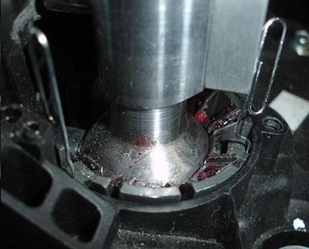
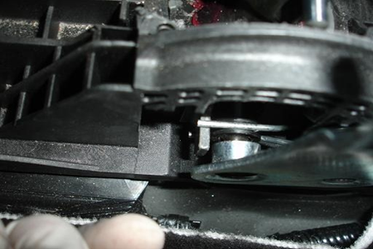
- The cup at the base of the shifter is held in by three plastic retaining clips. To remove them, depress the clips using a screwdriver or pick and move them inwards until yo ucan insert a paperclip between the tab and the sides of the shifter base to keep the clips in place until you can get all of them released.
- For the next step you'll pull up on the return spring on the side of the shifter to allow the shifter to be pulled up and out. You can either do so with the help of a friend and some needlenose pliers
Or you can do this by holding it up with a piece of wire or a zip tie.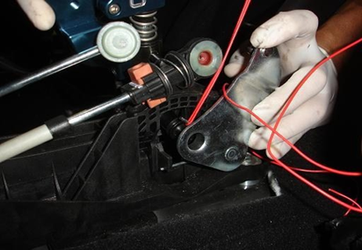
COBB Double Adjustable Shifter Installation
- With the shifter removed you will need to transfer over the o-ring, plastic cup and rubber retainer groove from the factory shifter to the COBB one. The small plastic white cup on the side of the shifter will also need to be removed but don't install it on the COBB unit quite yet.
- You will also want to use an all-purpose grease (preferably silicon based) to lube the large ball that sits in the plastic cup in addition to the smaller linkage balls that sit in the smaller linkage cups.
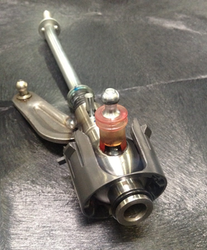
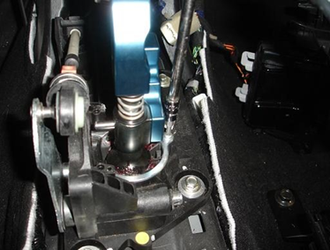
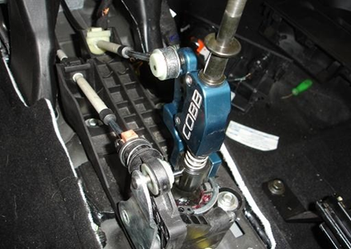
- Using the same spring/zip tie method utilized in removing the factory shifter, install the new shifter and make sure the spring is sitting properly in the groove of the COBB shifter as shown below. It should sit in the groove on the top and bottom of the rubber fitting.
- Once the shifter is sitting in the proper location you can place the smaller plastic cup inside the lower side of the shift linkage and lightly tap it in with a small hammer. It should sit flush once it's fully seated.
- You may now reinstall the metal retaining ring on top of the large plastic cup and tighten the T20 Torx screw.
- Reinstall both of the smaller plastic cups on the ends of the two shift linkage cables onto the balls on the shifter by pressing them on until they pop into place.
Shifter Adjustment
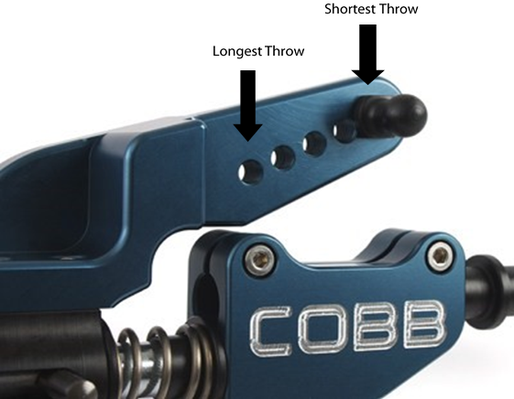
- In order to adjust the throw of the COBB short shifter, use a 10mm open ended wrench to remove the ball from the shifter and insert it into one of the provided holes. The lowest hole is the longest throw (~10% longer than stock) and the highest hole is the shortest (~30% more than stock). Shorter throws may require more effort and show some "notchiness" when changing gears due to the reduction in leverage. This is normal and can be adjusted somewhat by adjusting the knob height as shown in stage 3. The linkage ball should be tight but take care not to overtighten as it may cause damage.
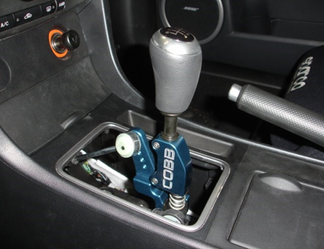
- Temporarily reinstall the knob so that you have a good idea of how everything feels when you are driving.
- The knob height is adjusted by loosening the two 3mm allen head bolts and sliding the shaft up or down in the clamp. Make sure not to go any higher than the groove on the lower part of the shaft. Tighten the screws securely but be careful to not over tighten them as it isn't necessary.
- With the shifter adjusted to your preference, remove the shift knob so that the boot can be reinstalled in step 5
- Reinstall the center console and the boot in the reverse order of what it was removed.
- Enjoy the more precise and shorter throws of your COBB Short Throw Shifter
COBB Customer Support Web Support and Tech Articles: COBB Tuning Customer Support Center Email: support@cobbtuning.com Phone support available 9am to 6pm Monday-Thursday. 9am to 4pm Friday (CST) 866.922.3059 return to www.cobbtuning.comContact Us:
Copyright 2023 © COBB Tuning Products LLC. All Rights Reserved. | www.cobbtuning.com