822600 - Air/ Oil Separator WRX STI 17-18 [Deprecated]
- Brandyn Mowat

826600 - VA Air Oil Separator
Subaru WRX STI 2017 - 2019
Congratulations on your purchase of the COBB Tuning Air Oil Separator! The following instructions will assist you through the installation process. Please read them BEFORE beginning the install to familiarize yourself with the steps and tools needed. If you feel you cannot properly perform this installation, we HIGHLY recommend you take the vehicle to a qualified and experienced automotive technician.
Table of Contents
A Special Note on Hose Installation
When installing the hoses and lines to and from the COBB Air Oil Separator, take special care to route them away from any sources of heat, ensure that they are free of kinks or obstructions, and secure them properly with zip ties to prevent movement and chafing. Additionally keep in mind that the engine will move slightly so leave a small amount of play in the lines where it goes up to the AOS to allow for some movement without causing damage or stress on the lines.
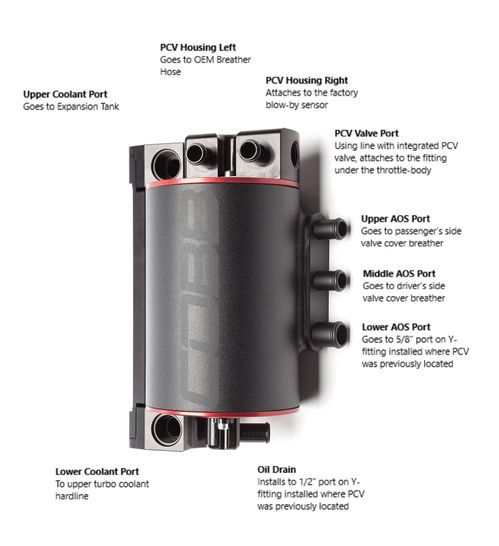
Quick Reference for Hose Attachment
IAG AOS Installation Instructions
17-18 WRX STI
COBB AOS Coolant Bleeding Addendum
- Now it's time to bleed the coolant. Ideally you won't have lost a lot of coolant, however this is an important step and can get a little bit time consuming, however any pockets of air can cause issues with overheating or incorrect coolant temperature settings.
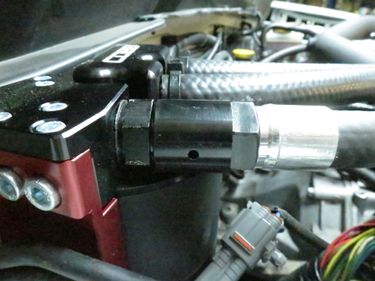
- The Upper Coolant hose on all of the COBB AOS units contain a small bleeder valve to make this easier. With the car cold but running, use a wrench to hold the fitting closer to the AOS and another to loosen the outer fitting which should allow coolant air to come out of the weep hole. Do this until no more air comes out.
- While not necessary bleeding the entire cooling system can ensure no air is still in the system. Using a coolant bleeding funnel like this one can make things a whole lot easier as they come with fittings to mount directly to the cap and allow the system to bleed and fill itself at the same time. (Shown on an STI but the process will be identical using a radiator cap)
Keep in mind that any coolant in the funnel will get just as hot as the rest of the coolant in the engine so use caution to avoid burns.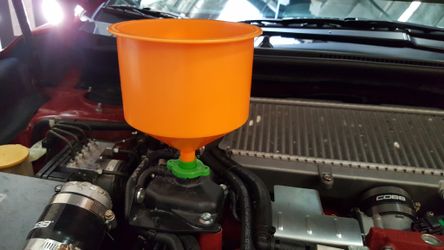
- With the system full turn on the vehicle and crank up the heater all the way. By having the heater on the coolant can circulate through the heater core which will remove air bubbles from that portion of the system. Make sure to keep an eye on your coolant levels at the tank or in the funnel so that the car doesn't add any more bubbles into the system.
- Once the coolant stops bubbling you're all done with the bleeding! This can take a while (it took around 30 minutes on our car). While it's bleeding make sure to keep an eye on the coolant temperature in order to make sure your car isn't overheating and that the fans are cycling on and off properly.
While idling the radiator will got very hot quickly, be careful to avoid burns.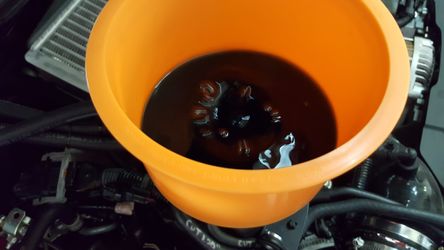
- Place the plug securely down in the funnel and remove it from the car. Put remaining coolant back in the bottle.
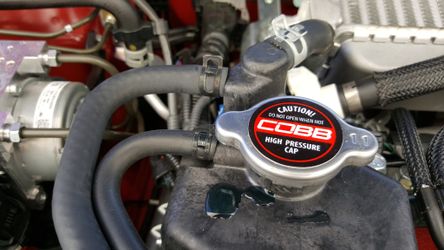
- Reinstall the Coolant reservoir cap.
Customer Support
Phone support available 9am to 6pm Monday-Thursday. 9am to 4pm Friday (CST)
866.922.3059
Related content
Copyright 2025 © COBB Tuning Products LLC. All Rights Reserved. | www.cobbtuning.com