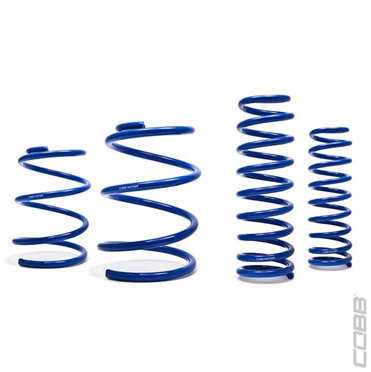
952760 - Sport Spring Kit[discontinued]

952760 – Sport Spring Kit
Mitsubishi Evolution X 2008 - 2013
Congratulations on your purchase of the COBB Tuning Sport Spring Kit for Mitsubishi Evolution X! The following instructions will assist you through the installation process. Please read them BEFORE beginning the install to familiarize yourself with the steps and tools needed. If you feel you cannot properly perform this installation, we HIGHLY recommend you take the vehicle to a qualified and experienced automotive technician.
IMPORTANT! Installing this kit will require custom tuning or utilizing an appropriate Stage Power Package map if you have a matching mechanical configuration. Please consult with COBB or an authorized ProTuner in your area if you have any questions!
Table of Contents
Parts List
- (2) COBB Front Sport Springs
- (2) COBB Rear Sport Springs
Tools Needed
- Phillips head screwdriver
- Flathead screwdriver
3/8" ratchet
3/8" 12mm socket
3/8" 14mm socket
3/8" 12mm deep socket
- 3/8" 14mm deep socket
3/8" 17mm deep socket
- 3/8" 19mm deep socket
- 12mm combination wrench
- 14mm combination wrench
- 17mm combination wrench
- 19mm combination wrench
- Coil Spring Compressor
Front Spring Replacement.
- On a level, flat area, raise the vehicle up on jack stands or a lift and removed the front wheels.
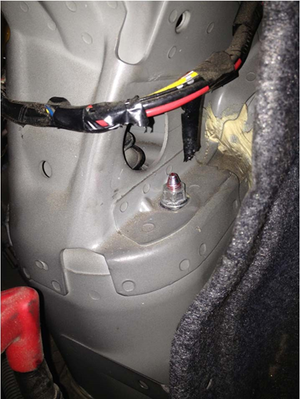
- Using a 12mm wrench or socket, remove the 12mm nut that holds the brake line assembly to the back of the strut. Pull the plastic guide that holds the ABS sensor wire in place away from the strut. Move it out of the way.
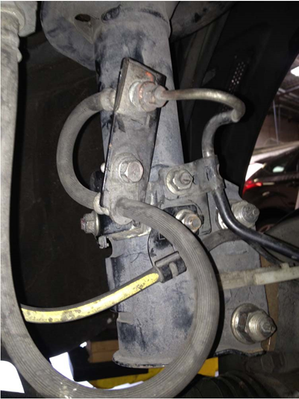
- Before removing any part of the factory suspension, we recommend marking the camber bolts in order to return the car to approximately the same camber settings when the springs are reinstalled. Mark the top bolt on the bolt-head side (not the nut) and its relative position on the strut. We still recommend having the car professionally aligned after the installation is complete to assure that your car is within proper specifications. With the brake line bracket and plastic guide removed, use a 19mm socket and a 19mm wrench to remove the lower stud and camber bolts from the car. Remember which one went where as they are different. The bolt with the flats on the flange goes on the top.
- To protect your axle boot, place an old magazine or some cardboard between the bottom of the strut and your axle boot. This ensures no torn boots when you remove the strut in the next step.

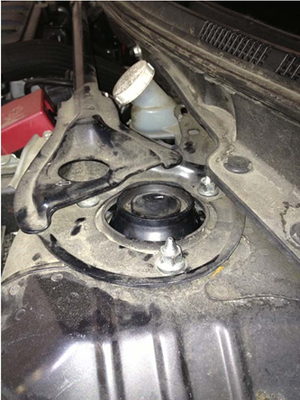
- Now, move to the top of the strut under the hood. First, remove the black center cap to expose the 17mm pillow ball nut. You’ll want to loosen it with a 17mm socket. DO NOT remove it all the way. You just want to loosen it 4-5 turns to get it started. Next, there are three (3) 14mm nuts that secure the top of the strut to the car. You’ll need a 14mm deep socket for one under the strut tower brace and a 14mm short socket for the one under the cowl. Careful, when these are all removed, the strut is free to fall. We recommend removing two nuts and loosening one until it’s almost removed. This way, you can hold the strut in the wheel well with one hand and remove the final nut with the other. Remove the strut from the vehicle once it is loose.
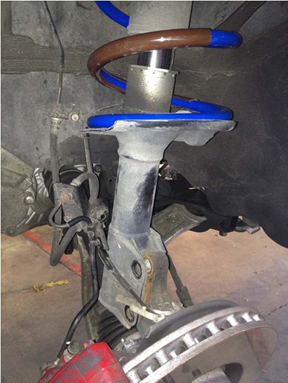
- With the front struts removed from the car, you’ll want to use your spring compressor to compress the spring enough to take the load off of the top hat and pillowball nut. Once enough pressure is removed, use the 17mm socket to finish removing the pillowball nut on the top of the assembly. Once completed, you can remove the strut from the spring. Take note of how the spring is installed before you remove the strut.
*Caution: If the spring is not compressed fully, the top hat will shoot off the assembly as you loosen the bolt due to the compression of the spring.* - Slowly release tension on the spring until it’s in a relaxed state. Remove the spring from spring compressor and load your new COBB sport spring into the spring compressor and compress it in a similar manner.
- Once the COBB spring is compressed, install the strut onto the spring in the reverse order it was removed from the factory piece. Tighten the pillowball nut as much as you can by hand for now with a socket. Once you release pressure on the spring, torque the nut to 50 ft/lbs.
- Complete Steps 2-8 on the other side of the car and reinstall the assemblies back into the car in the reverse order they were removed. You may need to use a floor jack to lift the hub up high enough to secure the two (2) 19mm bolts onto the strut. Torque the 12mm fasteners to 14 ft/lbs, 14mm fasteners to 33 ft/lbs, and 19mm fasteners to 80 ft/lbs.
Rear Springs
- Start off by removing the center carpet panel and the foam inserts on either side of the spare tire. You can then move on and remove the plastic cover that hides the battery and windshield washer reservoir by using a small flathead screwdriver to remove the four (4) plastic pop fasteners.
- On either side of the trunk you will find two 14mm nuts that secure the top of the strut to the vehicle. The more forward of the two is hard to see unless you climb all the way into the trunk. Loosen all four 14mm nuts but do not remove them using a 14mm socket, wrench or ratcheting wrench. A ratcheting wrench can make things faster for the nuts that are further forward.
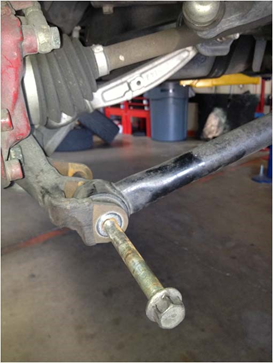
Raise the rear of the car and put it on jack stands. Remove the wheels. Place a floor jack under the rear hub and lift it until it is just barely supporting the weight of the hub. Using a 17mm socket and 17mm wrench, remove the long 17mm bolt that holds the lower strut mount and lower arm to the vehicle. Only remove enough of the bolt so that the lower shock mount is cleared. Slowly lower the jack to allow the hub to pull away from the strut. Go back and finish removing the 14mm nuts from inside the strut and carefully remove the strut from the car. Repeat on the opposite side.

- Using a spring compressor to relieve tension on the top mount of the shock, disassemble the rear strut.
- Once done install the COBB Sport Springs by recompressing and reinstalling the top hats.
- Install the assemblies back into the car in the reverse order of the way they were removed. You may to need to use a rubber mallet to reinstall the strut back into the lower mount. Use the floor jack to lift the hub into place so that you can reinstall the long, 17mm bolt. Torque the 14mm fasteners to 33 ft/lbs and 17mm fasteners to 50 ft/lbs
- Once everything is backed together and torqued, take the car for a short, and low speed drive to allow the car to settle out. Afterward take it for a full four-wheel alignment.
- You're all done! Go and enjoy!
Contact Us:
COBB Customer Support
Web Support and Tech Articles: COBB Tuning Customer Support Center
Email: support@cobbtuning.com
Phone support available 9am to 6pm Monday-Thursday. 9am to 4pm Friday (CST)
866.922.3059
return to www.cobbtuning.com
Copyright 2023 © COBB Tuning Products LLC. All Rights Reserved. | www.cobbtuning.com