5V1300 - Volkswagen MK6 Turboback
- Will Trang
- Brandyn Mowat

COBB Tuning Volkswagen MK6 Turboback - 5V1300
Congratulations on your purchase of the COBB Tuning Volkswagen MK6 Turboback! The following instructions will assist you through your installation process. Please read them first BEFORE beginning the install and familiarize yourself with the steps and tools needed. If you feel that you cannot properly perform this installation, we HIGHLY recommend you take the vehicle to a qualified and experienced automotive technician.
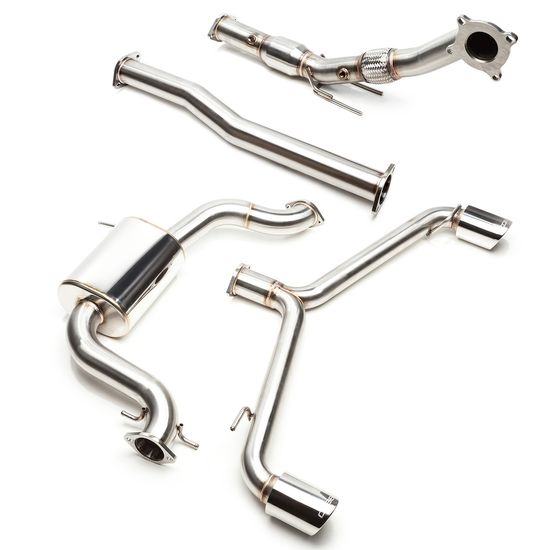
Part List
- High-Flow Catted Downpipe
- Muffler Section
- Tip Section
- Adapter Flange (Stock Downpipe Use Only)
- 3 x 3" Gasket ( 2 for catback only and 2 for downpipe only)
- 8 x M10 Flange Bolt
- 8 x M10 Flange Nut
Tools Needed
- 3/8" Ratchet
- Sockets: 13mm, 14mm, 17mm
- 14mm Wrench
- Socket Extensions (if needed)
- O2 Sensor Tool
- 10mm Hex/Allen Key
- Anti-Seize Goop
Downpipe to Turbo OEM Replacement Hardware Part # (optional)
- 1K0253115AB x1 - Turbo Gasket - https://www.ecstuning.com/b-genuine-volkswagen-audi-parts/exhaust-gasket/1k0253115ab/
- N10286108 x4 - Self Locking Nut - https://www.ecstuning.com/b-genuine-volkswagen-audi-parts/self-locking-nut-priced-each/n10286108/
- N0445203 x4 - Turbo Stud - https://www.ecstuning.com/b-genuine-volkswagen-audi-parts/exhaust-stud-priced-each/n0445203/
Removal of Factory Turboback
- Inspect the new components included with the COBB kit. If anything appears out of place or was damaged in shipping, please contact COBB immediately and do not proceed with the installation.
- Begin by using a 13mm socket to remove the two chassis braces protecting the stock exhaust.

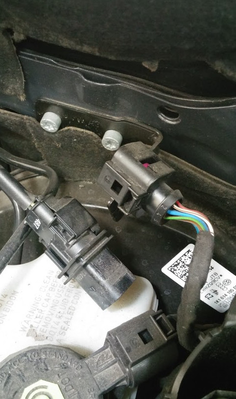
- Next, remove the O2 sensor near the catalytic converter on the stock downpipe. Use an O2 sensor tool to do so. To remove the sensor next to the turbo flange, unclip from the engine bay and remove after the downpipe is out of the car.

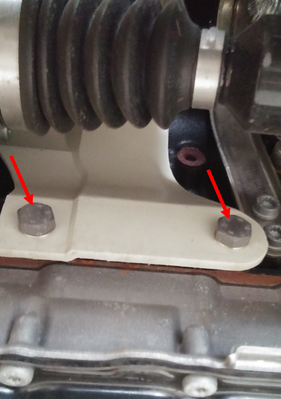
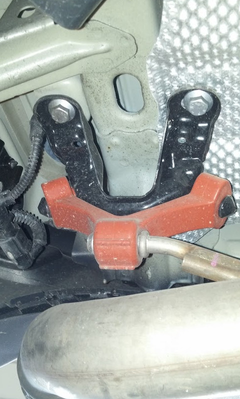
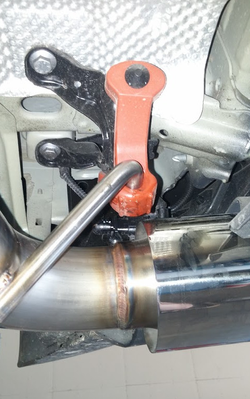
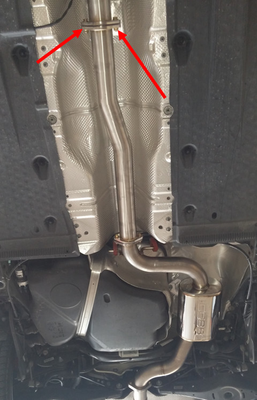
- Use a 13mm socket to remove the two bolts holding the front exhaust hangers in place.
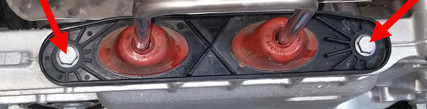
- Now remove the white shield below the turbo flange using a 13mm socket.
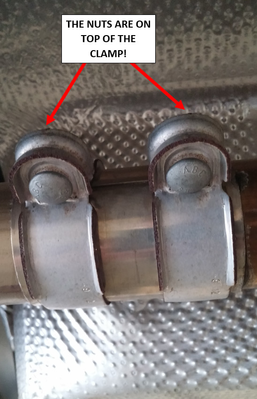
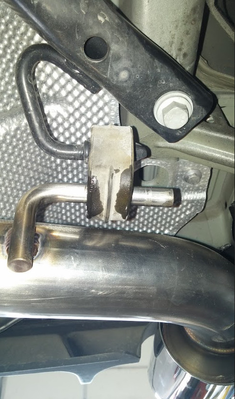
- Use a 13mm socket to loosen the two nuts on the stock exhaust clamp so that the clamp can now slide. No need to remove them completely, just loosen until the clamp is able to slide.
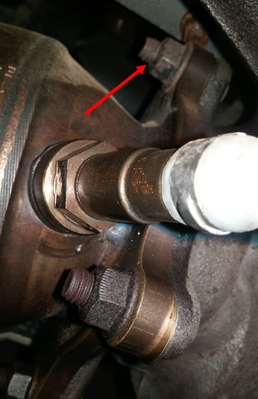
- Remove the four nuts holding the downpipe to the turbo flange using a 17mm socket. A 17mm box wrench may also be handy here. For the top nut that is shown below in the second picture, use an extension and go in from the top of the engine bay to access.
NOTE: Keep the stock downpipe to turbo bolts, these will be used for COBB Turboback kit.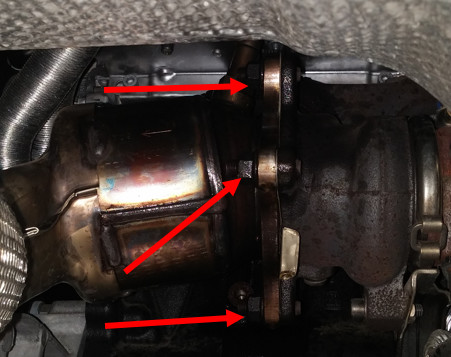
- With the four nuts removed, the front exhaust hanger unbolted, and the clamp loose, slide the clamp so that you can now remove the stock downpipe of of the turbo studs and out of the car.
NOTE: Keep the stock turbo gasket, this will be used for COBB Turboback kit. If it is in bad shape, we suggest a factory replacement from the dealership.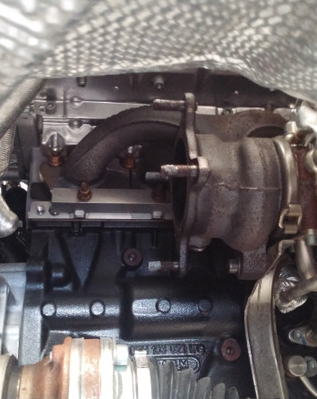
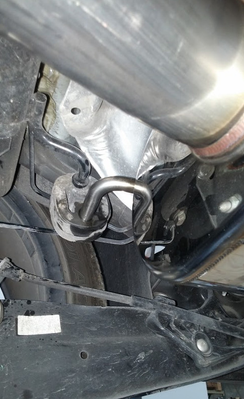
Now that the stock downpipe is removed, uninstall the remaining exhaust by detaching from each exhaust hanger in the order shown. It is recommended to have extra help for this procedure due to safety reasons.
- Once the exhaust is removed from all of the exhaust hangers, remove the exhaust from the car.
Installation of COBB Volkswagen MK6 Turboback
- Begin by threading on the O2 sensor that you removed with the stock downpipe. This will thread in near the turbo flange. Use an O2 sensor tool to do so.
NOTE: Apply a small amount of Anti-Seize to the O2 sensor threads to help with future removal. Nobody likes a stripped O2 sensor.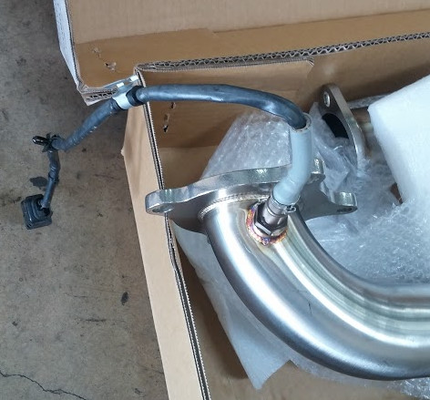
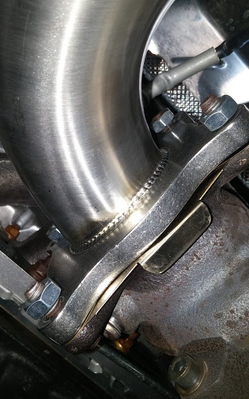
- Before you bolt the downpipe to the turbo studs, make sure the exhaust hanger bracket is in place on the downpipe! See step 4 for a picture reference.
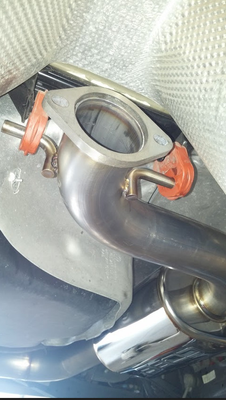
- Now, with the stock turbo gasket in place, place the COBB Downpipe into the correct position on the turbo studs. Loosely thread on the four nuts that came off with the stock downpipe.
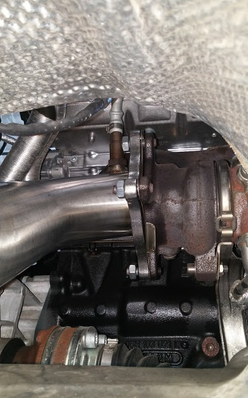
- Tighten the bolts securing the front exhaust hanger to the car using a 13mm socket.

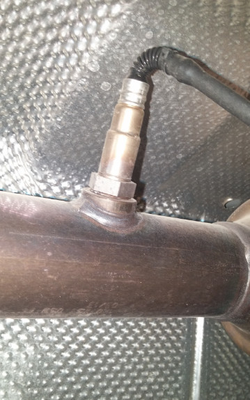
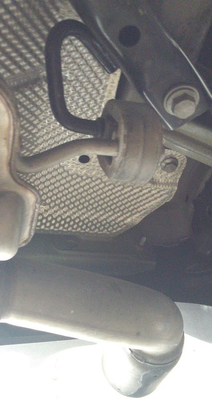
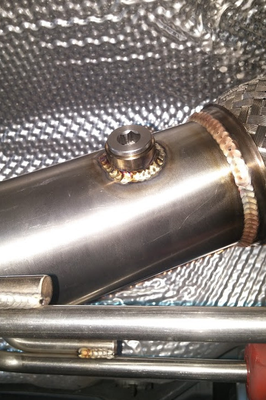
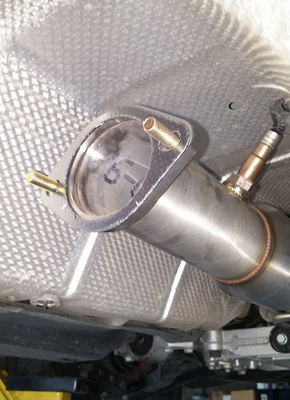
- Thread on and tighten the remaining O2 sensor using the O2 sensor tool. Remember the anti-seize! If you have a non-CBFA (California Emissions) car, the O2 sensor will be threaded into the back bung (behind the cat) as shown below. If you do have a CBFA car, both bungs would require an O2 sensor.
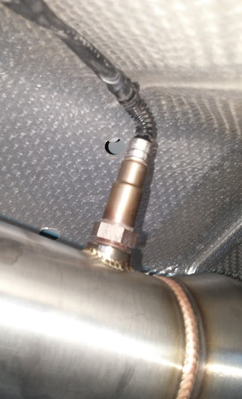
- Thread the O2 sensor plug in the correct bung depending on if you have a CBFA car or not. The photo below shows the plug in the front bung (after the flex) which is for a non-CBFA car.
- With the downpipe in place, install the COBB Tip Section of the exhaust by placing in the correct hangers.
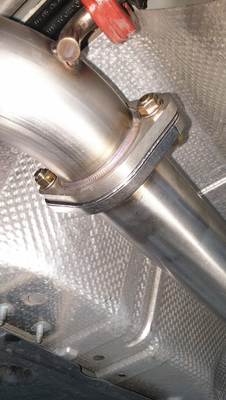
- Place one gasket with two 10mm flange bolts on the open end of the downpipe.
- Place the muffler section of the car through the necessary hangers as well as bolting the flange to the downpipe flange using the two bolts in step 8 and two 10mm nuts. Loosely thread on.
- Connect the back flange of the muffler section to the tip section using a gasket, two 10mm bolts and two 10mm nuts. Loosely thread on.
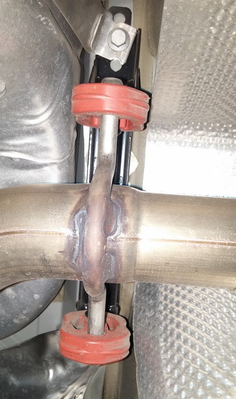
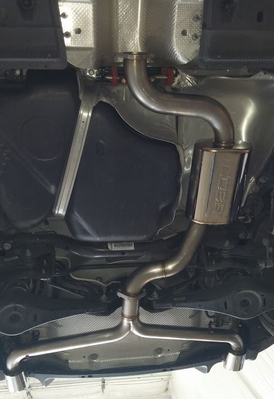
- Note, new versions with a resonated mid-pipe should be installed with the resonator towards the rear of the car as seen below.
- Note, new versions with a resonated mid-pipe should be installed with the resonator towards the rear of the car as seen below.
- Tighten down the four nuts on the downpipe. From there, we like to work from the tips to the downpipe tightening the exhaust, checking tip fitment as we work.
- Check to make sure all nuts and bolts are tight along with ensuring no steps were skipped. Enjoy your COBB Tuning Volkswagen MK6 Turboback!
Installation of COBB Catback to Stock Downpipe
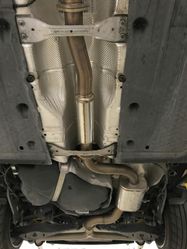
- Loosen the stock exhaust clamp using a 13mm socket. Slide the clamp towards the front of the car along the downpipe tube until the downpipe is no longer connected to the stock rear section.
- Now, unhook the rear section of the exhaust from all hangers in the order shown.
- The rear section of the exhaust can now be removed from the vehicle.
- Install the COBB Tip Section of the exhaust by placing in the correct hangers.
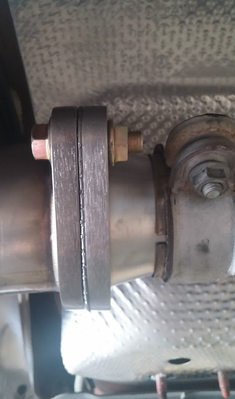
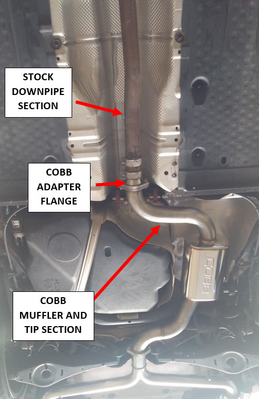
- Take the provided adapter flange and insert into the exhaust clamp. Tighten the clamp using a 13mm socket. This connects the stock downpipe to the adapter flange. Once the adapter flange is in place, install the COBB muffler section by using a gasket, two 10mm bolts and two 10mm nuts, connecting it to the adapter flange. Loosely thread on the nuts and immediately use a gasket, two 10mm bolts and two 10mm nuts to connect the muffler section to the tip section.
- Make sure the tips are in the desired position before you tighten each flange using 14mm wrenches or sockets. We like to work from the tips to the downpipe and check fitment as we go.
- Check to make sure all nuts and bolts are tight along with ensuring no steps were skipped. Enjoy your COBB Tuning Volkswagen MK6 Catback!
Links
Can let you know what parts will work with what map
The main resource page for MK7 GTI Installation Instructions
COBB Customer Support Web Support and Tech Articles: COBB Tuning Customer Support Center Email: support@cobbtuning.com Phone support available 9am to 6pm Monday-Thursday. 9am to 4pm Friday (CST) 866.922.3059 return to www.cobbtuning.comContact Us:
Copyright 2024 © COBB Tuning Products LLC. All Rights Reserved. | www.cobbtuning.com