815150 - Subaru Radiator Shroud VA WRX, STI

815150 - Subaru Radiator Shroud
WRX 2015-2021
STI 2015-2019
Congratulations on your purchase of the COBB Tuning Subaru Radiator Shroud! The following instructions will assist you through the installation process. Please read them BEFORE beginning the install to familiarize yourself with the steps and tools needed. If you feel you cannot properly perform this installation, we HIGHLY recommend you take the vehicle to a qualified and experienced automotive technician.
Table of Contents
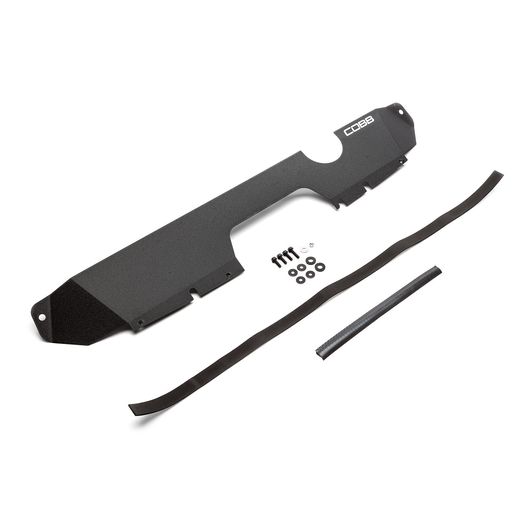
Parts List
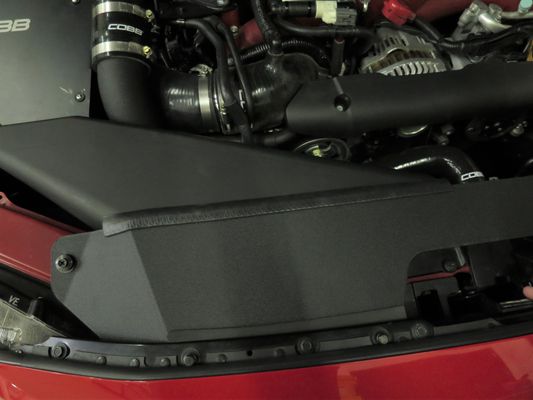
- Radiator Shroud
- 3' x1" x 1/8" Foam Trim
- 1' rubber trim
- (3) m6x20 flange Bolts
- (1) m6x25 flange bolts
- (4) m6 flat washers
- m6 Stainless Steel Fender Washer
- m6 lock nut
- (2) 10mm nylon washers
Tools Needed
- Trim removal tool
- 10mm combination wrench
- Razor Blade or Exacto Knife
Radiator Shroud Installation
- Start by using your trim tool to pop out the three trim clips holding the bumper retainer on the top of the front bumper. Gentrly pry upwards on the inner section to release the pressure and then pry up on the lower section to remove from the car. Make sure to take your time as they can break easily!
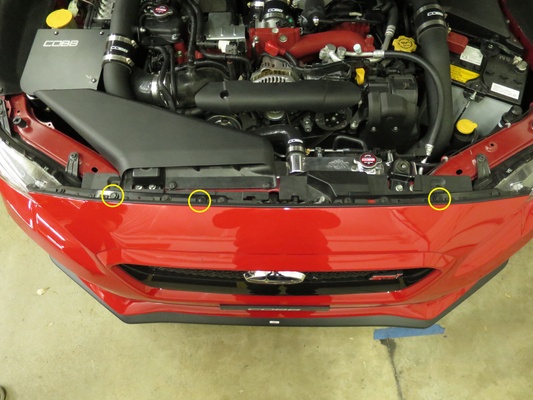
- Next up remove the two innermost headlight bolts using a 10mm socket.
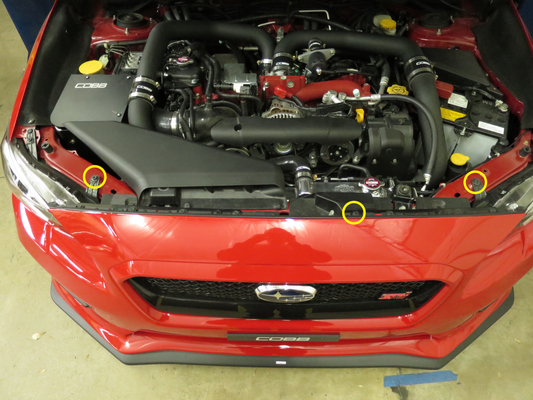
- Next up test fit the panel. Using chalk or painters tape mark along the edge of where the cooling panel will sit underneath the edge of the bumper. This is so we can get a good idea of where to put the foam tape to prevent chafing.
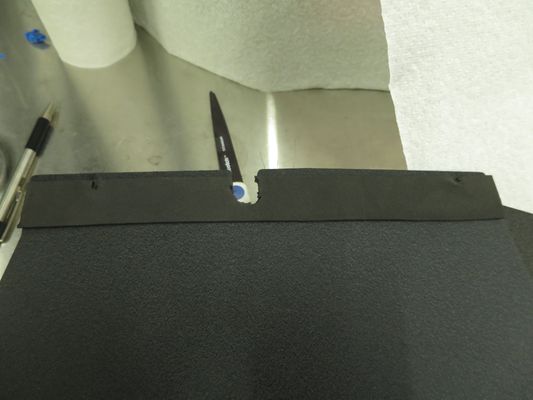
- Lay the foam tape over it to get a good idea of the length you'll need and mark it for trimming. When fitting up the tape make sure to go over your line by 1/8"-1/4" as the edge of the bumper and retainer can be pretty sharp and that's where most damage will occur if any so the extra room will prevent damage.
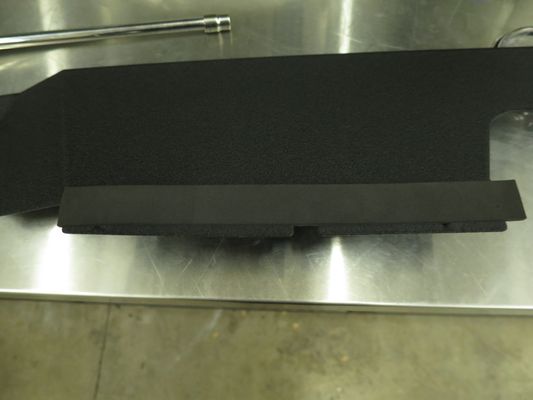
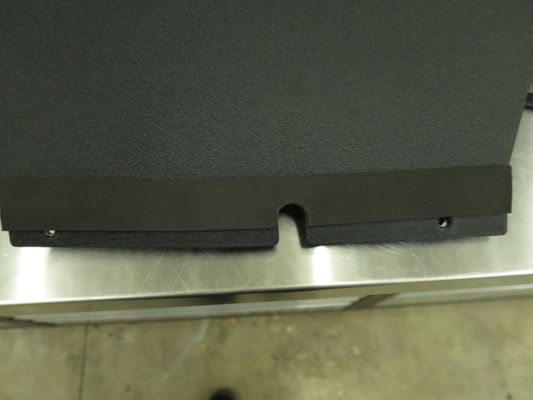
- Trim the insulating tape BEFORE putting it on. It will result in significantly cleaner edges as you can tell by these pictures.
- Now we can line up our hardware. The trim clips will be replaced by the three smaller M6 bolts along with the smaller plastic washers. The headlight bolts will get the large plastic washers added on to them, and the bolt closest to the hood latch will get the longer bolt with a plastic washer (for now). Below you can see a comparison of the stock hardware (left) vs the new hardware (right)


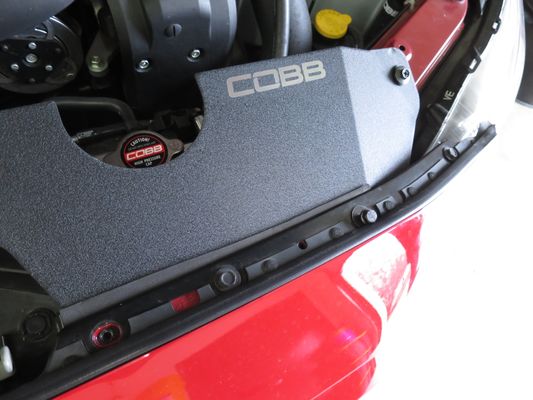
- Fit the shroud in place it should go underneath the bumper and the load distribution lip itself.
- Begin threading the stock bolts back in place but leave them loose for now to allow you the room to get the last bolt in place.
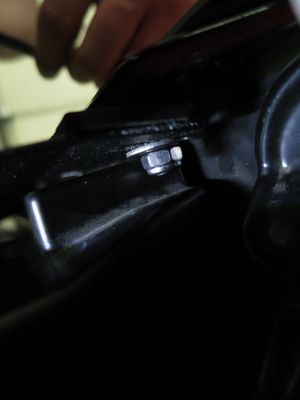
- Next turn your attention to the longer bolt going by the latch, this one is going to be a little trickier, you'll need to get the bolt into the existing threads in the bumper and then add the washer and lock nut to the back side after it's through the cooling panel. This will take some patience and a lot of little turns with a wrench. It can be made easier with a ratcheting wrench and having a friend hold the hood release out of the way.
- Once that is on and tightened you can tighten down the rest of the bolts starting with the headlight bolts. As you tighten make sure the washers on the headlight bolts aren't loose as that will indicate the shoulder of the bolt (it has a built in spacer) is sitting on the cooling panel rather than the washer itself. If that's the case loosen it off and reposition.
- Once done you can torque everything else down hand tight.
- Last but not lease put the trim on the shroud to avoid any chafing on the stock intake snorkel.
- You're all done! Go out and enjoy!

Links
COBB Product Install Instructions for Subaru Vehicles
Main Installation Instruction Repository for Subaru Parts
Calibration Map Notes for Subaru Vehicles
Link to Subaru Map Notes to see what map you should be on given the parts you've added
Contact Us:
COBB Customer Support
Web Support and Tech Articles: COBB Tuning Customer Support Center
Email: support@cobbtuning.com
Phone support available 9am to 6pm Monday-Thursday. 9am to 4pm Friday (CST)
866.922.3059
return to www.cobbtuning.com
Copyright 2024 © COBB Tuning Products LLC. All Rights Reserved. | www.cobbtuning.com