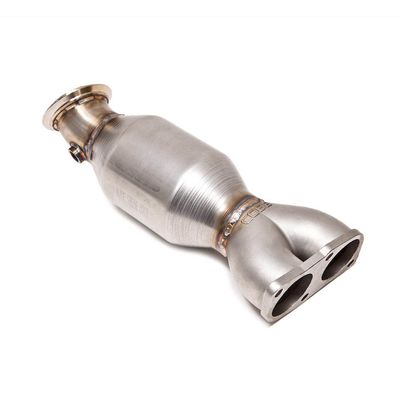
5B2202 - BMW N55 Catted Downpipe

5B2202 – COBB BMW N55 Downpipe
BMW 135i, 335i 2011-2012
BMW 135is 335i xDrive 2011
Congratulations on your purchase of the COBB Tuning BMW N55 Downpipe! The following instructions will assist you through the installation process. Please read them BEFORE beginning the install to familiarize yourself with the steps and tools needed. If you feel you cannot properly perform this installation, we HIGHLY recommend you take the vehicle to a qualified and experienced automotive technician.
IMPORTANT! Installing this kit will require custom tuning or utilizing an appropriate Stage Power Package map if you have a matching mechanical configuration. Please consult with COBB or an authorized ProTuner in your area if you have any questions!
Table of Contents
Parts List
- COBB N55 Downpipe
- (2) 2.5" 2-bolt Exhaust Gaskets
- (4) M8 Bolts
- (4) M8 Nuts
Tools Needed
- Phillips head screwdriver
- Flathead screwdriver
3/8" ratchet
3/8" 8mm socket
3/8" 10mm socket
3/8" 11mm socket
3/8" 12mm socket
3/8" 10mm deep socket
3/8" 12mm deep socket
- 3/8" 14mm deep socket
3/8" T20 Torx Bit
- 3/8" E10 inverted Torx
- 3/8" E12 inverted Torx
- 3/8" E14 inverted Torx
- 3/8" E18 inverted Torx
3/8" 12" extension
3/8" 6" extension
- 12mm combination wrench
- 13mm combination wrench
- 14mm combination wrench
- 15mm combination wrench
- 16mm combination wrench
- Oxygen Sensor Wrench
- Trim removal tool
Unhooking the Oxygen Sensors
- Place the car on a lift, or supported by four (4) jack stands using the factory jack points located underneath and behind the side skirt of the car (rectangular plastic pieces should be present).
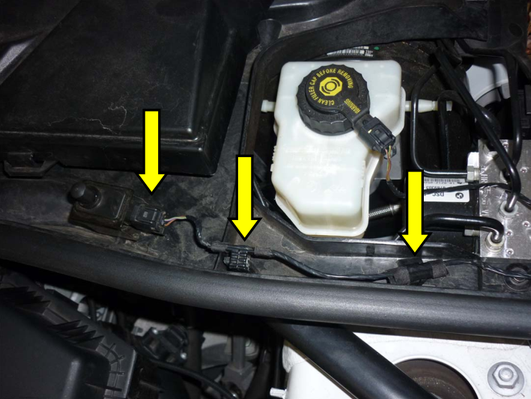
- Start by removing the cowl covers that are located on either side of the car. They will have clips on the front and back of the covers, unhook the covers with your fingers.

- In front of the cowls you just removed are the hood and ambient air temp sensors. Disconnect the plugs from the sensors and gently pull the wires back from the clips.
- Remove the six 8mm screws holding the centerpiece of the cowl in place. (This is also a good time to swap out the Cabin Air filter)
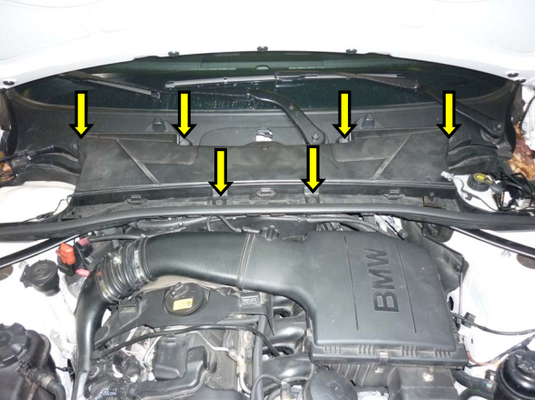
- Next remove the two 8mm screws at each end of the cowl and pull the cowl piece free from the car.
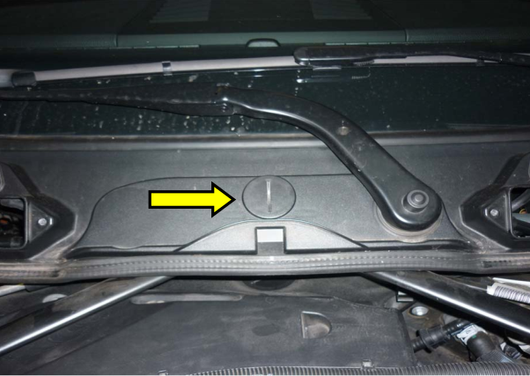
- In the middle of the wiper cover that is left on the car, remove the plug with a large slit on it using a flat head screwdriver.
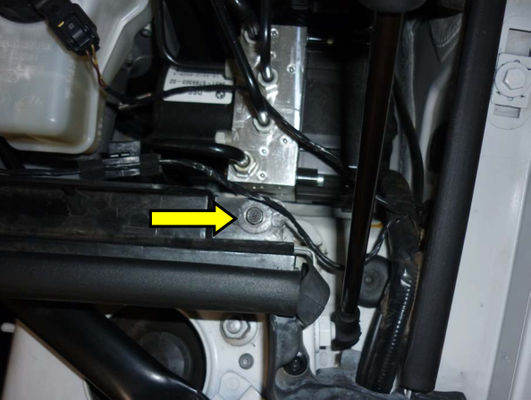
- Using an E18 inverted Torx socket, remove the bolt joining both braces.

- Next remove both E14 inverted Torx bolts from the shock towers and remove the strut brace bars from the car. Make sure to keep track of which side is which, as well as which one was on top in the back, as it will make installation easier.
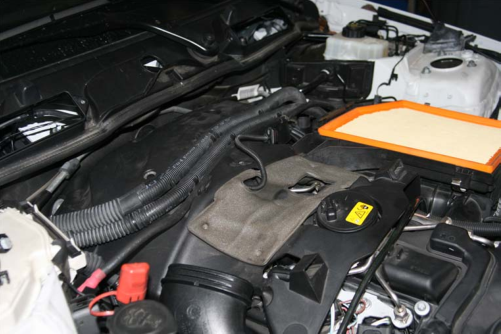
- Unhook the air box lid by unclipping the four metal clips holding the lid to the box.
- Next unhook the MAP sensor from the backside of the intake tube.

- On the passenger side of the motor, loosen the hose clamp on the intake tube closest to the shock tower and remove the entire intake assembly.
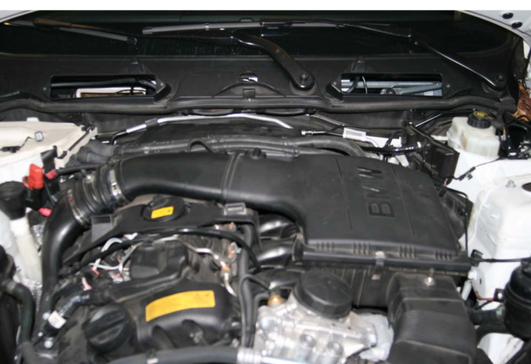
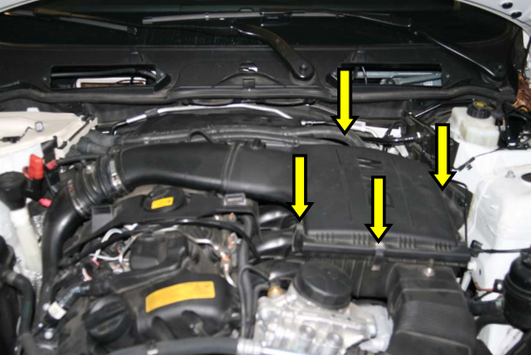
- To remove the engine cover, pop the three wiring harnesses out of their holders and pull up on the cover to pop it out of the posts holding it in place.
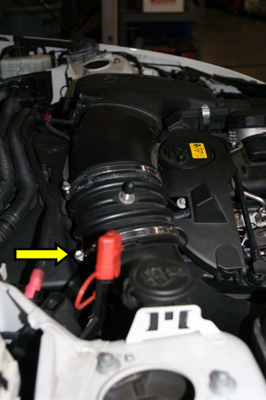
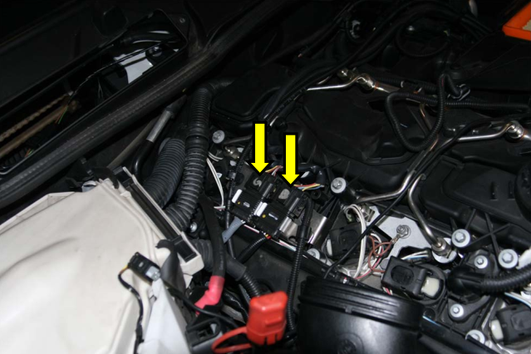
- On the passenger side rear of the motor there are two big rectangular plugs being held to the motor by metal clips. These are the oxygen sensor plugs. One plug should be agrey and the other black. Use something to mark which plug goes where before disconnecting them as connecting them in the wrong spot can cause problems. Once marked, disconnect the plugs and let the wiring fall down along the side of the motor.
Stock Downpipe Removal
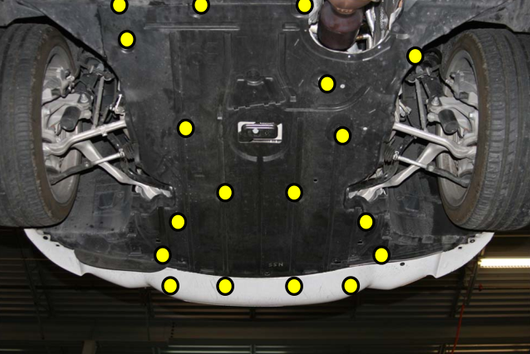
- Moving underneath the car, start by removing the eighteen screws holding the under tray in place using an 8mm socket.
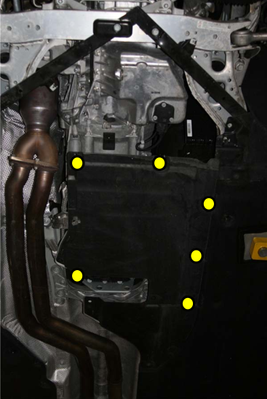
- Behind the under tray is another plastic tray covering the transmission. Using an 8mm socket, remove the six screws holding it in place.
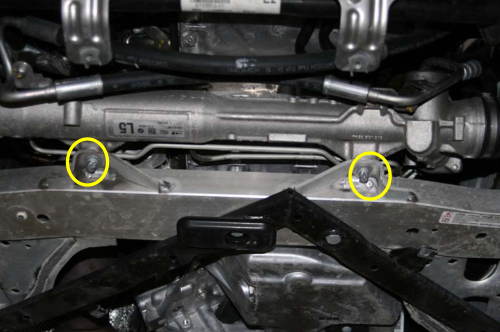
- In order to gain access to the V-band flange mating the downpipe to the turbine, you will need to loosen the rack and move it out of the way. Start by using a 16mm combination wrench and an E12 inverted Torx socket to remove both bolts holding the rack in place.
- Once the bolts for the rack are out, push the wheels towards the left as if you were making a left hand turn. This will slide the rack out of the holders on the sub-frame allowing it to move around as needed.
WARNING: You may need to take your car to the dealer after reinstalling your steering rack to be recalibrated if your car is not running correctly.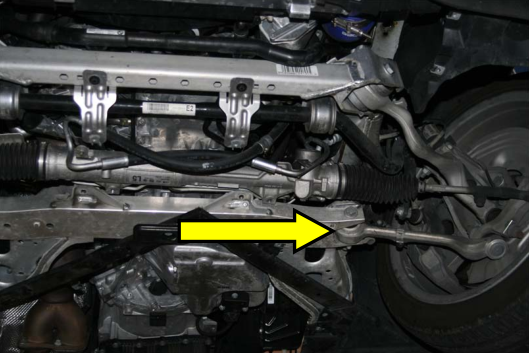
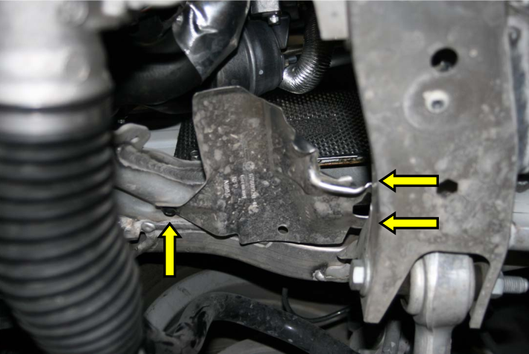
- With the rack out of the way, use a T20 Torx bit to remove the three screws holding the heat shield on the passenger side in place.
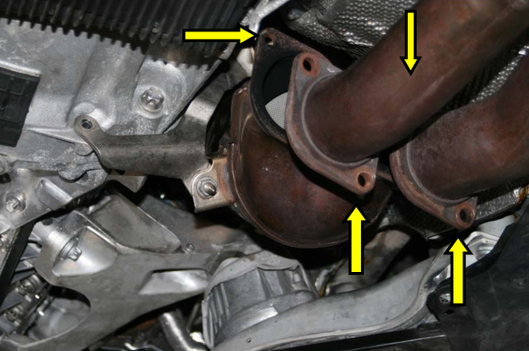
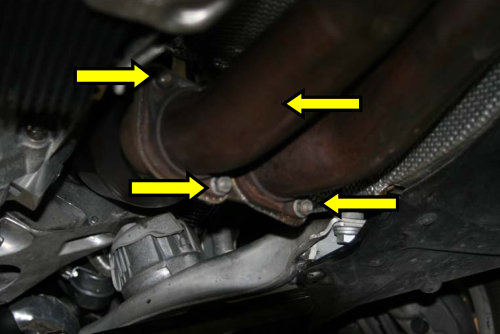
- Disconnect the front exhaust from the downpipes by removing the four nuts using a 12 or 13mm deep socket (We have seen both size bolts on different year vehicles so make sure not to strip them by using the wrong tool). When doing this it is suggested to place a pole jack or floor jack under the exhaust so that it does not fall when the last bolt is taken out.
- Lower the jack holding the exhaust allowing clearance for the downpipe to come out. Don't worry about dropping it as the exhaust should rest on the center chassis support in the middle of the car.
- Using an E10 and E18 inverted Torx socket on a universal swivel with a long extension, remove the transmission bolts holding the downpipe locator bracket in place.
- Remove the two nuts holding the placement bracket to the downpipe using a 12 or 13mm deep socket. The bracket won't come out too easy, so it is best to just leave it hanging to the downpipe.
- Remove the 13mm bolt holding the v-band for the downpipe in place.
- Spreading the v-band apart with one hand, slide the downpipe out with the other.
Installation of the COBB Downpipe.
- Remove the Oxygen sensors from the stock downpipe and put them into the COBB downpipe. We highly suggest spraying the sensors with penetrating lubricant and letting them soak before removal to avoid any damage. When reinstalling them into the COBB downpipe, apply a small amount of anti-seize to the threads in order to make them easier to remove in the future. Make sure that the sensors are in the correct locations and they do not get switched around as it will affect the way the car runs.
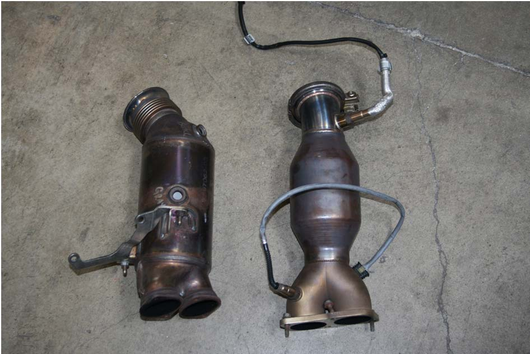
- Install the COBB downpipe and tighten the V-band flange with the stock 13mm bolt.
- Using the supplied 2.5" gaskets, M8 nuts and bolts, reconnect the exhaust to the downpipe.
- Following the reverse order of removal, reassemble the car.
- Congratulations! You have completed the installation of the COBB Downpipe for your BMW. Go out and enjoy!
Links
Main Installation Instruction Repository for Subaru Parts
Link to Subaru Map Notes to see what map you should be on given the parts you've added
COBB Customer Support Web Support and Tech Articles: COBB Tuning Customer Support Center Email: support@cobbtuning.com Phone support available 9am to 6pm Monday-Thursday. 9am to 4pm Friday (CST) 866.922.3059 return to www.cobbtuning.comContact Us:
Copyright 2023 © COBB Tuning Products LLC. All Rights Reserved. | www.cobbtuning.com