541202 or 541204 VA WRX J-Pipe Installation Instructions

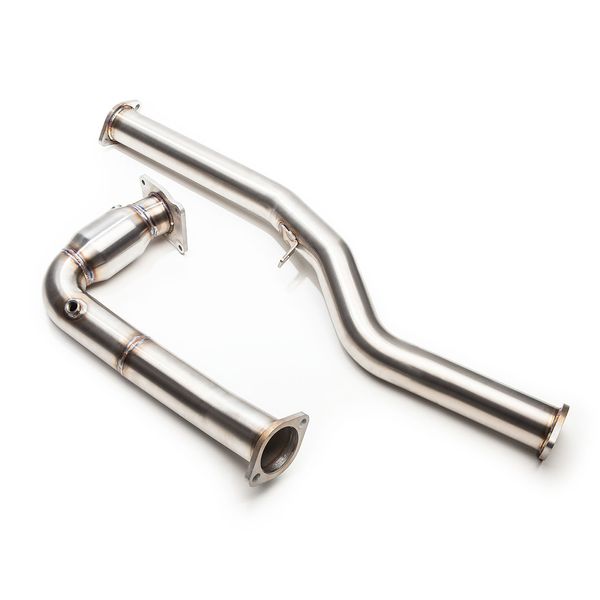
541202/541204 – COBB SS 3" J-Pipe
2015-2021 WRX
Congratulations on your purchase of the COBB Tuning J-Pipe kit! The following instructions will assist you through the installation process. Please read them BEFORE beginning the install to familiarize yourself with the steps and tools needed. If you feel you cannot properly perform this installation, we HIGHLY recommend you take the vehicle to a qualified and experienced automotive technician.
IMPORTANT! Installing this kit will require custom tuning or utilizing an appropriate Stage Power Package map if you have a matching mechanical configuration. Please consult with COBB or an authorized ProTuner in your area.
Part List
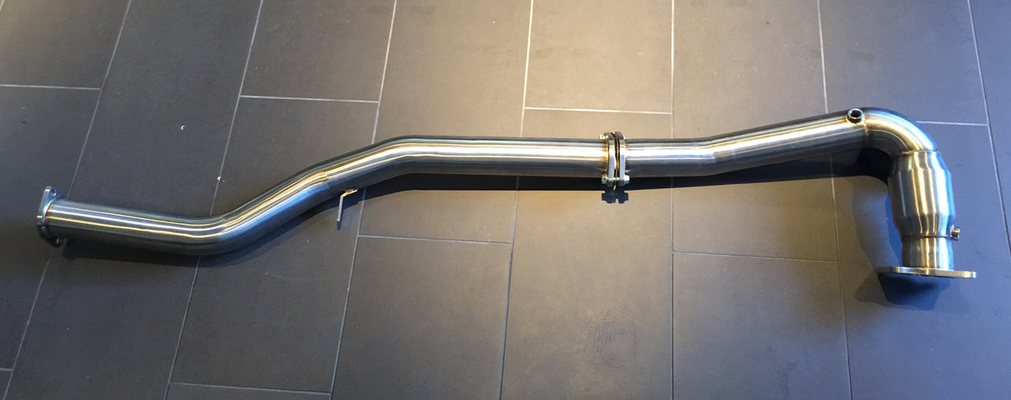
- 1 x J-Pipe
- 1 x Mid-Pipe
- 2 x 3" Gaskets
- 1 x Flange Adapter
- 2 x M10x35mm Bolts
- 2 X M10 Nuts
Tools Needed
- Ratchet
- 6-Point Sockets: 10mm, 12mm, 14mm, 15mm (universal joints for 12mm and 14mm)
- Extension
- Flathead Screwdriver
- O2 Sensor Socket Tool or 22mm Wrench
Removal of Stock J-Pipe
- Inspect the new components included with the COBB kit. If anything appears out of place, please contact COBB immediately and do not proceed with the installation.
- Begin by placing the car on the lift and raising it to where you can now access the bottom of the vehicle.
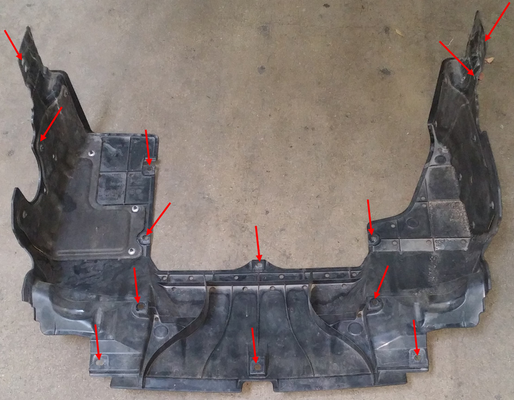
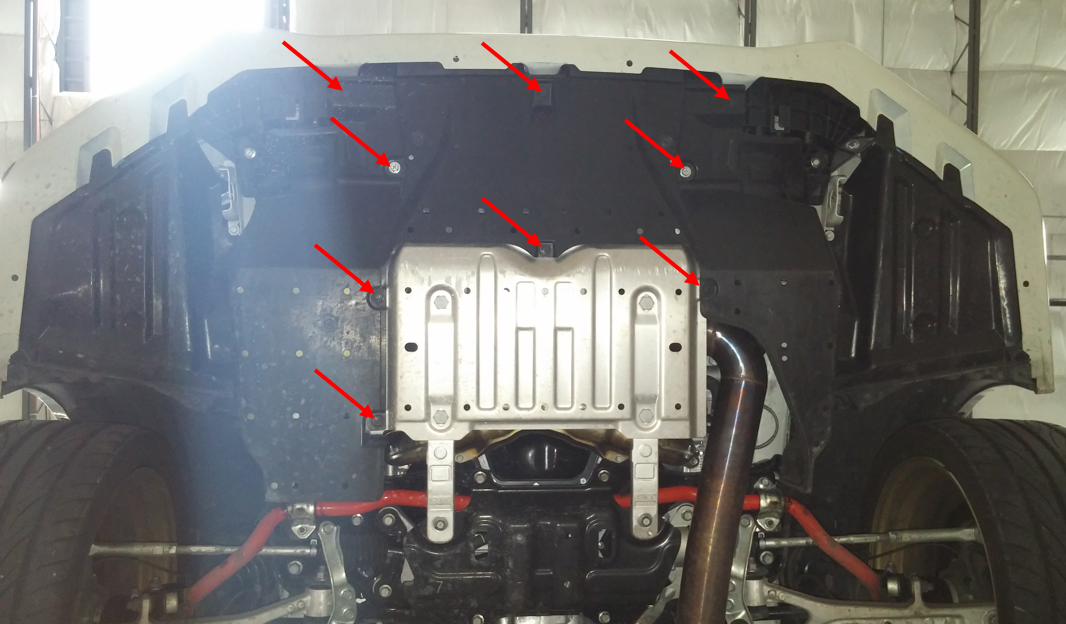
Next, remove the plastic under tray by using the flathead screwdriver to remove the pushpins and the 12mm socket to remove the two bolts holding the under tray to the car. Recommended: Take pictures of where each pushpin is for your future reference.

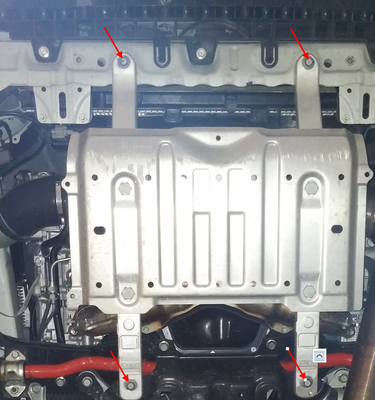
- Once the under tray is uninstalled, remove the skid plate by using a 12mm socket to loosen the bolts fastening it to the car.
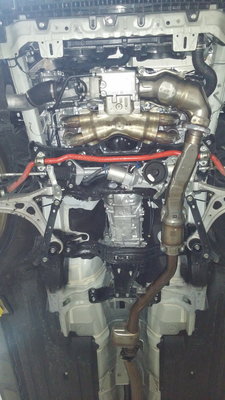
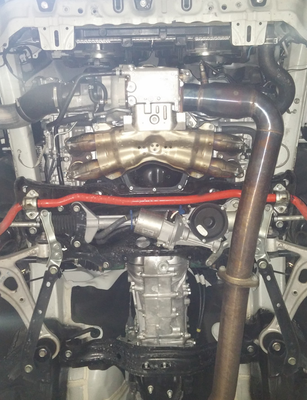
- With the under tray and skid plate removed, you should now be looking at your stock J-Pipe.
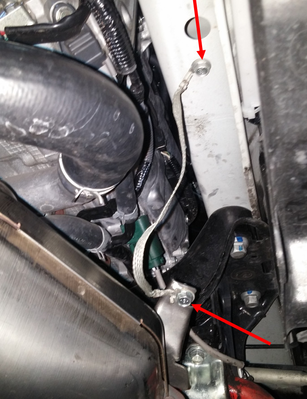
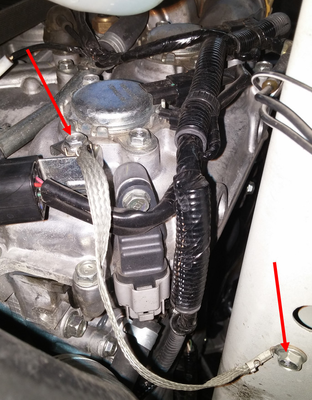
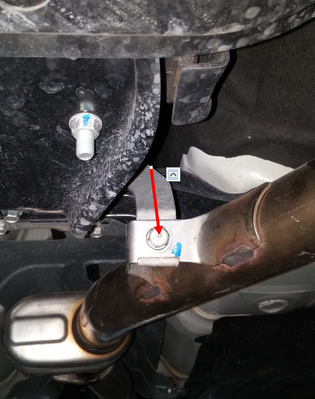
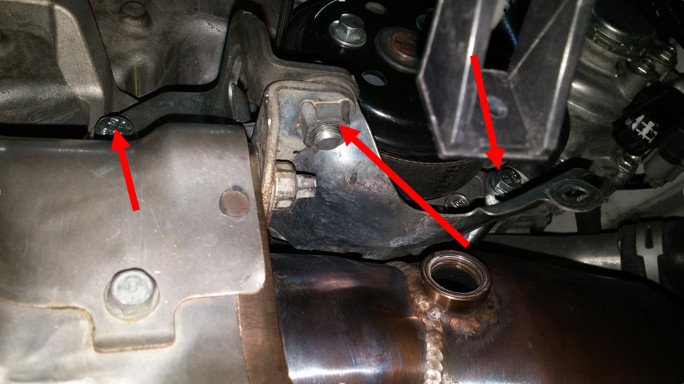
- To get this out of the way, unbolt the ground wire from the J-Pipe and reinstall it in the position seen in the second picture. The side mounted to the frame will remain in the same spot. Use a 10mm wrench or socket.
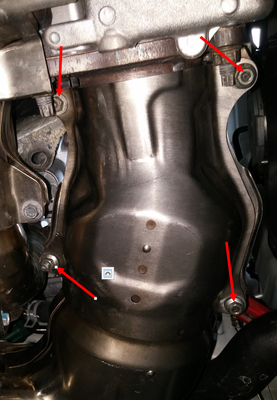
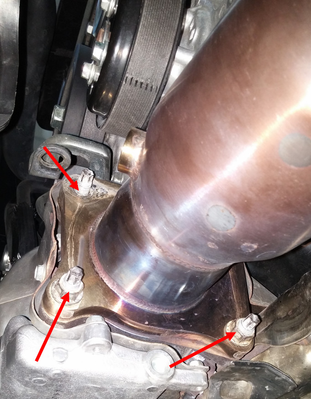
Above the J-Pipe flange you will see 3 metal braces/shields bolted to the top 2 bolts of the J-Pipe flange. Using a 14mm socket (universal if needed), unbolt the braces and shields and remove from the vehicle. PLEASE TAKE PICTURES OF HOW THE BRACES/SHIELDS ARE ON THE CAR STOCK FOR FUTURE REFERENCE!
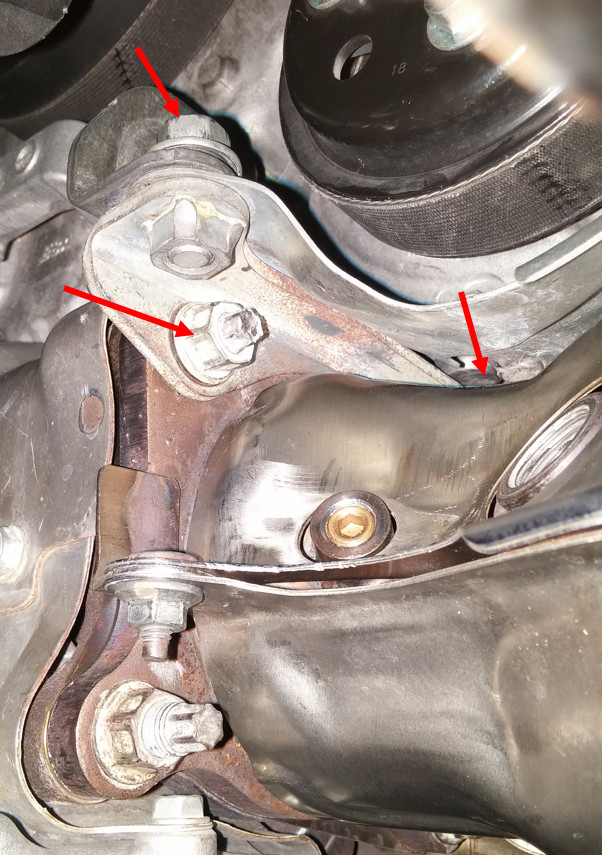
To get to the top right bolt on the J-Pipe flange, you may need to use a long extension to go over the J-Pipe to the bolt using a 14mm universal socket.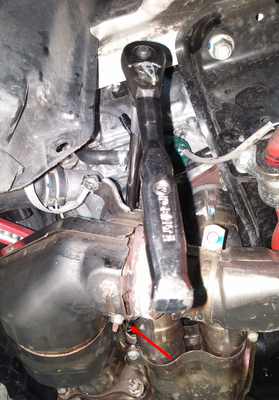
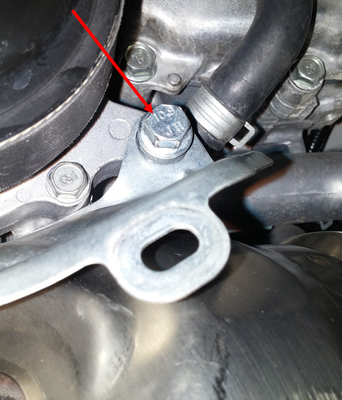
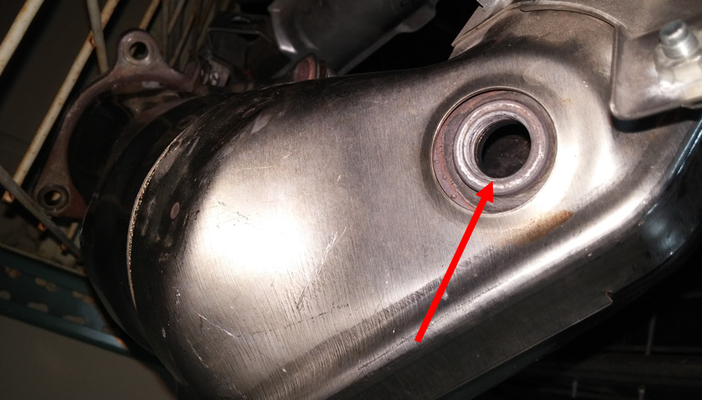
- To remove the stock heat shield around the J-Pipe, use a 10mm socket to loosen the 4 bolts seen below.
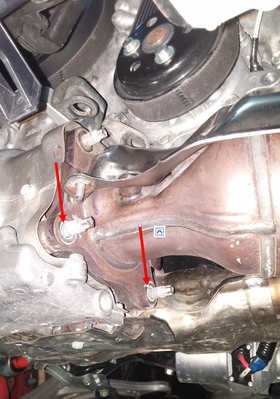
- With all the braces and heat shields removed, loosen the remaining two nuts holding the J-Pipe to the car.
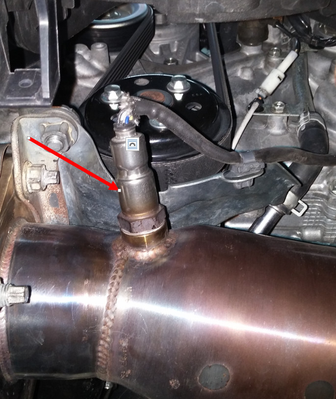
- Before you unbolt the J-Pipe from the exhaust mount on the car, remove both O2 sensors. Use an O2 sensor socket tool or a 22mm wrench.

- Once all O2 sensors are removed, unbolt the far section of the J-Pipe using a 14mm socket and disconnect the J-Pipe from the remainder of the exhaust using a 14mm and 15mm socket/wrench.
- Now you may carefully remove the J-Pipe from the car. Keep all stock nuts and bolts and leave the stock J-Pipe gasket in its position!
Installation of COBB J-Pipe
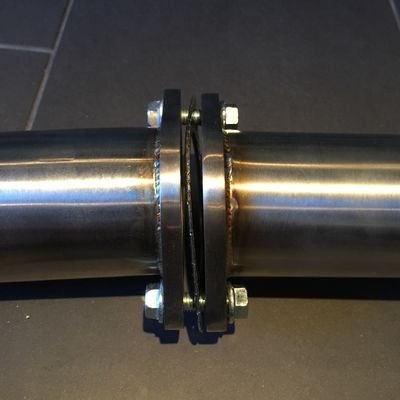
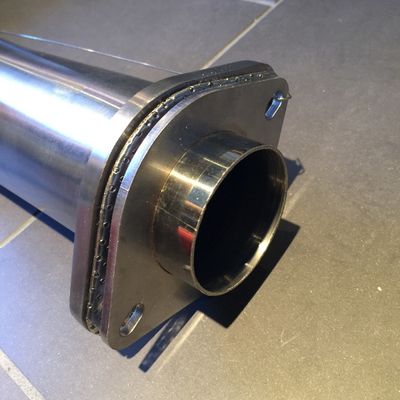
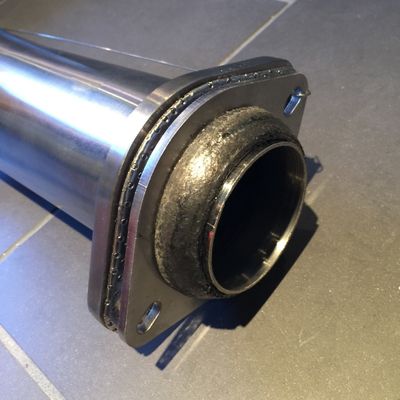
- Assemble the two halves of the J-pipe using one of the included 3" gaskets and M10 thread hardware as shown.
- Ensure that the stock J-Pipe gasket is placed on the 4 studs.
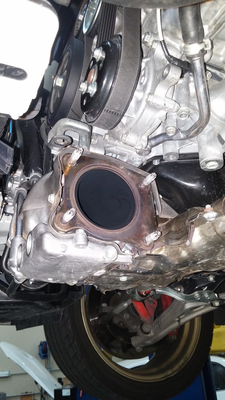
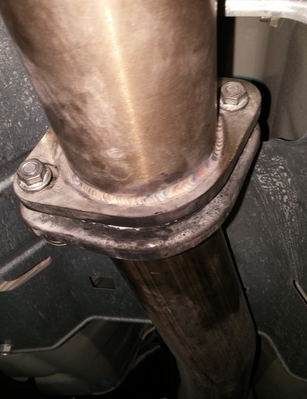
- To install the COBB J-Pipe, place the flange on the 4 mounting studs along with hooking the rear of the J-Pipe onto the stock mounting section shown in step 11 above. Only thread on the bottom 2 stock J-Pipe nuts to hold the J-Pipe up along with the stock bolt used in the rear section.

- With the J-Pipe in place, it is now time to reinstall the braces that were removed earlier. THERE ARE A TOTAL OF 3 PIECES! Use the stock nuts and bolts that were originally used. Reference the pictures you took when uninstalling the stock J-Pipe to easily see how the braces were on the car originally! It is recommended to use some sort of penetrating oil when bolting the nuts back on to prevent stripping in the future.
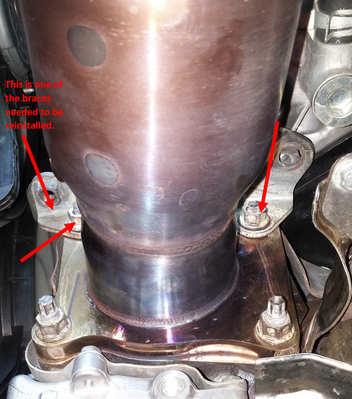
- Once all of the metal braces/shields are in place, begin tightening the 4 nuts holding the J-pipe to the car with a 14mm socket (universal if needed). Also tighten all of the bolts and nuts holding the braces/shields in place. These are the same nuts and bolts referenced in the above pictures.
- Now that the J-Pipe is bolted to the stock studs, move to the rear of the J-pipe.
- Install the 3" gasket followed by the Flange Adapter then the stock Donut gasket if you are choosing to install the COBB or stock cat-back on the car.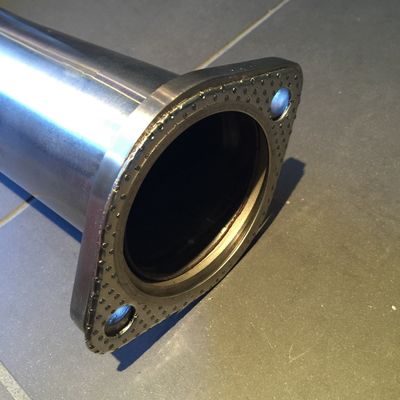
- Connect the J-pipe to the rest of the exhaust using the stock spring bolts in the original orientation. Use a 12mm and 13mm wrench or socket to tighten the bolts.
- With the J-Pipe installed on the car, you may now install the two O2 sensors you previously took off. Use an O2 Sensor Socket Tool or 22mm Wrench.

- Since the O2 sensors are now installed and the J-Pipe is installed on the car, check over each step and ensure that each nut/bolt is tight and that you did not skip anything.
- If you're going to be flashing the COBB Stage 2 map, it may be a good time to remove your secondary vacuum restrictor pill. For instructions click here: VA WRX Wastegate Secondary Restrictor Pill Removal
- Reinstall the stock skid plate on the car in the same position as it was before using the stock hardware. Use a 12mm socket to tighten each of the 4 bolts.
 =
= Once the skid plate is on the car, place the under tray in the stock position using the original pushpins and the two bolts. Use a 12mm socket to tighten the two bolts. Use the pictures you took before as a reference if needed!
- With the under tray reinstalled on your WRX, check to make sure there are no missing push pins or bolts.
- CONGRATULATIONS ON INSTALLING YOUR 2015+ COBB WRX J-PIPE!
Links
COBB Product Install Instructions for Subaru Vehicles
Main Installation Instruction Repository for Subaru Parts
Calibration Map Notes for Subaru Vehicles
Link to Subaru Map Notes to see what map you should be on given the parts you've added
COBB Customer Support Web Support and Tech Articles: COBB Tuning Customer Support Center Email: support@cobbtuning.com Phone support available 9am to 6pm Monday-Thursday. 9am to 4pm Friday (CST) 866.922.3059 return to www.cobbtuning.comContact Us:
Copyright 2023 © COBB Tuning Products LLC. All Rights Reserved. | www.cobbtuning.com