7C1100/7C1101 - COBB GTR SF and BigSF Intake Installation [Discontinued]
- Brandyn Mowat
- Former user (Deleted)

7C1100-BL, 7C1100-BK, 7C1101-BL, 7C1101-BK
2008-2015 World Market Nissan GTR
2009-2016 USDM Nissan GTR
These intakes do NOT fit on the 2016+ World Market or 2017+ USDM vehicles

Table of Contents
Parts Required
Tools Required
- Flat Blade Screwdriver
- Phillips Screwdriver
- 3/8 Ratchet
- 3/8 Extension
- 7mm Socket
- 8mm Socket
- 10mm Socket
- Pliers
Part List
- (2) Air intake tubes
- (2) Silicone reducing couplers
- (2) Air Filters
- (1) M6 x 40 Bolt
- (1) Rubber Isolator
- (2) M6x20mm Fender Washers
- (2) M6 Lock Washers
- (1) M6 Nut
- (2) 50-70mm Hose Clamps
- (2) 60-80mm Hose Clamps
Stock Airbox Removal
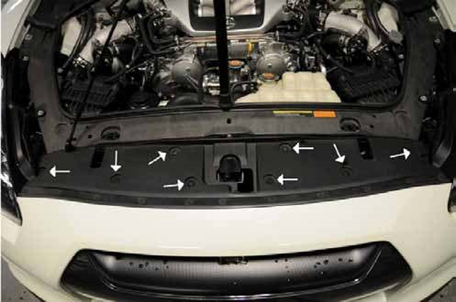
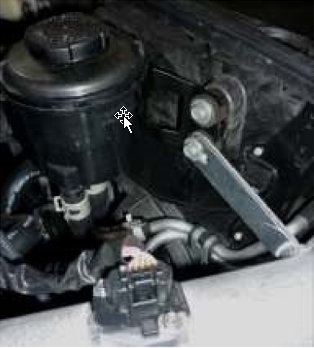
- Use a flat head screwdriver to lift up the center plug on the push clips that hold the radiator cover in place. There are eight (8) push clips that you will need to remove. Remove the cover panel and set it aside. Under the cover, you will find the intake velocity stacks with brackets in front of the factory air boxes
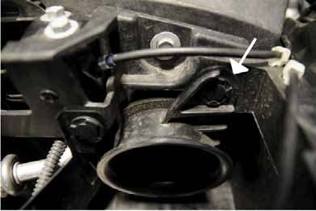
Starting on the left hand side of the car, use a flat head screwdriver to remove the push clip from the velocity stack along with the push clip and bolt (10mm socket) from the bracket located next to the velocity stack. Remove the velocity stack and bracket. These parts will not be reused.
Staying on the left hand side, remove the upper boost tube. Start by loosen the clamps at both ends of the upper boost tube using a 7mm socket. Disconnect the connector on the pressure sensor and the hoses attached to the blow off valve using a pair of pliers. Remove the upper boost tube.
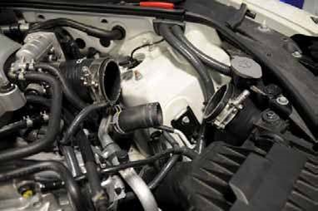
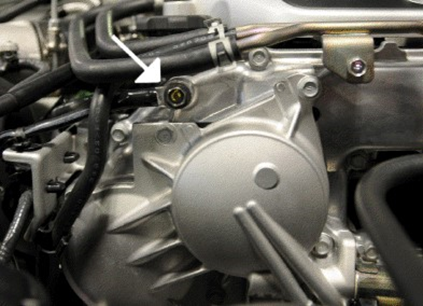
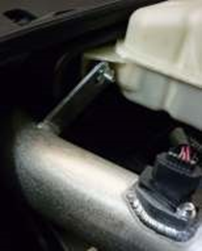
Disconnect the ground connection from the front timing chain case (12mm socket) and unclip the MAF sensor.
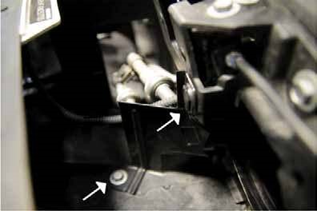
Unbolt the airbox bracket (10mm socket) and remove. The airbox bracket will not be reused.
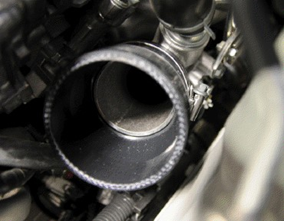
Loosen the clamps on the coupler between the airbox and turbo inlet using a 8mm socket. To remove the air box, pull upward on the air box. There are two (2) rubber grommets that hold onto the airbox from below. To release them, simply pull up on the box. It may be easier to remove the airbox by first taking out the air filter. This will allow you to place your hand inside the airbox and grasp the top of it giving you better leverage.
- Repeat the previous 6 steps in order to remove the right hand side airbox.
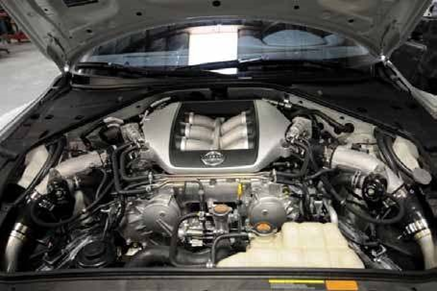
Installation of COBB Tuning Intake System
- Again starting on the left hand side, place the supplied coupler onto the turbo and loosely place the clamps over the coupler. Then place the coupler on the right hand side turbo.
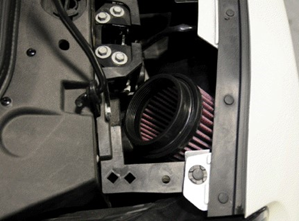
Place the air filter into the opening between the bumper and radiator support on the left hand and right hand sides. Doing this step before putting the intake tubes in allows for more room to fit the filters in place.
Place the both intake tubes loosely in the areas between the turbo and air filter. The left hand side tube will have SP-27001 or SP-27003 stamped into the non-bended end and the right hand side will be SP-27002 or SP-27004. Make sure to keep all of the clamps loose, as it will allow for easier positioning.
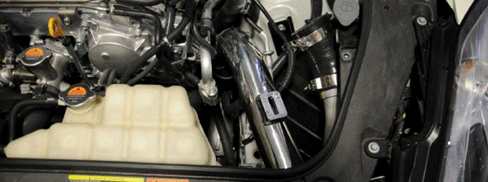
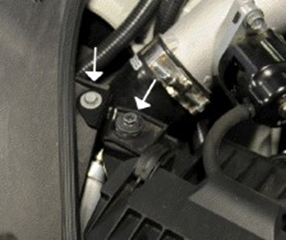
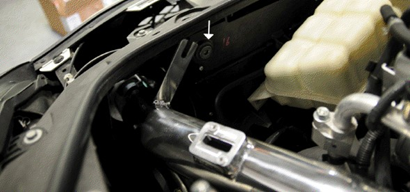
For the left hand side intake, remove the bolts on the coolant reservoir using a 10mm socket. Position the intake tube so it fits securely in the turbo coupler. Use the supplied rubber isolator, fender washer, lock washer and nut to secure the intake tube bracket to the coolant reservoir mounting point. Order will be coolant reservoir, rubber isolator, racket from intake, fender washer, lock washer, and then the nut. The factory bolt will still be used to secure the other side of the coolant reservoir.
For the right hand side intake, remove the lower bolt on the power steering reservoir using a 10mm socket. Position the intake tube so it fits securely in the turbo coupler. Use the supplied M6 x 40 bolt, lock washer and fender washer to secure the intake tube bracket to the power steering reservoir mounting point. The order will be reservoir, racket on the intake tube, fender washer, lock washer and finally the bolt head.
Tighten the clamps on the turbo inlets and intake tubes using an 8mm socket
Install the air filter onto the end of each intake tube with an 8mm socket
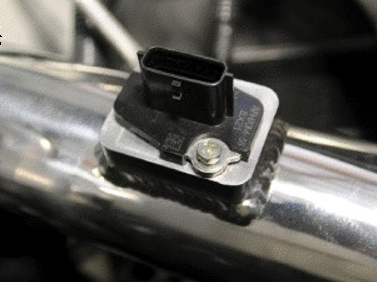
Remove the MAF sensor from the factory airbox and install them into the COBB Tuning intakes using a 7mm socket. Make sure that the left and right MAF sensors stay on their appropriate sides
Reinstall both ground connections, upper boost tubes and radiator cover. Double check that all hoses and sensors are connected and that all clamps are tight.
- Repeat all steps with the opposite side
Helpful Links/Information
Calibration Map Notes for Nissan Vehicles
Helps to figure out which map you should be on given the parts installed to your car
COBB Product Install Instructions for Nissan Vehicles
Main page for Nissan Installation Instructions
Copyright 2025 © COBB Tuning Products LLC. All Rights Reserved. | www.cobbtuning.com