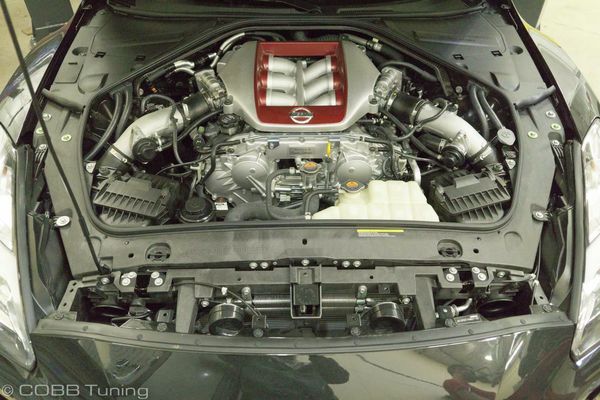
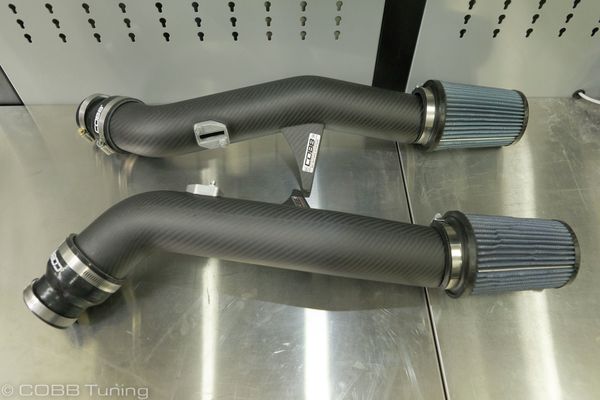
Nissan GT-R Carbon Fiber / Aluminum BigSF Intake System
- Paul Geyman
- Brandyn Mowat
- Former user (Deleted)

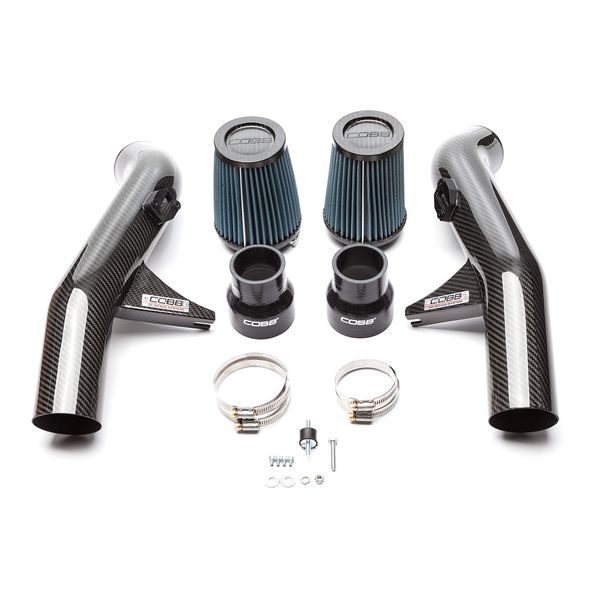
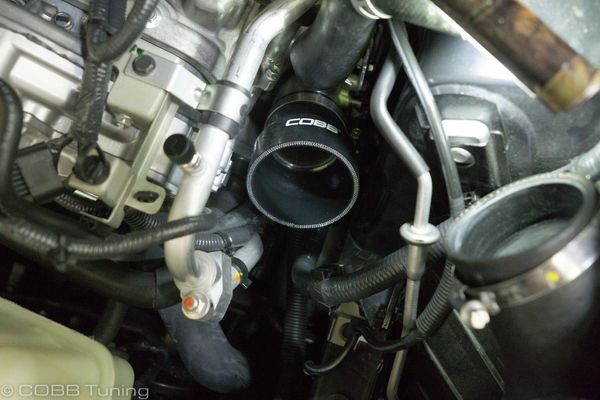
7C1201 – Nissan Carbon BigSF Intake System
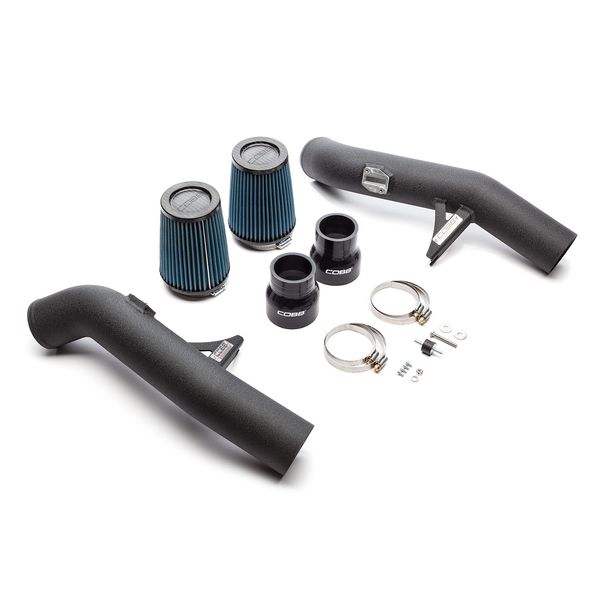
7C1150 - Nissan BigSF Intake System
GT-R 2008-2018
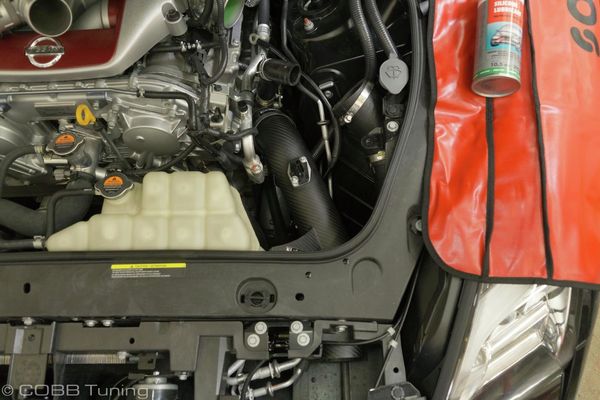
Congratulations on your purchase of the COBB Tuning Nissan GT-R Carbon BigSF Intake System! The following instructions will assist you through the installation process. Please read them BEFORE beginning the install to familiarize yourself with the steps and tools needed. If you feel you cannot properly perform this installation, we HIGHLY recommend you take the vehicle to a qualified and experienced automotive technician.
IMPORTANT! Installing this kit will require custom tuning or utilizing an appropriate Stage Power Package map if you have a matching mechanical configuration. Please consult with COBB or an authorized ProTuner in your area.
Parts List
- GT-R Carbon Intake Tube Driver
- GT-R Carbon Intake Tube Passenger
- 3"-2.25" Straight Silicone Reducer (2)
- Air Filters (2)
- M6 x 40mm Bolt
- M6 Rubber Isolator
- M6 x 20mm Fender Washer
- #40 Hose Clamp (2)
- #48 Hose Clamp (2)
- M6 Lock Nut
Tools Needed
- Flathead screwdriver
3/8" Ratchet
3/8" 7mm socket
- 3/8" 8mm socket
3/8" 10mm socket
3/8" 12mm socket
- 12" extension
Pliers
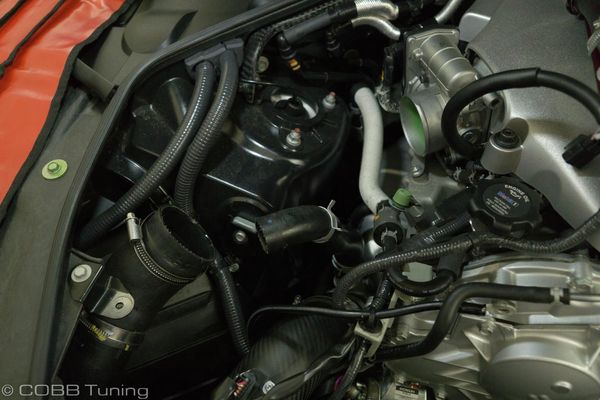
Removal of Stock Intake/Airbox
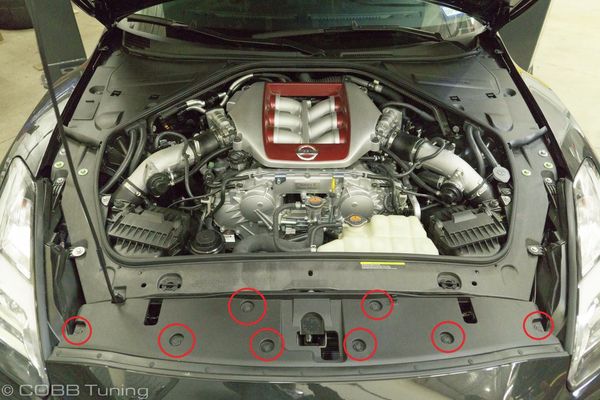
- Using a flat head screwdriver, pop each push pin out that are used to hold the radiator cover in place. There are (8) push pins that you will need to remove. Once this is done, remove the cover and set it aside.
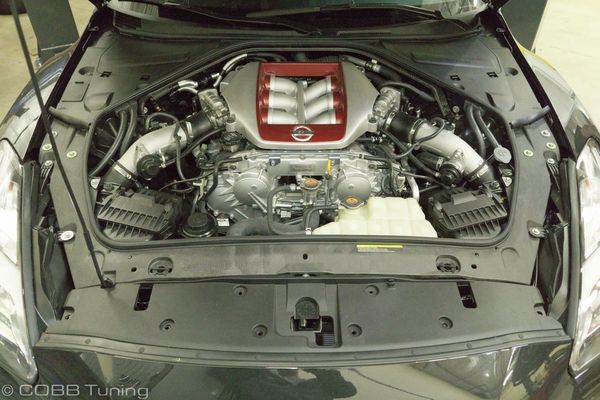
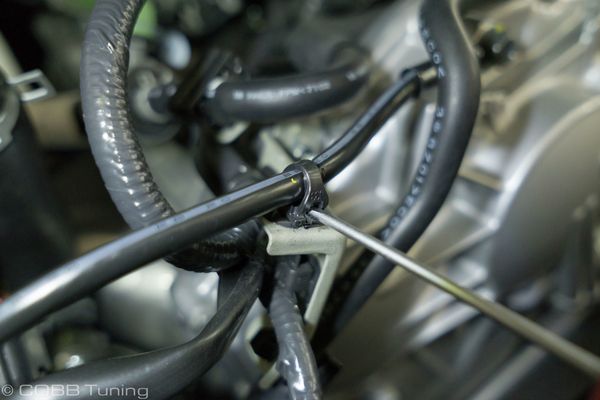
- Under the cover, you will find intake velocity stacks with brackets in front of the factory air boxes. Starting on the passenger's side of the engine bay, use a flat head screwdriver to remove the push pin from the velocity stack.

- On the driver's side of the engine bay, use a flat head screwdriver to remove the push pin from the velocity stack.
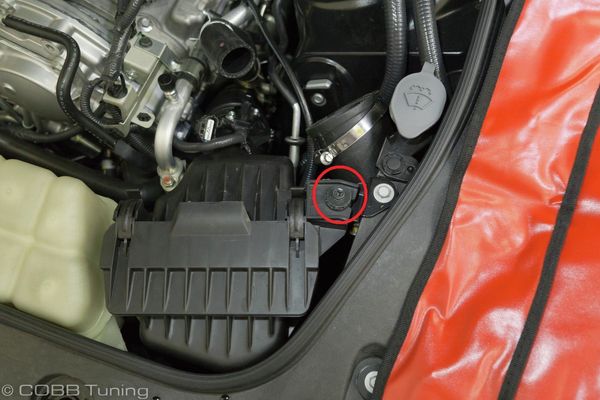
- On the passenger's side, remove the 10mm bolt and push pin from the bracket located next to the velocity stack location.

- On the driver's side, remove the 10mm bolt and push pin from the bracket located next to the velocity stack location.
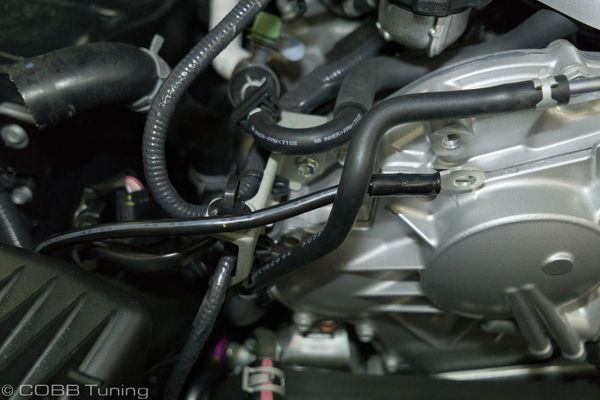
On the passenger's side, remove the charge pipe. Start by loosen the clamps at both ends of the charge pipe using a 7mm socket. Disconnect the connector on the pressure sensor and the hoses attached to the blow off valve using a pair of pliers. Remove the charge pipe.
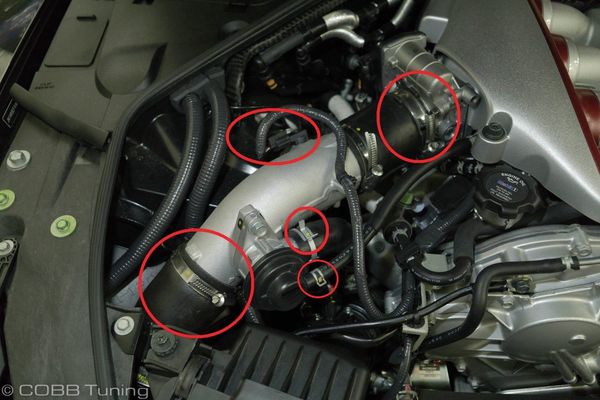

- On the driver's side, remove the charge pipe. Start by loosen the clamps at both ends of the charge pipe using a 7mm socket. Disconnect the connector on the pressure sensor and the hoses attached to the blow off valve using a pair of pliers. Remove the charge pipe.
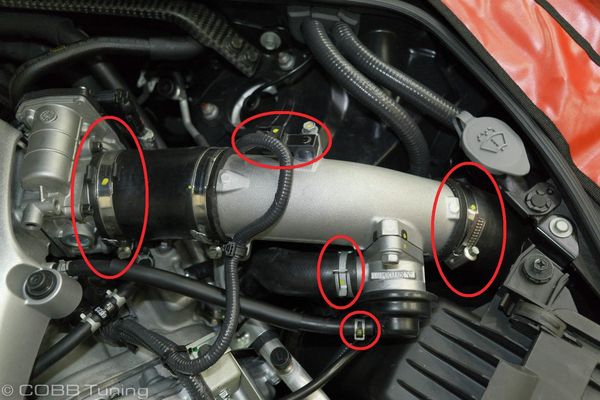
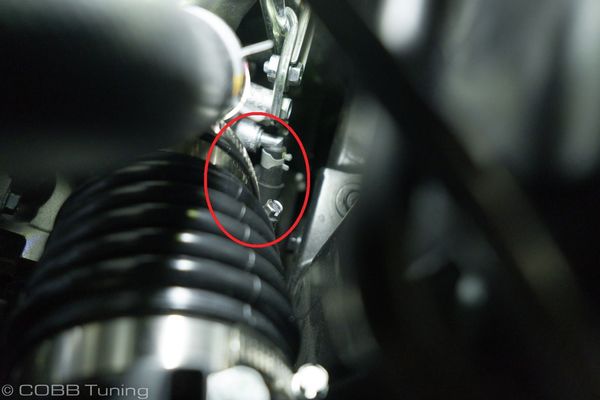
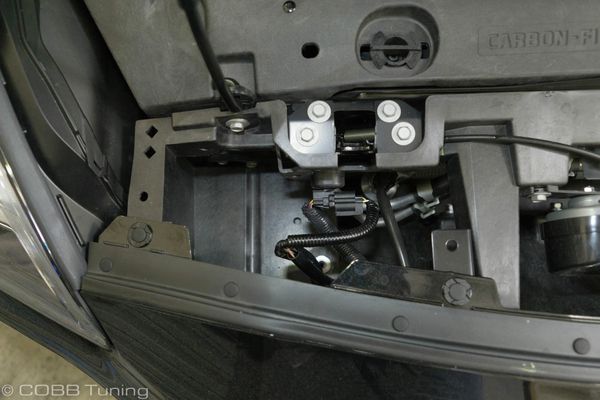
- Disconnect the (2) ground connection from the fronts of timing chain case using a 12mm socket and release the retaining clip.
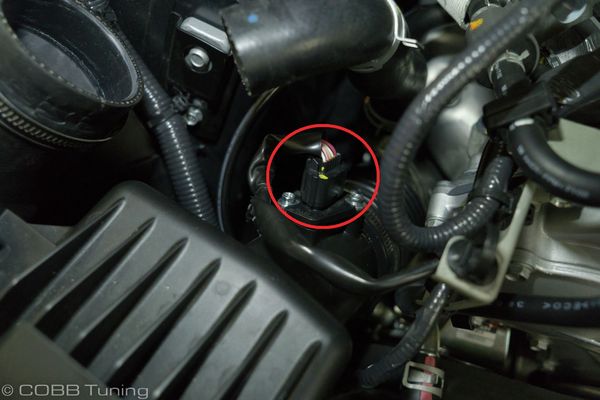
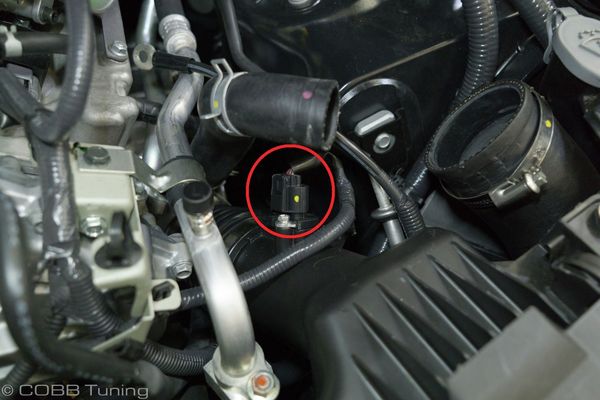
- Unclip the MAF sensor on each airbox.

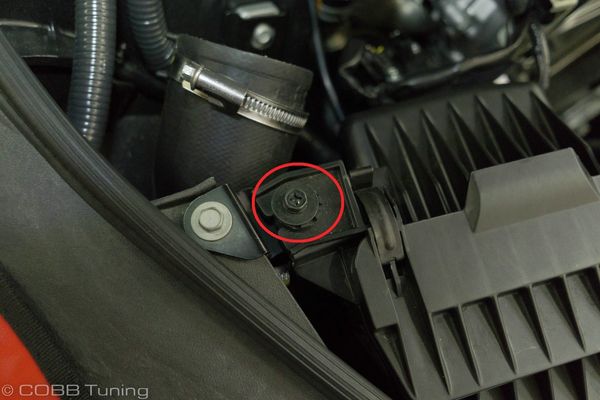
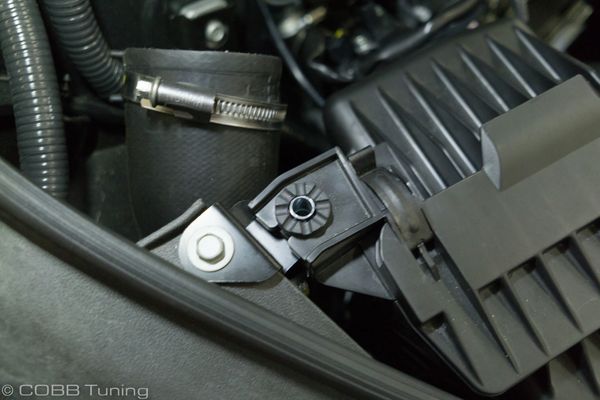
- On the driver's side, unbolt the airbox bracket using a 10mm socket and remove.
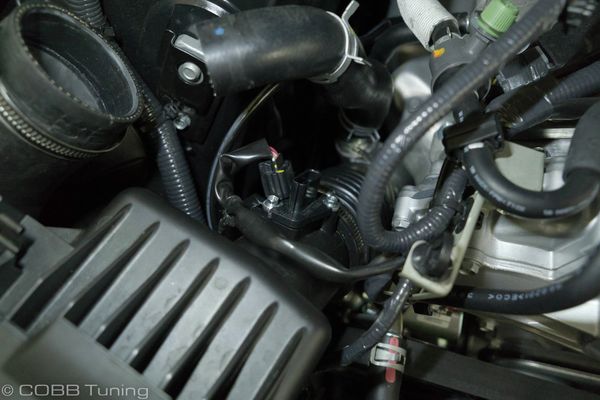
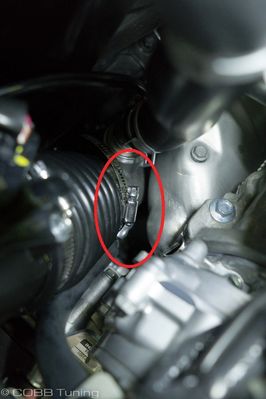
Loosen the clamps on the coupler between the airbox and turbo inlet using a 8mm socket. To remove the air box, pull upward on the air box. There are two (2) rubber grommets that hold onto the airbox from below. To release them, simply pull up on the box. It may be easier to remove the airbox by first taking out the air filter. This will allow you to place your hand inside the airbox and grasp the top of it giving you better leverage.

- On the passenger's side, unbolt the airbox bracket using a 10mm socket and remove.
- Loosen the clamps on the coupler between the airbox and turbo inlet using a 8mm socket. To remove the air box, pull upward on the air box. There are two (2) rubber grommets that hold onto the airbox from below. To release them, simply pull up on the box. It may be easier to remove the airbox by first taking out the air filter. This will allow you to place your hand inside the airbox and grasp the top of it giving you better leverage.
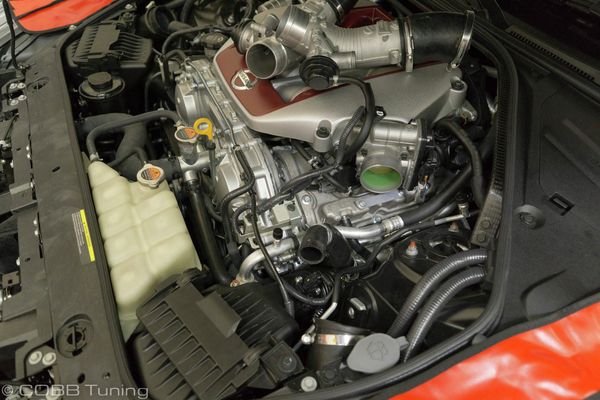
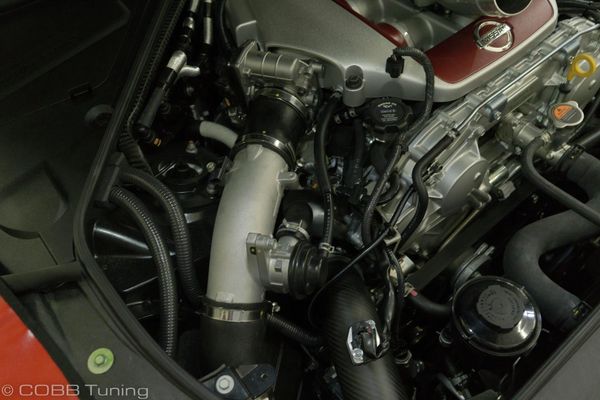
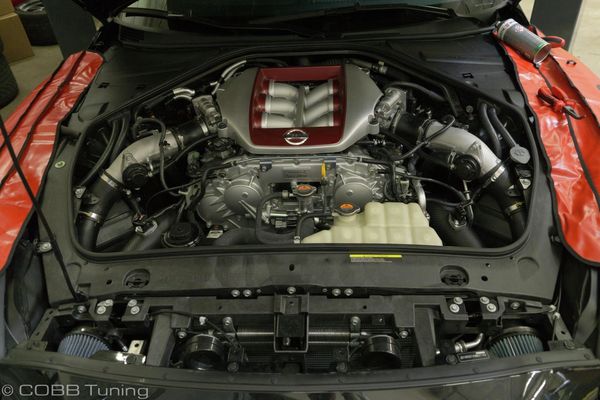
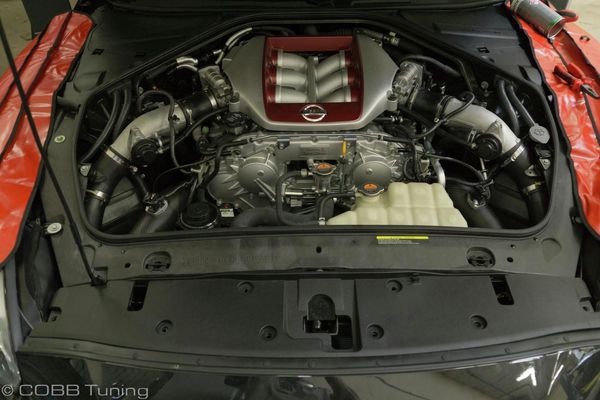
Installation of COBB Tuning GTR Carbon Big SF Intake System
- The assembly of each air filter will be as follows:
- To begin, place each turbo silicone reducer on the respective turbo.

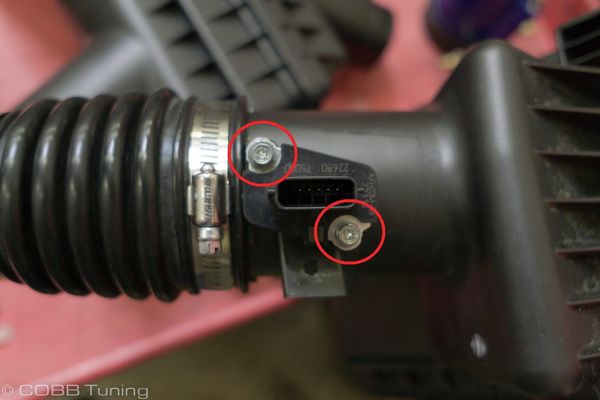
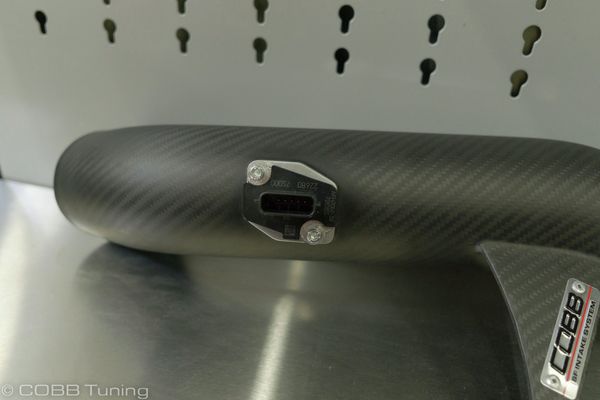
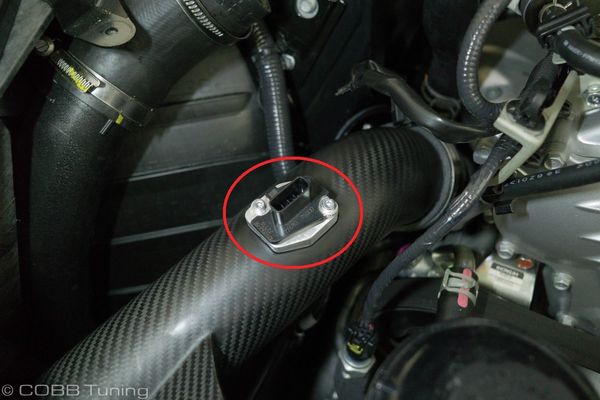
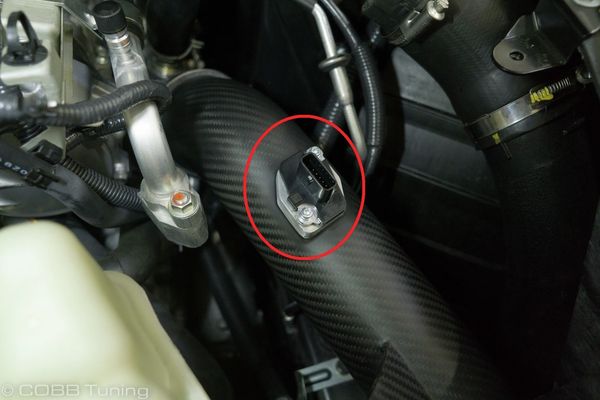
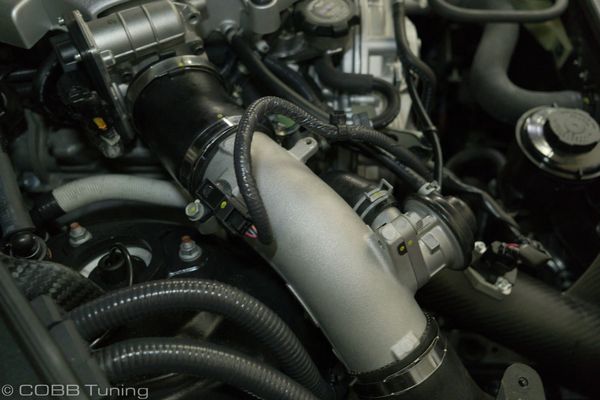
- Remove the MAF sensor from each OEM intake tube and transfer them to the COBB intake tubes.
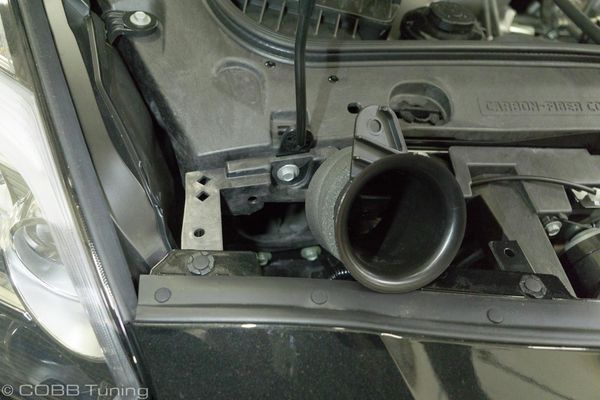
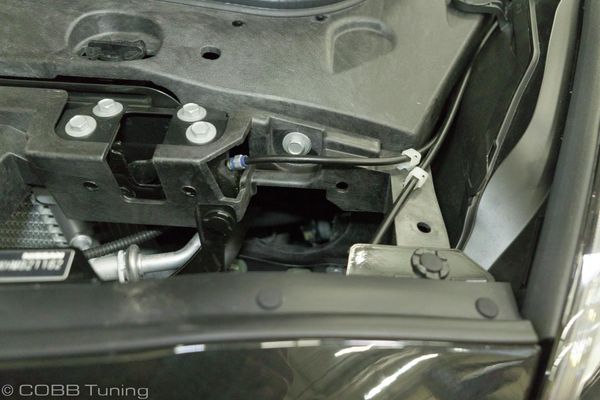
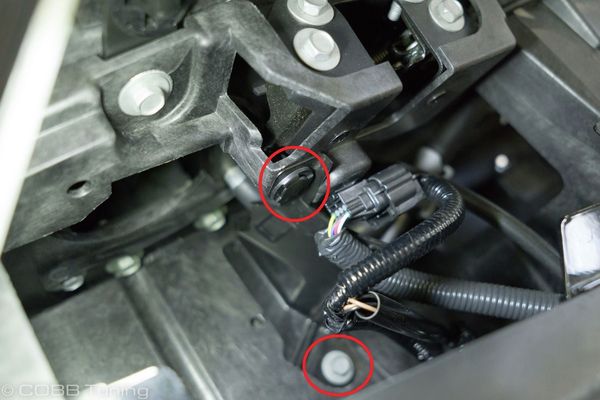
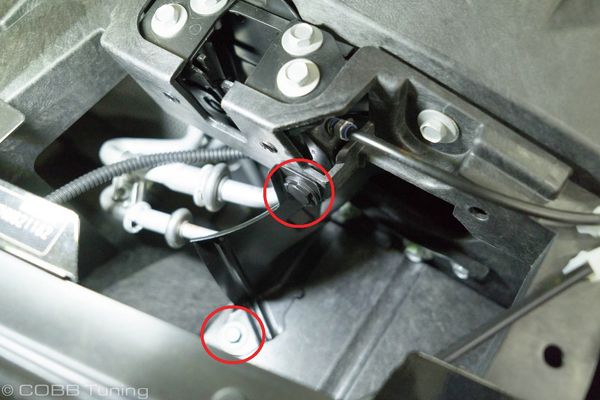
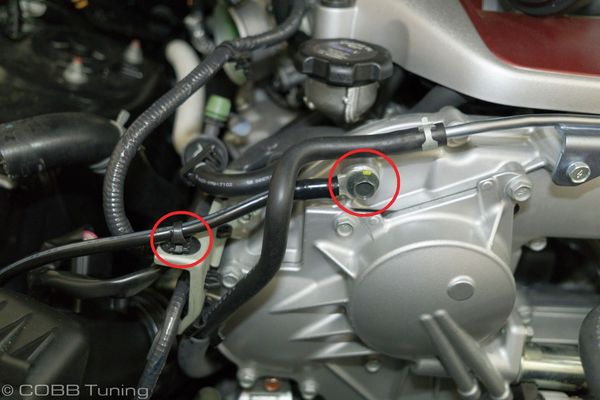
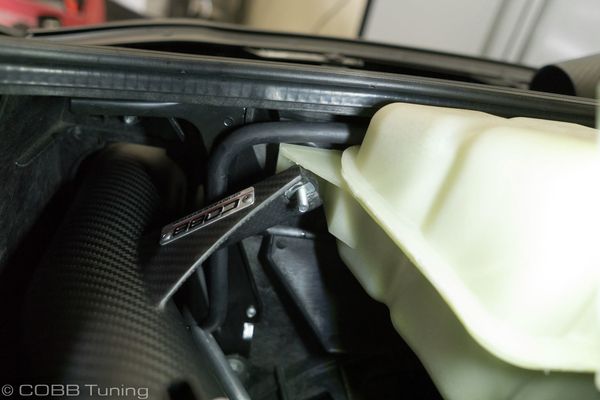
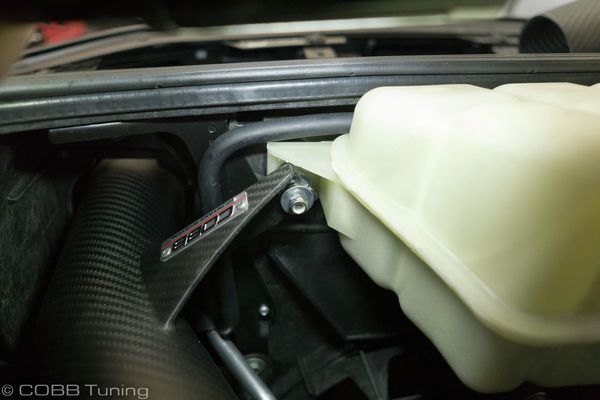
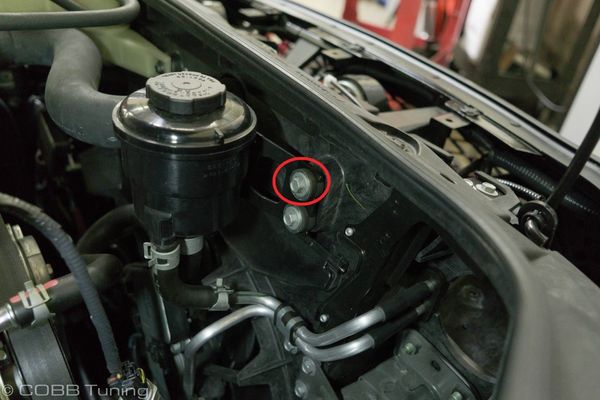
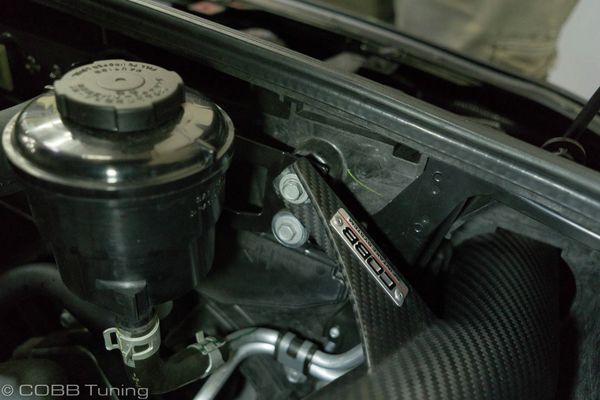
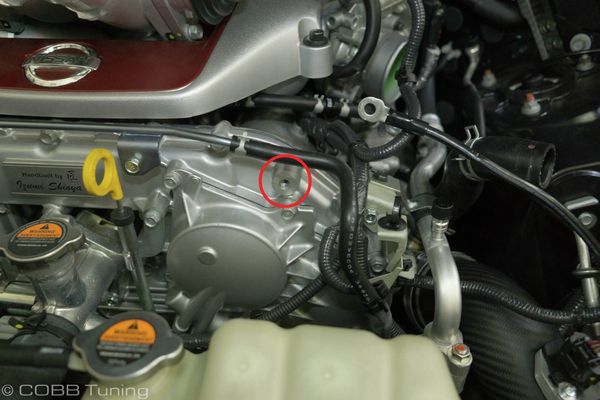
- At the front of the engine bay, on the driver's side, remove the 10mm bolt securing the coolant reservoir.
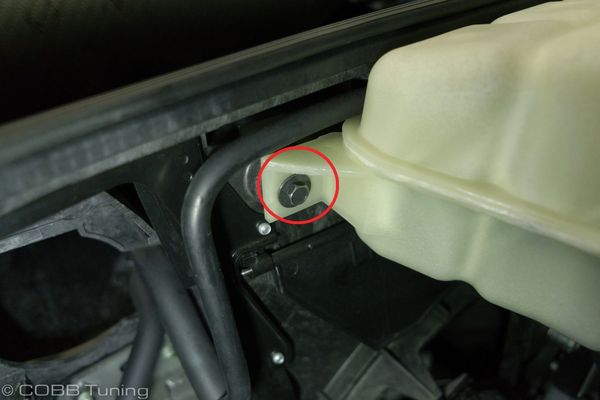
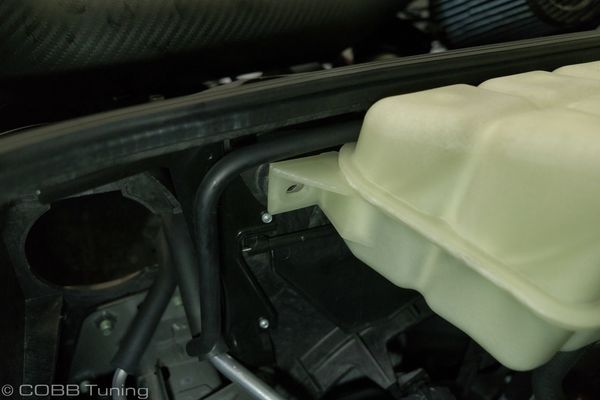
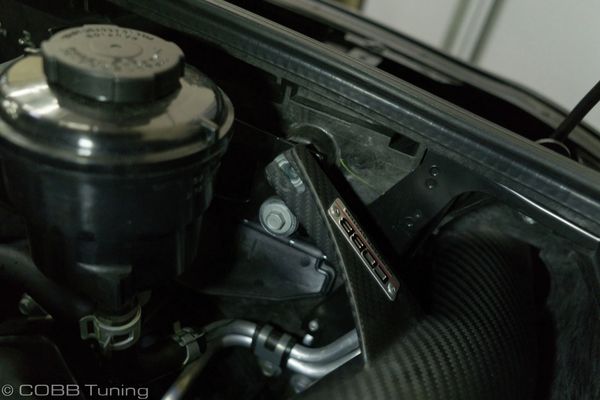
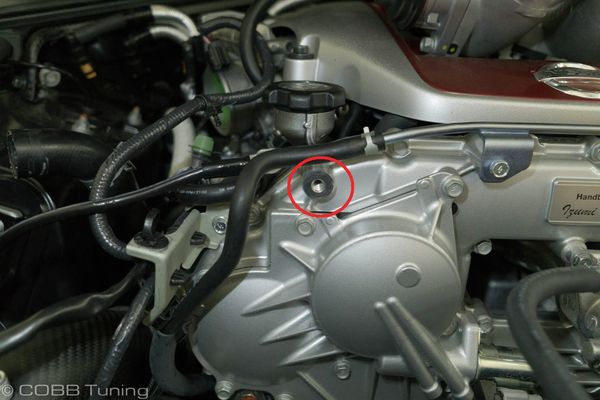
- Secure the coolant overflow housing with the provided mounting bolt and isolator.
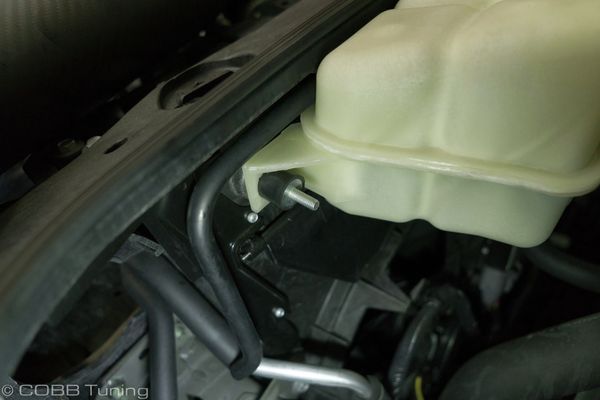
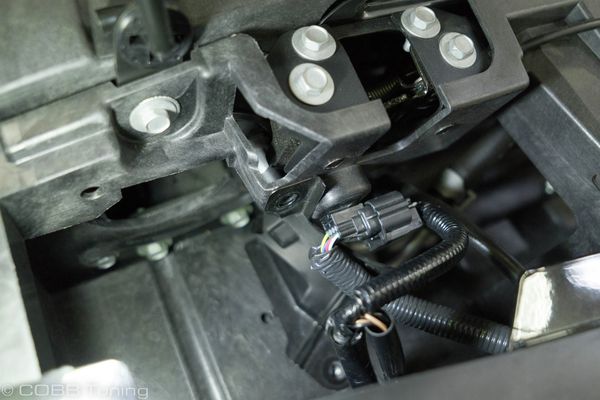
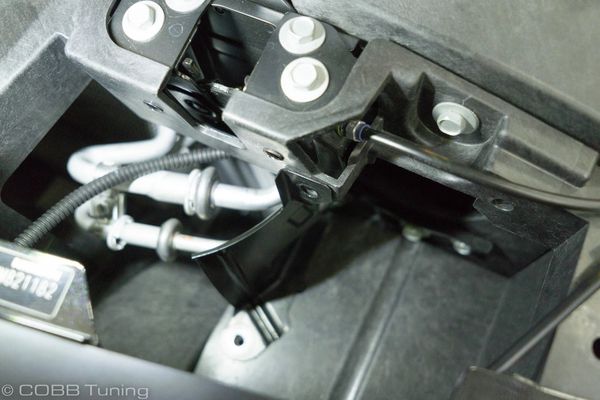
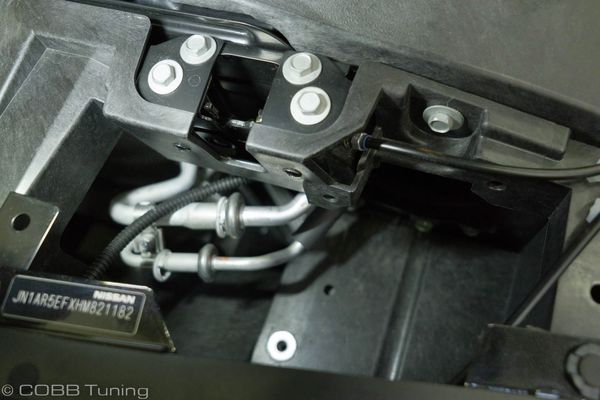
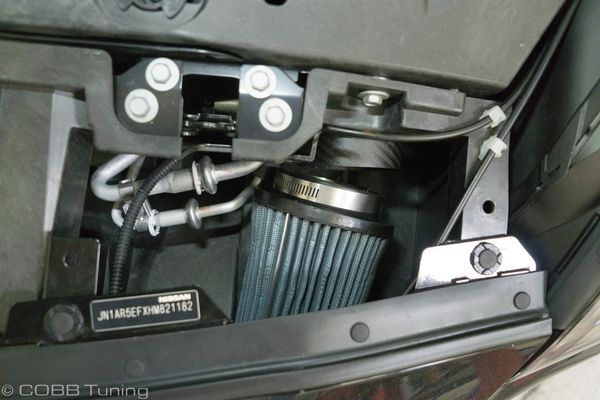
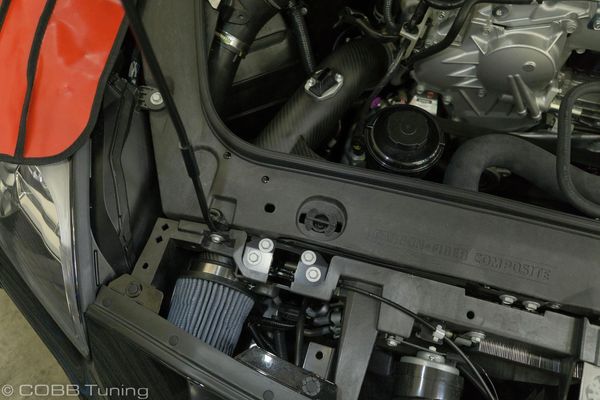
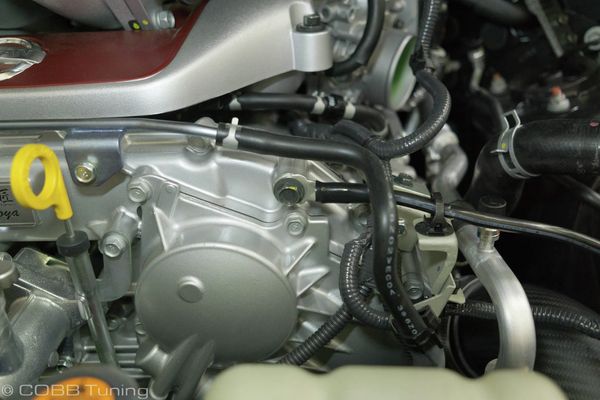
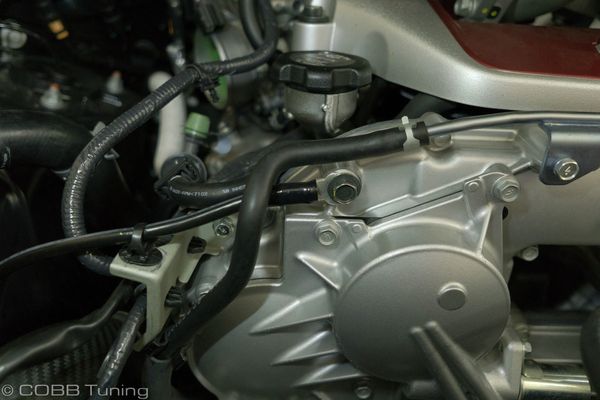
- Using a small amount of silicone lubricant, insert the driver's side intake tube to the turbo inlet and slide the bracket on the mounting location for the coolant reservoir. Secure the bracket with the provided nut.
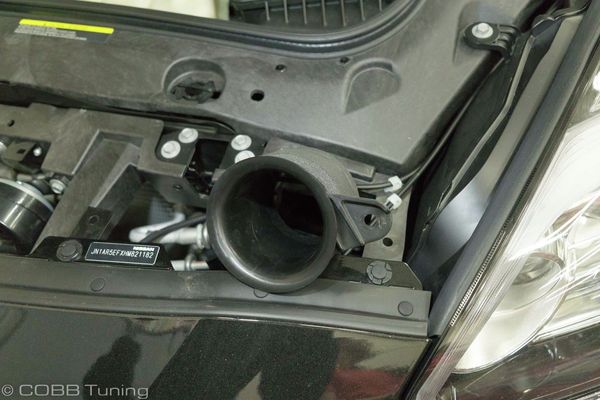
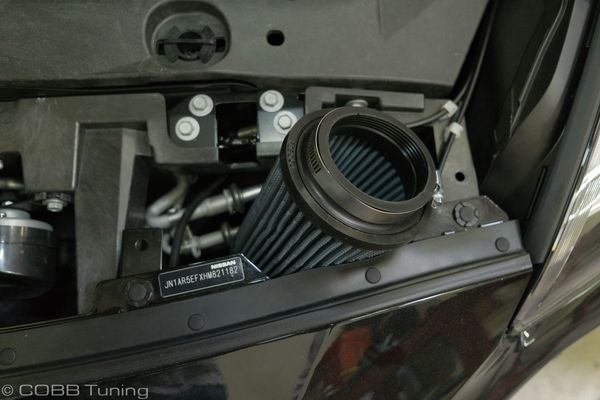
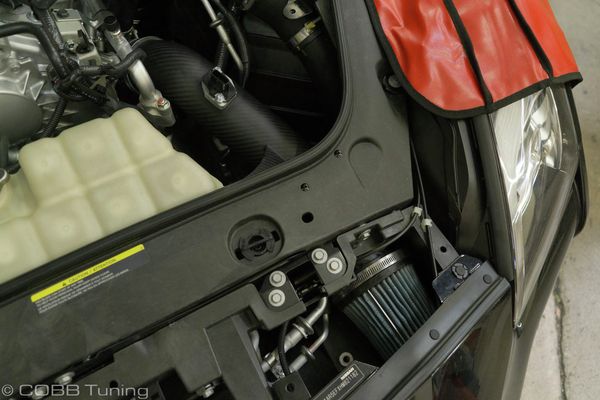
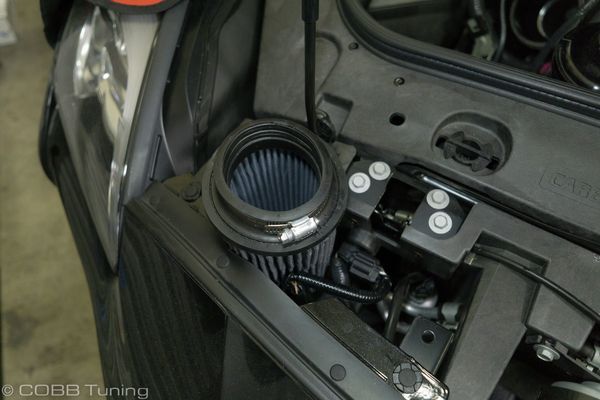
- Gently compress the provided intake filter and slide it through the space between the front bumper and front chassis braces.
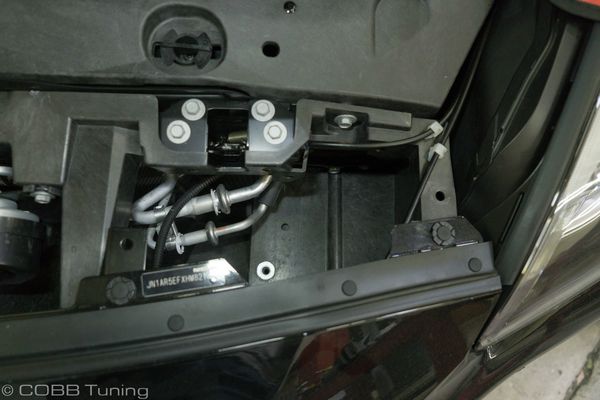
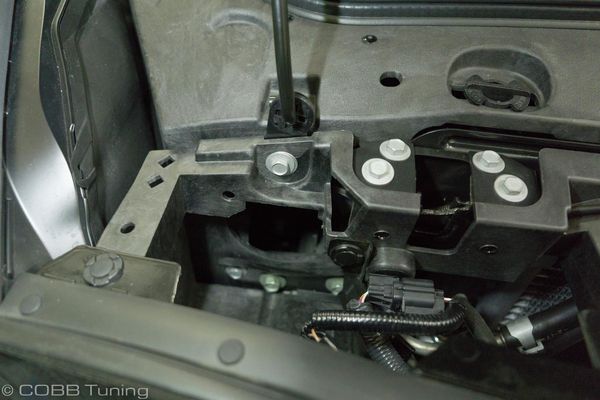
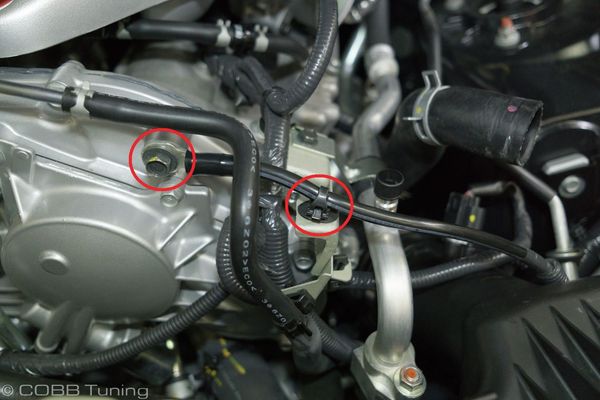
- At the front of the engine bay, on the passenger's side, remove the top 10mm bolt securing the Power Steering reservoir.
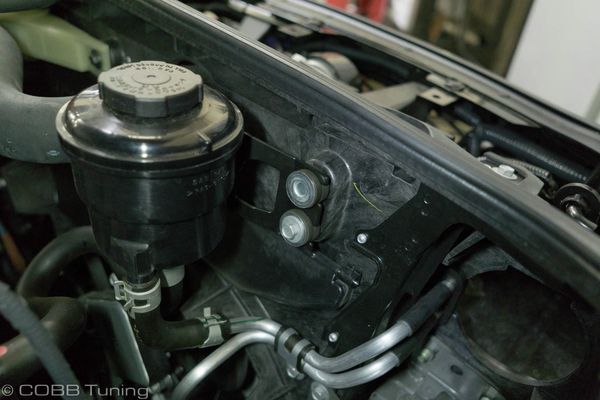
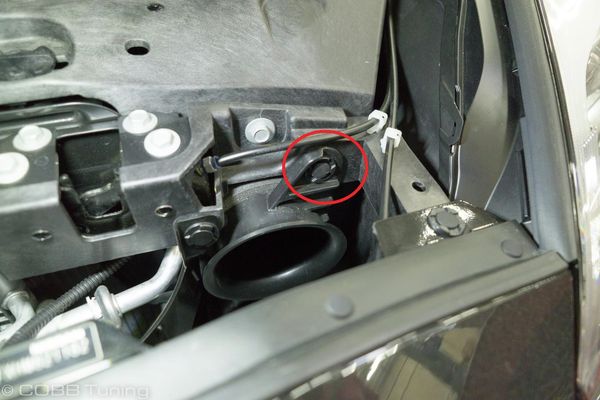
- Using a small amount of silicone lubricant, insert the passenger's side intake tube to the turbo inlet and secure the intake bracket at the power steering fluid reservoir.
- Gently compress the provided intake filter and slide it through the space between the front bumper and front chassis braces.
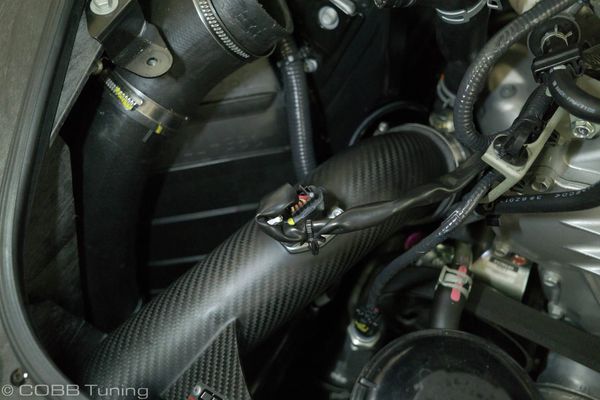
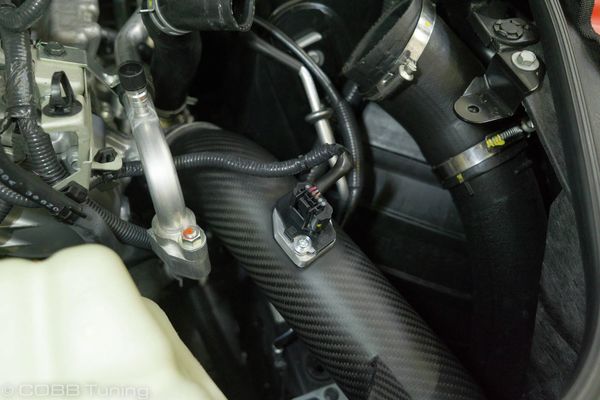
- Attach the MAF electrical harness to each MAF sensor.
- Reattach the (2) grounding connections to the timing chain case.
- Reinsert the charge pipe on the passenger's side of the engine. Be certain to reconnect the pressure sensor and BPV connections.
- Reinsert the charge pipe on the driver's side of the engine. Be certain to reconnect the pressure sensor and BPV connections.
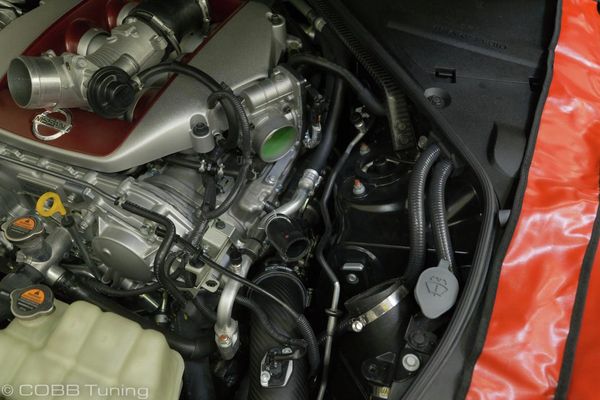

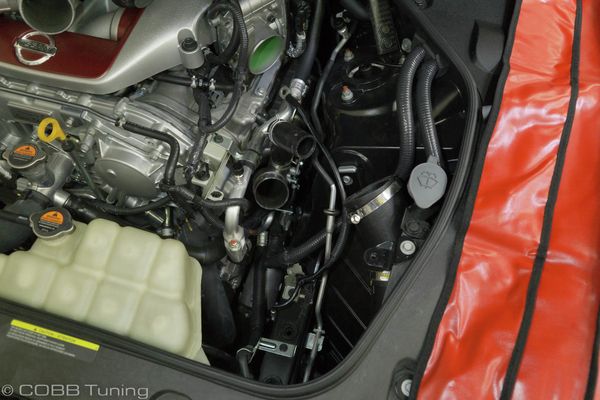
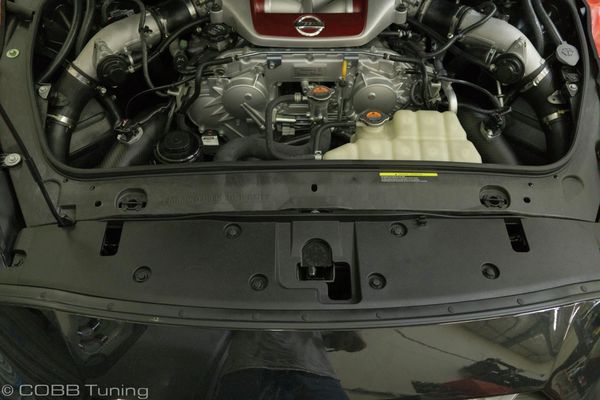
- Reinstall the radiator cover using the OEM (8) push pins.
- We recommend conducting a pressurized smoke test to verify you have no leaks in the intake tract.
- Flash the appropriate calibration for your new COBB carbon fiber BigSF intakes and enjoy!
CARB Sticker Installation (On CARB Certified Applications)
This product is covered under CARB EO D-660-63
For additional information on CARB EO options for your Nissan, check out our page CARB EO numbers for COBB Nissan Products
Install the supplied CARB sticker on an easily viewable space that won't be susceptible to large amounts of heat. We recommend on the radiator core support, or the underside of the hood.
Calibration Map Notes for Nissan Vehicles
Helps to figure out which map you should be on given the parts installed to your car
COBB Product Install Instructions for Nissan Vehicles
Main page for Nissan Installation Instructions
COBB Customer Support Web Support and Tech Articles: COBB Tuning Customer Support Center Email: support@cobbtuning.com Phone support available 9am to 6pm Monday-Thursday. 9am to 4pm Friday (CST) 866.922.3059 return to www.cobbtuning.comContact Us:
Copyright 2025 © COBB Tuning Products LLC. All Rights Reserved. | www.cobbtuning.com