
- Inspect the new components included with the COBB kit. If anything appears out of place, please contact COBB immediately and do not proceed with the installation.
- Begin by placing the car on the lift and raising it to where you can now access the bottom of the vehicle.
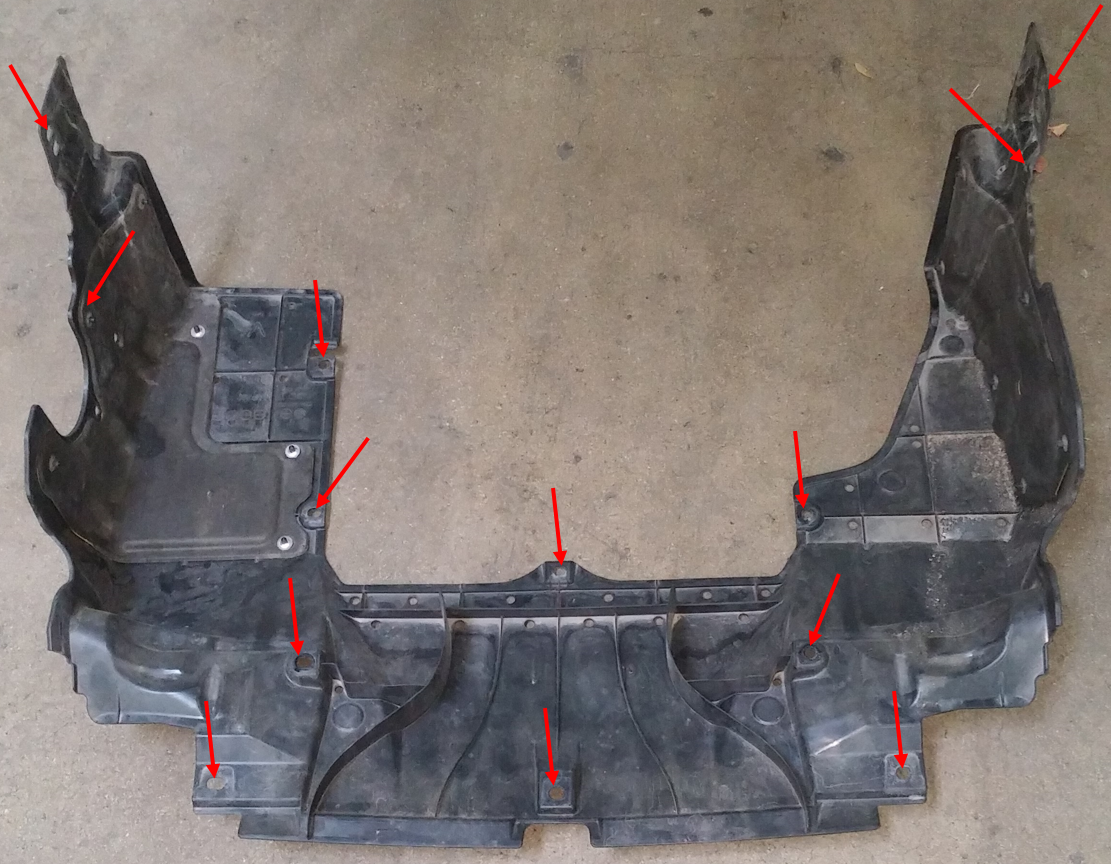
Next, remove the plastic under tray by using the flathead screwdriver to remove the pushpins and the 12mm socket to remove the two bolts holding the under tray to the car. Recommended: Take pictures of where each pushpin is for your future reference.

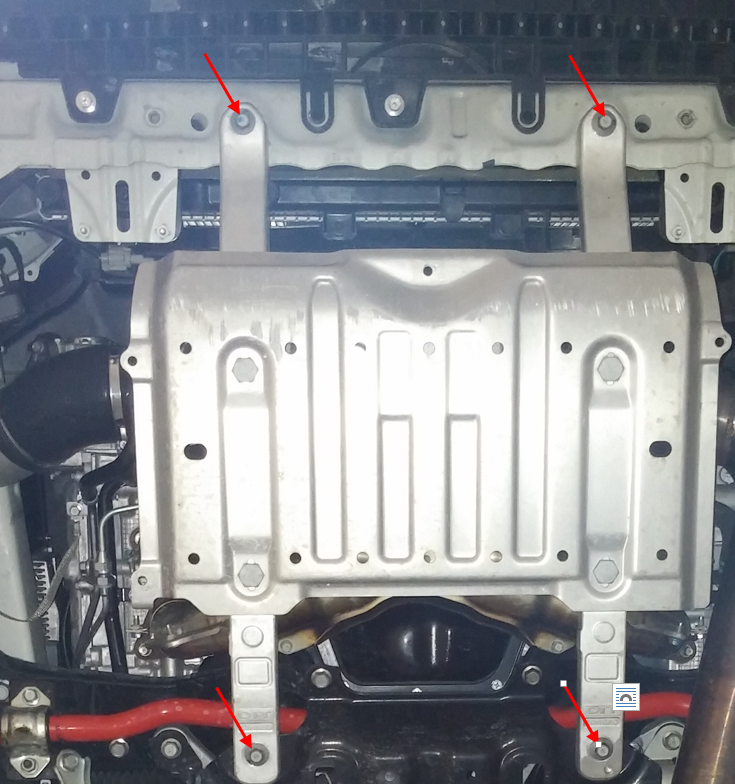
- Once the under tray is uninstalled, remove the skid plate by using a 12mm socket to loosen the bolts fastening it to the car.
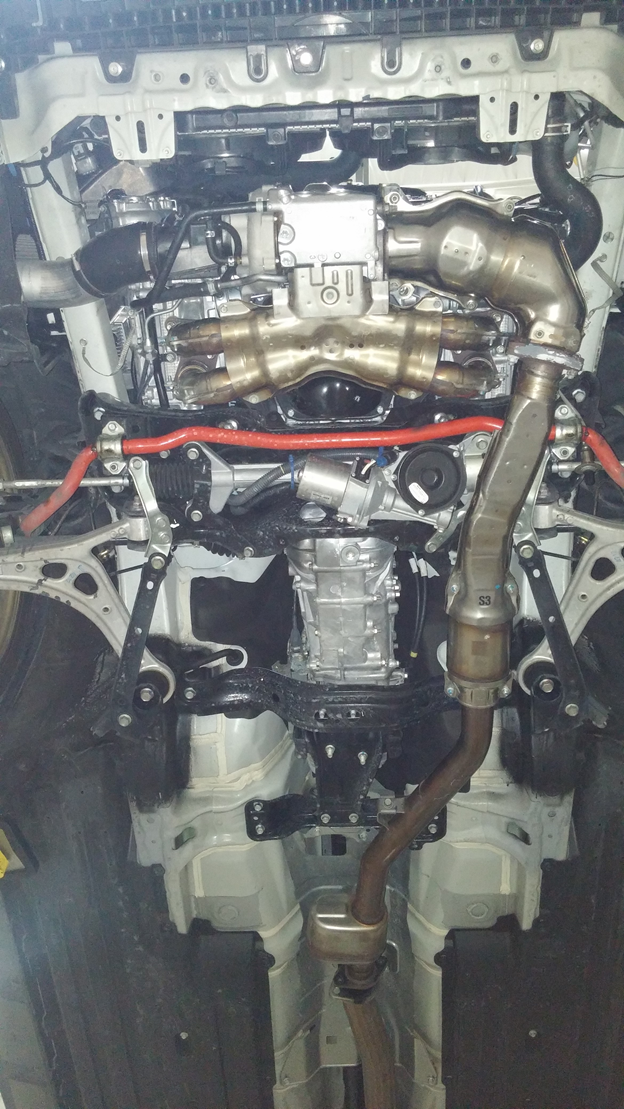
- With the under tray and skid plate removed, you should now be looking at an open bottom side of the car!
Restrictor Pill Removal
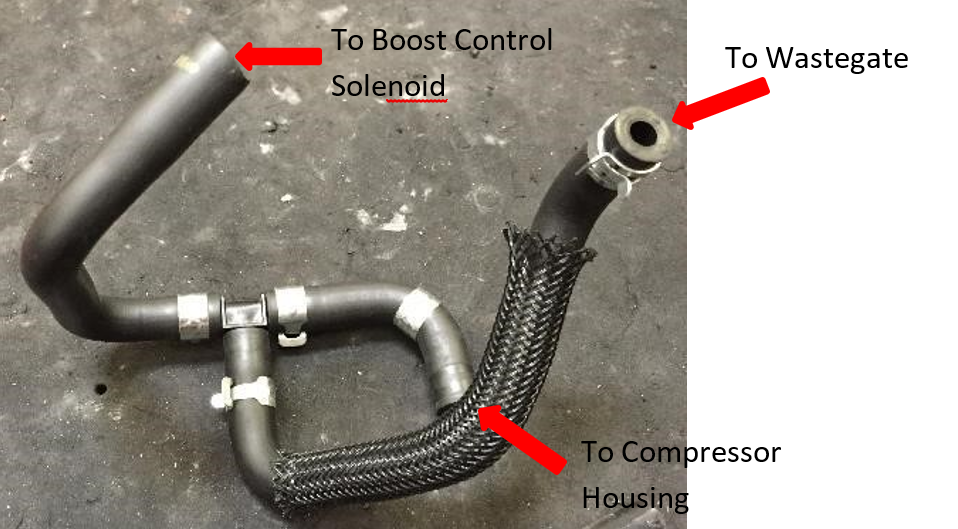
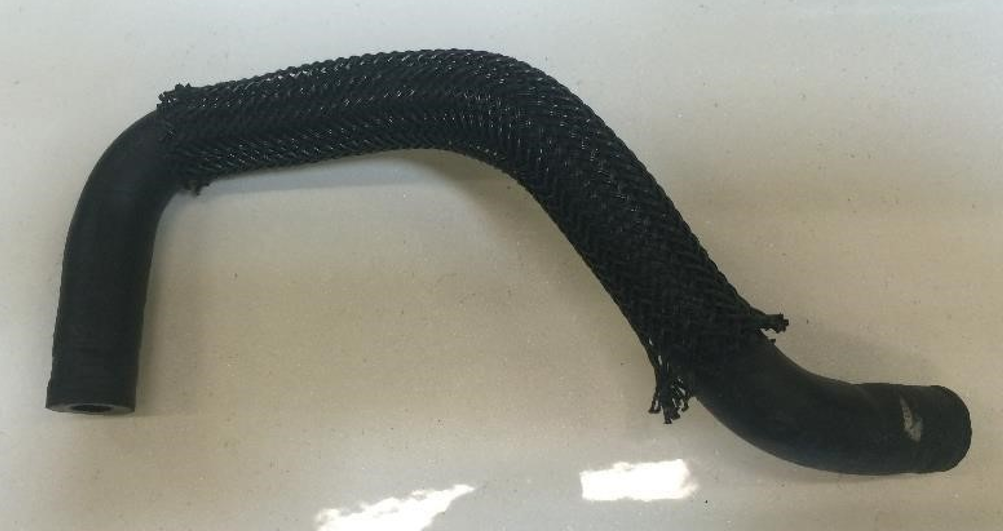
- On the passenger side of the vehicle (USDM) locate the turbo vacuum lines. The line with the covering is the one we're looking for.
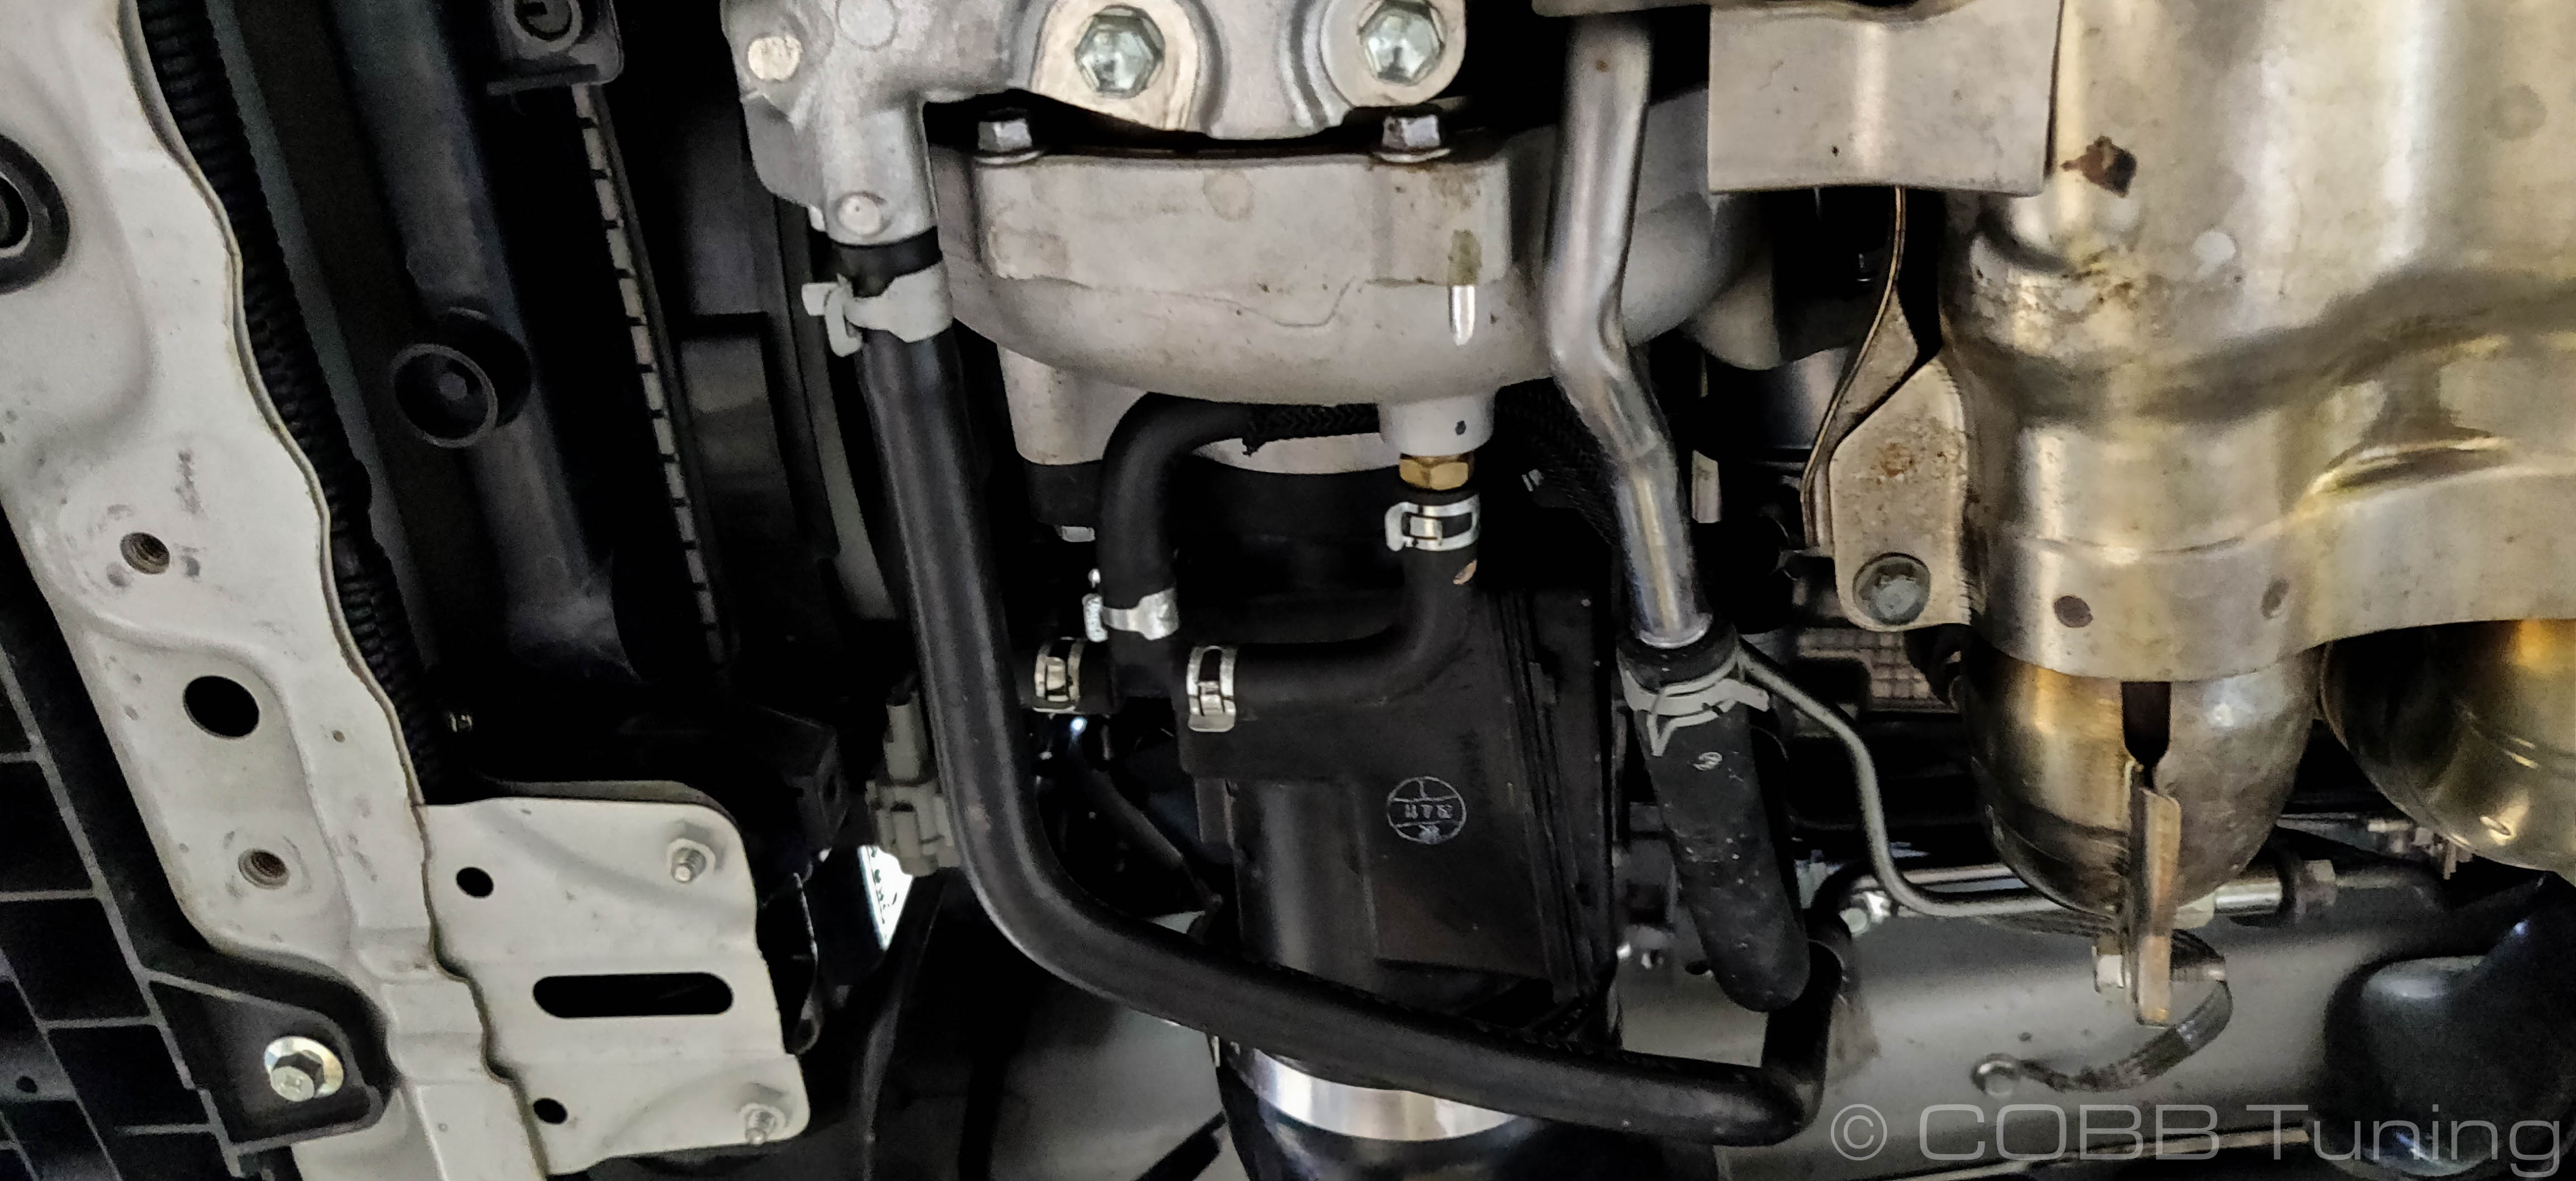
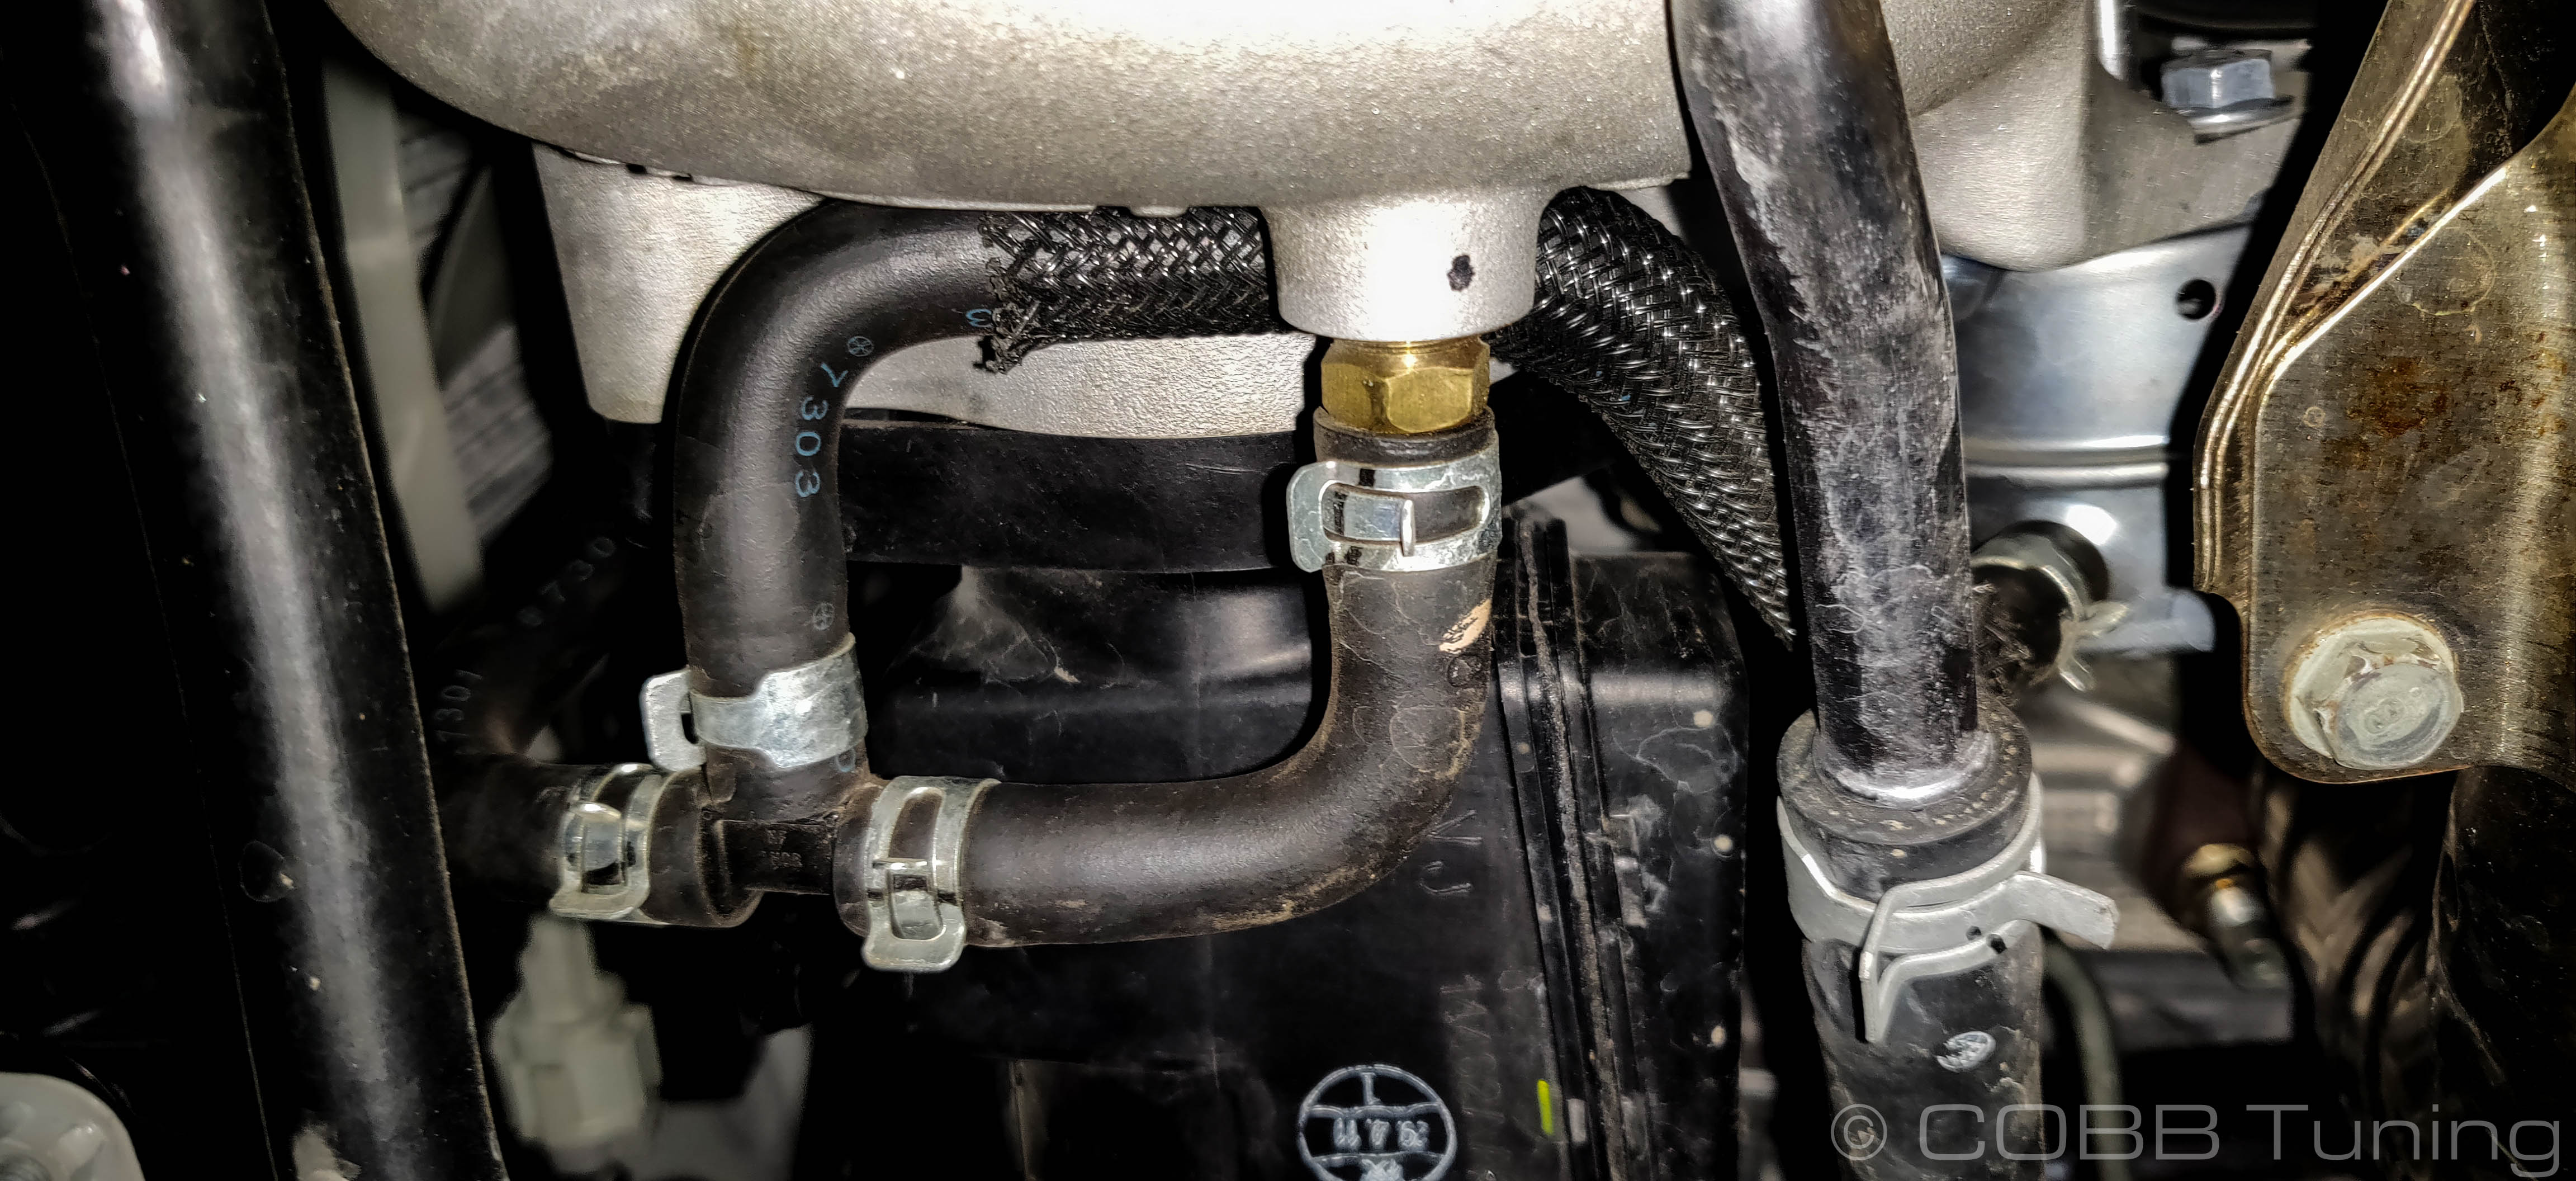
- Undo the hose clamp from the T fitting and Wastegate.
- With the hose removed, you should be able to see the fitting inside the line.
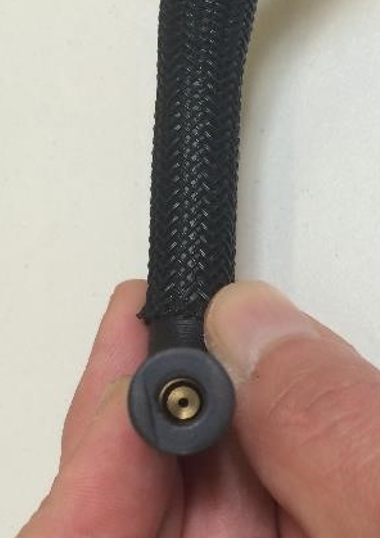
- At this point, one option is to remove the brass fitting from the line. However, in the event that you want to go back to stock, we usually suggest keeping the line as-is and simply swapping it out with a new piece of 6mm (1/4") vacuum line.
- Flash an appropriate map for the modification.
- You're all done! Go out and enjoy!
Links
Subaru Installation Instructions
Main Installation Instruction Repository for Subaru Parts
Link to Subaru Map Notes to see what map you should be on given the parts you've added
Error rendering macro 'excerpt-include' : You can only link to a page or blog post.