
7F2500 – Raptor Front Mount Intercooler
Ford Raptor 2017 - 2020
Ford F150 (3.5, 2.7 ecoboost engines only) 2017 - 2019
Congratulations on your purchase of the COBB Tuning Raptor Front Mount Intercooler! The following instructions will assist you through the installation process. Please read them BEFORE beginning the install to familiarize yourself with the steps and tools needed. If you feel you cannot properly perform this installation, we HIGHLY recommend you take the vehicle to a qualified and experienced automotive technician.
IMPORTANT! Installing this kit will require custom tuning or utilizing an appropriate Stage Power Package map if you have a matching mechanical configuration. Please consult with COBB or an authorized Protuner in your area if you have any questions!
Table of Contents
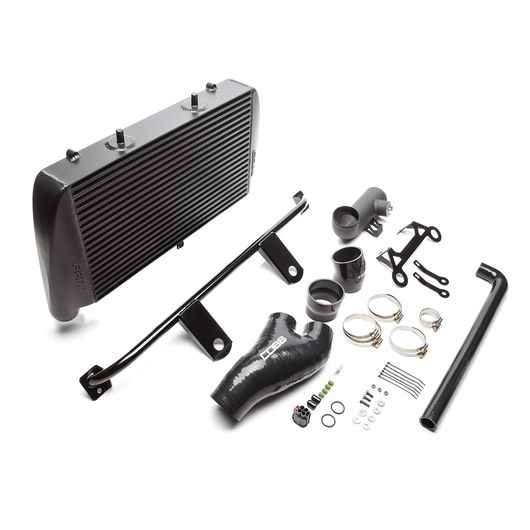
Parts List
- Lower Intercooler Bracket
- Upper Intercooler Bracket
- Raptor Intercooler Assembly
- Raptor Hot-Pipe Y-Coupler
- Raptor Cold Pipe Assembly
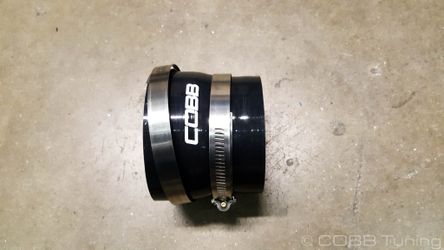
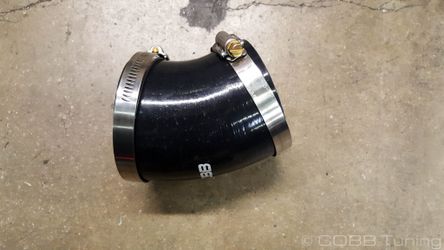
- 3" 28 degree IC to BOV hose
- 3.5" - 3" Reducer
- (2) Raptor Stock Bumper Support Bracket
- BOV Recirculation Line
- (2) BOV Recurculation Line Replacement O-Rings
- Super-Lube
- (2) Vinyl Caps for Shutter Plugs
- Intercooler Fan Electrical Socket (Female)
- (4) Intercooler Fan Electrical Plug
- #56 Hose Clamp
- (4) #48 Hose Clamp
- (2) #44 Hose Clamp
- (2) #24 Hose Clamp
- (6) Black Zip Ties
- M6 x 20mm Stainless Bolt
- (3) Flanged Hex Nut 6mm
- (2) M6x18mm Fender Washer
Tools Needed
Sockets
3/8"
Hand Tools
- Phillips head screwdriver
- Flathead screwdriver
- Trim removal tool
- Razor Knife
- Air Saw or Dremel
Misc.
- Marking device similar to a paint pen or sharpie
Wrenches
This installation does involve cutting into the factory grill shutter assembly. The shutters will not be able to be re-installed with the COBB Front Mount Intercooler, or after the trimming is done. If you want to re-install them you'll need a new shutter assembly
2018/19 Raptor
Ford P/N FL3Z-8475-F
2018/19 F150
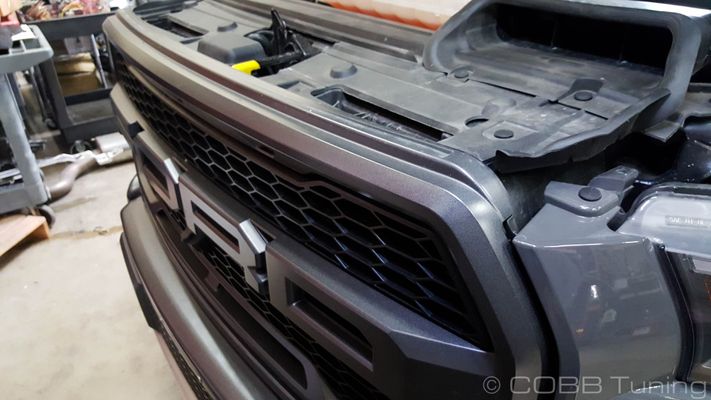
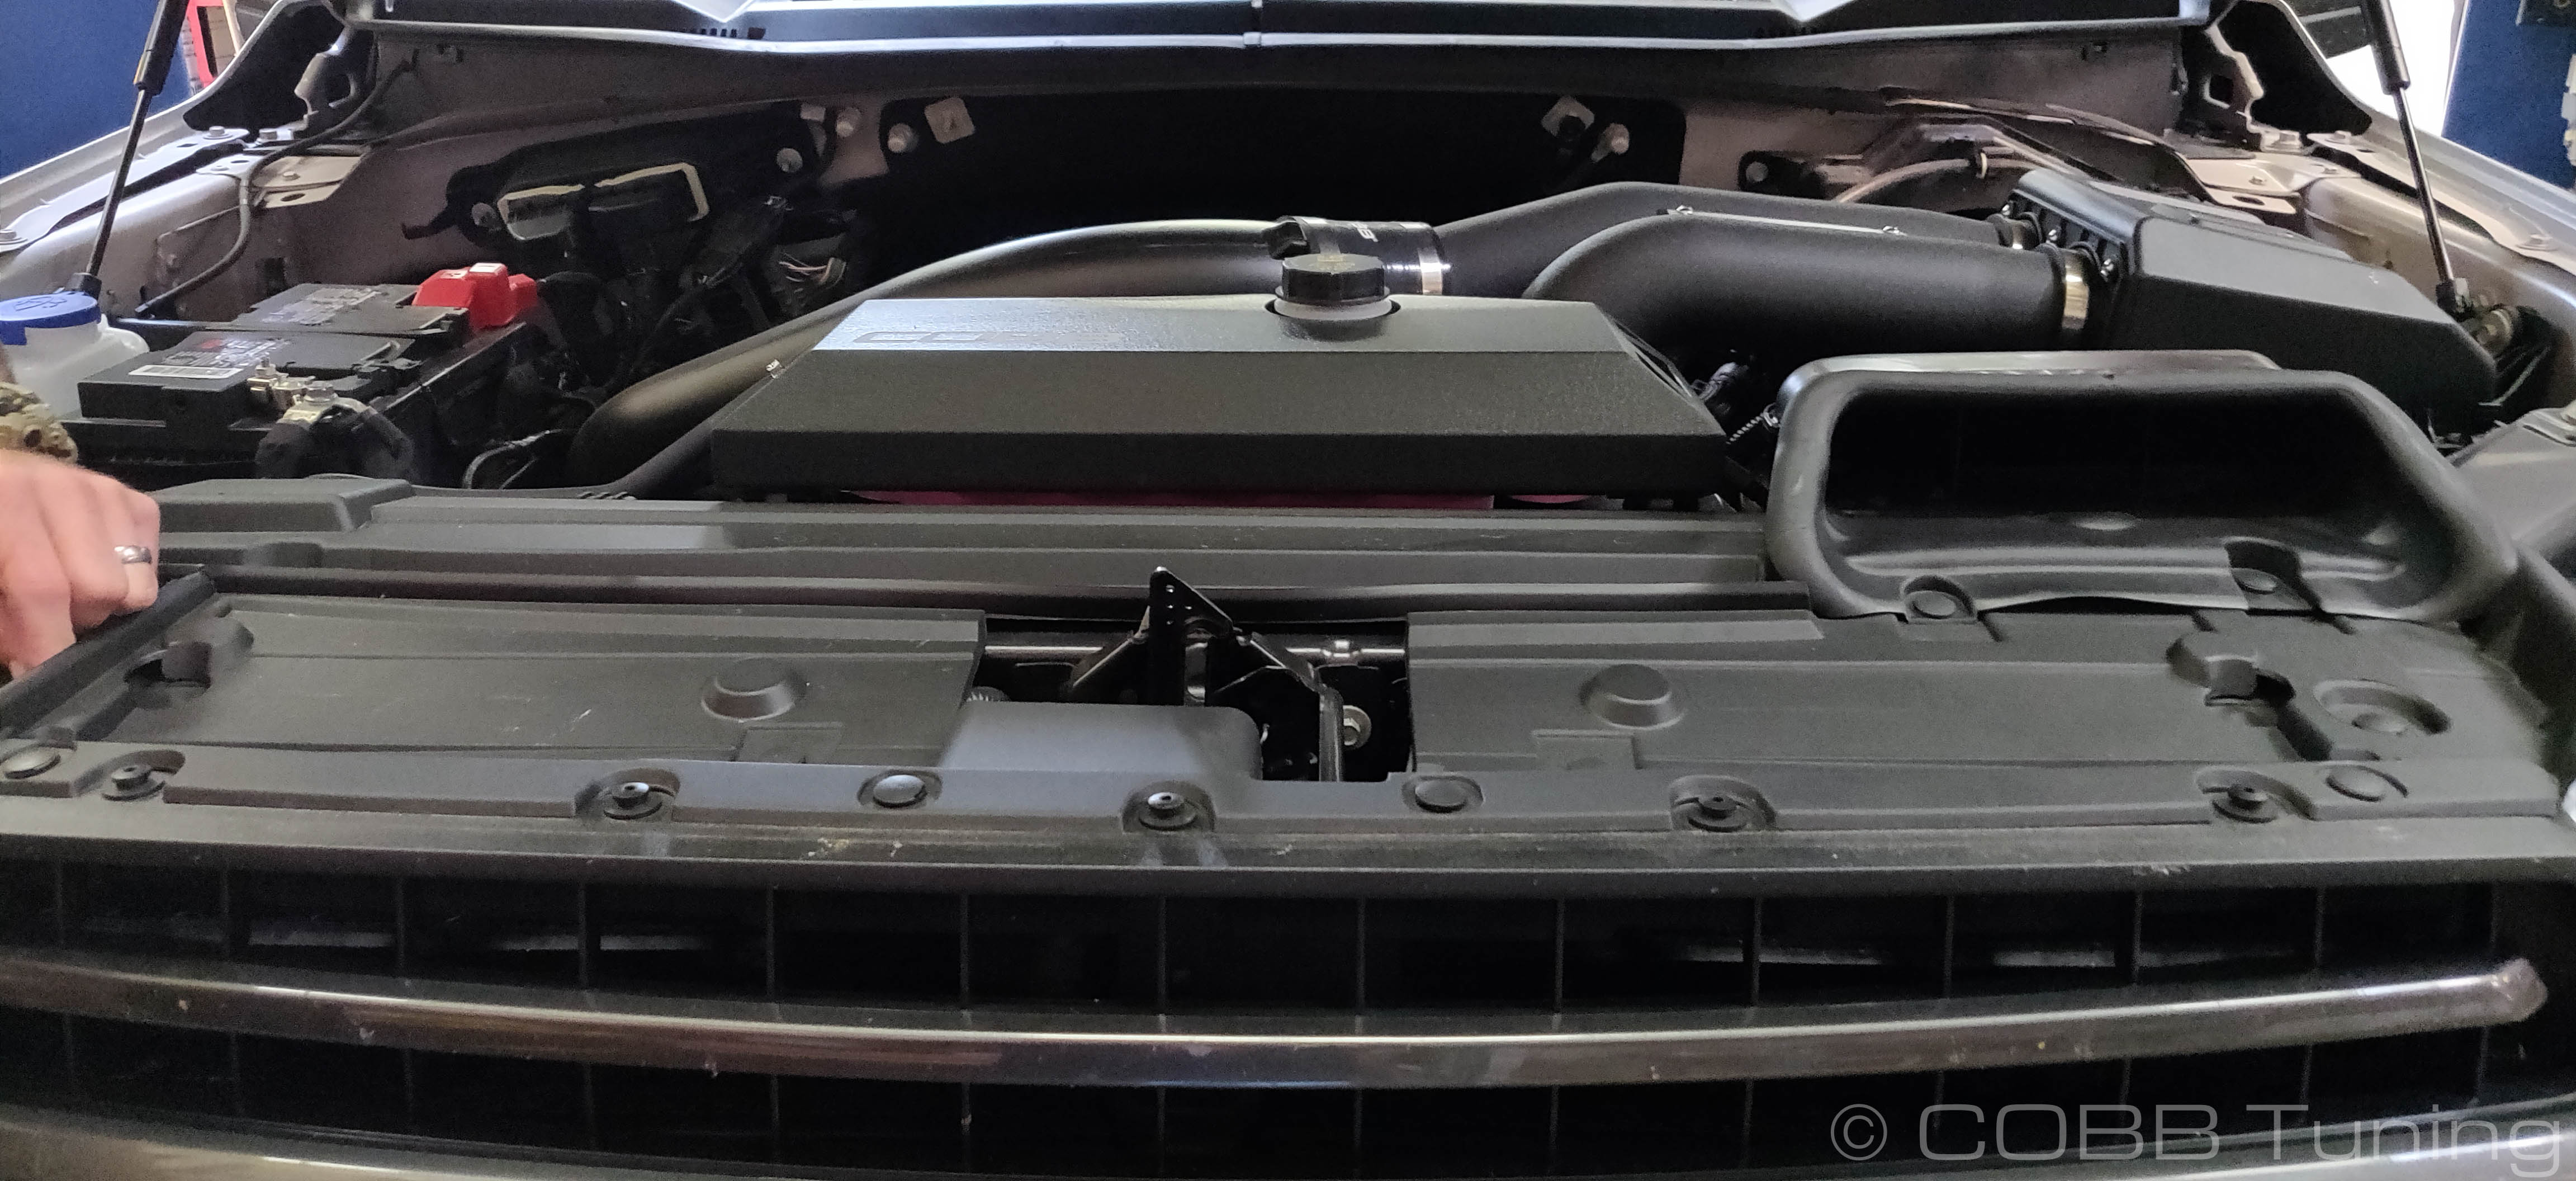
Grille Removal Raptor
- Park your truck in a flat level area. Under most conditions you have enough clearance to do this with the car on the ground, however having access to a lift can make some parts slightly easier.
- Using your trim tool, remove the two clips holding the inlet snorkel in place
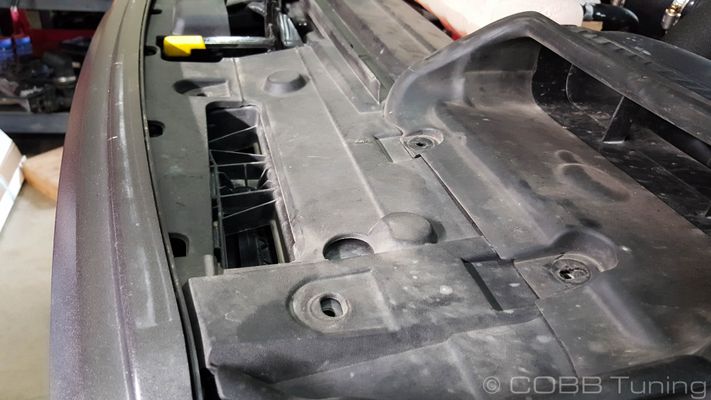
- Pull out the remaining seven clips holding the upper grille/radiator cover in place and remove it from the car, you'll probably need to lift up the snorkel gently to pull it free.
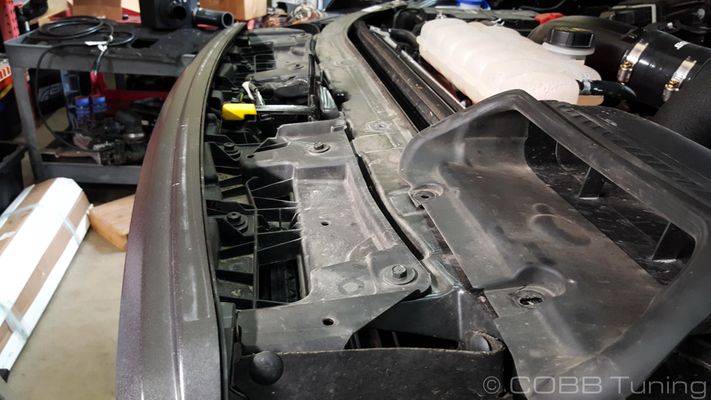
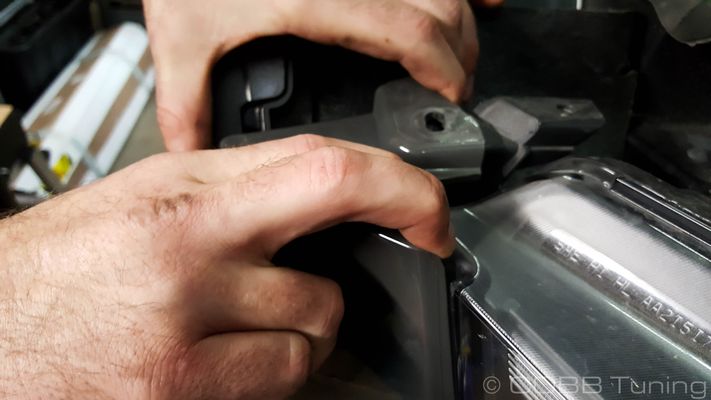
- Remove the one clip on either side of the car holding the top of the headlight bezel in place.
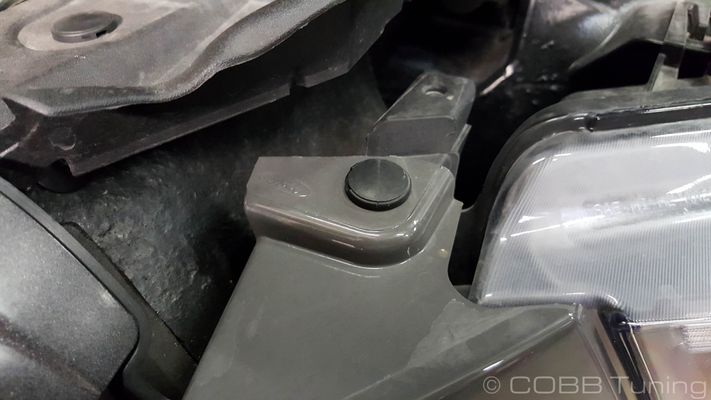
- Pop the headlight bezel free where it meets the center piece of the bumper. Gently pull outward on the top of the headlight bezel and pop it free of the clips. You should be able to leave it attached on the outside as completely removing them isn't needed.


- Remove the three clips on either side holding the rubber radiator shroud in place on the grille shroud.
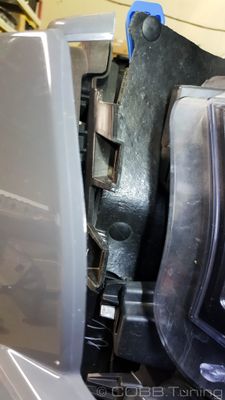

- You can leave the clips holding it to the core support.
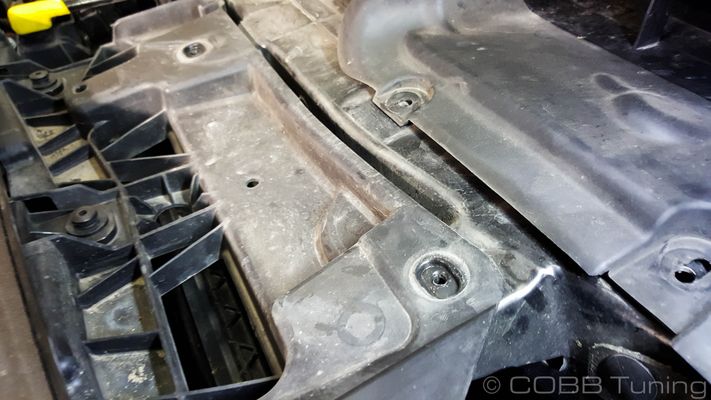
Remove the four 10mm bolts on the top of the grille using your socket.
These bolts, like many others go straight into metal (some into plastic). Make sure to avoid torquing these bolts too hard either when loosening or tightening these bolts as it's very easy to strip them out on accident.
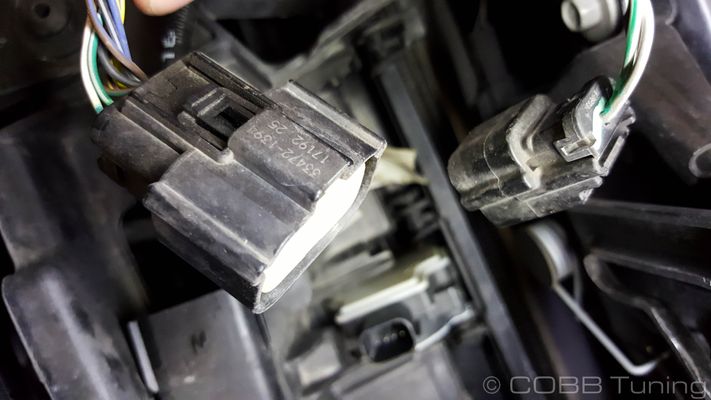
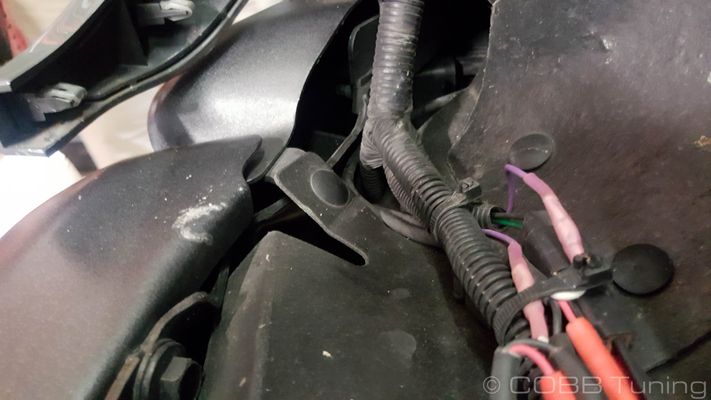
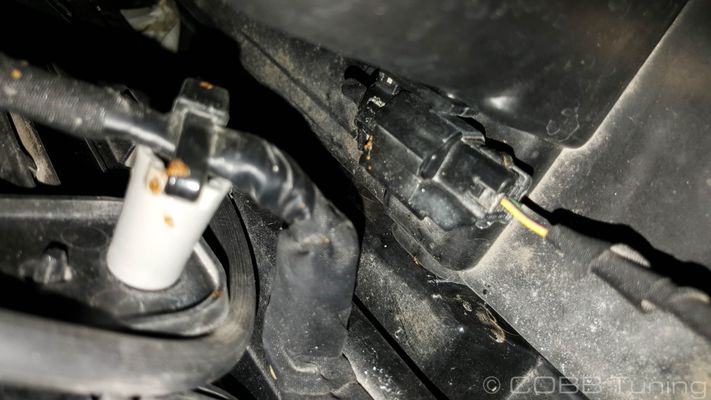
- Undo the two electrical plugs on the top center of the grille structure by depressing the clip then pulling them out.
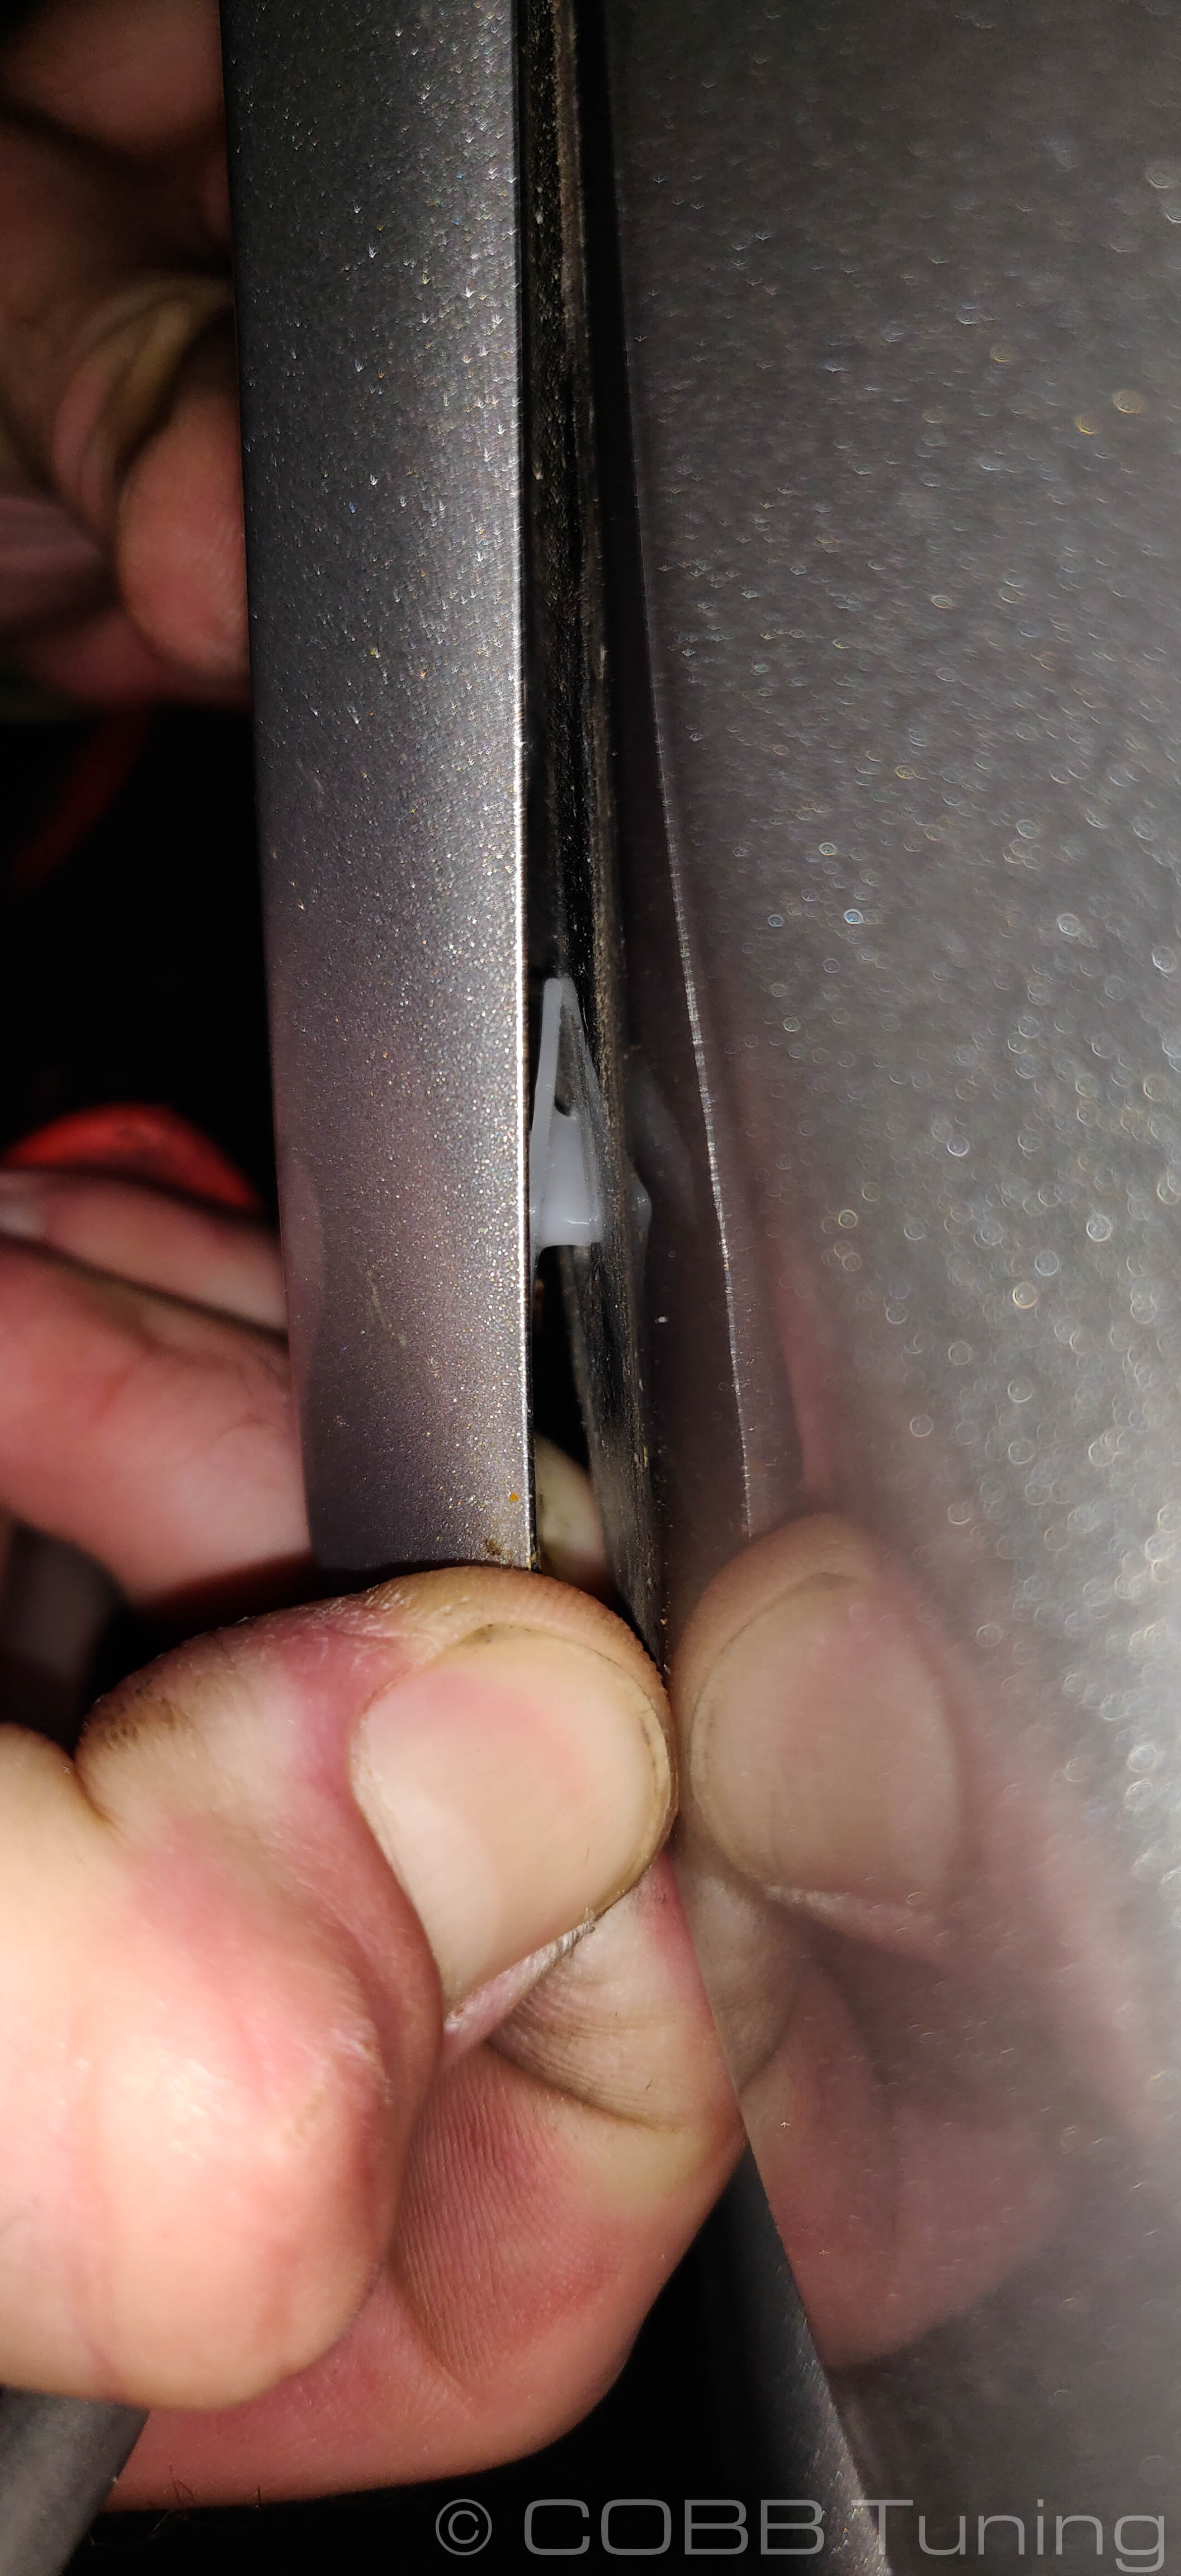
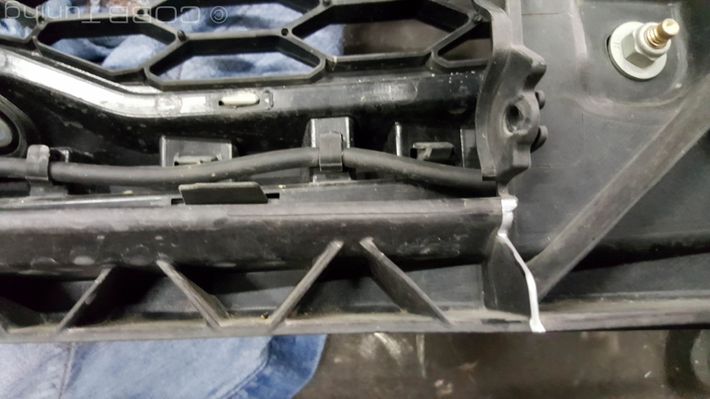
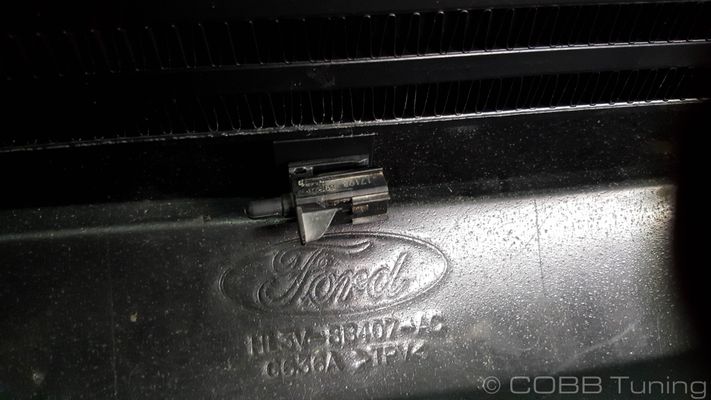
- Gently spread the retainer ring on the washer line and unplug the hose.
- Using your trim tool again, remove the two clips holding the harnesses to the support.
- Undo the two 8mm bolts on each lower corner of the grille using your extension and an 8mm socket.
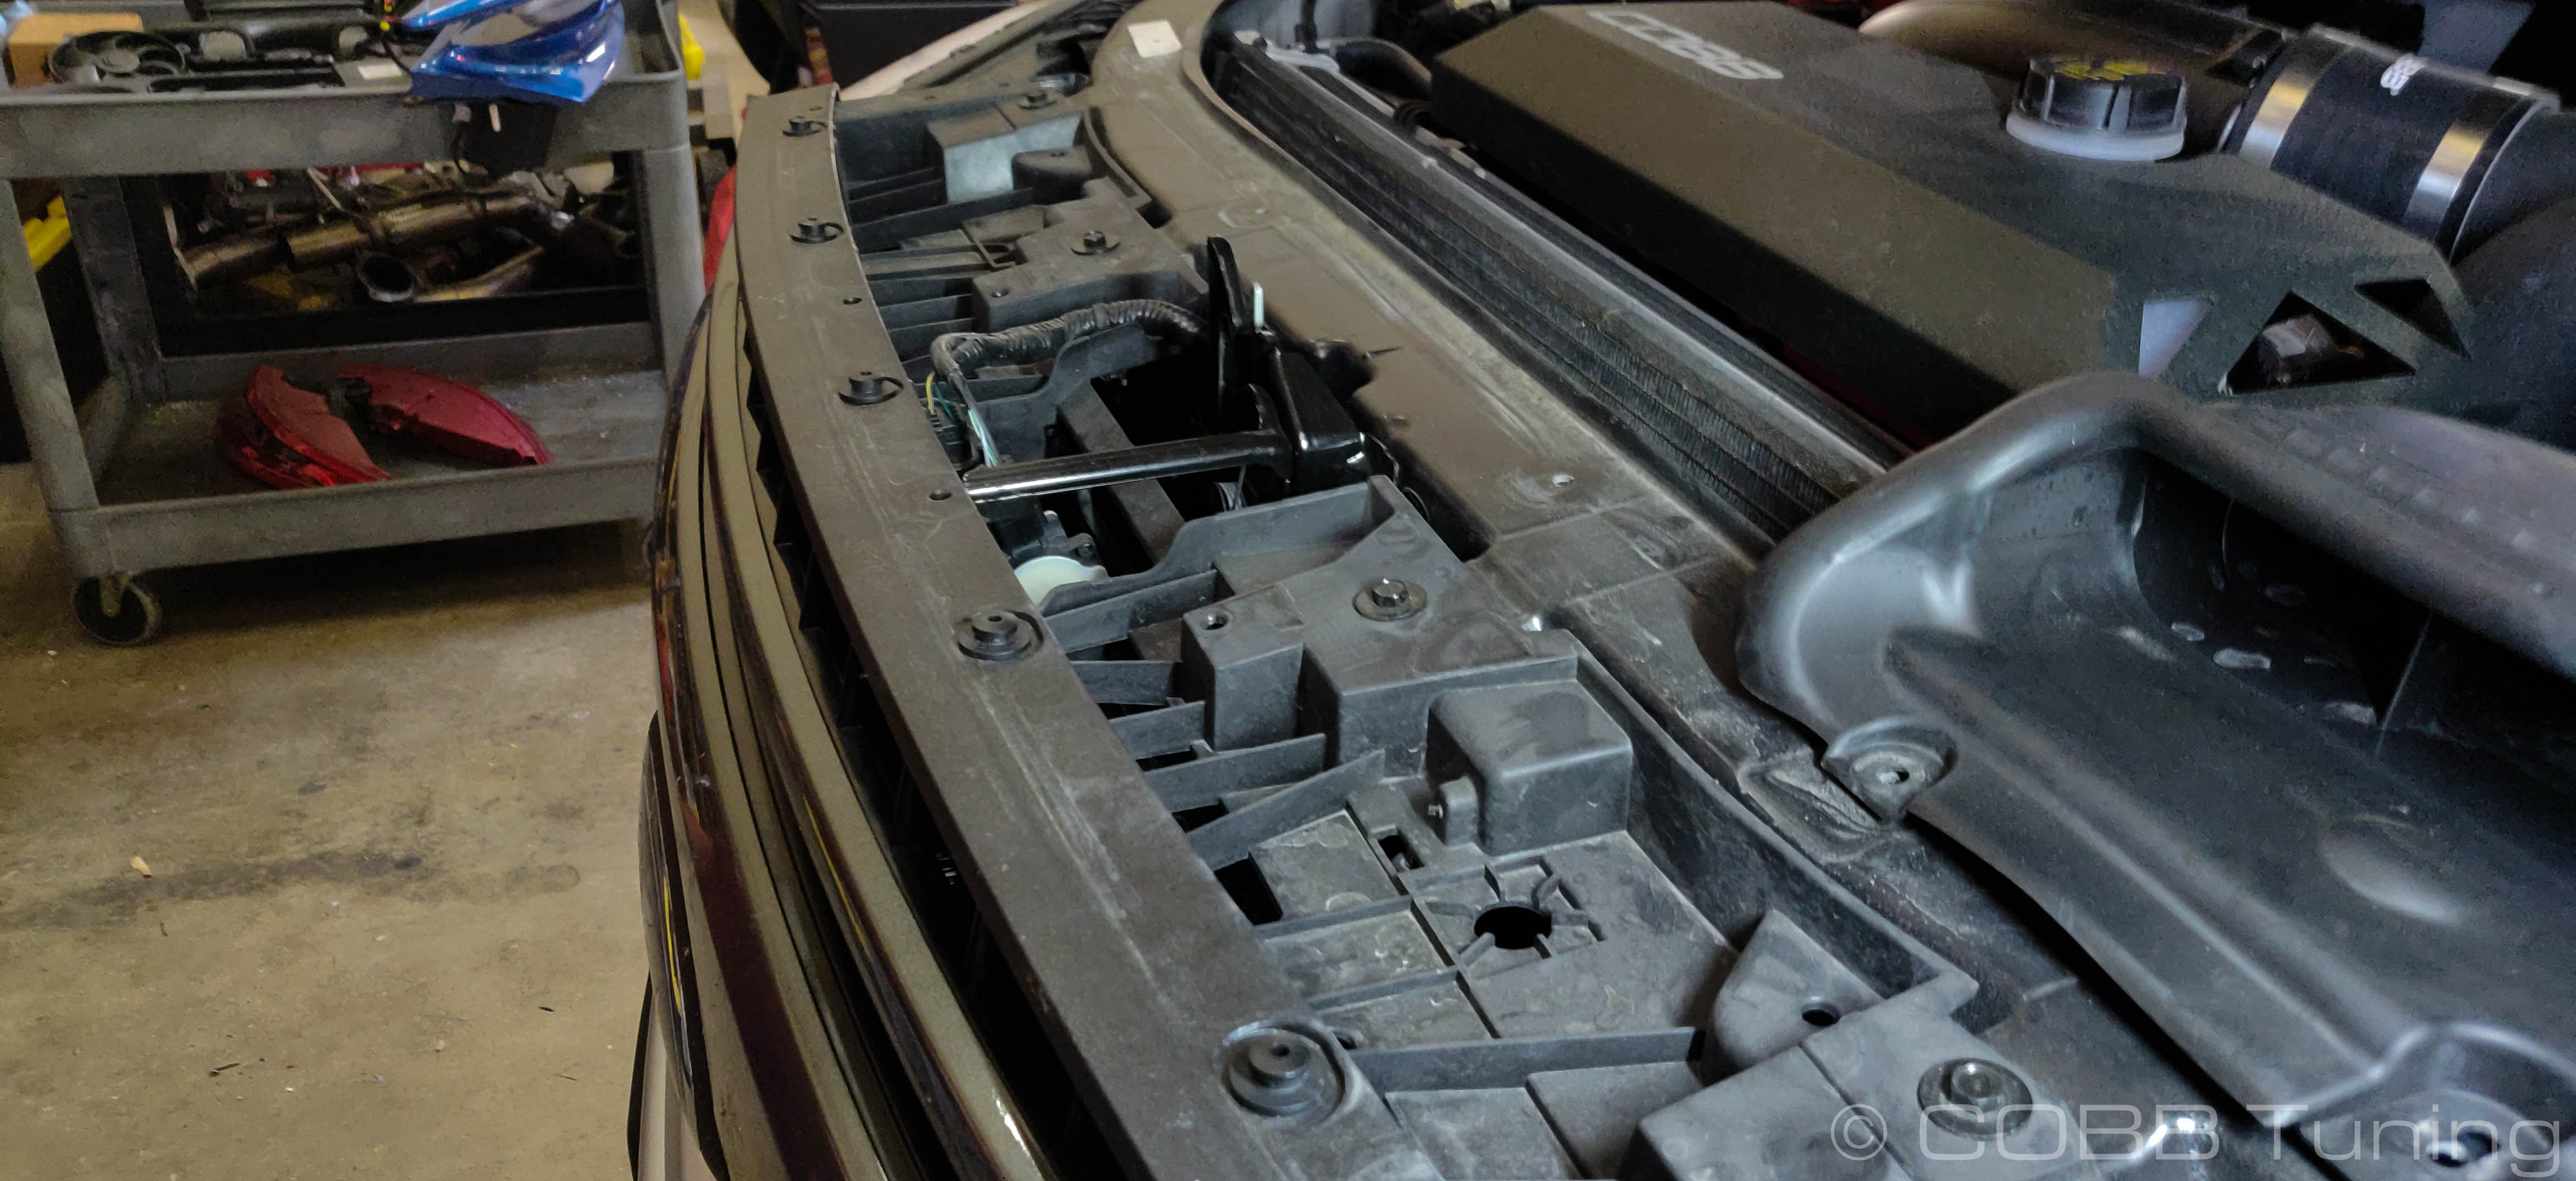
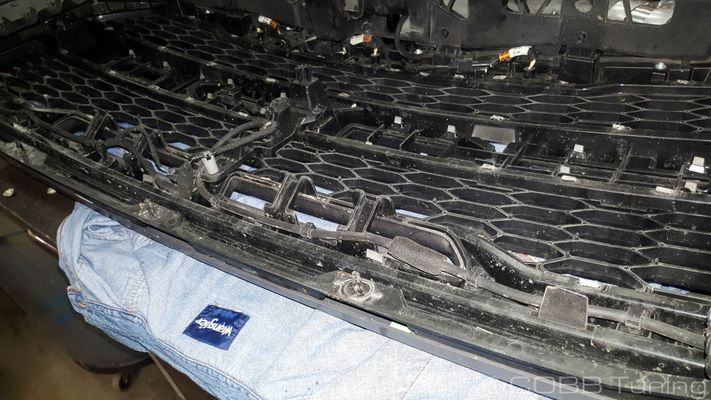
Remove the front grille assembly and set it somewhere safe!
Grille Removal F150
- Park your truck in a flat level area. Under most conditions you have enough clearance to do this with the car on the ground, however having access to a lift can make some parts slightly easier.
- Using your trim tool, remove the two clips holding the inlet snorkel in place
- Remove the other seven clips holding the upper grill/radiator cover in place.
- Some trucks will have two more trim clips in the corners near the core support.
- In the front corner of the wheelwell of the front two wheels you'll find two small 7mm bolts on the passenger's side, and either one or two on the driver's side. Remove them using your 7mm wrench.
- Gently pry outward on the fender flare and pop the clips free with your trim tool, making sure not to scratch the paint in the process (laying down painters tape on top of the paint can prevent minor scratches. (If not equipped with the fender flares skip this step.

- With both corners free firmly pull outward on the under-grille trim to remove it from the car. Set it somewhere safe.
- With the trim removed, use your 8mm to remove the 8mm bolts found on the lower right corner of each side underneath the headlight.

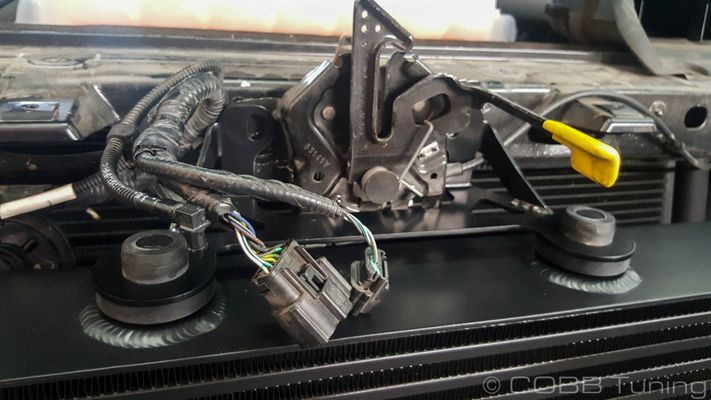
- Unplug the grille shutters, and the accessory wiring plugs found next to the hood latch.
- Use your trim tool to pop the wiring harness free.
- Remove the 4 8mm bolts holding the top part of the grille shell in place.
- Slowly pull outwards on the entire grille assembly to remove it from the car. Set it somewhere safe for now.
Intercooler Removal
Remove the 4 13mm bolts holding at the front and 2 15mm bolts in the rear of the skid plate in place, watch out for the brace in the rear and note the orientation it was in when removed as it will only fit in that way when you go to reinstall.
Raptor only
The clips with built in nuts found on the frame can fall off easily, so make sure not to lose them!
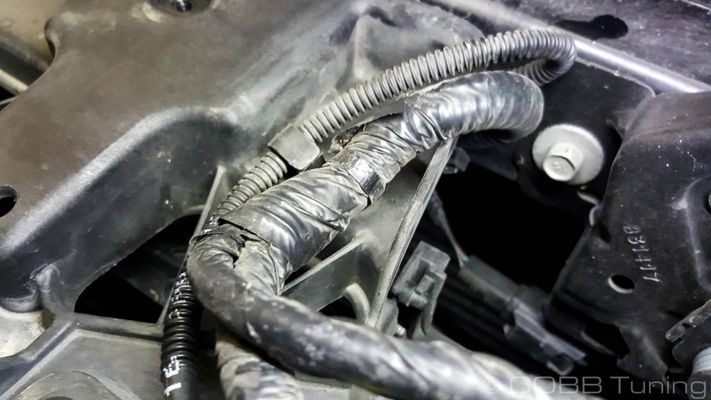
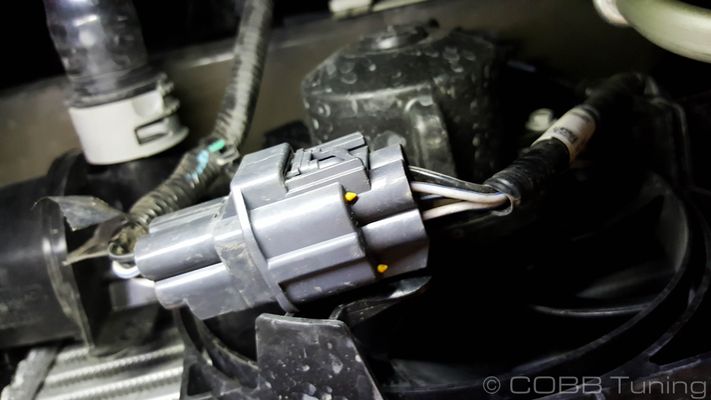
Reach up and undo the wiring to the fans by gently squeezing the clip before disconnecting them. Then disconnect harness from fan using your trim tool.
Raptor Only
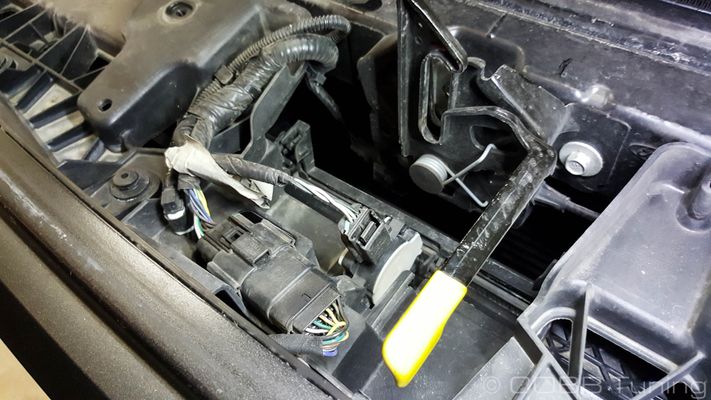
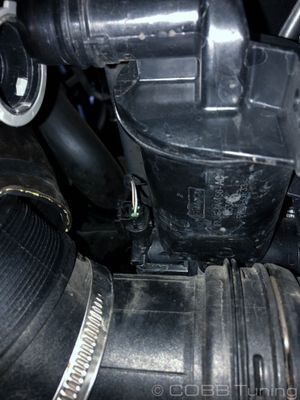
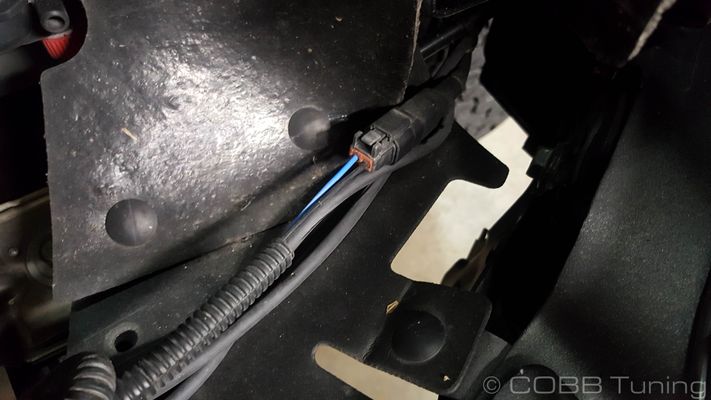
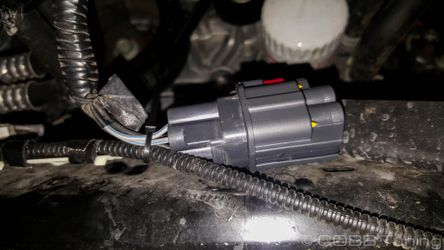
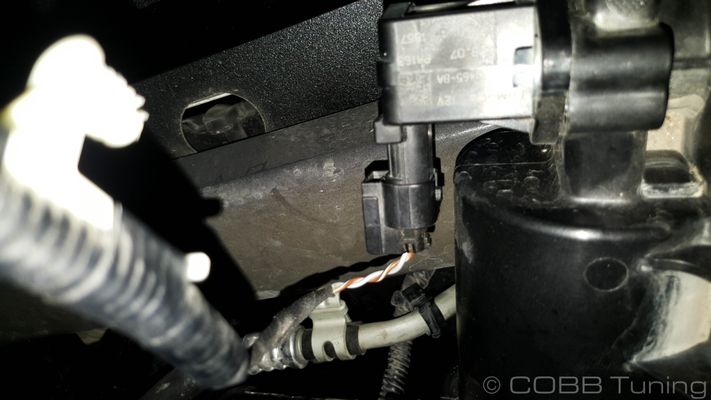
- Disconnect electrical plug going to the electronic bypass valve.
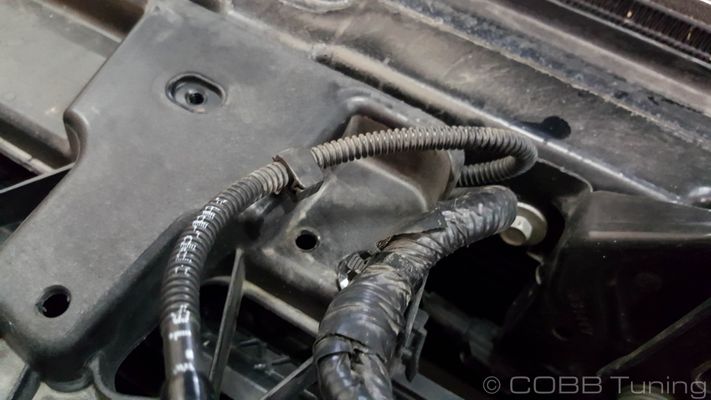
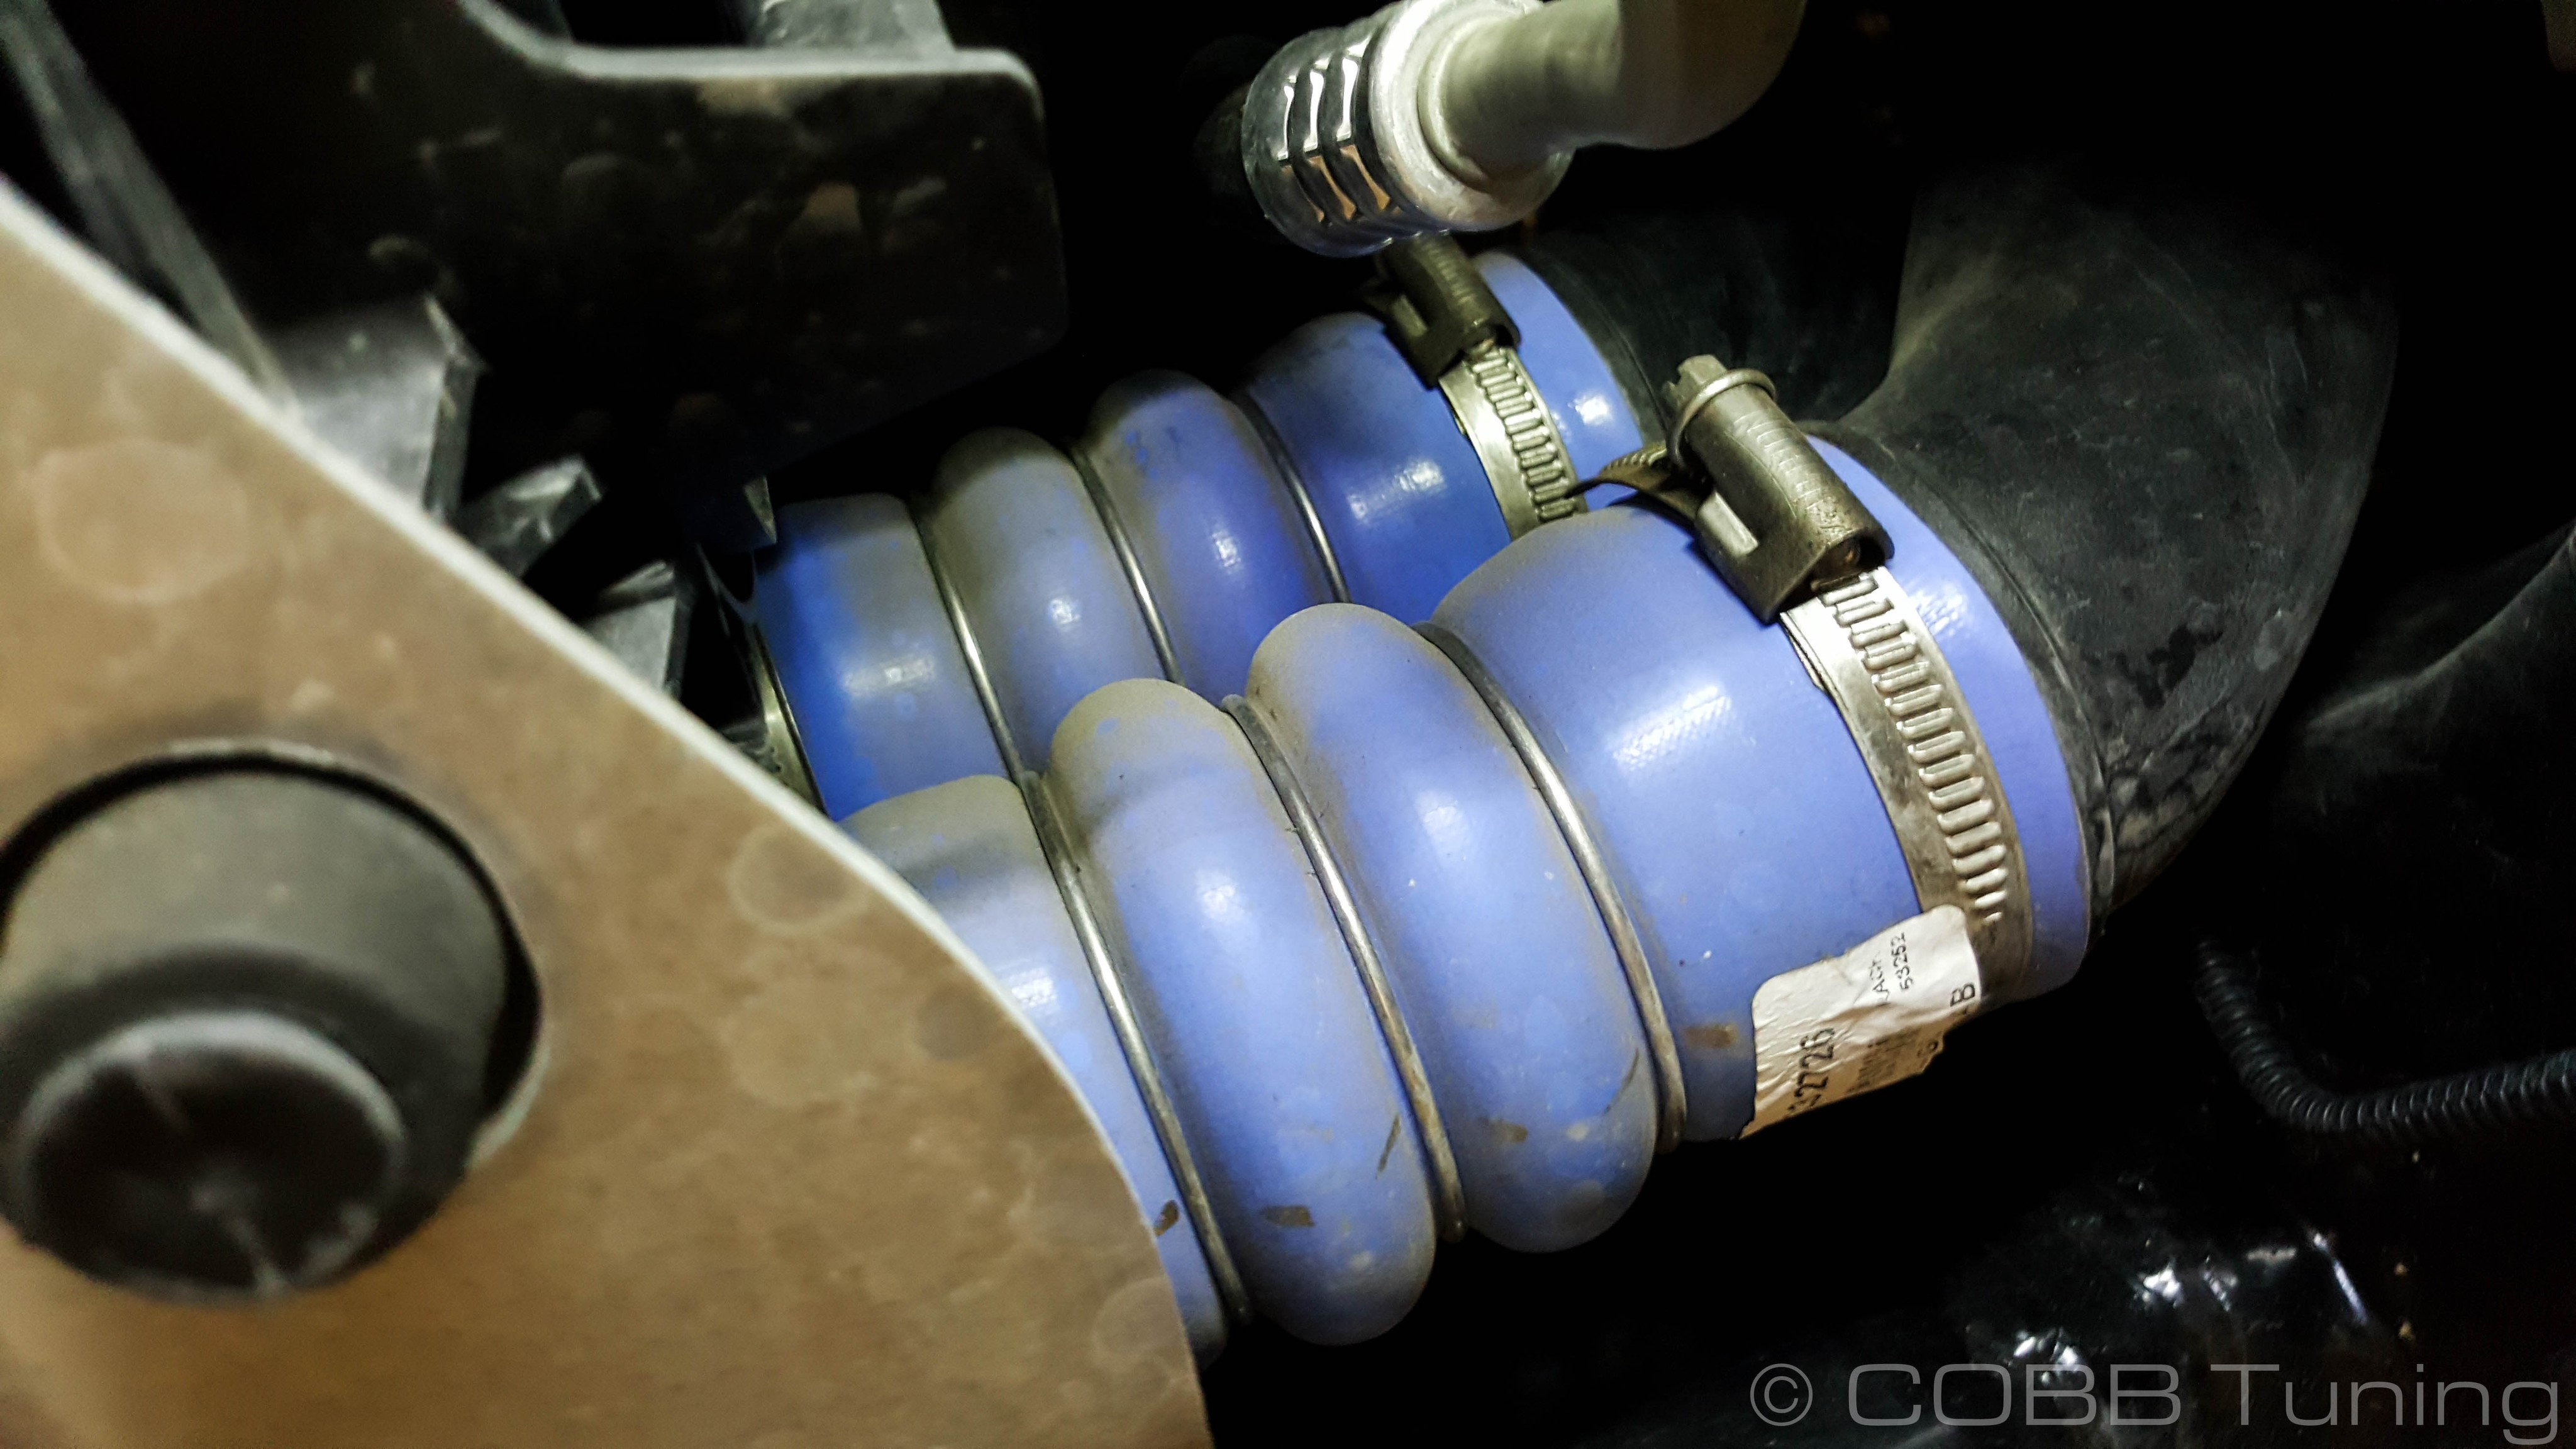
- Loosen up the 3 couplers on the front mount intercooler, then pull them free. If you can manage it easily you can also just remove them completely. In order to loosen them you'll either need a screwdriver of a socket (7mm/8mm depending on your vehicle)
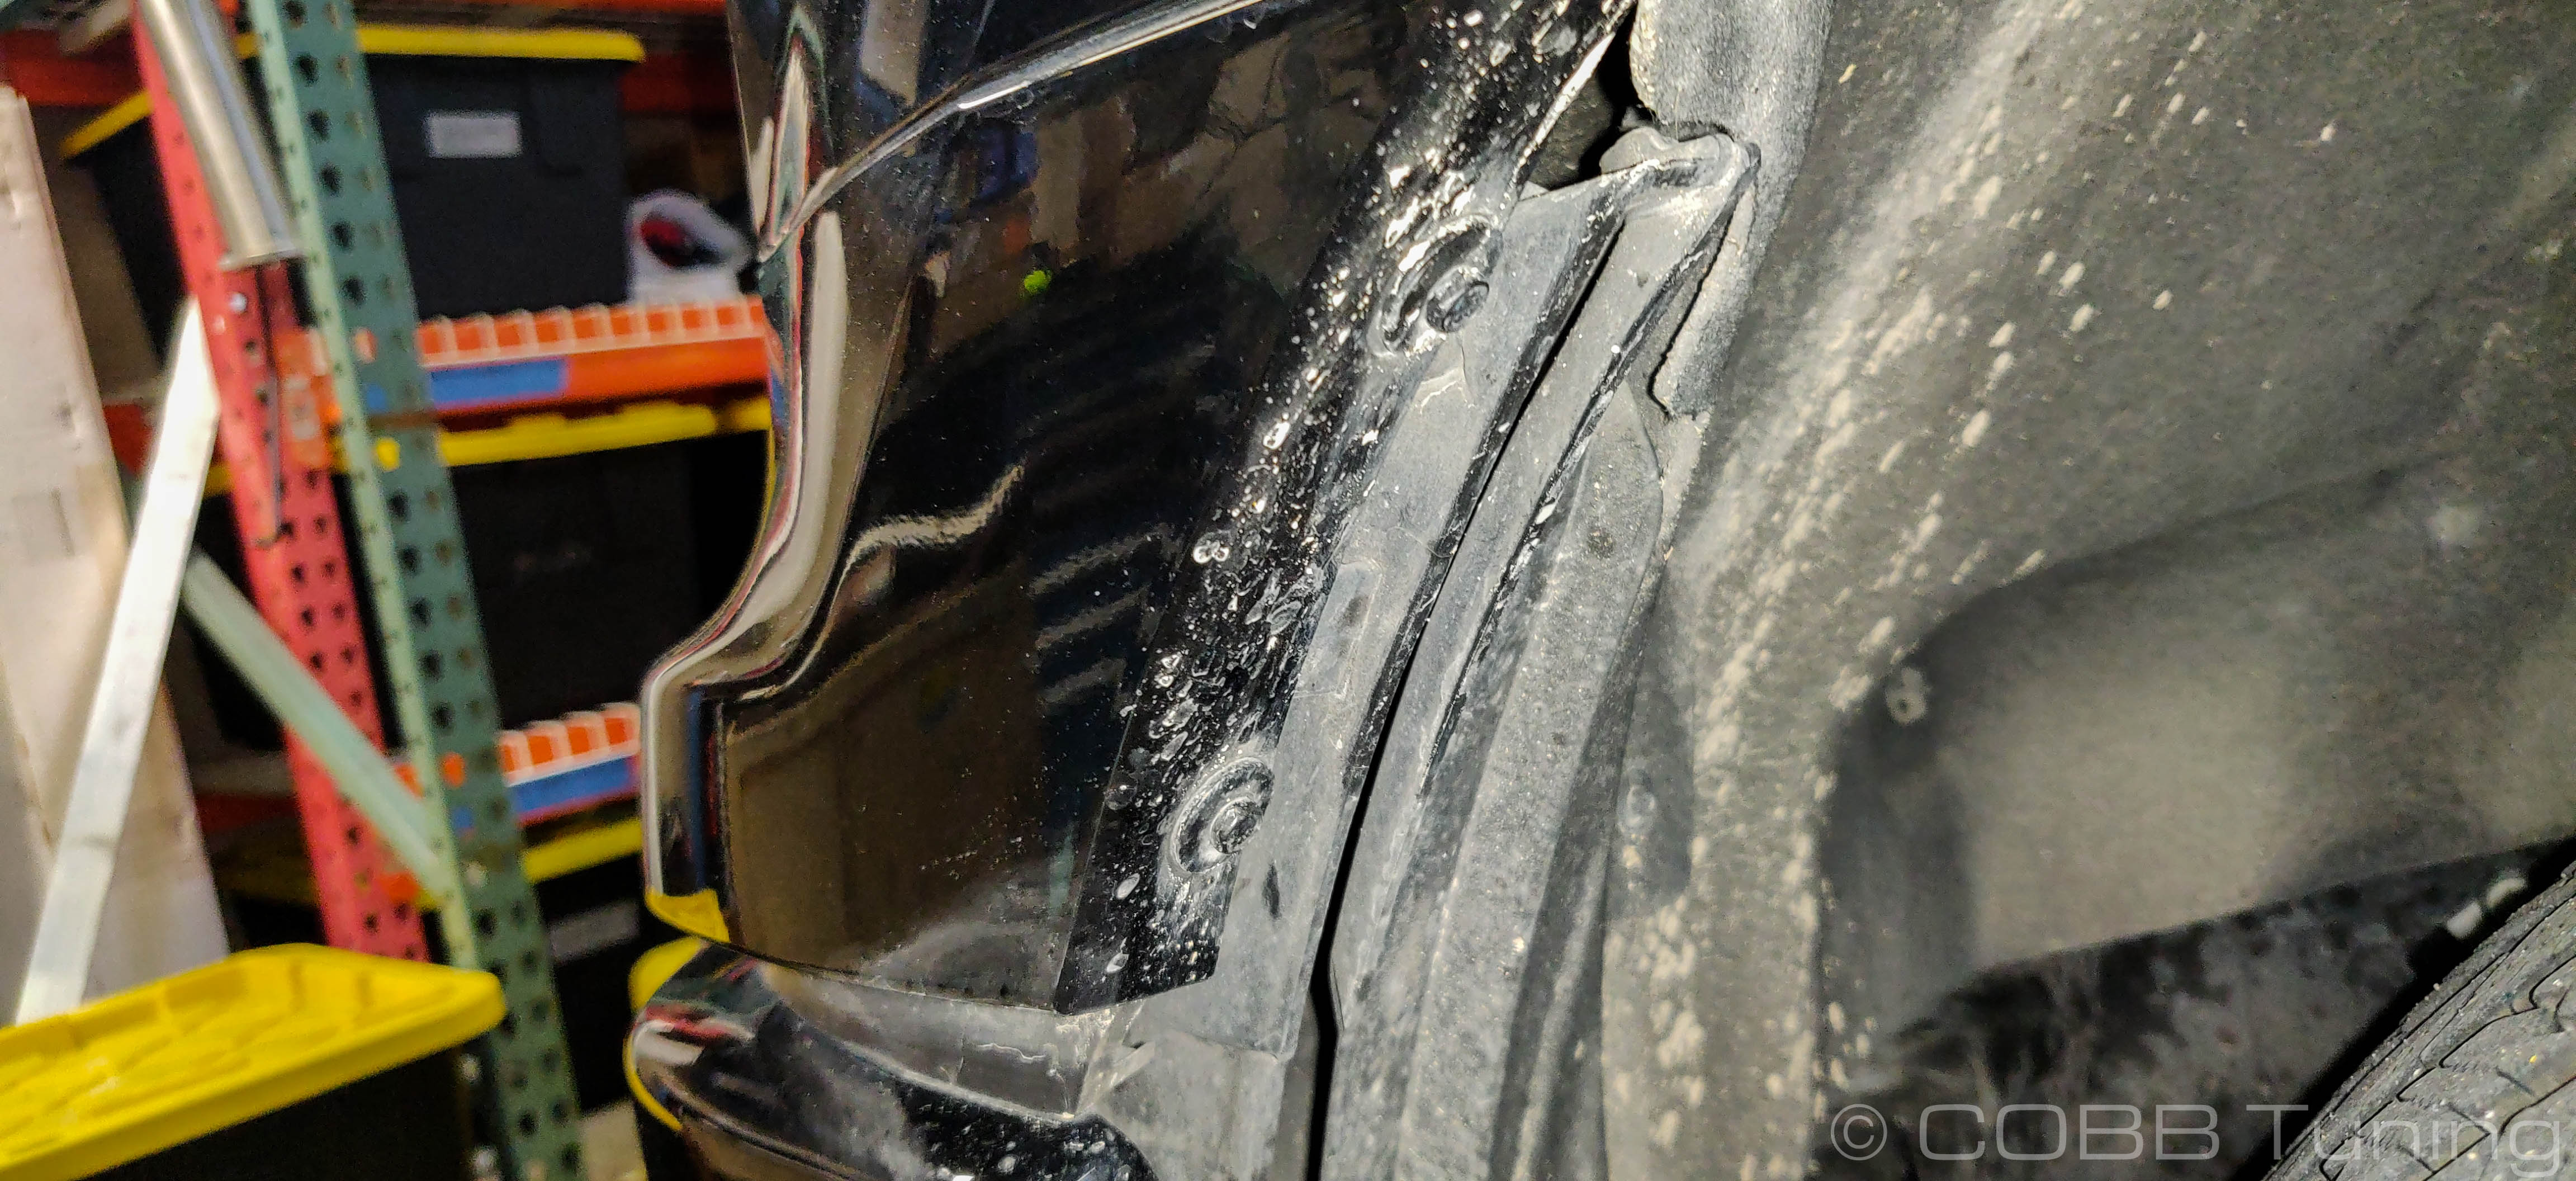
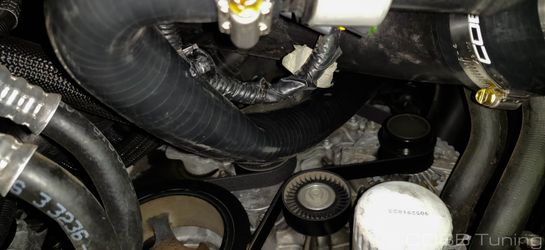
- Disconnect the bpv hose from the intake and the BPV itself by turning left 1/4 turn. Sometimes it will be stuck due to dirt or debris getting into the clip. Softening it with some wd40 or water can make this more simple.
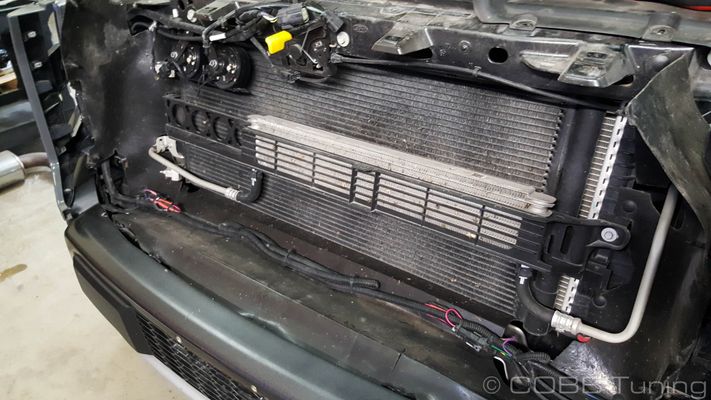
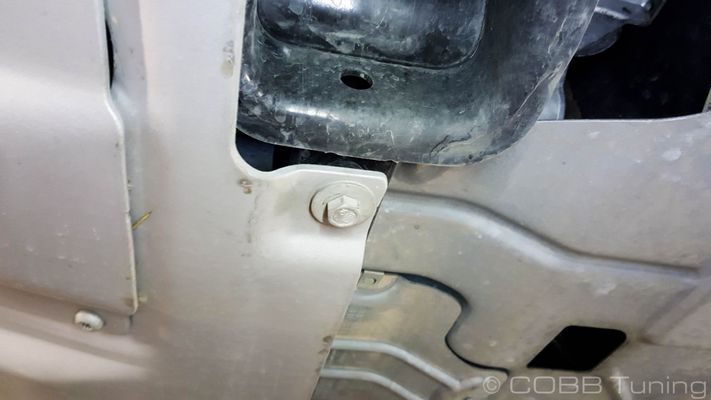
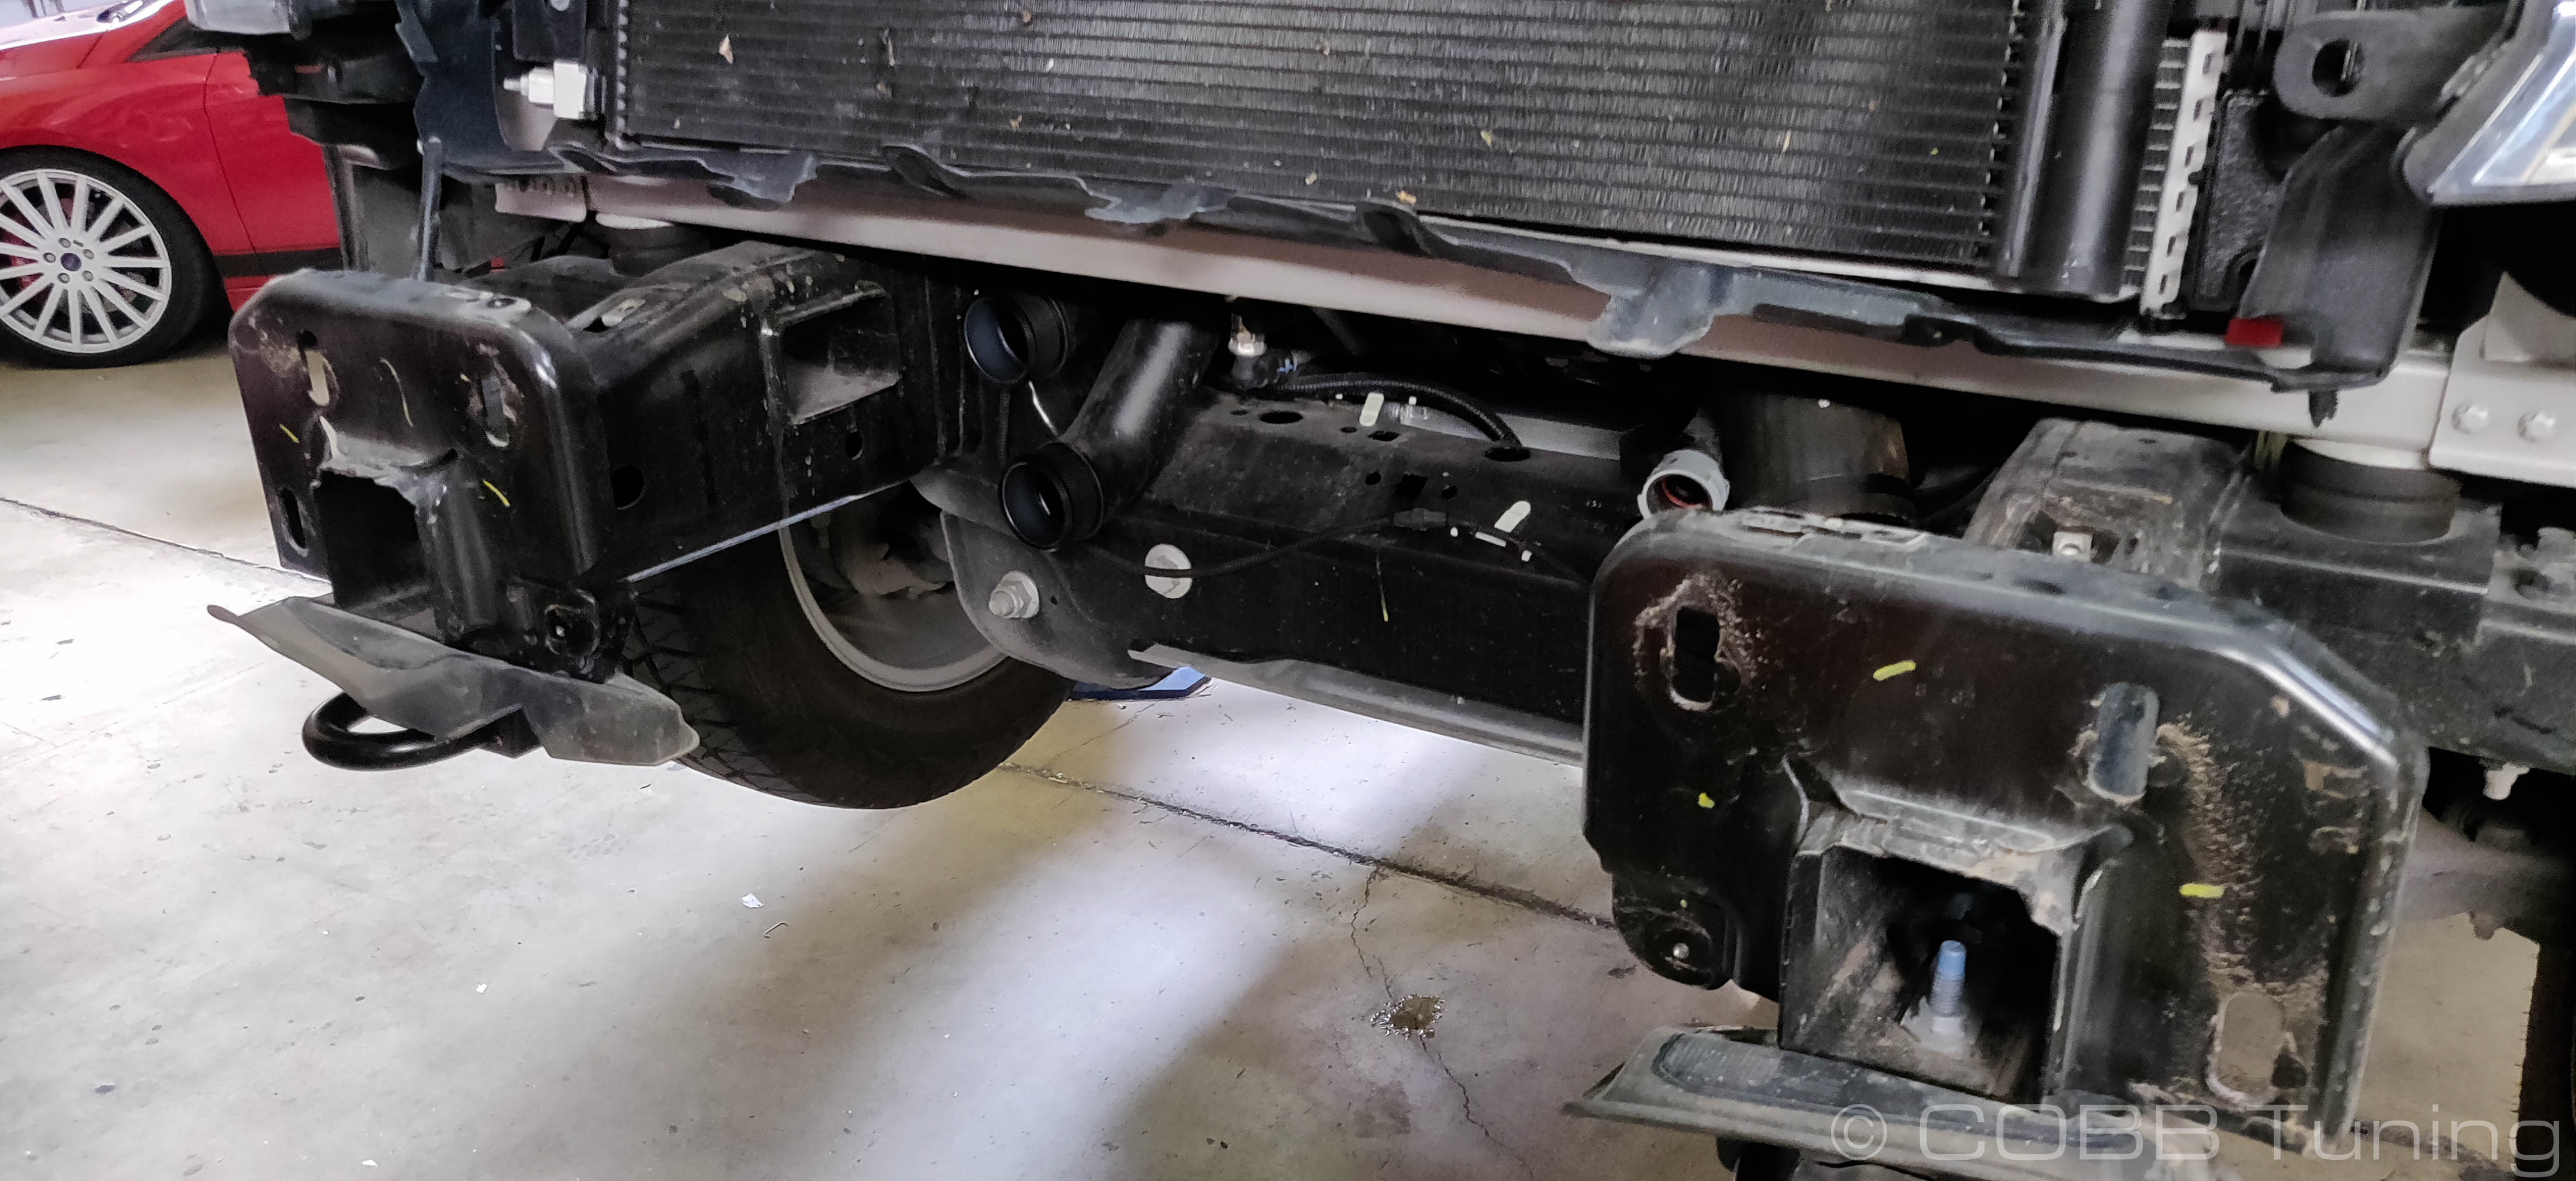
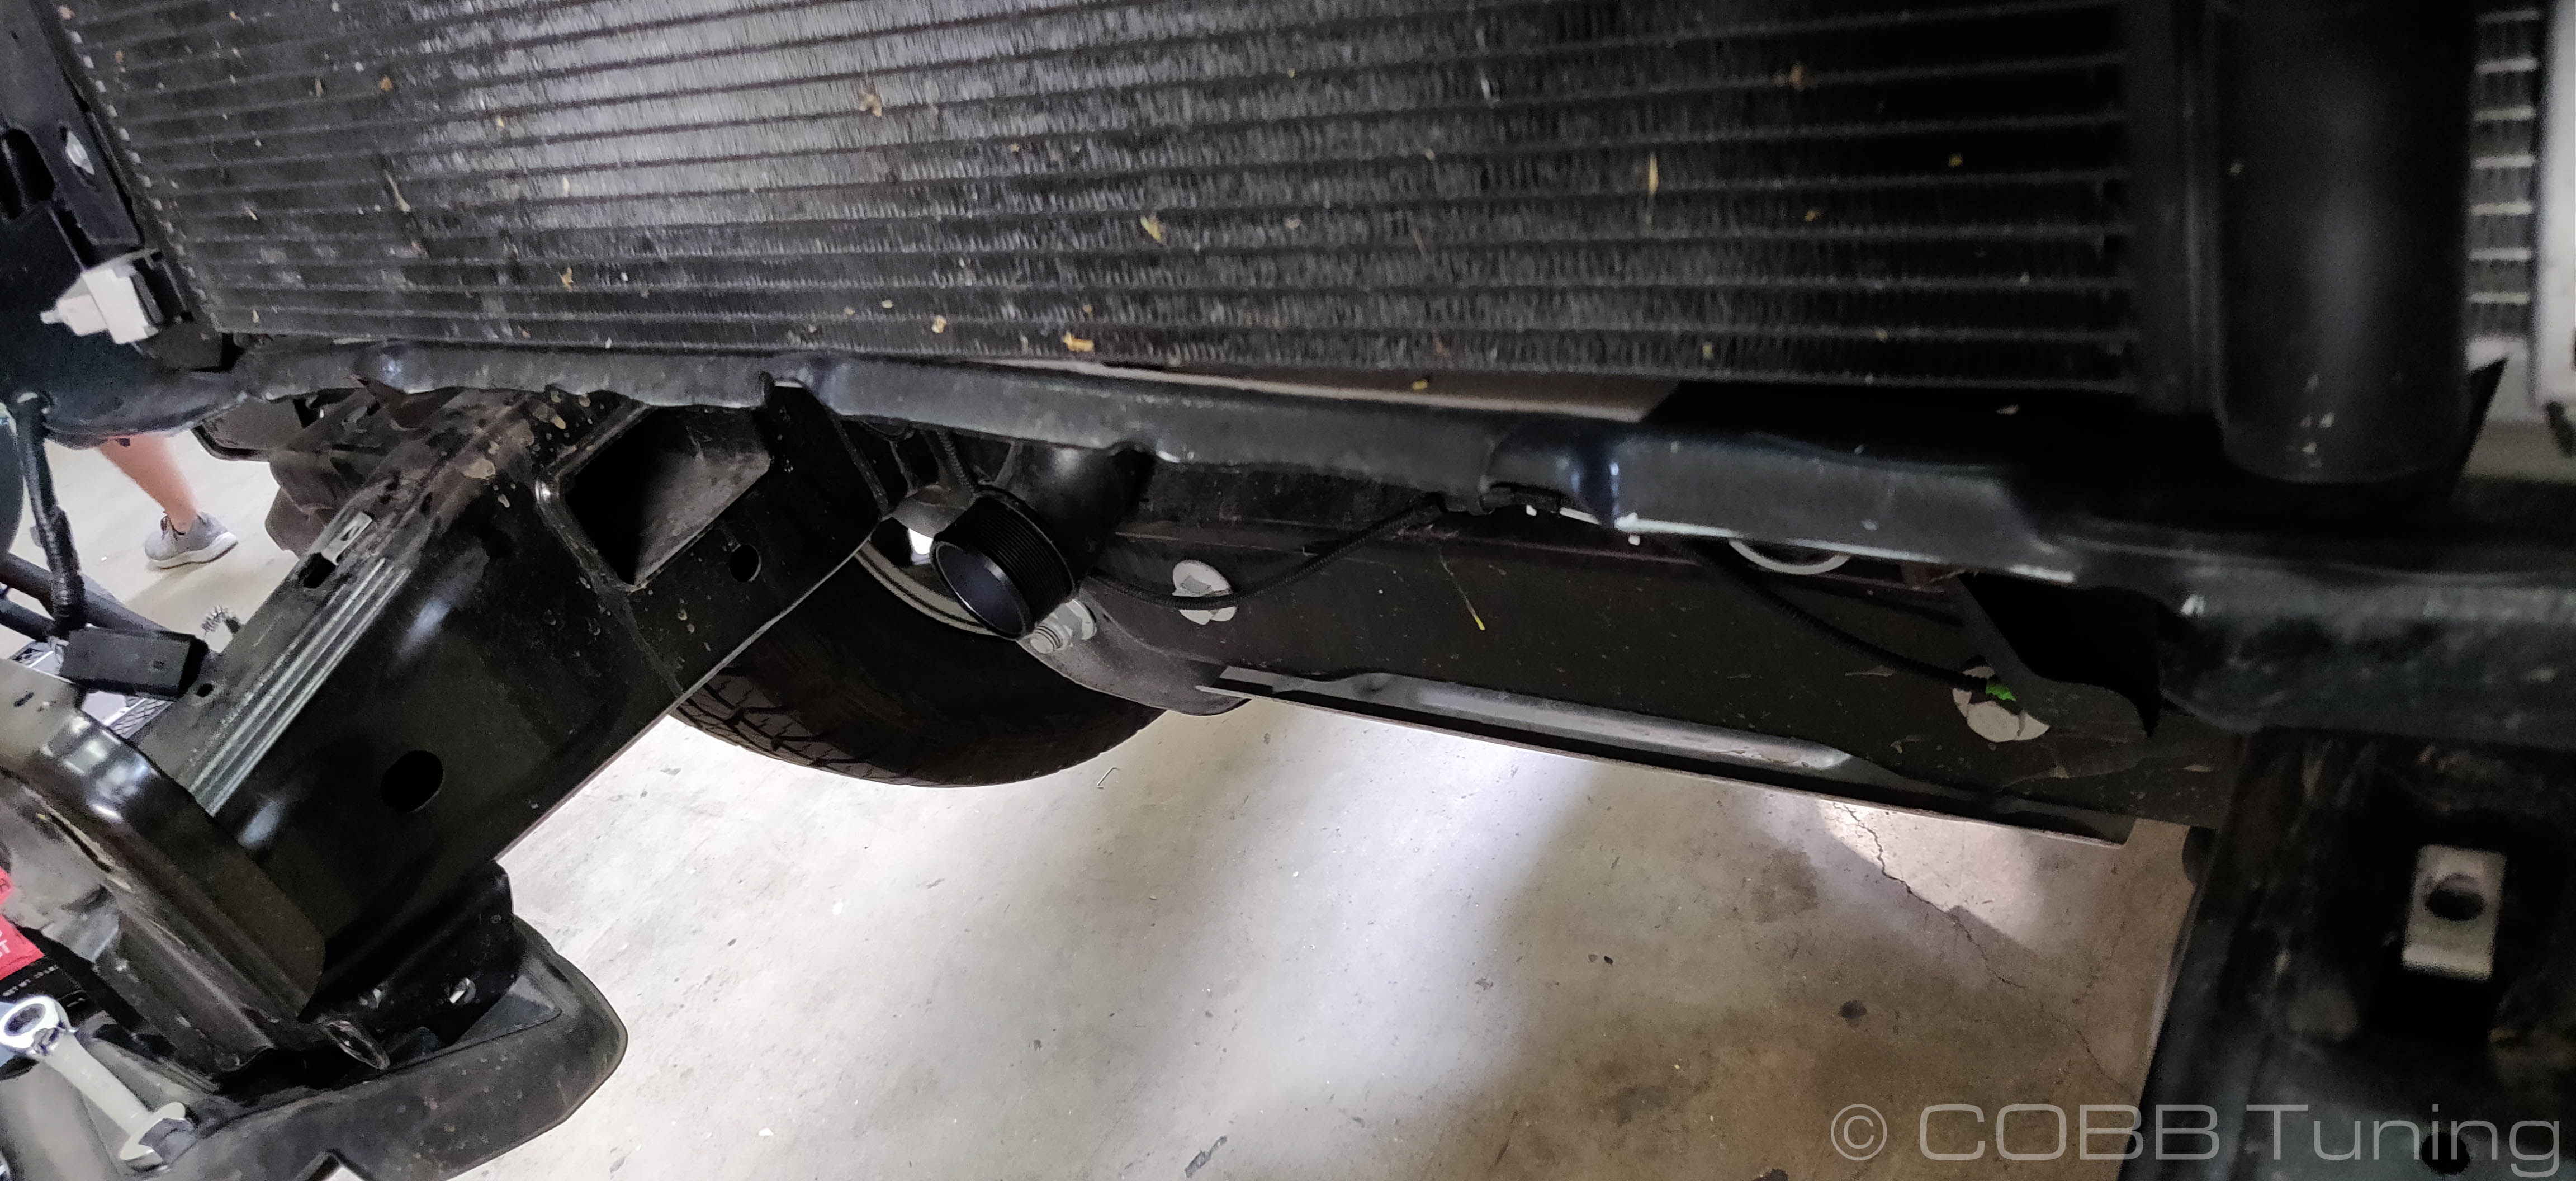
- Undo the two 15mm bolts holding the support for the intercooler core in place.

- Remove the two wiring connectors on the fan and intercooler where they are attached.
- Drop the intercooler and fans out of the frame rails and set somewhere safe.
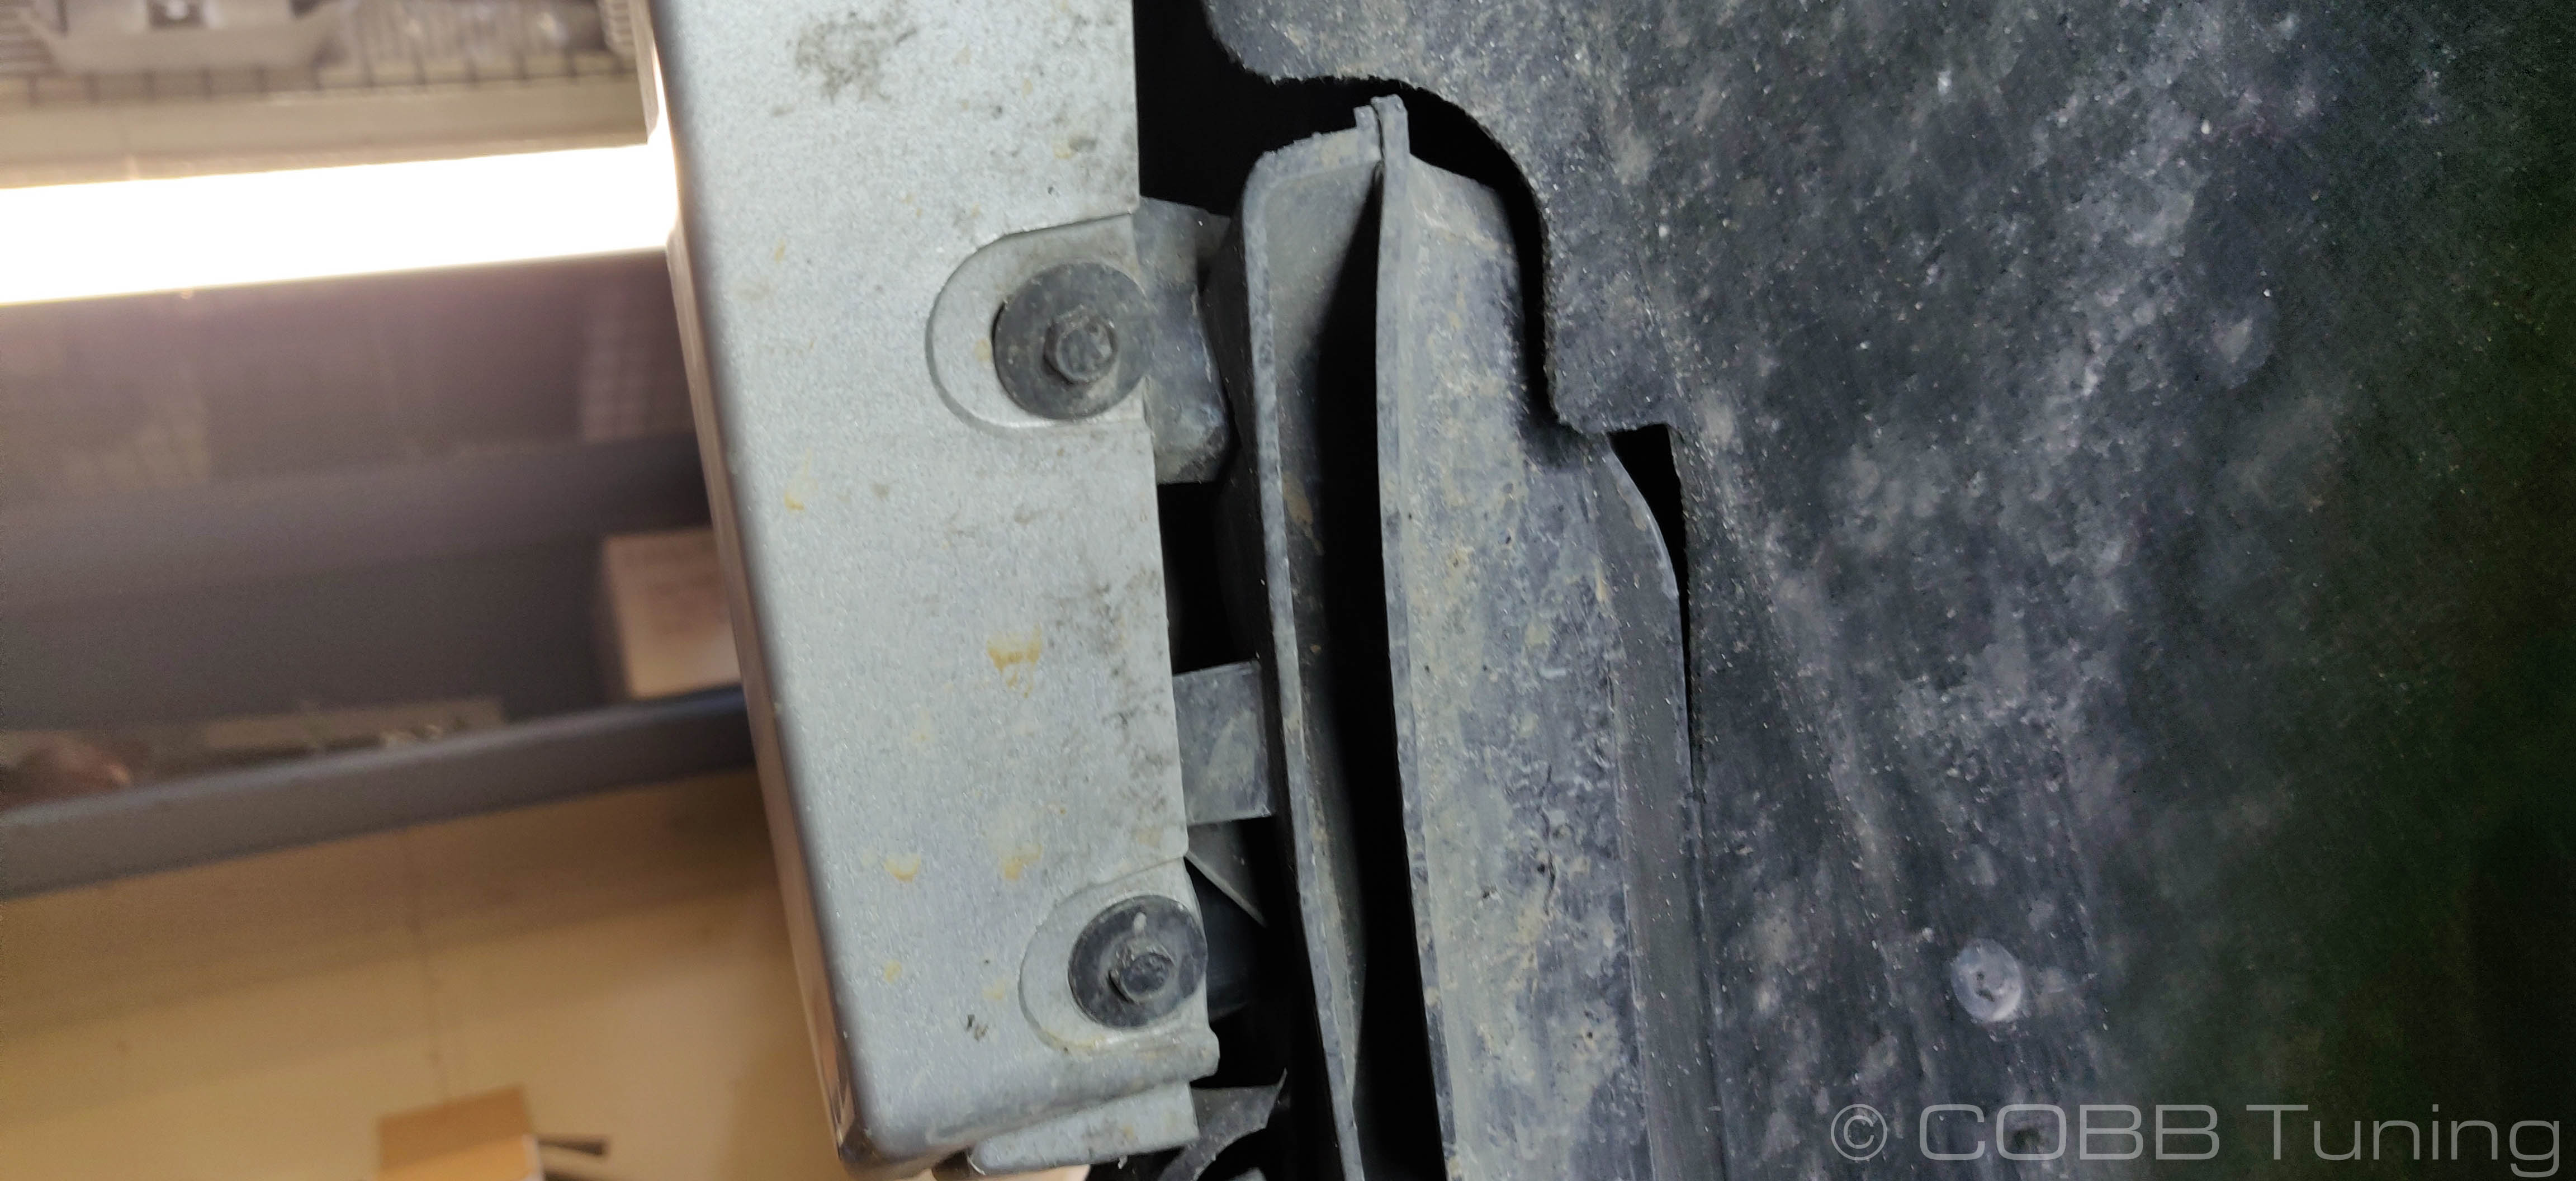
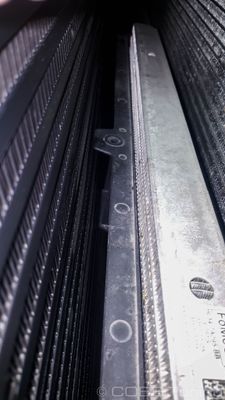
- Take out the two lower bolts for intercooler shutters using an offset 8mm wrench. There isn't a lot of room so a ratcheting wrench with an offset head that fits can be handy, otherwise you'll be in for a long haul!
- Disconnect the front 3 trim clips to pull up the rubber radiator shroud
- Undo the harness clips from shutter assembly so that the harness is free.
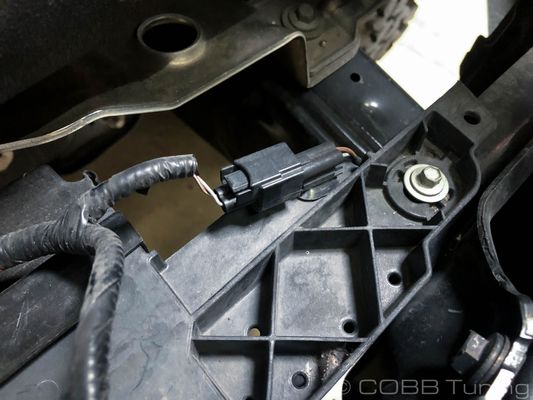
- Unplug the shutter assembly
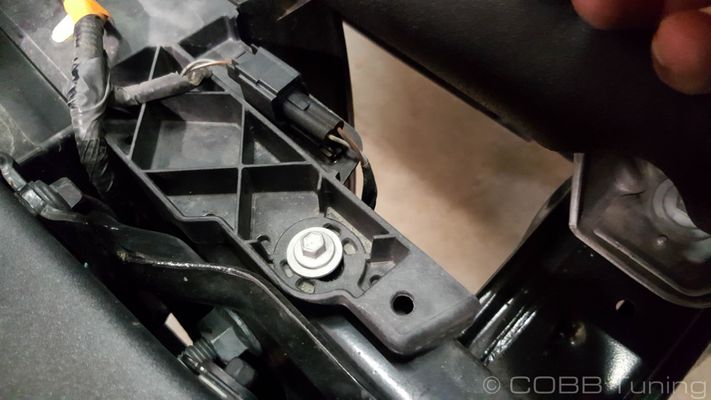
- Unbolt the shutter assembly with a 8mm socket.
- Remove shutter assembly by lifting up and pushing out to release the tension from the pins on the side
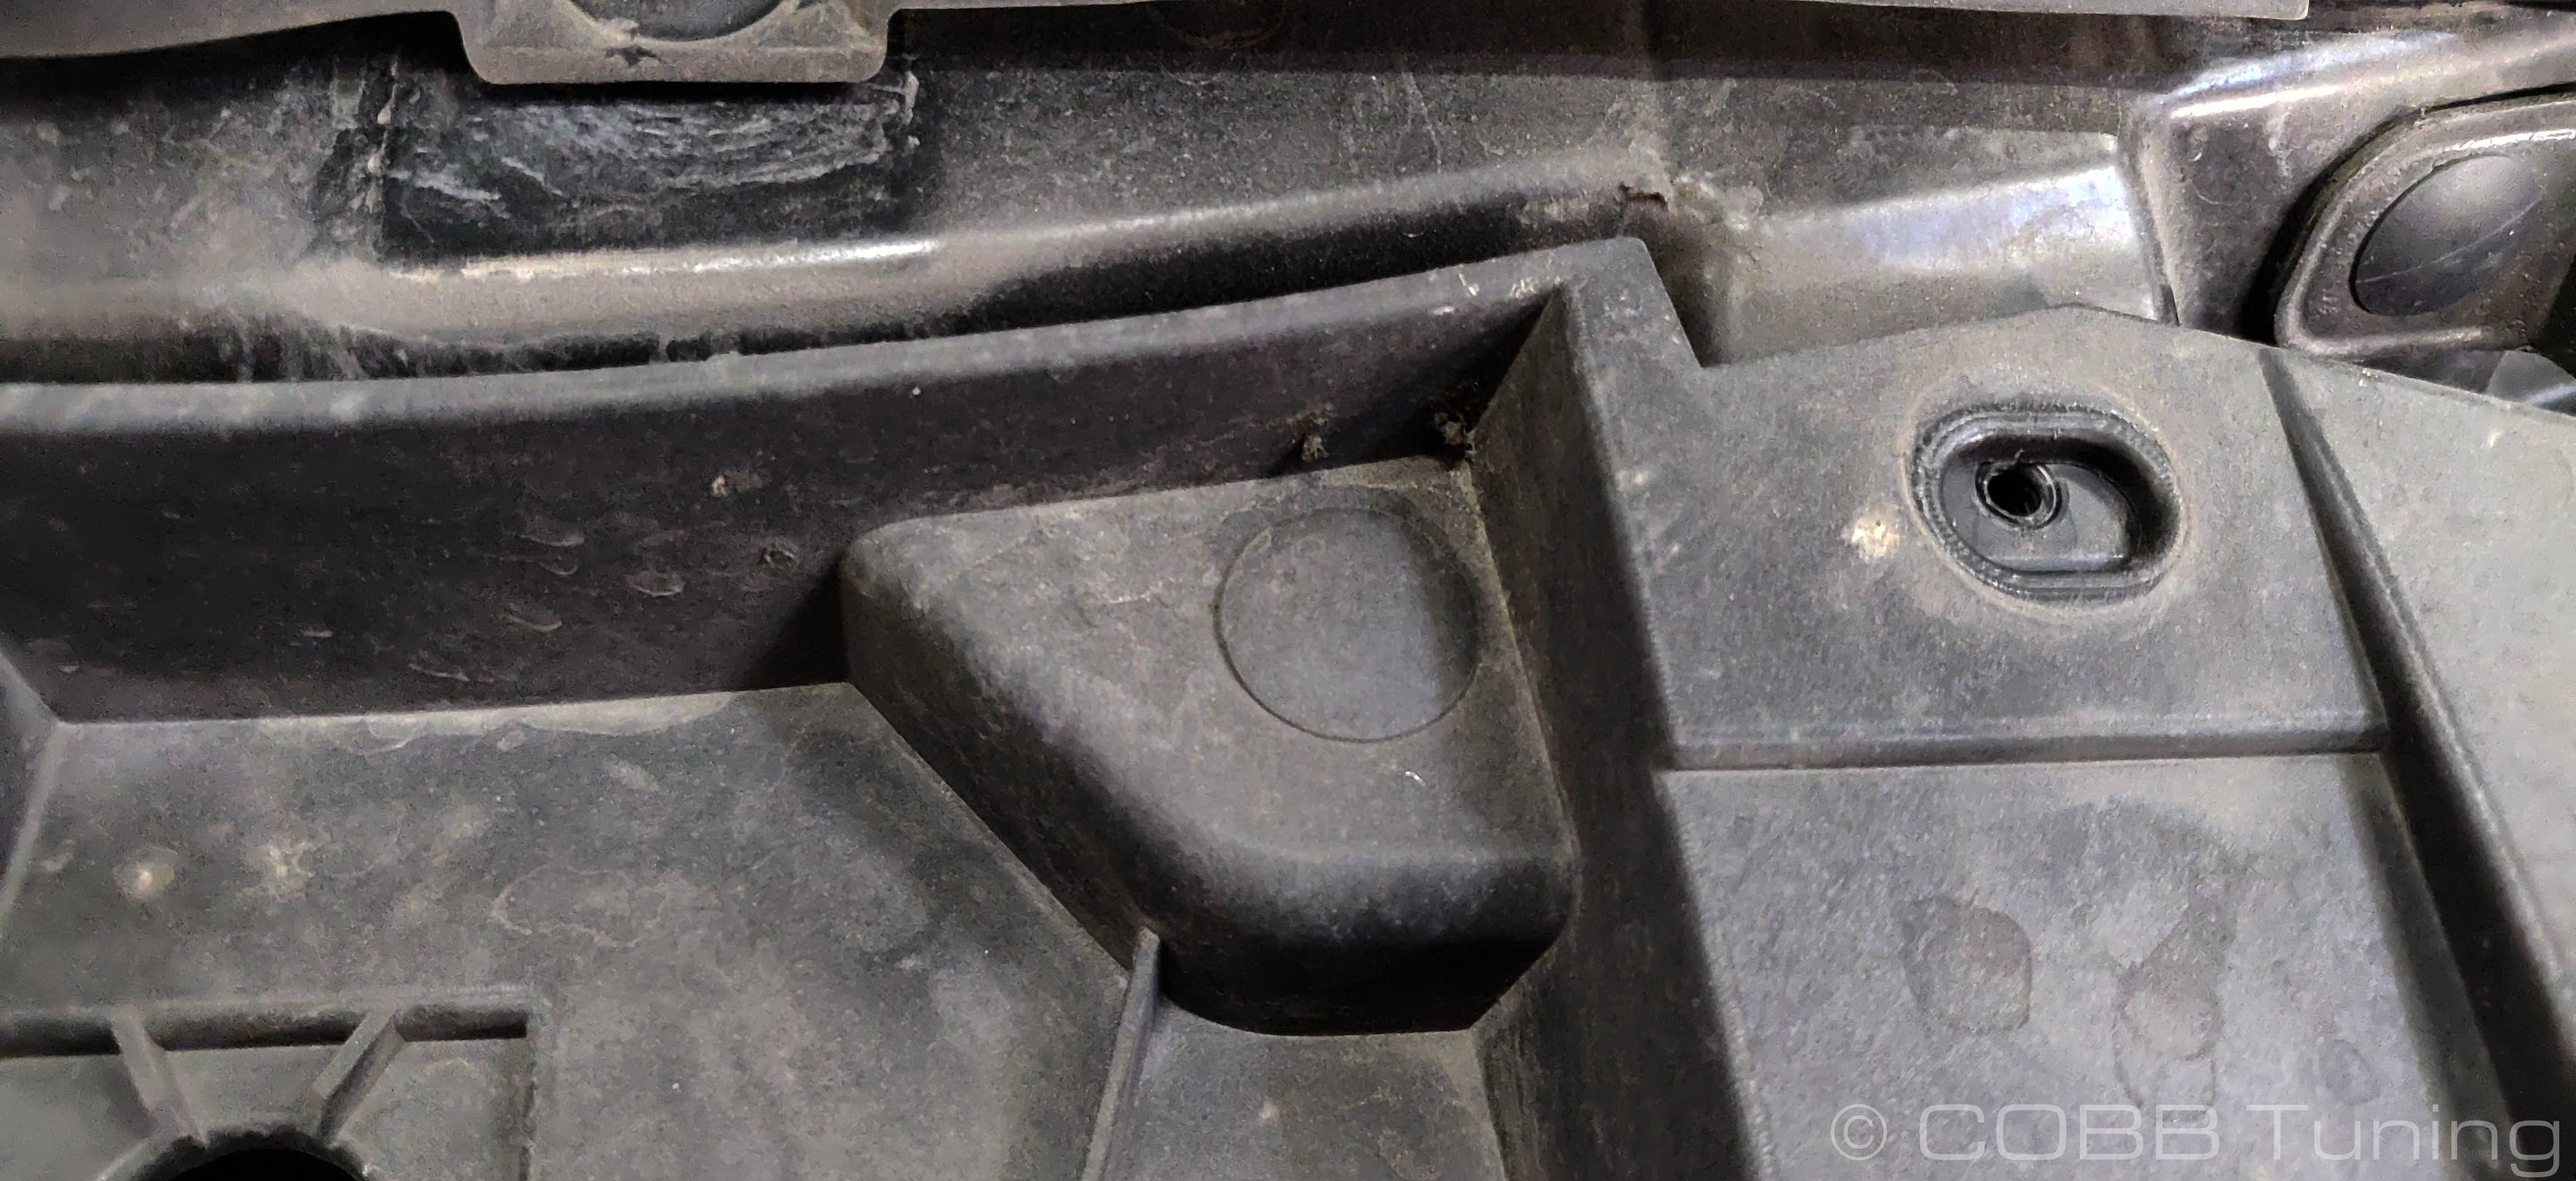
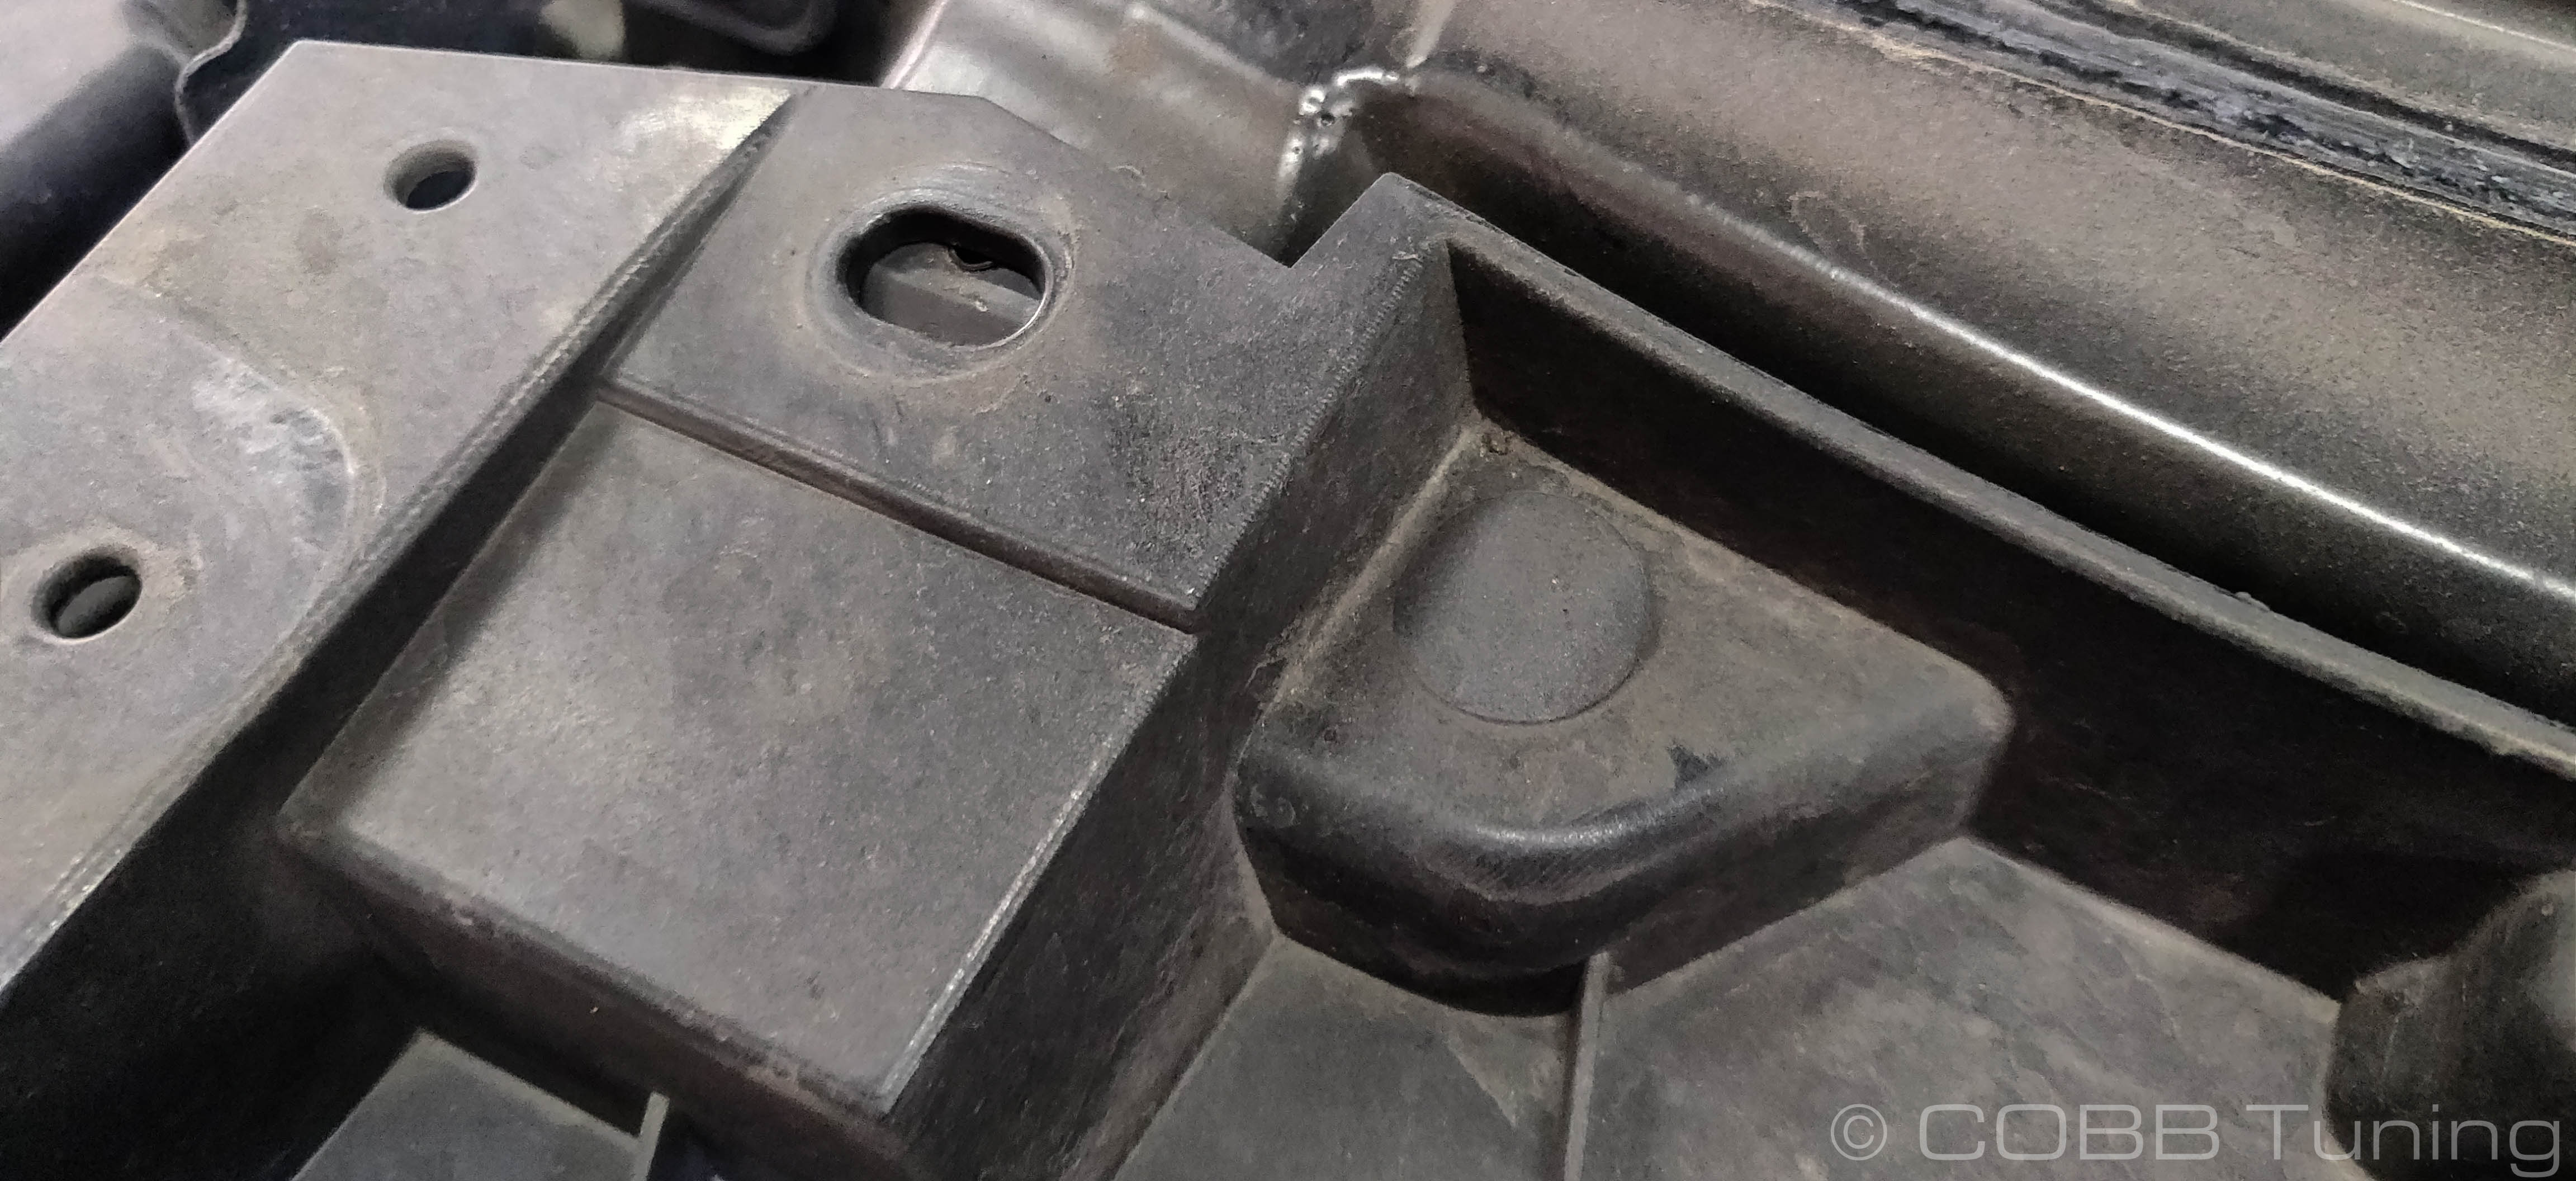
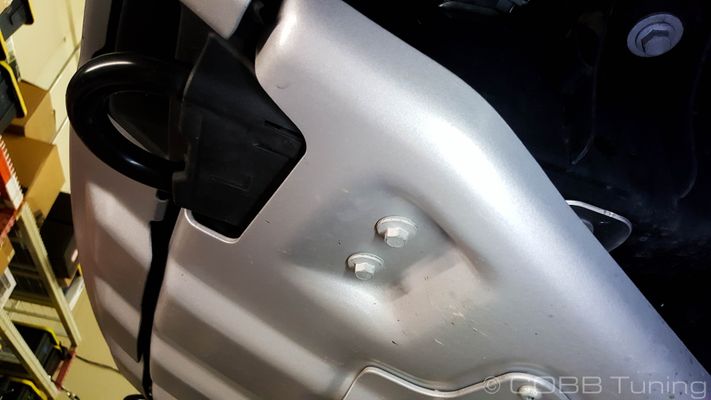
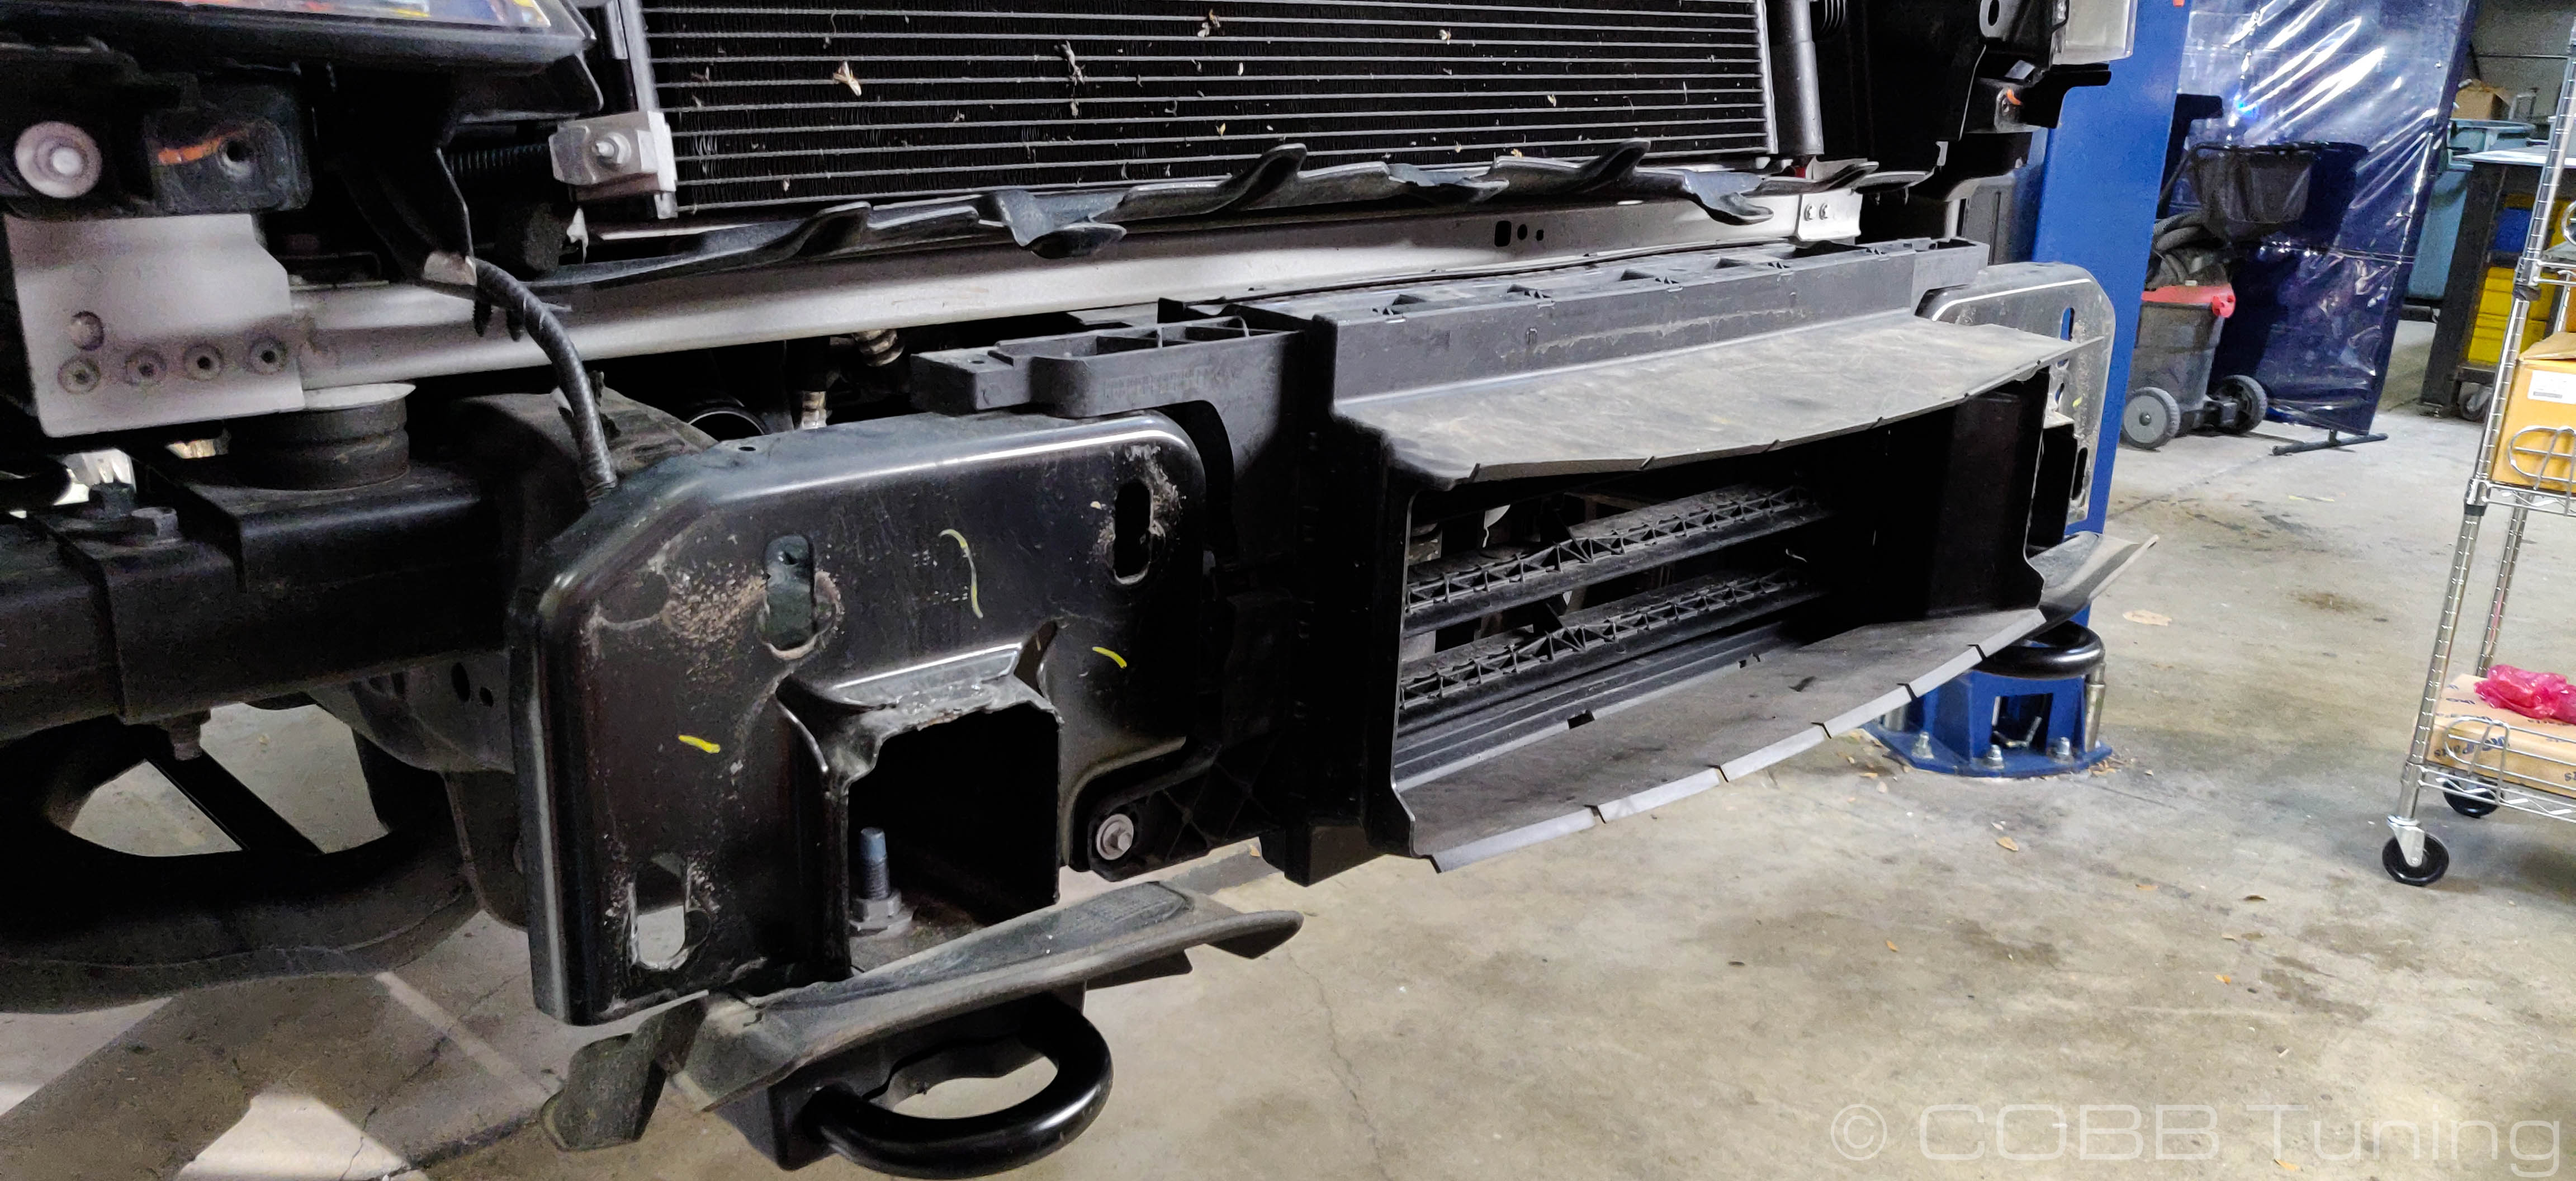
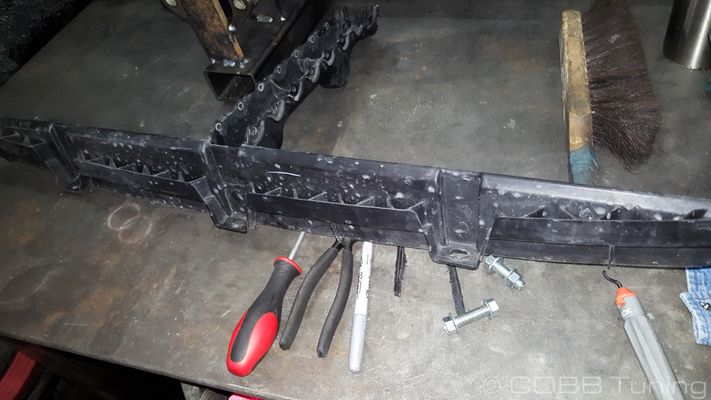
Remove the 8mm bumper supports
Raptor Only
- Follow up by taking out the 15mm bolts holding bracket in place
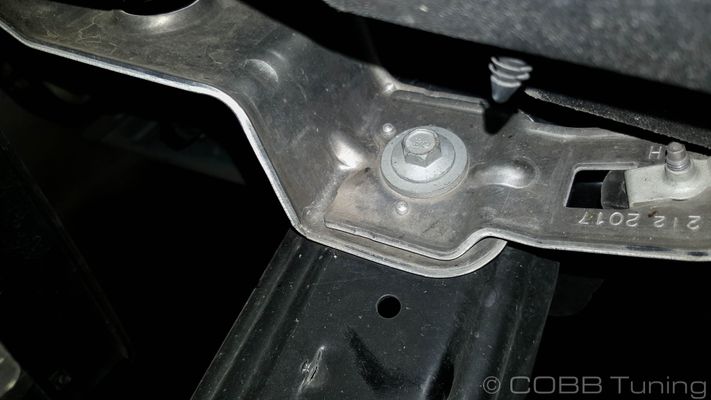
- Remove bracket from car
Intercooler Shutter Removal (Optional for F150)
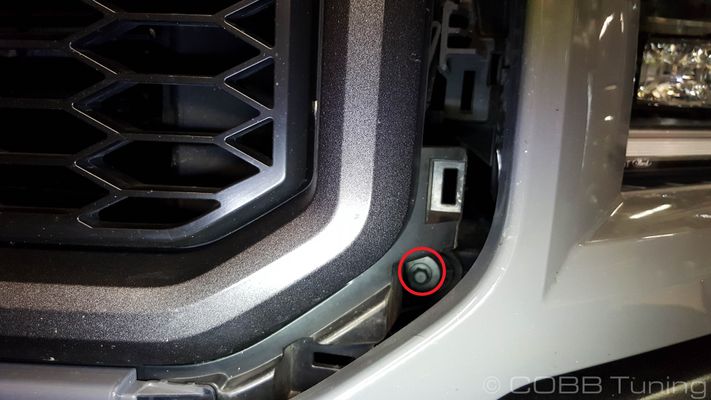
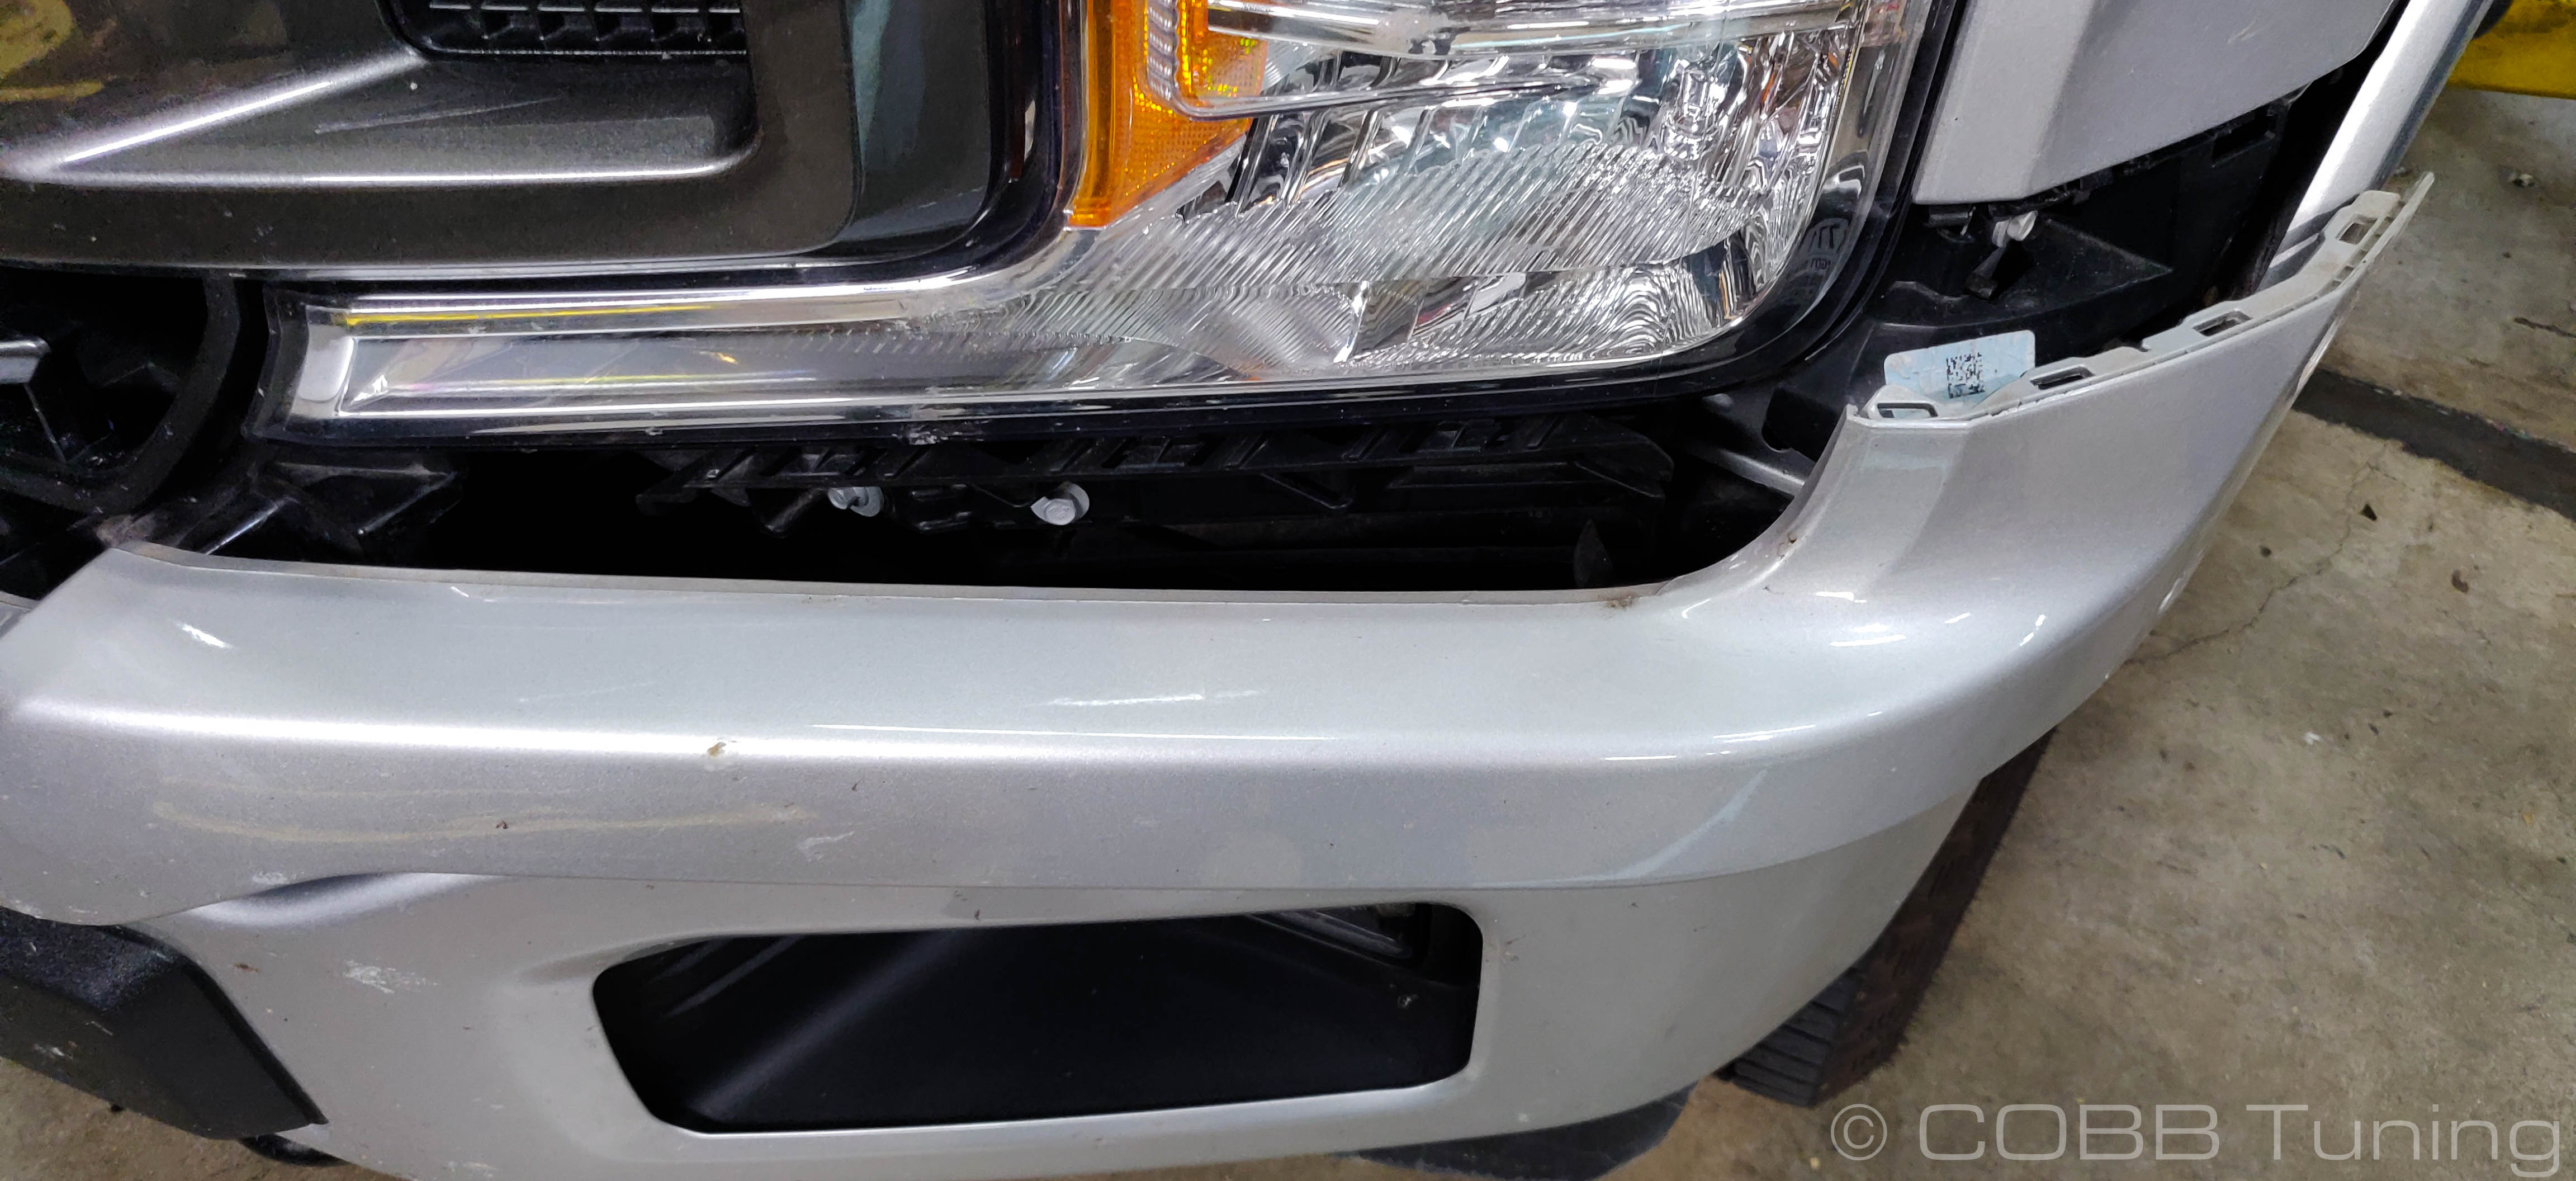
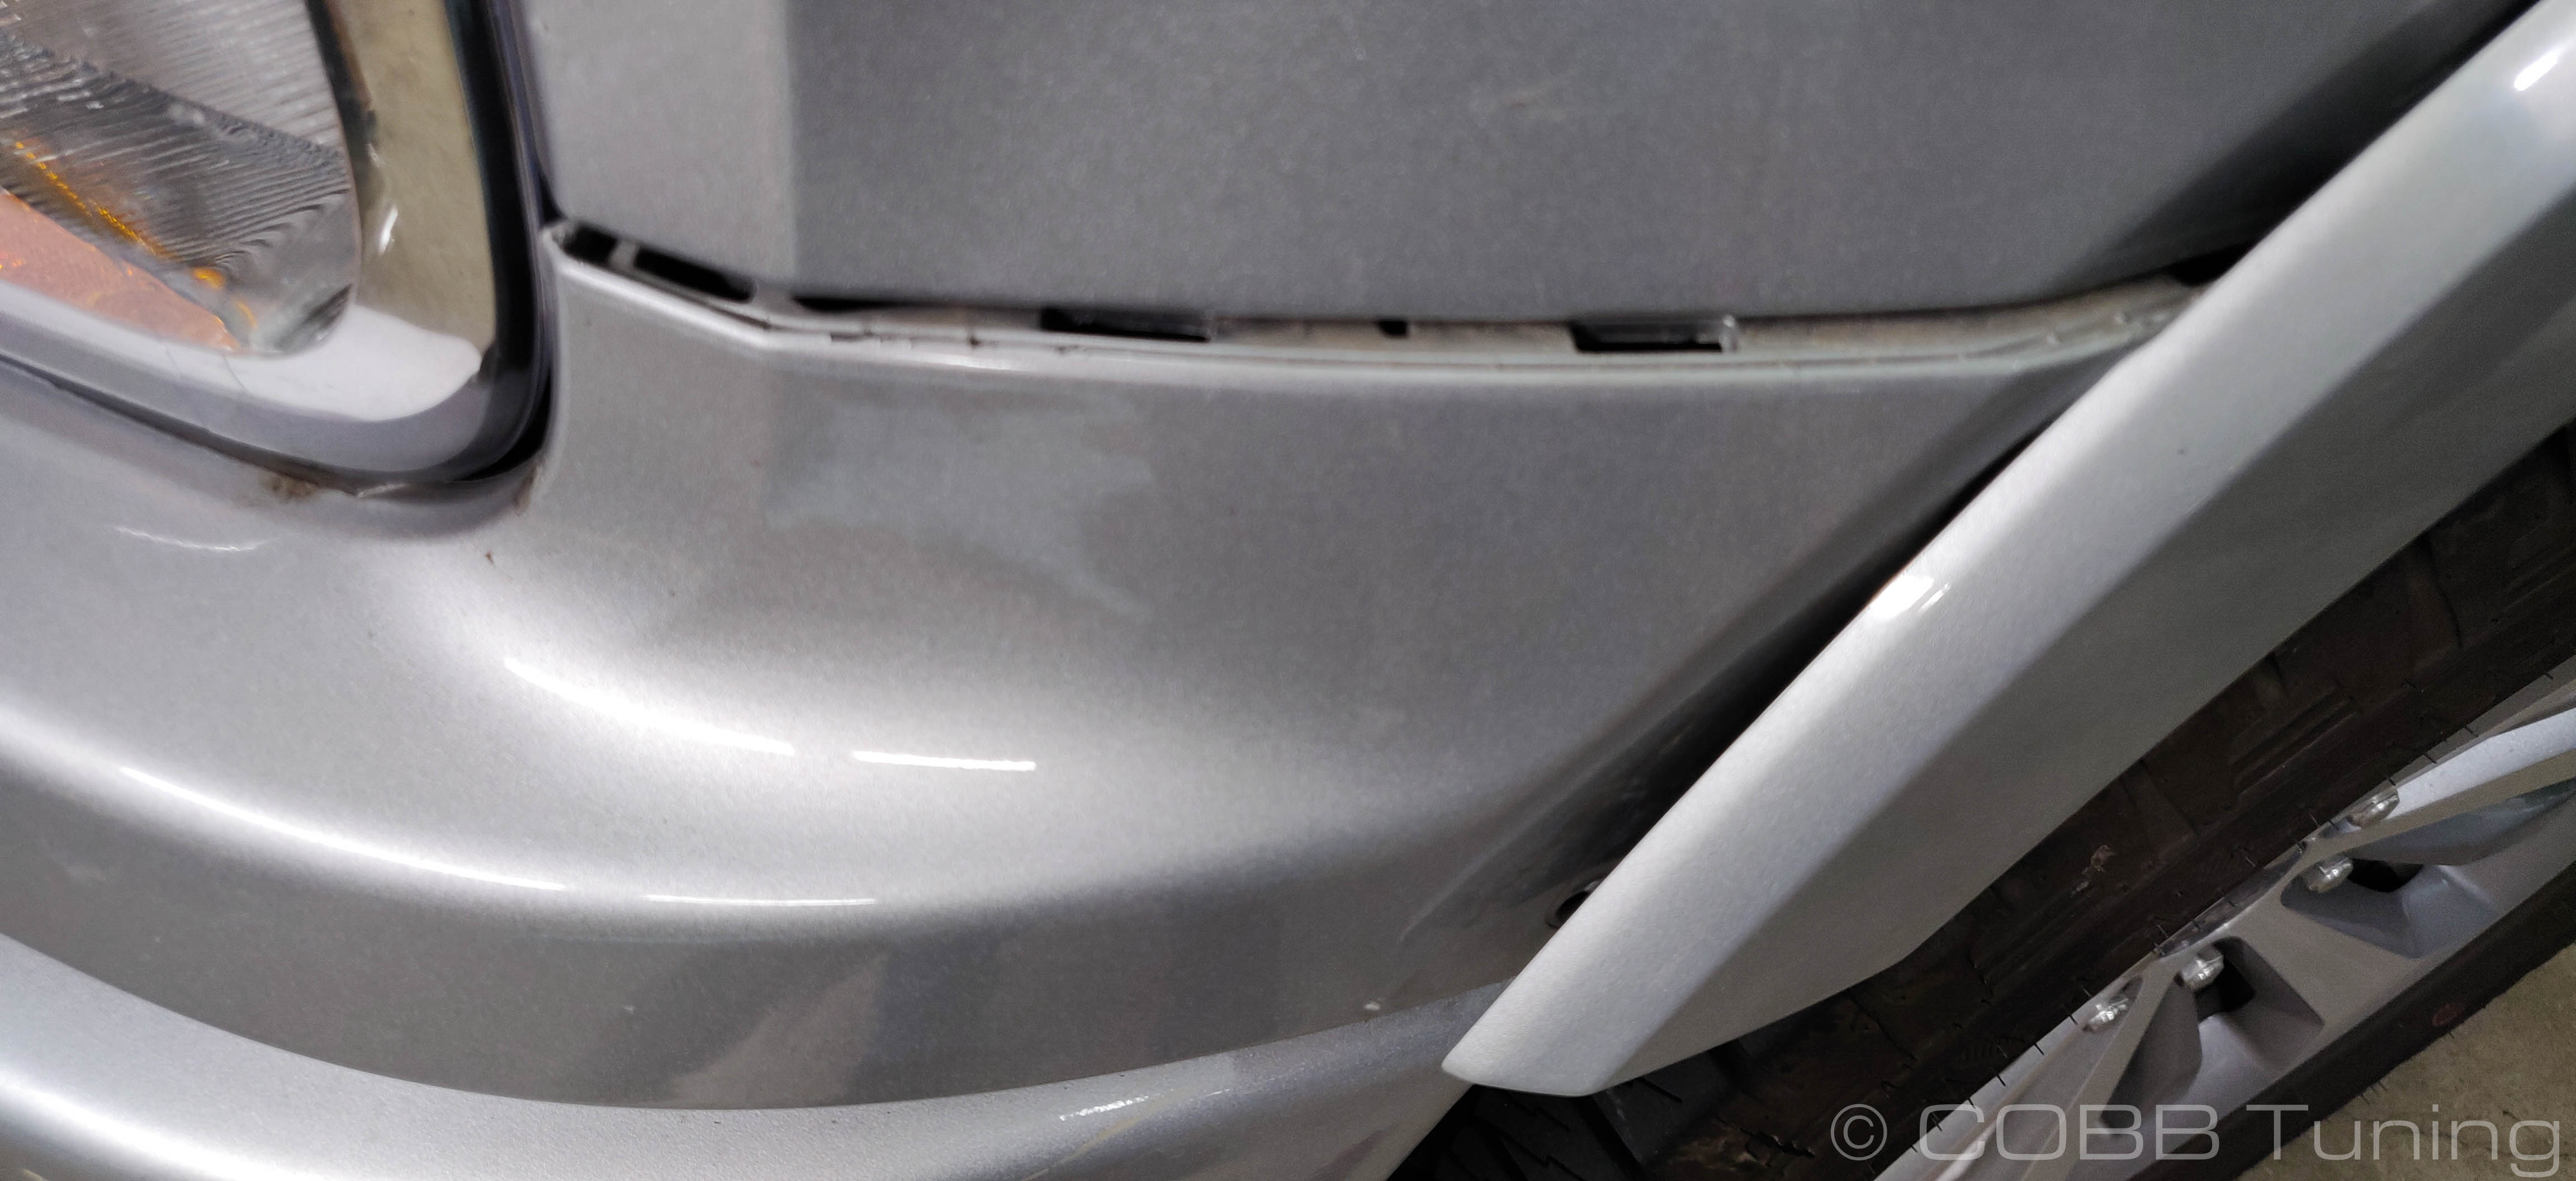
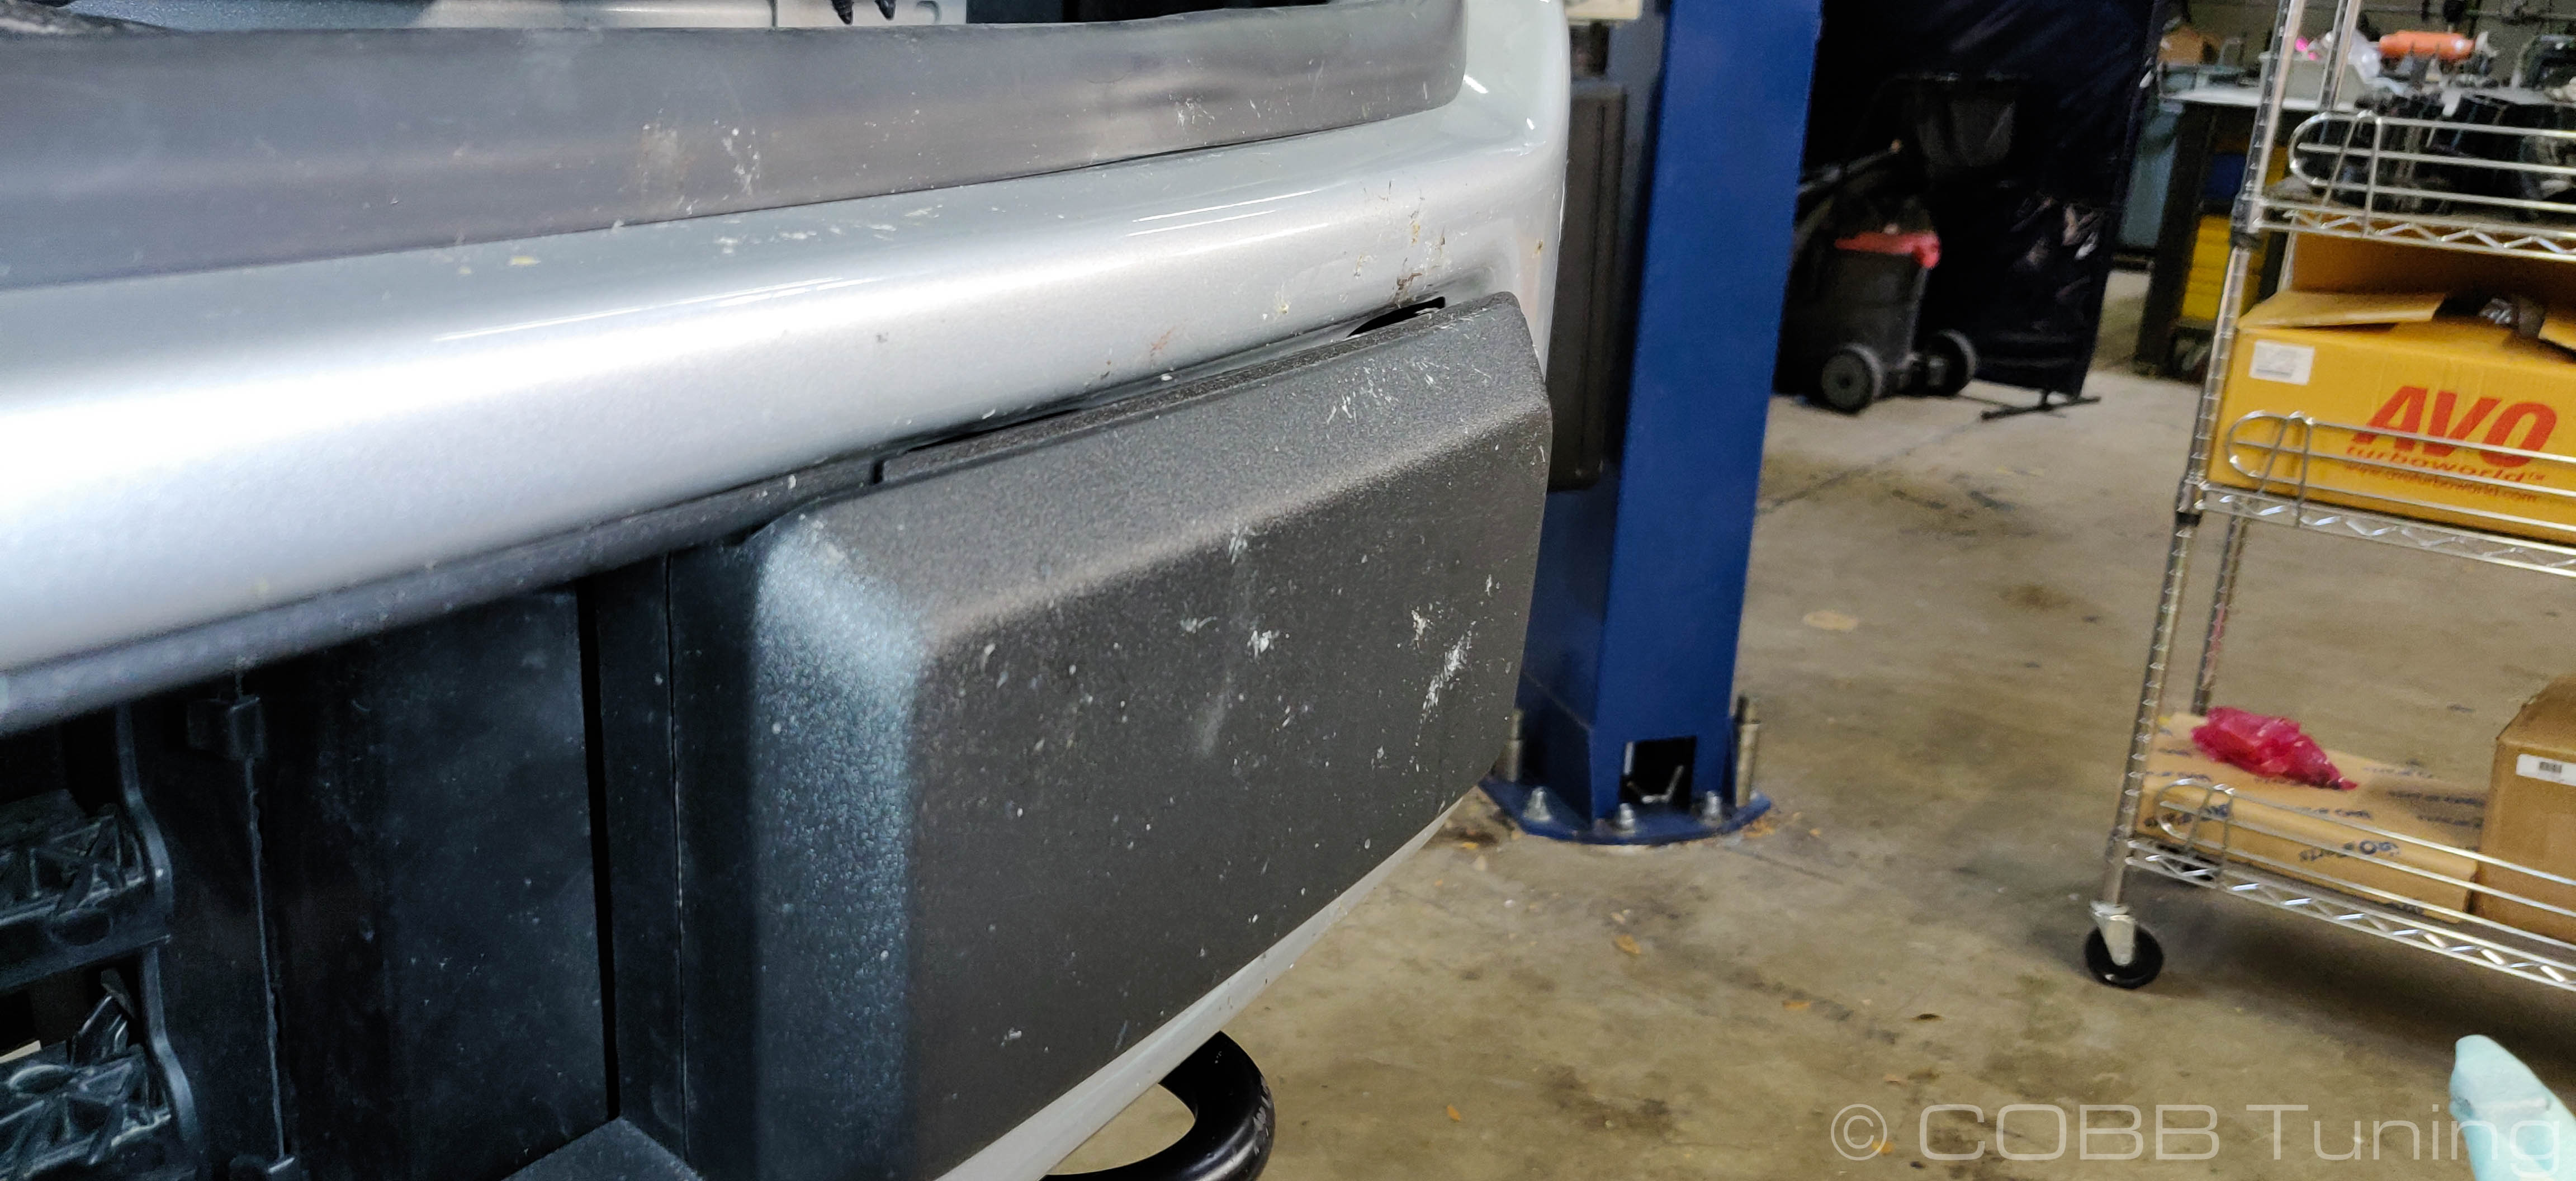
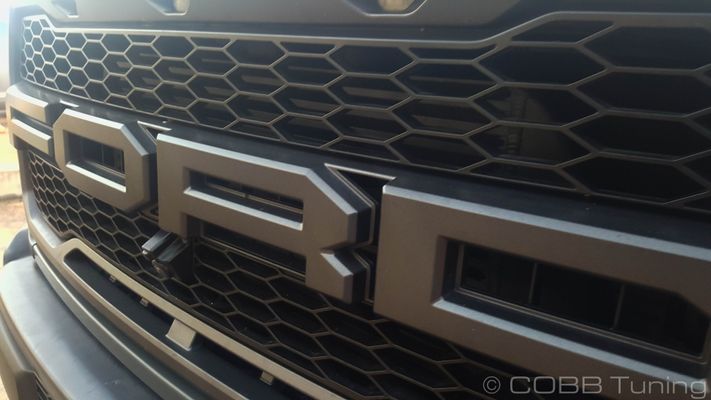
- Start by popping off the front bolt covers on the bumper.
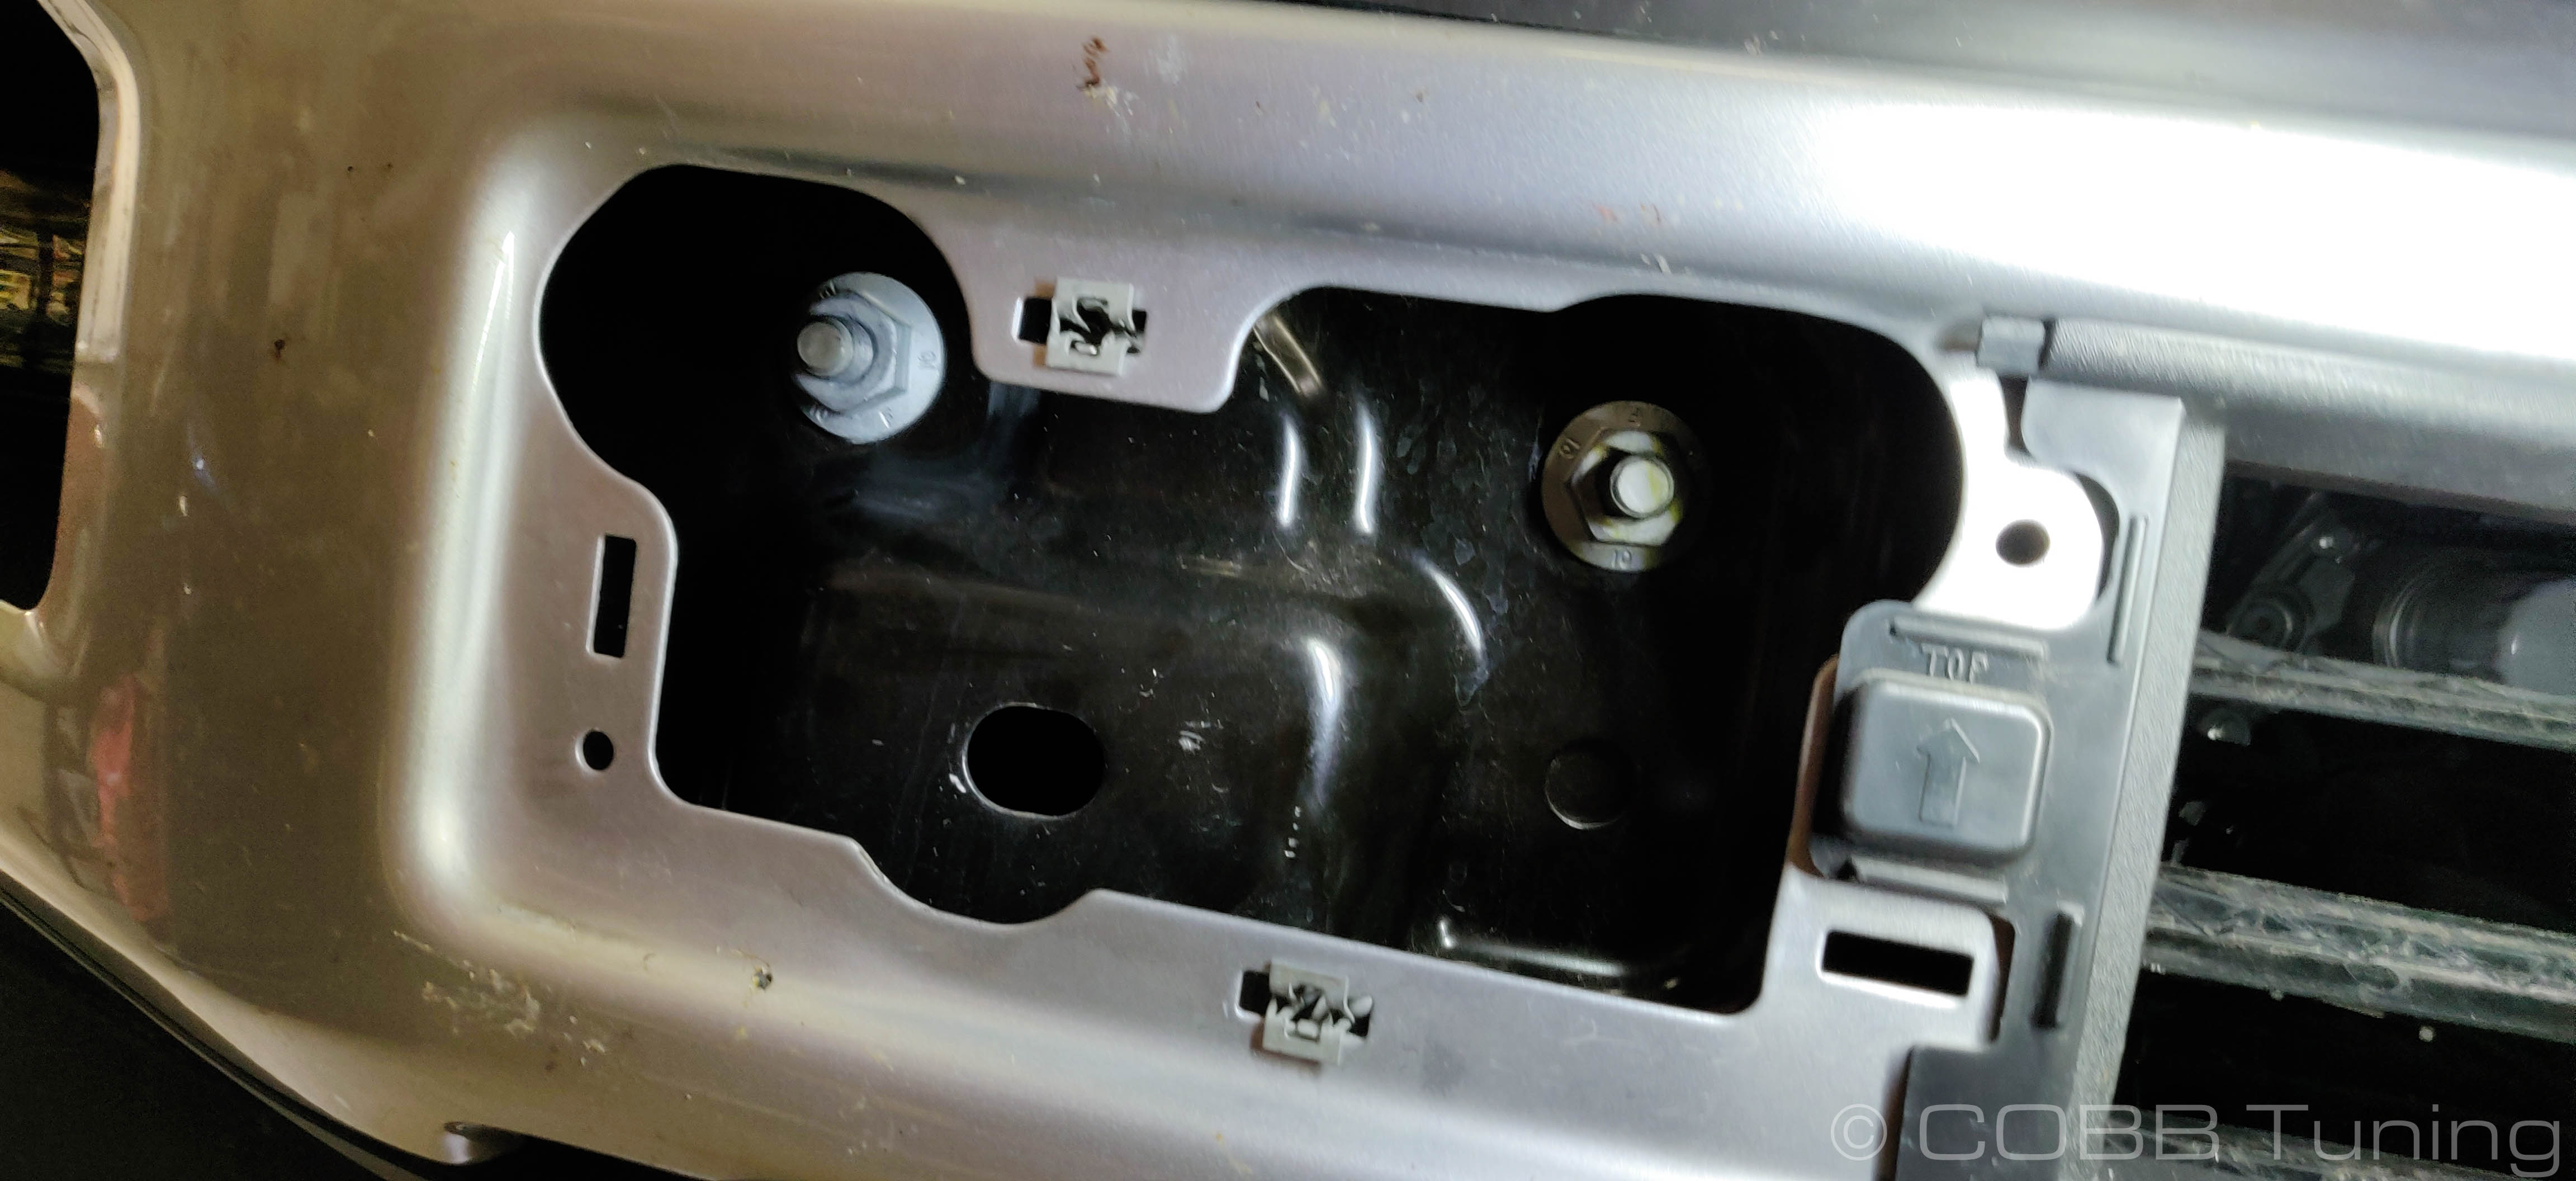
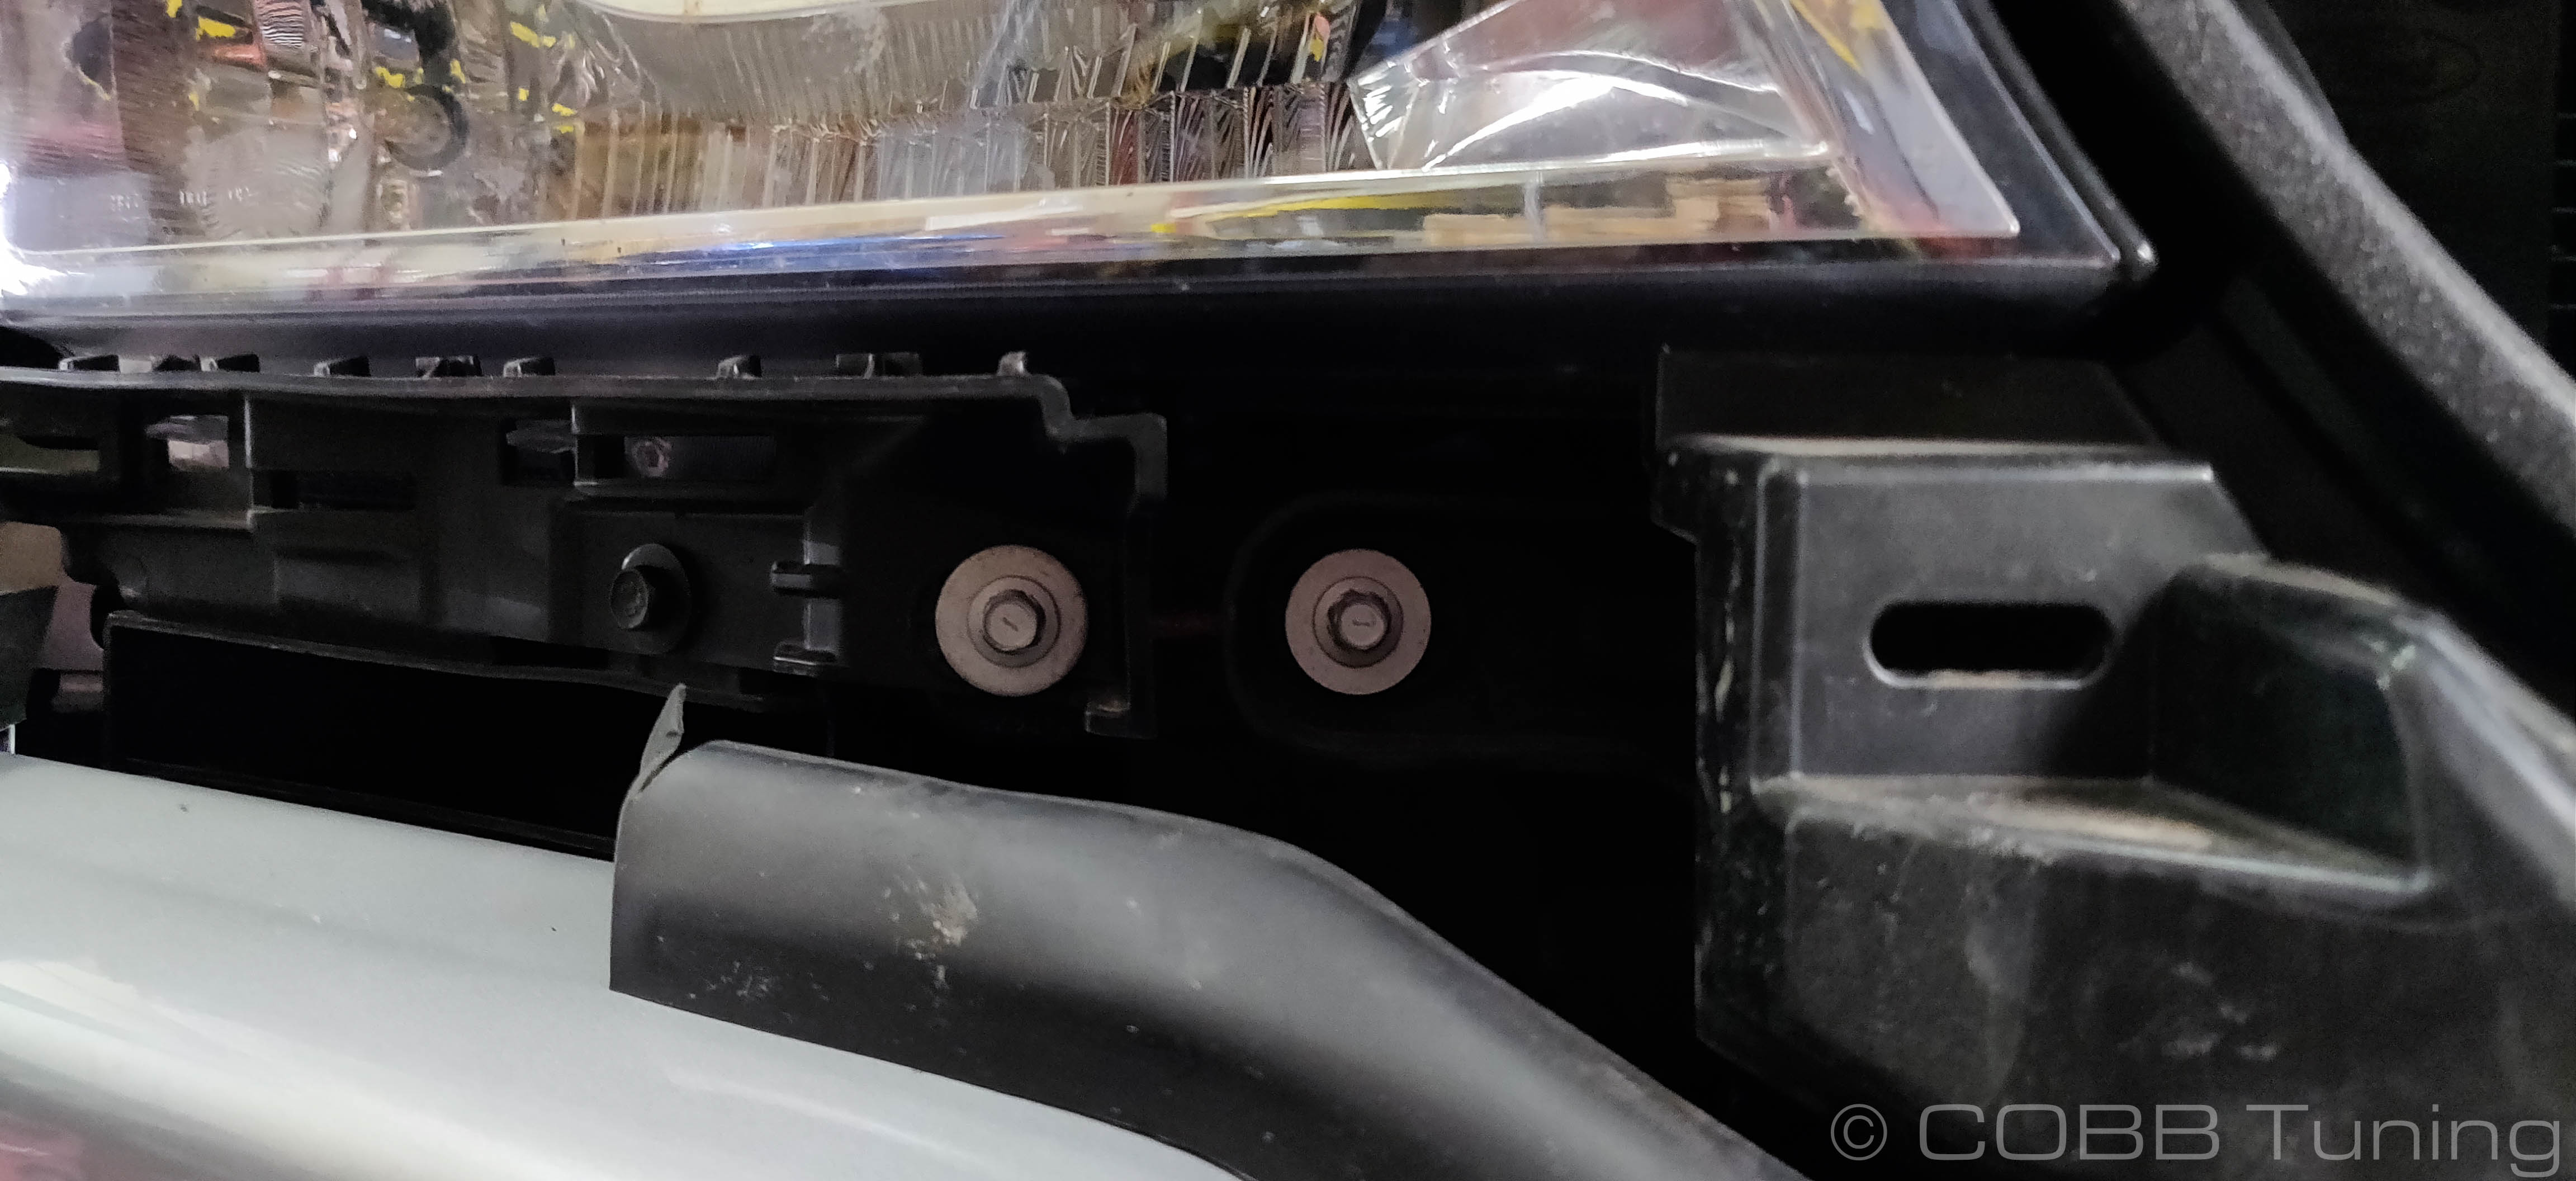
- With a friend supporting the bumper, remove the 3 bolts on each side of the bumper using a 19mm socket and ratchet then remove the bumper and put it in a safe place.
- Unbolt the lower 8mm bolt on either side to remove the intercooler shroud from the car.
Raptor Intercooler Installation
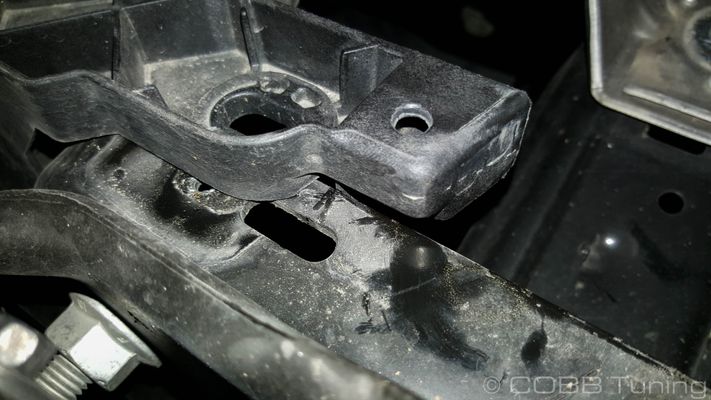
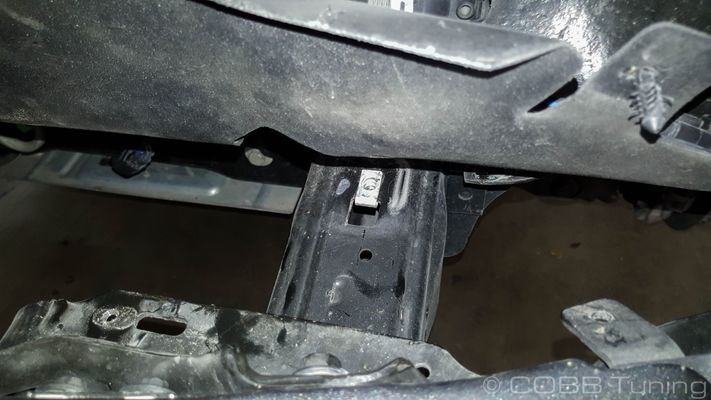
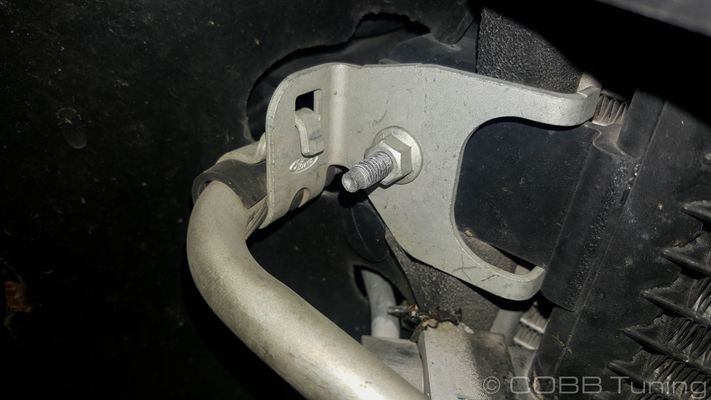
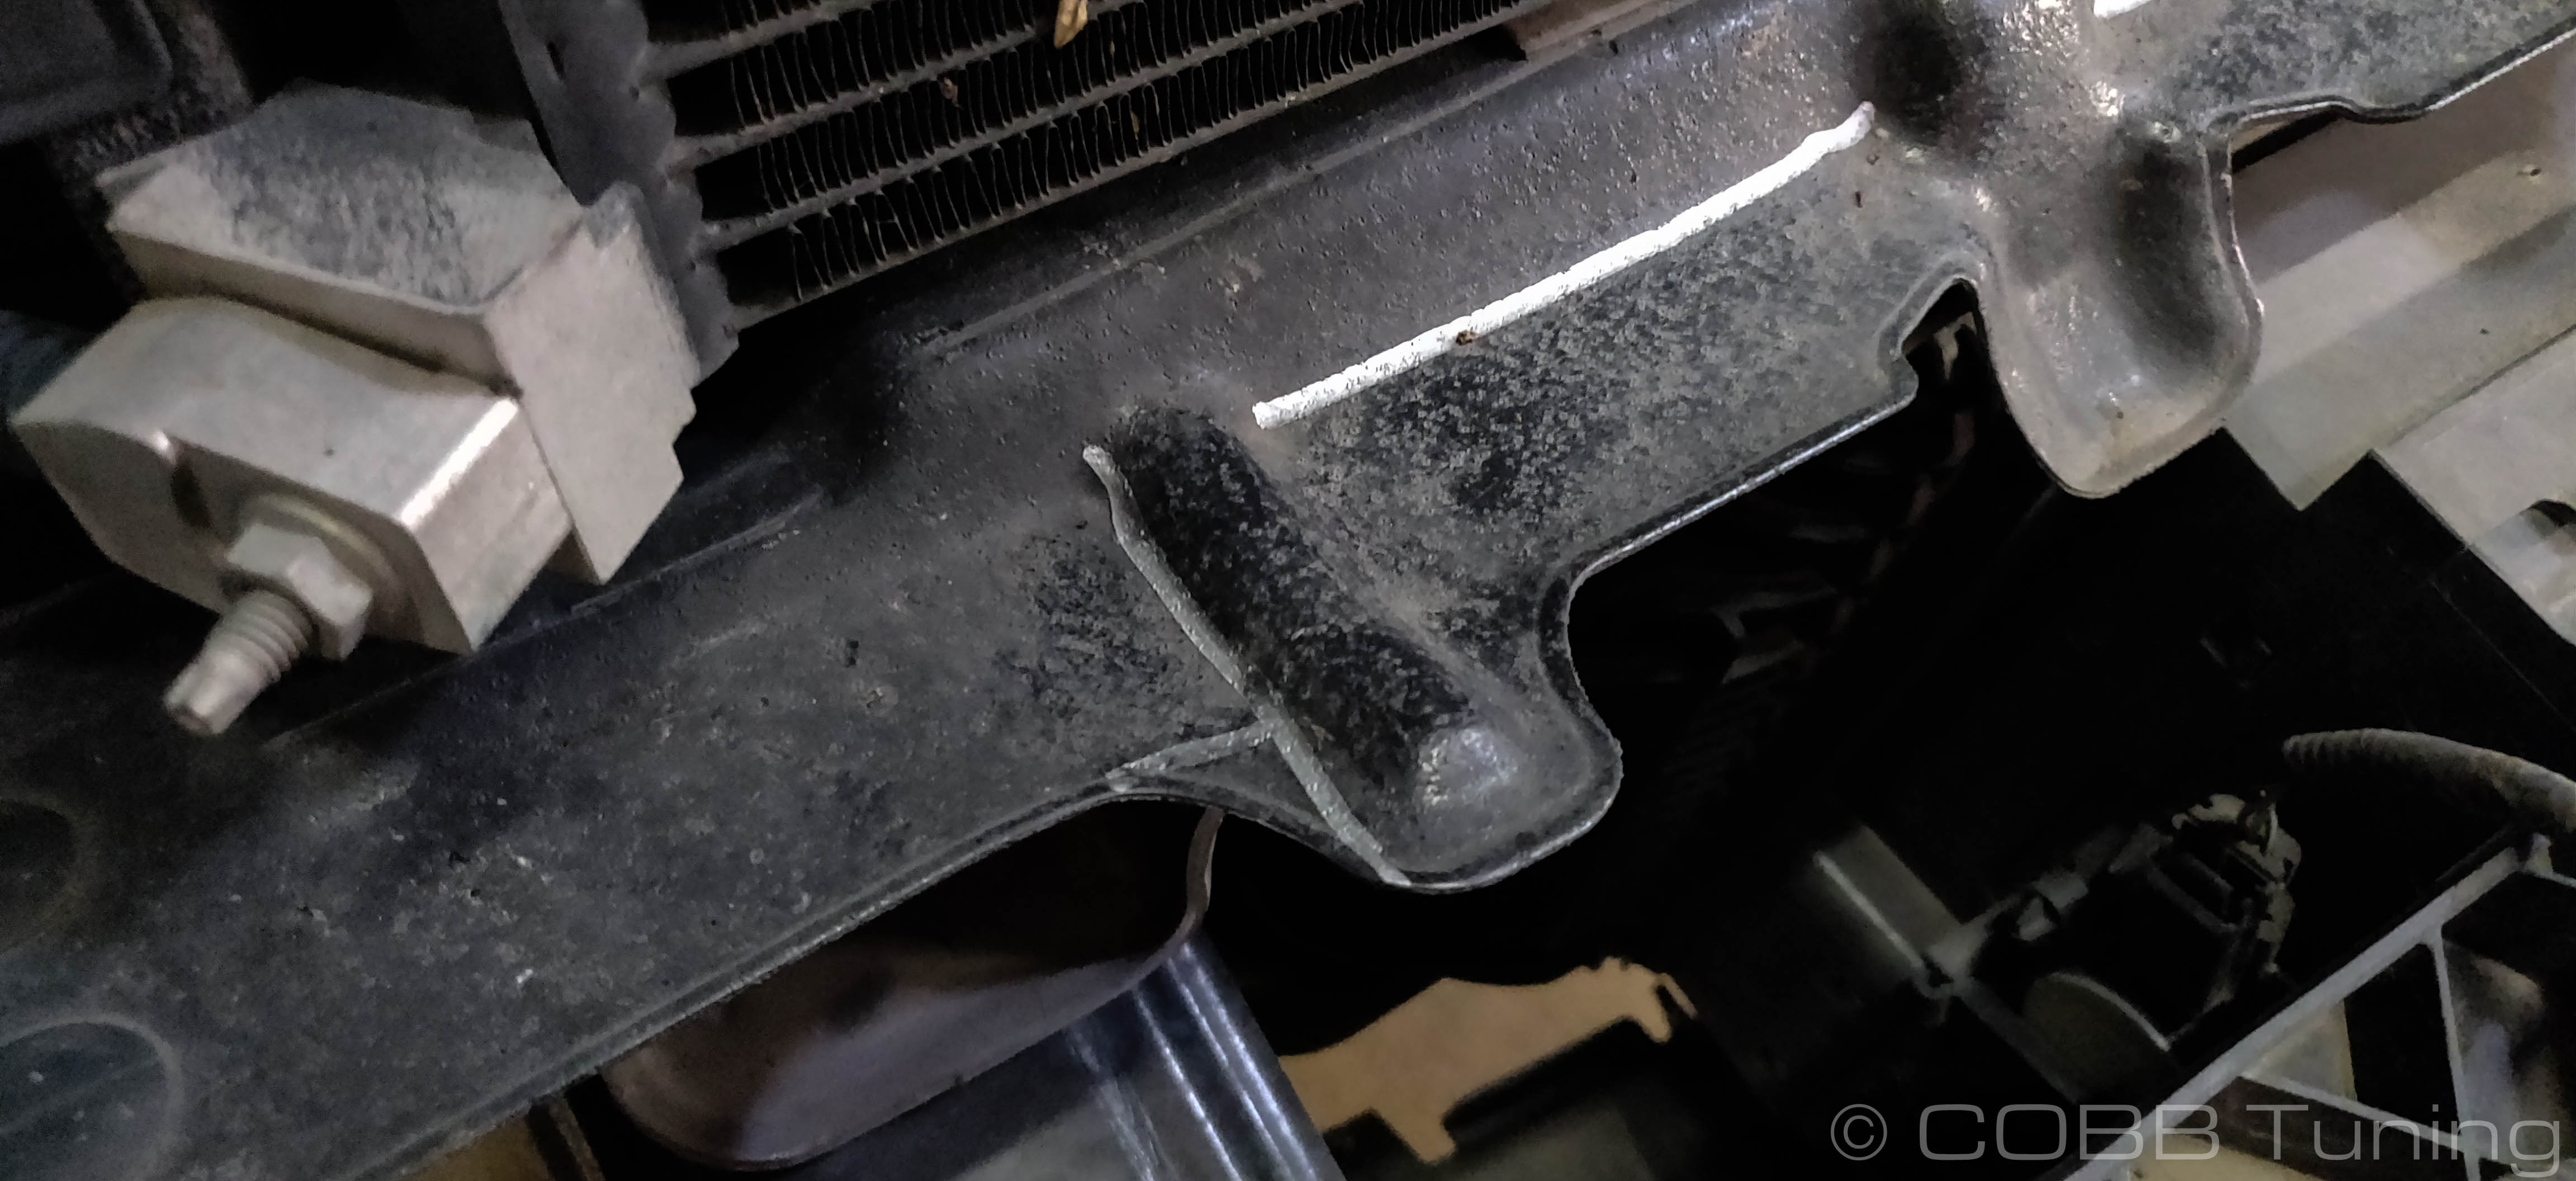
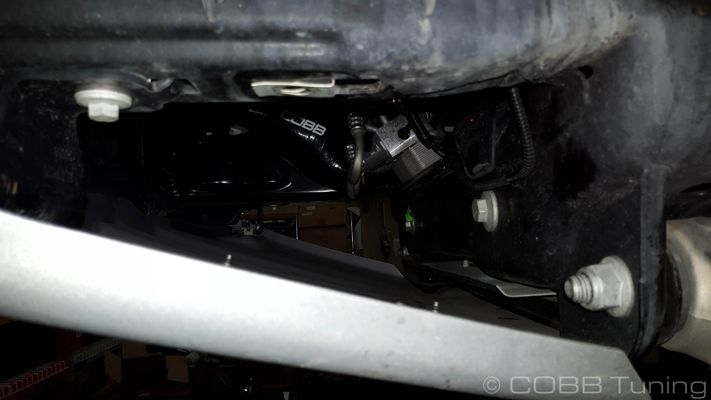
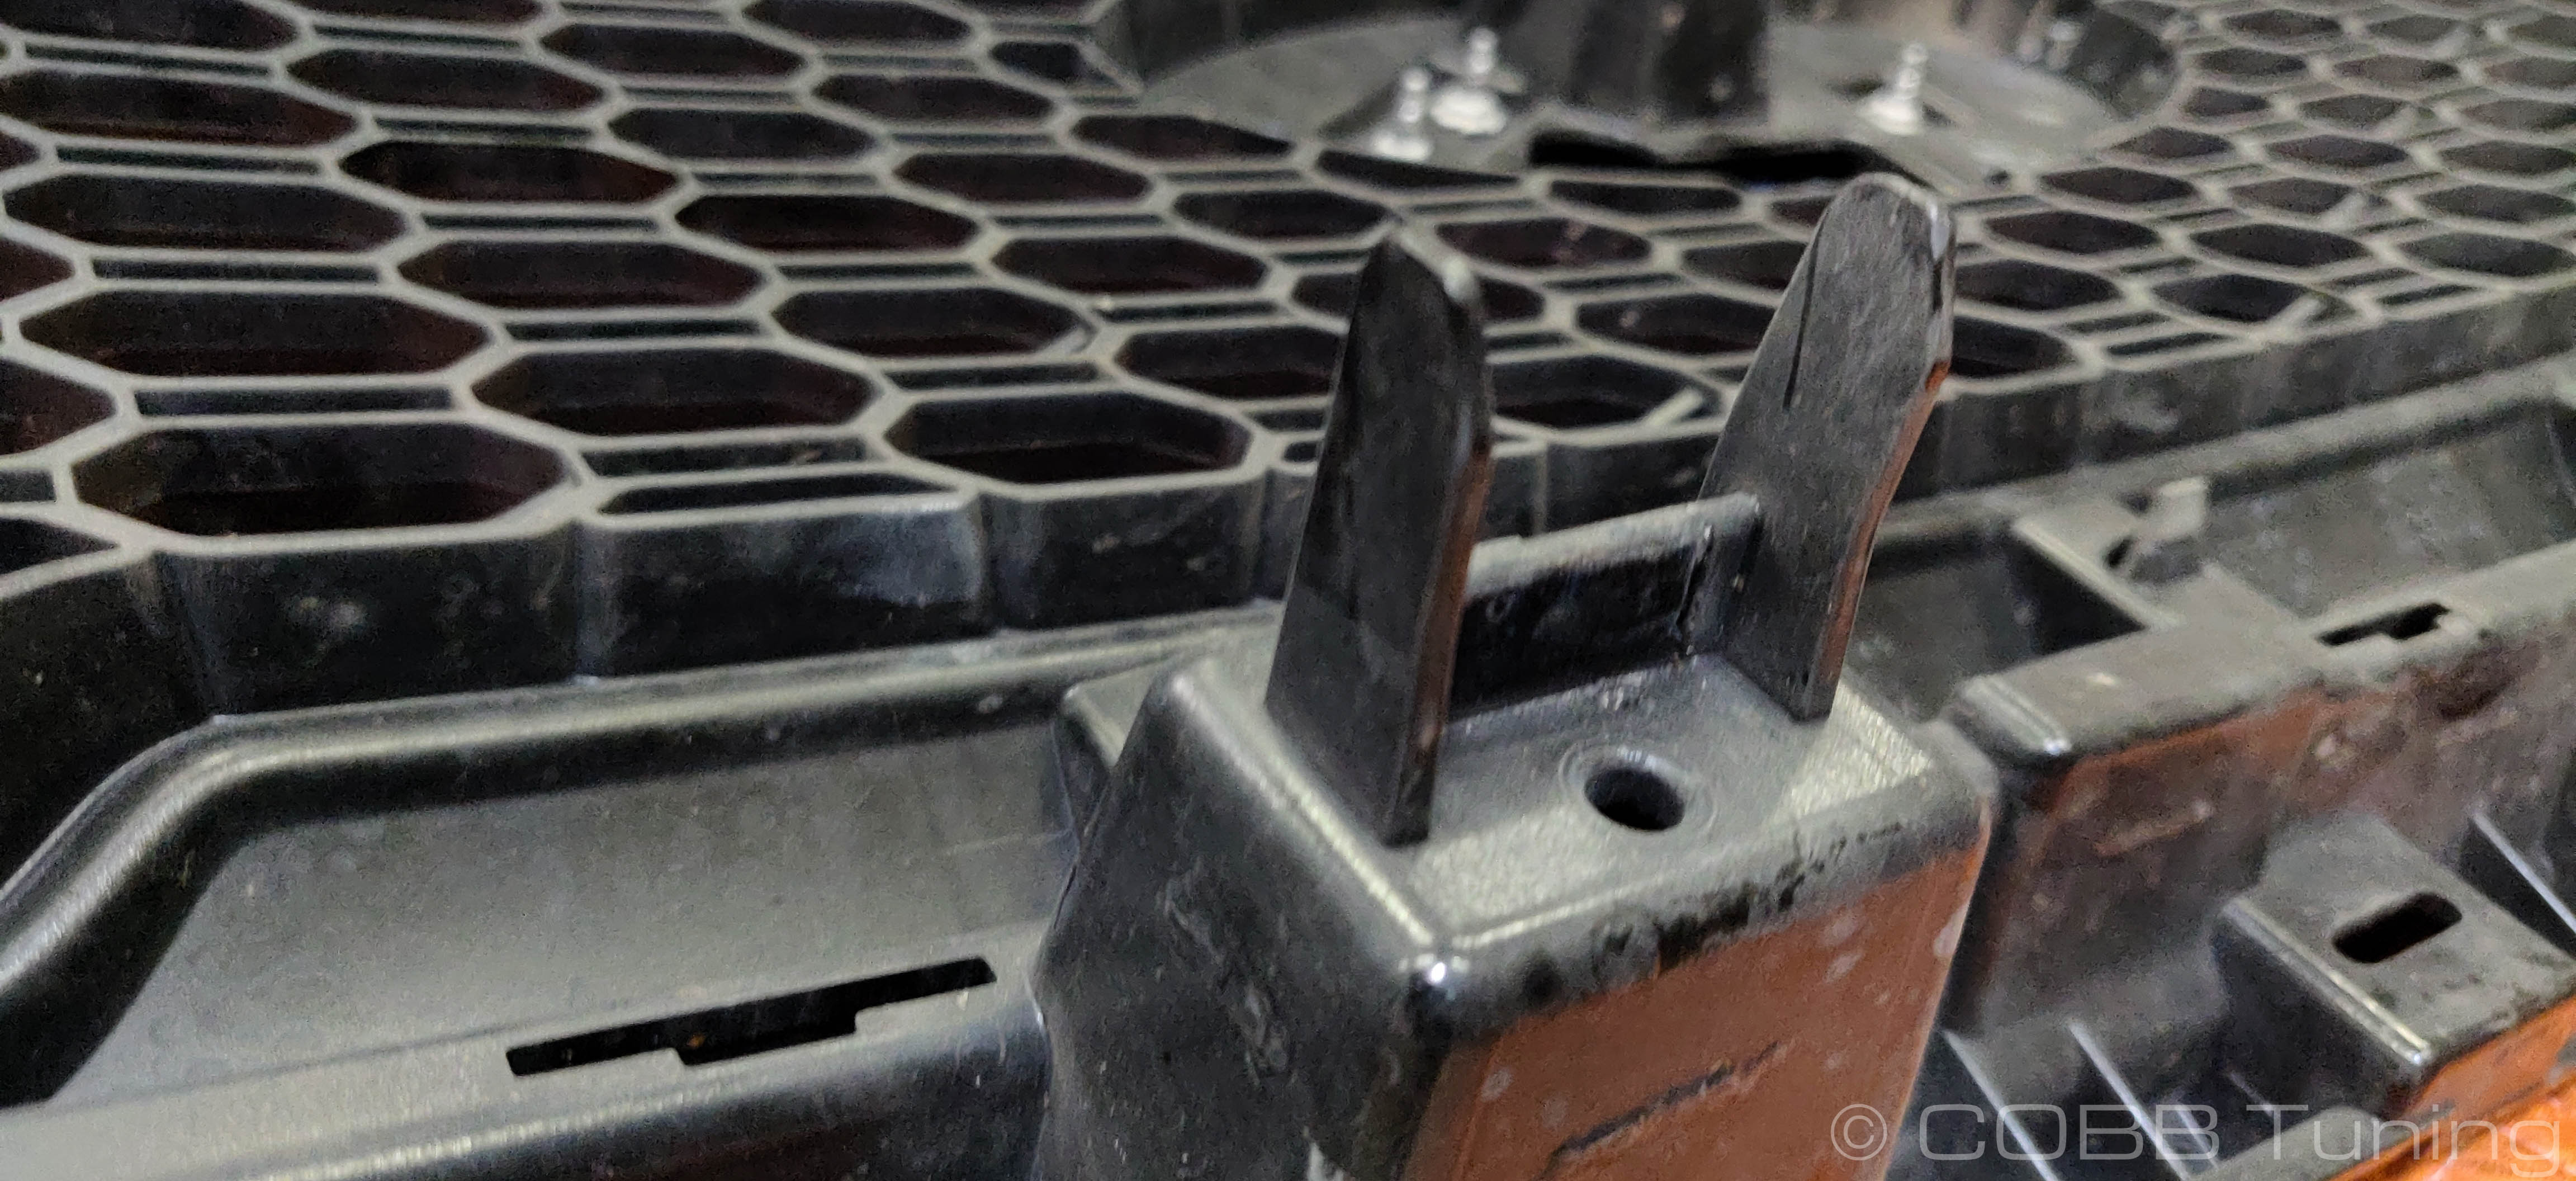
Loosely Install intercooler bracket using stock hardware with bumper support brackets. Make sure the tab end is pointing up. If you're running an aftermarket or frame-cut bumper you may not need these.
The bumper support brackets are not needed on F150 installations.
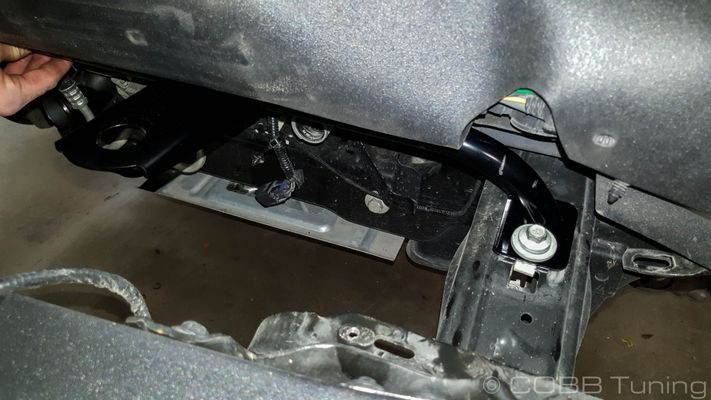
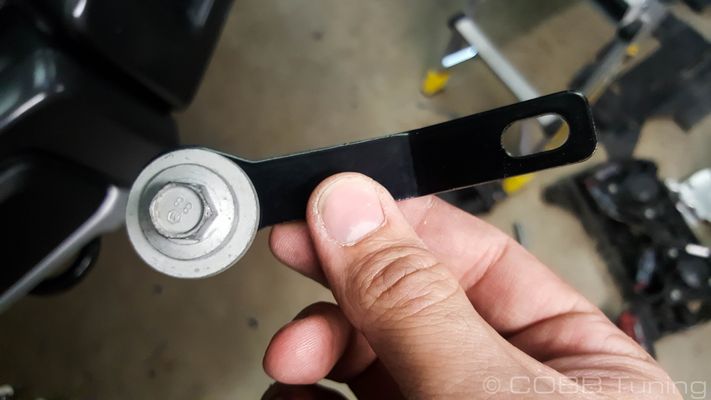
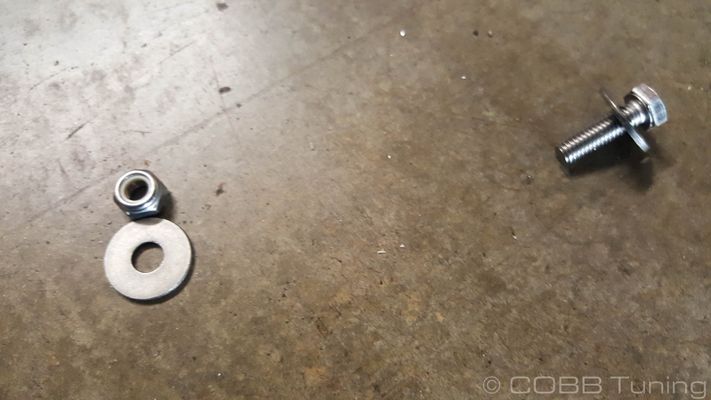
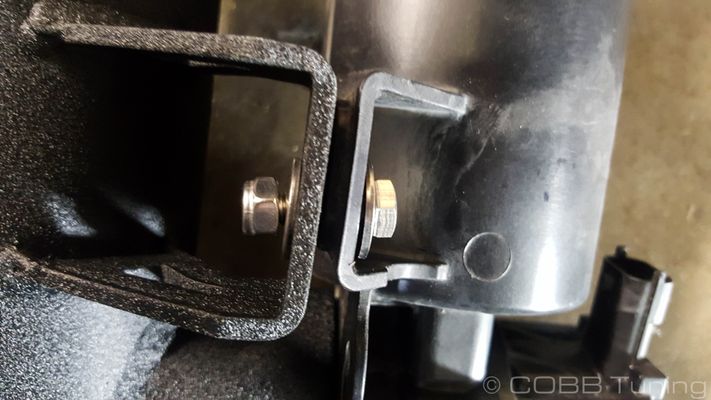
- Using a shorter bolt, lock nut, and a washer on each side attach the bumper support loosely.
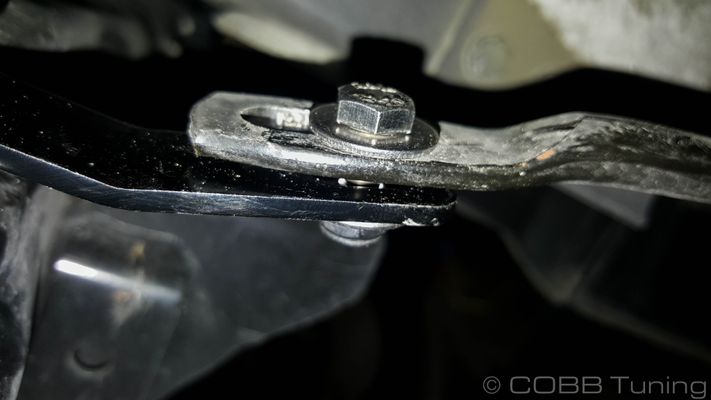
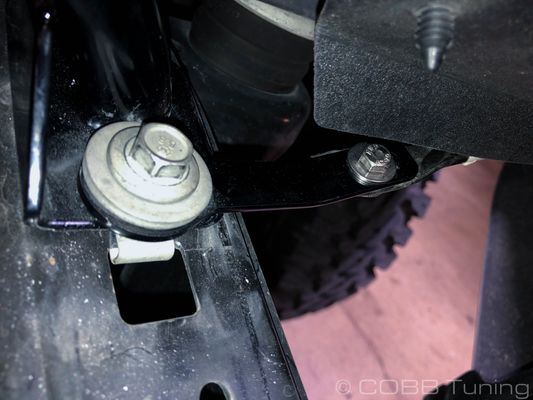
- Tighten the bumper support bolts down to stock torque specs
- Torque down the intercooler bracket.
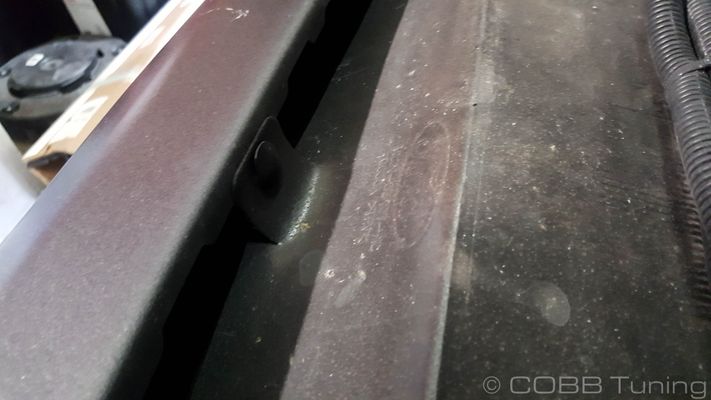
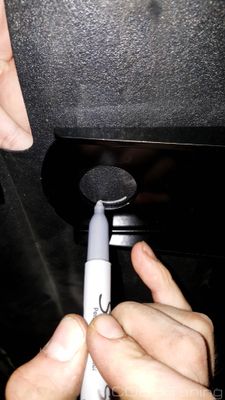
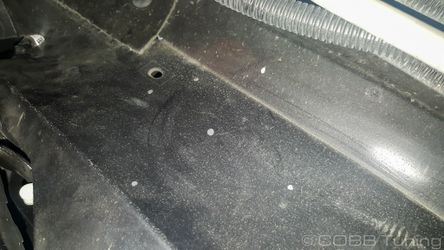
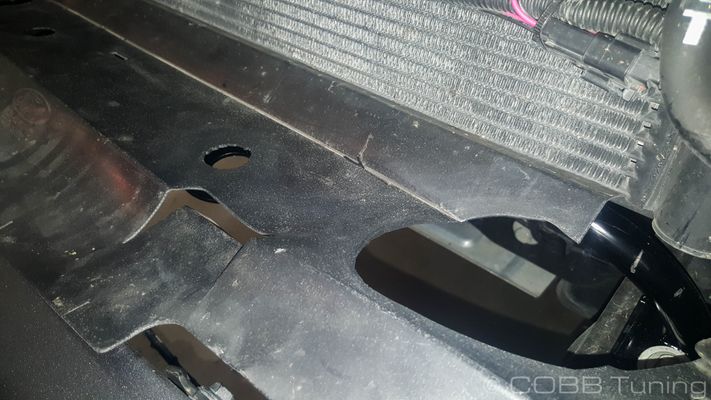
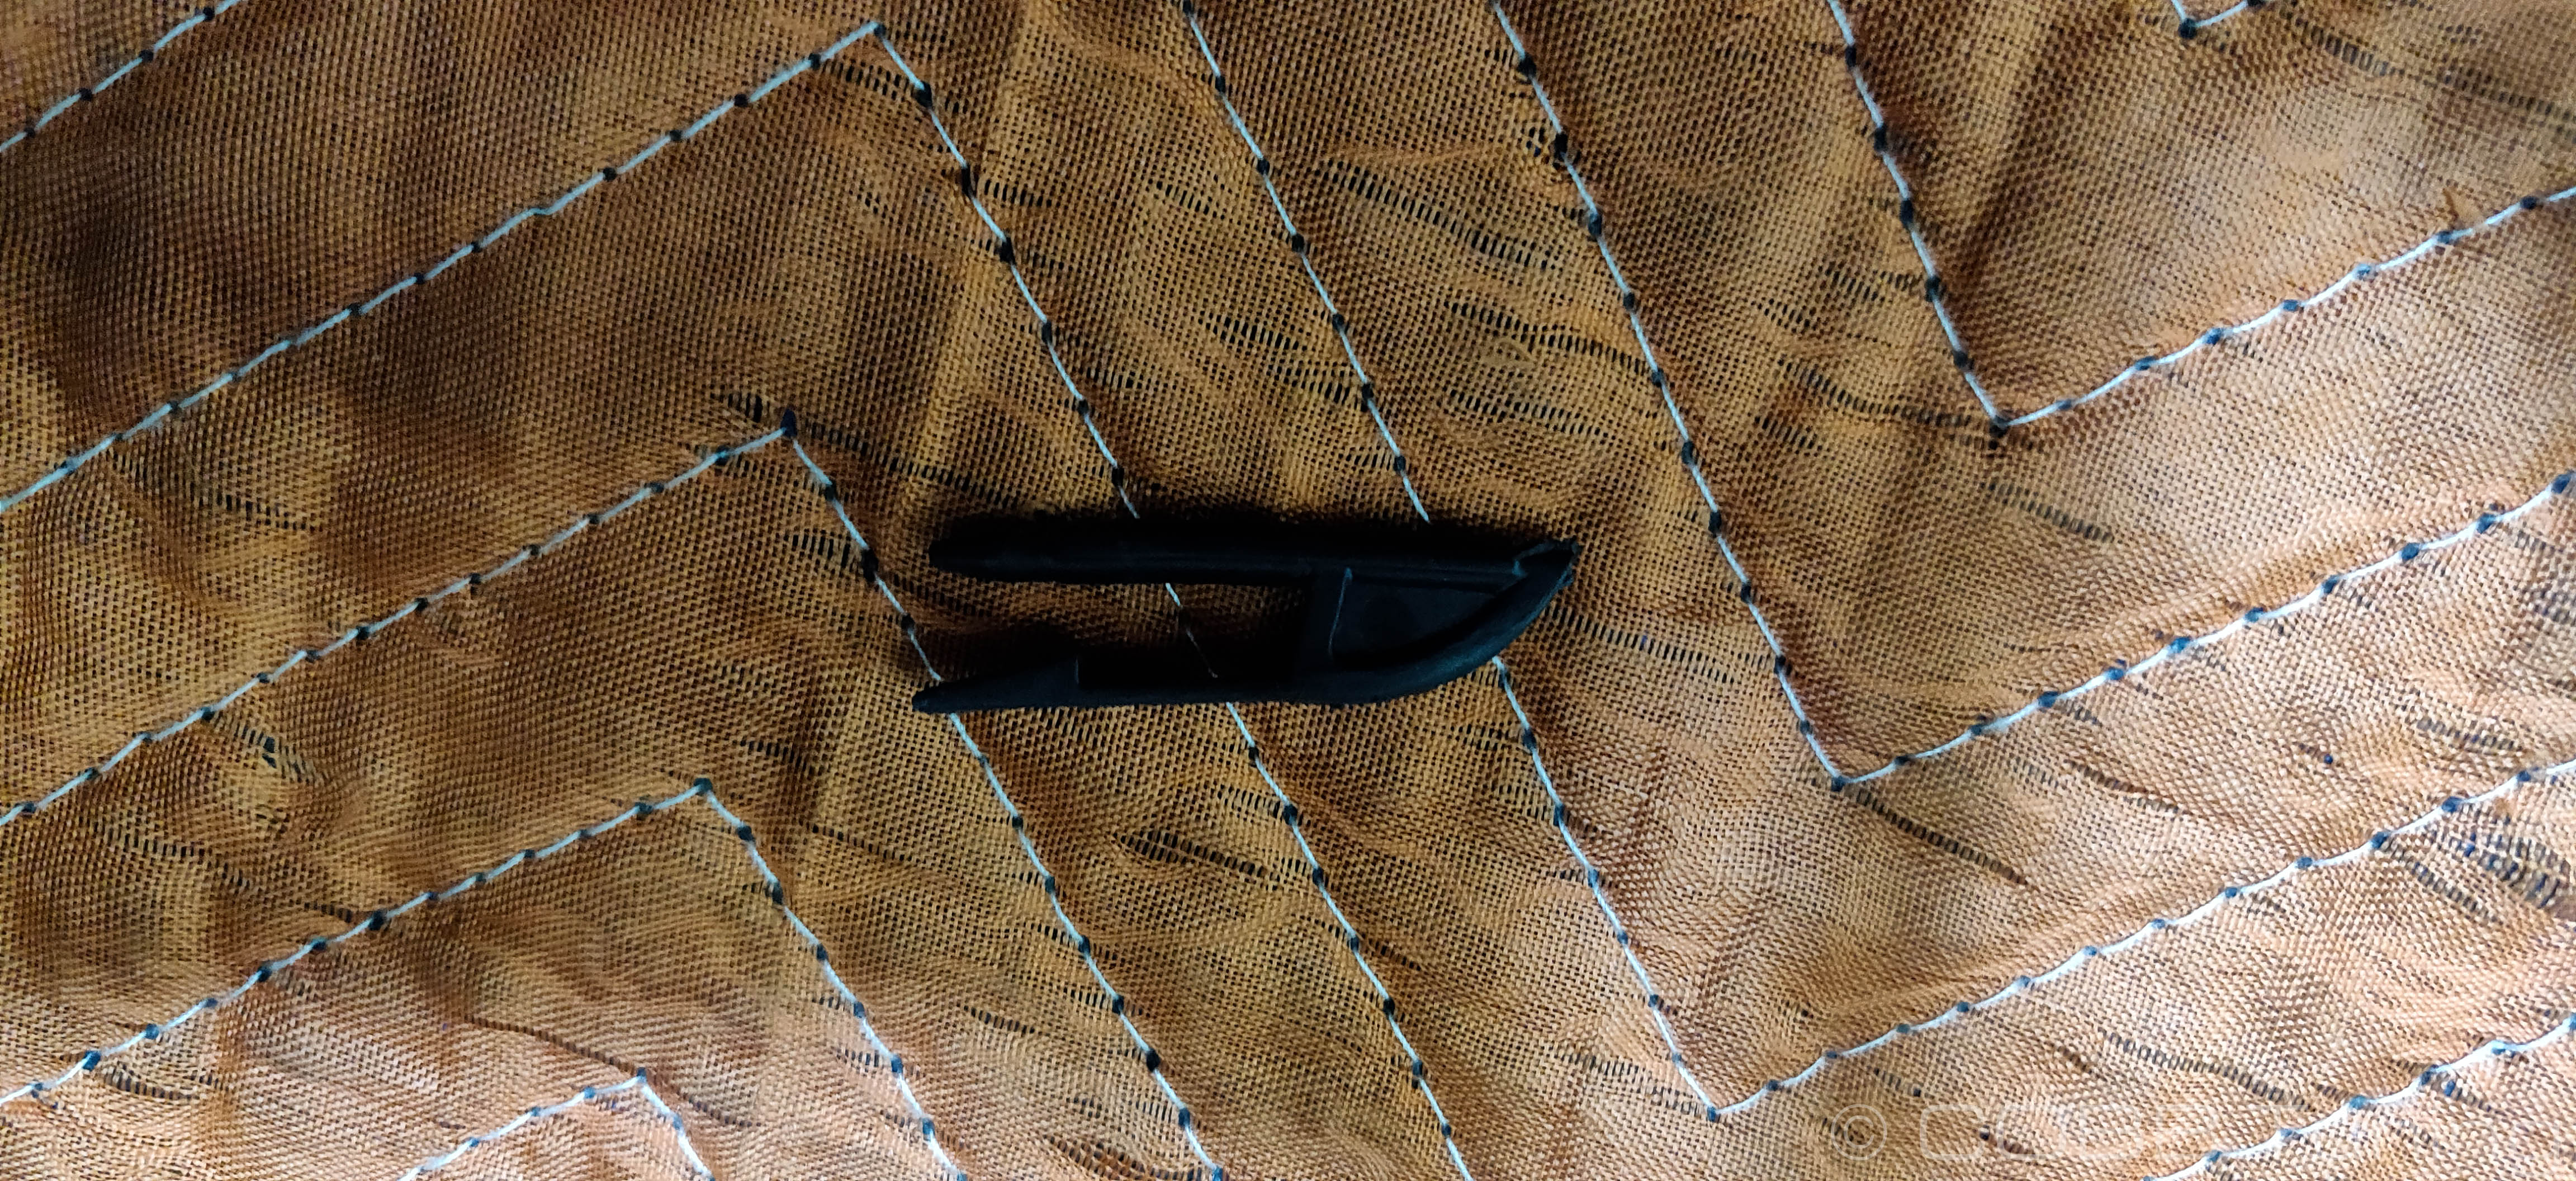
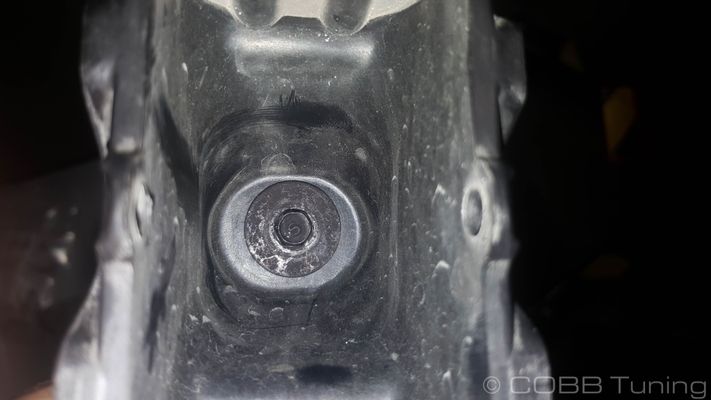
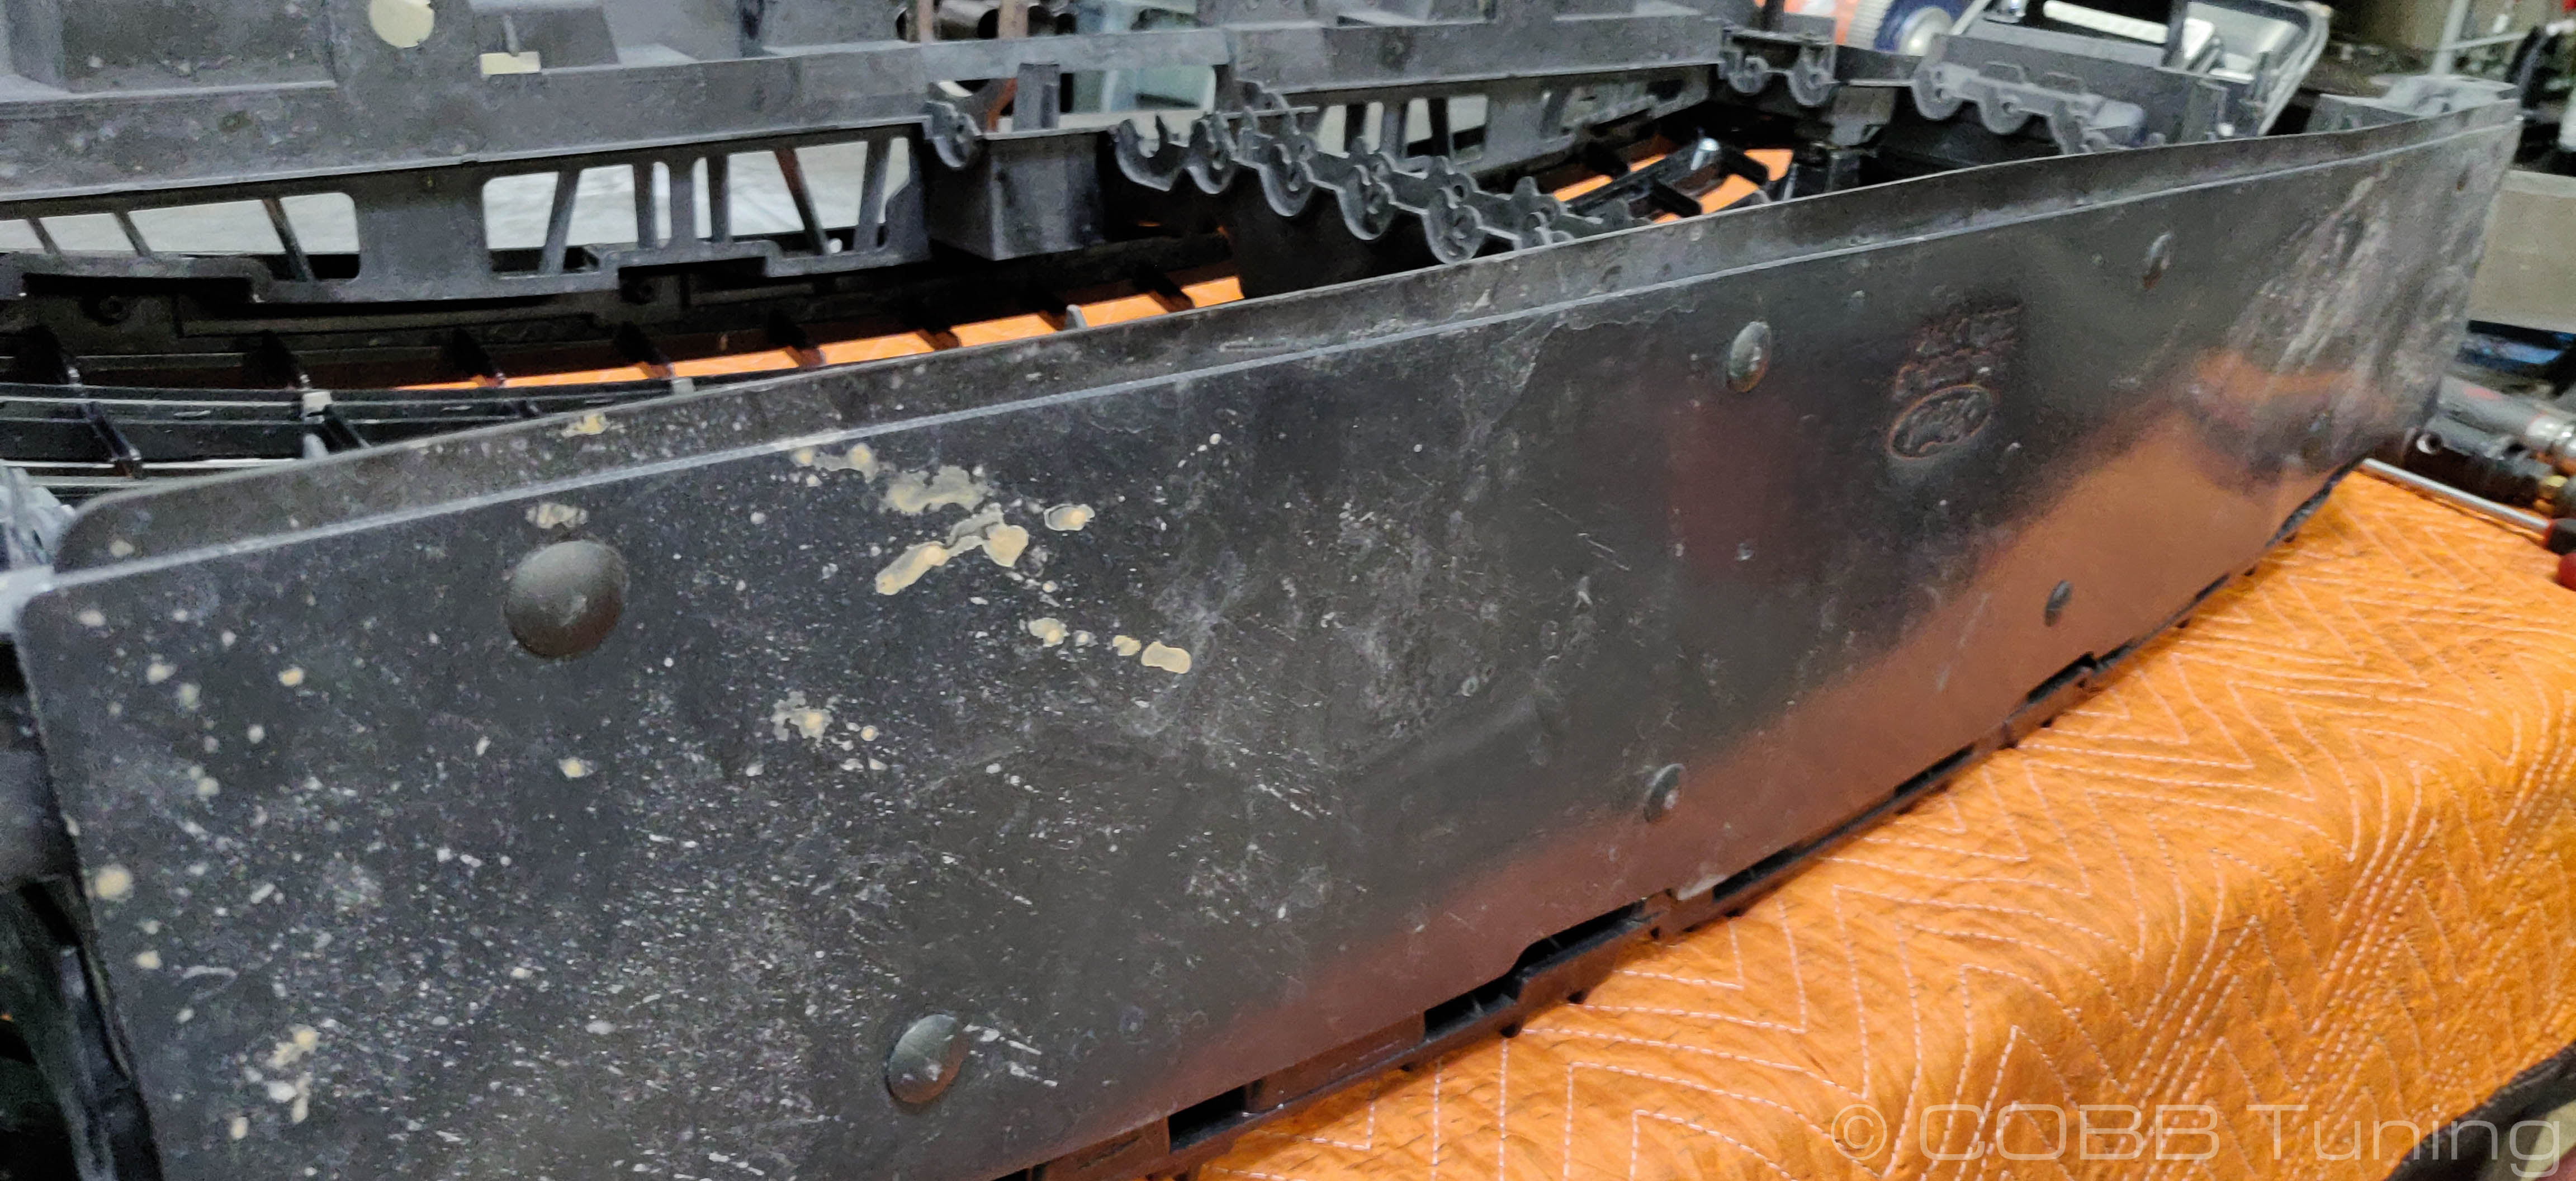
- Fold down the bottom rubber mat with clips.
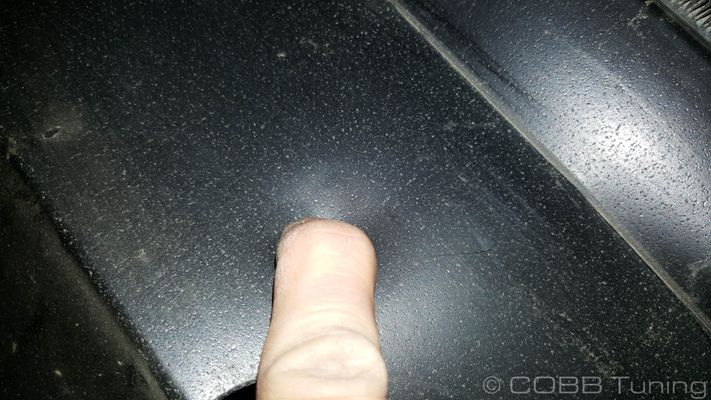
- Pressing down on the top, go up from underneath to mark out a circle.
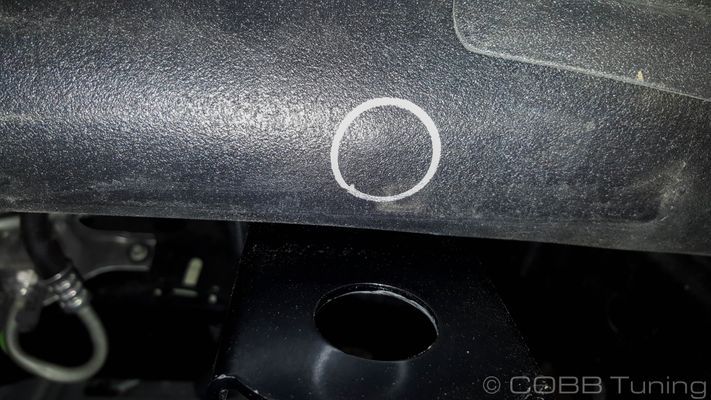
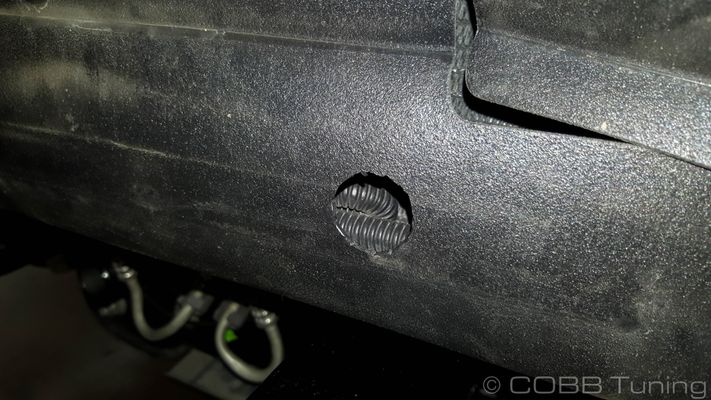
- Cut out the circle carefully using a razorblade or sharp scissors. May need to cut on the outside of the drawn line to make things fit properly.
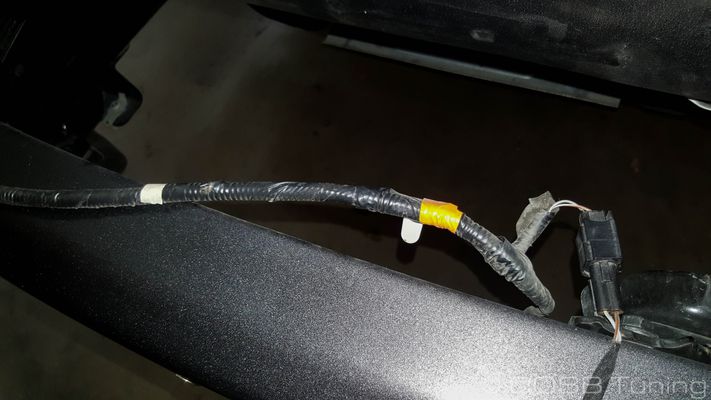
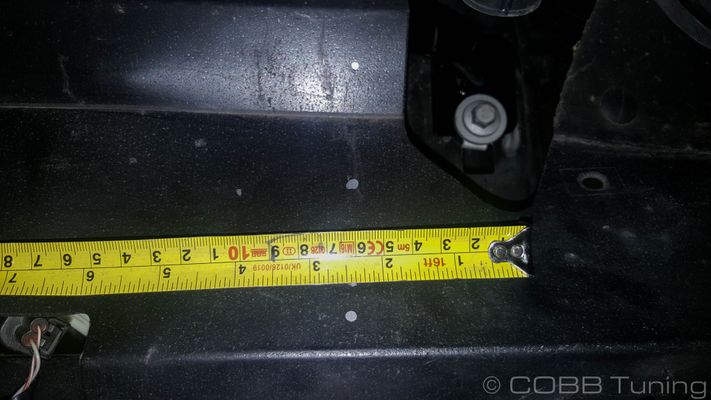
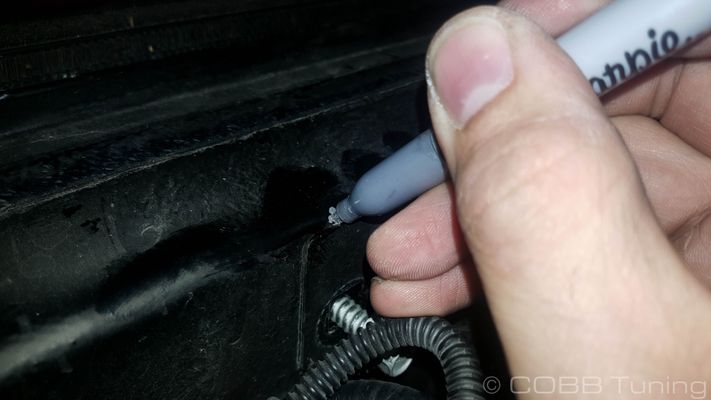
- From one inch behind the center of your hole, measure 7.25:" towards the closest side of the car then leave a mark.
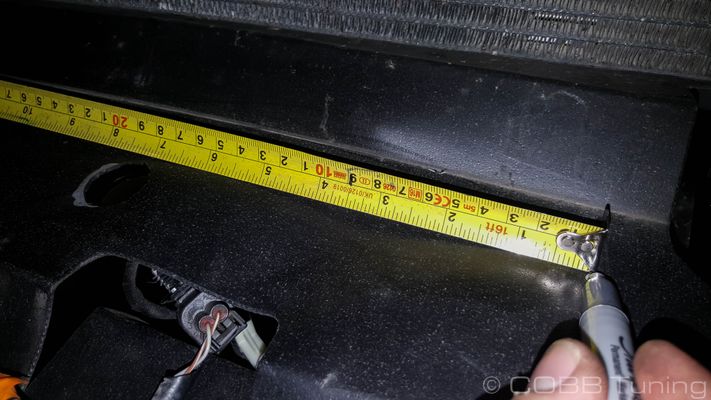
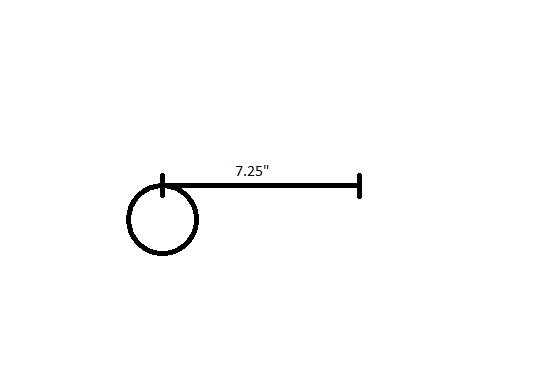
- Make a 4" circle around that hole to mark the cut
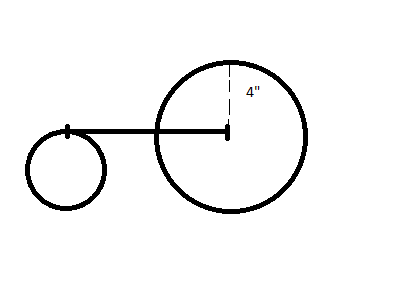
- Cut and repeat on the other side.
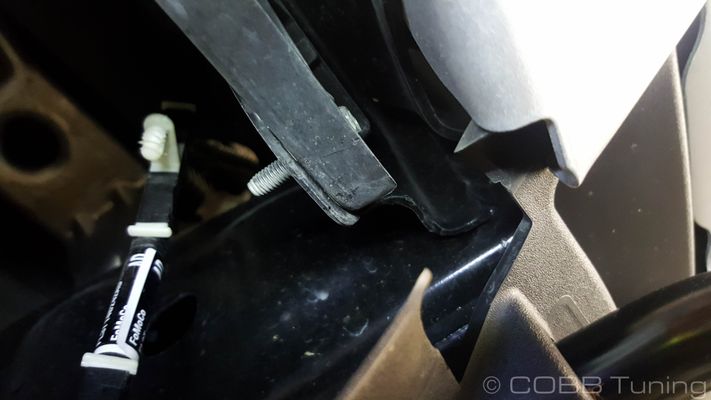
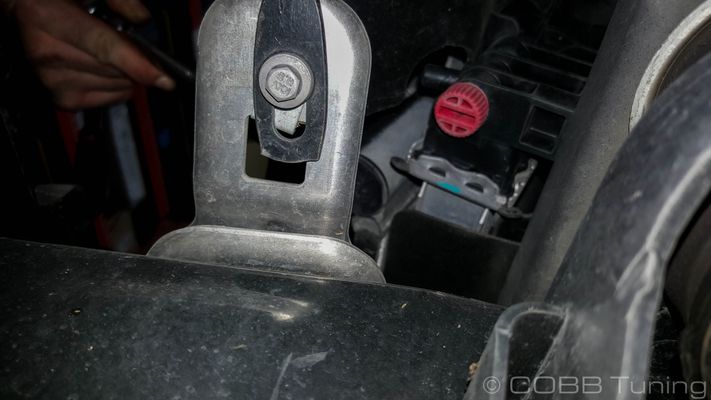
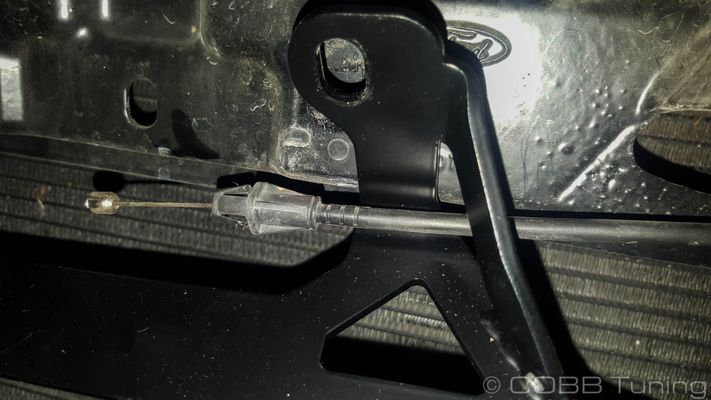
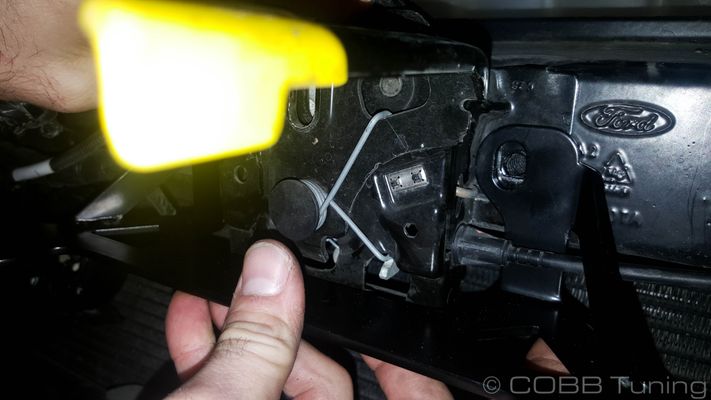
- Remove the two 10mm bolts on the hood bracket, mark above to keep latch aligned

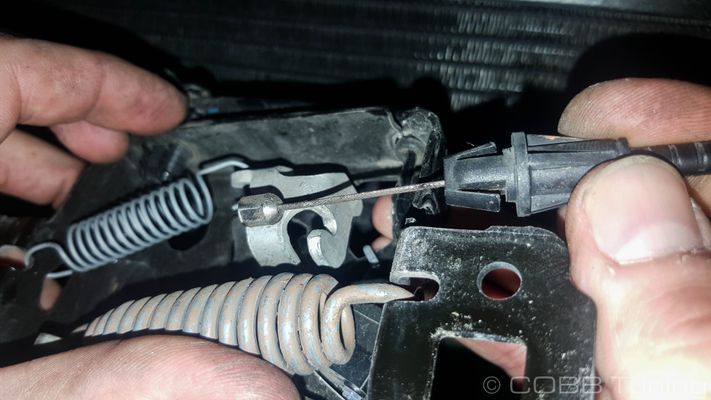
- Unloop the cable ferroule from the cable bracket.
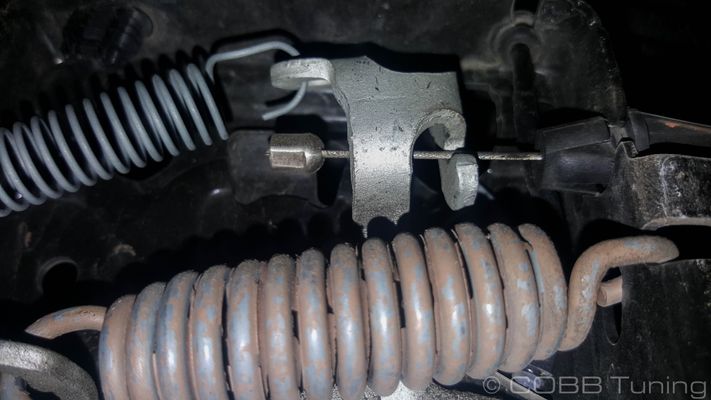
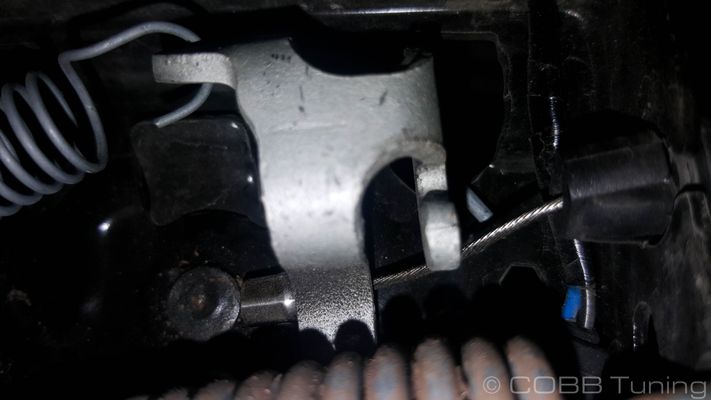
- Squeeze the plastic cable retainer and remove cable
- Set the latch up on the radiator support and out of the way.
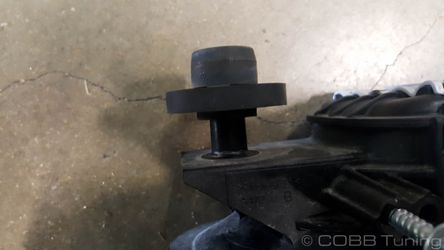
- Remove the rubber bumpers from the stock intercooler and add them onto the new COBB unit
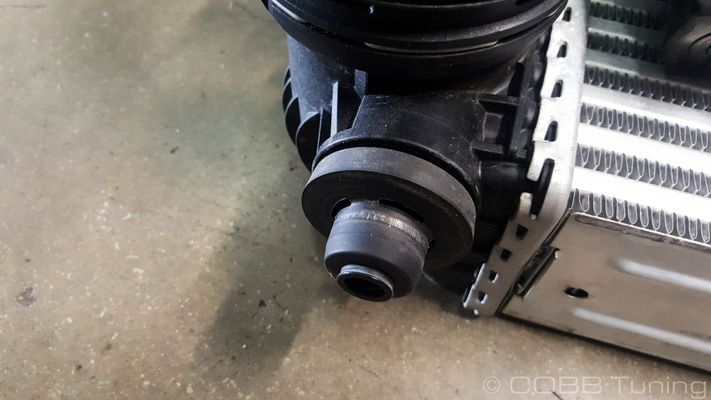
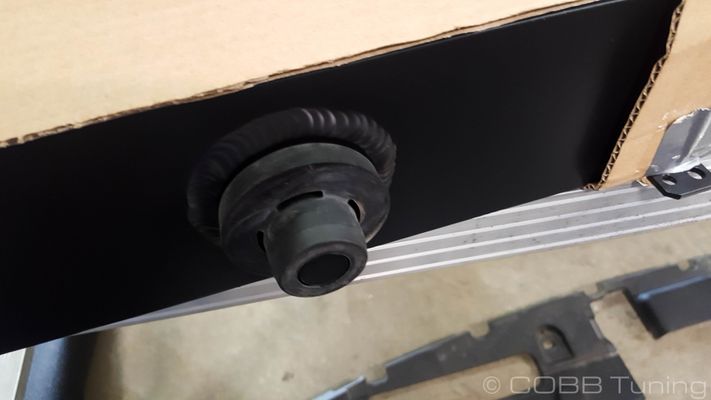
- Install intercooler and wiggle to get the rubber mounts in place correctly.
- Pass your cable through the upper intercooler bracket.
- Reinstall the cable onto the latch assembly.
- Install the top mount bracket onto the intercooler mounts. Using the stock bolts do your best to line up the hood latch while pushing down on the bracket to keep it as low as possible.
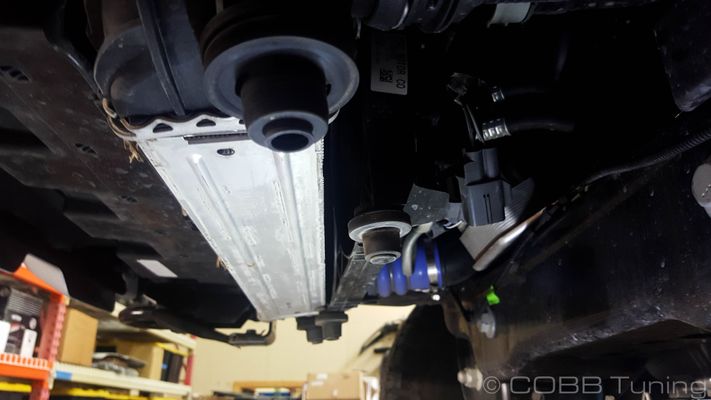
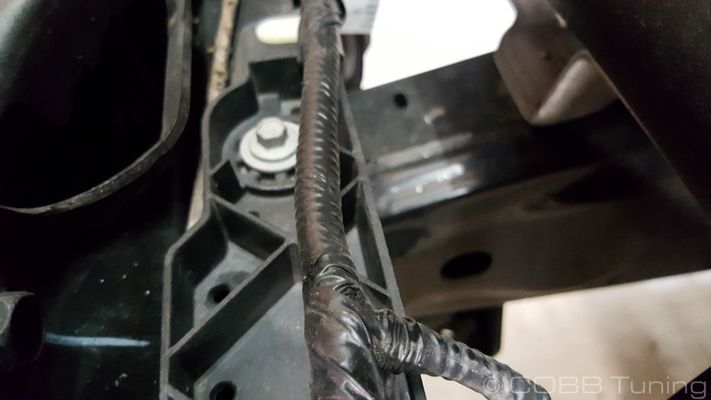
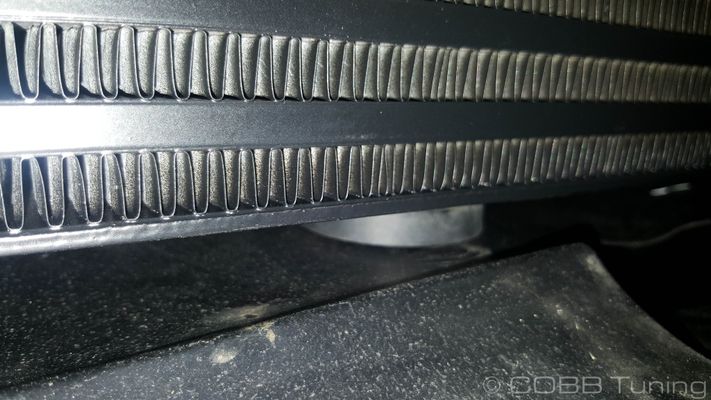
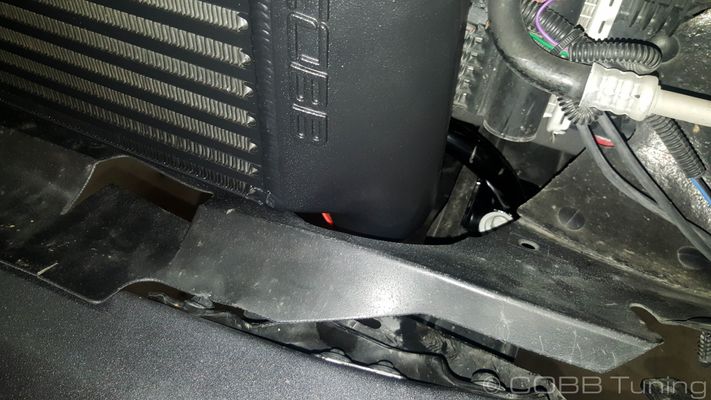
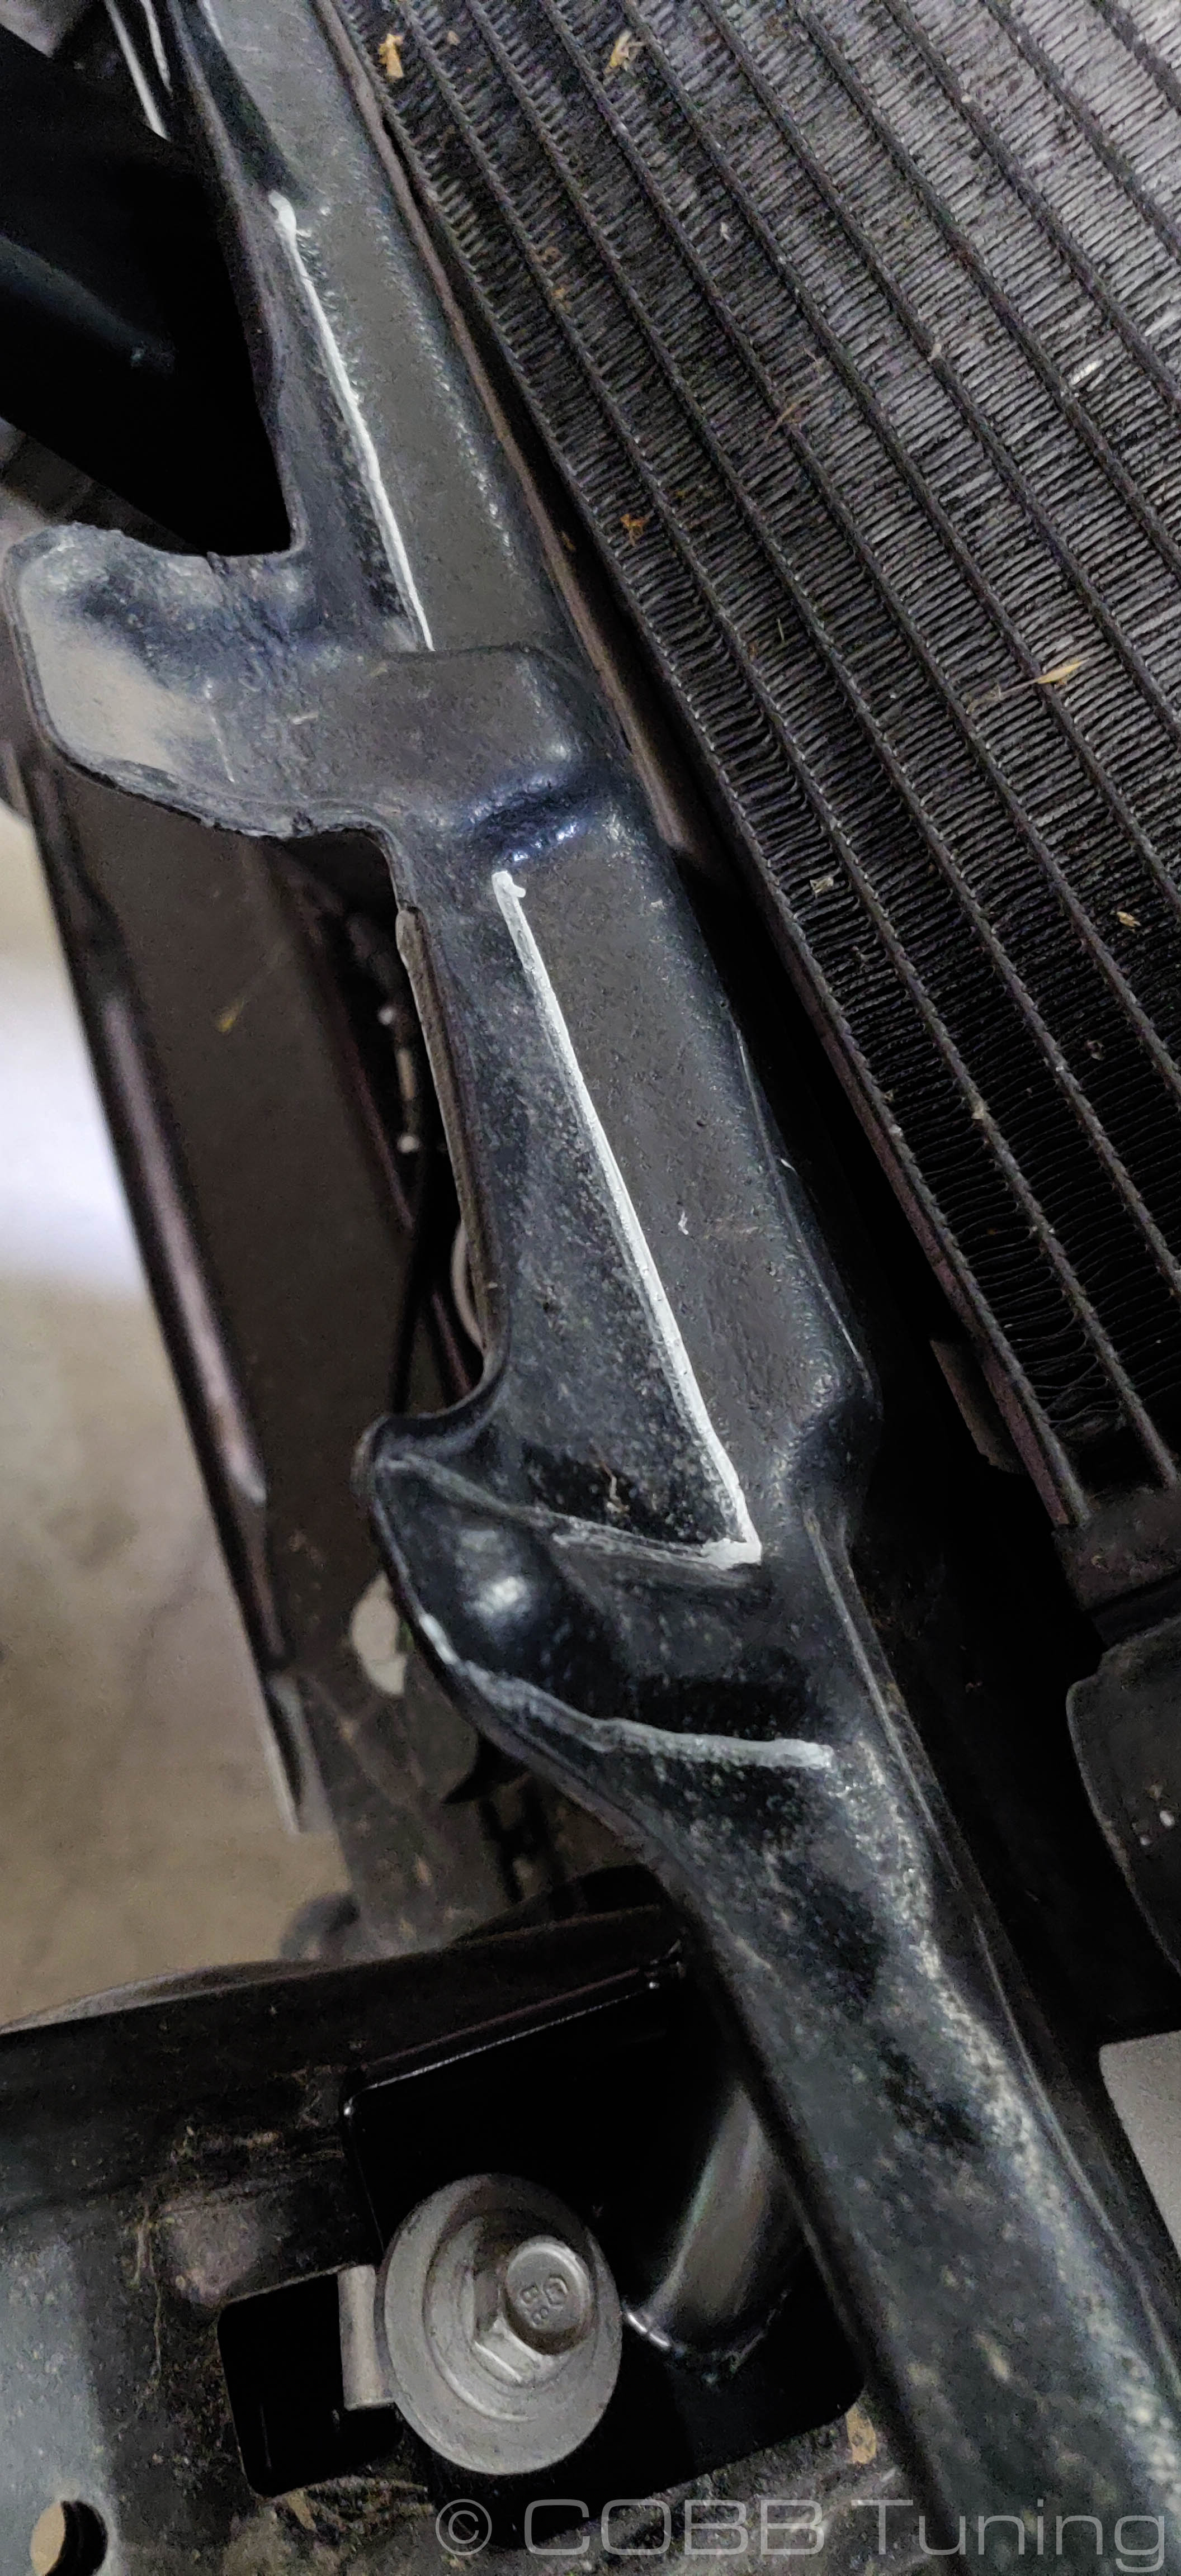
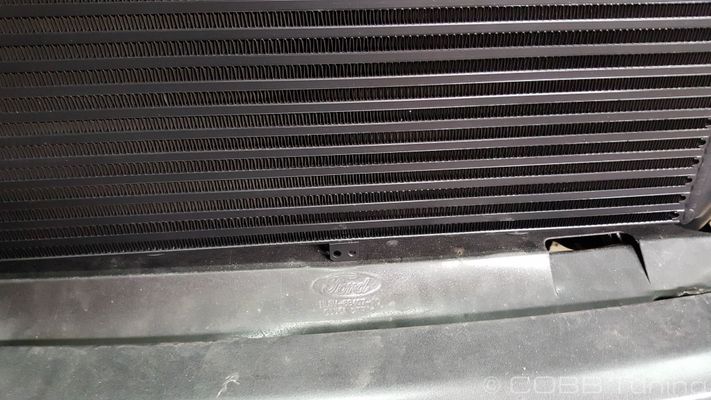
- Check clearance with transmission cooler line. If it looks like it will touch loosen this bracket by adjusting the tab upwards and push the ac line further back and out of the way before crimping the tab back down.
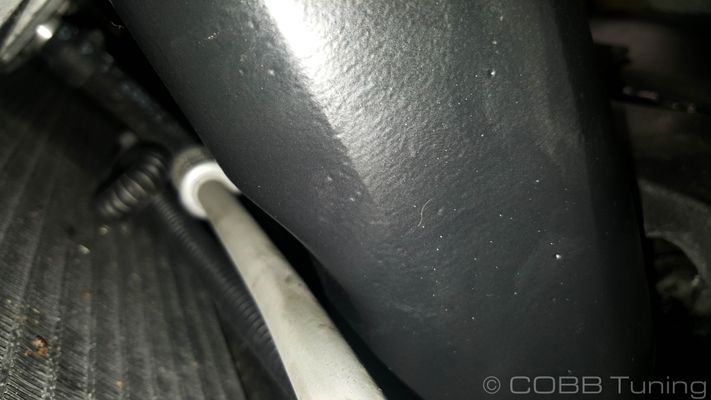
- Double-check clearance with the stock transmission cooler. If the lip sticking out is too close you may want to trim it down.
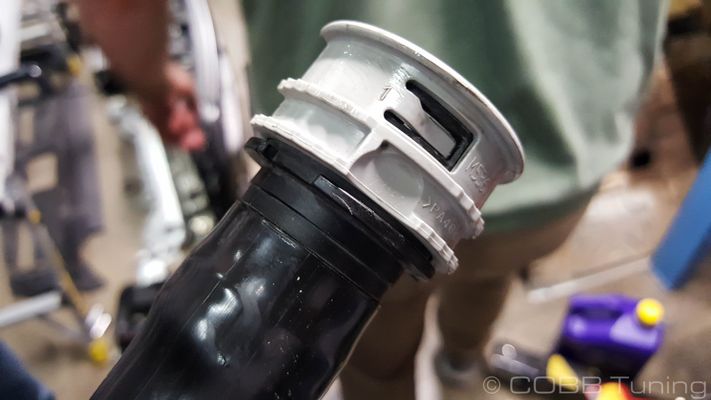
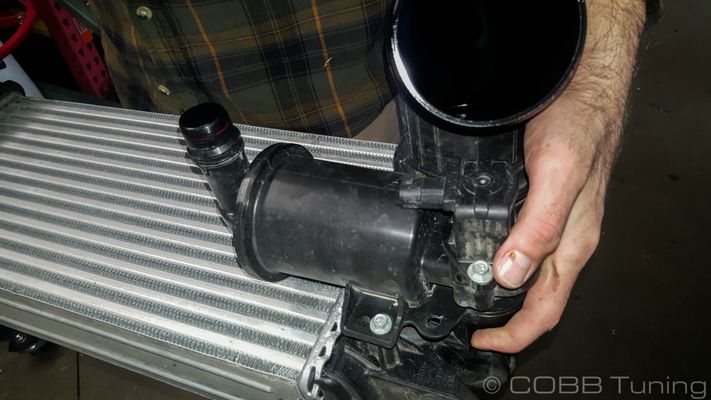
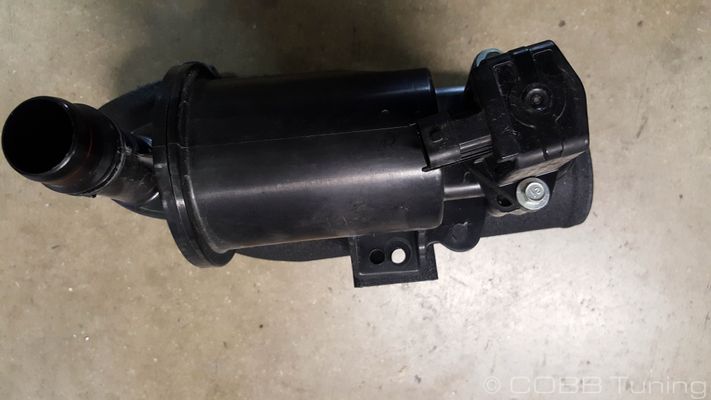
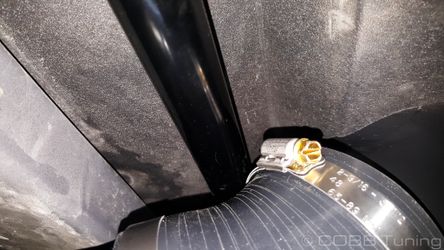
- Remove your BPV from the intercooler core using an 8mm socket. Turn the BPV counter clockwise until it stops and then pull upward gently to remove.
- After checking to make sure the o-ring isn't torn. Lubricate the o-ring with super lube then Install the bpv by holding it at the shown angle and gently wiggling until it slides in, then turn clockwise until it stops

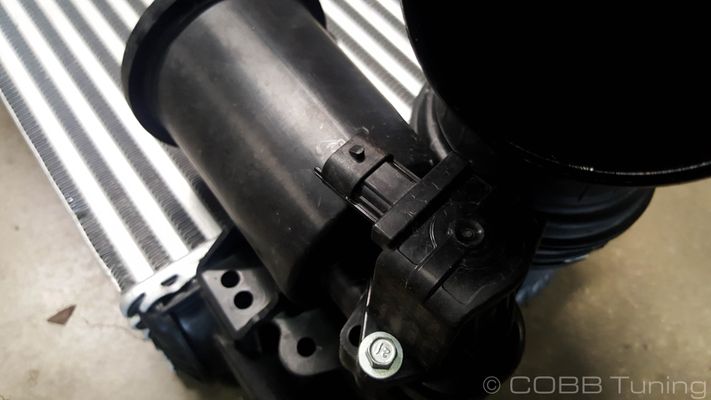
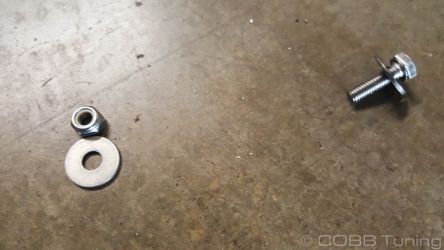
- Using two washers, a lock nut and the longest bolt, attach the BPV to the bpv tube. Make sure the pbv is clocked all the way to the right (without forcing it) before tightening down hand tight with your wrenches (do not overtighten or the plastic will crack)
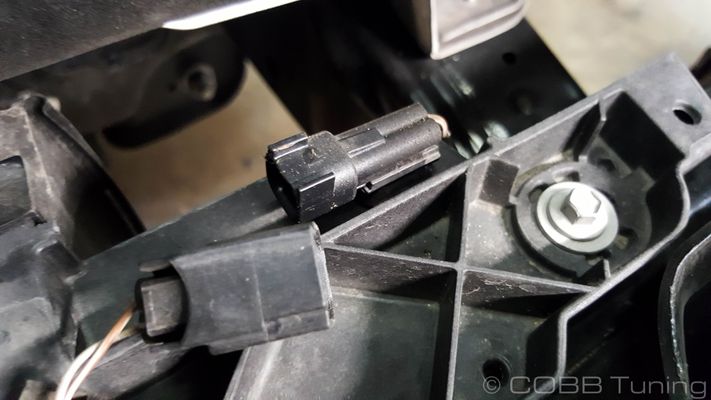
- insert the terminal plugs into the provided connector
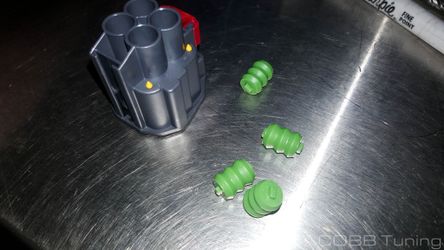
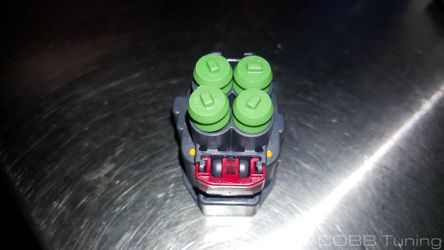
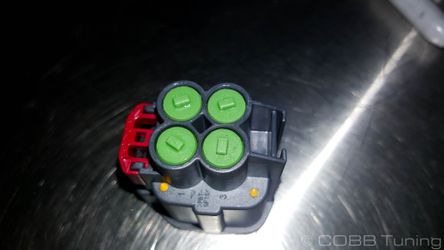
- Install your connector into the stock fan connector and move up the red connector to lock it in place.
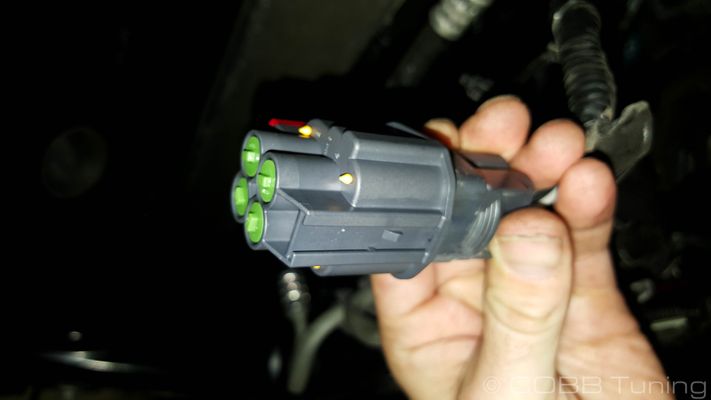
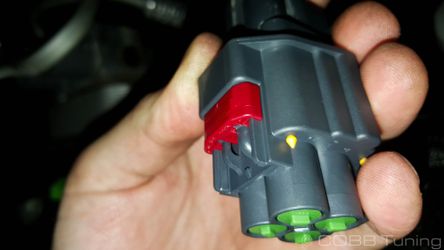
- Ziptie the connector out of the way on the frame away from any heat sources.
- Insert plastic caps into the lower and upper grille shutter connectors.
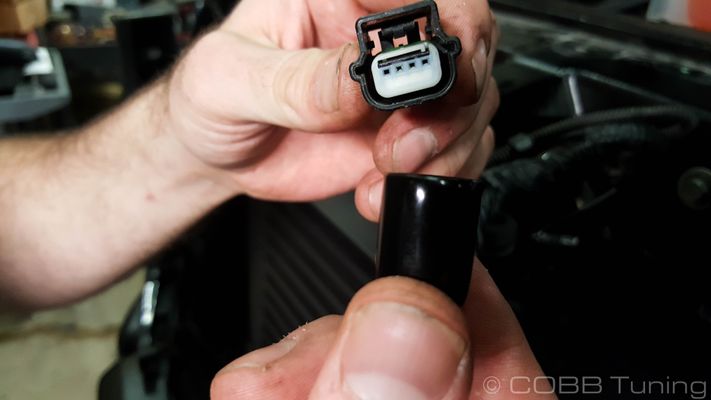
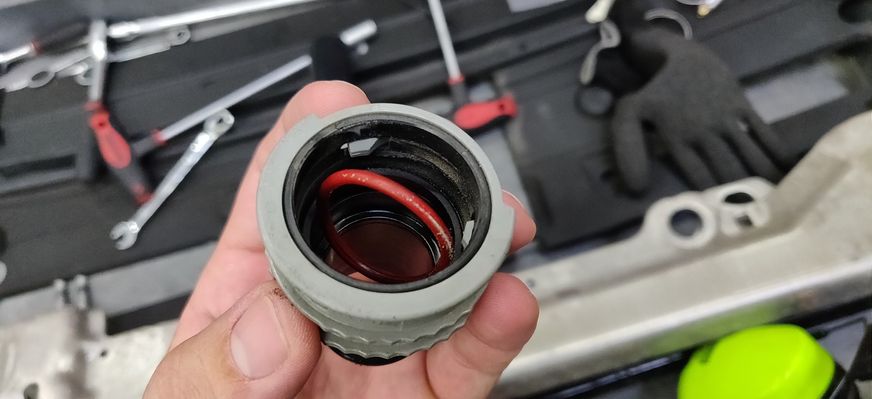
- Cut out connectors from BPV hose carefully. Cutting a v shape allows a bit more space to relieve pressure on the fitting so you can pull it out properly. Optionally using a heat gun to loosen the plastic and then pulling out the connectors can work as well.

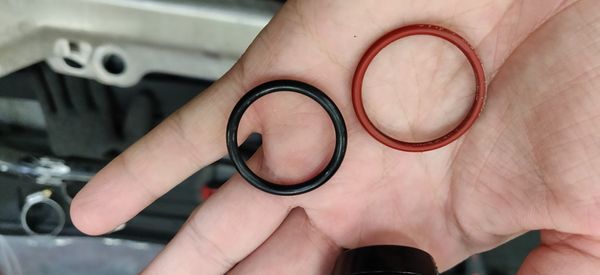
- Remove the o-rings from the inside of the connector.
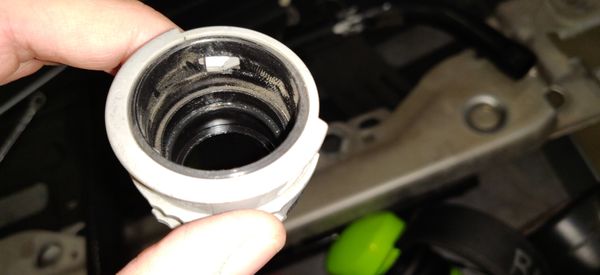
- Lube up and install the new o-ring as well as the ones on the rear of the connector.

- Add two of the smaller clamps to each end of the bpv tube.

- Install them into the tubes. Make certain the o-ring doesn't get pushed out as you install it into the hose.
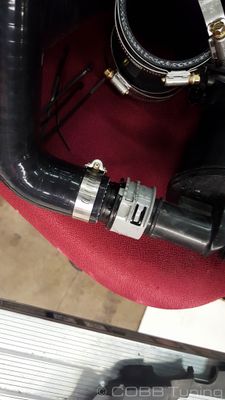
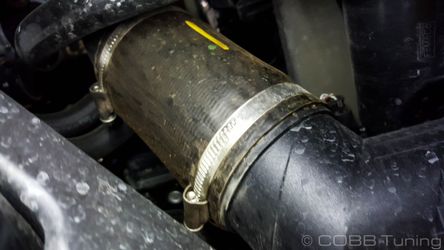
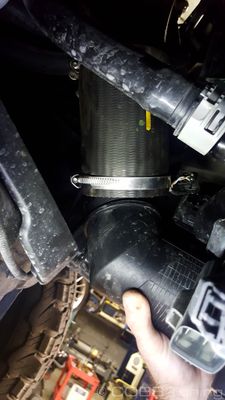
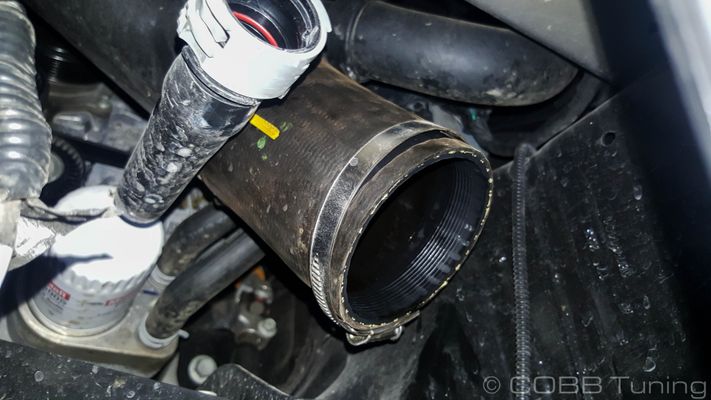
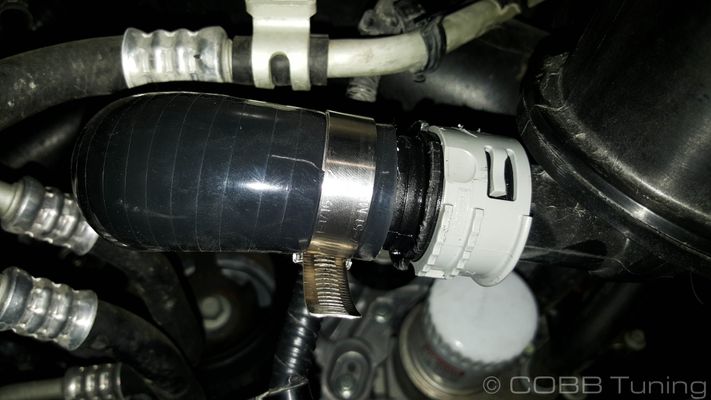
Reinstall onto the turbo inlet tube
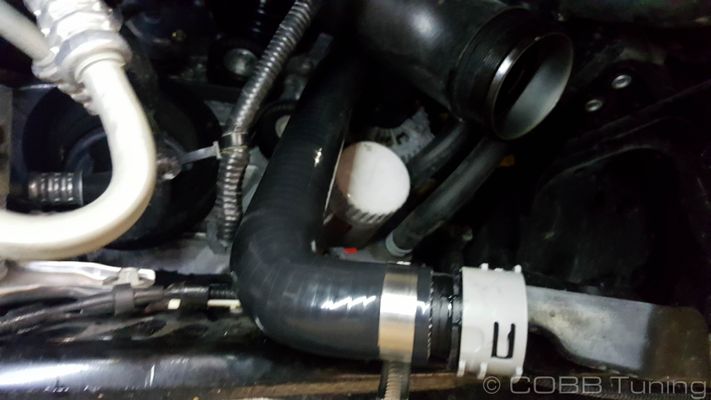
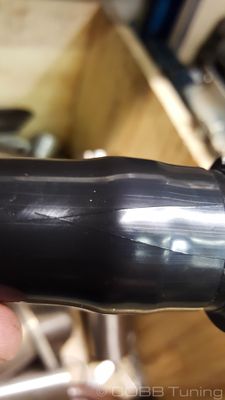
Make sure not to kink the hose as it may cause issues. Sometimes you can remove the kink by slightly changing the routing of the hose, or in some cases you may need to remove a small amount of material from the straight end.
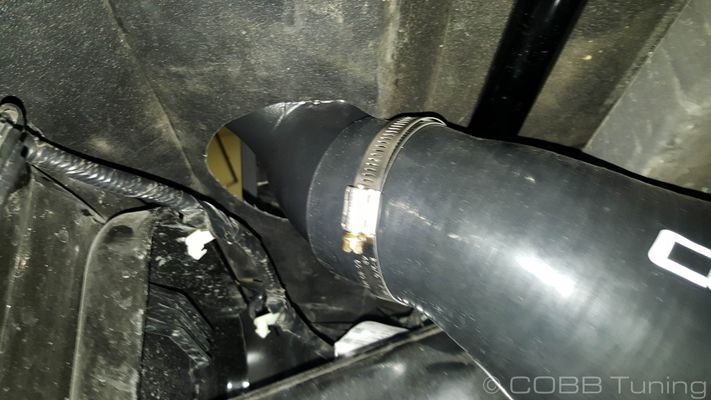
- add 1 48 and one 56 clamp to the expansion end
- add 2 48 clamps to the 45 degree coupler
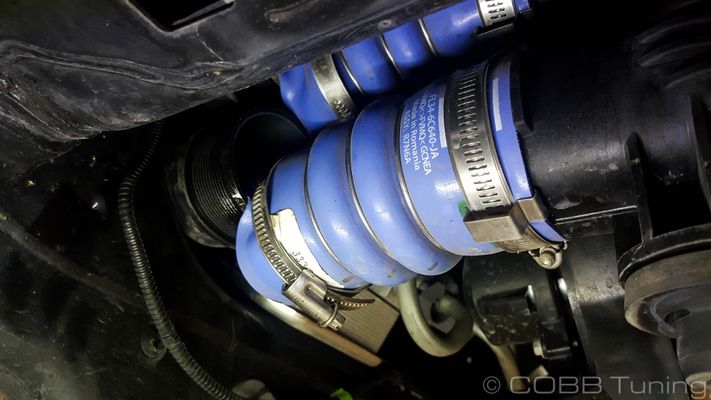
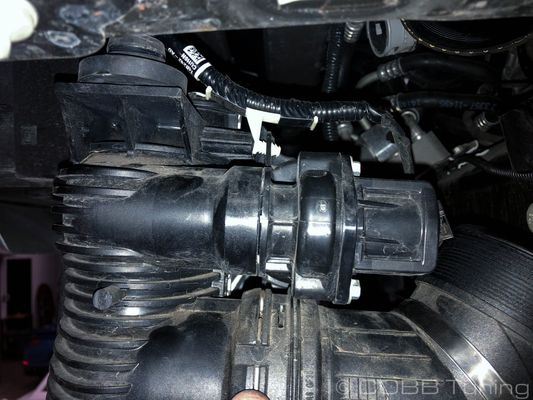
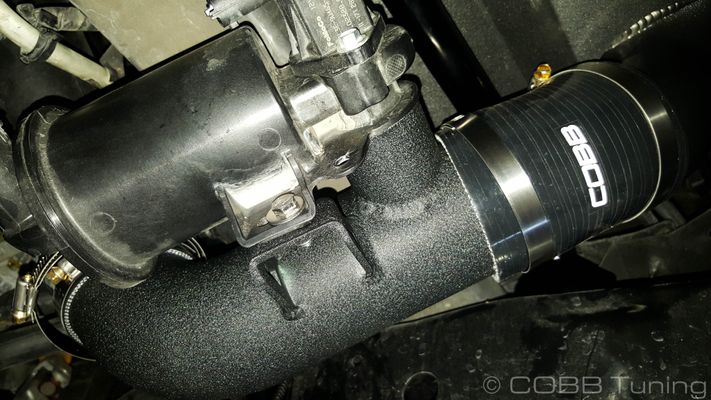
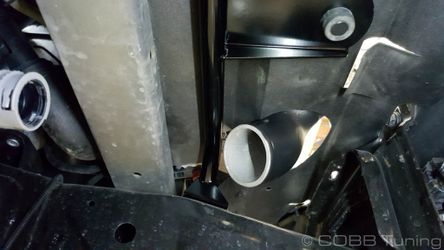
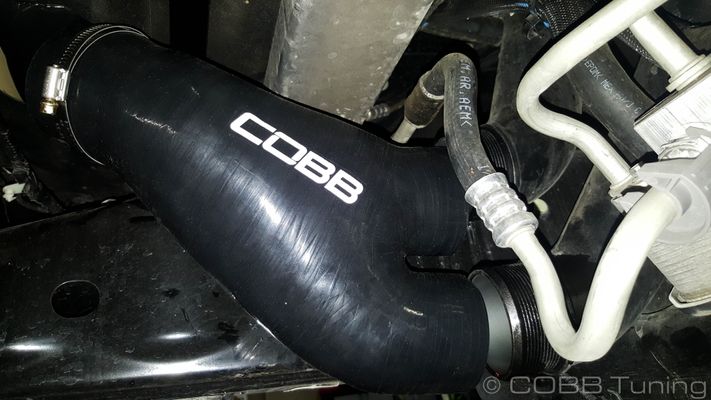
- add the 45 to the intercooler and the large end of the expander to the rear intake tube before pushing the bpv pipe into place, rotating to allow clearance between it and the bracket above.
- Add 2 44 and one 48 clamp to the y- coupler
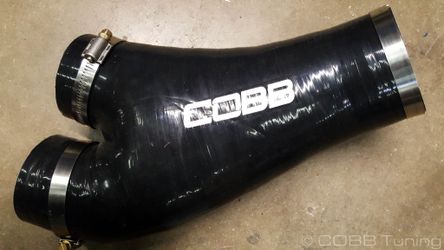
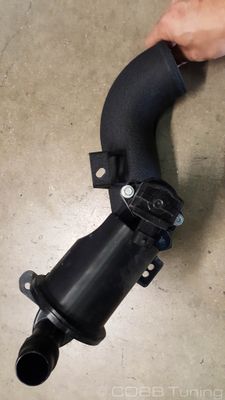
- Install onto the Intercooler and the two turbo inlet pipes
- Connect the bpv tube to the bpv
- Reconnect the BPV harness.
F150 Intercooler Installation
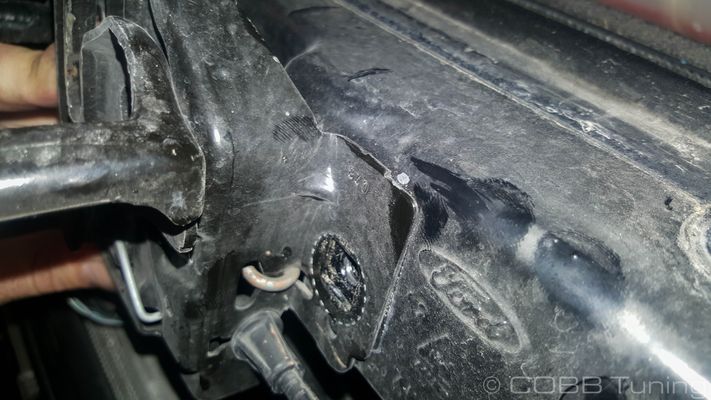
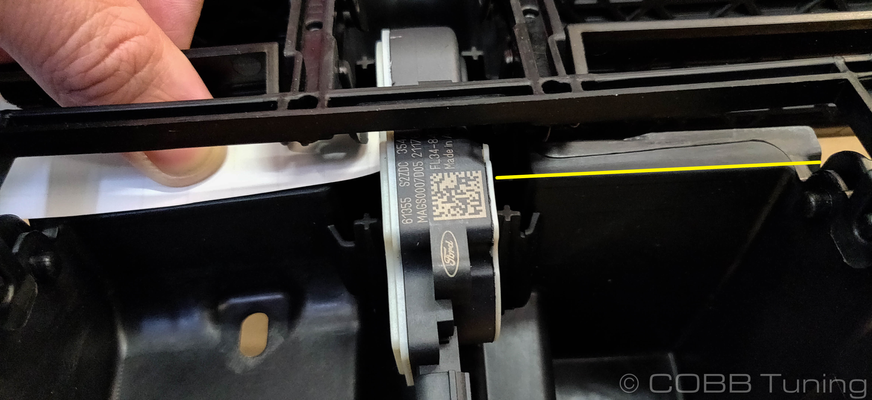
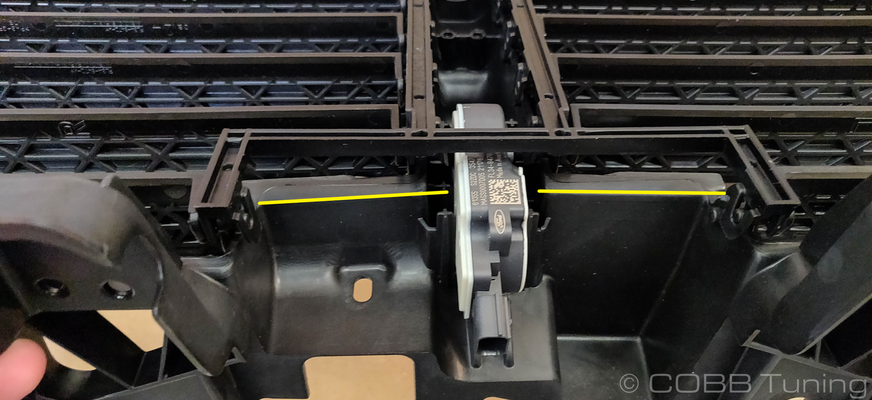
- Mark the radiator flap along the seam and then the outer side of the outermost nubs that stick out.
- Cut the front edge of the radiator shroud flap
- Install the lower intercooler bracket using the stock bolts.

- Starting on the outside edge of the outer most nubs then along the crease all the way across. You may be able to trim less depending on your specific vehicle as there are some differences in vehicle tolerances that we've seen.
- Remove the two 10mm bolts on the hood bracket, mark above to keep latch aligned
- Unloop the cable ferroule from the cable bracket.
- Squeeze the plastic cable retainer and remove cable
- Set the latch up on the radiator support and out of the way.
- Remove the rubber bumpers from the stock intercooler and add them onto the new COBB unit
- Install intercooler and wiggle to get the rubber mounts in place correctly.
- Pass your cable through the upper intercooler bracket.
- Reinstall the cable onto the latch assembly.
- Install the top mount bracket onto the intercooler mounts. Using the stock bolts do your best to line up the hood latch while pushing down on the bracket to keep it as low as possible.
- Remove your BPV from the intercooler core using an 8mm socket. Turn the BPV counter clockwise until it stops and then pull upward gently to remove.
- After checking to make sure the o-ring isn't torn. Lubricate the o-ring with super lube then Install the bpv by holding it at the shown angle and gently wiggling until it slides in, then turn clockwise until it stops
- Using two washers, a lock nut and the longest bolt, attach the BPV to the bpv tube. Make sure the pbv is clocked all the way to the right (without forcing it) before tightening down hand tight with your wrenches (do not overtighten or the plastic will crack)
- Insert plastic caps into the lower and upper grille shutter connectors.
- Cut out connectors from BPV hose carefully. Cutting a v shape allows a bit more space to relieve pressure on the fitting so you can pull it out properly.Optionally using a heat gun to loosen the plastic and then pulling out the connectors can work as well.
- Remove the o-rings from the inside of the connector.
- Lube up and install the new o-ring as well as the ones on the rear of the connector.
- Add two of the smaller clamps to each end of the bpv tube.
- Install them into the tubes. Make certain the o-ring doesn't get pushed out as you install it into the hose.
Reinstall onto the turbo inlet tube
Make sure not to kink the hose as it may cause issues. Sometimes you can remove the kink by slightly changing the routing of the hose, or in some cases you may need to remove a small amount of material from the straight end.
- add 1 48 and one 56 clamp to the expansion end
- add 2 48 clamps to the 45 degree coupler
- add the 45 to the intercooler and the large end of the expander to the rear intake tube before pushing the bpv pipe into place, rotating to allow clearance between it and the bracket above.
- Add 2 44 and one 48 clamp to the y- coupler
- Install onto the Intercooler and the two turbo inlet pipes
- Connect the bpv tube to the bpv
- Reconnect the BPV harness.
Grille Shutter Removal Raptor
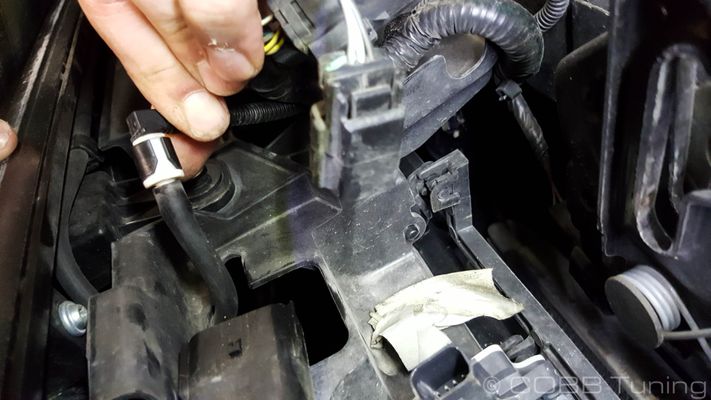
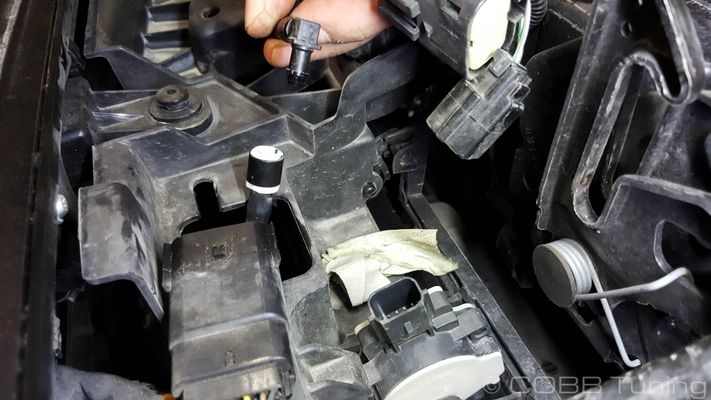
Remove ambient air temperature sensor from grille by gently popping it out and unplugging the harness.
2018 only

- Pop out the grille shutters one by one with a pry tool.
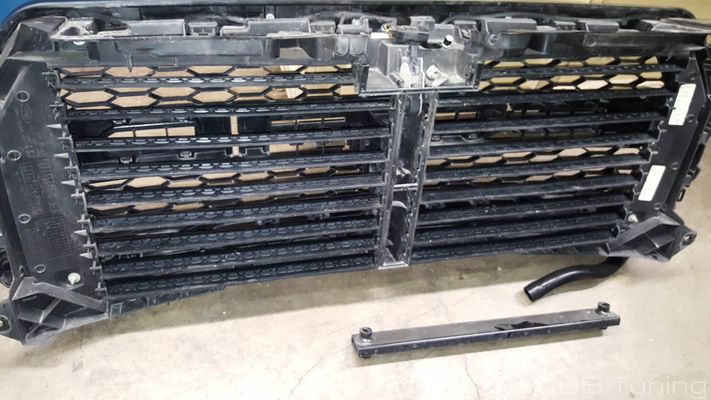
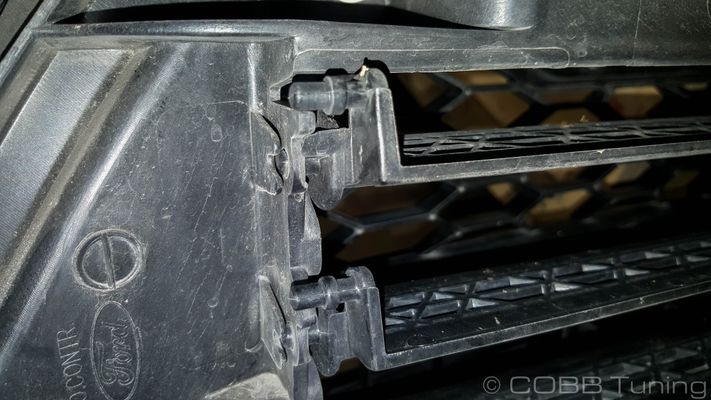
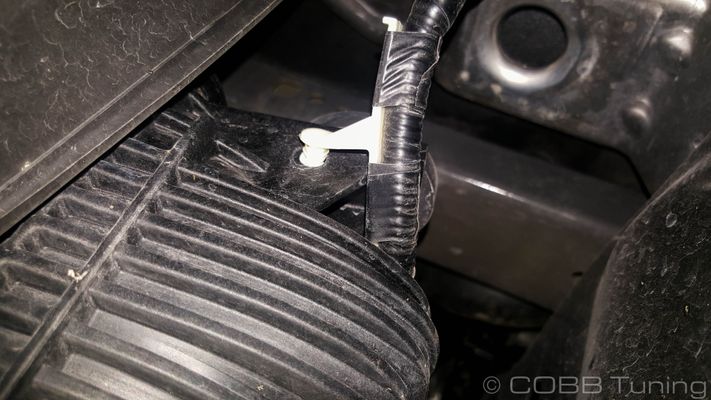
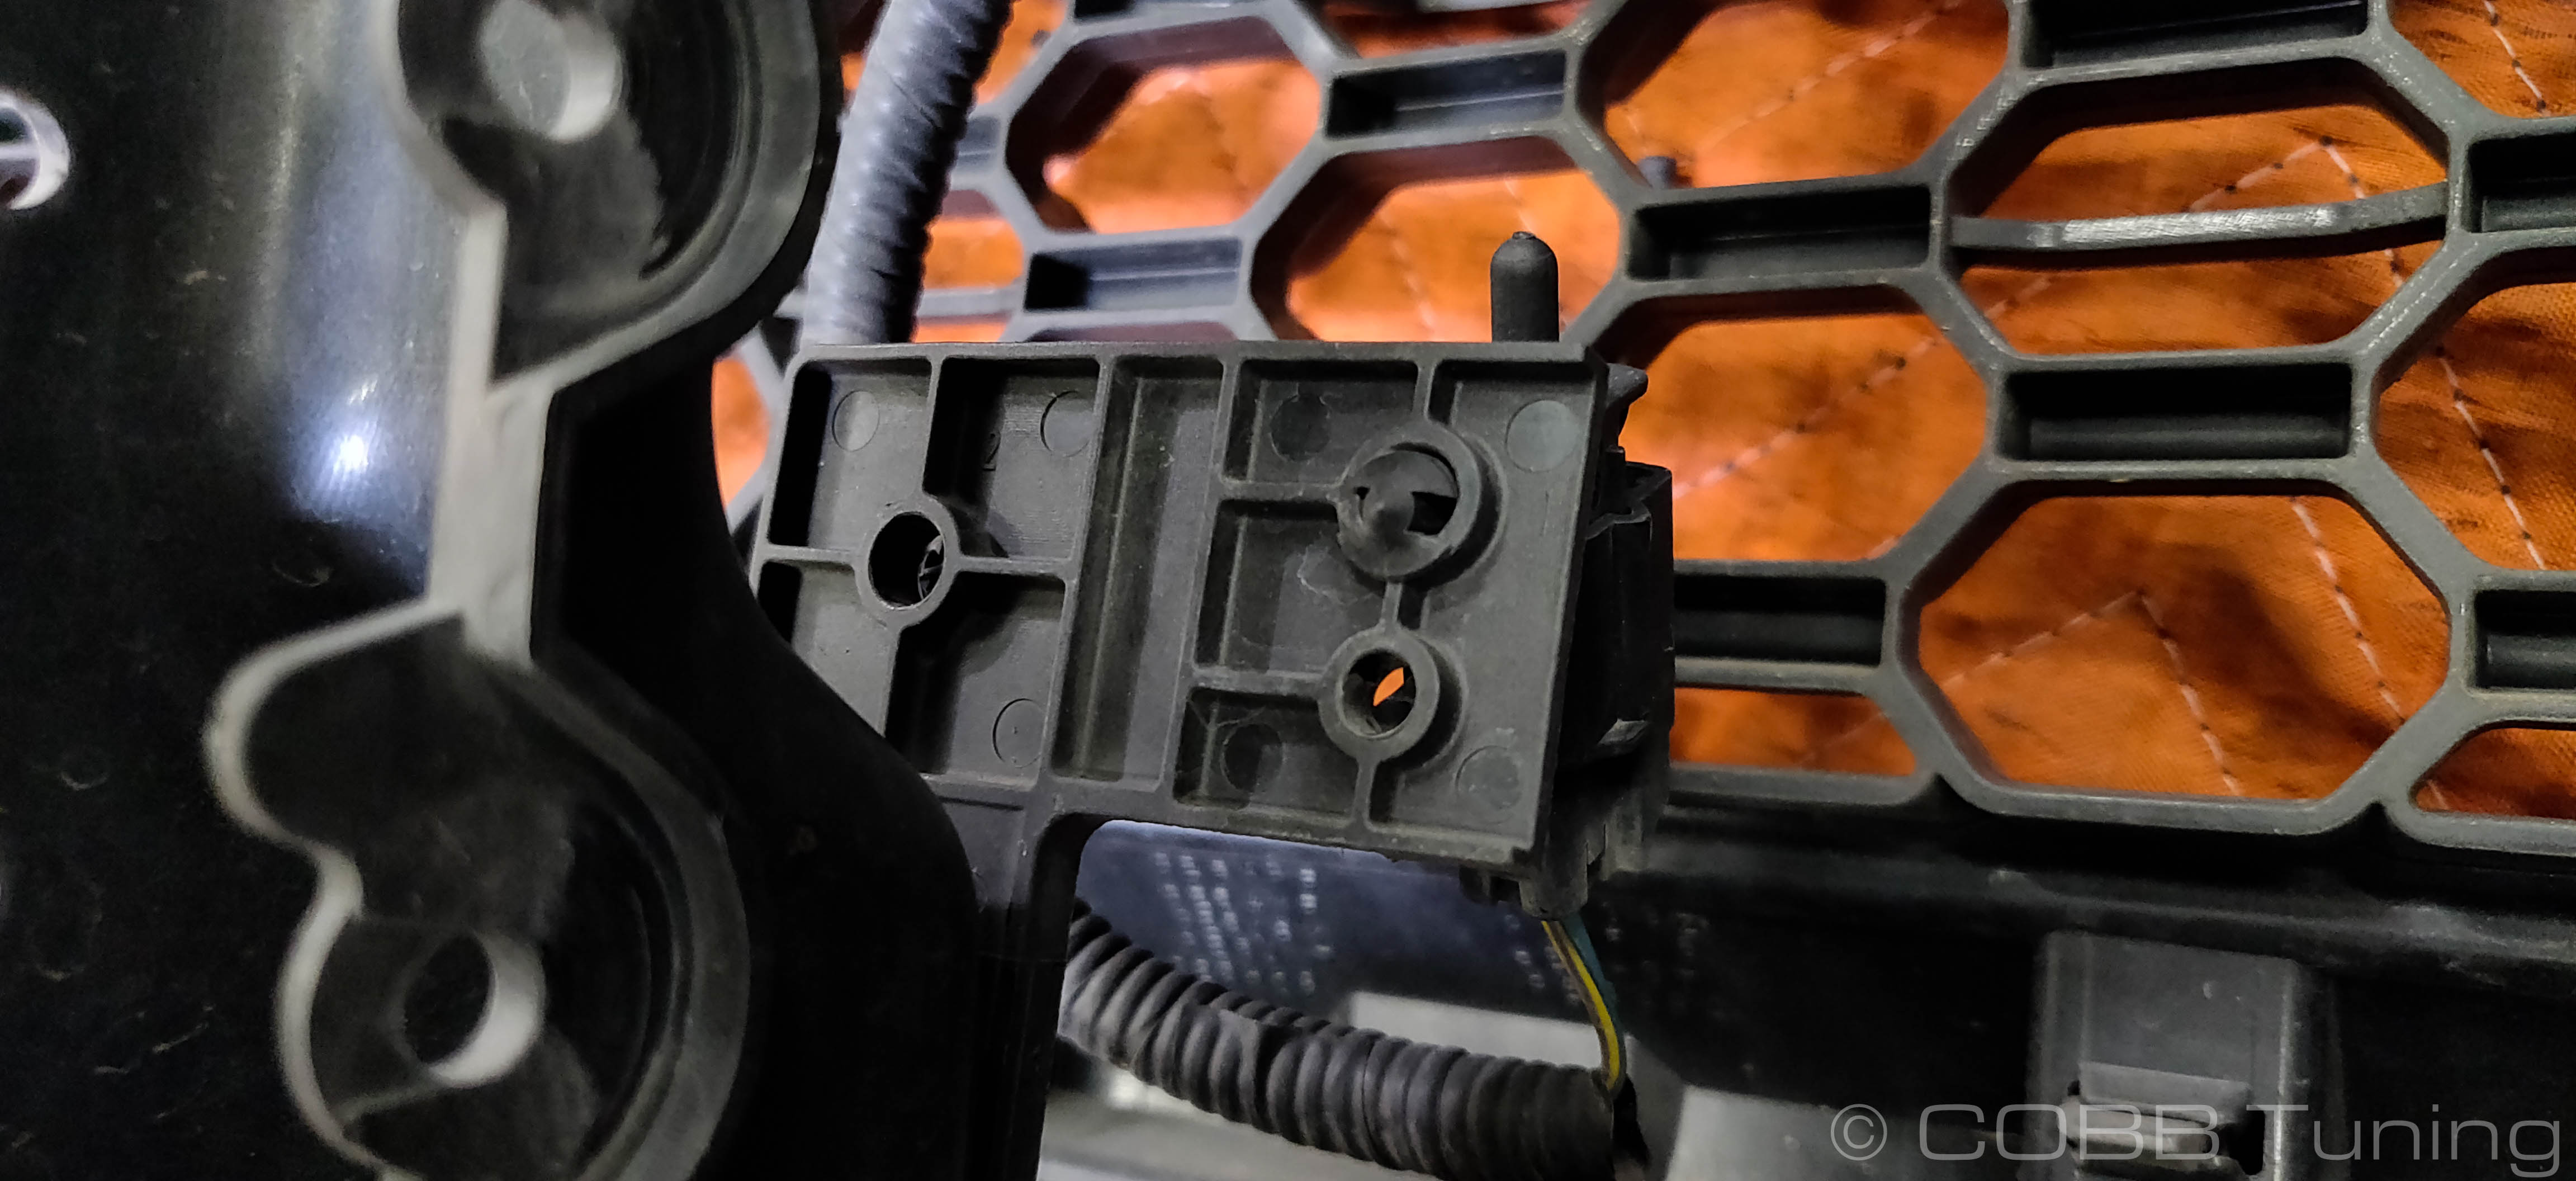
- Remove the motor by pulling sideways on the flat end of the retaining clip by prying the clip away from the support.

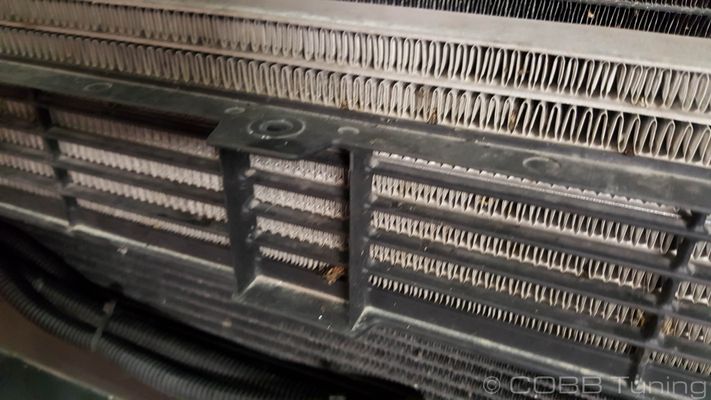
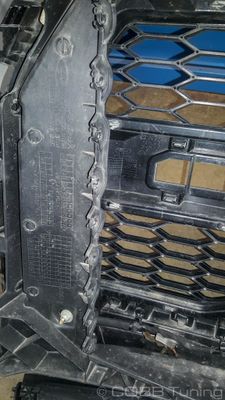
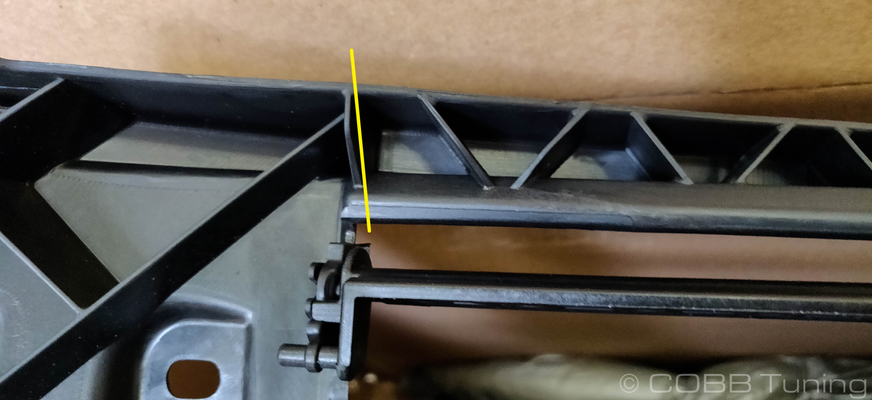
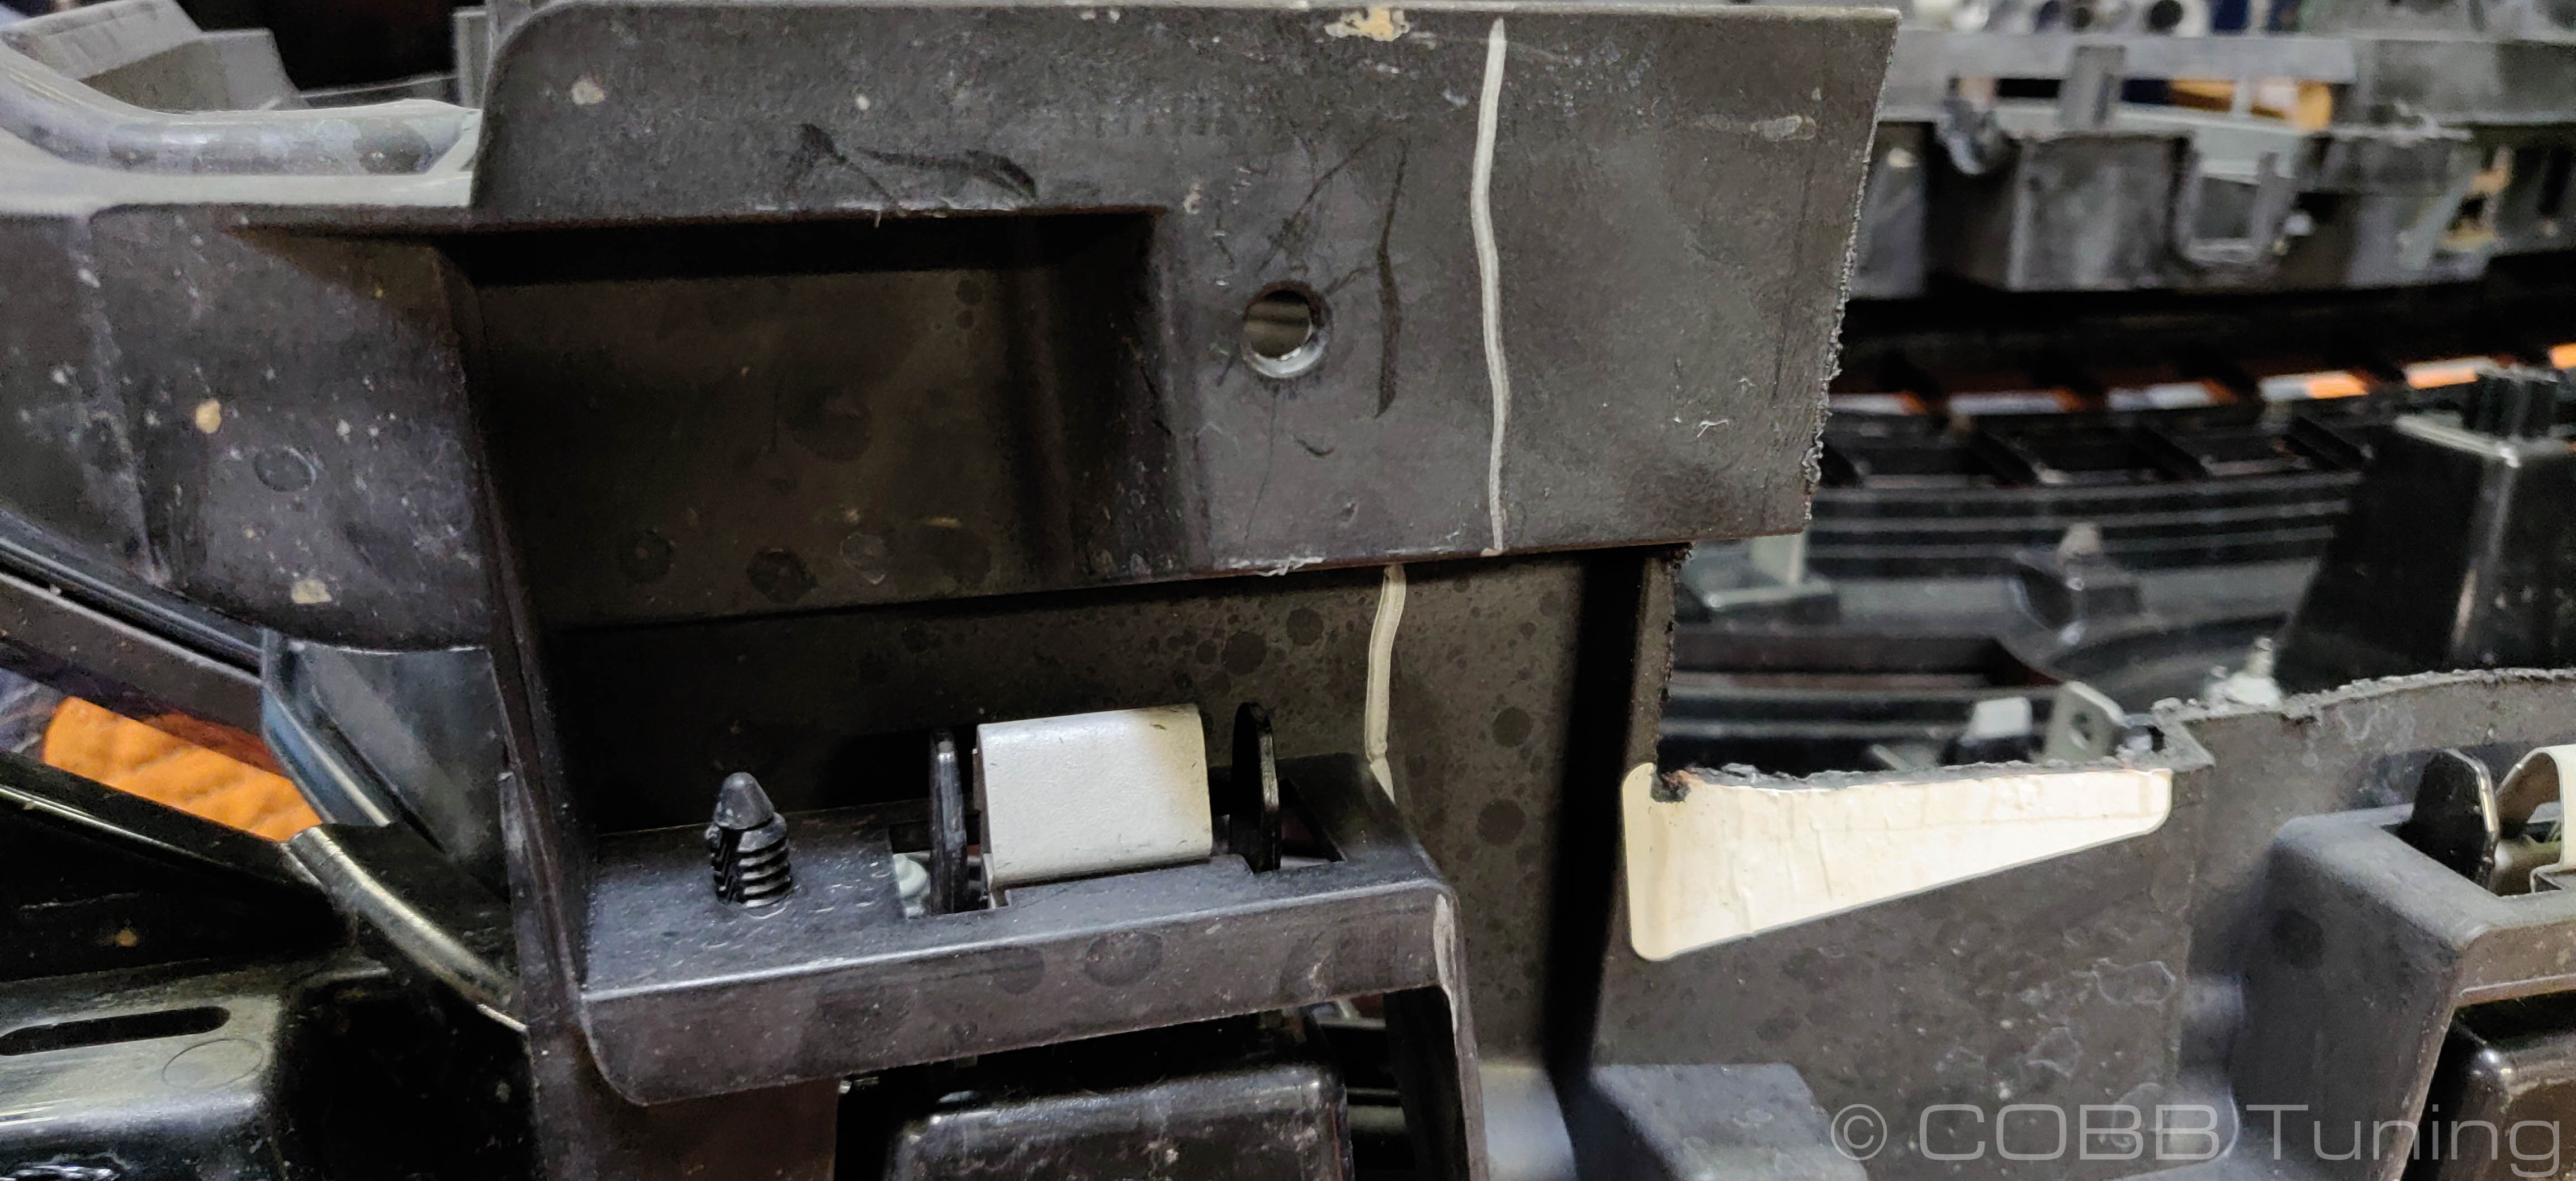
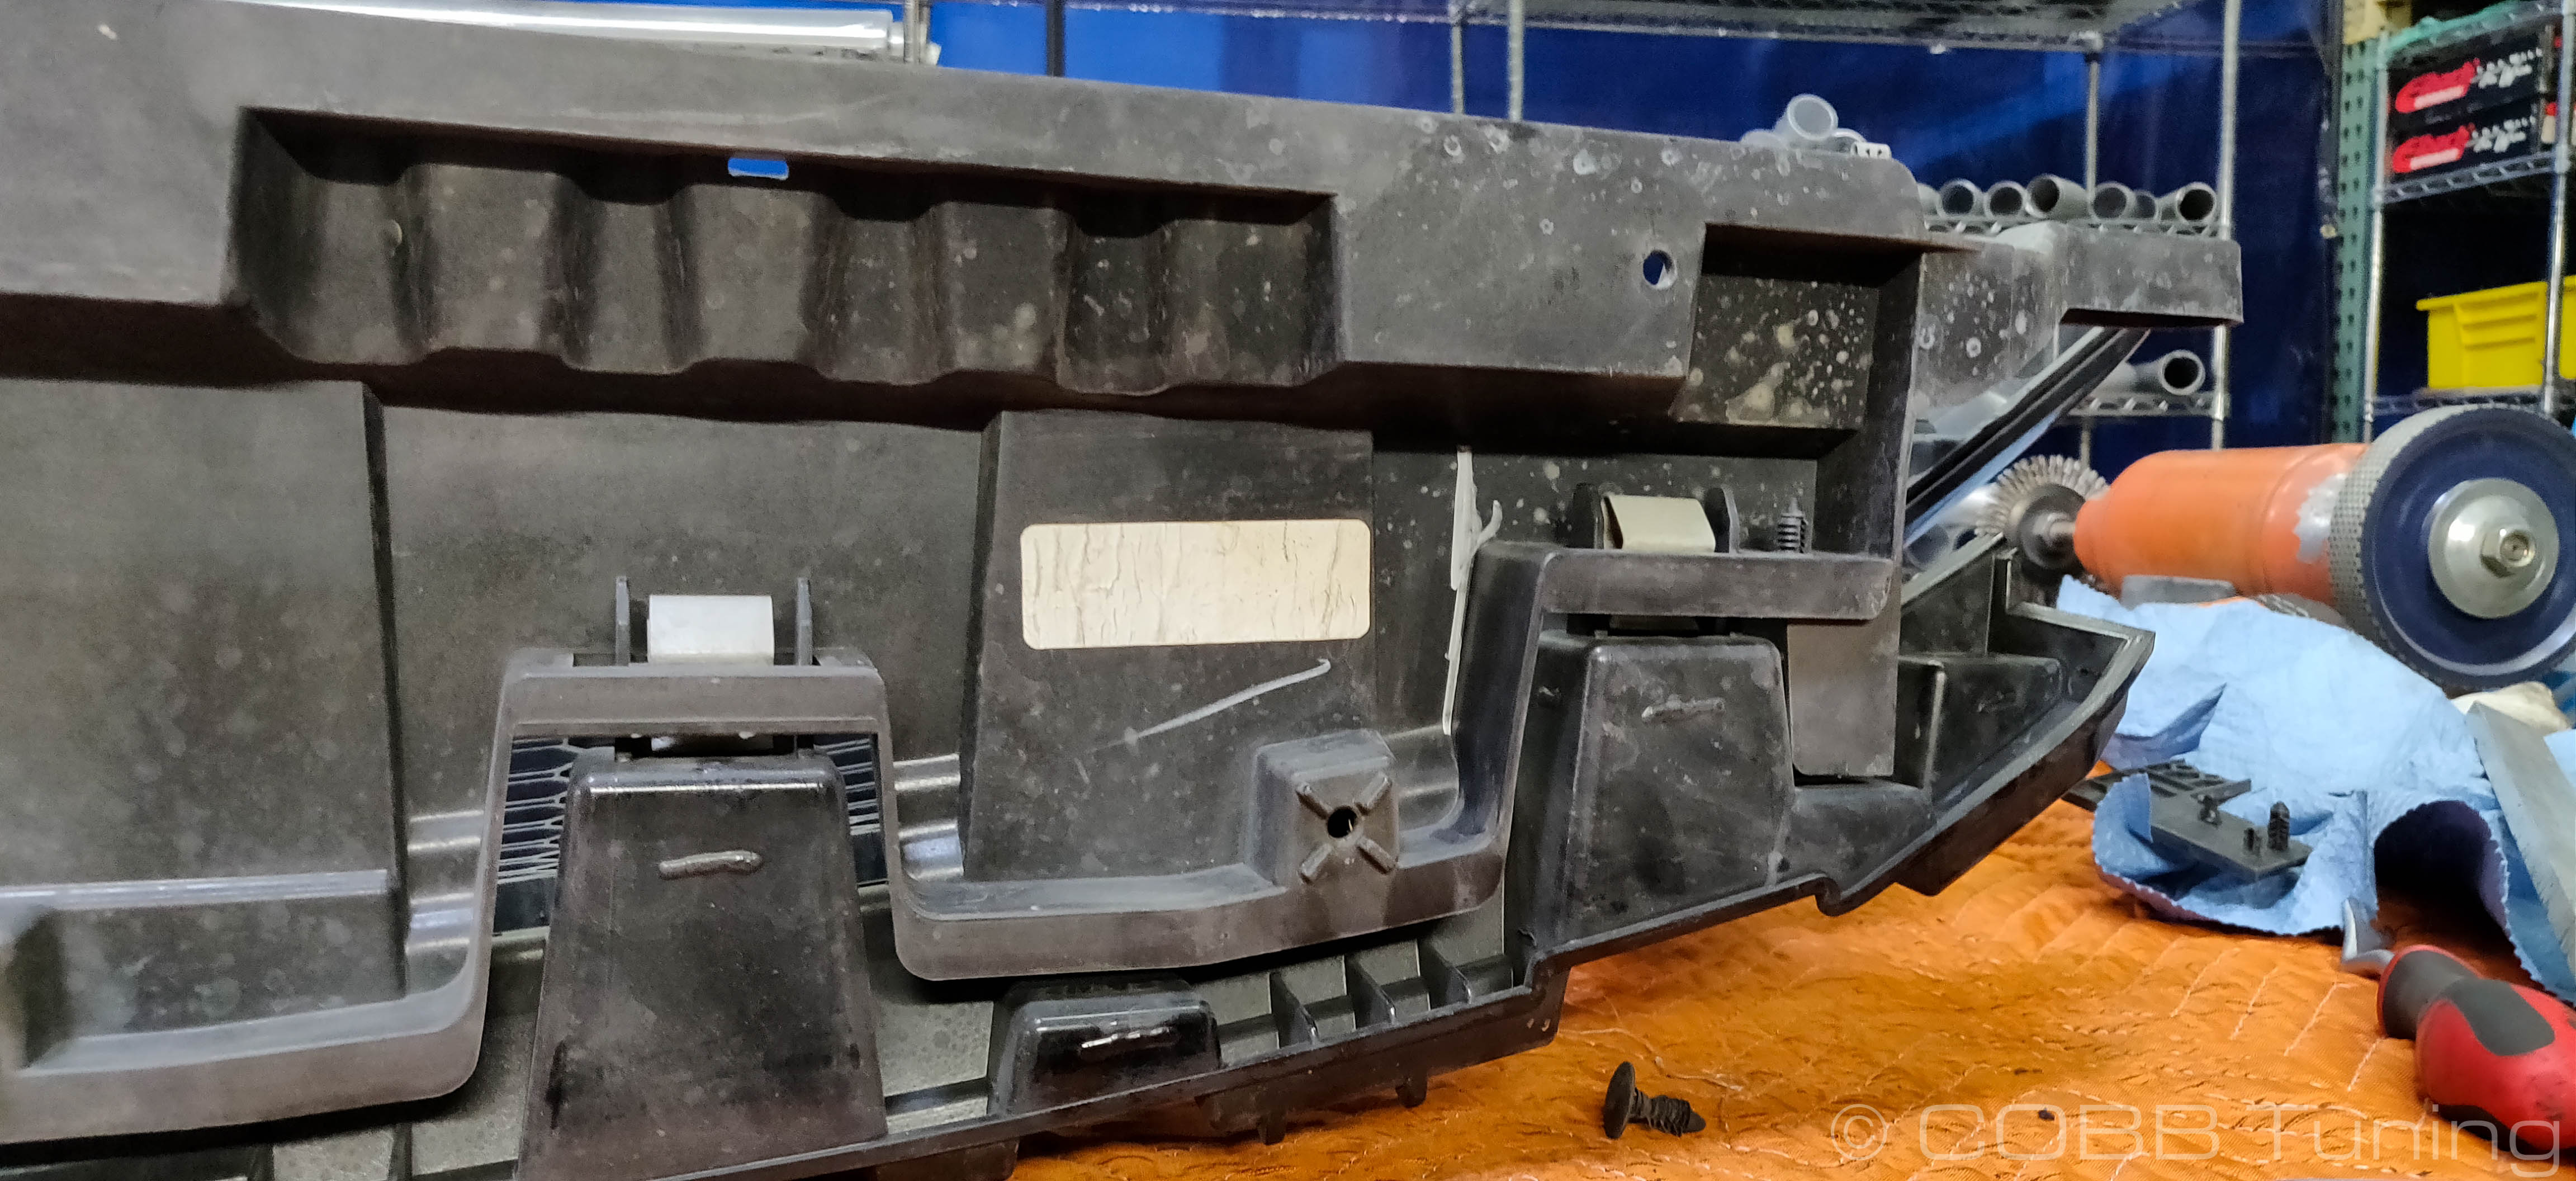
- Trim out the top edge along the line marked.
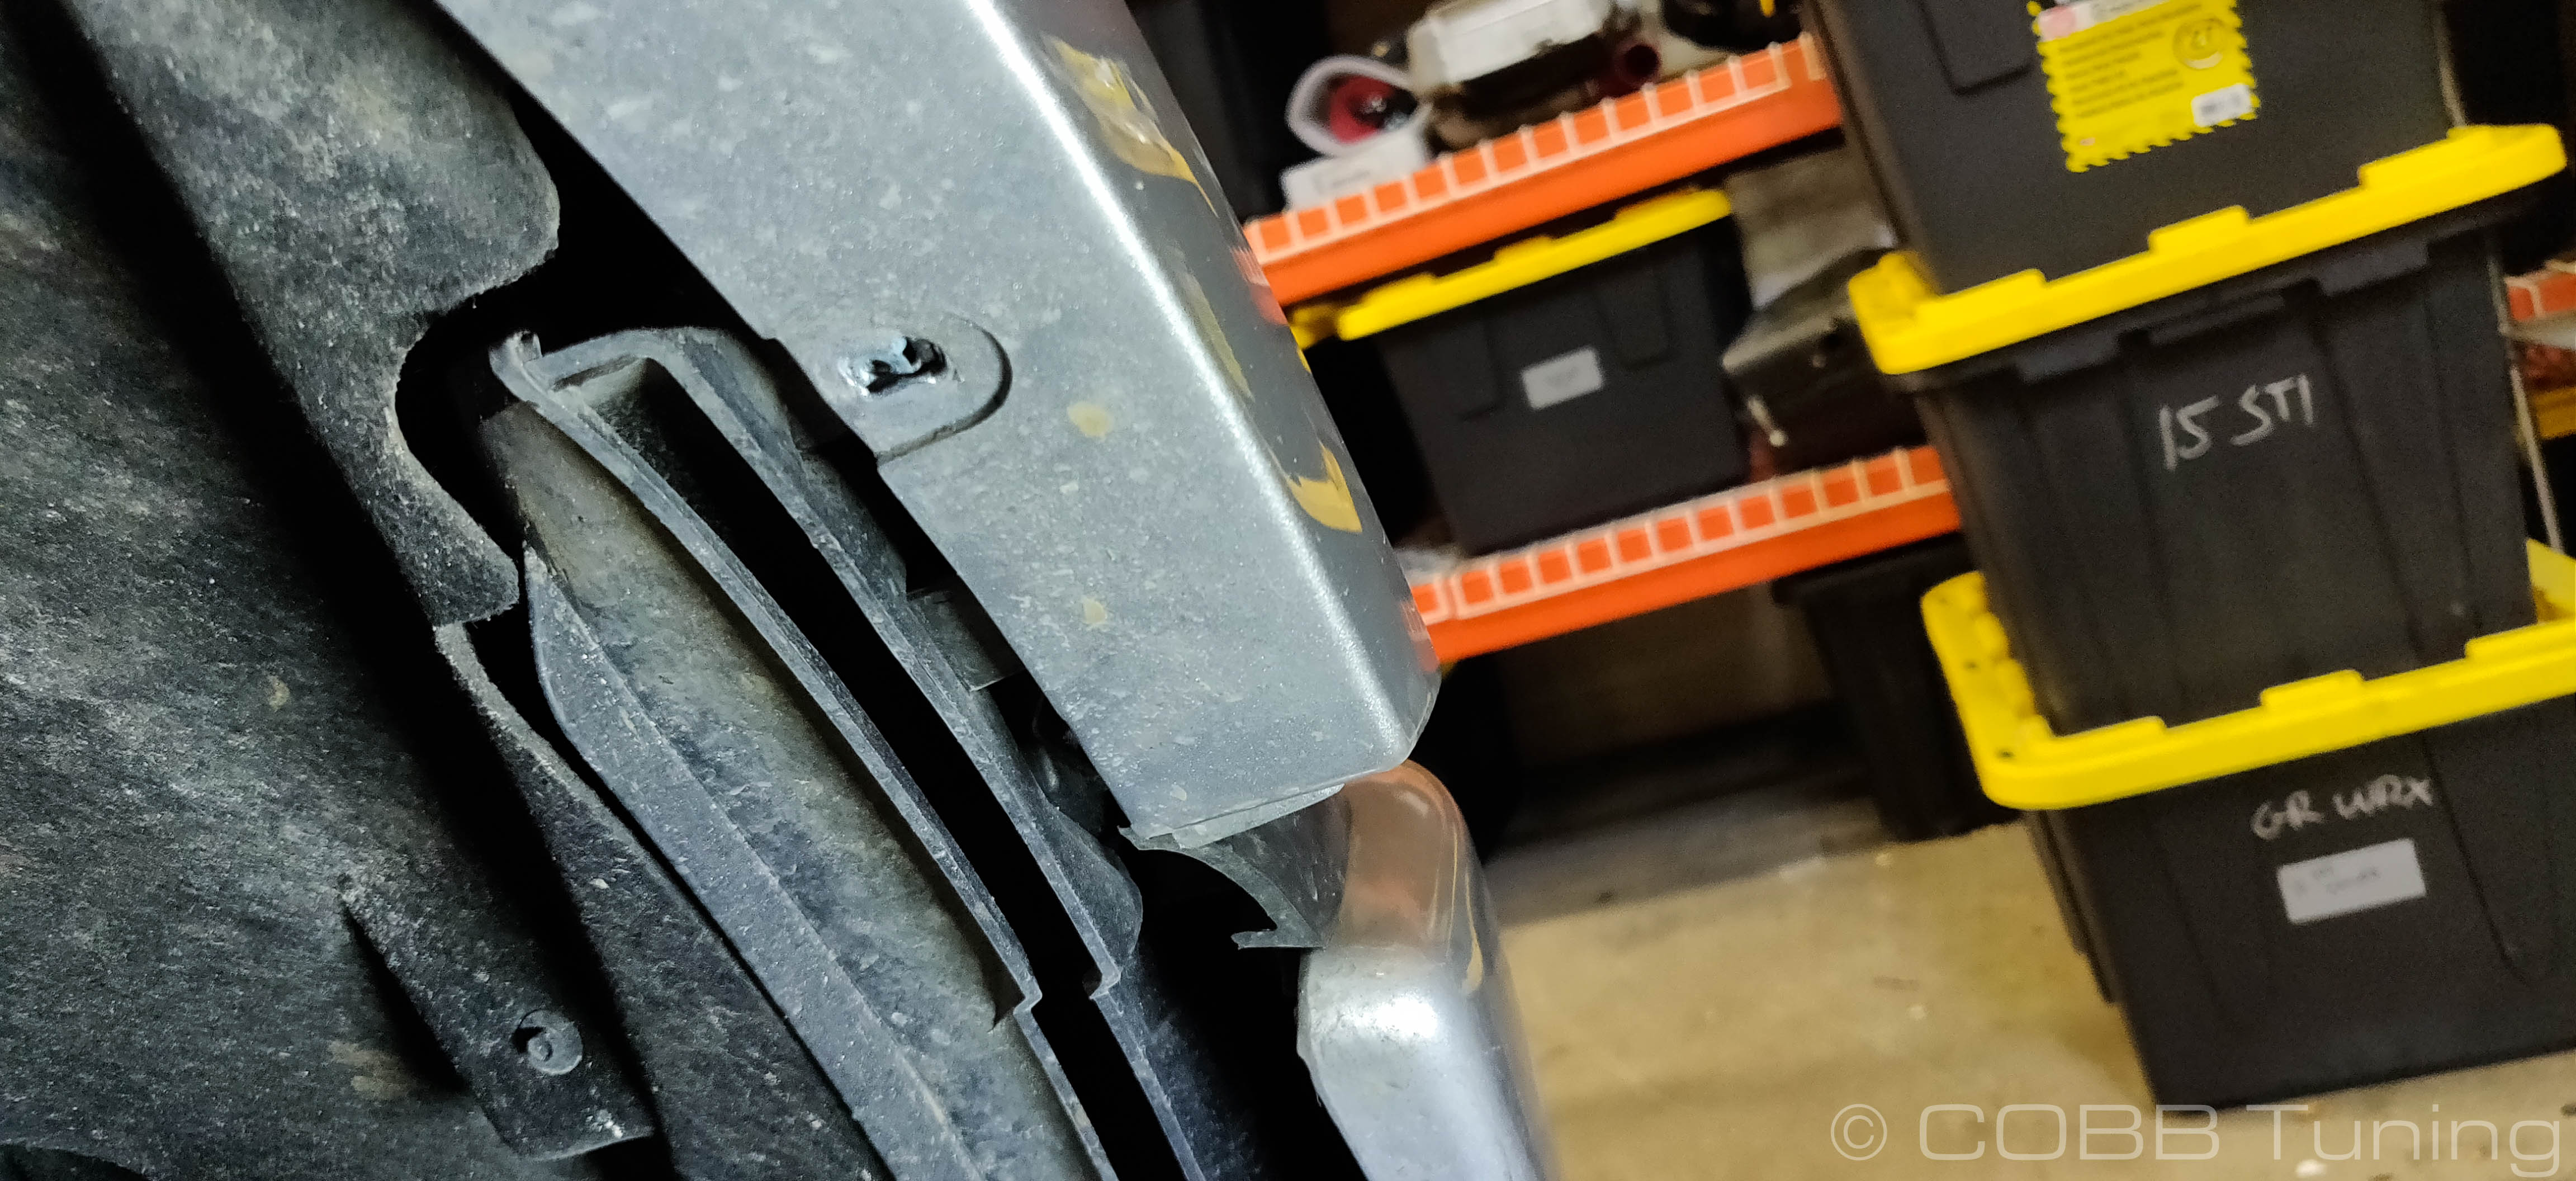
- Trim the bottom edge up to the flat support fin shown in silver, do not cut through the fin itself.. Try not to go through it as it will add structural rigidity to what is left after.

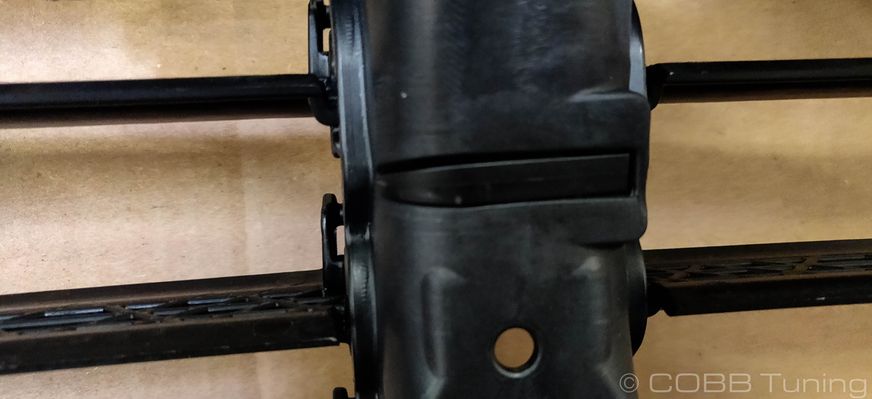
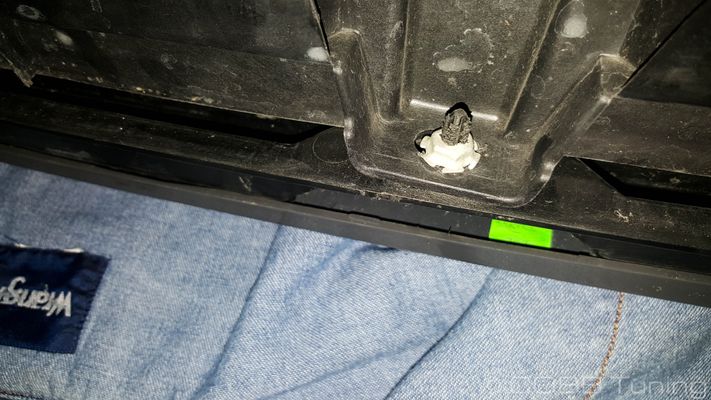
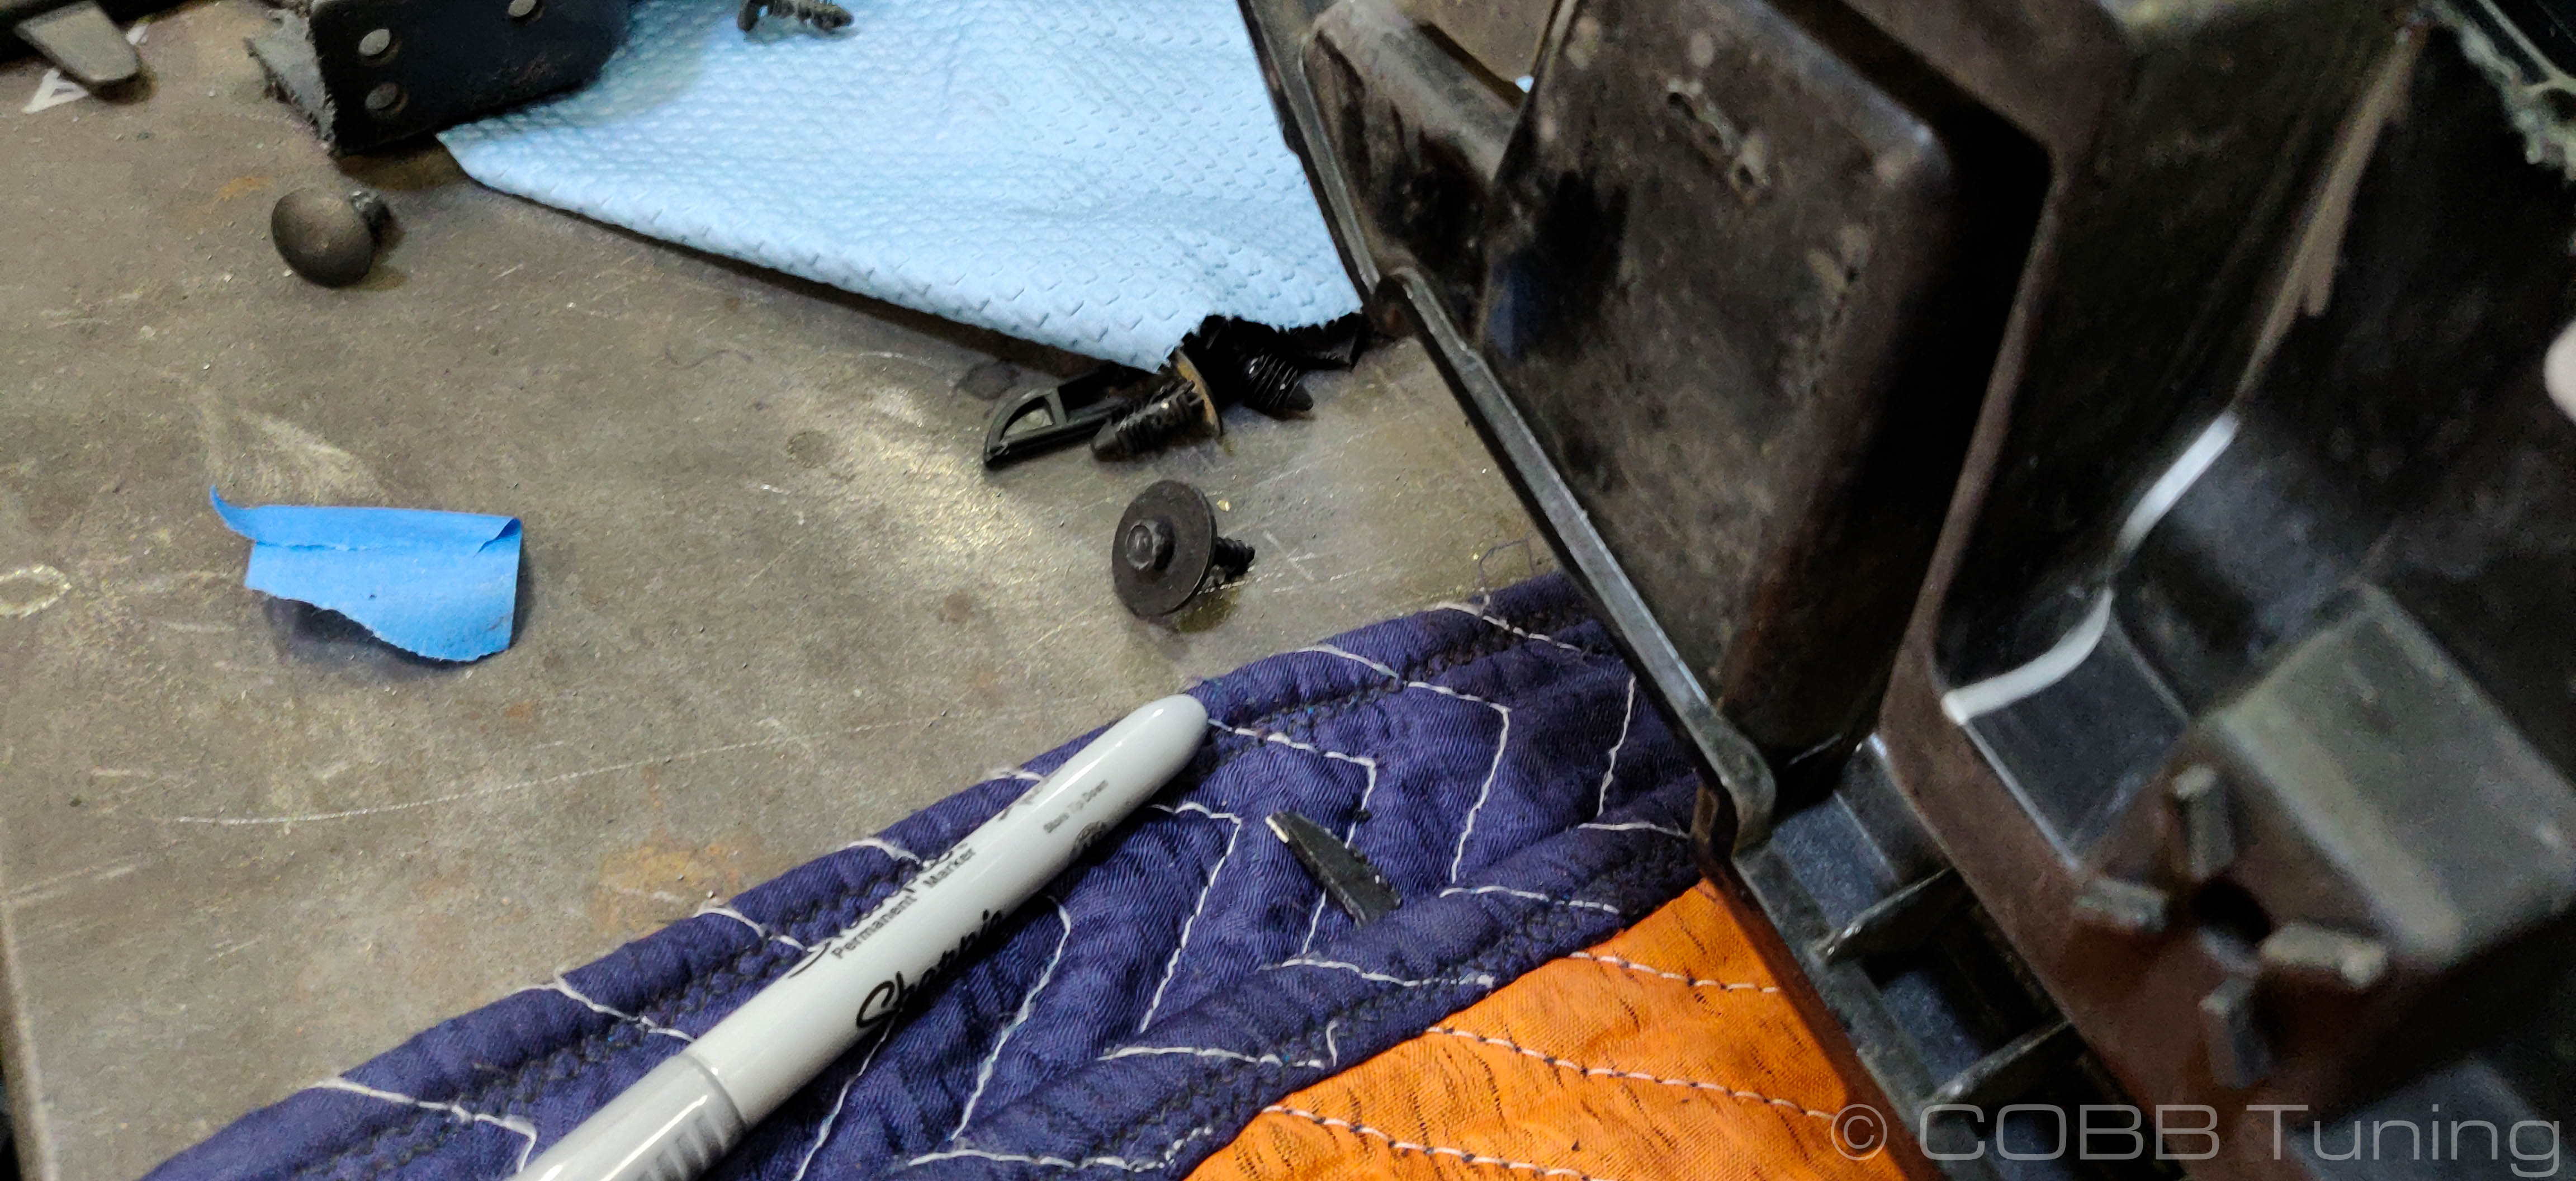
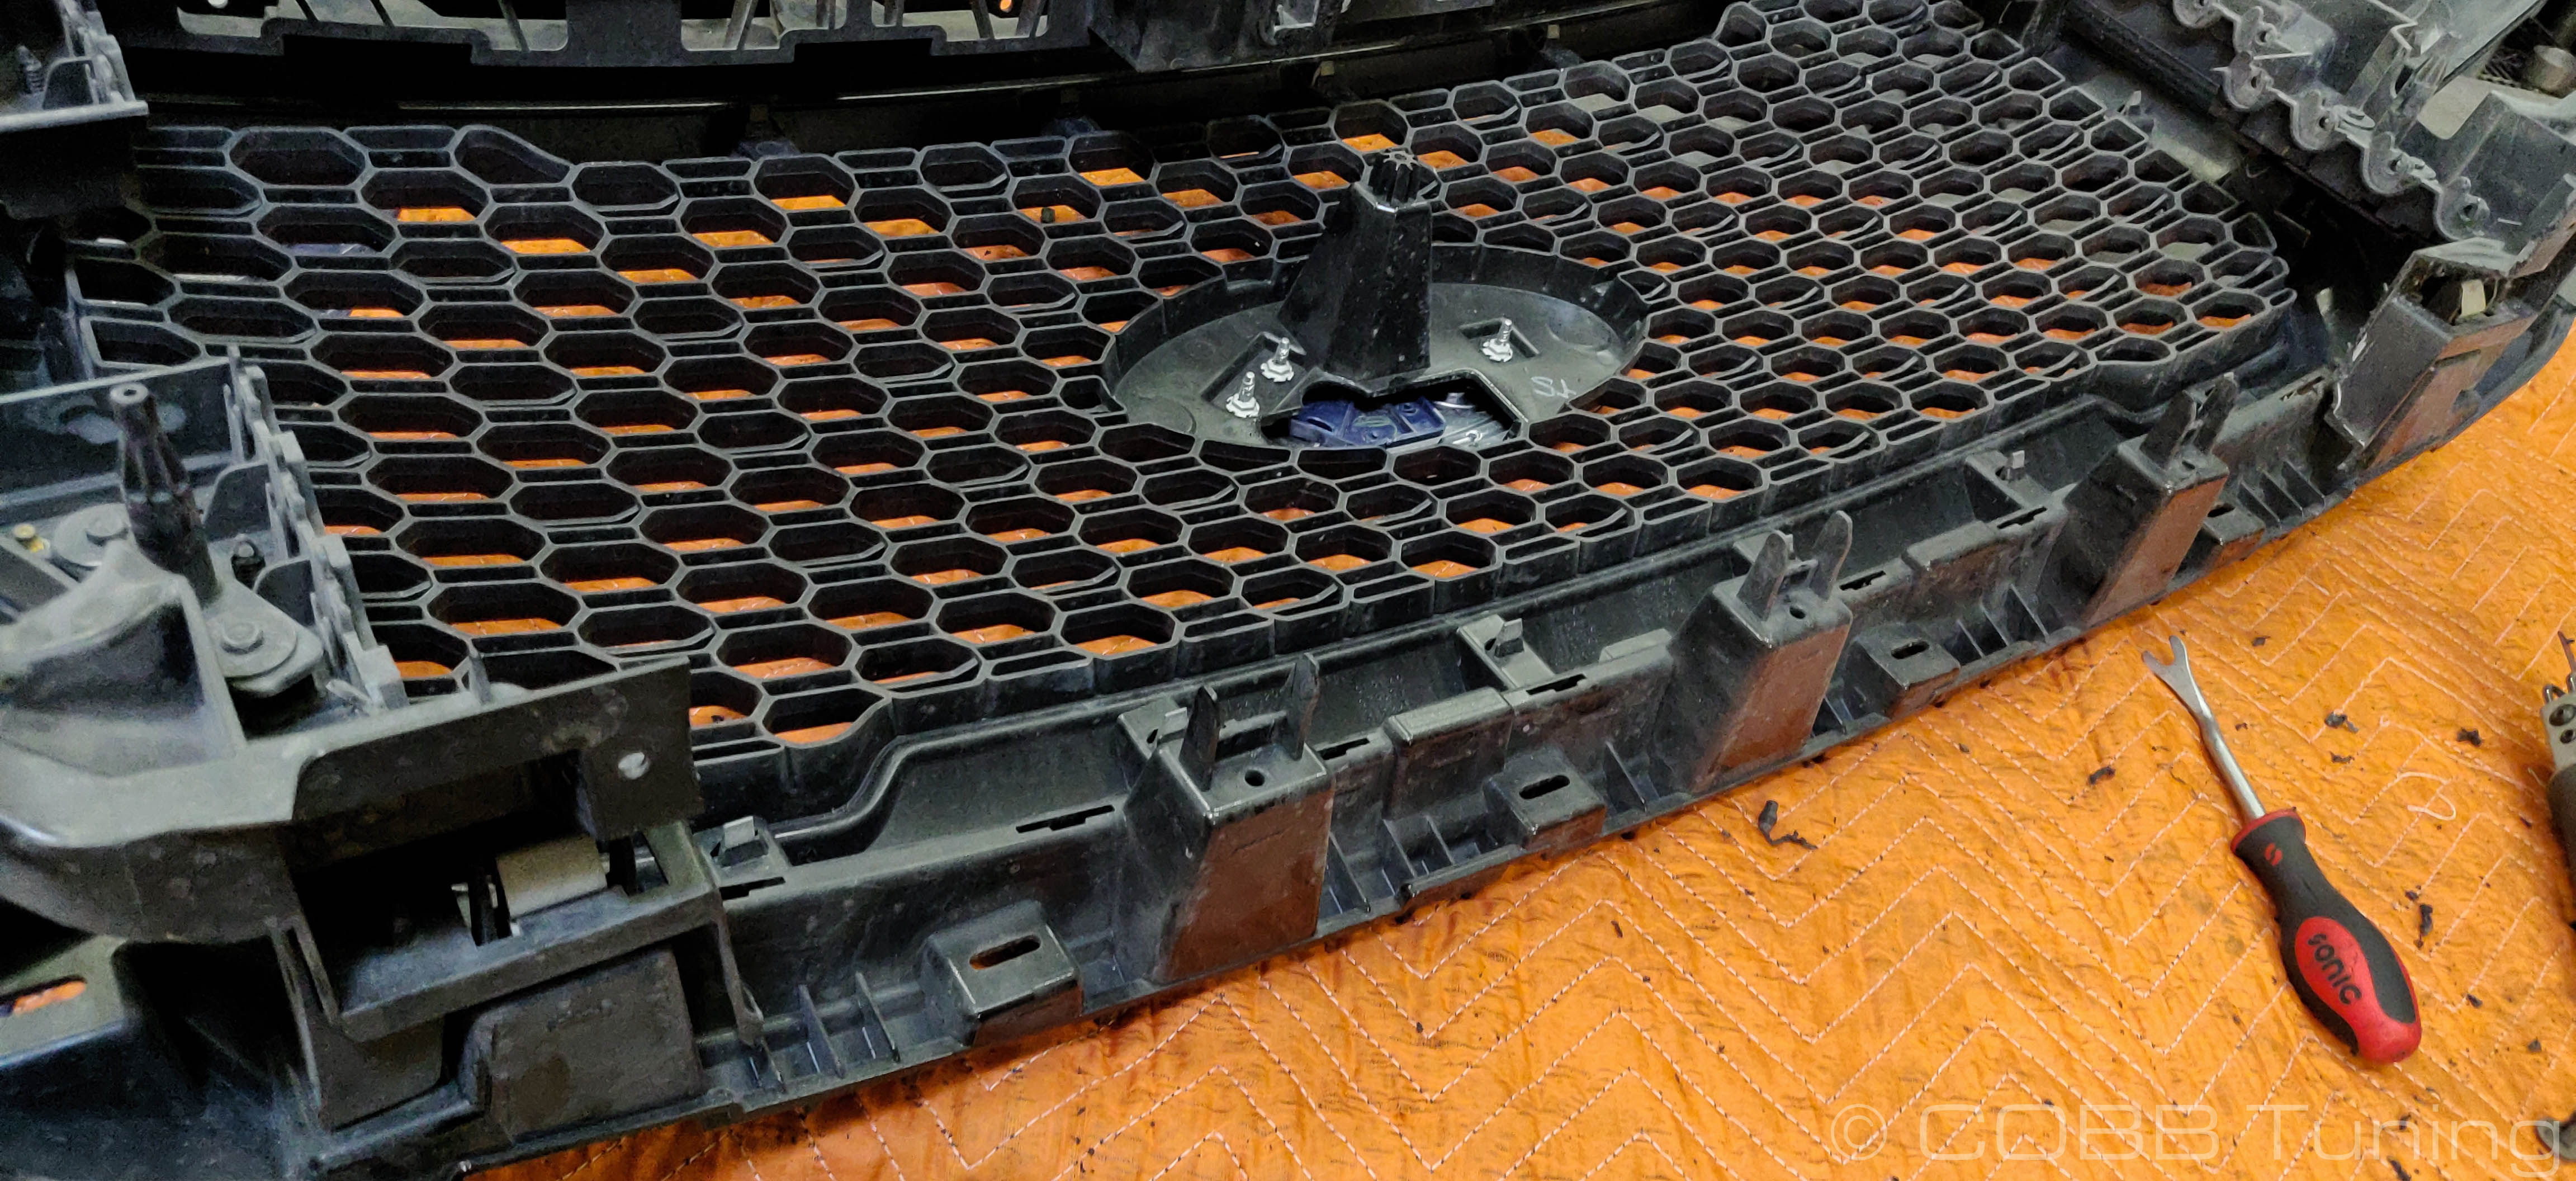
- Undo the bottom 3 plastic "nuts". These are designed to cut into the plastic pegs so sometimes turning them to the left while prying upward helps them come off cleanly.
- Remove the single 8mm bolt in the middle.
- Remove the center shutter assembly
- Install on the ambient air temperature sensor onto the FMIC
- Install the outer clips for the rubber shroud but leave the middle out for now.
- Begin to carefully install the grille without scratching the headlight trims.
- when it's in place, reach up through the rubber and install the wiring harness into the ambient air temperature sensor.
- Reinstall the rest of the grilles clips and bolts along with the lower skid tray. Dont forget to check out all that free space!
- You're all done! Go out and enjoy!
Grille Shutter Removal F150
Remove ambient air temperature sensor from grille by gently popping it out and unplugging the harness.
2018 only
- Pop out the grille shutters one by one with a pry tool.
- Remove the motor by pulling sideways on the flat end of the retaining clip by prying the clip away from the support.
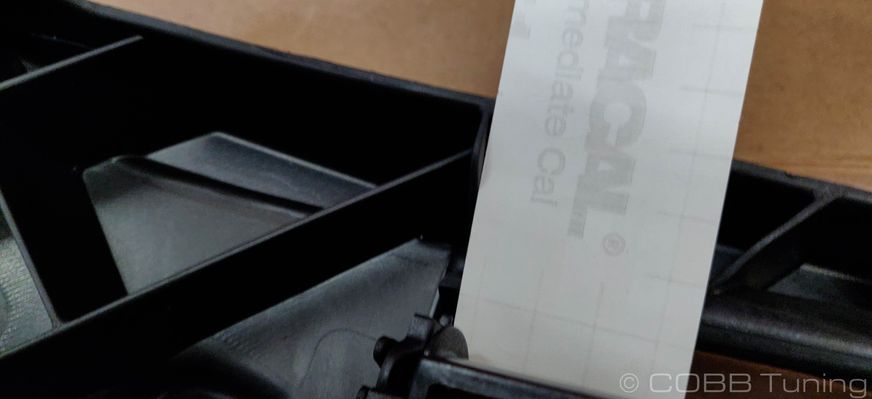
- Trim out the top edge along the line marked.
- Remove the rubber piece from the bottom of the grille assembly by removing all of the clips with your trim tool.
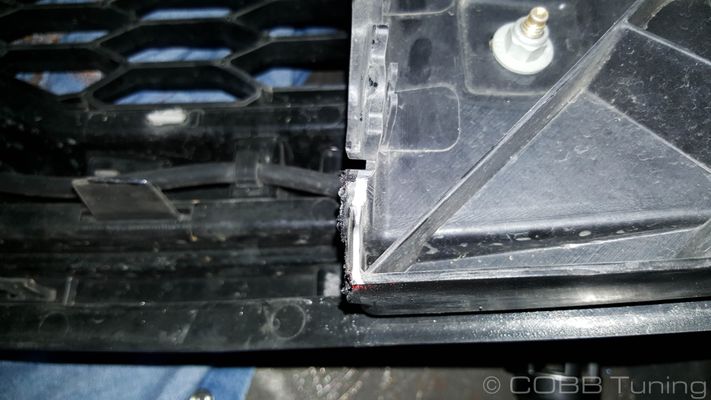
- Cut inward along the inside edge of the grille clips the furthest to the outside.
- Now cut out the inside along the line you marked earlier.all the way through the lighter piece of plastic but not into the grille itself. Sometimes it can be easier if you do it in stages to make the cuts straight. Once done you can pop the center three metal clips free and remove the center portion of the grille surround.
- Snip off the part that sticks out on the clip tabs.
- Install on the ambient air temperature sensor onto the FMIC
- That done you can re-install the grille.
- If you aren't tuning your car with the appropriate map you'll need to plug-in the motor from the grille shutters and zip tie it somewhere it won't rattle loose or block the hood from closing.
- You're all done! Go out and enjoy!