
Part Number – Part Name
Vehicle Coverage
[placeholder]
Congratulations on your purchase of the COBB Tuning xxxxxxxxxxxxx! The following instructions will assist you through the installation process. Please read them BEFORE beginning the install to familiarize yourself with the steps and tools needed. If you feel you cannot properly perform this installation, we HIGHLY recommend you take the vehicle to a qualified and experienced automotive technician.
Table of Contents
Parts List
- Hitch cover
- (2) o-rings
Tools Needed
Sockets
- 3 required if you're adding in runes or gemstones for a bonus critical multiplier. (4 if going for attack speed)
Hand Tools
Section 1
- Find your vehicle.
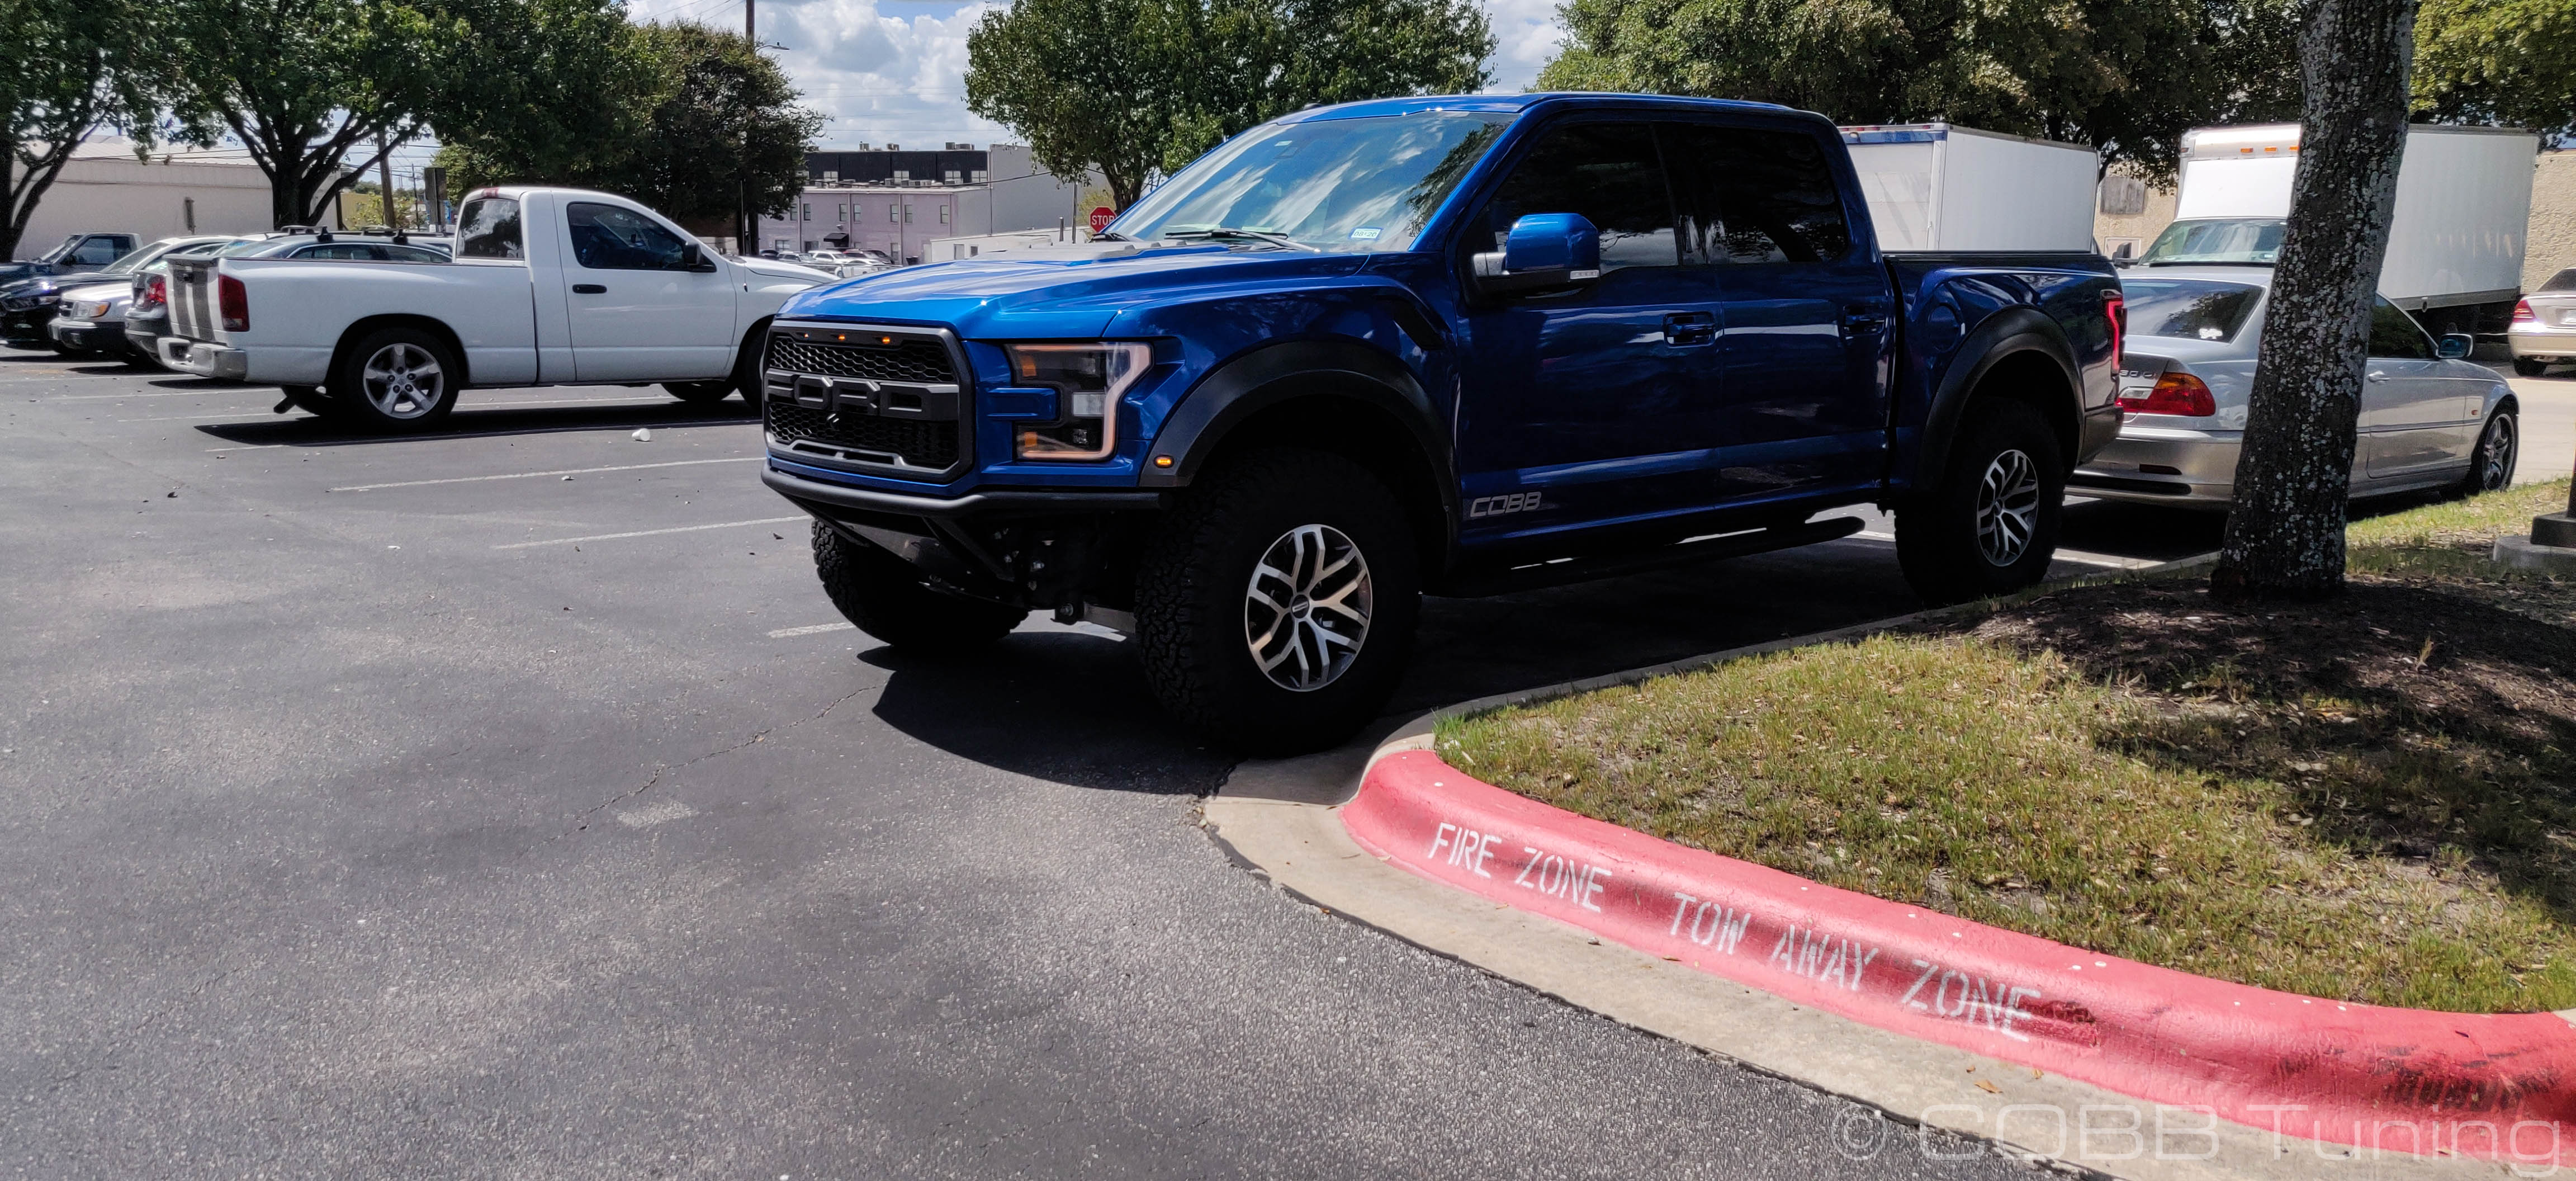
- Make sure the suspension is broken in properly
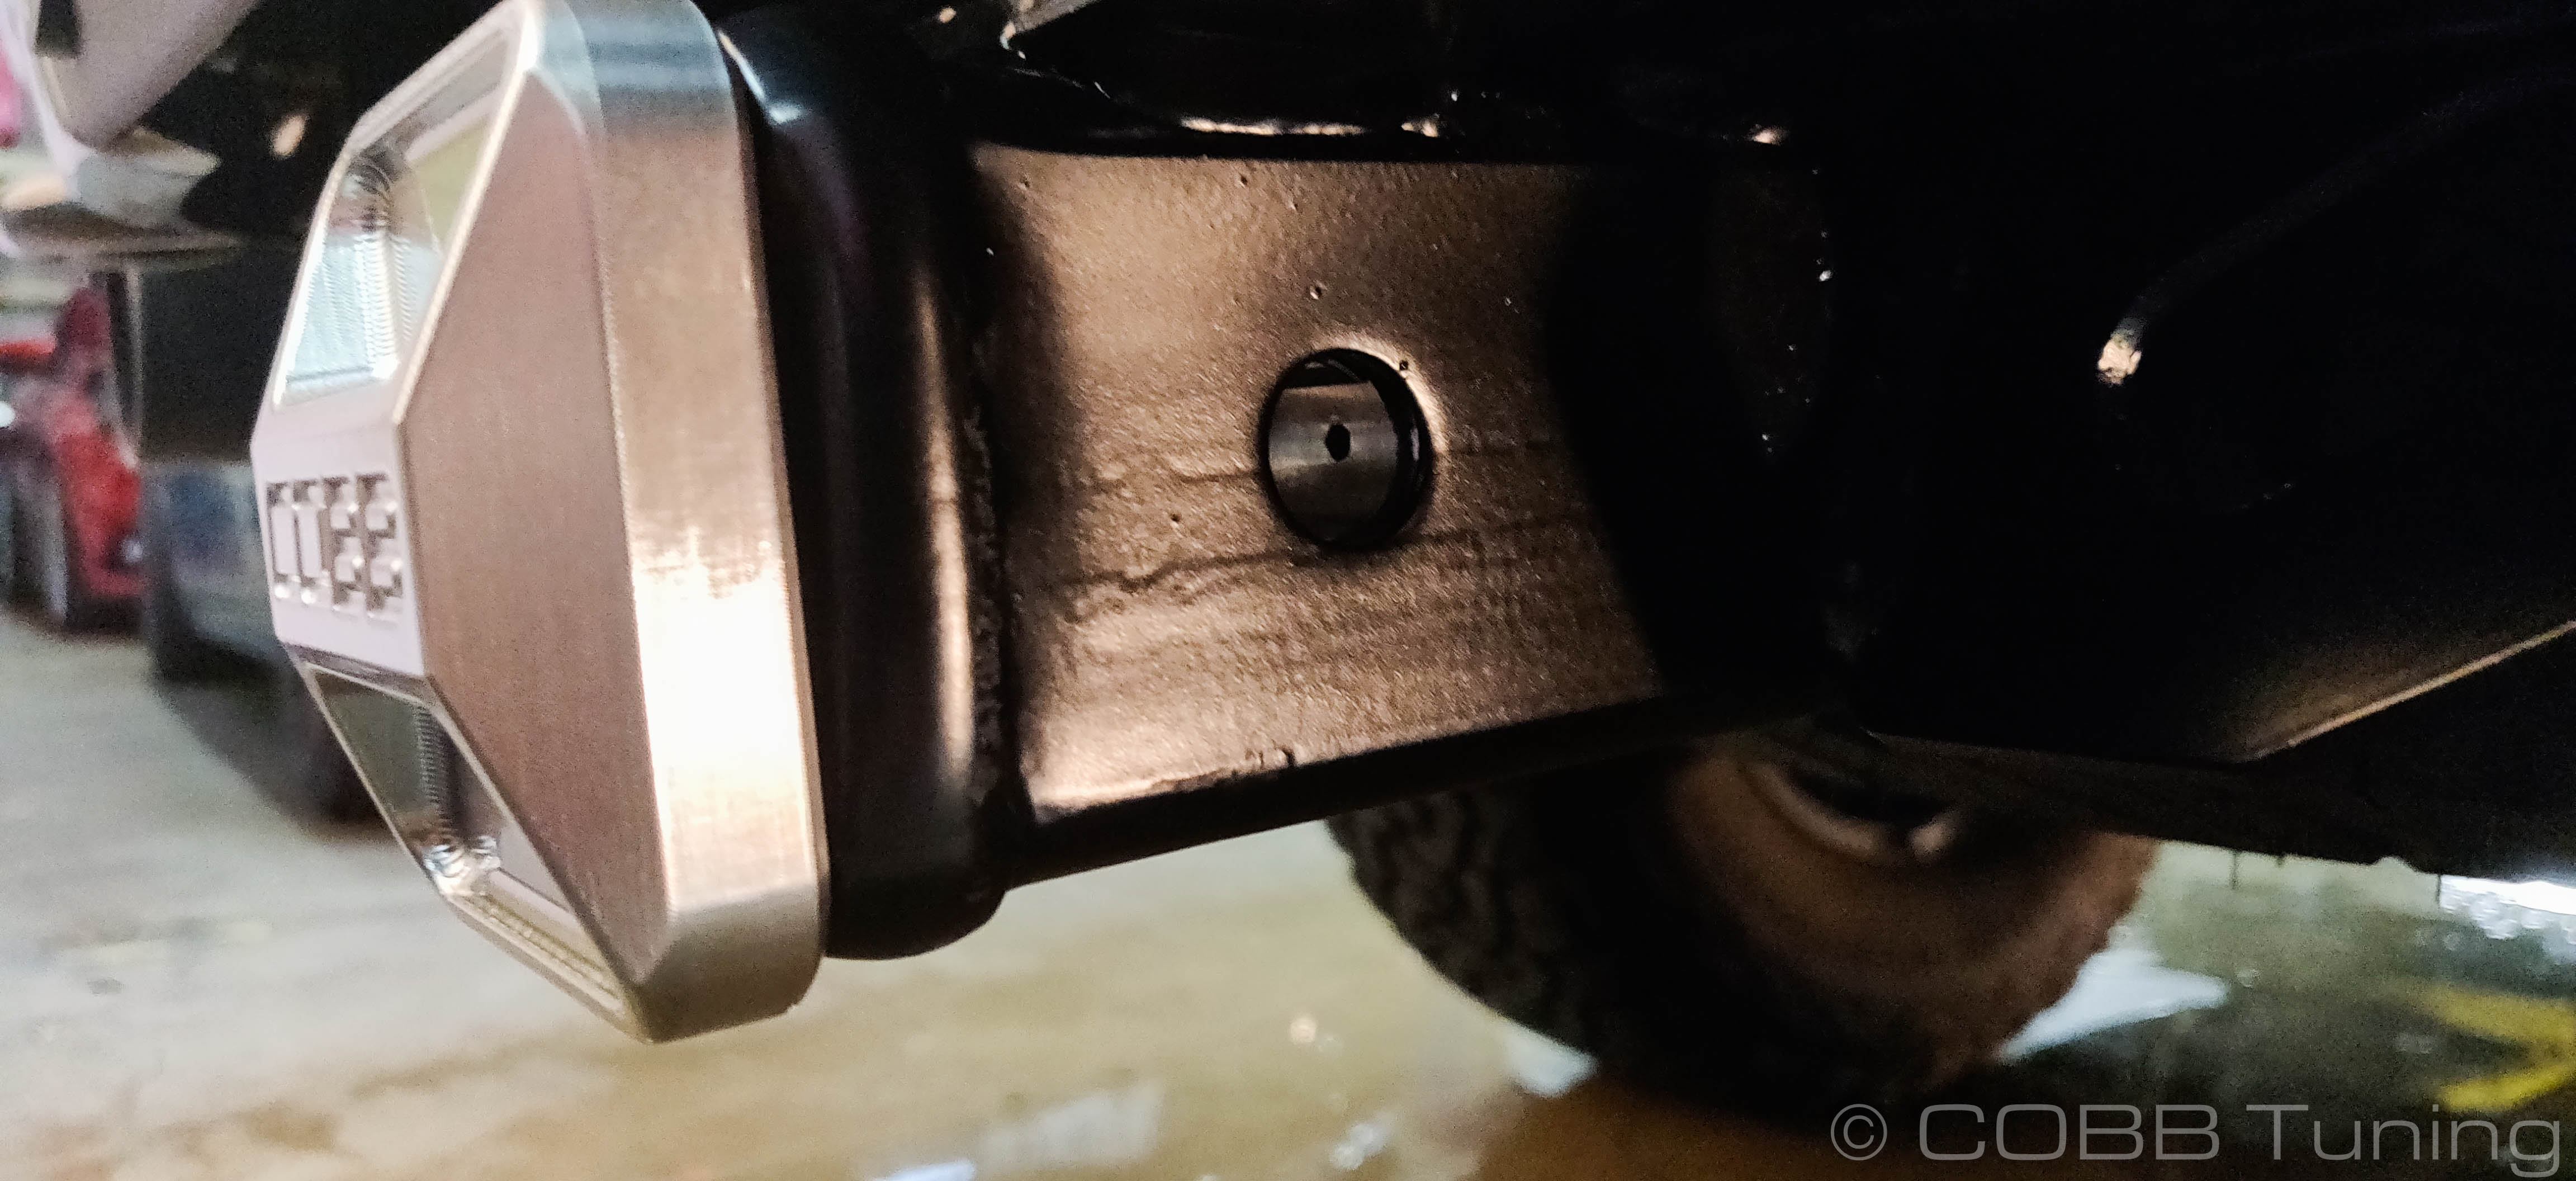
- Make sure it has the proper sized class 3 or 4 receiver. (2")
- Park it in a flat level area.
- Approach the vehicle with respect

- Warm your hands (coffee drinking optional)
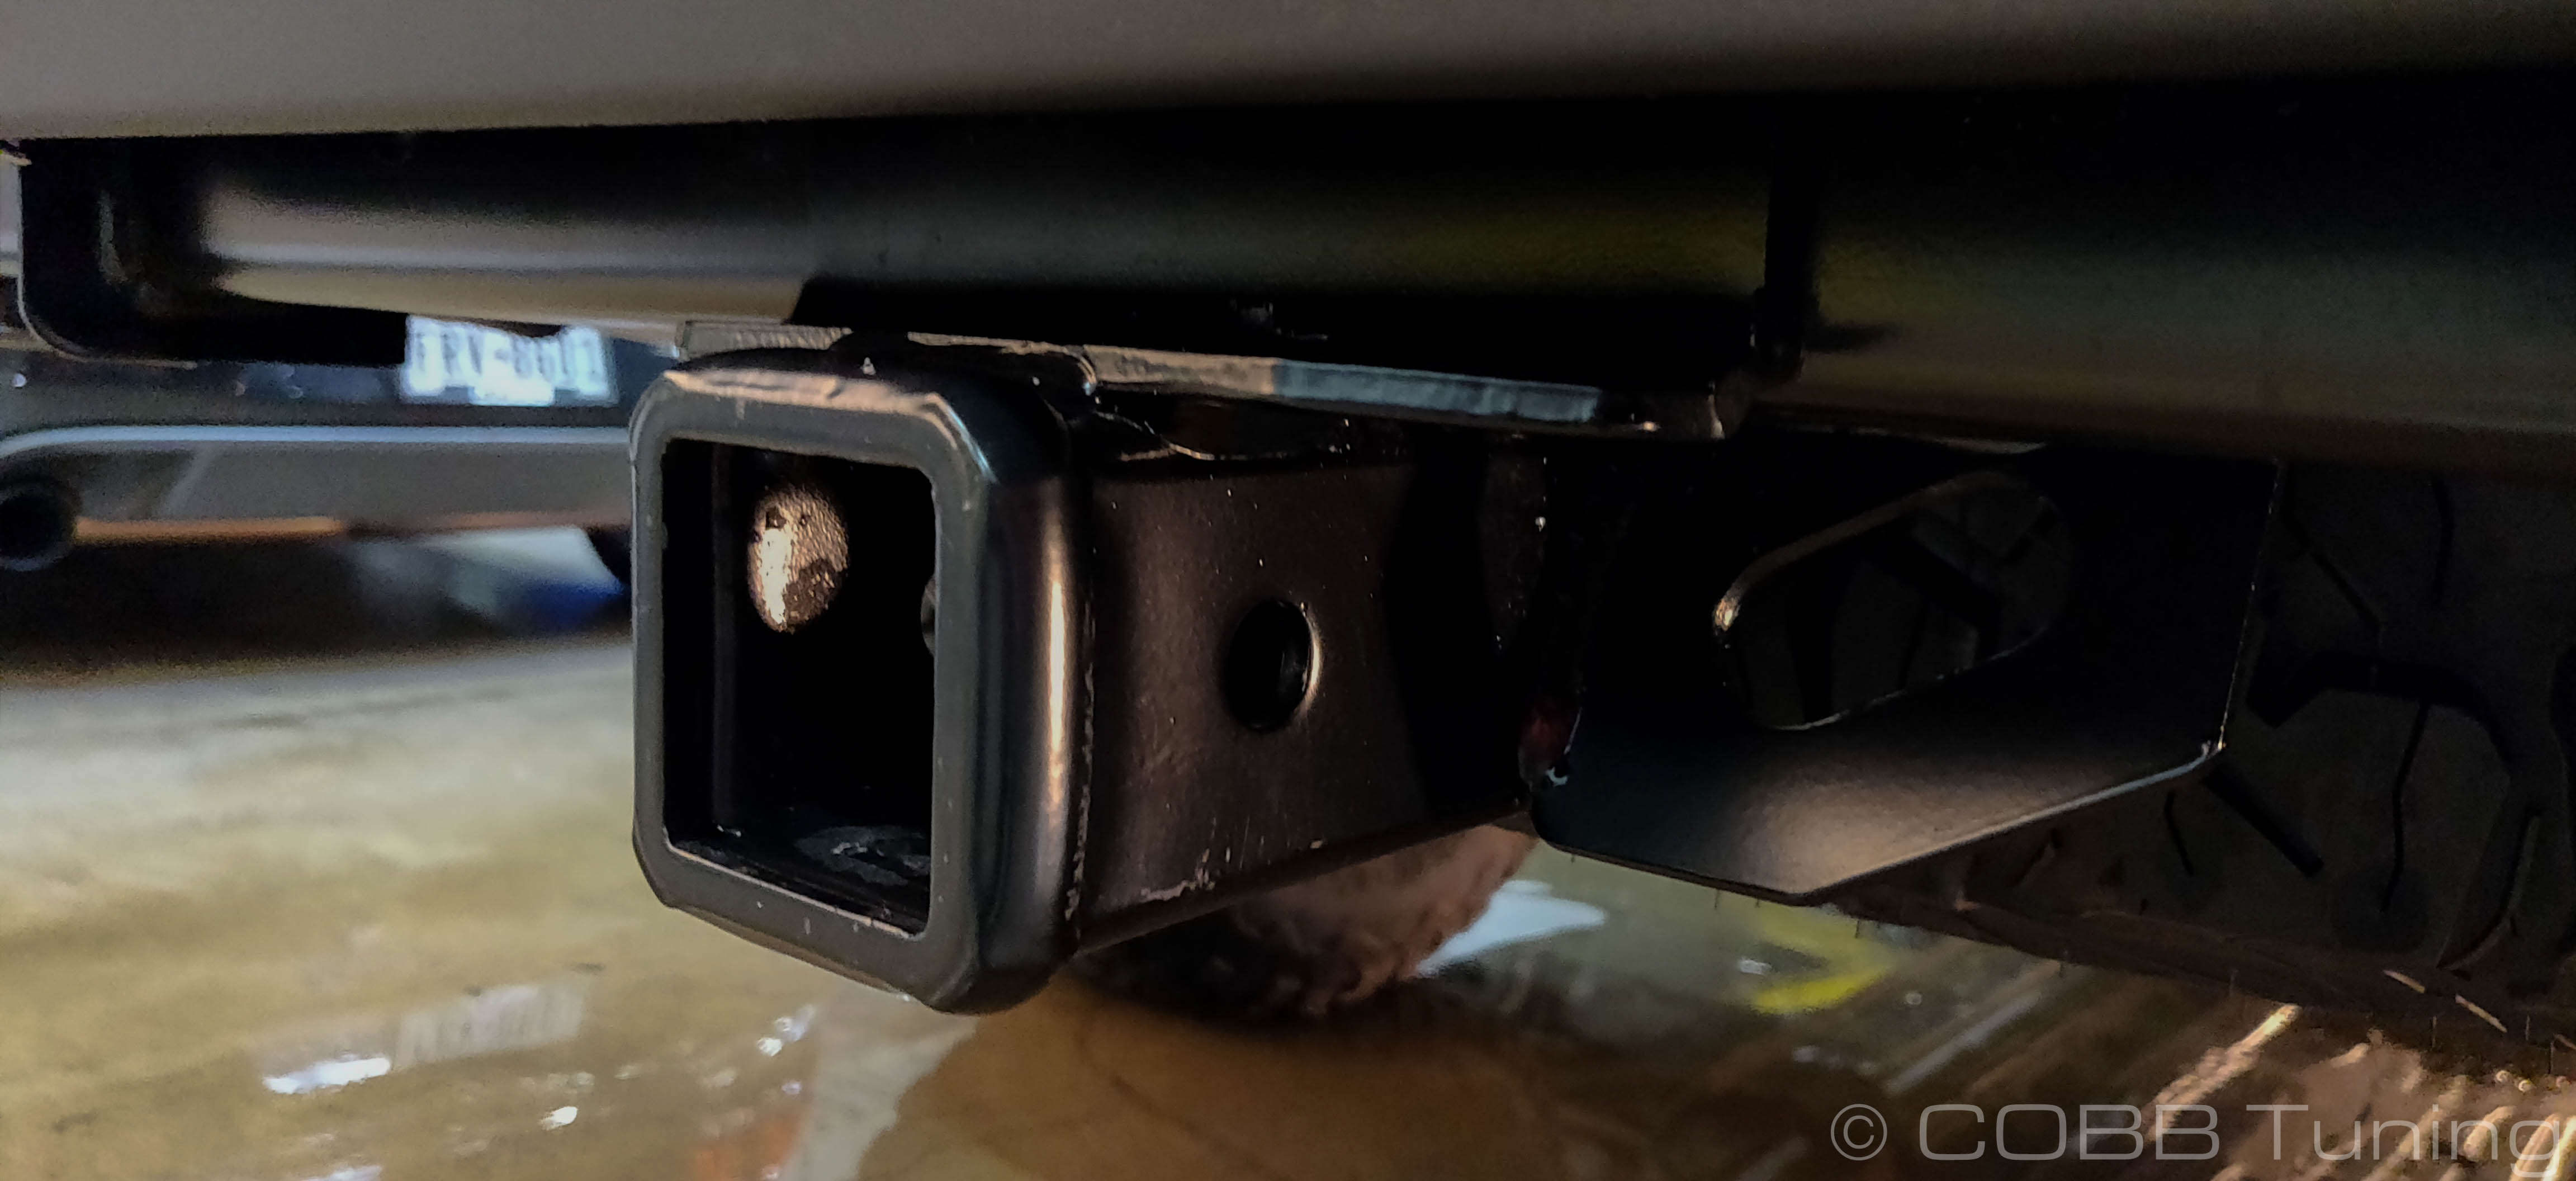
- Slide the o-rings onto the hitch from the back. Going from the front is slightly more difficult.
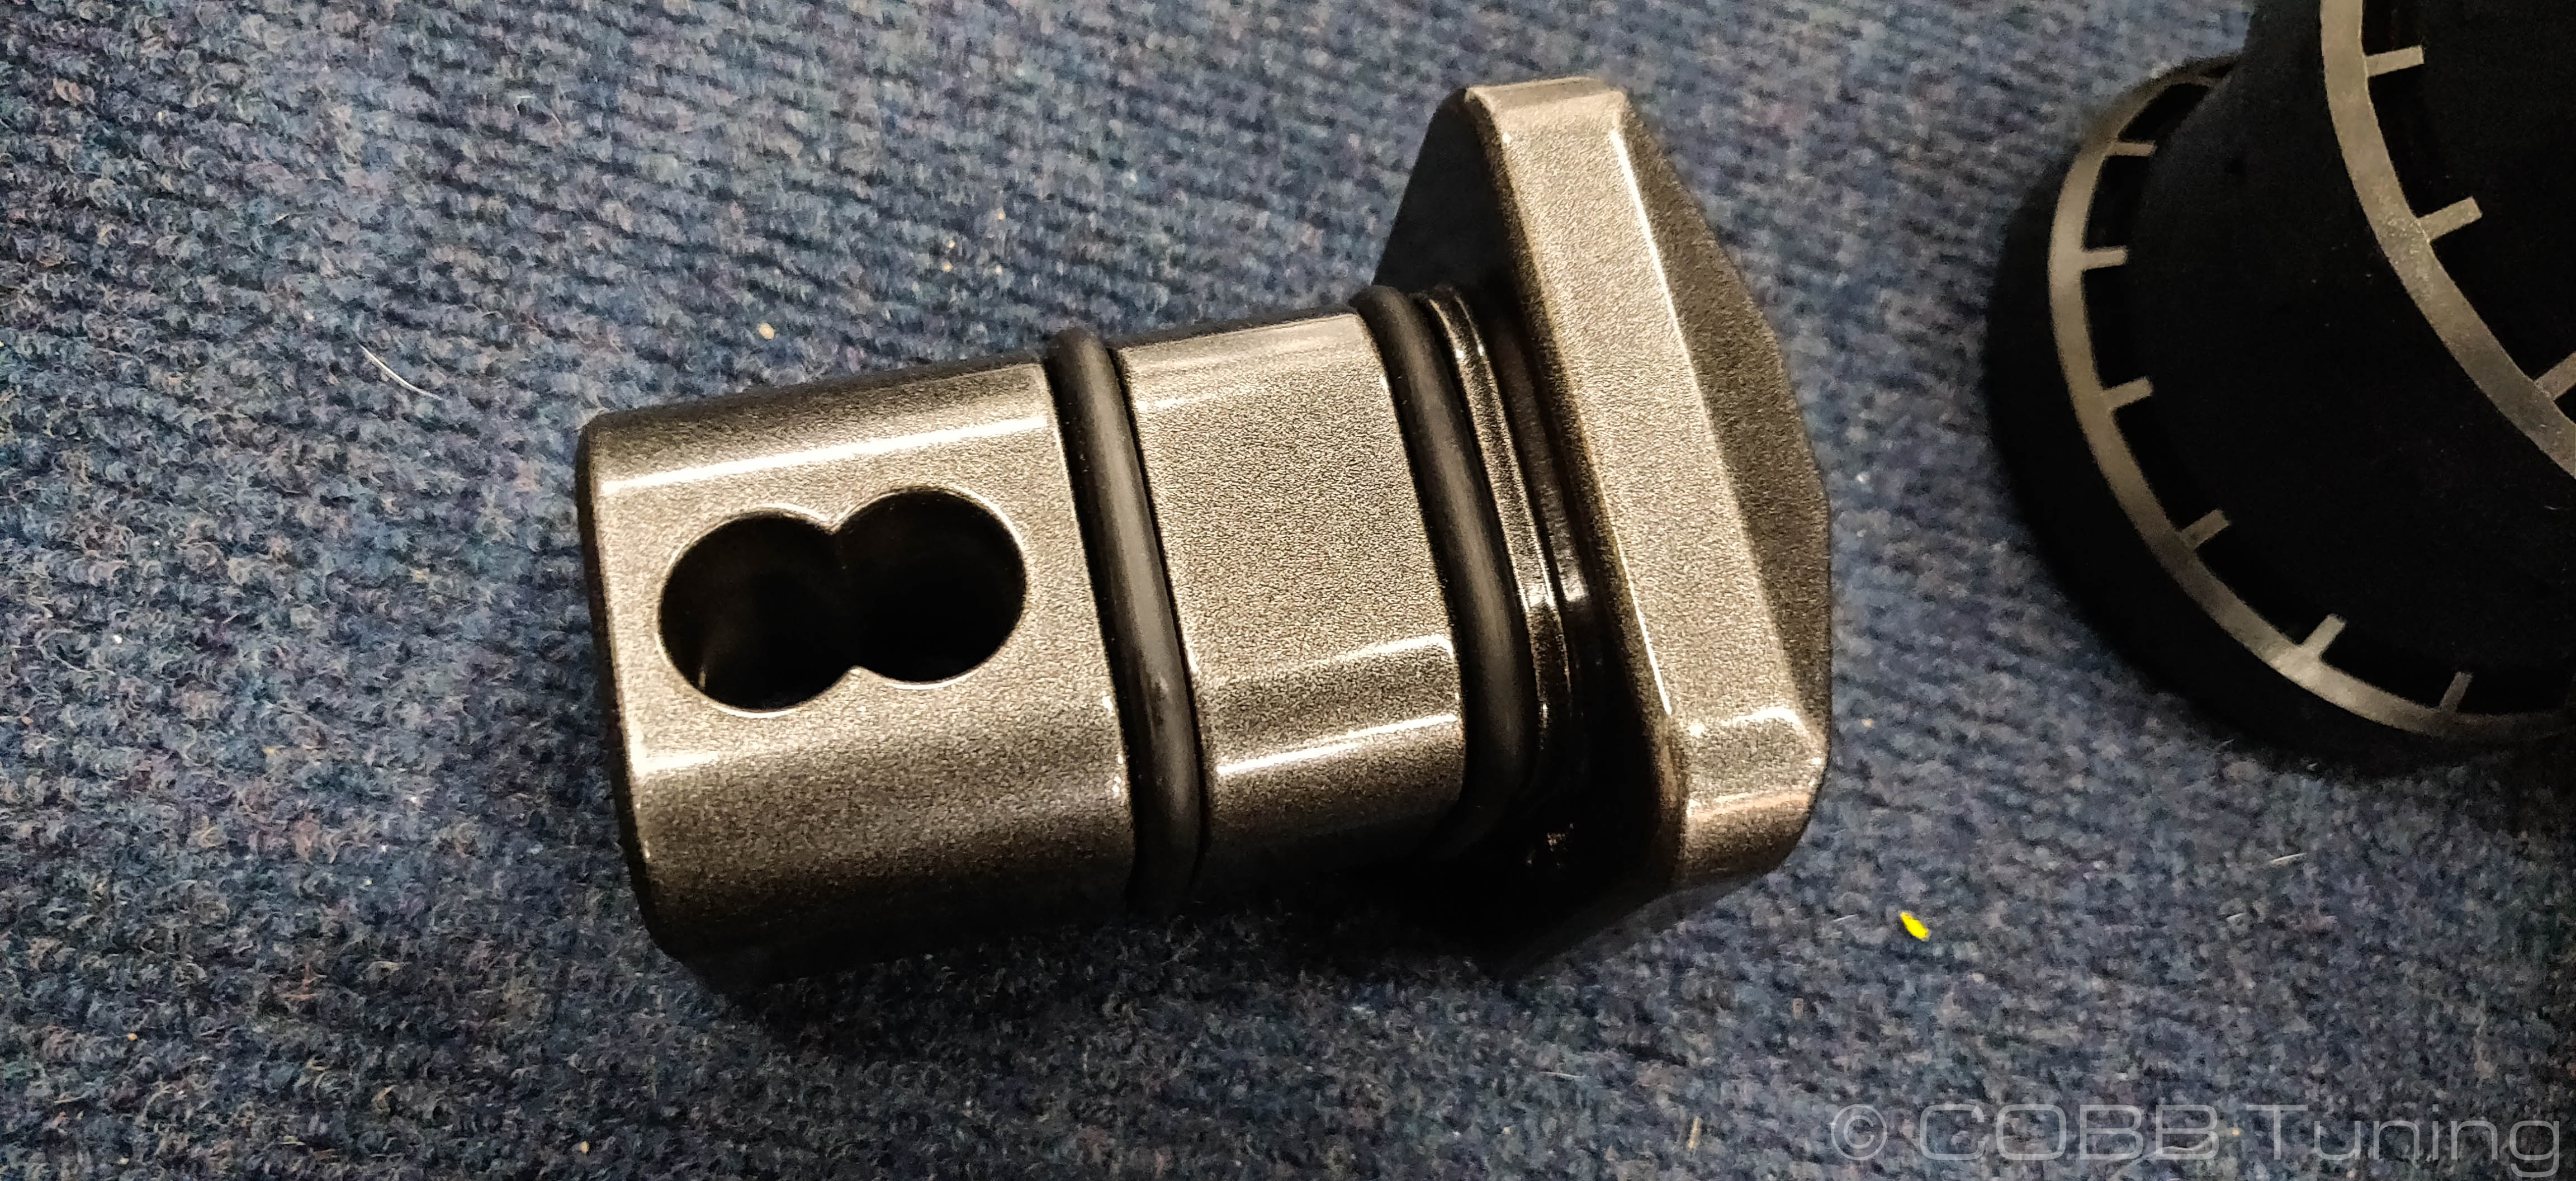
- Add a small amount of grease to the hitch to prevent corrosion of the hitch itself. The cover is powdercoated so it shouldn't be an issue on that.
- Gently slide the hitch cover into the hitch with the bolt holes going across side to side rather than up and down.
- Check if words are right side up. If they are not, remove and repeat steps 9 and 10 unto they are corrected.
- Choose which pin location fits best, there are two, one may fit more flush than others.
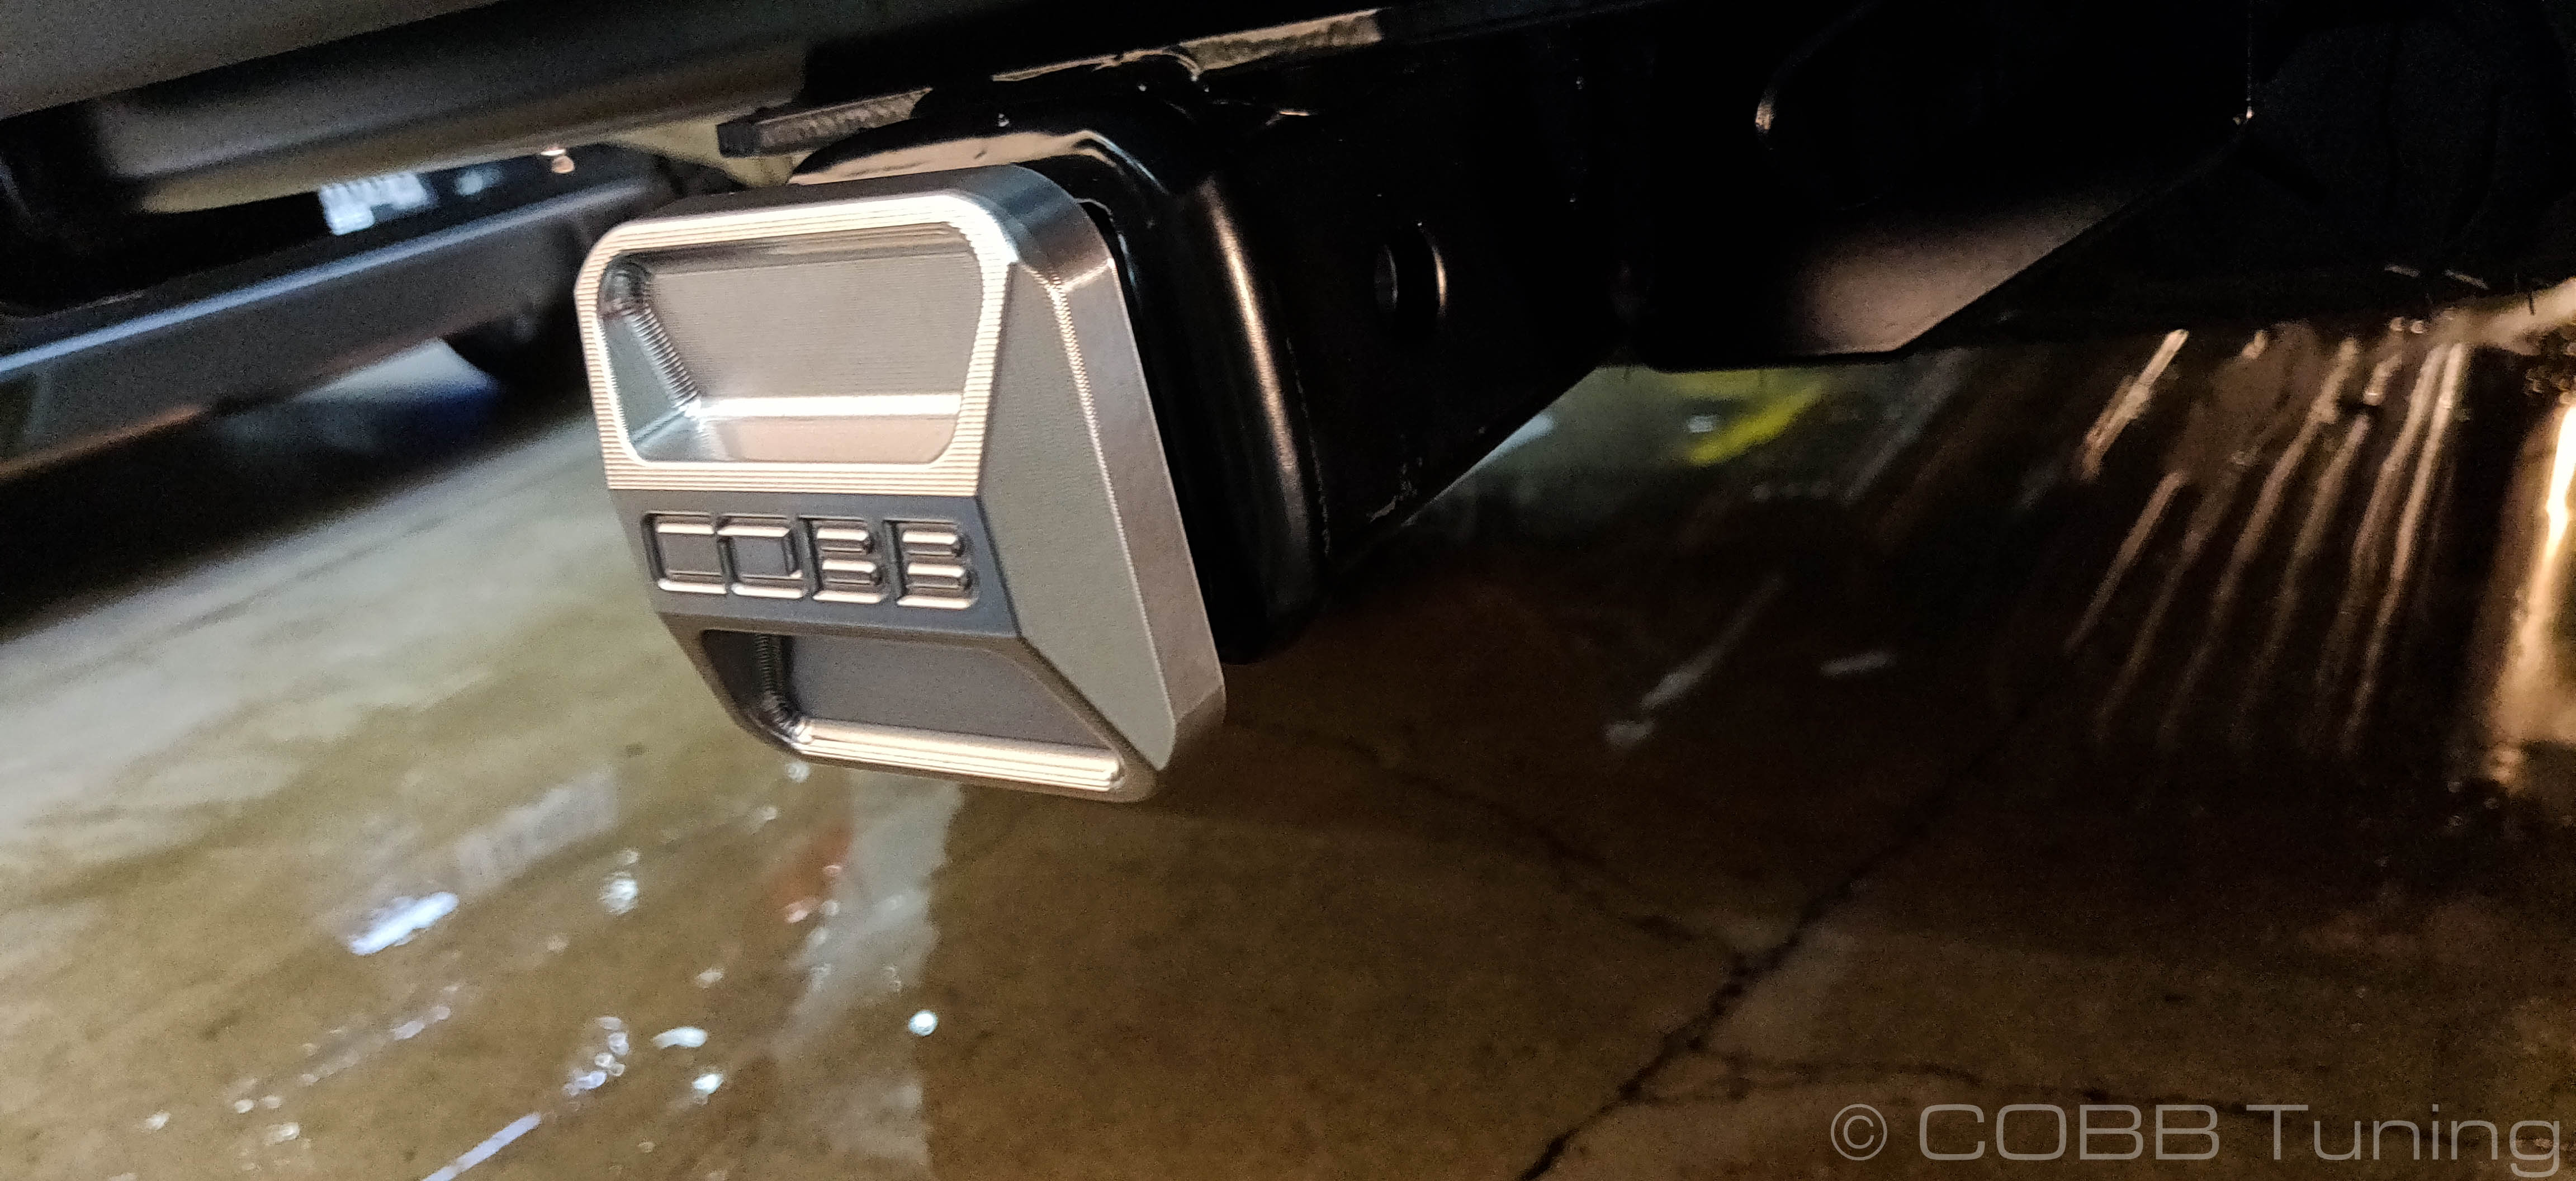
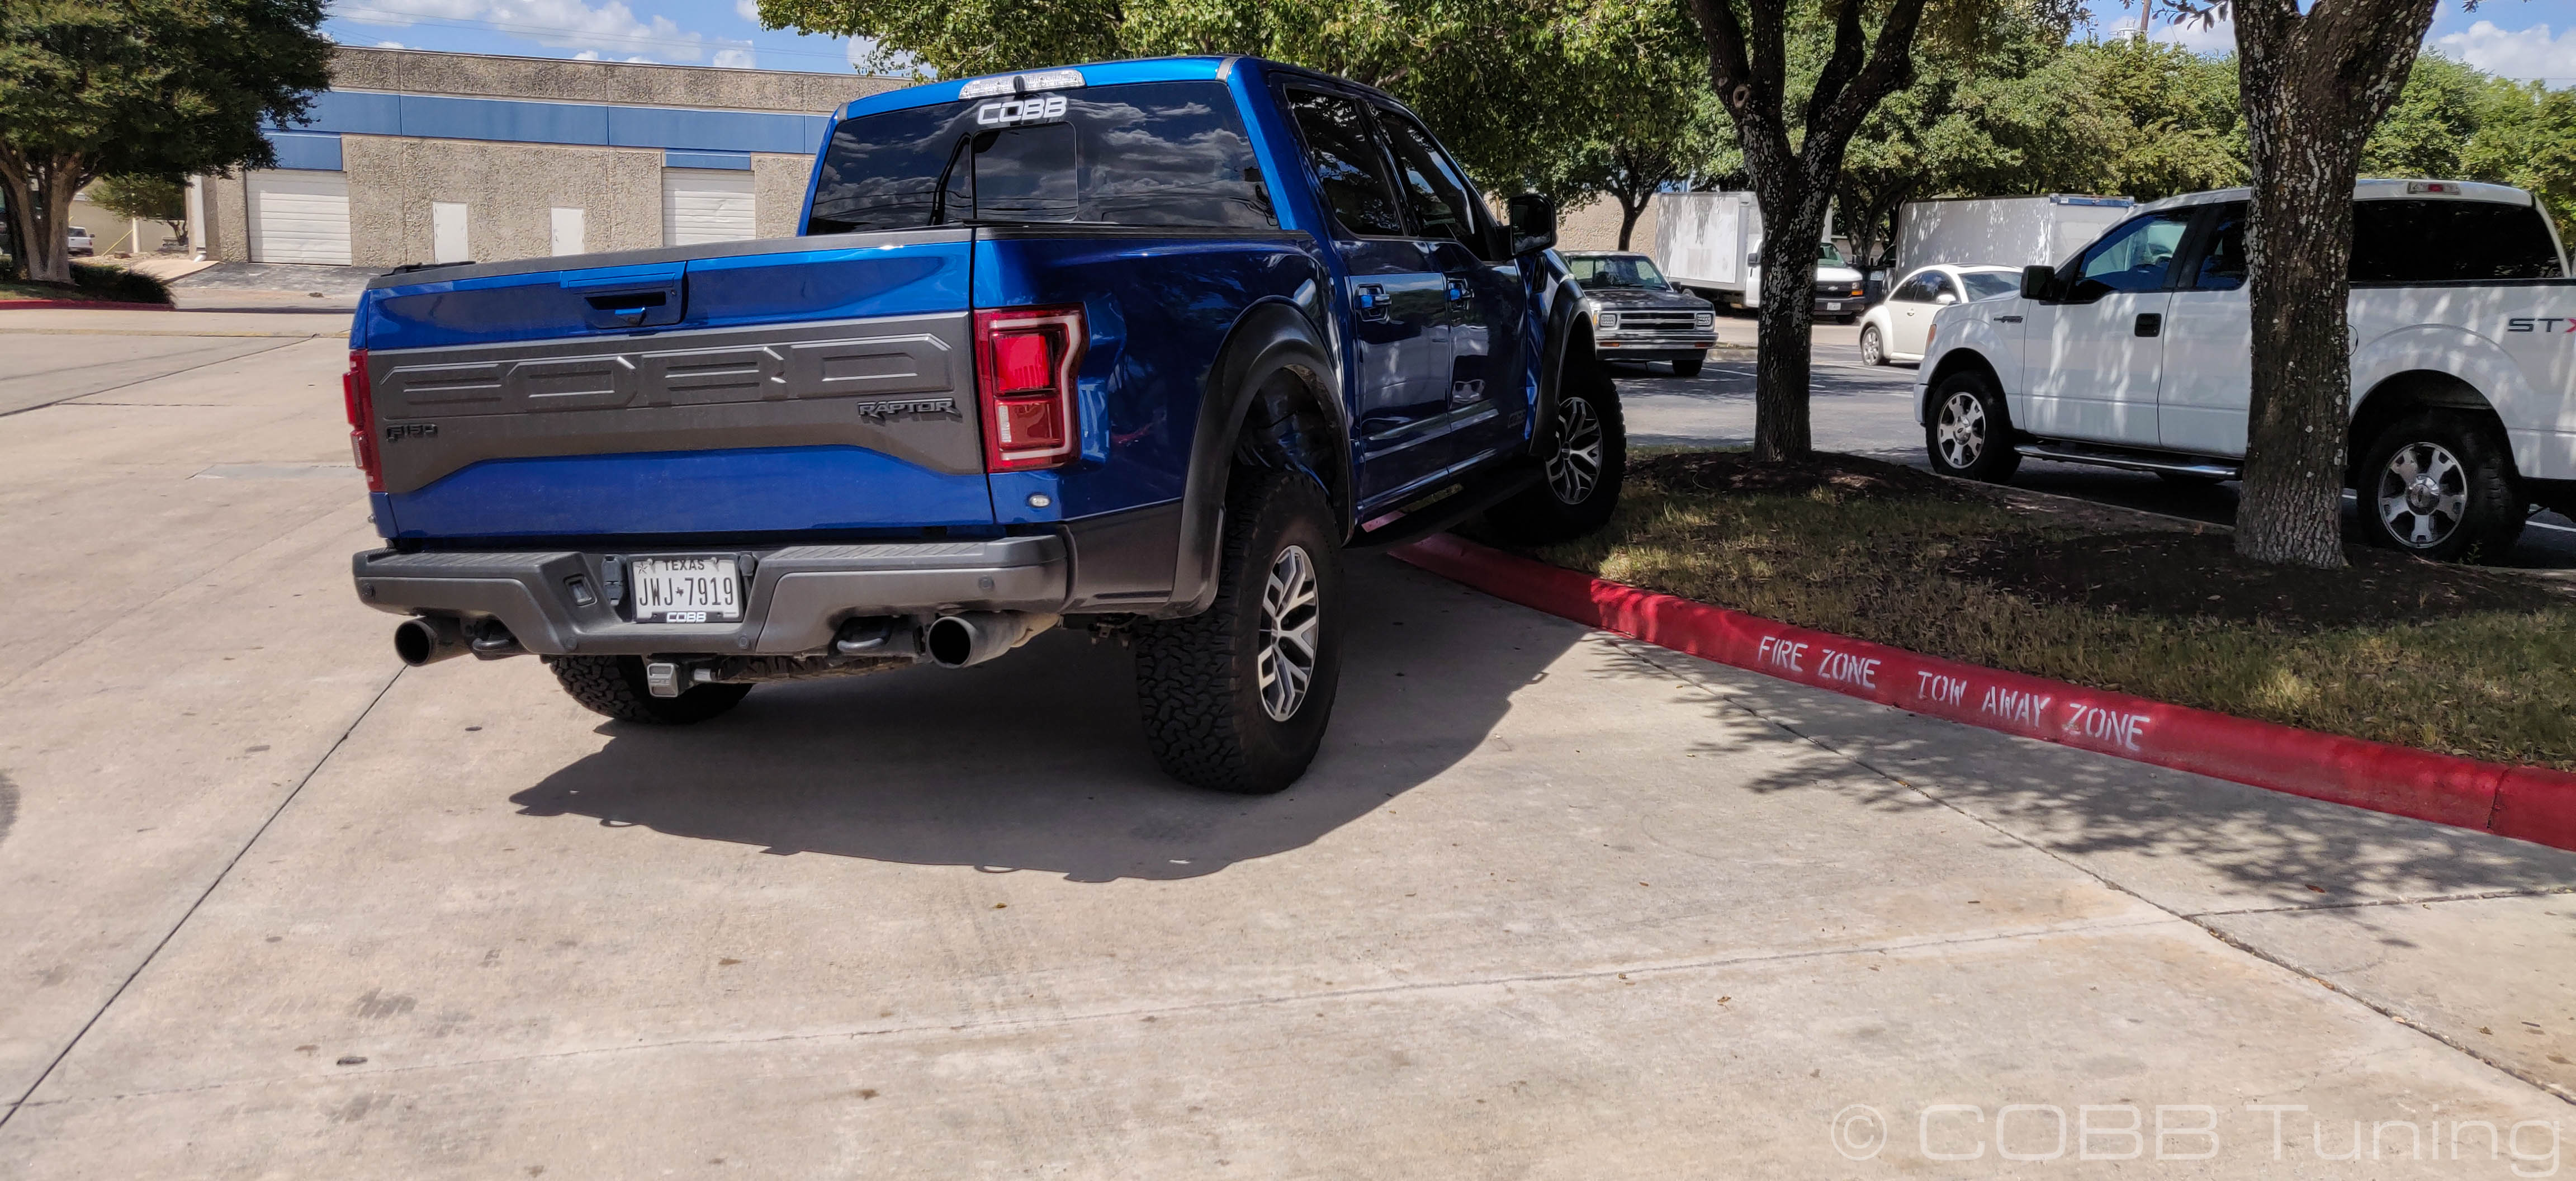
- You're all done! Go out and enjoy.
Links
COBB Customer Support Web Support and Tech Articles: COBB Tuning Customer Support Center Email: support@cobbtuning.com Phone support available 9am to 6pm Monday-Thursday. 9am to 4pm Friday (CST) 866.922.3059 return to www.cobbtuning.comContact Us: