
BPV REBUILD-KIT - XLE BPV Rebuild Kit
Universal - ONLY WORKS ON CURRENT GENERATION BPV
Congratulations on your purchase of the COBB Bypass Valve Rebuild Kit! The following instructions will assist you through your installation process. Please read them first BEFORE beginning the install and familiarize yourself with the steps and tools needed. If you feel that you cannot properly perform this installation, we HIGHLY recommend you take the vehicle to a qualified and experienced automotive technician.
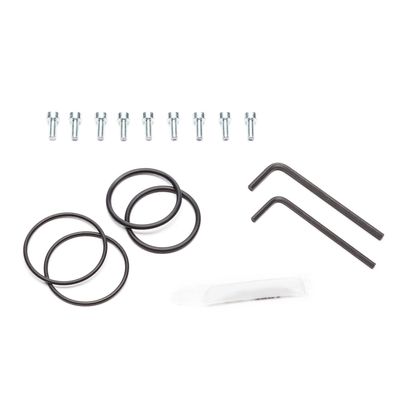
Part List
- (2) small o-rings
- (2) large o-rings
- (9) button head cap screws
- (1) tube of super-lube
- (1) M2.5 hex key
(1) M3 hex key
If you are missing any of the items listed, please immediately contact COBB Support at support@cobbtuning.com.
BPV Rebuild
- Begin by removing the (2) button head cap screws on the nose with the provided M2.5 hex key. Note the orientation of the flange (if applicable) for your reference on reassembly. You can discard these screws.

- Remove the (6) or (7) button head cap screws on the base flange with the provided M3 hex key. You can discard these screws.

- Remove the piston from the body of the BPV by pushing through the nose opening. You can also apply pressure to the back of the piston by blowing through the vacuum port, if necessary.


- Clean the BPV piston using a cloth soaked in rubbing alcohol or brake cleaner to remove any oil residue.

- Using an o-ring pick, remove the o-ring from the BPV piston.

- Apply super-lube one of the thin o-rings and install it onto the BPV piston.


- Clean the BPV body using a cloth soaked in rubbing alcohol or brake cleaner to remove any oil residue.

- Reinsert the BPV piston spring and verify it's orientation.

- Insert the BPV piston, verifying that the o-ring is not pinched at the top of the nose opening.


- Remove the outer o-ring from the BPV base flange.

- Apply super-lube to a thin o-ring and insert it on the outside of the BPV flange.


- Remove the inner o-ring from the BPV flange.

- Apply super-lube to a thick o-ring and insert it on the inside of the BPV flange.


- Insert the base flange on the BPV body and attach it via the provided button head cap screws.

- Remove the o-ring from the BPV nose.

- Apply super-lube to a thick o-ring and insert it on the BPV nose.


- Attached the BPV nose to the BPV body using the provided button head cap screws.


Related Video
Widget Connector url https://www.youtube.com/watch?v=4oauy7tL0Fs&feature=youtu.be
| Insert excerpt |
|---|
|
|