
316630, 316650 - Legacy GT Spec B Flex Fuel Kit
Subaru Legacy GT Spec B
316630
column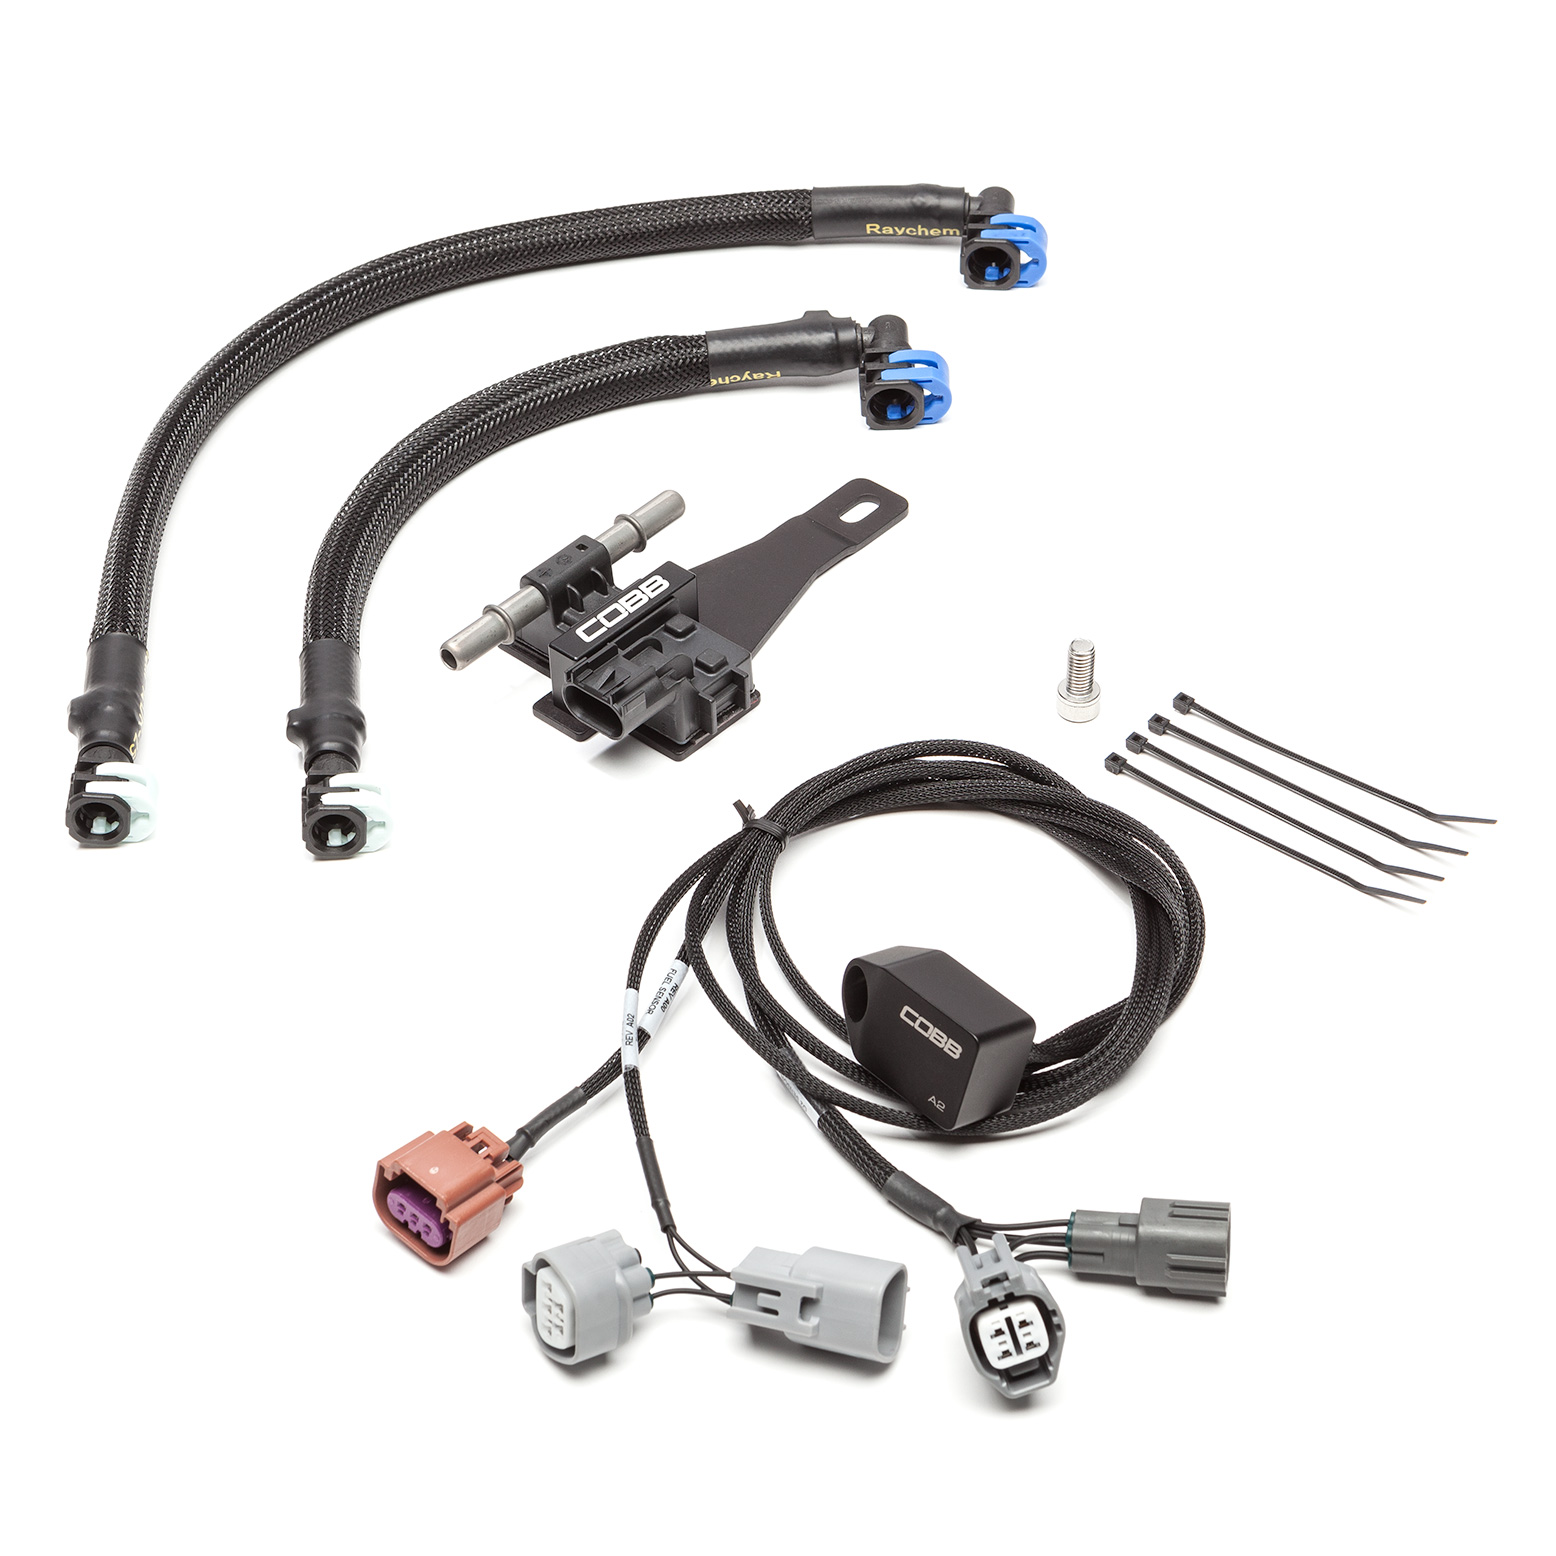
Congratulations on your purchase of the COBB Tuning Flex Fuel kit! The following instructions will assist you through the installation process. Please read them BEFORE beginning the install to familiarize yourself with the steps and tools needed. If you feel you cannot properly perform this installation, we HIGHLY recommend you take the vehicle to a qualified and experienced automotive technician.
IMPORTANT! Installing this kit will require custom tuning or utilizing an appropriate Stage Power Package map if you have a matching mechanical configuration. Please consult with COBB or an authorized ProTuner in your area.
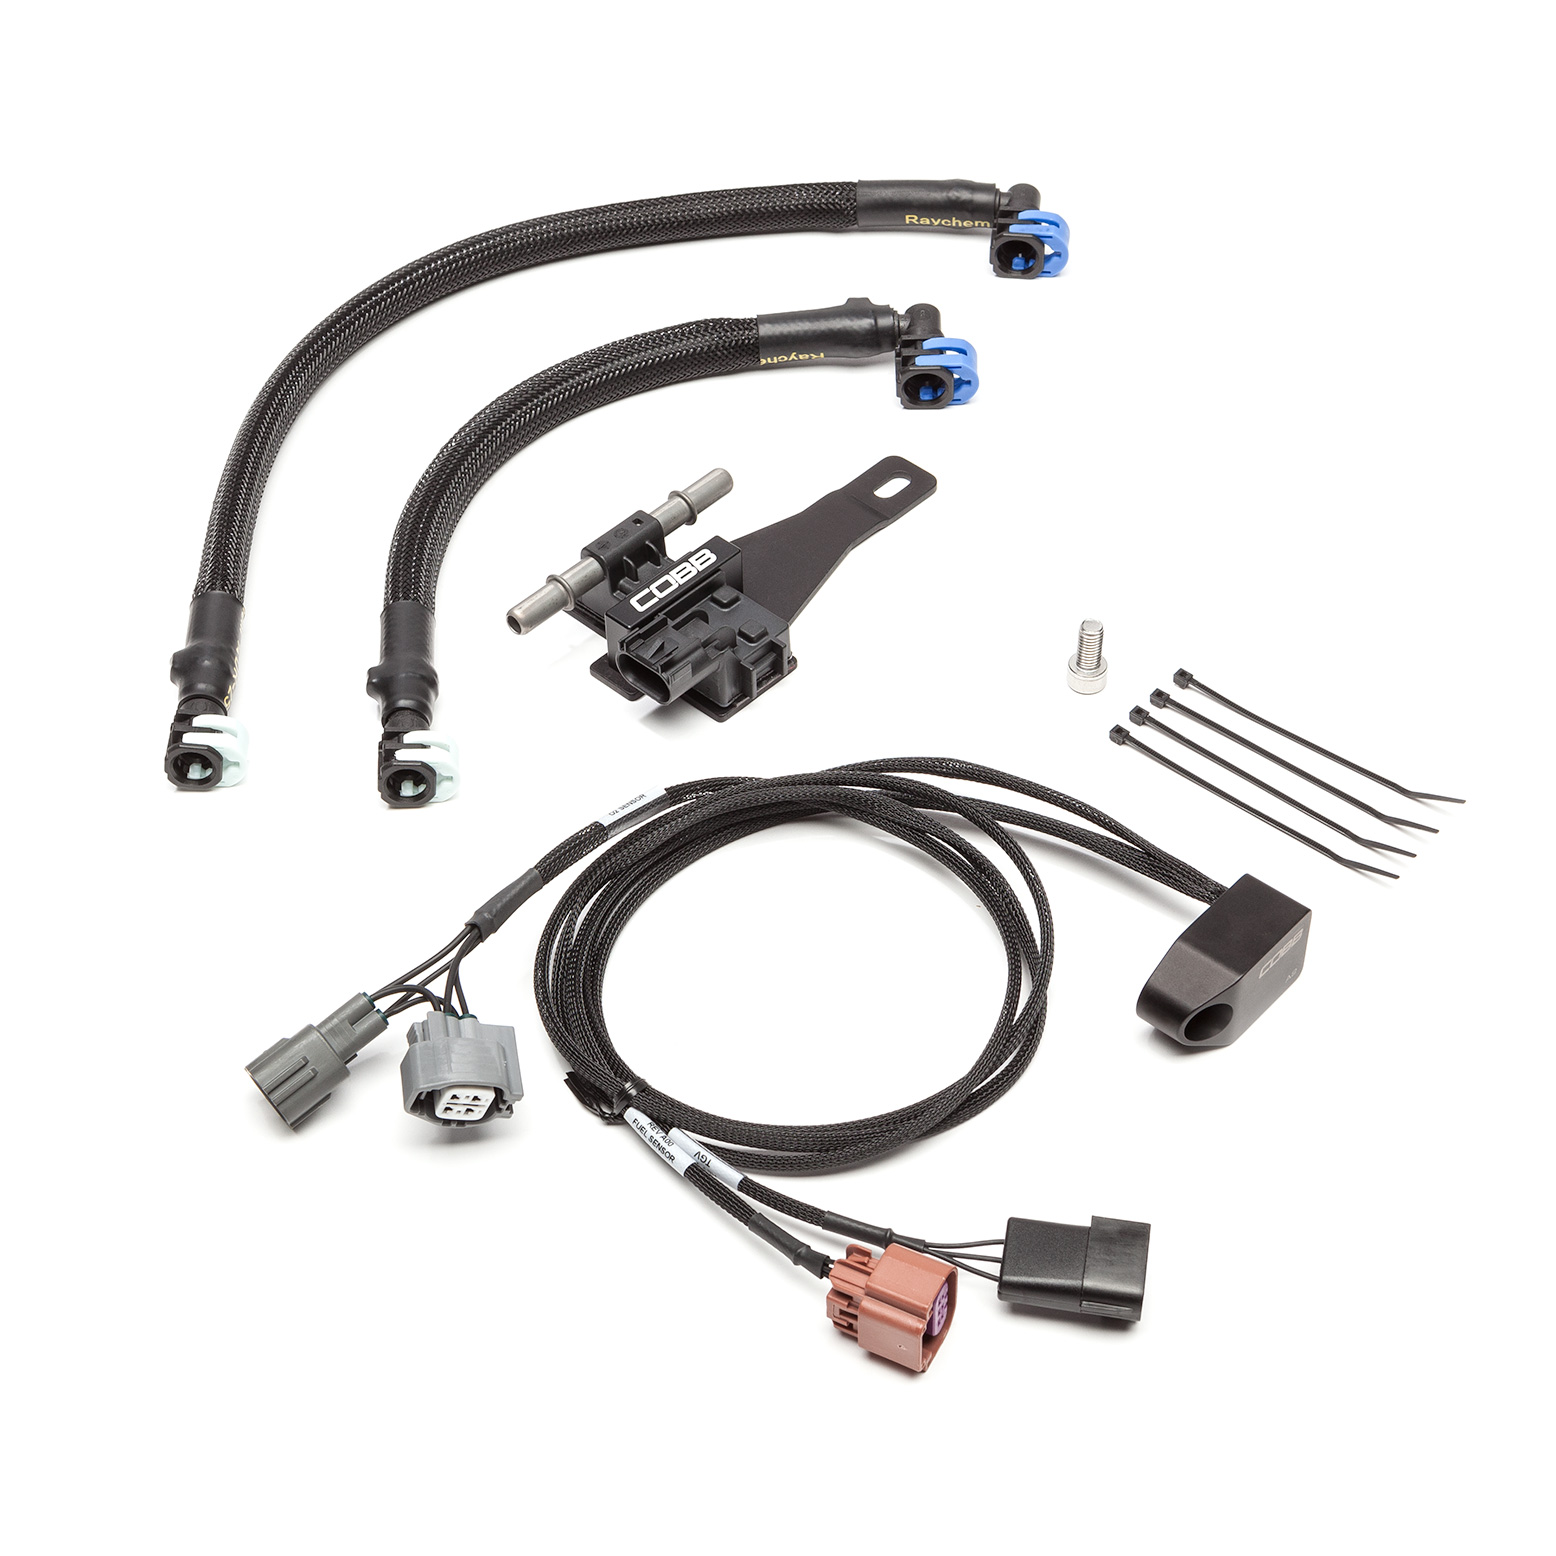
Part List
- 1 x Flex Fuel Module
- 1 x Flex Fuel Sensor
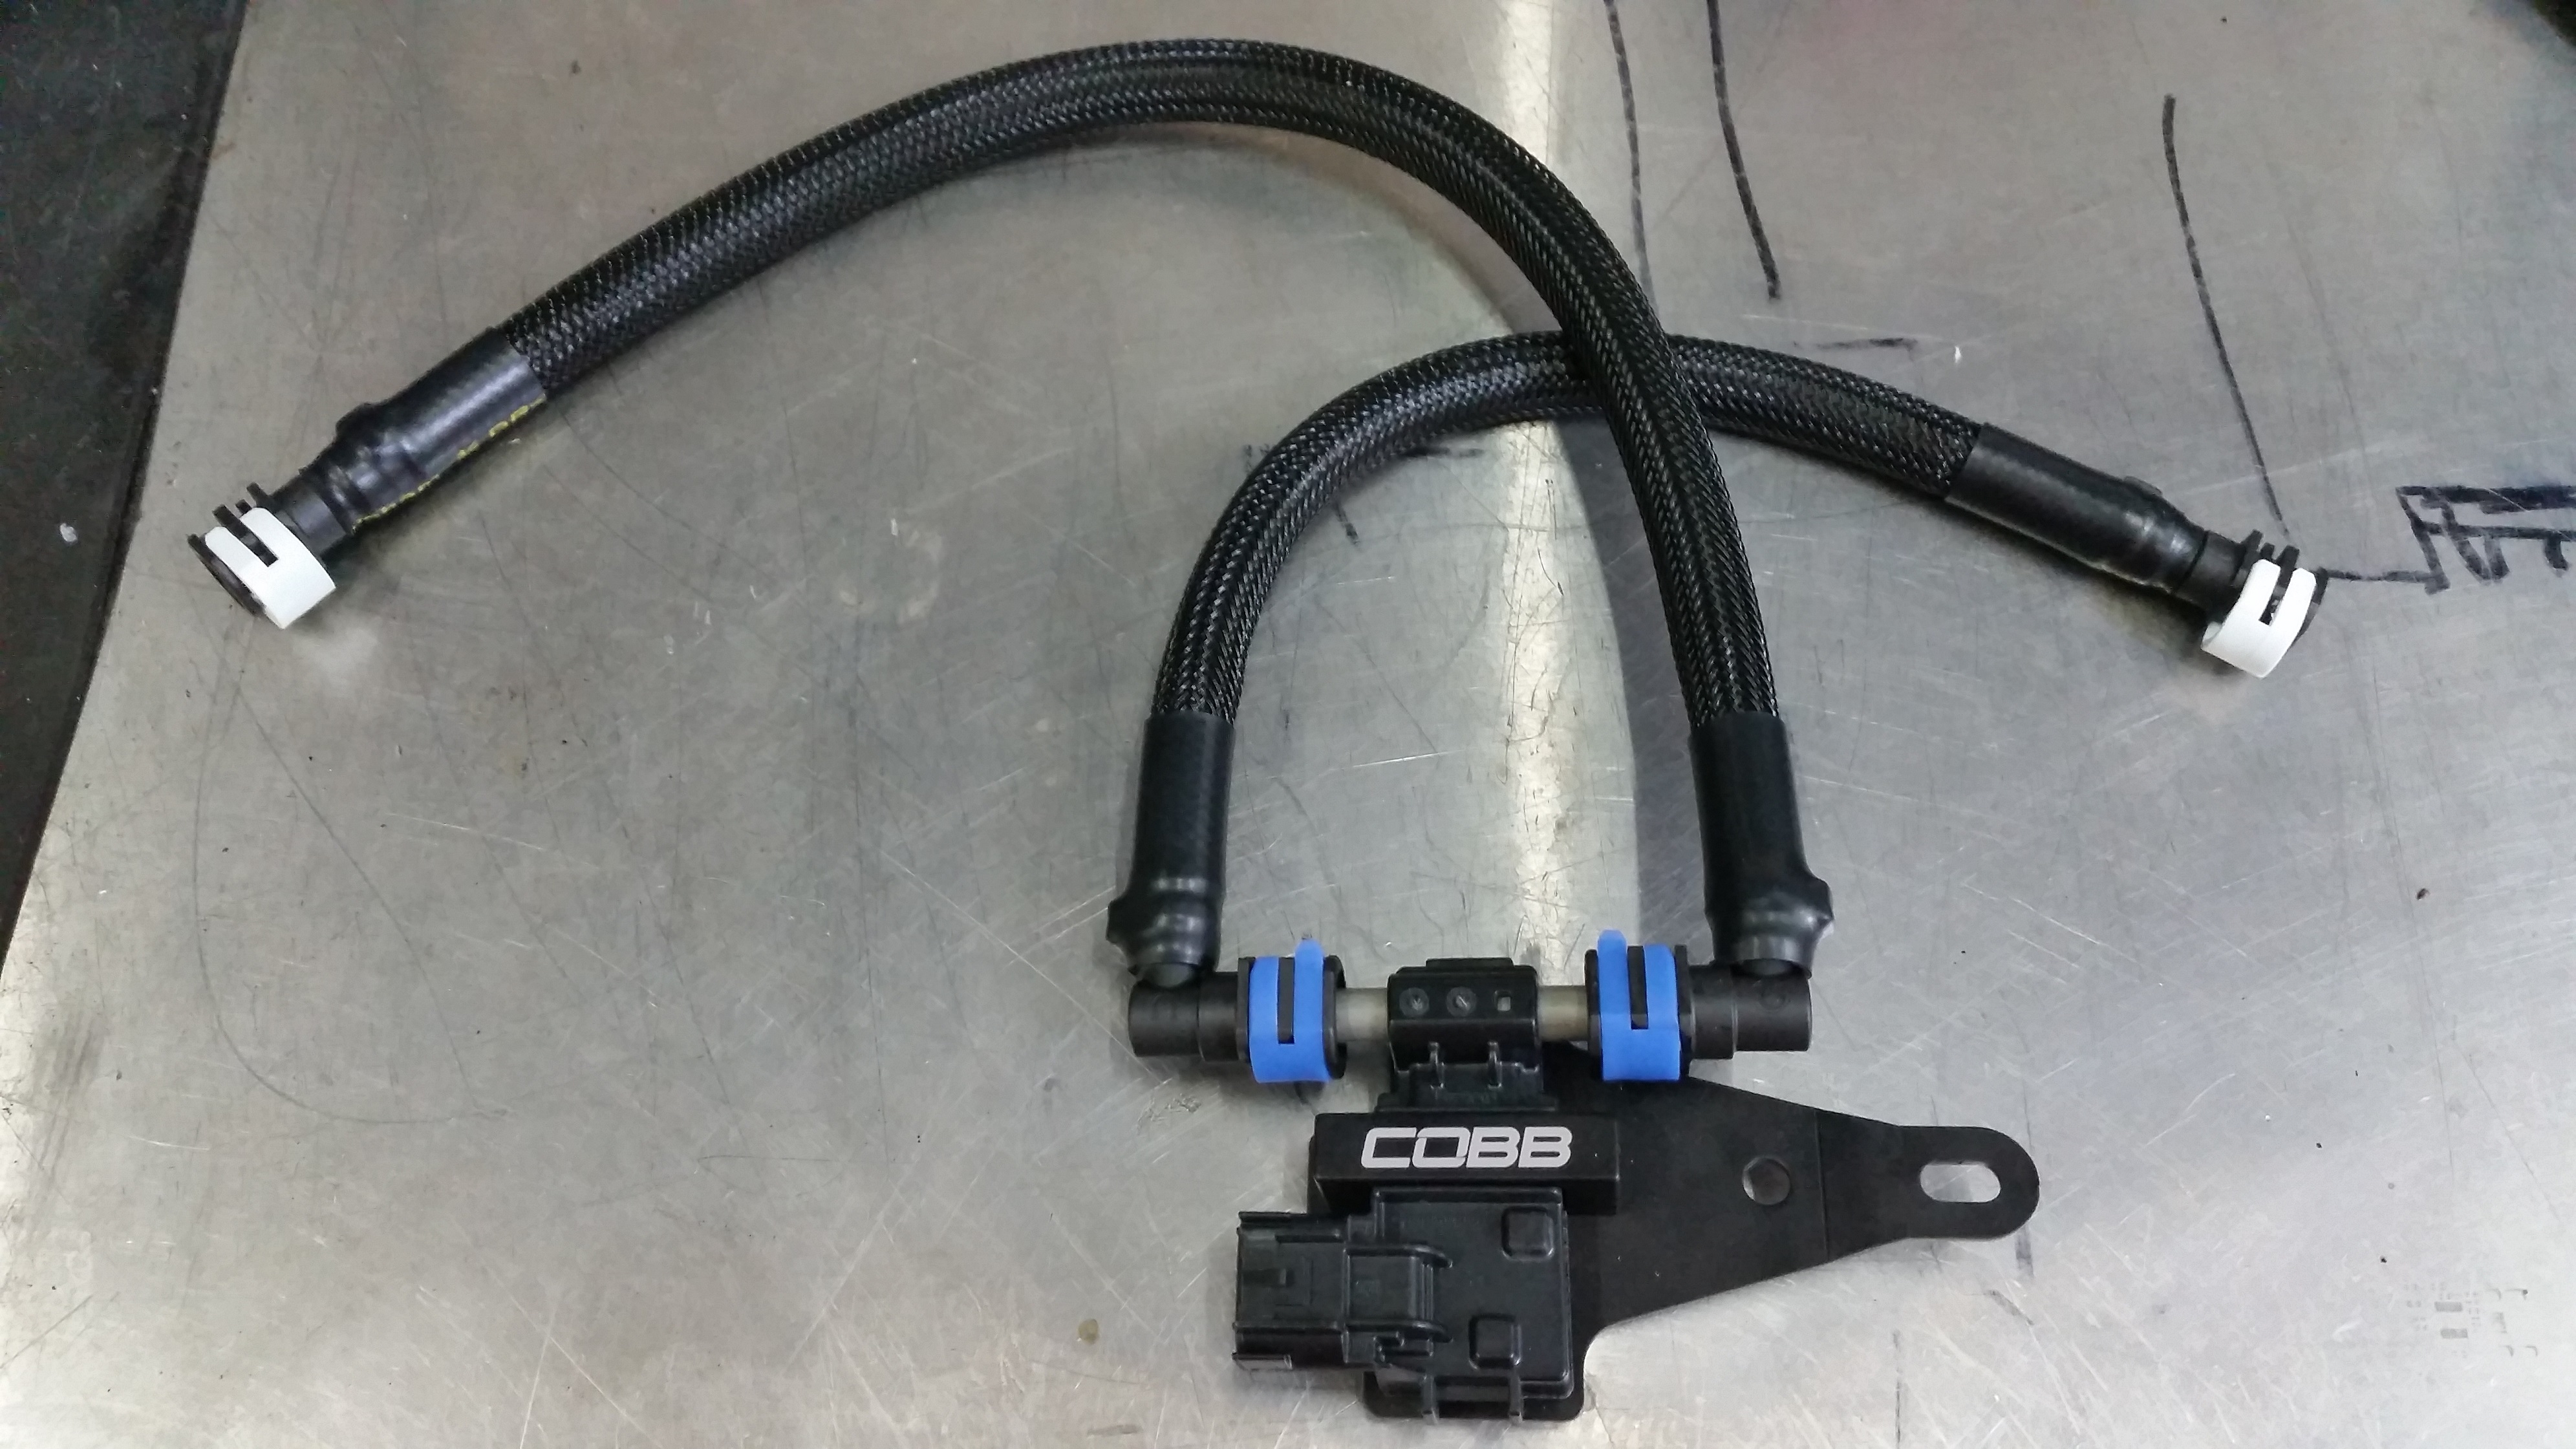
- 1 x Long Assembled Fuel Line
- 1 x Short Assembled Fuel Line
- 1 x Mounting Bolt
- 3 x large Zip Ties
- 2 x Medium Zip Ties
Tools Needed
- 7mm Nut Driver
- Flat Head Screwdriver
- Trim clip removal tool (optional)
- 10mm Wrench
- 12mm Wrench
- 10mm Socket
- 12mm Socket
- Ratchet
- Pliers
- Safety Glasses
- Rags
- Silicone Spray or Similar
Important! Before removing your fuel line, make sure to discharge existing fuel pressure from the system. Failure to do so can result in fire, property damage, and/or death!
Initial Preparation and Removal of Existing Fuel Lines
- Inspect the new components included with the COBB kit. If anything appears out of place, please contact COBB immediately and do not proceed with the installation.
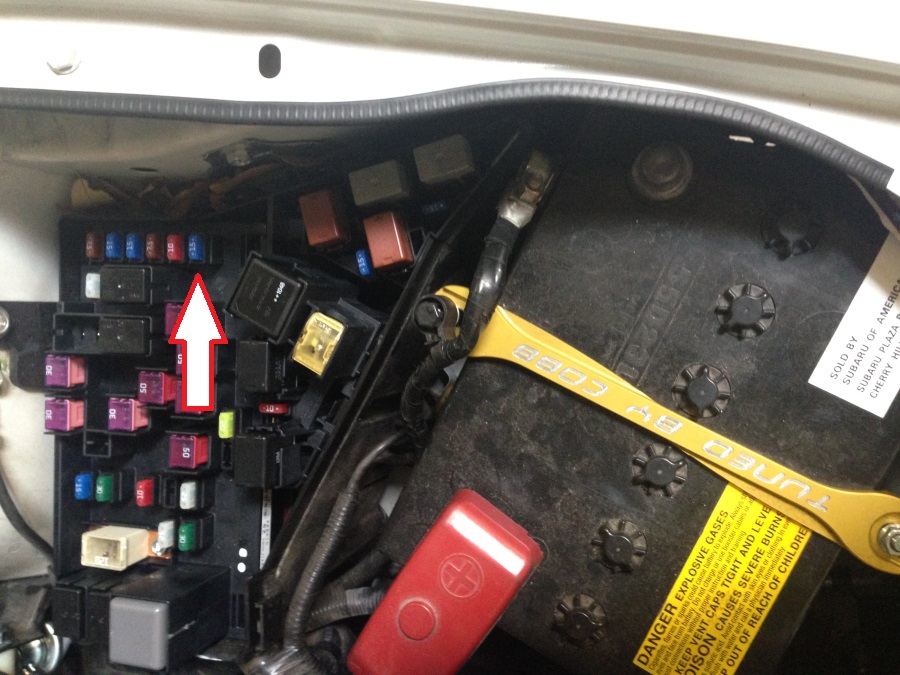
- Make sure the engine is off and completely cool. Discharge the existing fuel pressure from the system. Consult the factory service manual for OEM methods. One potential method is to disable the fuel pump by pulling the fuse on the driver's side of the engine bay (consult the underside of the lid for correct fuse location), then attempt to start the vehicle. The vehicle will likely run for a brief moment and stall. Fuel pressure is reduced by this method, but some pressure may remain in the system.
- Raise and suitably support the vehicle. Never work on a vehicle supported by a jack alone.
- Disconnect the vehicle's negative battery terminal, then positive battery terminal with a 10mm wrench or socket. Ensure no sources of spark or flame are present. Remove battery from vehicle.
- Prepare spill catch rags in case of fuel spills during line removal.
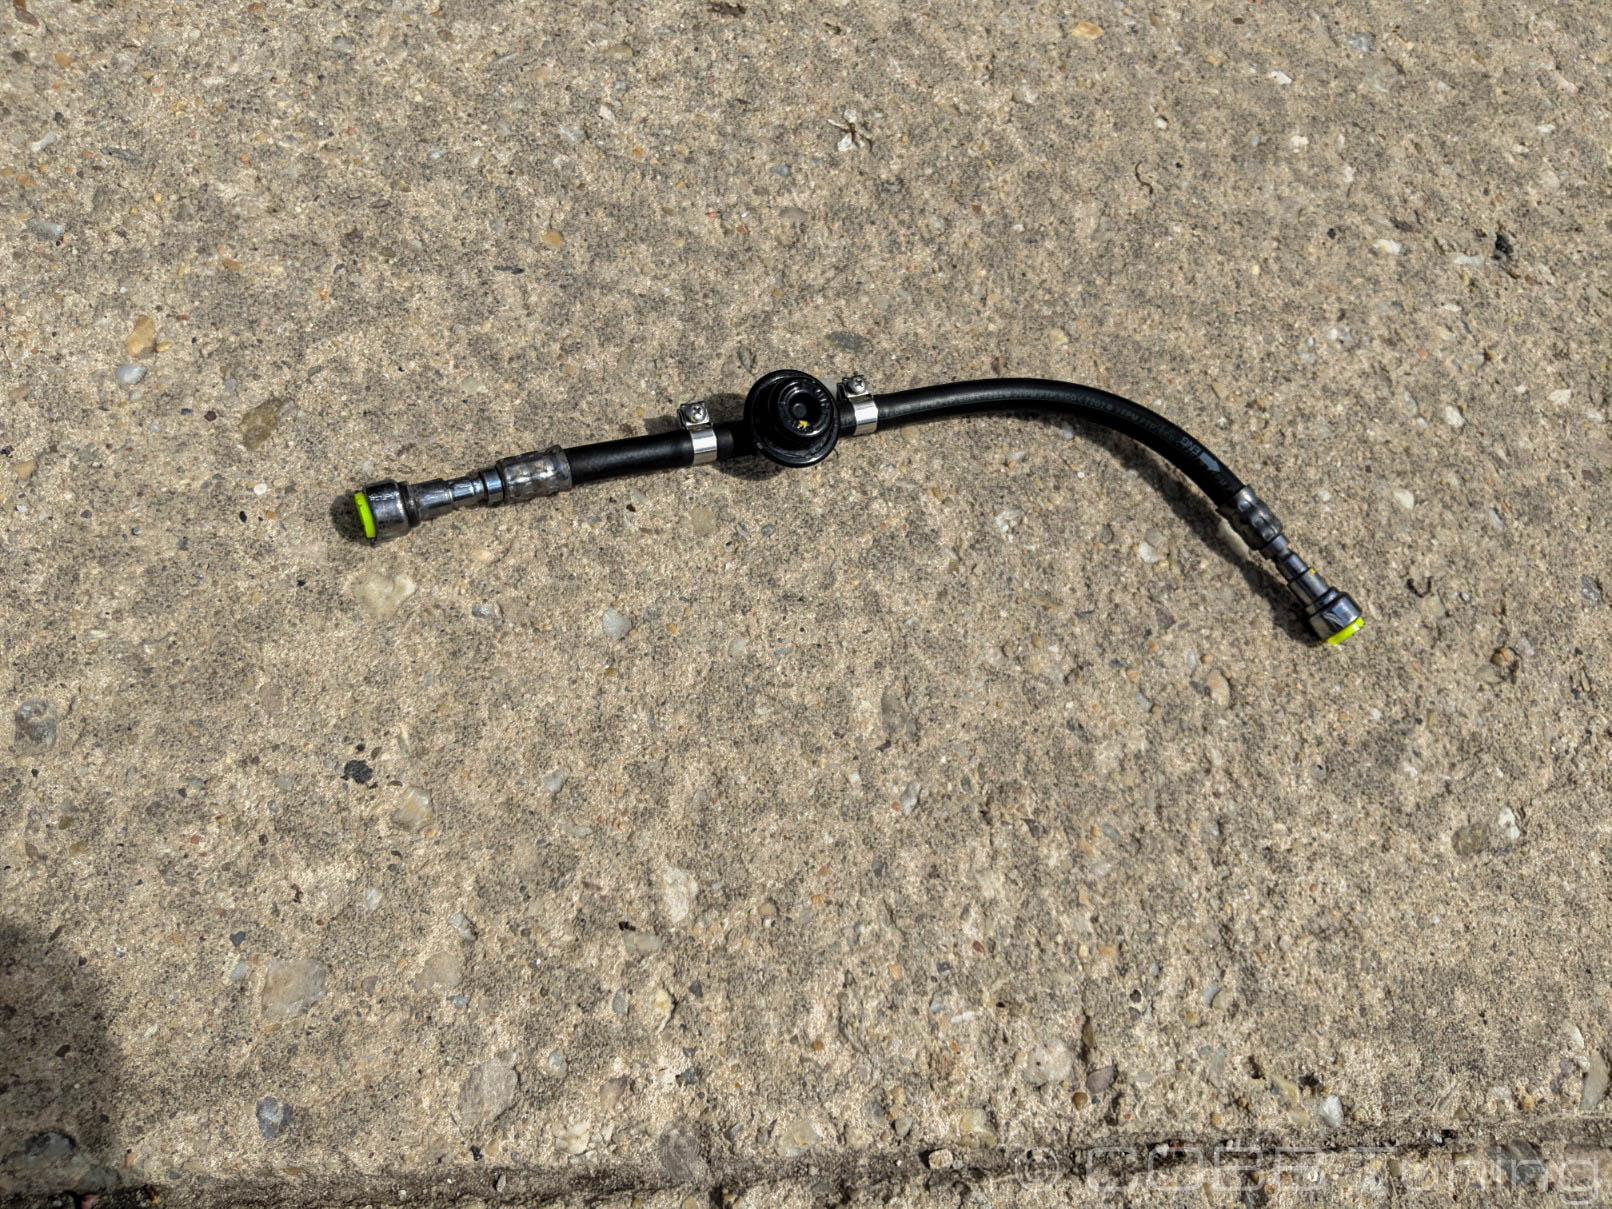
- Remove the top fuel line from the vehicle by using your disconnect tool.
- Remove the leftover plastic tabs from the fuel lines, as they will not be needed with the new lines.
Installation of COBB Flex Fuel Sensor
This can be the most difficult portion of the install! Please take your time to avoid cross-threading the fuse box bolt
- As a suggestion, install the fuel lines on the sensor before installing the assembly in the vehicle. This helps ensure the fuel lines are mated and LOCKED to the male fittings - the lines may need to be rotated slightly to fully insert and operate the latches. The latches will not close unless the line is fully inserted.
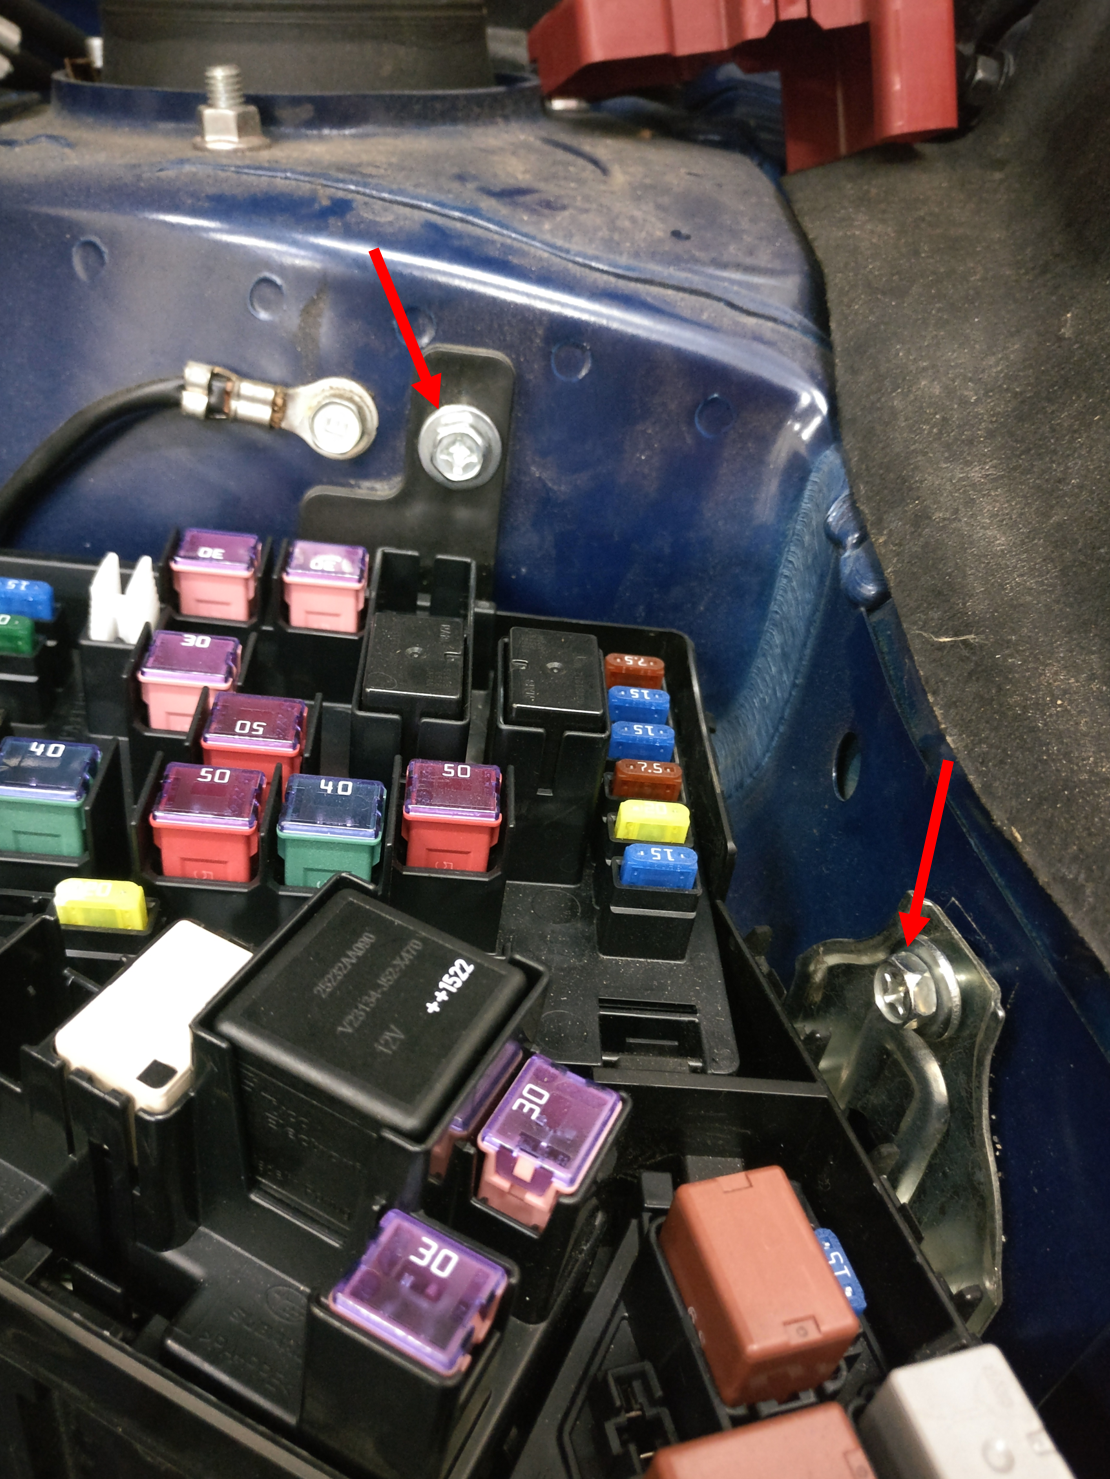
- To install the COBB flex fuel sensor, first remove the lower fuse box bolt shown below using a 10mm socket (similar to previous generation).
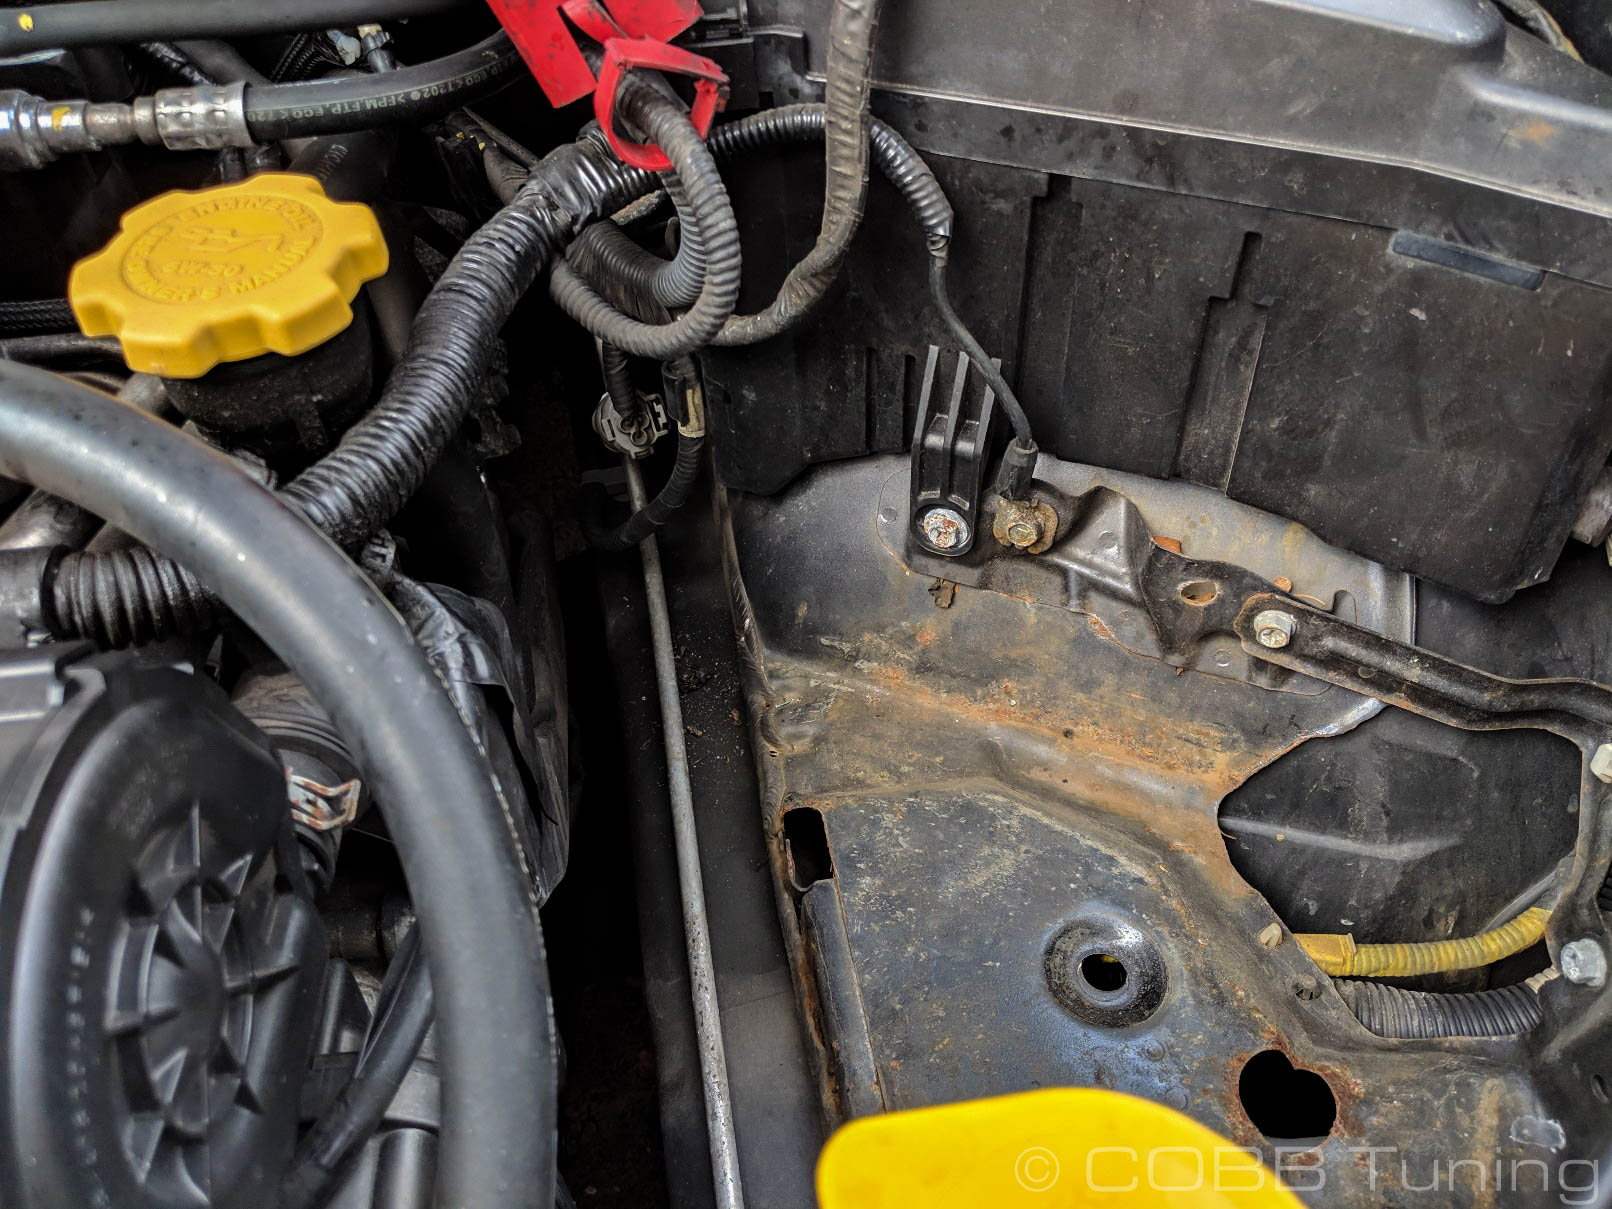
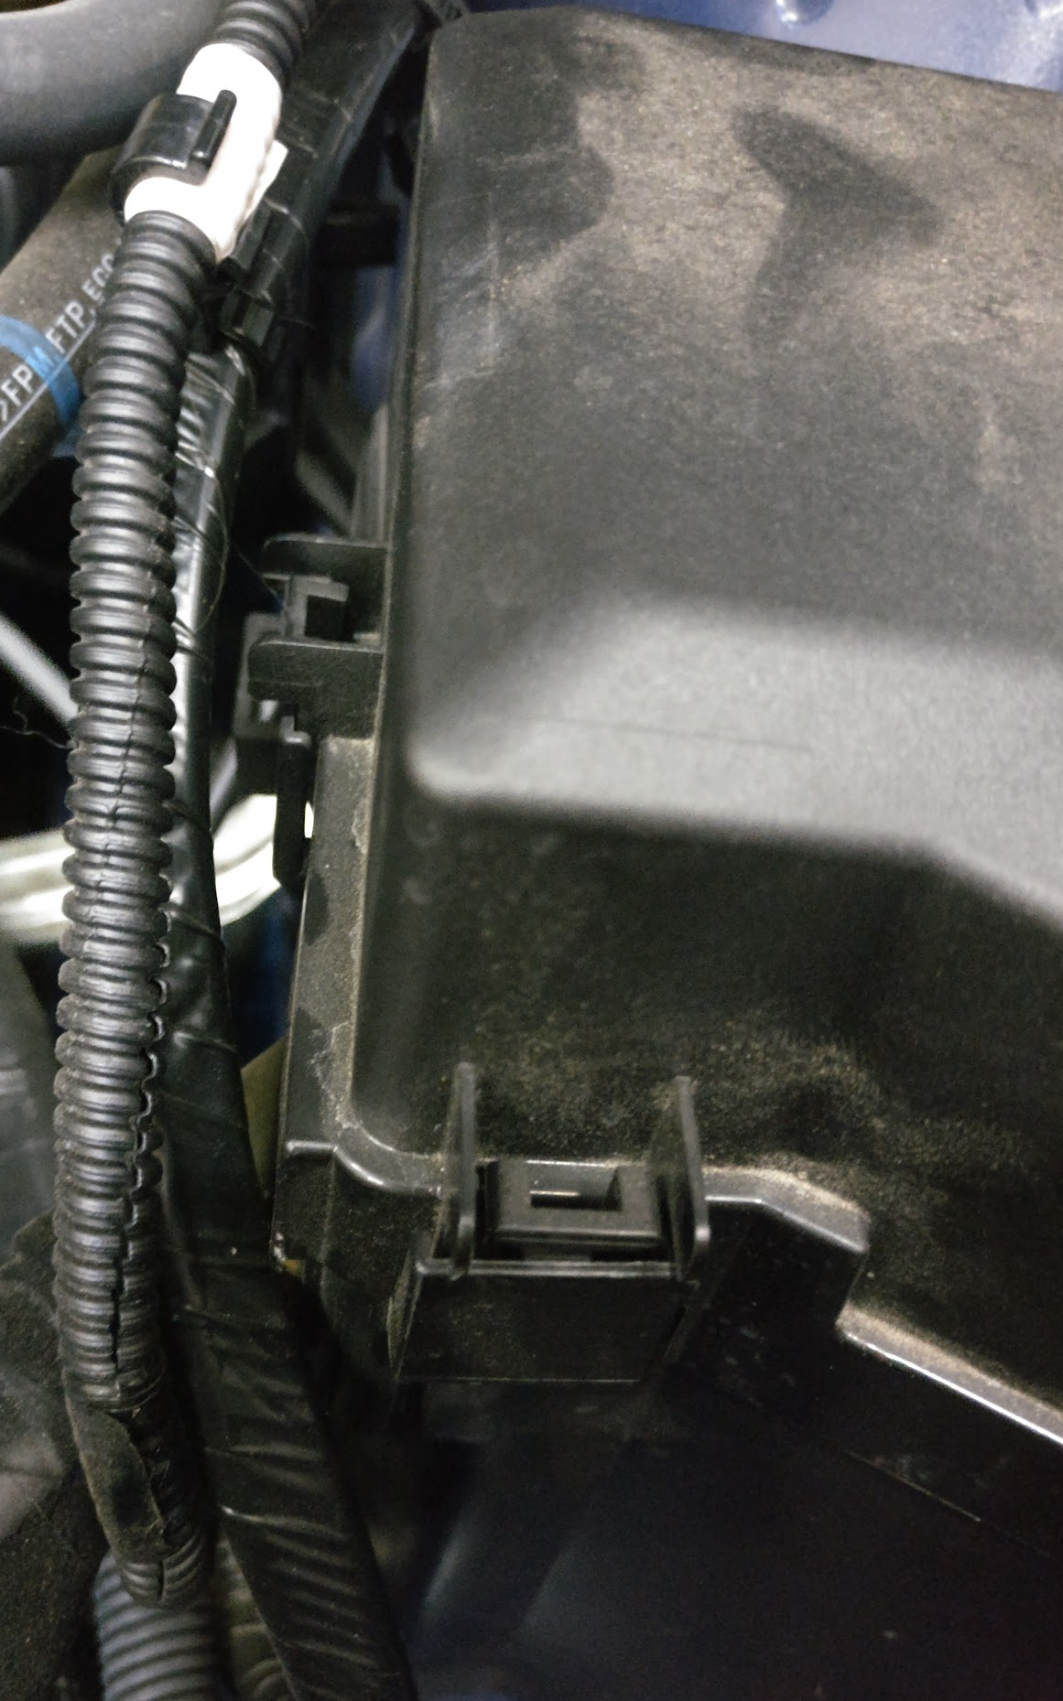
- Before you install the bracket, use a 10mm socket to loosen or remove the two other bolts that hold the fuse box in place. This will make installing the bracket with the stock screw much easier. Remove the lid of the fuse box by pushing in on the two tabs to access the bolts.
- Now you should be able to slide the slotted end of the bracket in between the fuse box and the chassis. Orient the bracket so the fuel connections are on the top, and the electrical connection on the bottom, facing the engine. Use the smaller hole closest to the sensor so that the sensor doesn't hit the metal cover on the engine
Take your time! It may take some finesse and pressing down on the fuse box to line up the holes. It's very easy to cross-thread the attachment point here. Unbolting the fuse box in step 3 should make this step much easier! When tightening with a 10mm socket, make sure that you hold the bracket in the position shown so that it does not shift out of position.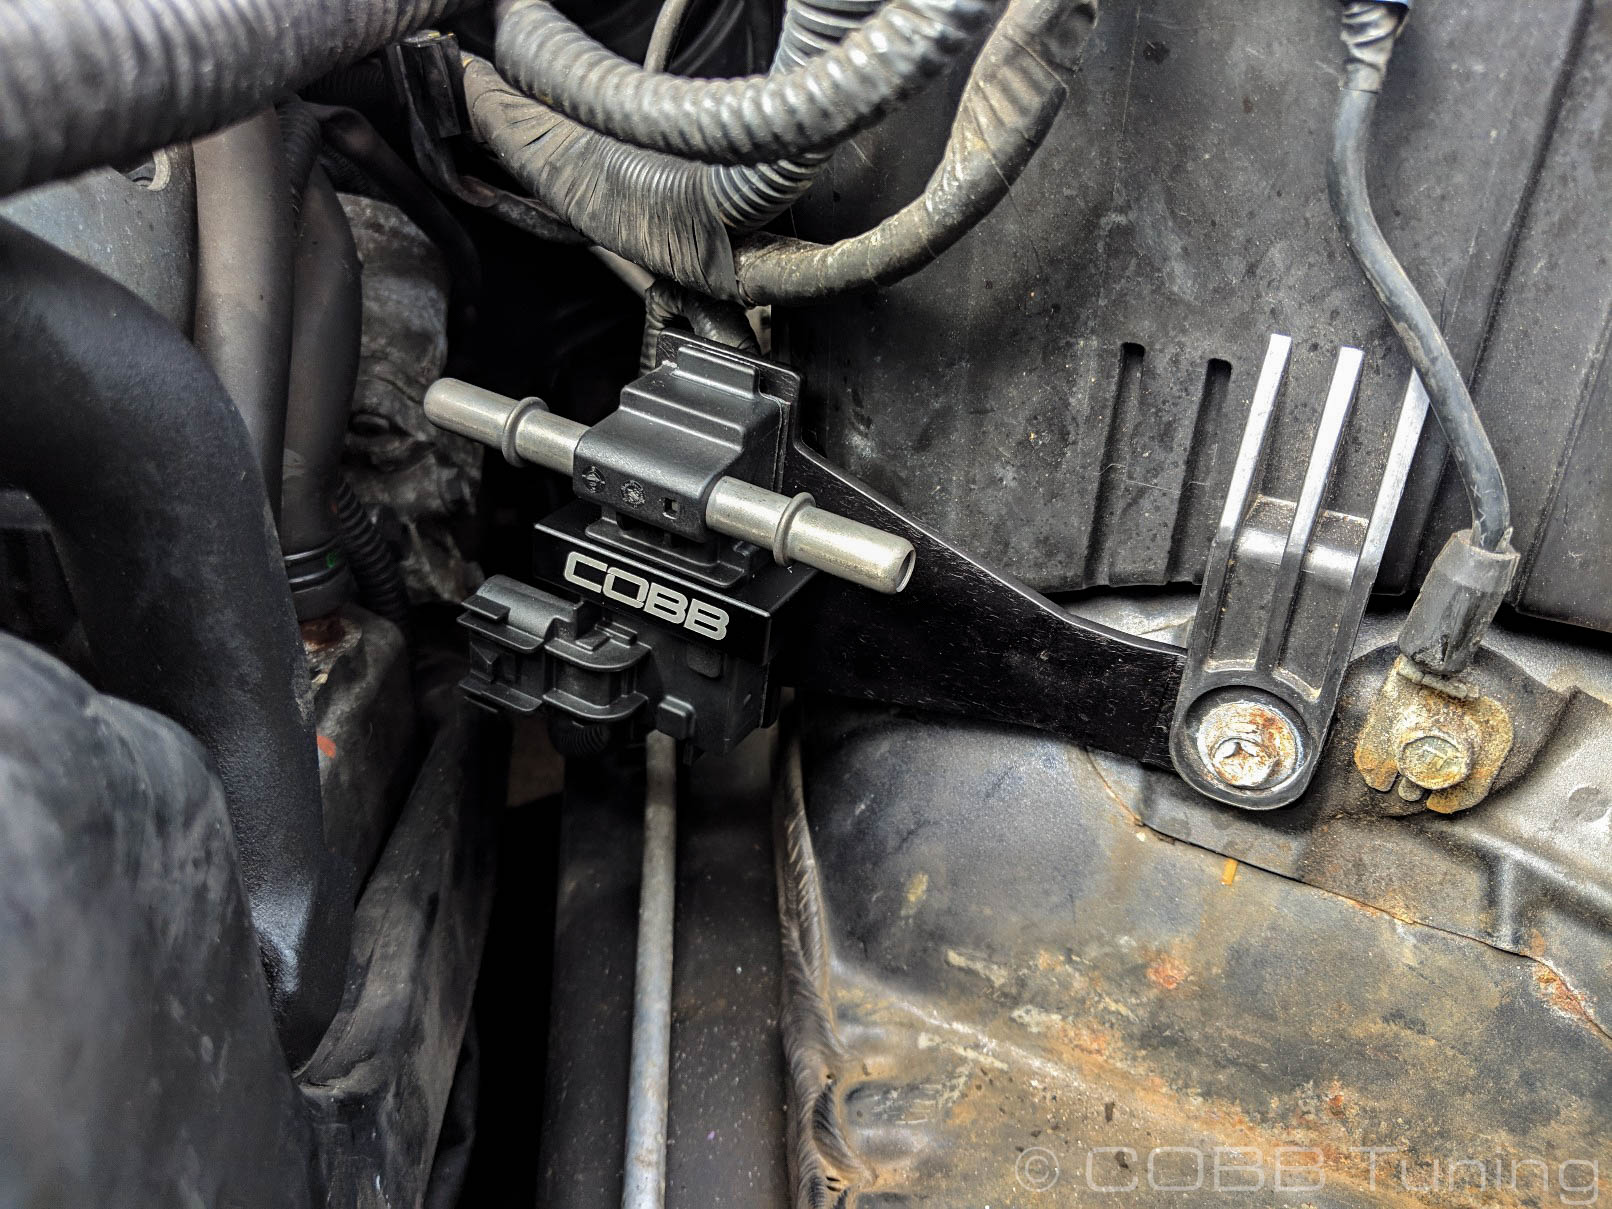
- Reinstall the two other bolts that were removed from the airbox and clip back on the lid.


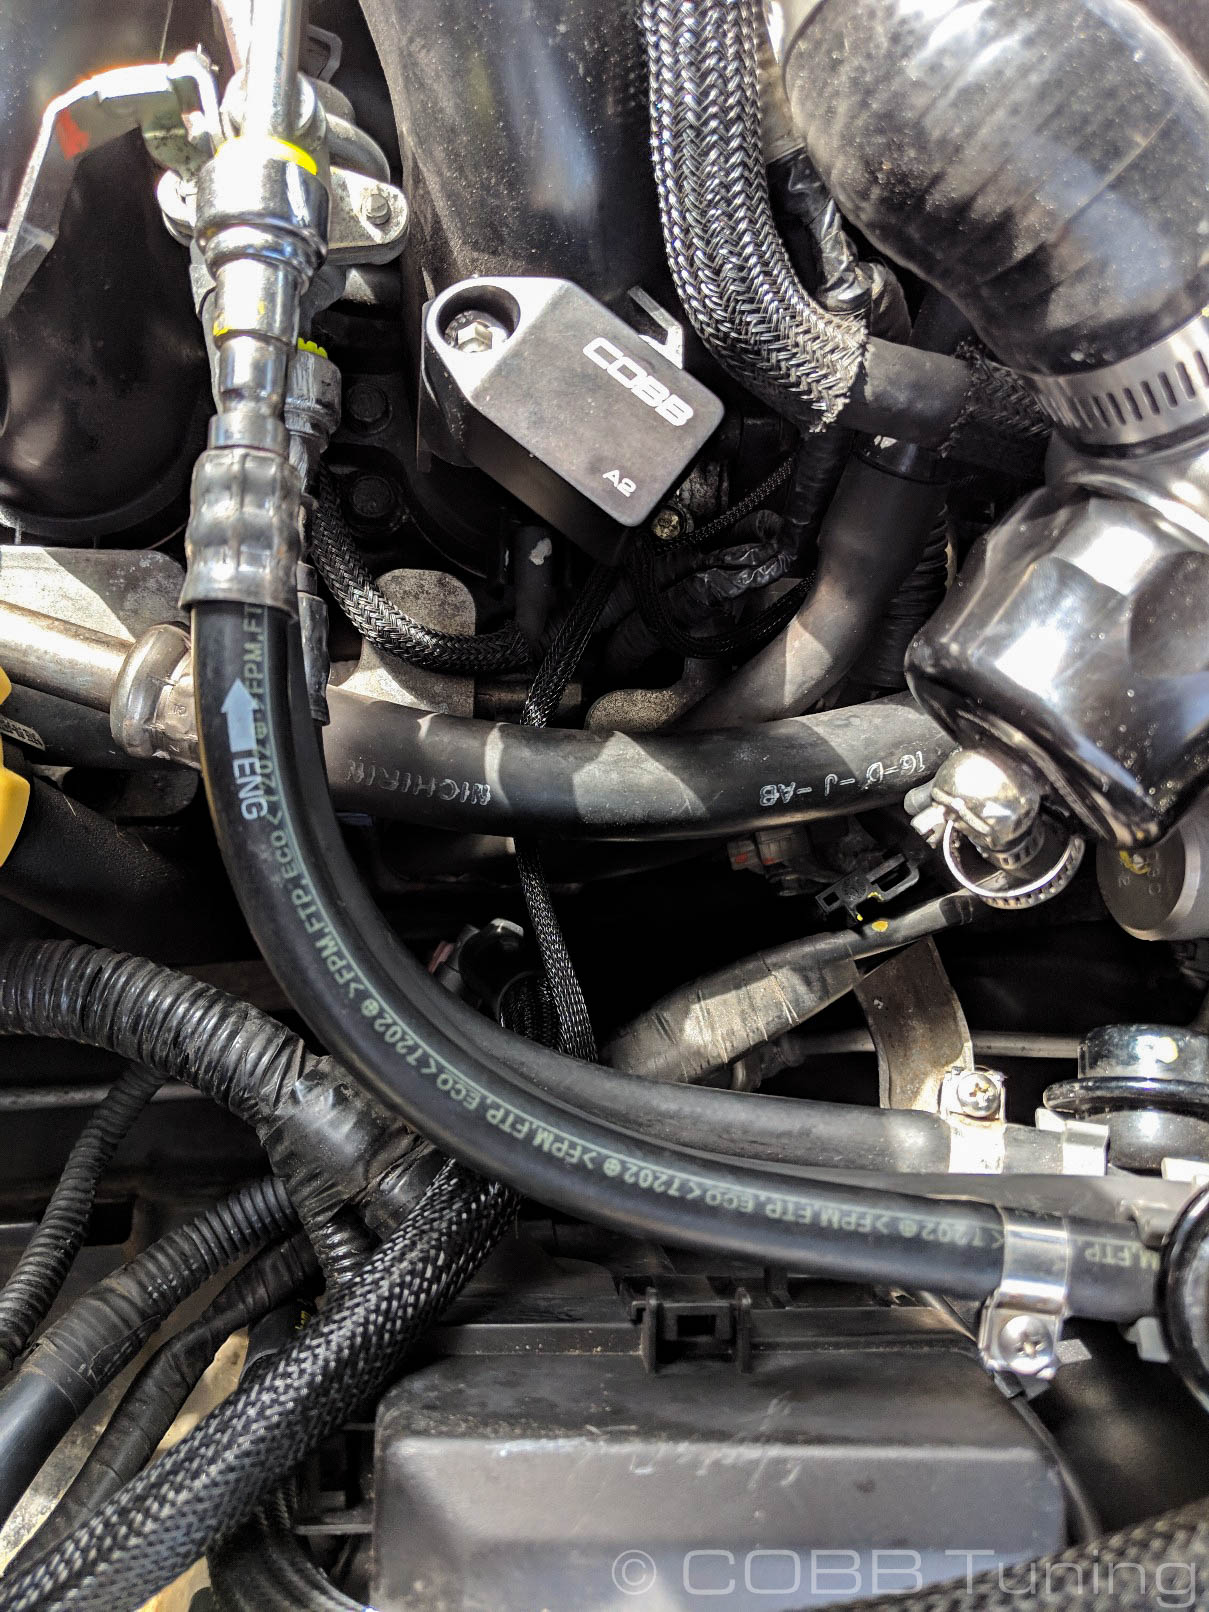
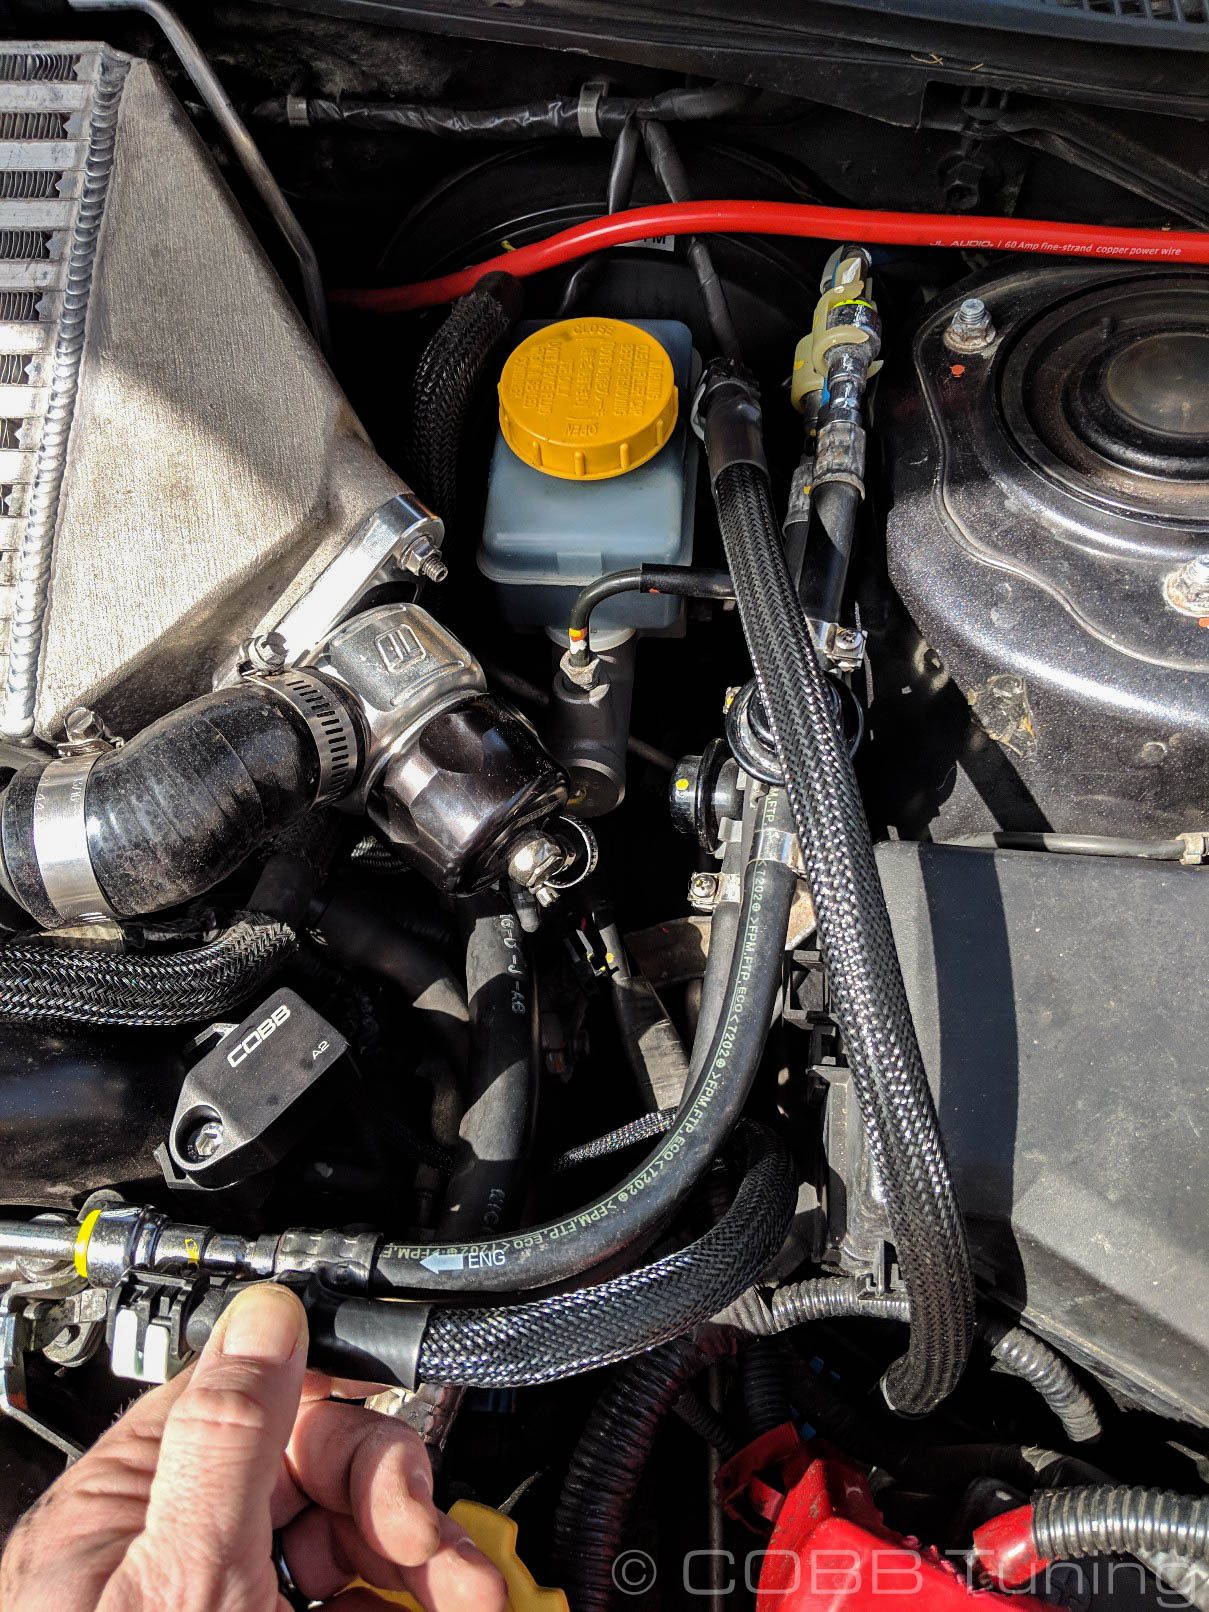
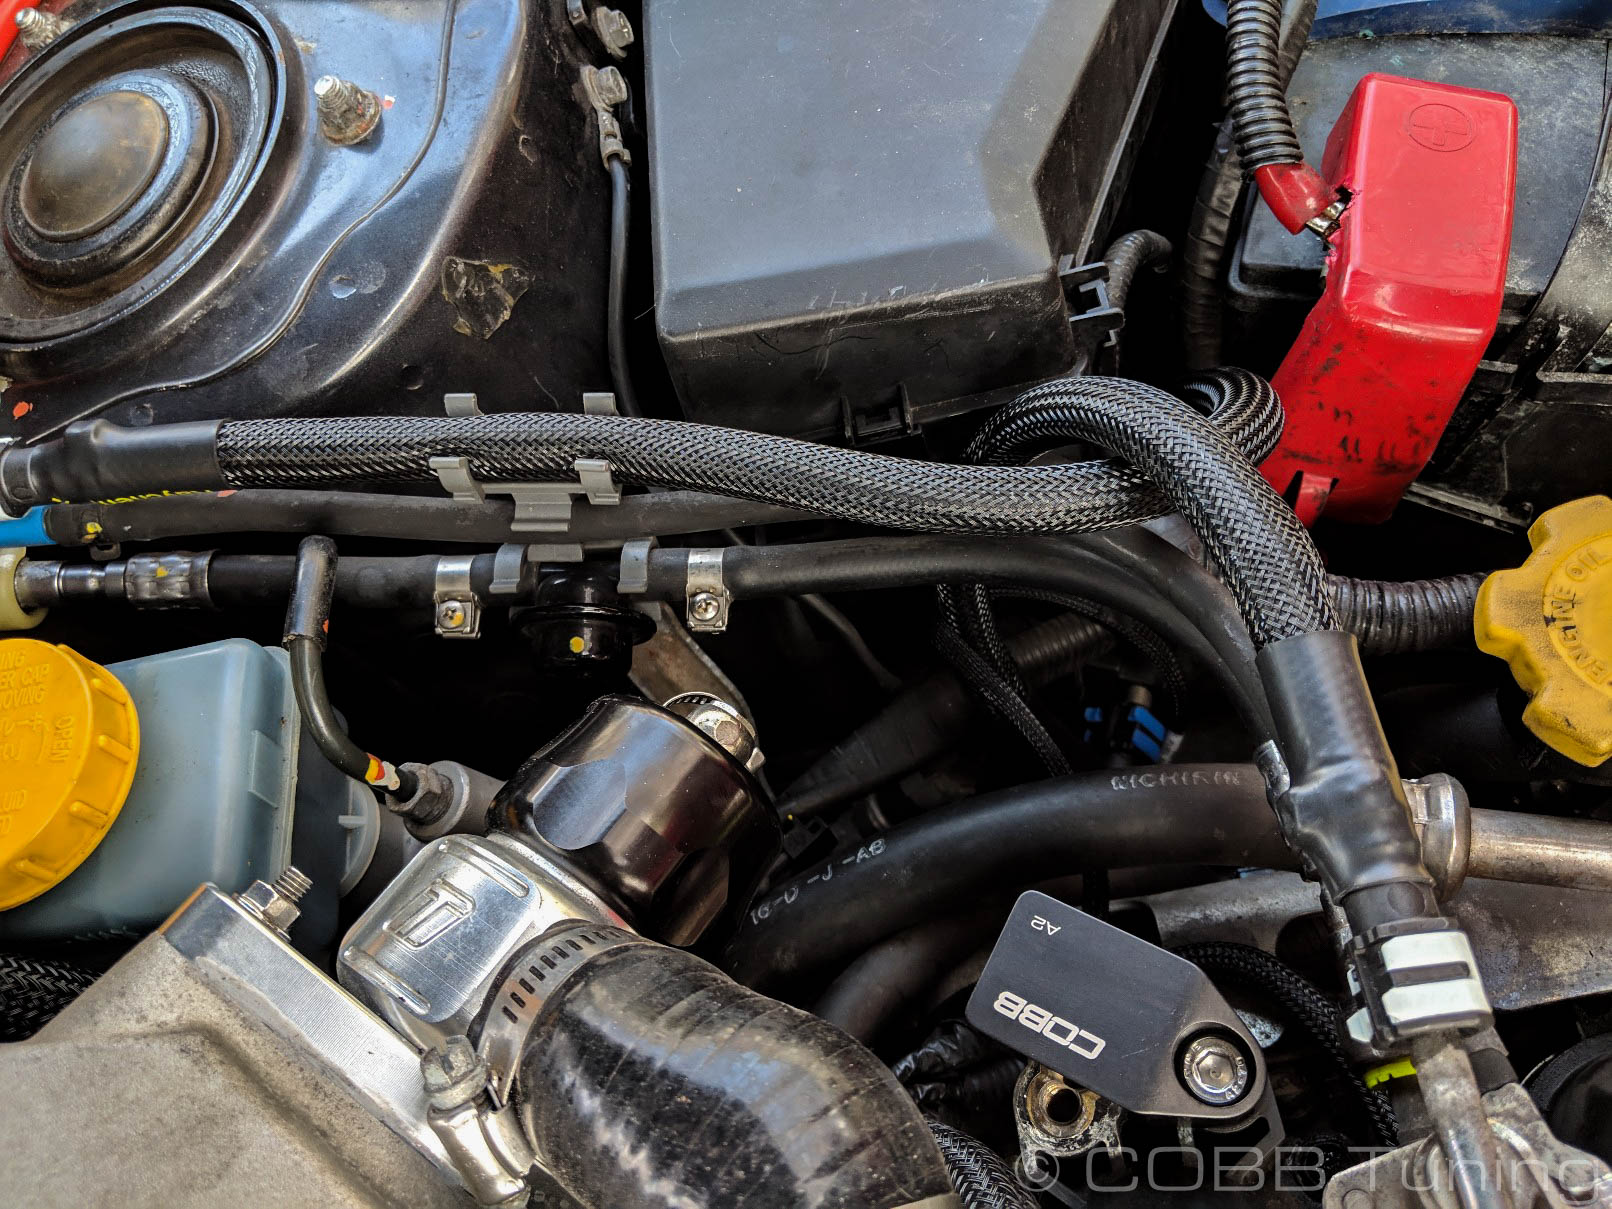
Installation of COBB Flex Fuel Kit Hoses
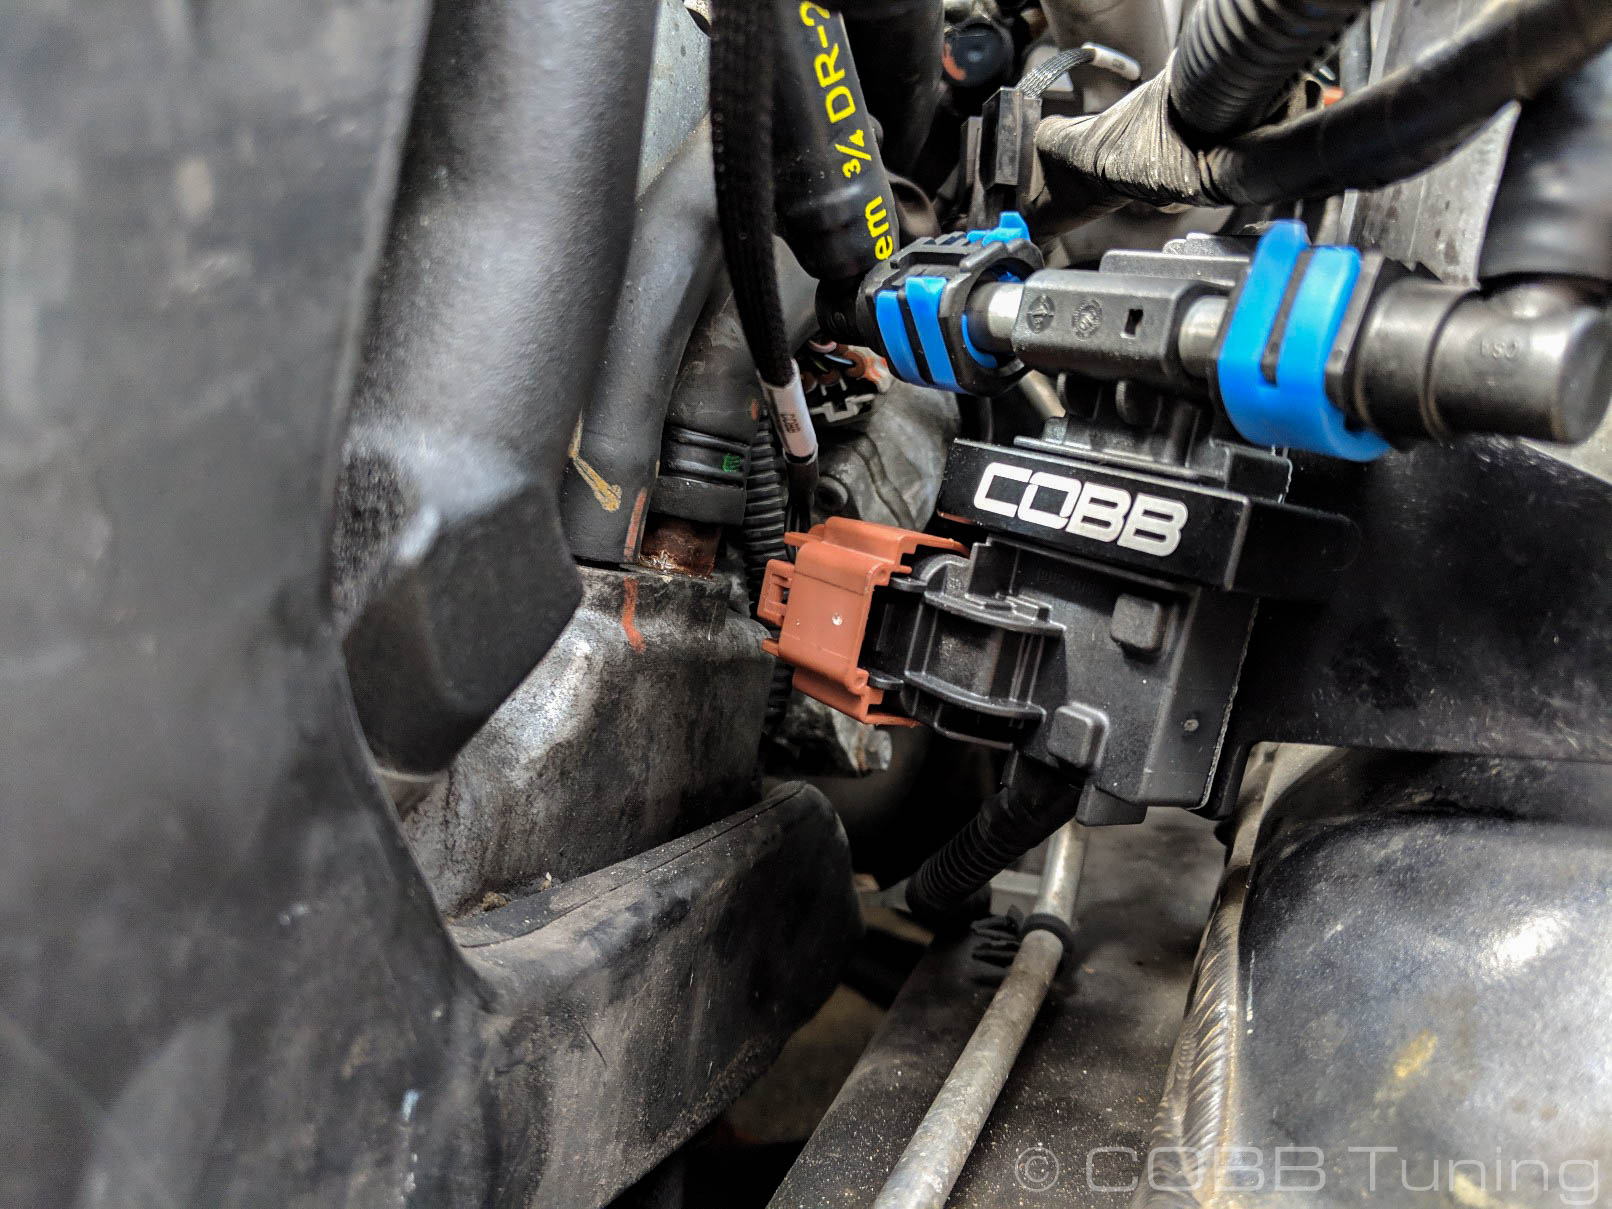
The COBB Flex Fuel Sensor installs in the new feed line between the manifold connector and the firewall.
- Install the long hose to the firewall and the short hose to the engine, following the routing of the old line as shown
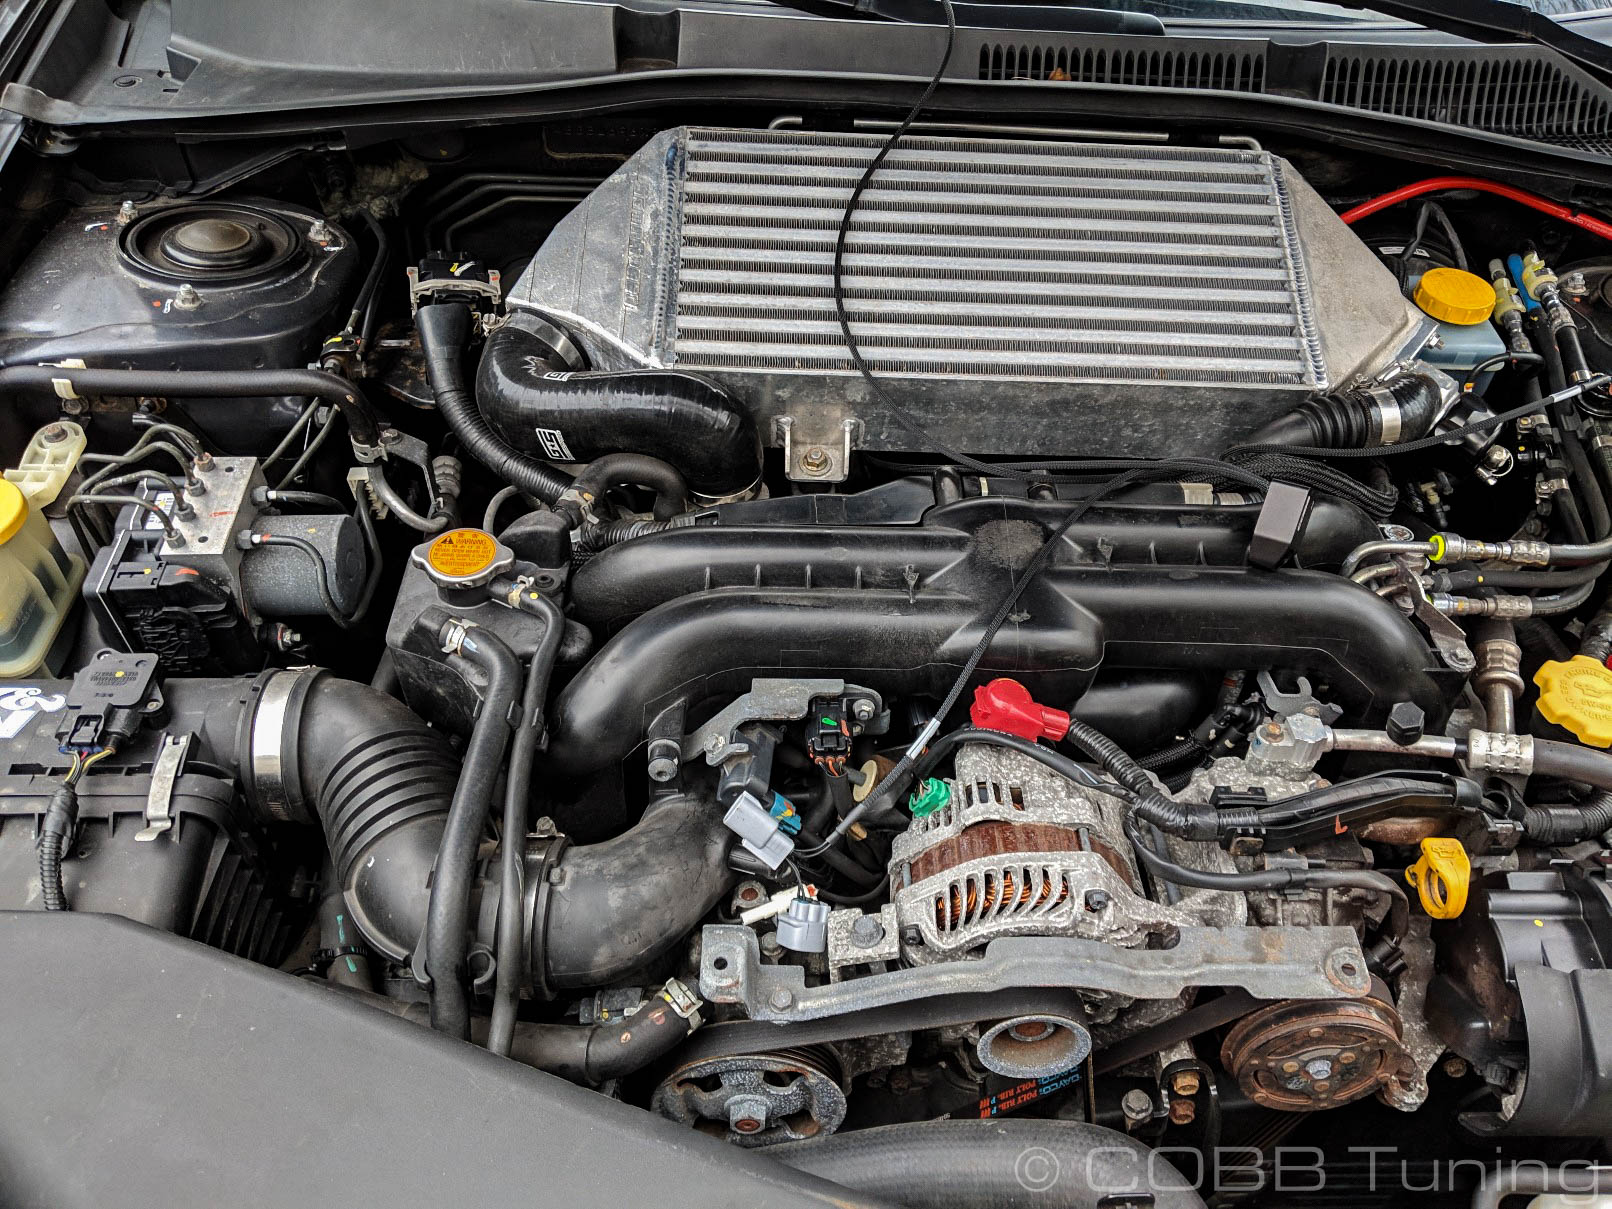
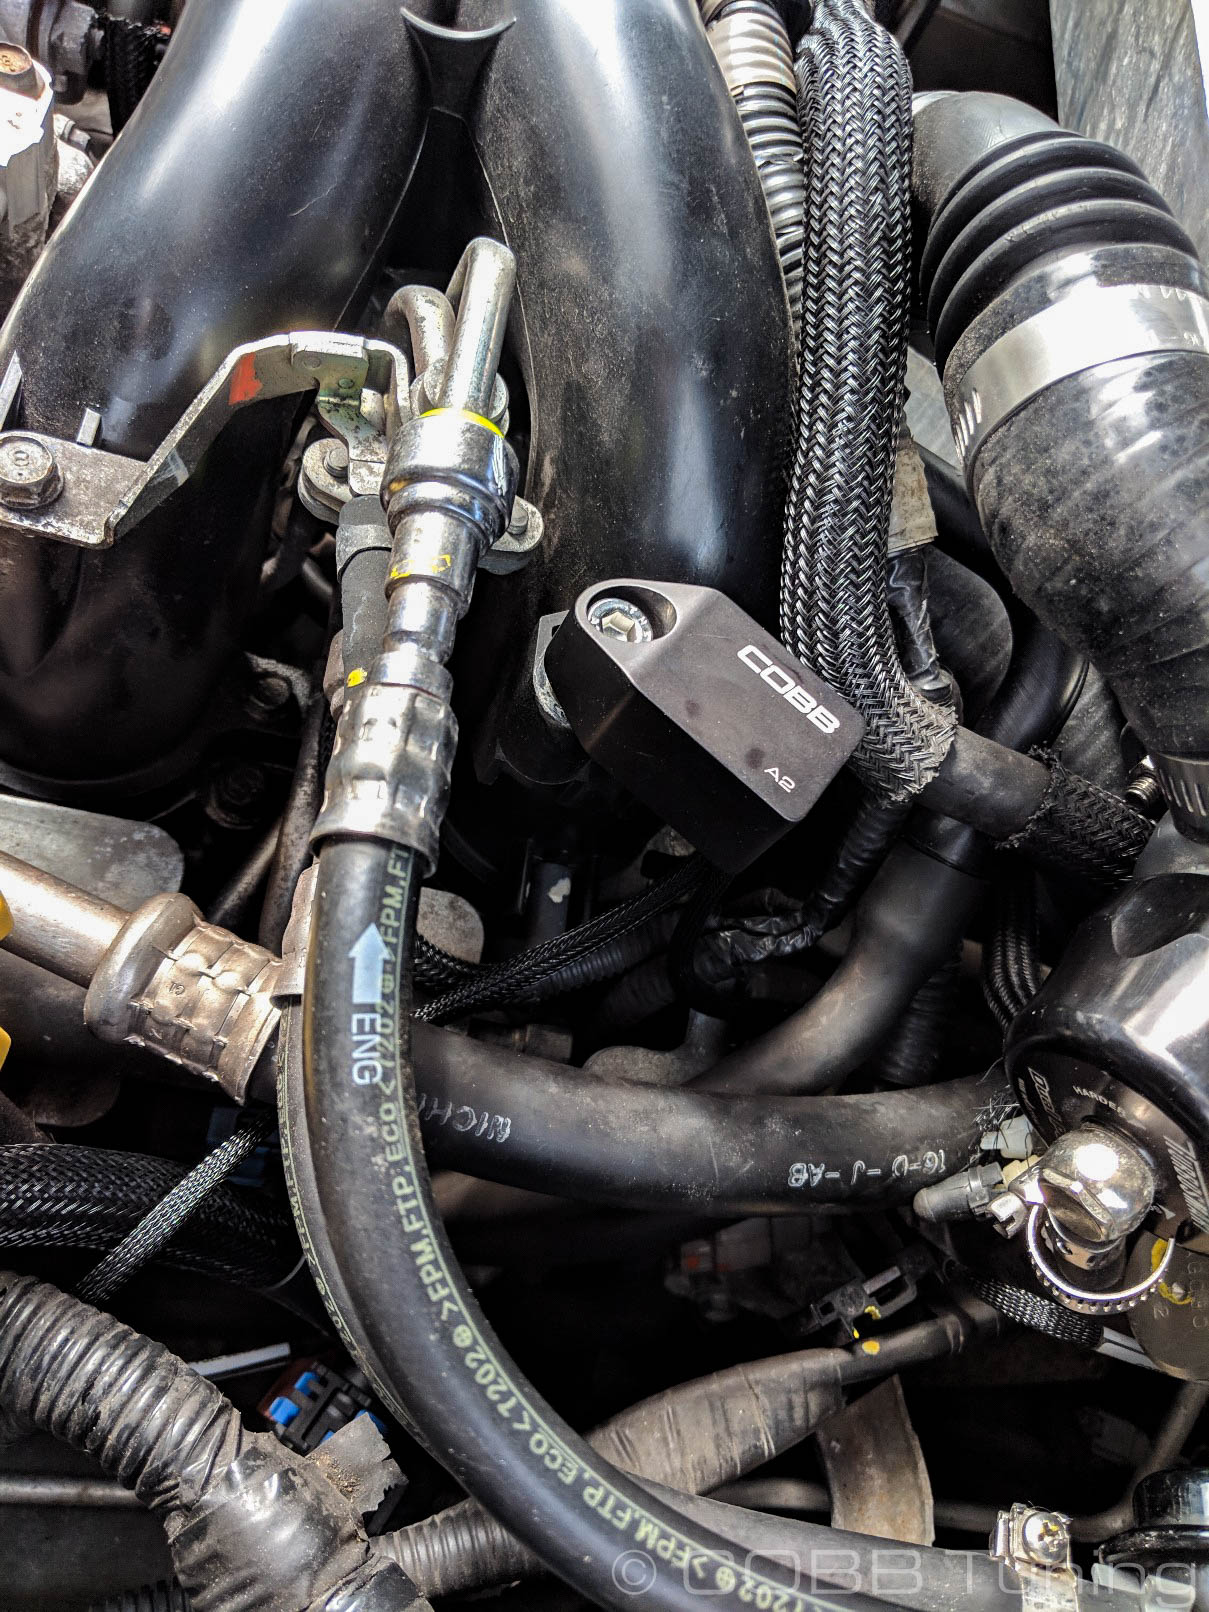
Installation of COBB Flex Fuel Module
The COBB Flex Fuel Module is designed to be bolted manifold and plugged into the COBB Ethanol Sensor, in-line with the factory Rear O2 sensor and Tumble Generator Valve (TGV).
| Note |
|---|
The Rear O2 connector obtains 12V power, and does not alter the O2 sensor signal going to the ECU. The TGV connection allows the motor signals to pass through for those still using the factory TGV's, however the feedback normally used to check TGV position is used to transmit Ethanol content data to the ECU (Engine Control Unit). Mounting location may vary by customer/ installer preference, however it is recommended to seal any un-used connections from water intrusion, ideally by using the proper connector mate and using plugs to seal the mating connector. |
- Bolt the flex fuel module to the rear bolt hole on the intake manifold
- Pass the Flex Fuel Connector through the factory hoses and wiring harnesses and plug it into the Ethanol sensor. Ensure there is no strain on the connector, wiring, or the module.

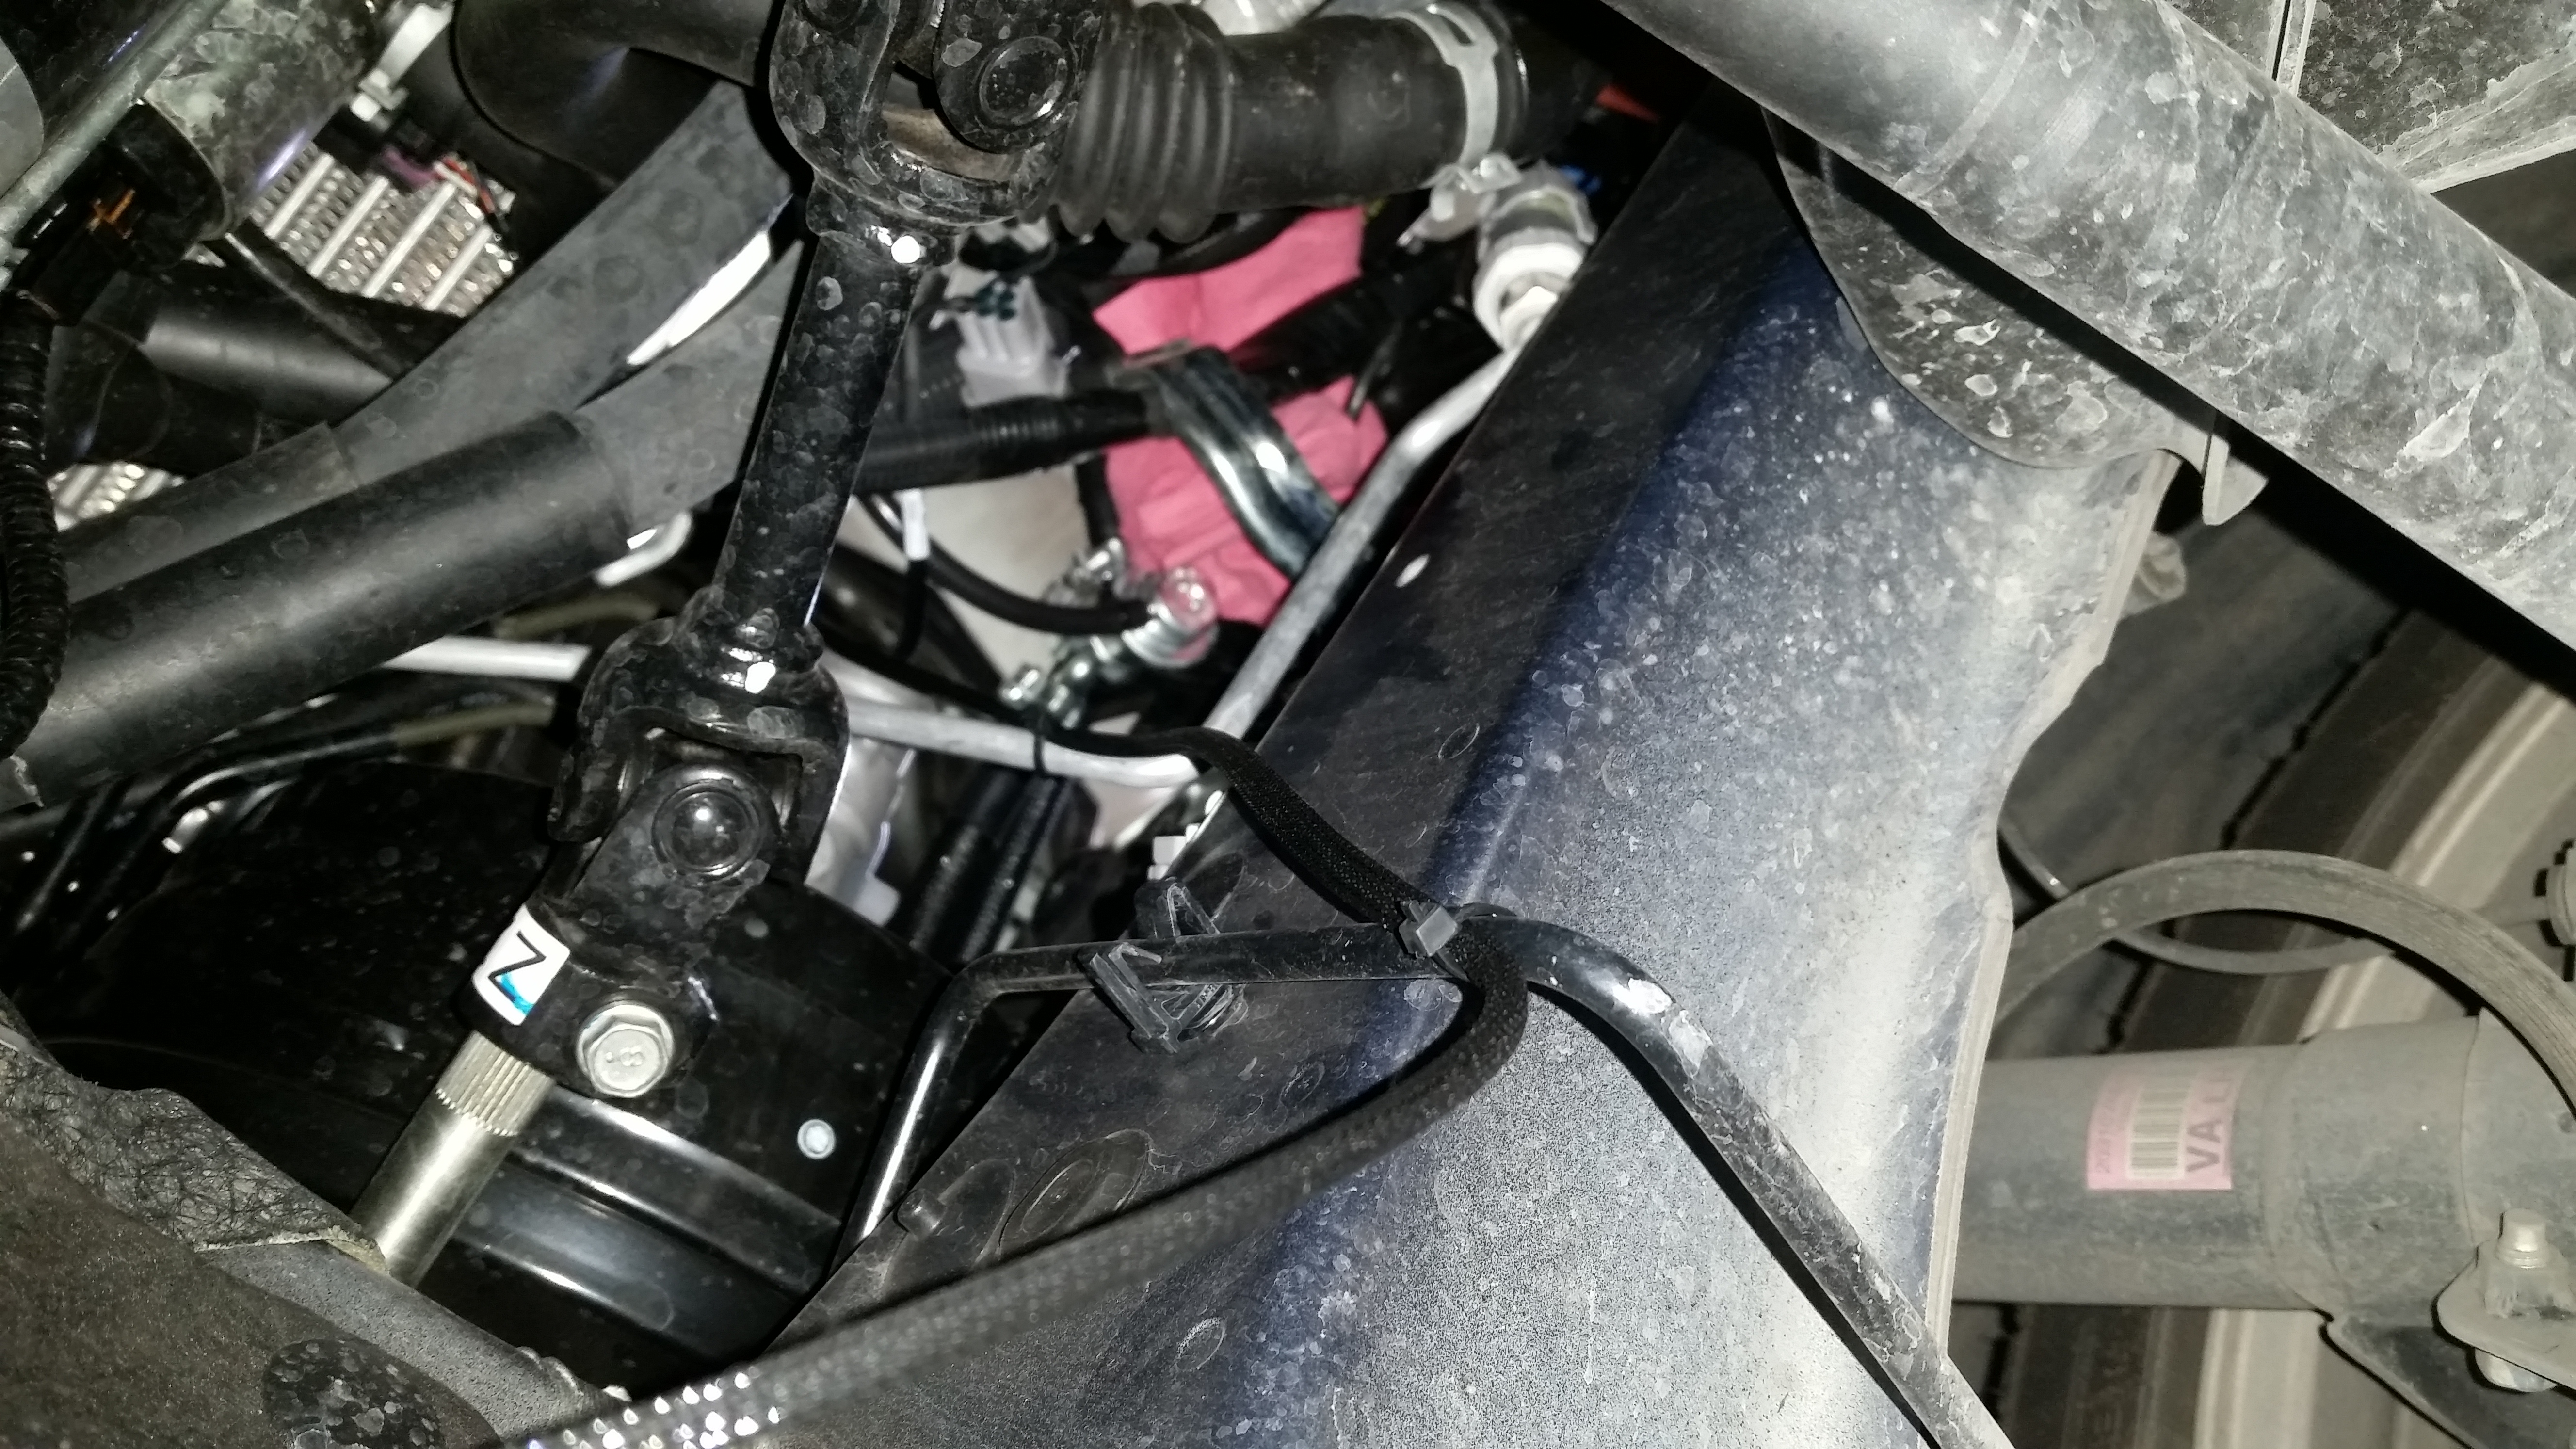
- Route the (4-pin) Rear O2 Connector to the front of the car, down toward the exhaust.
- Pass the TGV connector through the factory hoses and harnesses to the TGV valve on the driver's side of the vehicle toward the rear of the engine. Make sure there isn't any strain on the wiring and zip tie it out of the way.
- Connect the Rear O2 Connector between the factory O2 sensor harness and the O2 Sensor connector. Using the included zip-ties, secure the connectors as far away from the exhaust pipe as possible but without inducing strain on the harnesses.
.jpg?version=2&modificationDate=1558369923731&cacheVersion=1&api=v2&height=400)
- The O2 connector harness has extra length to work on a variety of vehicle configurations. Using the included zip-ties, secure the harness to the existing main engine harness toward the front of the vehicle. Ensure that the harness will not make contact with moving parts and has sufficient slack between the engine and lines as well as lines and harness so that there is no strain as the engine moves.

Final Assembly
- Lower vehicle safely.
- Re-install the battery, ensuring that it does NOT make contact with the new fuel hose, as the sensor bracket is designed to press against the fuse box, but NOT make contact with the battery.
- Reconnect the positive terminal, and cover with the factory guard to reduce the risk of short circuiting the battery. In case you missed the step above, make sure there is NO exposed fuel or rags near the car. Fumes can easily be ignited when connecting the battery
. - Reconnect the negative battery terminal and prime the fuel system by cycling the key between the "OFF" and "RUN" positions at 3-second intervals. 4 or 5 cycles will be adequate to re-pressurize the low-pressure system. CAREFULLY INSPECT FOR LEAKS AND IMMEDIATELY CORRECT IF ANY ARE FOUND!
- Prime (Turn the key but do not start the engine until the fuel pump stops), then start the vehicle and again inspect for any leaking or abnormalities. Halt immediately if any fuel leaks or other issues are found!
- Installation of the Cobb Flex Fuel kit is now complete! We recommend inspecting for any signs of leaking or component deterioration periodically for safety and performance purposes. Enjoy your new COBB Flex Fuel Kit!
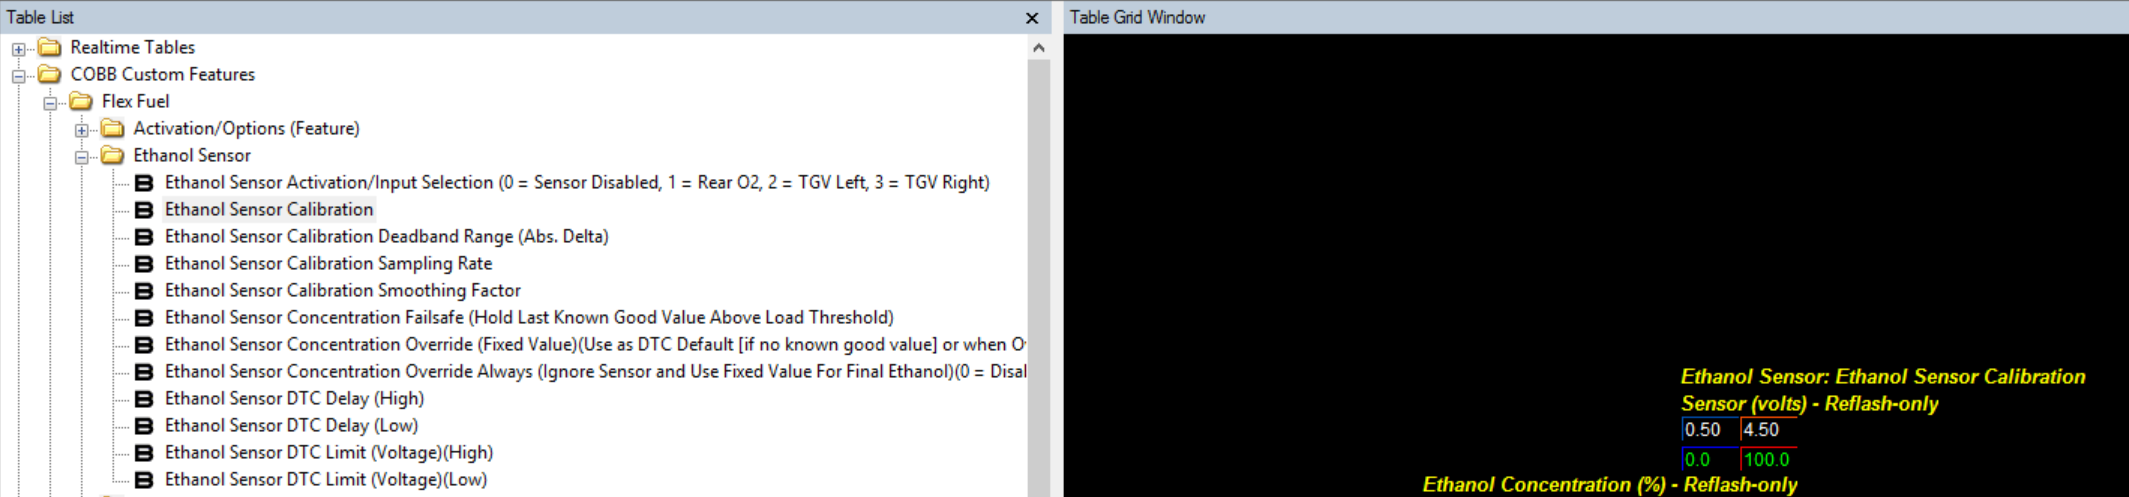
Calibration Data
Ethanol Sensor Input Selection = TGV Left

Sensor calibration:
0.5 V = 0% Ethanol
4.5 V = 100% Ethanol
Links
Subaru Installation Instructions
Main Installation Instruction Repository for Subaru Parts
Link to Subaru Map Notes to see what map you should be on given the parts you've added
COBB Flex Fuel Troubleshooting: Subaru
| Insert excerpt | ||||||
|---|---|---|---|---|---|---|
|