
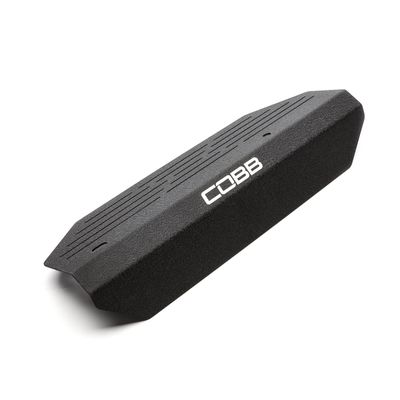
815055 - Subaru Aluminum Alternator Cover
Subaru Impreza WRX 2008 - 2014
Subaru Impreza WRX STI 2008 - 2014
Congratulations on your purchase of the COBB Tuning Subaru Aluminum Alternator Cover! The following instructions will assist you through the installation process. Please read them BEFORE beginning the install to familiarize yourself with the steps and tools needed. If you feel you cannot properly perform this installation, we HIGHLY recommend you take the vehicle to a qualified and experienced automotive technician.
IMPORTANT! Installing this kit will require custom tuning or utilizing an appropriate Stage Power Package map if you have a matching mechanical configuration. Please consult with COBB or an authorized ProTuner in your area if you have any questions!
Table of Contents
| Table of Contents |
|---|
Parts List
- Alternator Cover
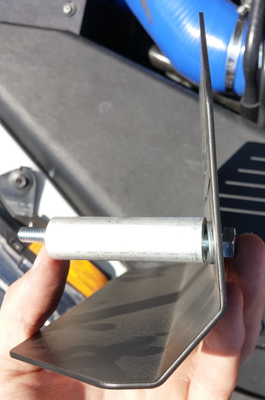
- Spacer, Short
- Spacer, Long
- Button Head Cap Screw M6 x 60mm x 20mm
- Button Head Cap Screw M6 x 75mm x 20mm
- 2x Nylon Washer 6mm
- Lock Washer 6mm
- 2x Flat Washer 6mm
- Fender Washer 6mm
- Flange Head Nut 6mm
Tools Needed
Sockets
3/8"
Wrenches
Removal of Stock Alternator Cover
- Park your car in a flat level area and allow it to cool down.
- Using your 10mm socket, remove the bolt from the alternator cover.
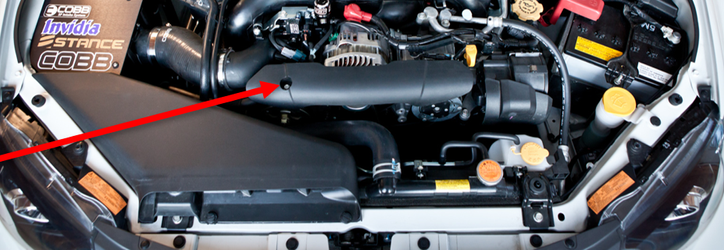
- Pull the alternator cover up until the insert on the right pops out of the grommet.
- Once the alternator cover is out, remove the stock grommet.
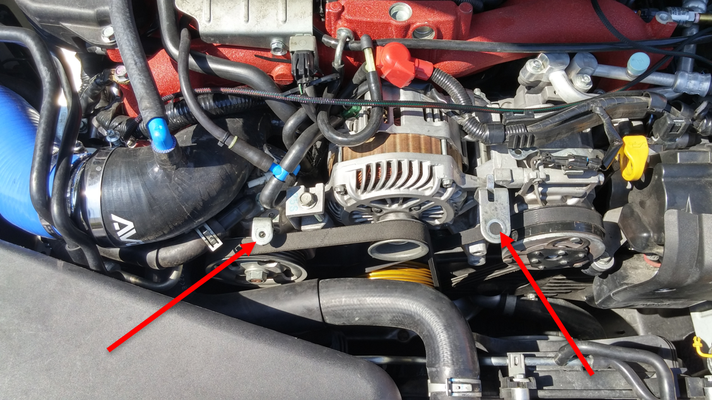
Installation of COBB Alternator Cover
- To start out, place a 6mm nylon washer on the 76mm button head cap screw before inserting the screw into the passenger's side mounting slot (Left side if looking at the engine bay). Then slide the longer spacer over the screw from the back side.
- Now go ahead and screw that into place on the passenger's side bracket but leave it somewhat loose.
- Take the 6mm nylon washer and place it on the 60mm button head cap screw. Insert the screw into the driver's side of the bracket then add one of the 6mm flat washers along with the shorter spacer onto the screw.

- Place the assembly down on the right hand side and from underneath add a flat washer, lock washer and the provided nut.
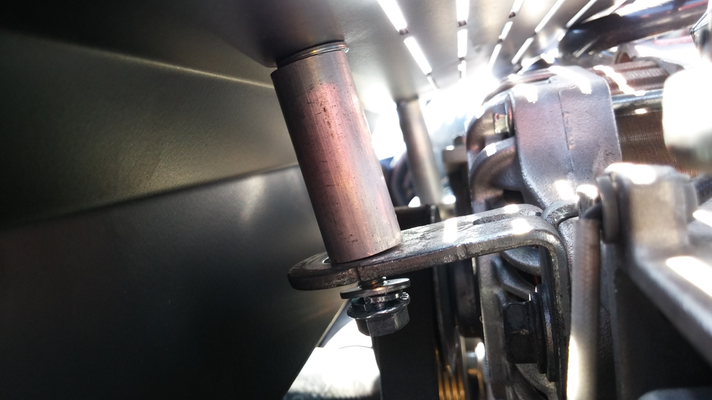
- While trying to keep the cover straight, slowly tighten it up on each end until it is secure and rigid. Over-tightening may cause chipping so just go until it is snug.
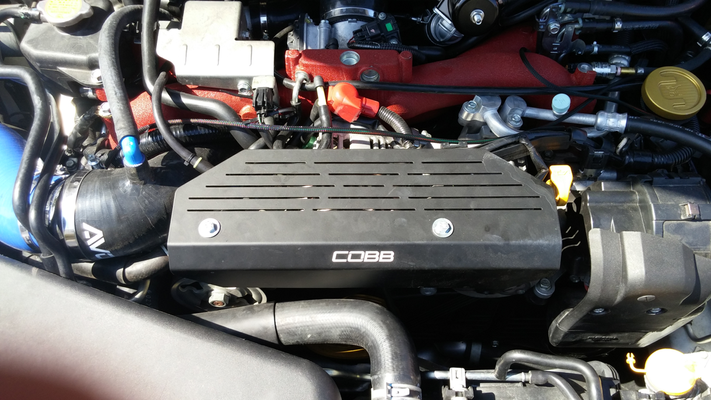
- Once the bolts are tightened down you're good to go! Go out and enjoy!
Links
Subaru Installation InstructionsCustomer Support
COBB Tuning Customer Support Center
Phone support available 9am to 6pm Monday-Thursday. 9am to 4pm Friday (CST)
866.922.3059
Return to cobbtuning.com| Insert excerpt | ||||||
|---|---|---|---|---|---|---|
|