
815100 - Subaru Aluminum Radiator Shroud
Subaru Impreza WRX 2008 - 2014
Subaru Impreza WRX STI 2008 - 2014

Congratulations on your purchase of the COBB Tuning Aluminum Radiator Shroud! The following instructions will assist you through the installation process. Please read them BEFORE beginning the install to familiarize yourself with the steps and tools needed. If you feel you cannot properly perform this installation, we HIGHLY recommend you take the vehicle to a qualified and experienced automotive technician.
Table of Contents
| Table of Contents |
|---|
Parts List
- Radiator Shroud
Tools Needed
Sockets
3/8"
Hand Tools
Stock Component Removal
- Inspect the new components included with the COBB kit. If anything appears out of place, please contact COBB immediately and do not proceed with the installation.
- Park your car in a flat level area and allow it to cool off.
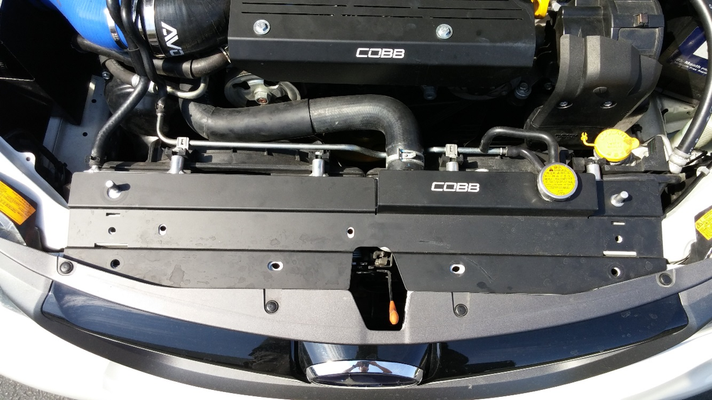
- Locate all the points where you'll need to remove items in order to show the holes used.
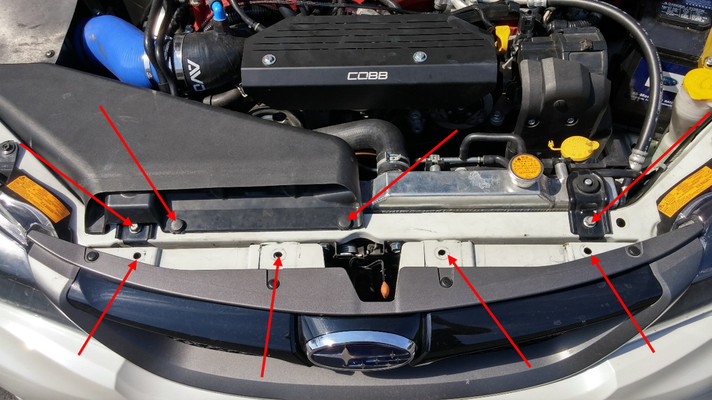
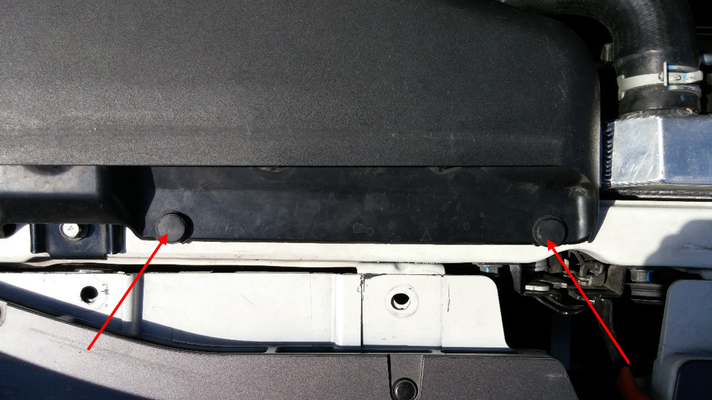
- Using your trim tool or a flat blade screwdriver, remove the push clips holding the stock intake snorkel. Make sure to keep them as they will be used for installing the radiator shroud.
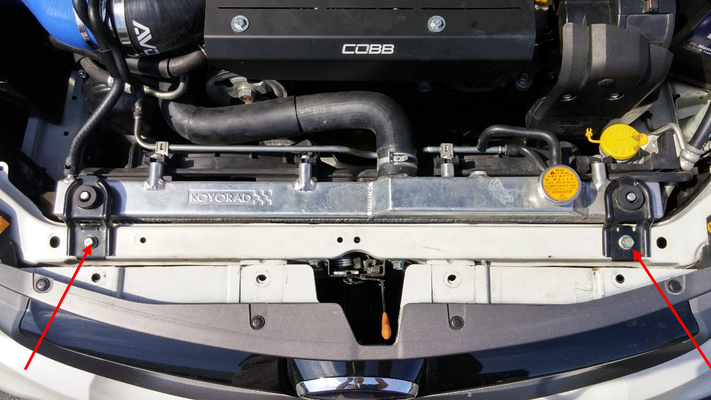
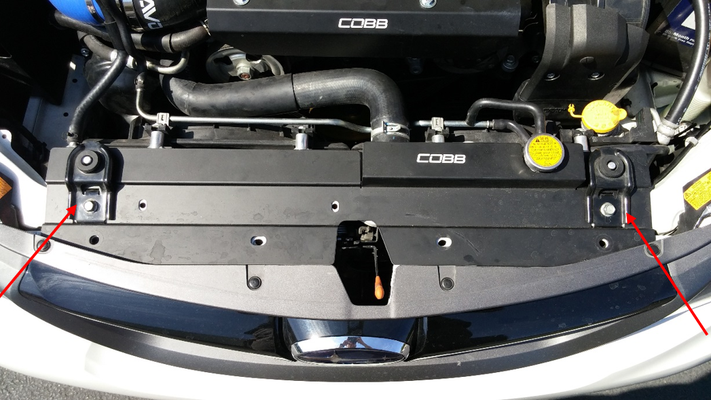
- With the ratchet and 12mm socket, remove the bolts holding the radiator support brackets in place and remove the brackets. Place the bolts somewhere safe, these will be used for installing the radiator shroud.
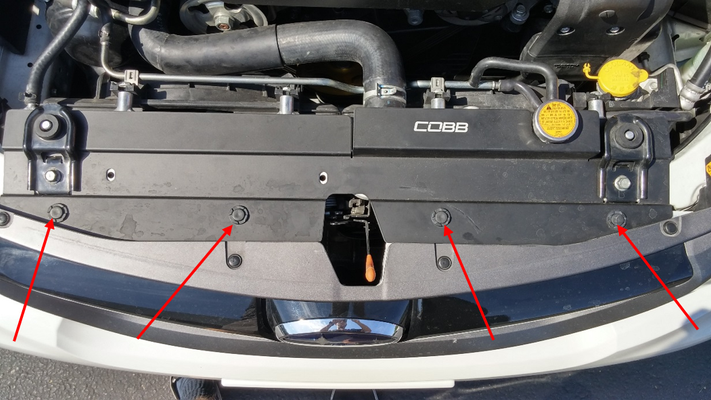
- Using a screwdriver, remove the remaining push pins near the front of the car. KEEP ALL PUSHPINS, these will be used for installing the radiator shroud. (NOTE: This picture already has the black push pins uninstalled; the arrow shows the holes they came out of.)

COBB Radiator Shroud Installation
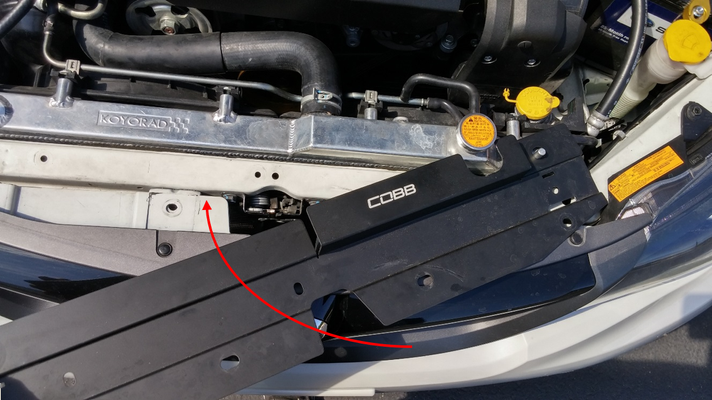
- Now, take the COBB Radiator Shroud and place it in the correct position on the car. This easier to do by first installing the right side of the radiator shroud to the driver's side radiator support mount before rotating the shroud in order for the cutout to slide under the radiator cap.
- Reinstall the radiator support brackets over the shroud in their original location but leave the bolts loose for now.
- Take the stock trim clips and put them in place in order to fasten the shroud to the car.
- Now you can go back and tighten down the radiator support brackets the rest of the way.
- Reinstall the stock intake snorkel and realign it to the remaining two mounting holes.

- You're all done! Go out and enjoy!
Links
Subaru Installation InstructionsSUBARU CALIBRATION SUPPORT - a link to map notes which can provide insight in to what map you should be running.
| Insert excerpt | ||||||
|---|---|---|---|---|---|---|
|