
512273 - Internal Wastegate Bracket
Congratulations on your purchase of the COBB Tuning Internal Wastegate Bracket! The following instructions will assist you through the installation process. Please read them BEFORE beginning the install to familiarize yourself with the steps and tools needed. If you feel you cannot properly perform this installation, we HIGHLY recommend you take the vehicle to a qualified and experienced automotive technician.
IMPORTANT! Installing this kit will require custom tuning and additional custom components to work correctly for your vehicle.
Table of Contents
| Table of Contents |
|---|
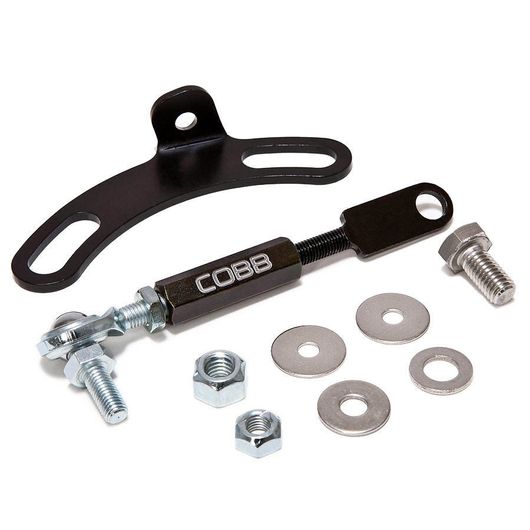
Parts List
- Internal Wastegate Bracket
- Internal Wastegate Adjustable Arm
- M8 x 16 Hex bolt
- M8 Lock nut
- M8 Flat washer
- M6 Flat washer
- 1/4 - 28 Lock nut
Tools Needed
- Phillips head screwdriver
- Flathead screwdriver
3/8" ratchet
3/8" 10mm socket
3/8" 11mm socket
3/8" 12mm socket socket
- 11mm combination wrench
- 12mm combination wrench
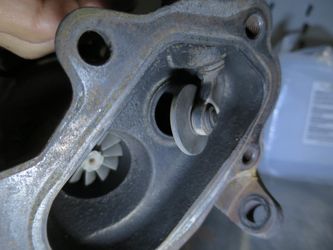
Stock Wastegate Actuator Removal
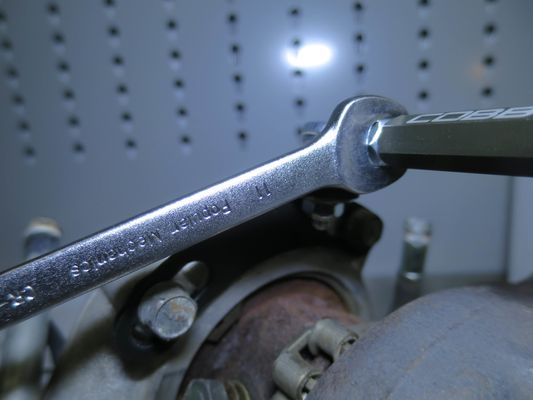
- Once you gain access to your turbo and the wastegate area, go ahead and break loose the two 12mm bolts on the compressor housing holding the actuator in place. (this may take some penetrating oil if they've been in place for a long time.
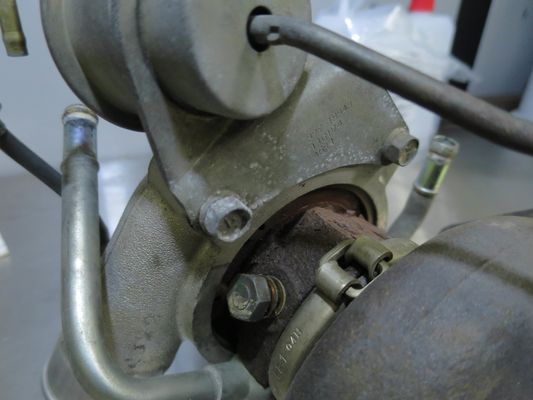
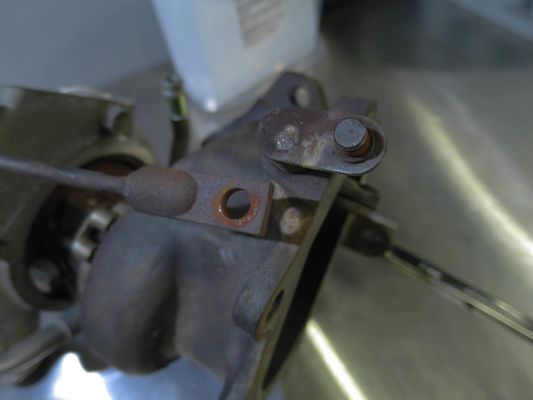
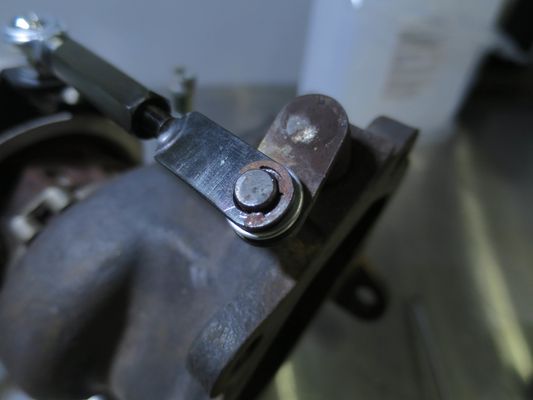
- With the bolts cracked loose but not removed, turn your attention to the wastegate actuator arm, and locate the E-Clip holding it in place
- Using a small flat blade screwdriver pop the clip out of place, making sure not to lose it as you'll need it later on. (An easy way to keep it with you is to put your hand over the assembly so that it pops into your and as it comes off. If your screwdriver fits in the gap between the pin and the clip, you can simply rotate it around and it should pop the clip out.
- Once the clip is removed, go ahead and pull the actuator arm free, be careful as it will likely be under spring loaded tension from the actuator and can come off with a bit of force.
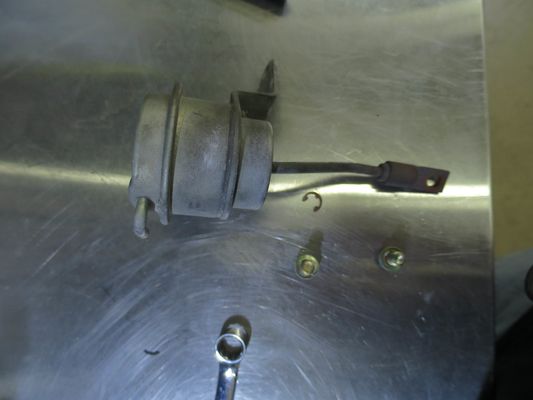
- Now you can go ahead and remove the entire actuator assembly from the turbo.
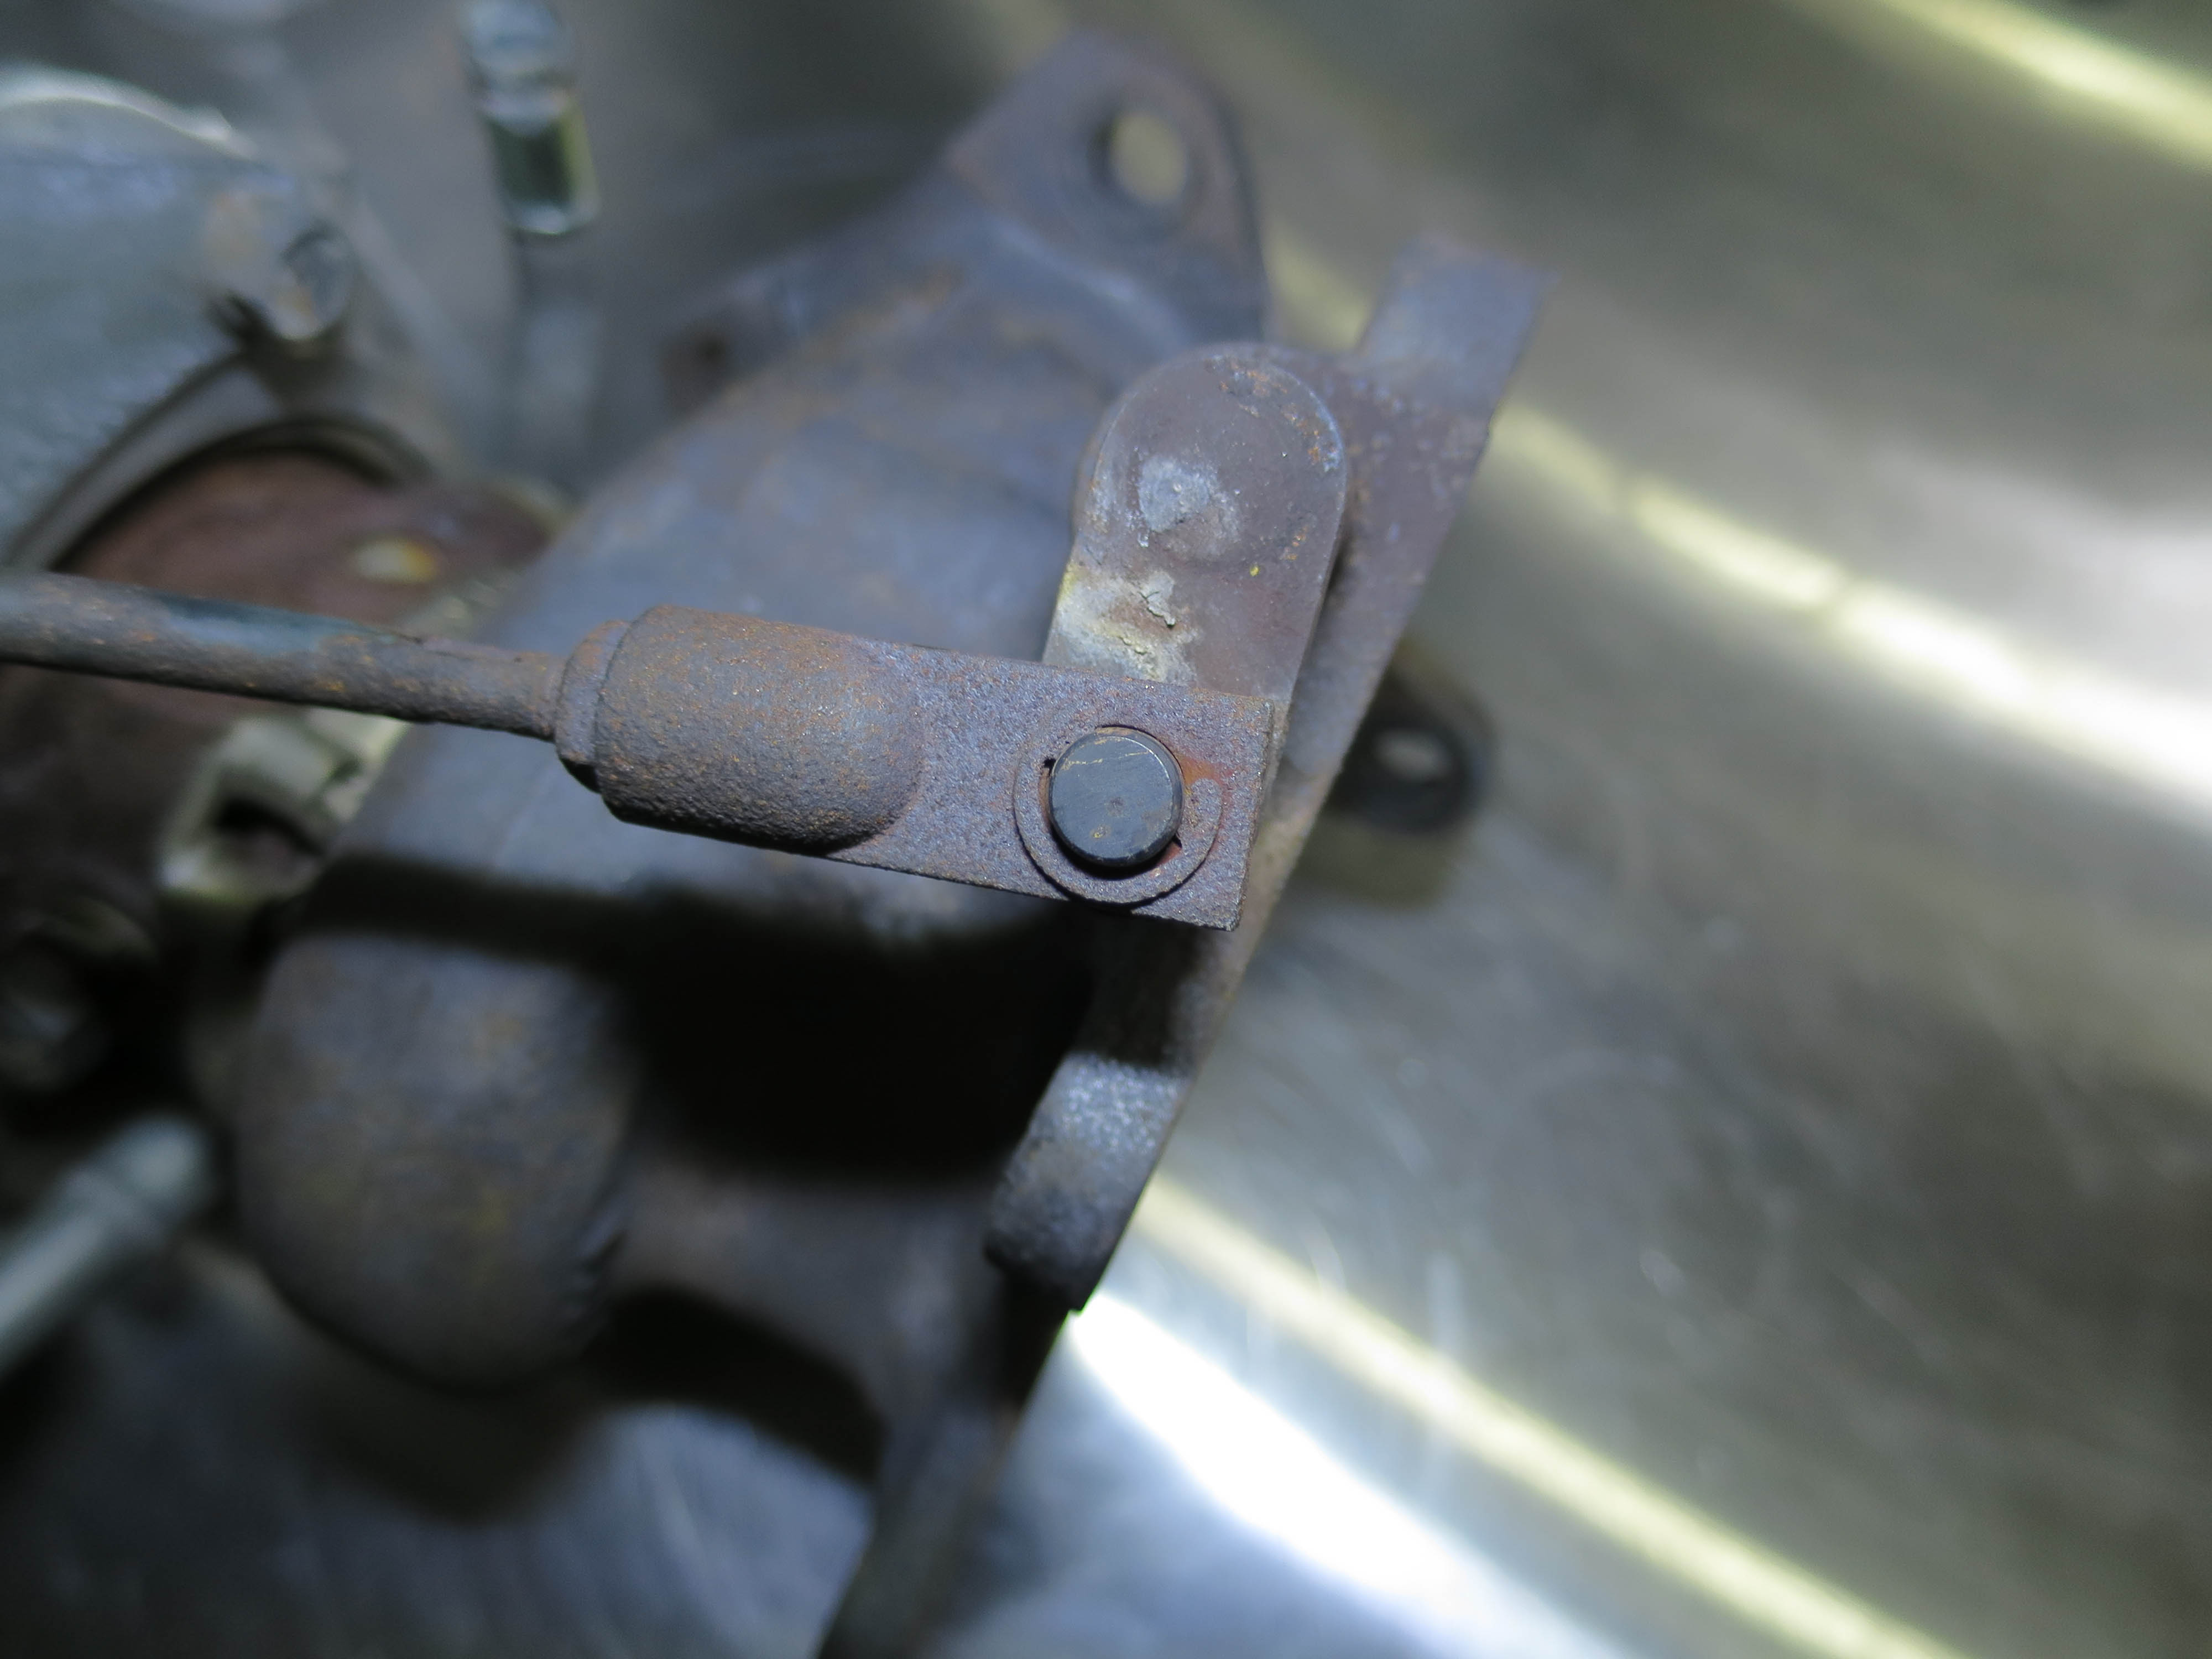
Wastegate Bracket Installation on Stock Turbo or COBB 20g
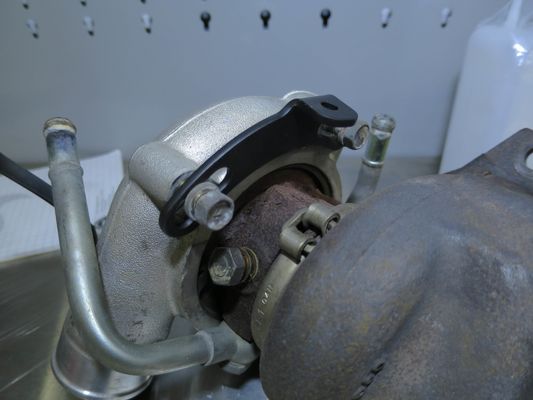
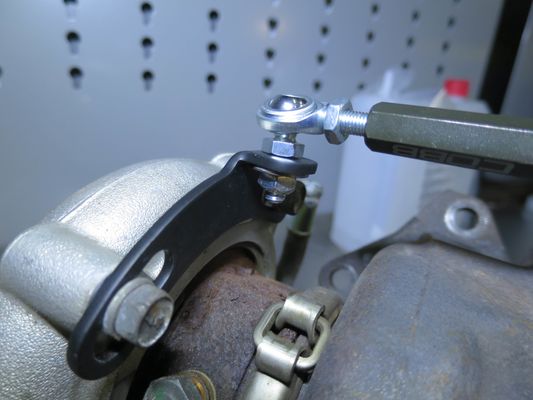
- Using the two bolts that held the wastegate actuator in place, install the new wastegate bracket so that it is held against the turbo, but loose enough that it can still slide around.
- Now go ahead and place the M6 washer onto the pivot pin on the wastegate actuator arm. If your turbo has a hole instead, you will use the provided bolt, nut, and washer.
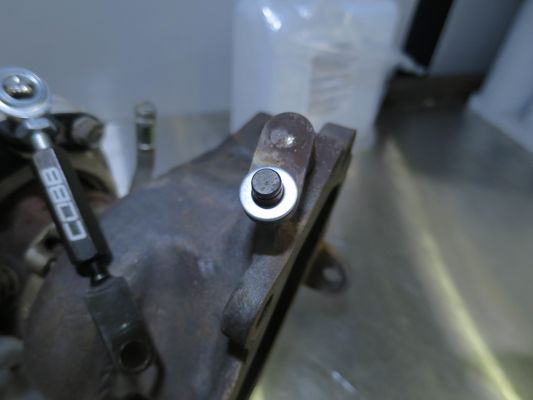
- With that in place go ahead and install the ball socket end of the IWG arm onto the bracket, making sure to use a washer underneath. Then tighten using 2 11mm wrenches.
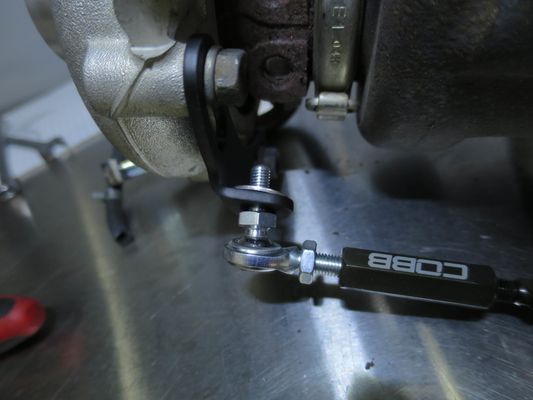
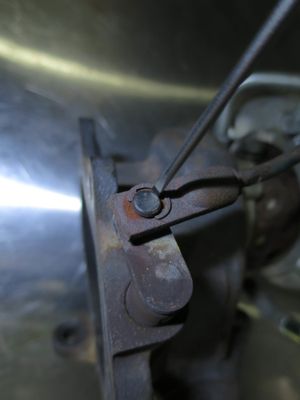
- Now go ahead and slip the other end over the wastegate actuator pin and push on the old e-clip. You may need to loosen this up by spinning the center collar of the arm to adjust the length.
- Using a M12 socket or wrench, tighten up the bracket bolts.
- Spin the center section of the arm to go ahead and adjust the wastegate all the way closed. Or all the way open if you're trying to make the car really boring to drive.
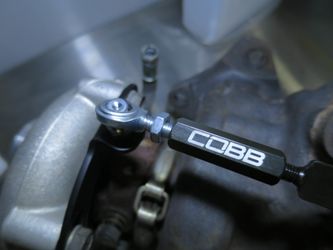
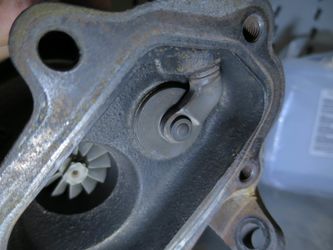
- Once you're done go ahead and spin the jam nut down towards the center collar, then tighten it by turning the jam nut towards the collar, and the collar towards the jam nut using two 11mm wrenches.
- You're all done! At this point make sure your new external wastegate is set up appropriately and get a custom tune to support the modifications.
| Insert excerpt | ||||||
|---|---|---|---|---|---|---|
|