Versions Compared

Key

  • This line was added.
  • This line was removed.
  • Formatting was changed.


512274 (long)

Universal Internal Wastegate Bracket Install Instructions

short: 2002-2008 WRX, 2004-2007 STI, 2004-2007 Forester XT

long: 2009-2014 WRX, 2008-2014 STI, 2009-2010 2.5 GT  


***Warning: This part is only to be used in conjunction with an External Wastegate***


Congratulations on your purchase of the COBB Tuning Universal Internal Wastegate Bracket for your turbocharged vehicle! The following instructions will assist you through your installation process. Please read them first BEFORE beginning the install and familiarize yourself with the steps and tools needed. If you feel that you cannot properly perform this installation, we HIGHLY recommend you take the vehicle to a qualified and experienced automotive technician.
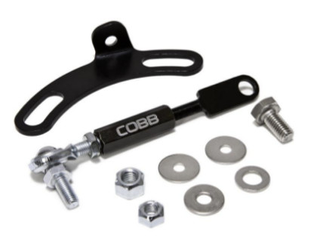
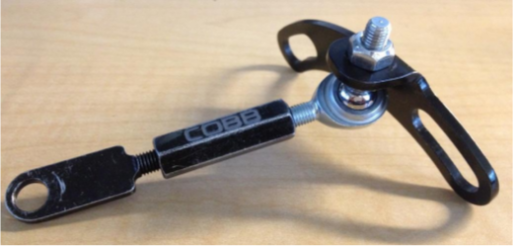
Part List

  • Bracket 
  • Rod Linkage 
  • RH/LH "COBB" Sleeve Nut
  • Spade Bolt
  • 1/4"-28 Jam Nut
  • 1/4" Flat Washer
  • 1/4"-28 Lock Nut
  • M8 Hex Bolt
  • M8 Flat Washer
  • M8 Lock Nut

Tools Needed

  • 7/16" Wrench 
  • 1/2" Wrench
  • 7/16" Deep Socket
  • Ratchet
  • Various Extensions
  • 8mm Socket
  • 10mm Socket
  • Small Pick or Hook


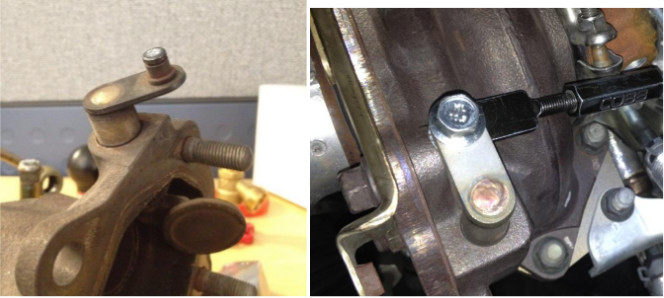
Removal of Stock Wastegate Actuator

      1. With the car cooled down, locate the factory wastegate actuator mounted on the turbo. Depending on the application, it is held to the compressor housing with either two or three 8mm or 12mm 

          bolts. Using a socket or wrench, loosen and remove the bolts to allow the wastegate actuator to hang freely.


      2.  Using a small screwdriver, pick, or hook, remove the retaining clip that secures the wastegate actuator arm to the internal gate’s arm. Depending on the application, it may be on top or bottom of the
           arm. Make sure to not lose it when it pops off. Depending on the application, you will need it again. On the picture below, the retaining ring is below the arm.

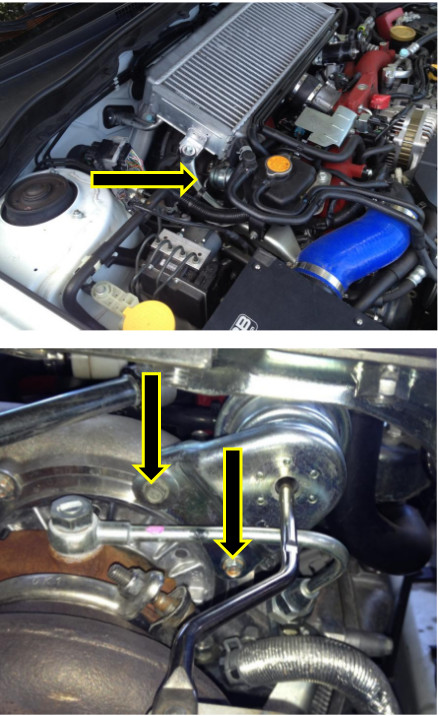
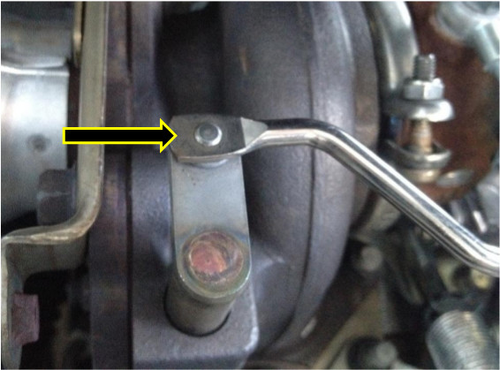
      3.  Disconnect the vacuum line on the wastegate actuator and remove the actuator from the vehicle.


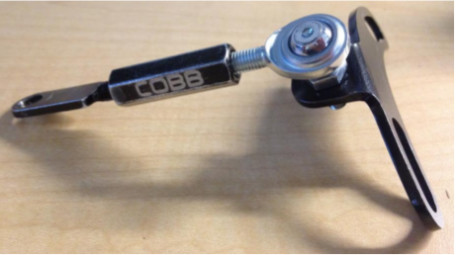
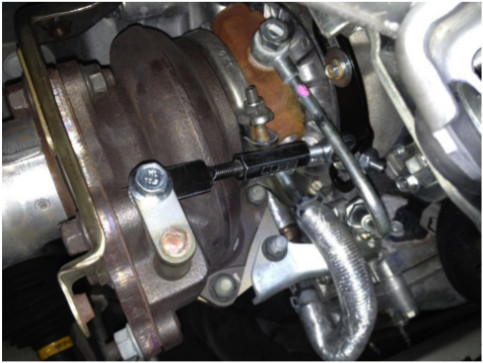
Installation of COBB Universal IWG Bracket


      1.  Depending on the application, there are three configurations that your IWG bracket is going to be mounted.  Try them out and see which one works best for you.   Most applications work  well with Configuration A.

 
A.   

B. 
 

C. 
 
2.  Loosely install the IWG bracket assembly onto your compressor housing using the factory hardware.  If your compressor housing uses the 8mm bolts, install one of the supplied flat fender washers onto the factory bolt before using them to secure the bracket. For the larger bolts, the flat washer is not necessary.

3.  If the turbo’s internal gate arm has an integrated stud with retaining ring groove, like pictured below left, install the spade bolt over the top of the stud and replace the factory retaining ring.To increase or decrease the overall length of the assembly to fit, turn the long sleeve nut in the middle of the threads. Extend it just long enough to fit over the stud/hole. If the wastegate arm has a hole,      install the spade bolt (on top or below the arm, whichever is a better fit) using the supplied M8 hardware.  It may be best to not fully tighten this hardware yet as adjustments may be necessary. 


4. Orient the assembly to the position that fits best on the turbo and tighten down the bracket onto the compressor housing.  

5.  Now, if applicable, tighten the M8 hardware that is holding the flattened spade bolt to the gate’s arm. On some applications, the spade bolt does not sit perfectly flat.  You may tighten the hardware down and bend the spade bolt for a better fit.  This is acceptable and will not cause adverse effects.

6.  With everything else tightened, using an open ended wrench, tighten the middle sleeve nut until the internal gate is fully closed.  Be sure to not over tighten and strip the threads.  Once tight, screw the jam nut down onto the longer sleeve nut and tighten it in place.  

7. Ensure that the vacuum hose that was previously installed onto the internal wastegate actuator is plumbed correctly to the newly installed external wastegate.

8. Enjoy your new COBB Tuning Universal Internal Wastegate Bracket!
 

Insert excerpt
Contact Us:
Contact Us:
nopaneltrue