
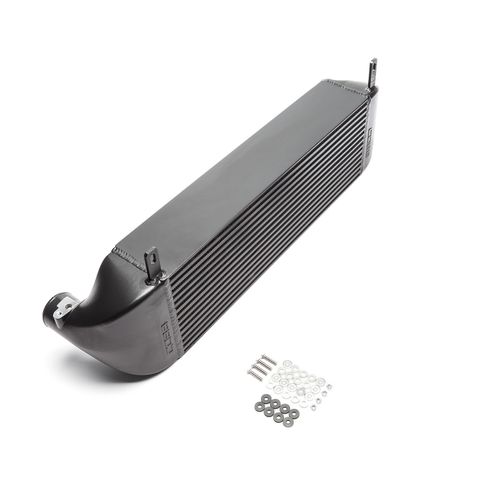
793500 – Focus RS Front Mount Intercooler
Vehicle Coverage
 2017 - 2018 Ford Focus RS
Congratulations on your purchase of the COBB Tuning Focus RS Front Mount Intercooler! The following instructions will assist you through the installation process. Please read them BEFORE beginning the install to familiarize yourself with the steps and tools needed. If you feel you cannot properly perform this installation, we HIGHLY recommend you take the vehicle to a qualified and experienced automotive technician.
IMPORTANT! Installing this kit will require custom tuning or utilizing an appropriate Stage Power Package map if you have a matching mechanical configuration. Please consult with COBB or an authorized ProTuner in your area if you have any questions!
Table of Contents
| Table of Contents |
|---|
Parts List
- COBB Black or Silver Front Mount Intercooler Core
- (8) Anti-Vibration Washers
- (4) M6x30mm Bolts
- (16) M6x18mm washers
- (4) M6x20mm Washers
- (4) M6 Lock Nuts
- 2.5" - 2.75" Silicon Coupler
- 90° Silicon Coupler
- (2) Stainless #40 clamps
- (2) Stainless #48 clamps
- COBB Stencil
Tools Needed
Stock Front Mount Intercooler Removal
- Park the car in a smooth flat place. Lift and support it safely with jack stands or on a lift.
- Remove the four trim clips as well as the eleven Torx screws using a T-30 bit.
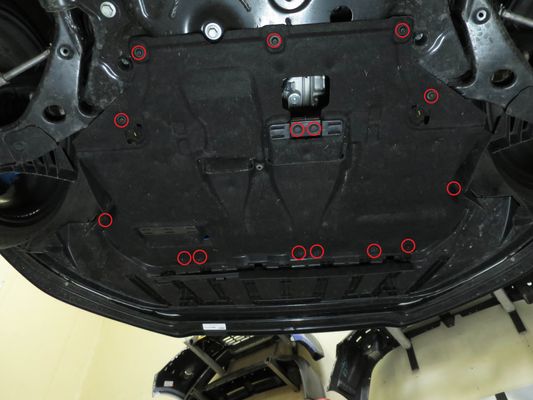
- Move to the wheel wells and remove the other 2 T-30 bolts from each side.

- In the engine bay remove the two trim clips and four T27 bolts holding the upper trim piece in place.
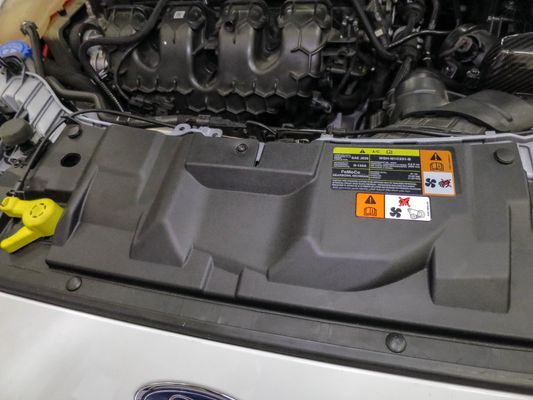
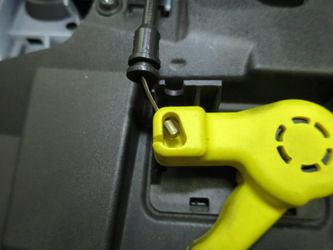
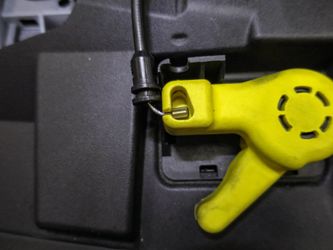
- In the engine bay remove the cable for the hood release by lifting the cable up in order to release it from the holder, then moving the cable towards the handle to release pressure and allow you to pop the cable retainer out of the top.
- Now pull outward on the corners of the bumper in order to release them from the clips under the headlight. Be careful not to scratch them, applying painters tape to the edge of each fender to prevent scratches as things move around and as you remove the rest of the bumper.
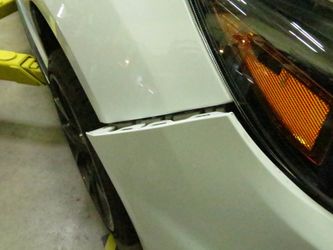
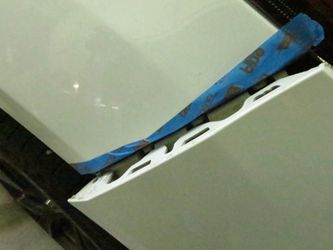
- Once loose get the bumper itself off. It will oftentimes require two people to get it off properly without scratching the car or bumper. Wiggling the bumper straight outward can help release all of the clips.
Note: If you're running into difficulty getting all of the clips to release, removing the headlights can make things more simple and allow you to get the bumper out more easily.
- Once the bumper is loose, disconnect the fog light wiring on the driver's side. Once done set the bumper somewhere safe and out of the way to prevent damage
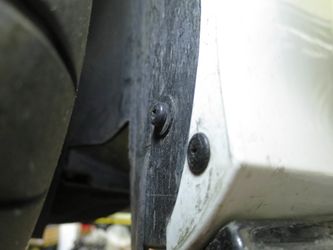
- Unclip the bumper support cover from the bumper beam and move it out of the way.
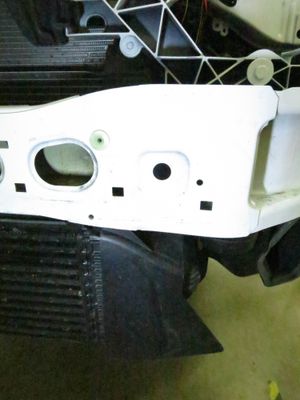
- Remove the radiator cowling by squeezing the clips inside of the bumper support and unbolting the two T20 screws
- Take out the side covers, they should pop out simply with some minor wiggling and you can wait until after the core is removed to remove the driver's side if it won't come out easily.
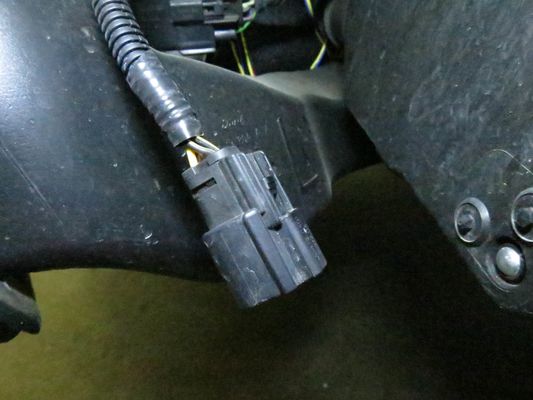
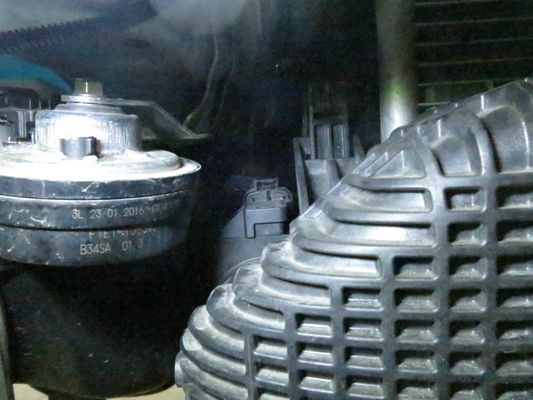
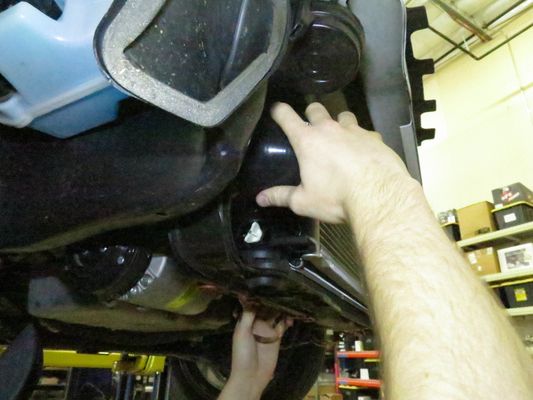
- Unplug the MAP sensor on the passenger's side of the intercooler by pressing in on the release tab for the electrical connector.
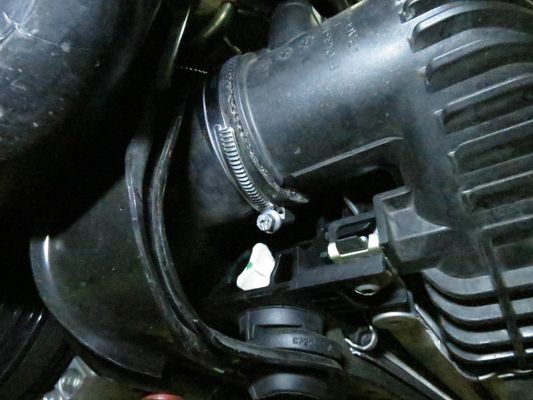
- Remove the hose clamps on both ends of the FMIC. The factory clamps will require a screwdriver or 7mm socket while the COBB Hard Pipe Kit clamps will require a screwdriver or 8mm socket.
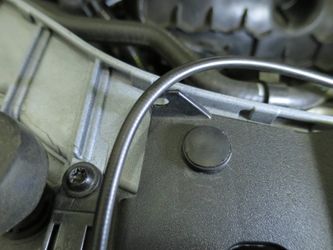
- Undo the two T30 screws on the bottom of the intercooler mounting it to the car.
- Pop the silicone couplers off of the hard pipes as far as possible.
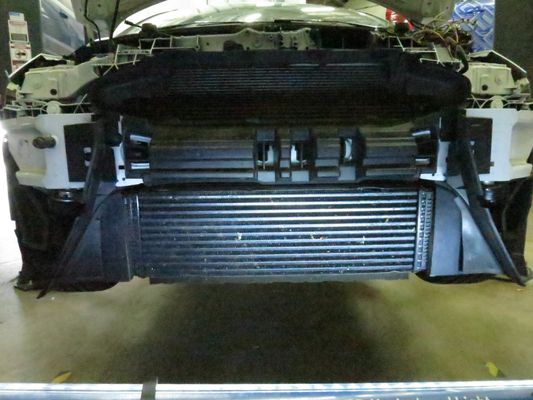
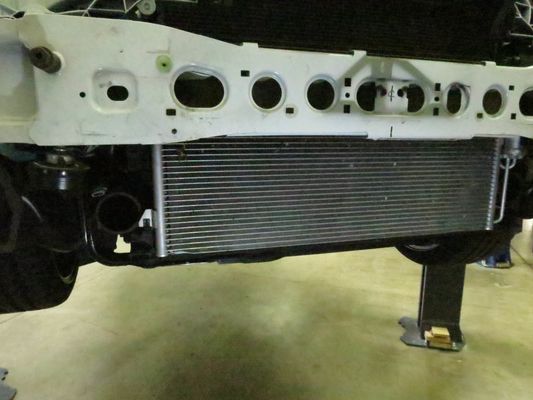
- Now it should be possible to remove the intercooler. Remove it by moving it back at the top and forward at the bottom while pulling it down in order to release the top clips.

- Once the clips are removed it should be possible to remove the core from the car.
- Now using a T20 remove the stock MAP sensor from the end tank of the stock intercooler core.
- Now, after double checking that it's in good shape, you can reinstall the MAP sensor onto the new COBB core using the provided M6x12mm bolt and tightening it down with a 10mm wrench.
- Now install If you are using the stock hard pipes you will need to utilize the stock couplers. If you are using the COBB Hard pipe kit install the silicone couplers using a 7mm wrench to use the stock hose clamps. They will install more easily using some silicone spray as a lubricant. If you previously had the hard pipe kit installed by itself on your car, you will still need to swap out the couplers for the ones provided with the corelarger set it came with, as they are slightly larger than the ones in the hard pipe kit which were sized for the stock core. If you are using the stock hard pipes you will need to utilize the stock couplers.
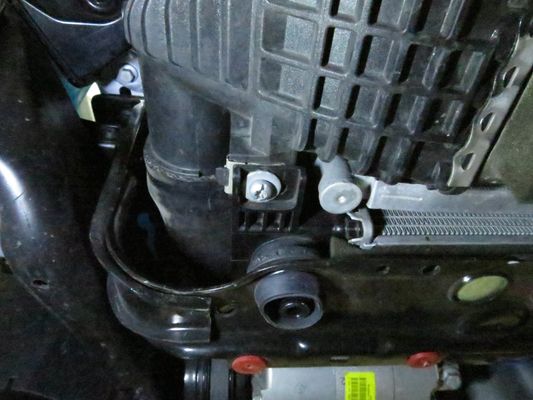
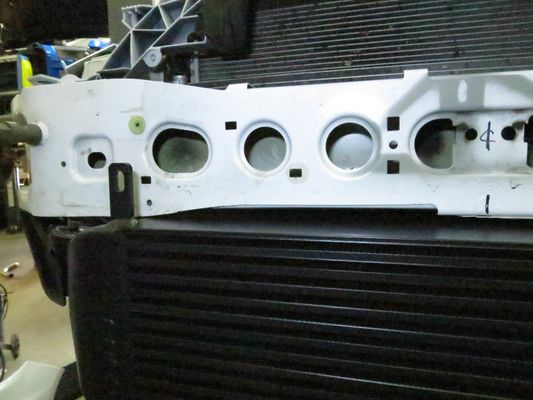
- Now line up the core with the square holes in the bumper. Using a jack of some kind to support it will make things infinitely easier as the core is pretty heavy. Having a friend help steady it while you attach everything in place can be a big help.
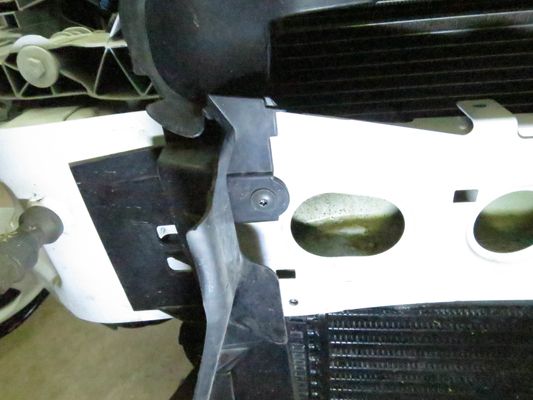
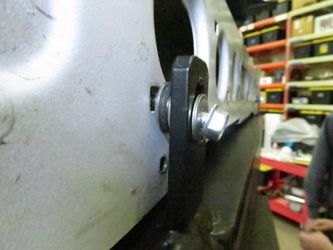
- Assemble the bolts as shown. You'll use the M6x30mm bolts with a washer on either side of a rubber bumper, placing that between the intercooler mount and the bumper, with a washer by itself on the inside of the bumper beam and a 20mm width washer on the outside.

- Now do the same thing with the lower mounts, using a rubber washer sandwich on either side of the vehicle side support and a washer under the bolt head going down through the entire assembly.
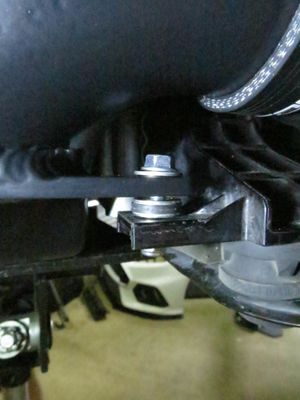
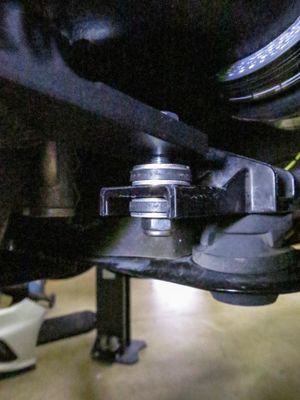
- With everything in place but loose, get the whole thing lined up.
- Once the core is in position, tighten it up at the bottom first with a 10mm socket, making certain you don't over tighten and compress the rubber.
- Now tighten the upper mounts, making sure it's up as high as possible to avoid clearance issues.
- With the core in place tighten down all of the hose clamps to prevent any leaks and plug the MAP sensor back in.
- At this point it's a good time to flash the appropriate map for your car and turn things on to check for leaks.
- If you're leak free you can reinstall everything and go out to enjoy!
Links
Ford COBB Product Install Instructions for Focus RS
Main Installation Instruction Repository for Focus RS Parts
Ford COBB Product Install Instructions for Focus RS
Link to Focus RS Map Notes to see what map you should be on given the parts you've added
| Insert excerpt | ||||||
|---|---|---|---|---|---|---|
|