
59122 – Ford Focus ST Catted Downpipe
Ford Focus ST 2013 - 2018

Congratulations on your purchase of the COBB Tuning Ford Focus ST Catted Downpipe! The following instructions will assist you through the installation process. Please read them BEFORE beginning the install to familiarize yourself with the steps and tools needed. If you feel you cannot properly perform this installation, we HIGHLY recommend you take the vehicle to a qualified and experienced automotive technician.
IMPORTANT! Installing this kit will require custom tuning or utilizing an appropriate Stage Power Package map if you have a matching mechanical configuration. Please consult with COBB or an authorized ProTuner in your area if you have any questions!
Table of Contents
| Table of Contents |
|---|
Parts List
- Downpipe
- 3" exhaust gasket
- (2) m10x1.25 35mm long Hex Bolt
- (2) m10x1.25 Flange Hex Nut
- (2) m8x1.25 16mm long Hex Bolt
- (2) m8x1.25 Hex Nut
- (2) m8 Flat Washer
Tools Needed
- Phillips head screwdriver
- Flathead screwdriver
3/8" ratchet
3/8" 8mm socket socket
3/8" 10mm socket
3/8" 13mm socket
- 3/8" 14mm socket
- 3/8" 15mm socket
3/8" T30 Torx Bit
3/8" 12" extension
3/8" 6" extension
- Oxygen Sensor Wrench
- 7mm combination wrench
- 8mm combination wrench
- 10mm combination wrench
- 14mm combination wrench
- 15mm combination wrench
Removal of Factory Downpipe
- Start off by getting the vehicle up on a lift or placing jack stands under the front of the vehicle to get it up in the air and give you some room to work. Make sure the emergency brake is set firmly and you’ve blocked the rear wheels if you’re using jack stands.
- Using a T-30 Torx bit, remove the undertray by removing the screws that hold it in place. You’ll need to first remove the small lip section followed by the rest of the undertray.
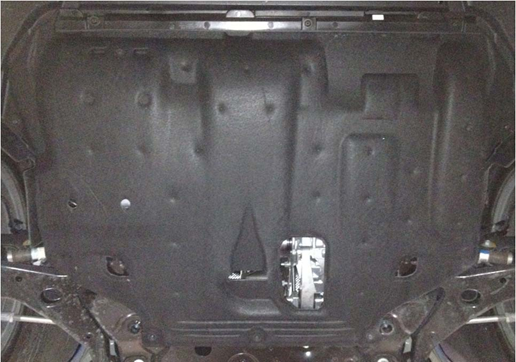
- Now that the undertray is removed, you’ll have full access to the downpipe. Start off by removing the six (6) 13mm nuts that secure the downpipe brackets to the transmission. There is one hidden above the motor mount that can be a bit tricky to see.
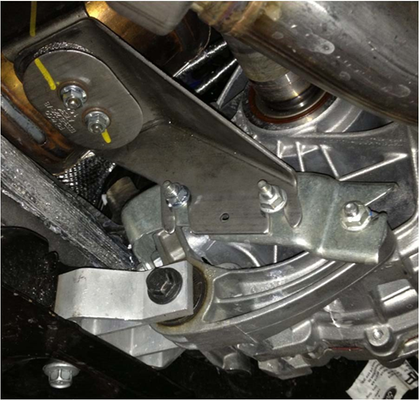
- With all the nuts removed, you’ll find that the bracket is loose but doesn’t necessarily just fall off. You’ll need to pull the bottom of the outside bracket towards the passenger side of the vehicle until it pops off of the lower stud. Once it gets past the lowest stud, it should come off easily.
- Using a socket and a wrench, remove the two bolts that connect the rear of the downpipe to the rest of the exhaust system.
- Using a 10mm socket, remove the two bolts that hold the downpipes rubber exhaust hanger grommet to car.
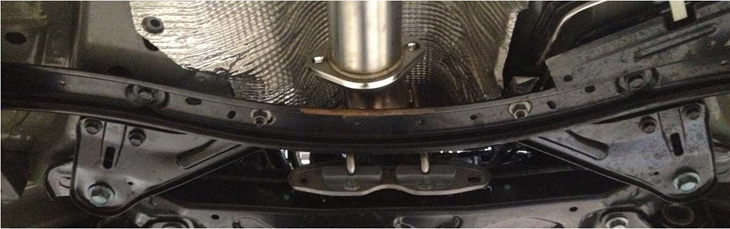
- Using a 15mm socket, remove the two (2) nuts and four (4) bolts that hold the rear sub-frame cross-brace to the vehicle and set it aside.
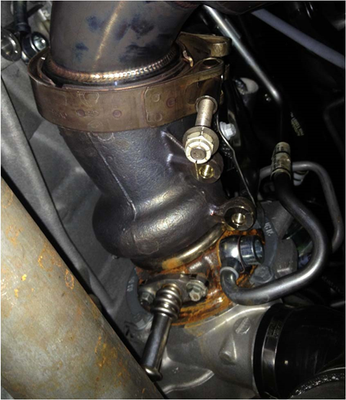
Using a ratchet, long extensions, and a 13mm socket, remove the bolt on the v-band clamp that connects the downpipe to the turbo. It’ll take some work but you’ll need to pry the v-band clamp off of the flanges. A pry bar or screwdriver may be needed. Some tend to be harder than others to remove.
- There are two O2 sensor plugs that need to be disconnected before you can remove the downpipe. To get to them, you’ll need to remove the intake tract between the airbox and the turbo.
- Remove the engine cover by pulling up. Set aside.
- Remove the rubber cover off of each windshield wiper to access the 15mm nut underneath. Remove each wiper. Remember which side is which for reinstallation later.
- Remove the two Torx and four plastic fasteners at the top of the cowl. Remove the upper portion of the cowl and set aside.
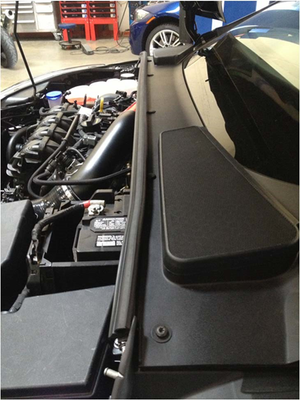
- Underneath, there are two (2) 10mm fasteners holding the next layer of cowl in place. Remove them and remove the cowl.
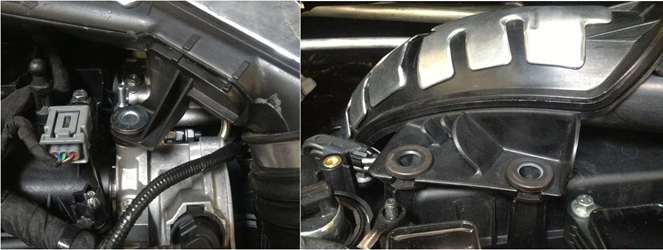
Remove the clamp and then remove the hose from the barbed fitting that goes into the back of the intake
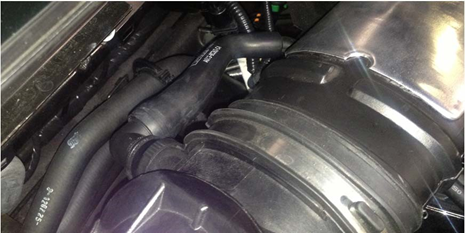
- Using an 8mm socket or wrench, loosen the clamp that attaches the corrugated tubing to the elbow coming out of the airbox.
- Using a 7mm socket or wrench, loosen the clamp that attaches the intake tube to the top of the turbo.
- Using deep sockets or wrench, remove the three fasteners that hold the intake tract to the top of the motor. Then remove the motor cover mounting stud from the rubber grommet for reinstallation later.
- With everything loose you should now be able to remove the intake tract. It may be easier to loosen the clamp in the middle of the tract and split it in to two pieces to remove more easily.
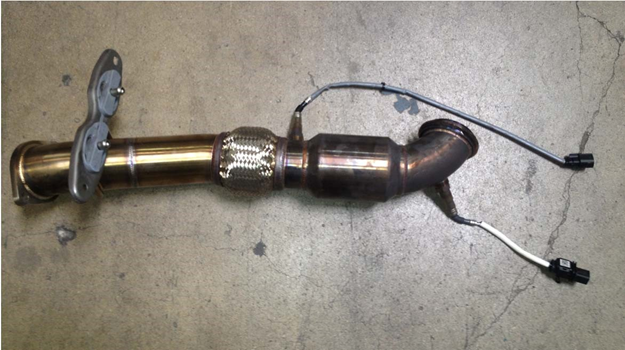
- With the intake tract out of the way, reach down and disconnect the O2 sensor plugs. If you can’t locate them, locate the O2 sensors on the downpipe and follow the wire up to the connection.
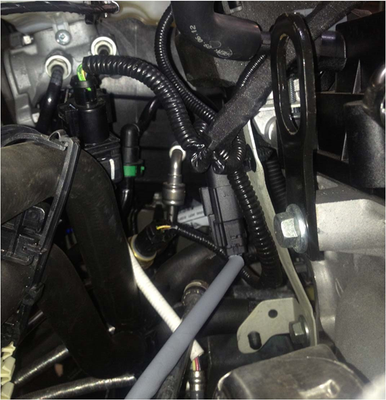
- With the O2 sensor plugs removed, you can now remove the downpipe.
Installing COBB Downpipe
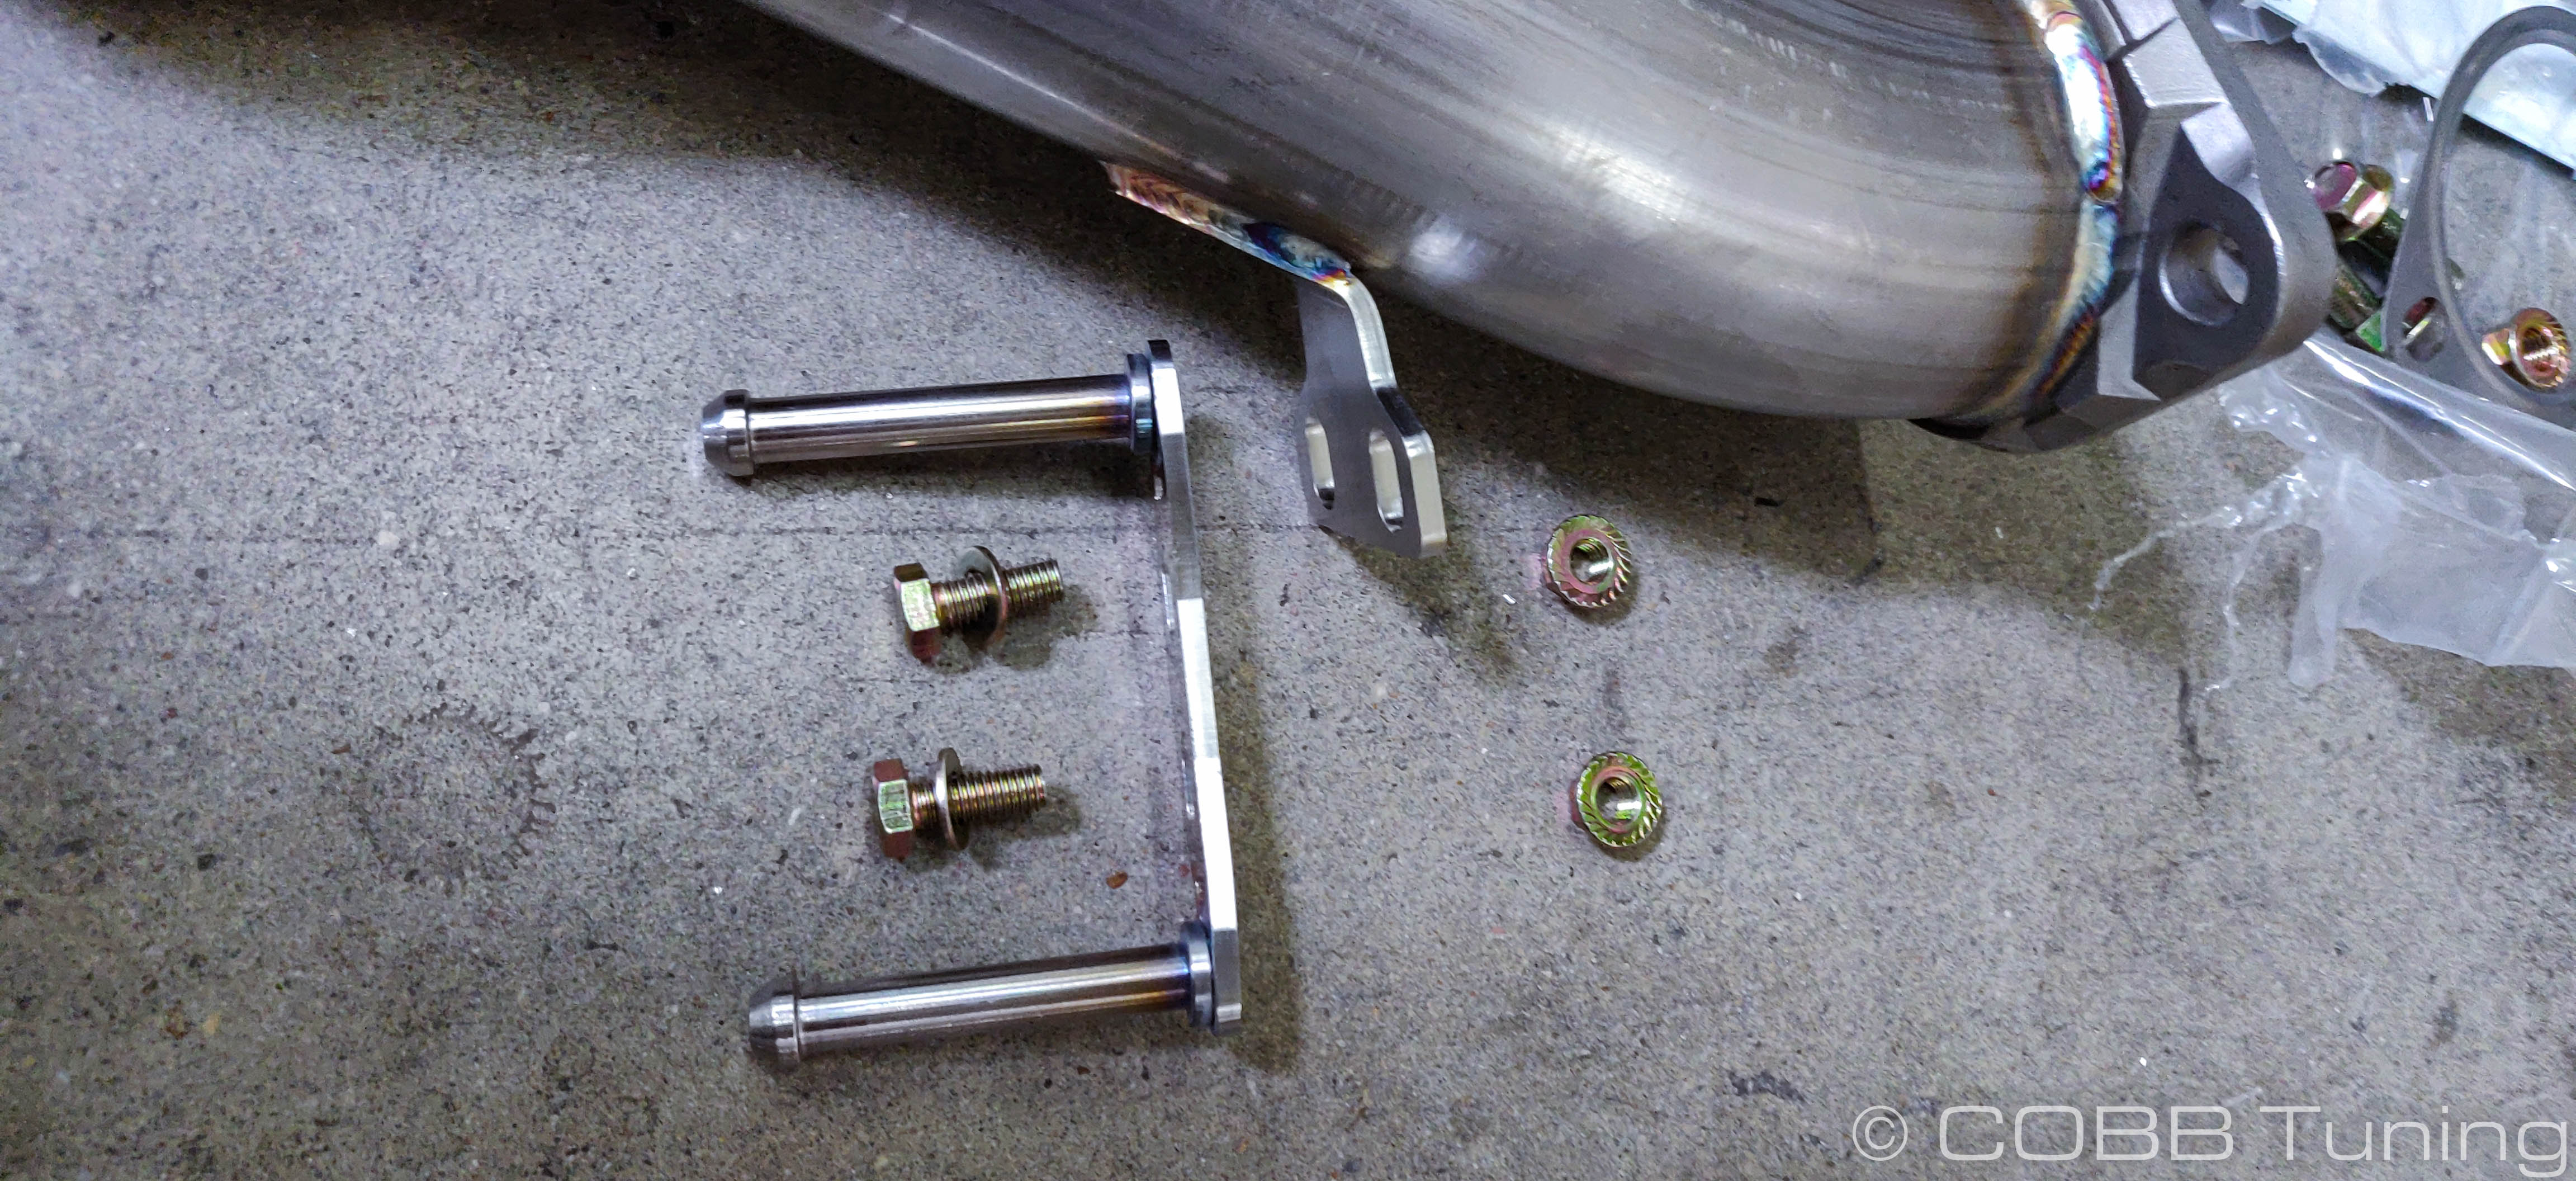
- Install the rear support bracket. The bracket gets installed on the front side of the bracket on the downpipe with the pins pointing forward. You'll use the smaller m8 bolts with a washer under the head, then into the bracket, the downpipe, then with the serrated hex bolt on the back side. You can leave the bracket slightly loose so that you can shift it around as needed to match up with your exhaust.
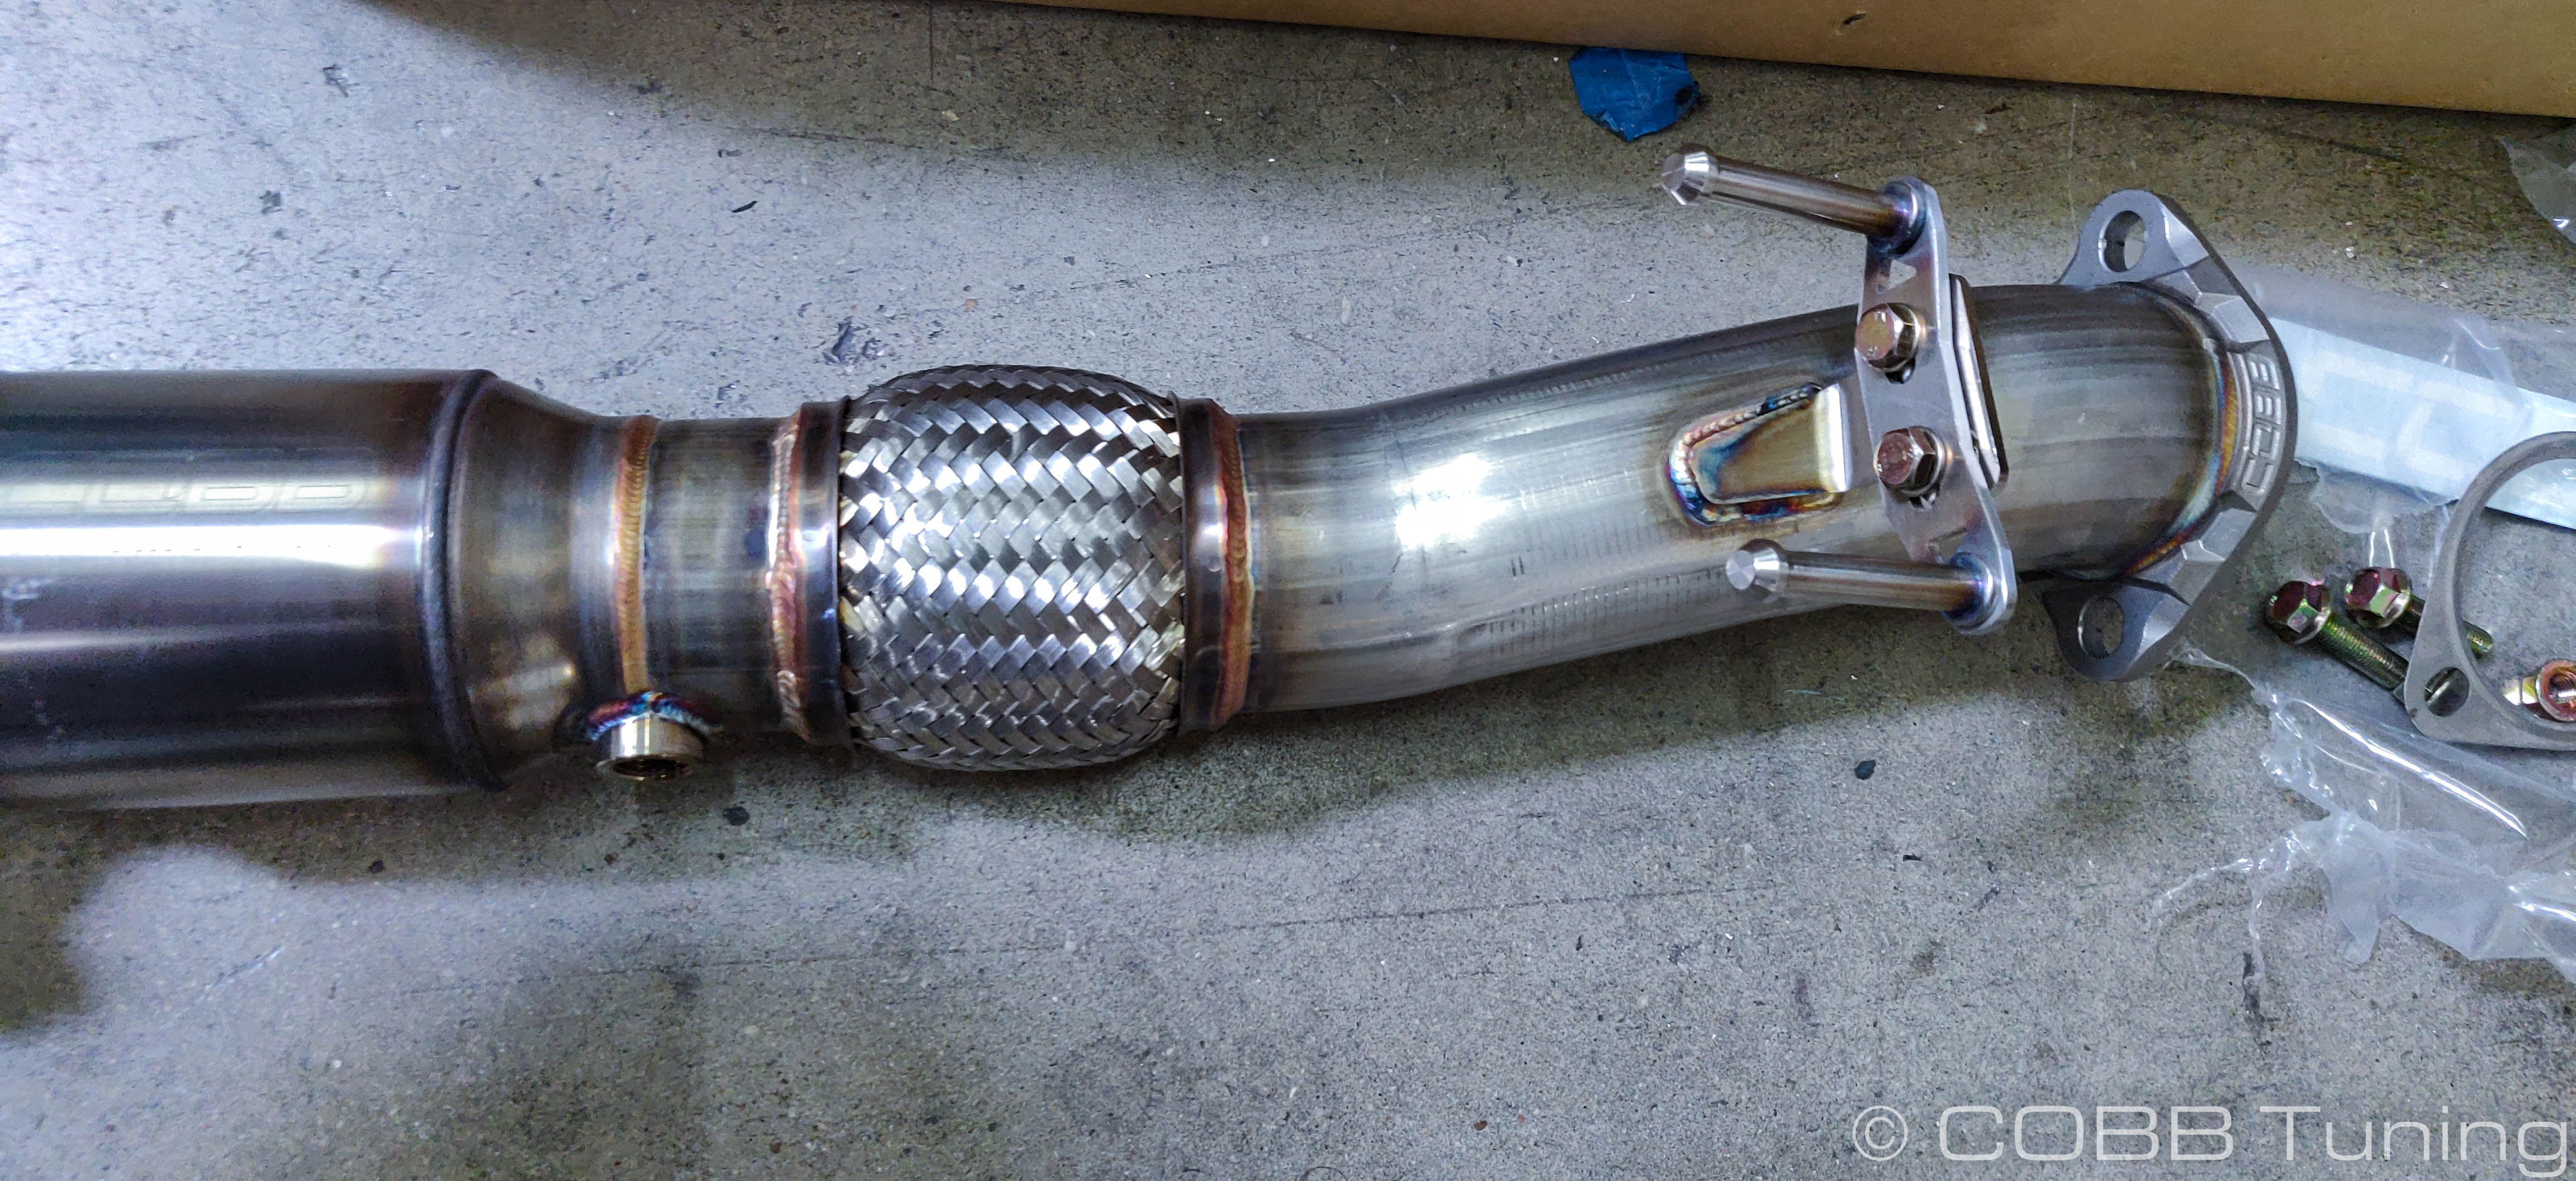
- Install the exhaust hanger section onto the downpipe with the flat side pointing towards the front.
- Using an oxygen sensor wrench, remove the two O2 sensors from the factory downpipe. Put a small amount of anti-seize onto the threads and install them into the COBB downpipe, keeping in mind which one goes where.
- Using the supplied m10 bolts going from the front towards the back, reattach the downpipe to your exhaust using the supplied gasket.
- Once you have the exhaust sitting the way you want and tightened to the downpipe, go ahead and bolt the downpipe exhaust hanger to the car using the factory bolts.
- Using 14mm tighten down the downpipe bracket.
- Complete the installation by following the previous steps in reverse order until the vehicle is back together.
- If installing with a factory catback exhaust, use the smaller diameter supplied gasket between the downpipe and the exhaust. If installing with an aftermarket 3” exhaust, use the larger diameter gasket.
- You won’t need to reinstall the brackets that previously connected the factory downpipe to the motor mount/transmission area.
- Use your COBB AccessPORT to load up the correct tune for your new modifications and go enjoy your new COBB Catted Downpipe!
Links
COBB Product Install Instructions for Focus ST
Main Installation Instruction Repository for Focus ST Parts
Ford Focus ST Map Notes for Focus ST
Link to Focus ST Map Notes to see what map you should be on given the parts you've added
| Insert excerpt | ||||||
|---|---|---|---|---|---|---|
|