
891001 891010 - COBB Tuning Rear Motor Mount Focus ST
Ford Focus ST 2013 - 2018

Congratulations on your purchase of the COBB Tuning Focus ST Rear Motor Mount! The following instructions will assist you through the installation process. Please read them BEFORE beginning the install to familiarize yourself with the steps and tools needed. If you feel you cannot properly perform this installation, we HIGHLY recommend you take the vehicle to a qualified and experienced automotive technician.
Table of Contents
| Table of Contents |
|---|
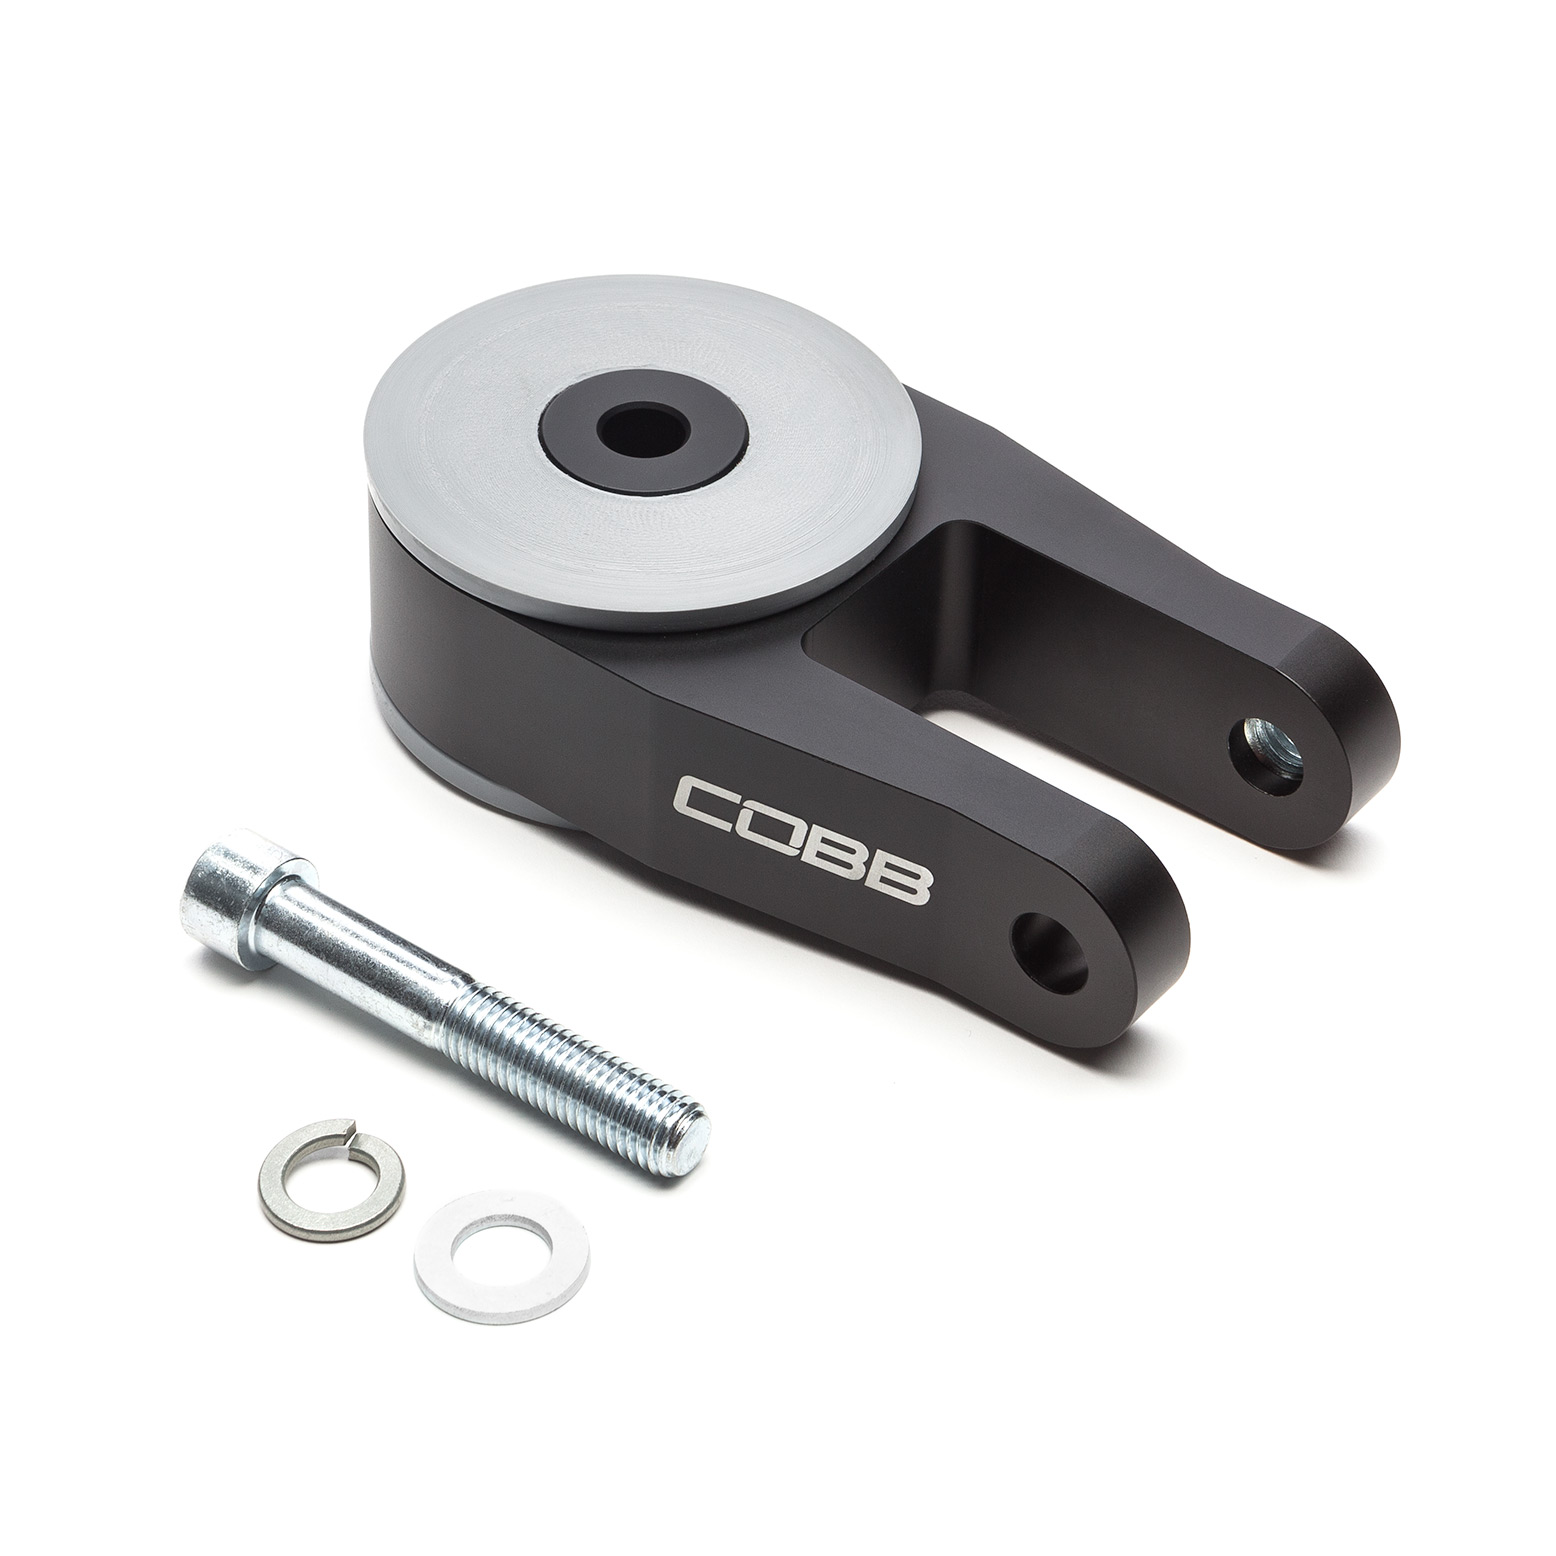
Parts List
- COBB Tuning Rear Motor Mount
- M12 x 75mm Socket Head Cap Screw
- 12mm Flat Washer
- 12mm Split Lock Washer
Tools Needed
- Phillips head screwdriver
- Flathead screwdriver
- 3/8" 15mm deep socket
- 3/8" T30 Torx Bit
- 3/8" m10 Allen
- 13mm combination wrench
- 15mm combination wrench
Removal of Motor Mount
- Start off by getting the vehicle lifted up in a flat and level area.
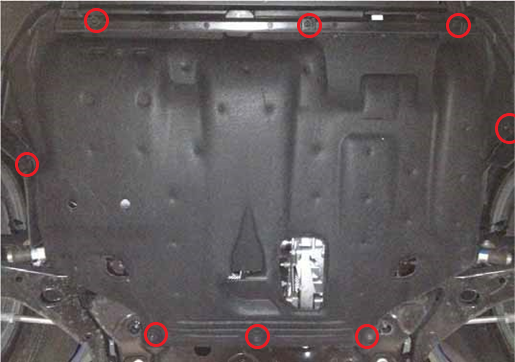
- Using a T-30 Torx bit, remove the undertray by undoing the eight screws holding it in place.
- With the undertray removed, you'll have full access to the rear motor mount. Start off by removing the six (6) 13mm nuts that secure the downpipe brackets to the transmission. There is one directly above the motor mount on the back side of one of the brackets as well.
- With all the nuts removed, you’ll find that the bracket is loose but doesn’t necessarily just fall off. You’ll need to pull the bottom of the outside bracket towards the passenger side of the vehicle until it pops off of the lower stud. Once it gets past the lowest stud, it should come off easily.
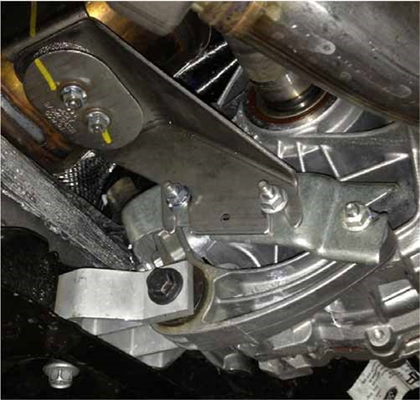
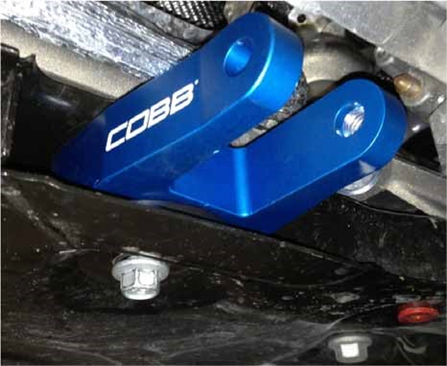
- Now, use a 15mm socket or ratcheting wrench to remove the horizontal bolt that secures the rear motor mount to the transmission. (Circled Above) You will see now that the motor can pivot easily forward and backward.
- Using the same 15mm socket, remove the vertical bolt (Squared In Above Picture) that holds the rear motor mount into the subframe. Once removed, the mount is loose but still captured in place by the transmission bracket. Keep track of which one is the vertical bolt, as it will be reused.
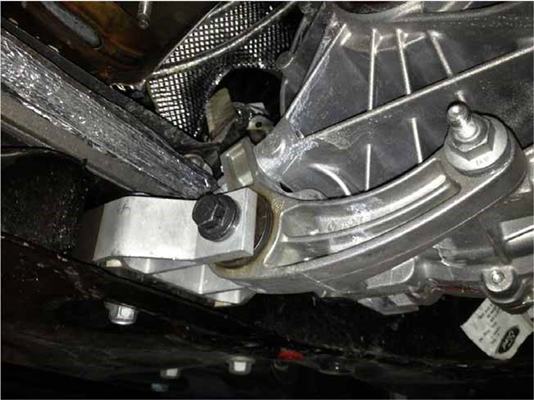
- Using a 15mm wrench (ratcheting works great here), remove the final three 15mm studs that secure the transmission bracket to the transmission. Once loose, push the bottom of the motor towards the front of the car to allow the transmission bracket and rear motor mount to come out of the car.
Installation of COBB Motor Mount
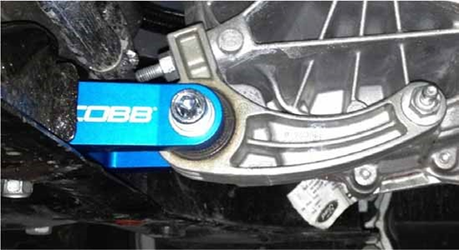
- With the factory mount out of the way, install your COBB RMM into the same location as the factory mount as shown. It will be a tighter fit than the stock mount since it is new so working it back and forth can get it closer until the vertical bolt hole is lined up. Once done, loosely install the vertical bolt.
- Install the factory transmission bracket in to place using the 15mm studs that were previously removed. Torque to 45 ft/lbs.
- Now, install the included socket head cap screw with a lock washer and flat washer into the horizontal bolt location to secure the COBB mount to the factory transmission bracket. Tighten to 75 ft/lbs using a 10mm hex/Allen socket. It may require some mild movement of the motor to get lined up.
- With the horizontal fully tightened, go back and torque the vertical fastener to 70 ft/lbs with a 15mm socket.
- Reinstall the downpipe support bracket using the six (6) 13mm nuts that you previously removed. Some force may be needed to get it all lined up and to pop over that bottom stud that gave you trouble when removing it.
- Reinstall the undertray pieces using the T-30 Torx Bit. We recommend you tighten by hand so as not to strip the plastic threads.
This particular part is under huge amounts of dynamic forces while driving. Because of this, we recommend you go back and re-torque all the fasteners after the first few days of driving to ensure nothing has come loose. Visual inspection is recommended during oil changes or any other time you’re under the vehicle
- Go out and enjoy!
Related Links
Widget Connector url https://www.youtube.com/watch?v=ckTnGHMaOmA
Mazda Installation Instructions
Main Installation Instruction Repository for Focus ST Parts
Link to Focus ST Map Notes to see what map you should be on given the parts you've added
| Insert excerpt | ||||||
|---|---|---|---|---|---|---|
|