
752100 – Mitsubishi Evolution X SF Intake
Mitsubishi Evolution X MR, GSR, FE, SST 2008-2015
Congratulations on your purchase of the COBB Tuning SF Intake for Mitsubishi Evolution X! The following instructions will assist you through the installation process. Please read them BEFORE beginning the install to familiarize yourself with the steps and tools needed. If you feel you cannot properly perform this installation, we HIGHLY recommend you take the vehicle to a qualified and experienced automotive technician.
IMPORTANT! Installing this kit will require custom tuning or utilizing an appropriate Stage Power Package map if you have a matching mechanical configuration. Please consult with COBB or an authorized ProTuner in your area if you have any questions!
Table of Contents
| Table of Contents |
|---|
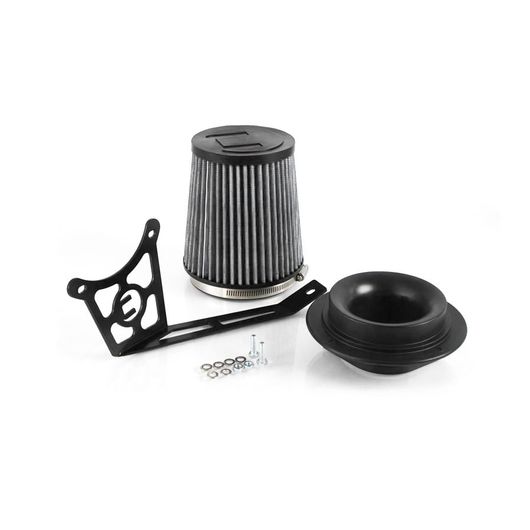
Parts List
- Bracket to Chassis Washe
- MAF Housing
- Filter
- Intake Bracket
- (2) MAF Housing to Bracket Mounting Bolts
- (2) MAF Housing to Bracket Mounting Nuts
- (4) MAF Housing to Bracket Flat Washers
- (2) MAF Housing to Bracket Lock Washers
- Bracket to Chassis Bolt
- Bracket to Chassis Washer
Tools Needed
Factory Air Box Removal
- Start by removing the two plastic Phillips head fasteners from the factory intake duct.
- With the fasteners removed you may now remove the intake duct by pulling it straight out of the air box.

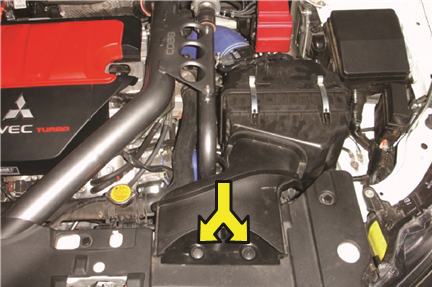
- To remove the factory air box you will now need to remove the 10mm bolt located on the lower front side of the box.
- Now unclip the MAF sensor connector and the two plastic clips that secure the MAF sensor harness to the air box using a pair of needle nose pliers
- Now loosen the 10mm bolt on the hose clamp that secures the turbo inlet tube to the MAF sensor housing and you should be able to lift the factory air box and MAF sensor housing up and out.
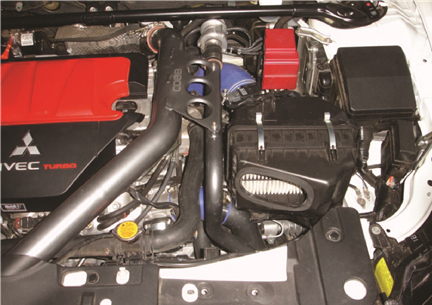
- At this point using your trim tool or a small flat-head screwdriver you will need to unclip the wiring harness from the factory air box bracket. While not necessary you can remove the entire air box bracket at this time (2 12mm bolts) for a cleaner look, or just leave it in place.
COBB SF Intake Install
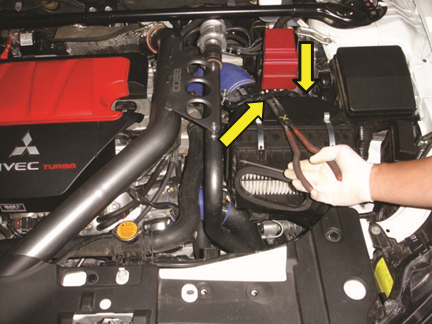
- Remove the two 10mm bolts that secure the MAF sensor housing to the factory air box. Make sure and also remove the rubber gasket and the two metal spacers from the air box. Note: sometimes the spacers stay in the MAF housing, sometimes they fall out, so be sure not to lose the spacers and gasket as they will be re-used.
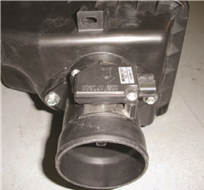
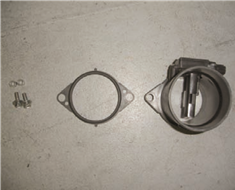
- Attach the factory MAF housing to the COBB MAF adapter reusing the factory 10mm bolts. You may find it easier to install the rubber gasket into the COBB MAF adapter instead of placing it on the end of the MAF housing Don’t forget to put the factory metal spacers inside the MAF housing when assembling. Tighten, but do not over tighten the 10mm bolts as this may cause the brass inserts to pull out of the MAF adapter.
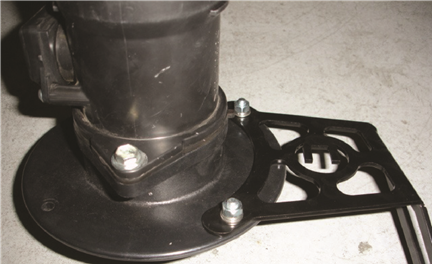
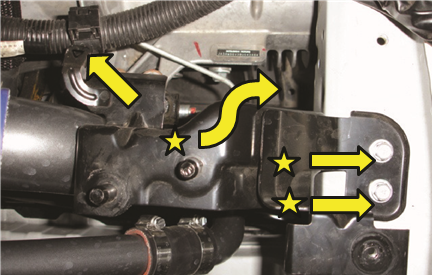
- At this point you can also attach the COBB intake bracket to the MAF adapter using the supplied 10mm bolts, nut, and washers as shown.
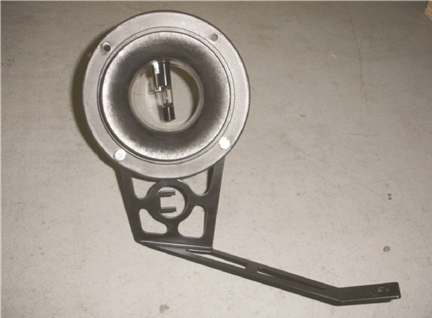
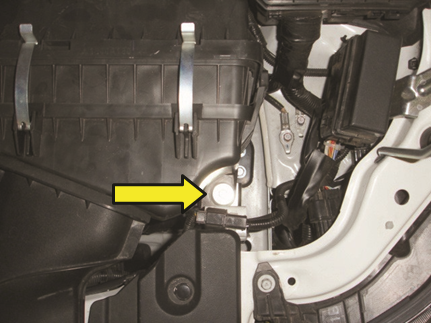
- You may now install the MAF housing, adapter, bracket assembly in the car. Install the 13mm bolt and washer in the extra hole in the frame rail as shown and re-tighten the factory 10mm hose clamp.
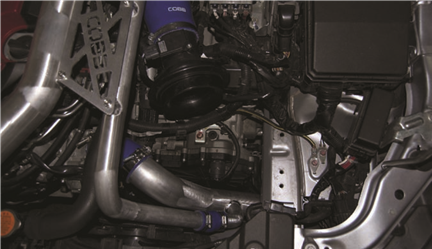
- Now clip the MAF connector back into the MAF sensor choosing the best path for the wiring harness. Secure the filter on the end of the COBB MAF adapter using the supplied 8mm hose clamp and tighten, but do not over tighten the clamp as this may damage the clamp and/or the housing.
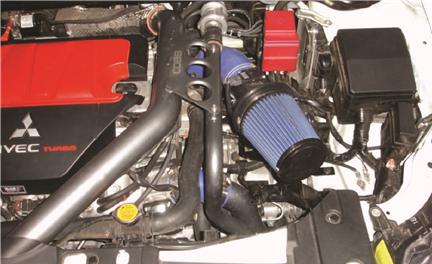
- You have the option at this point to re install the factory inlet duct if desired using the two plastic phillips head fasteners.
- You're all done! Go out and enjoy!
Links
MitsubishiCalibration Map Notes for Mitsubishi Vehicles
| Insert excerpt | ||||||
|---|---|---|---|---|---|---|
|