
701550 – Ford Fiesta ST Hard Pipe Kit
Fiesta ST 2014-2019
Congratulations on your purchase of the COBB Tuning Fiesta ST Hard Pipe Kit! The following instructions will assist you through the installation process. Please read them BEFORE beginning the install to familiarize yourself with the steps and tools needed. If you feel you cannot properly perform this installation, we HIGHLY recommend you take the vehicle to a qualified and experienced automotive technician.
IMPORTANT! Installing this kit will require custom tuning or utilizing an appropriate Stage Power Package map if you have a matching mechanical configuration. Please consult with COBB or an authorized ProTuner in your area if you have any questions!
Table of Contents
| Table of Contents |
|---|
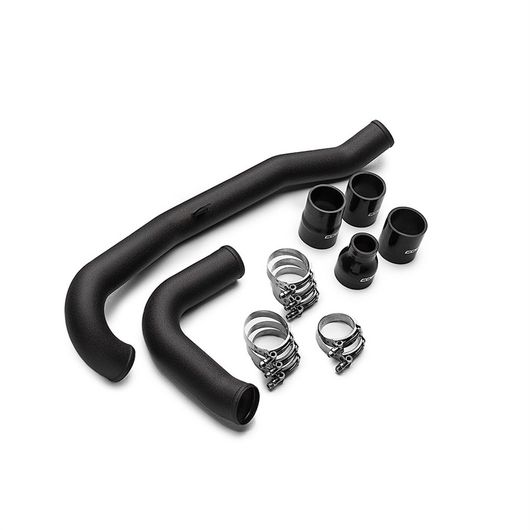
Parts List
- Charge Pipe - Hot
- Charge Pipe - Cold
- Silicone Straight Reducer 2.5"-1.5"
- Silicone Straight Reducer 2.5" - 2.375"
- Silicone straight Coupler 2.5"
- 7 x 2793 Clamp 70-78mm
- 2789 44-51mm
- COBB License Plate Frame
- 2 x COBB Stickers
- 2 x M8x30 Hex Bolts
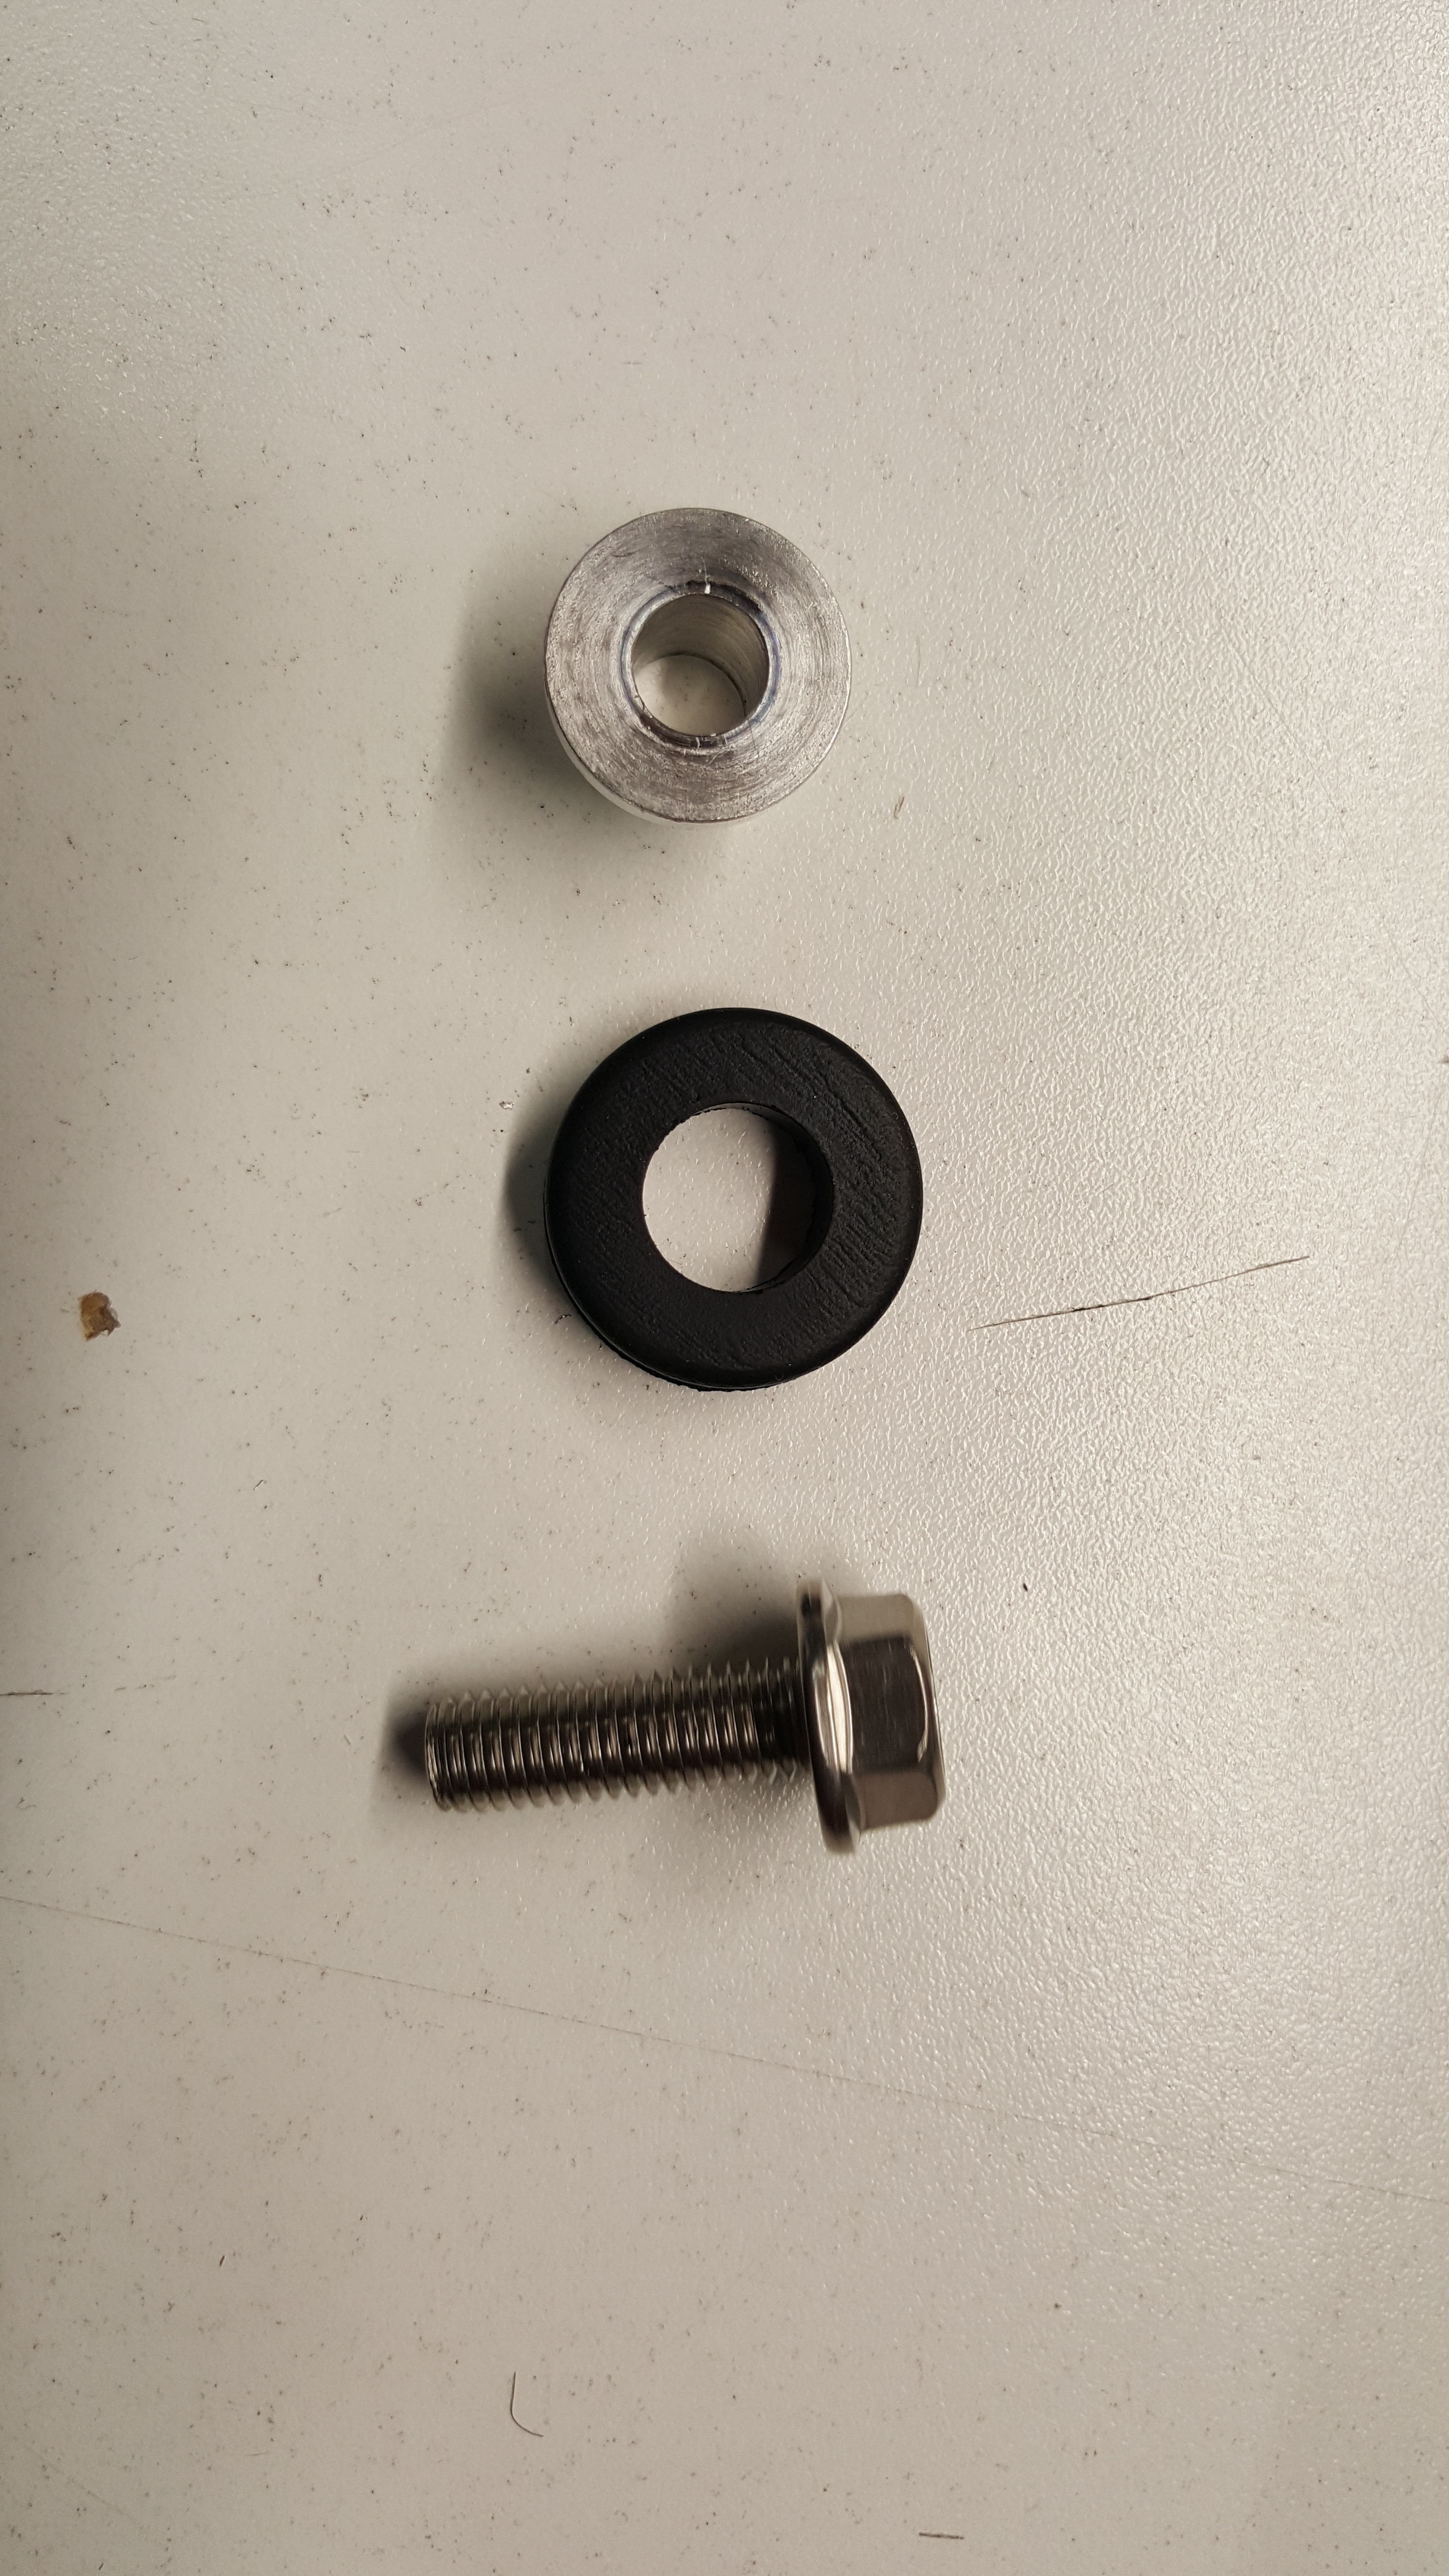
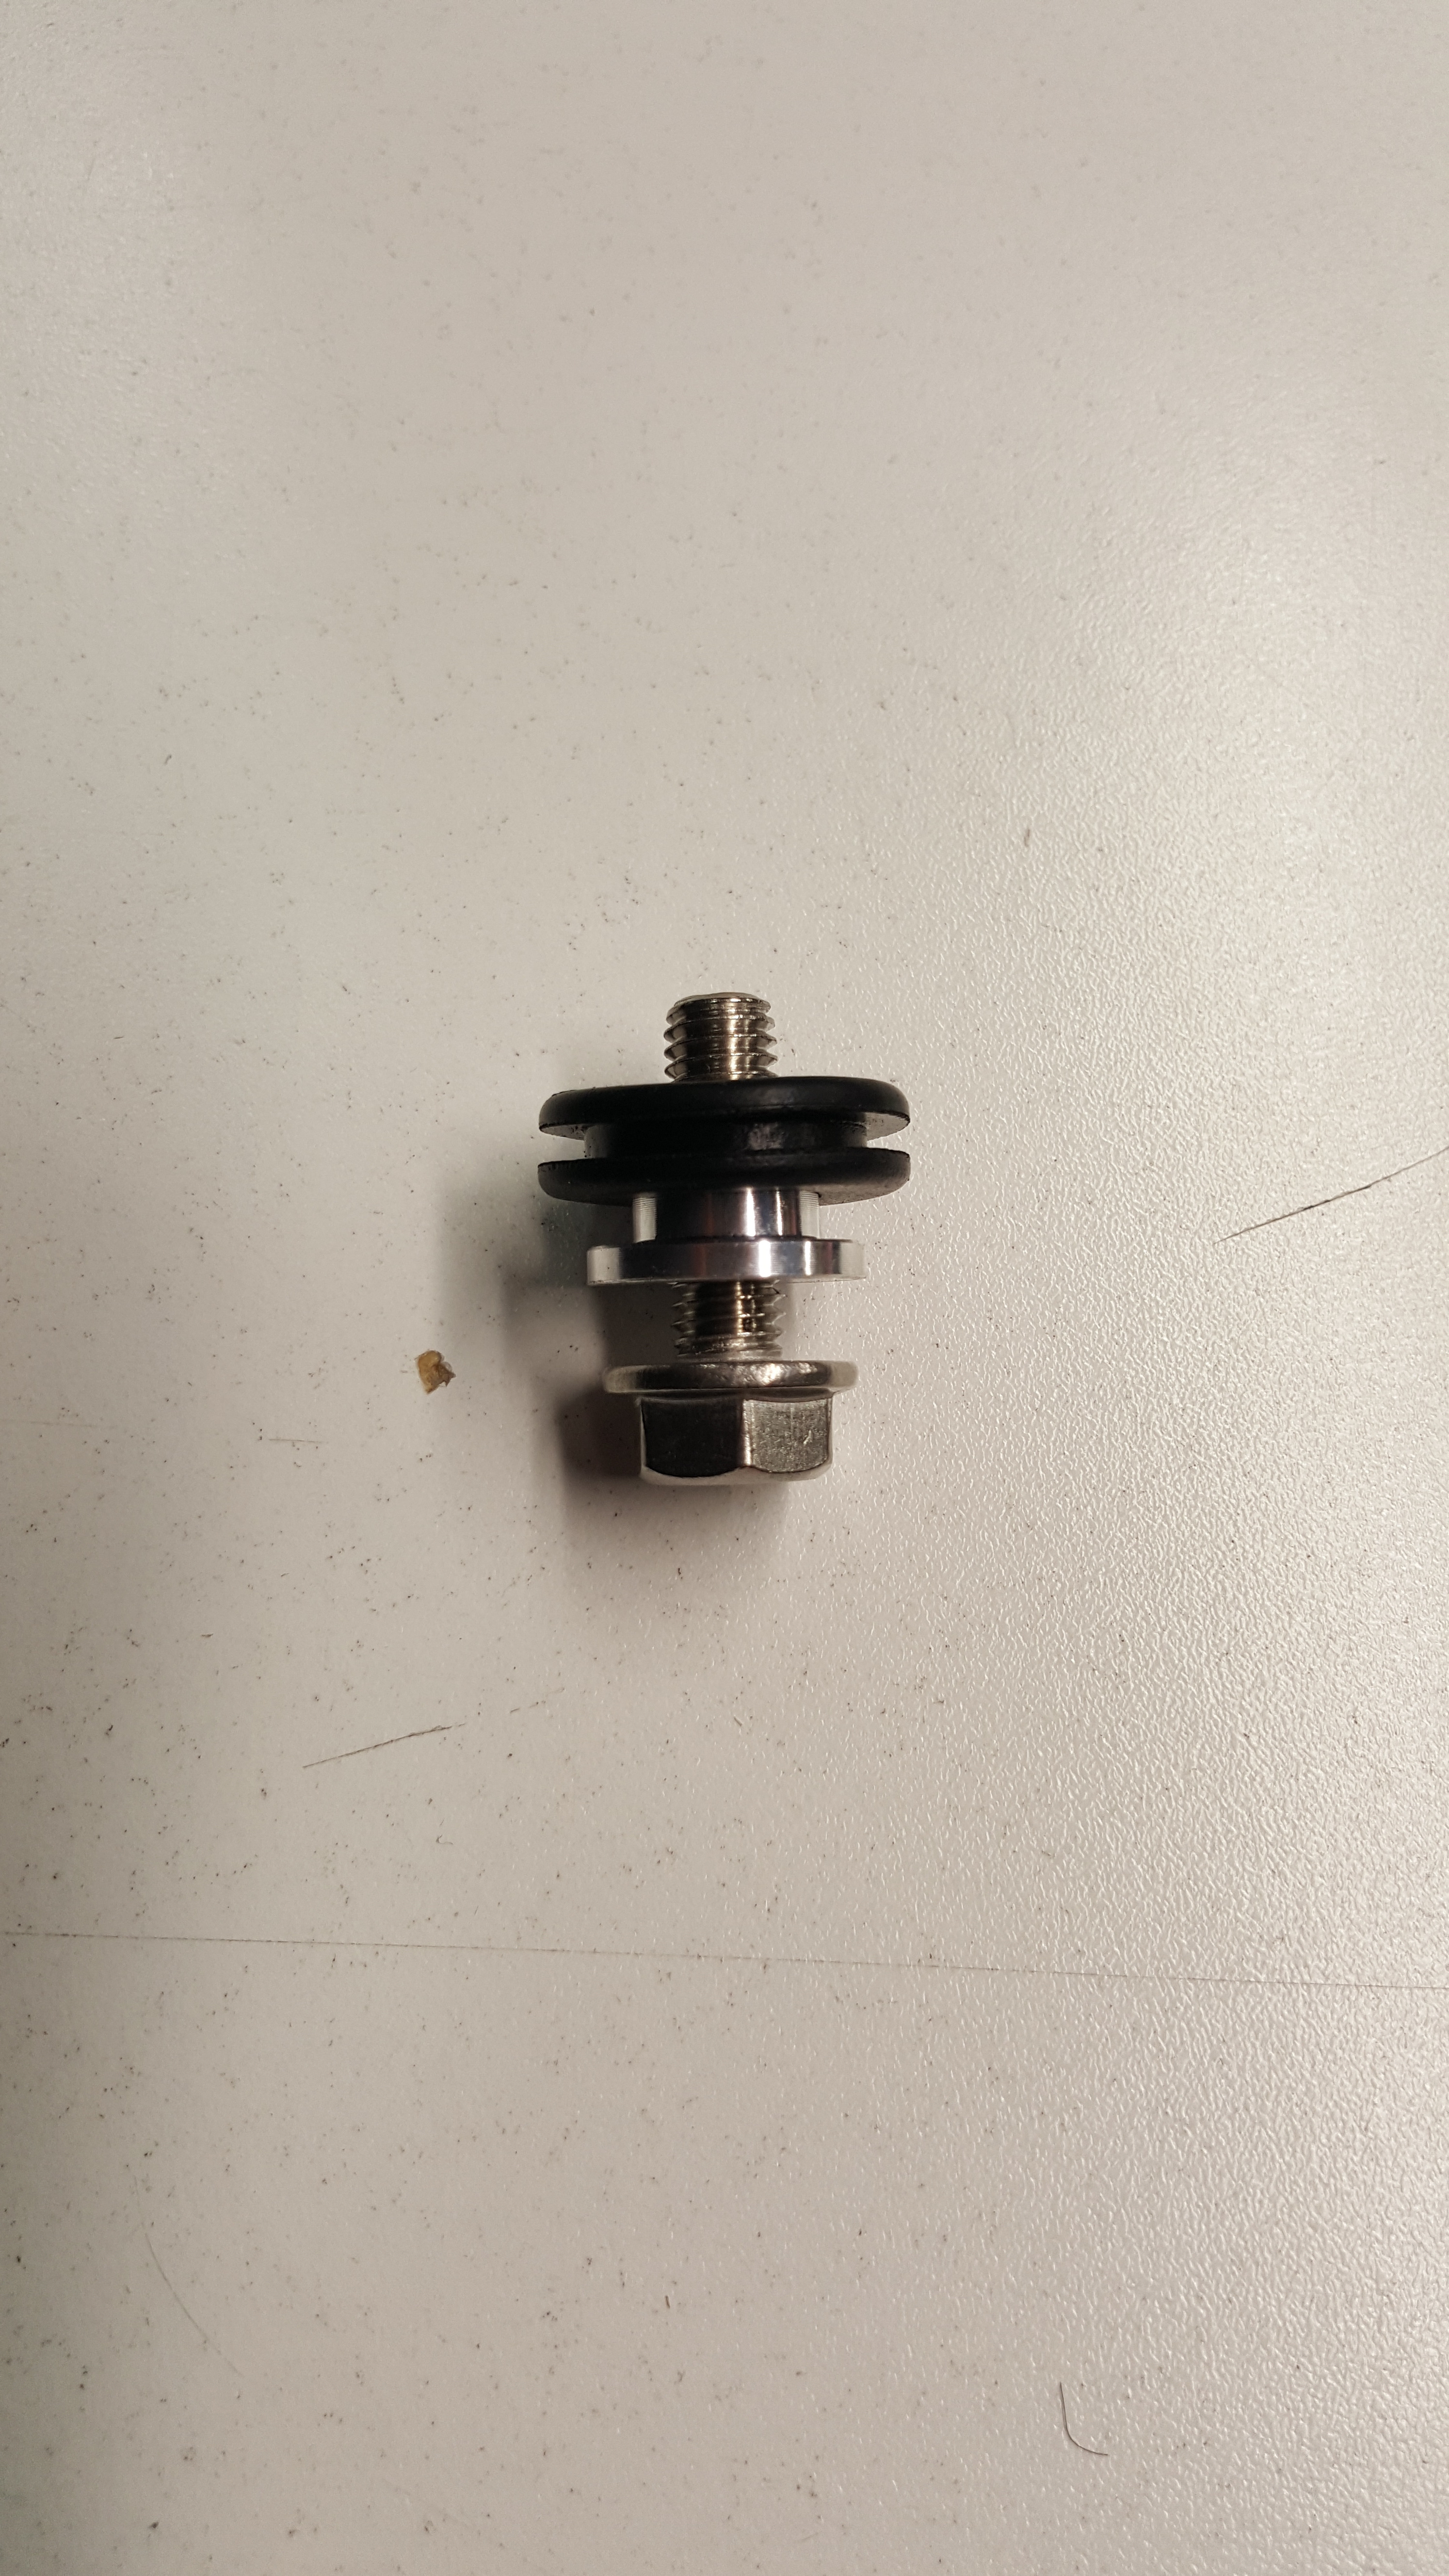
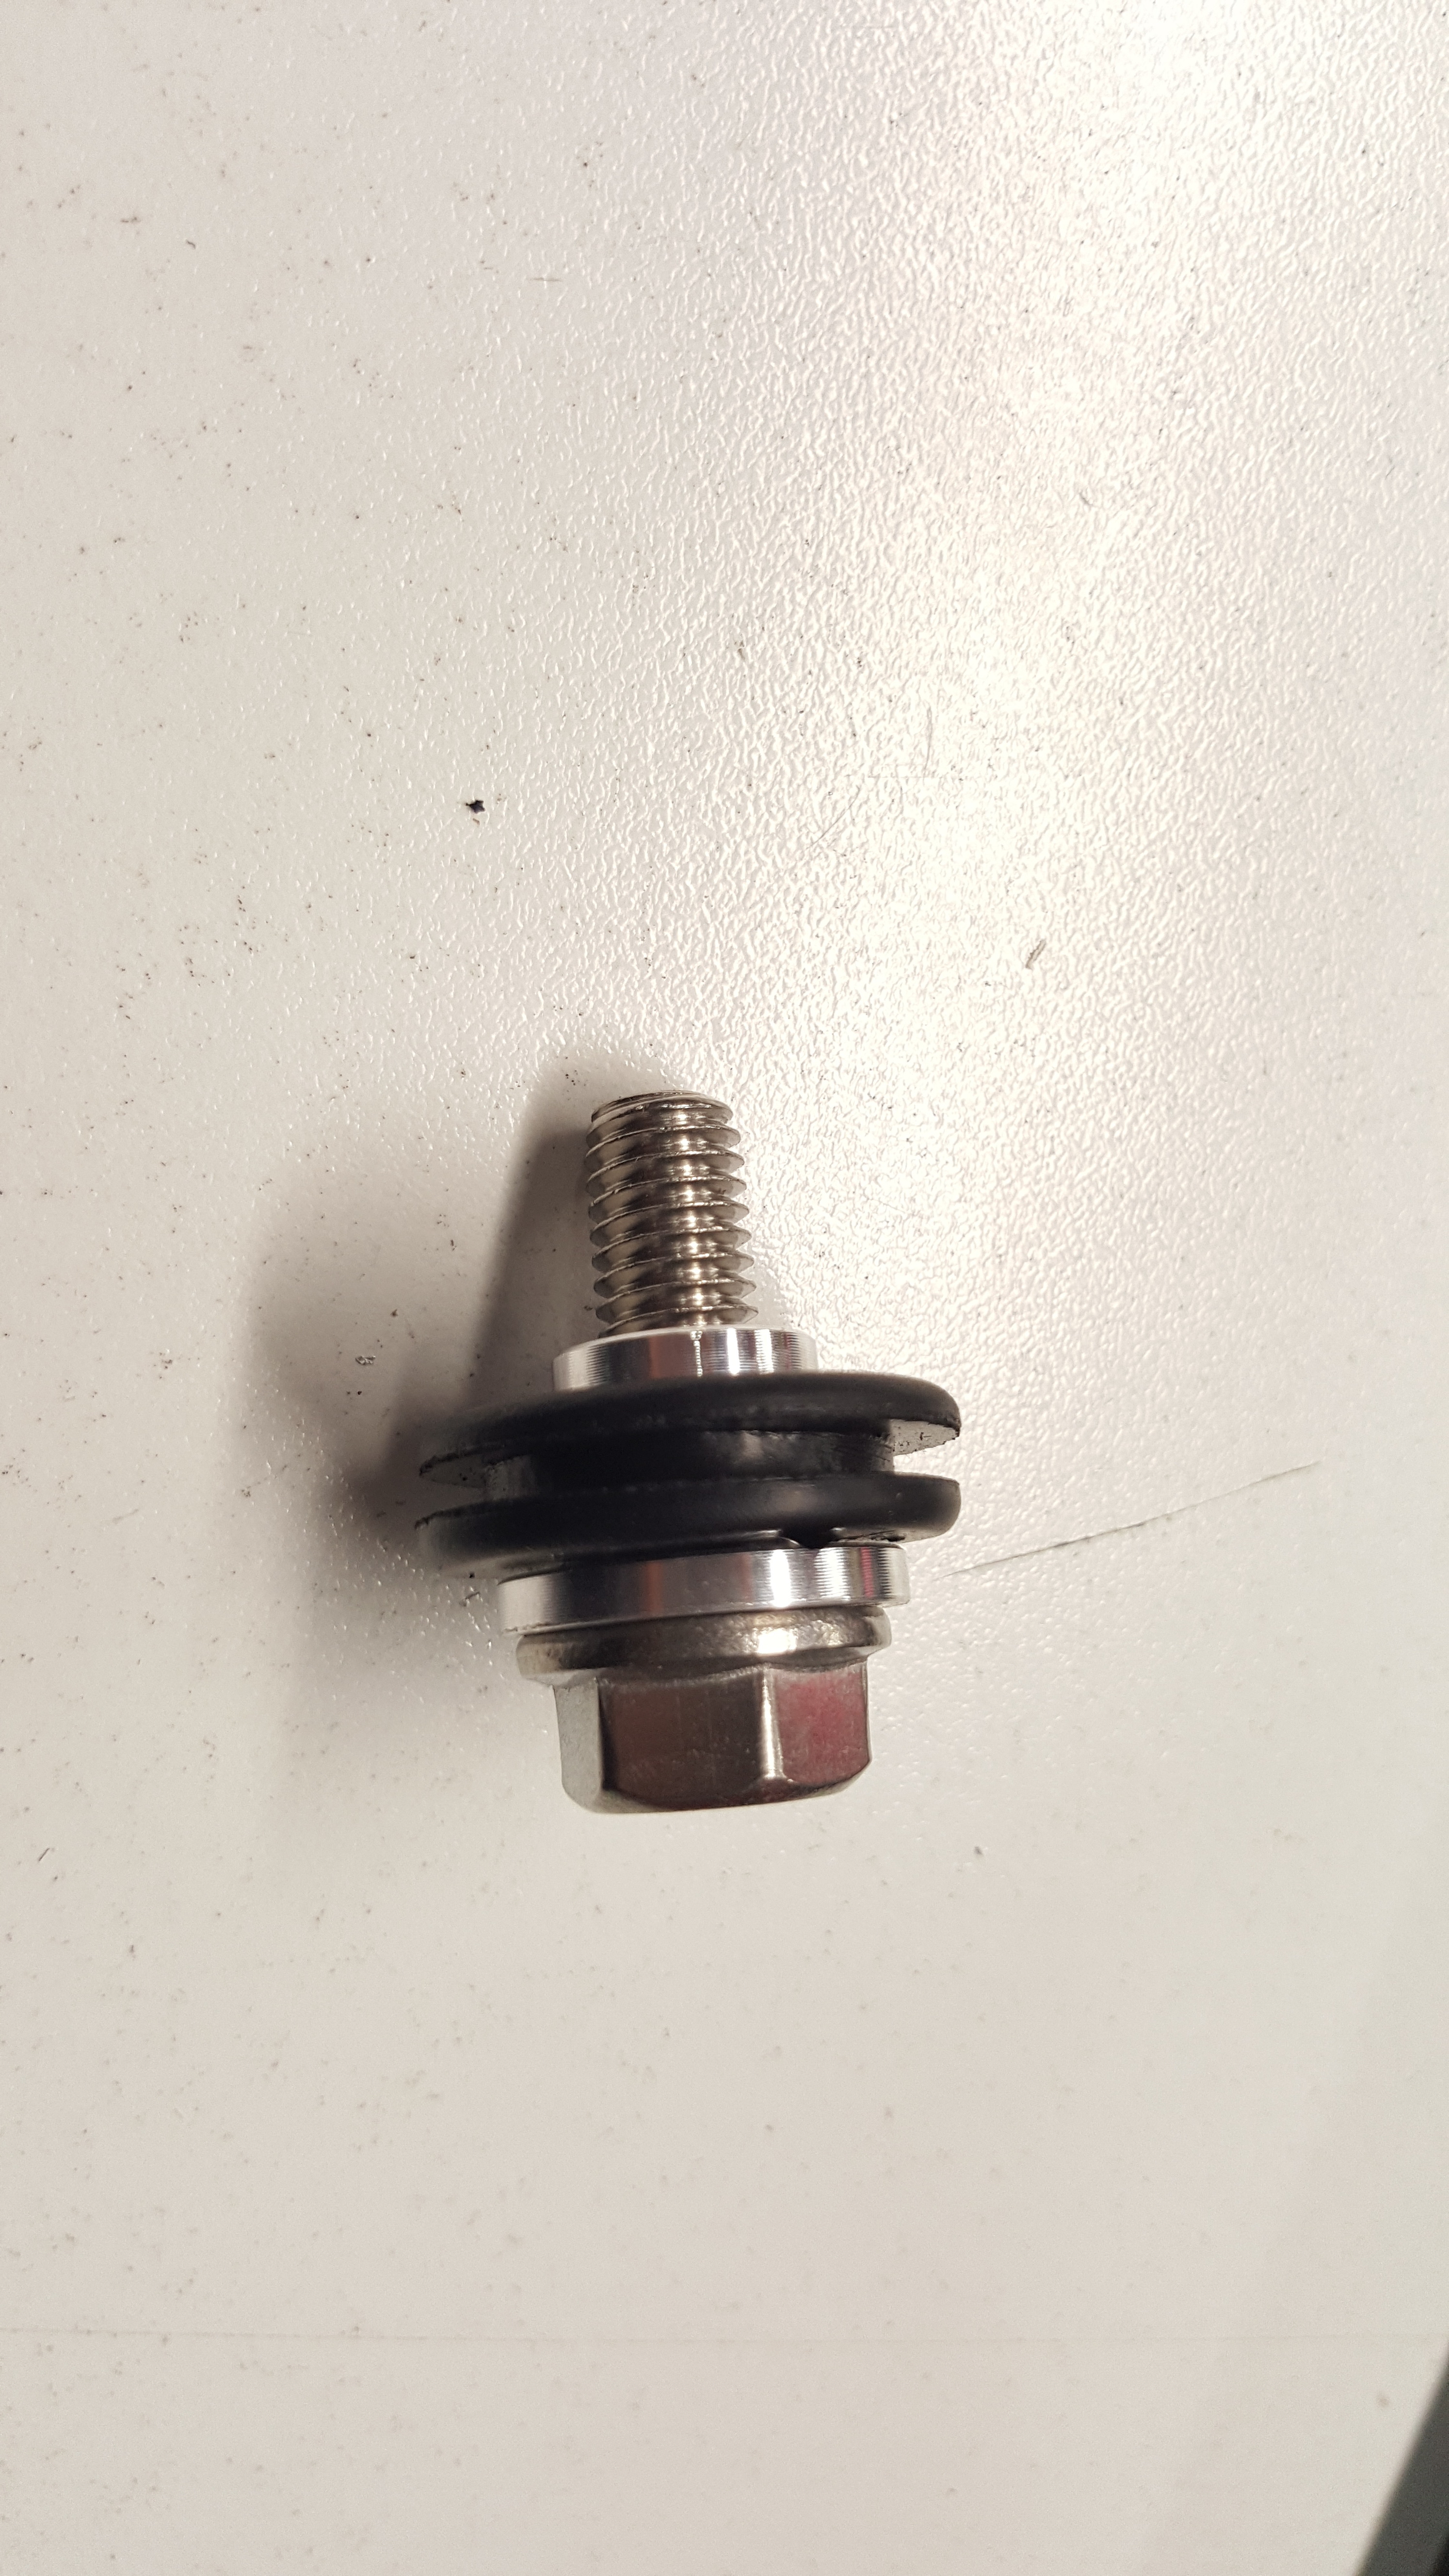
- (2) Aluminum Spacer Bushing
- (2) Rubber Grommets
Tools Needed
- Phillips head screwdriver
- Flathead screwdriver
3/8" ratchet
- 3/8" 7mm socket
3/8" 8mm socket socket
- 3/8" 10mm socket
- 3/8" 13mm socket
- 8mm Ratcheting combination wrench (recommended but not necessary)
3/8" T25 Torx Bit
3/8" T30 Torx Socket
3/8" 12" extension
3/8" 6" extension
3/8" Socket Swivel
- M4 Allen Key
- Trim removal tool
- Channel Lock Pliers
Removing Stock Pipes
- While we chose to remove the bumper since we were doing a core install at the same time, it is quite simple to perform the installation with the bumper still on and simply reaching up from underneath to unhook things.
- Using a 7mm socket, loosen the worm clamp on the intercooler inlet and outlet hose.
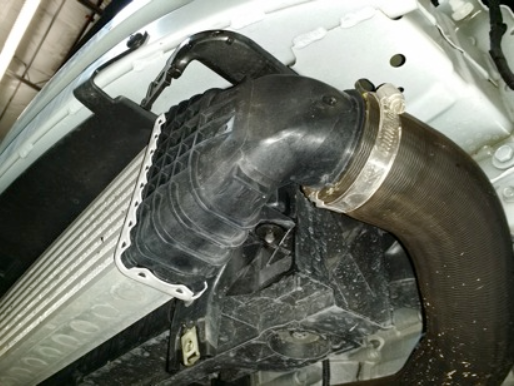
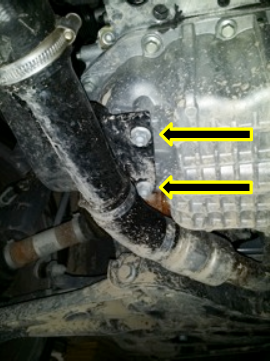
- Next utilize a 7mm socket to loosen the hose clamp that attaches the factory piping to the turbo at theback of the motor. Also, use a 13mm socket to remove the two (2) 13mm nuts that hold the pipe to the bottom of the motor. Remove the pipe.

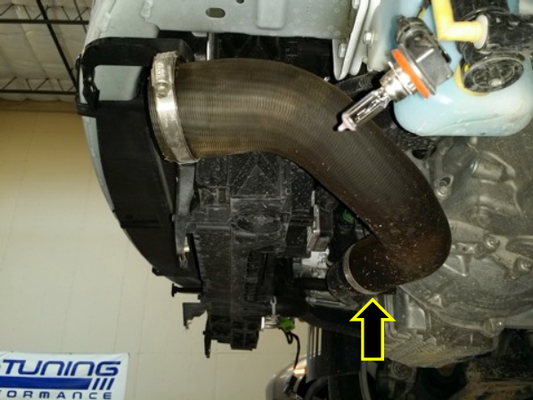
- Still using that handy dandy 7mm socket loosen the opposite end of the the charge pipe connecting to the throttle body, once that's done you can remove the whole soft charge pipe leaving the hard plastic one in place.
Installing the COBB Hard Pipe Kit
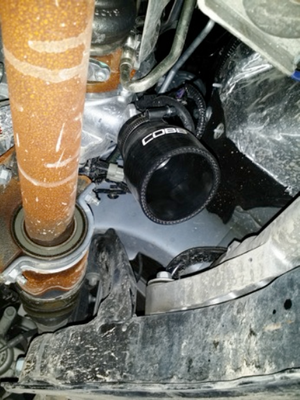
- Install the 2.5” to 2.375” silicone reducer onto the plastic throttle body pipe, with the smaller endgoing over the plastic tube. Loosely install a T-bolt clamp over over both ends of the coupler.Now, install the smaller cold-side charge pipe as shown below. Install a 2.5” straight coupler andT-bolt clamps between the end of the charge pipe and the intercooler oulet. We’ll come back andtighten them down later once the rest of the kit is installed.
- Use the smaller T-bolt clamp to install the 2.5" to 1.5 " reducer onto the turbo outlet and tighten it down.
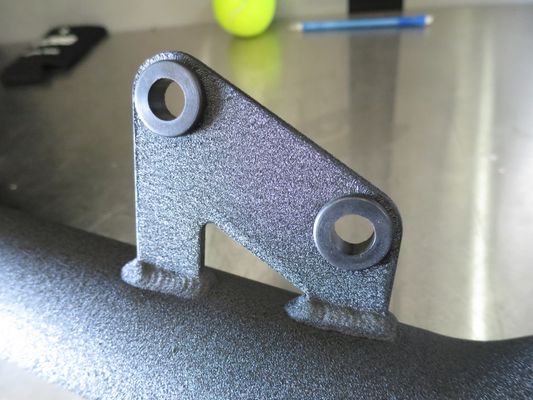
- Next go ahead and put the provided rubber grommets into the holes of the charge-pipe bracket.
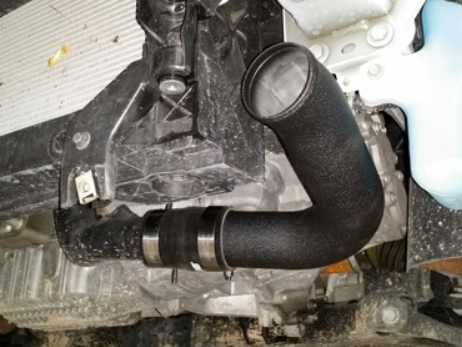
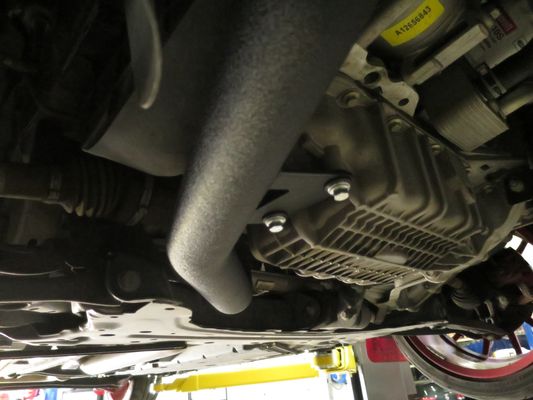
- Now, install the larger charge pipe into the turbo silicone and onto the threaded post coming off the motor where the factory charge pipe was connected. Install a 2.5” straight coupler between the end of the charge pipe and the intercooler inlet. Make sure to fully seat the bracket onto the base of the post and push the charge pipe well up into the turbo silicone. Loosely install a T-bolt clamp over each side of the connections.
Install the aluminum bushing spacers into the pipe, and using your 6mmx25mm bolts, install the turbo charge pipe to the block. The order in which these are installed is Grommet - Aluminum Spacer (Flat area facing away from the car) - Bolt
- With both charge pipes loosely installed, adjust the pipes so get the best fit possible and workfrom one side to the other tightening down all the T-bolt clamps until everything is secure.
- Now you can go ahead and re-install the bumper (if removed) and go out and enjoy!
Links
COBB Product Install Instructions for Fiesta ST
Main Installation Instruction Repository for Fiesta Parts
Ford Fiesta Map Notes for Fiesta ST
Link to Fiesta Map Notes to see what map you should be on given the parts you've added
| Insert excerpt | ||||||
|---|---|---|---|---|---|---|
|