
Accessport Manager
23.1.1
User Guide
08
04/
1602/
20162020
| Table of Contents | ||
|---|---|---|
|
Introduction
Accessport Manager is designed to manage all aspects of your Accessport. Maps can be loaded on the Accessport, datalogs can be retrieved or deleted, and Accessport firmware can be updated.
Application Features:
- Drag-and-drop maps directly to and from your computer and the Accessport
- Easily configure the startup screen for your Accessport (V3 only)
- Map details are shown instantly for each selected map
- Search through thousands of maps by vehicle or map field text (filename, short description, long description, vehicle, and vendor)
- Available firmware updates for the Accessport are automatically detected and can be installed with a single button click
- Accessport Manager automatically checks for new versions, keeping itself up to date
Further sections of this manual include detailed information on the various functions of Accessport Manager and contact information for COBB Technical Support.
Thank you for using COBB Tuning products!
Getting Started
Installing the Software
The latest version of Accessport Manager can always be downloaded directly from the COBB Tuning website, at httphttps://www.cobbtuning.com/apmproducts/accessport-manager.
On Windows:
Run the APManagerSetup.exe executable to start installation. Once running, follow the on-screen prompts to select an installation path and complete the installation.
On OSX:
Open the APManager.dmg disk image, then drag the Accessport Manager icon to Applications.
Running the Software
- On Windows, click Start->Programs->Accessport->Accessport Manager
- On OSX, open Applications, then run Accessport Manager.
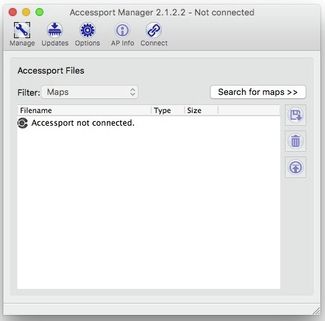
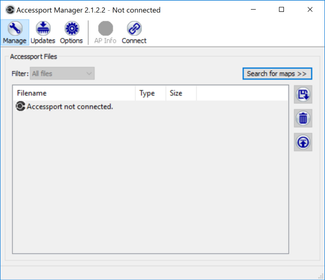
Connecting to the Accessport
To update your Accessport with new maps and update firmware, use the supplied USB cable to connect the Accessport to your computer. The larger end of the USB cable goes to the computer and the smaller end of the USB cable goes to the Accessport. If using a different cable than was supplied with the Accessport, make sure it is data transfer capable and not simply a charging cable.
Once plugged in, the Accessport will start up and be detected by Accessport Manager, as long as "Automatically connect to Accessport" is checked under Options. Accessport Manager will also automatically check for new firmware for your Accessport.
It is strongly advised to update to new Accessport firmware whenever Accessport Manager notifies that it is available, because we are constantly improving our products!
When you're finished managing the files on youur your Accessport, press the "Eject AP" button to disconnect. If you would like to reconnect the Accessport to the computer, simply press "Connect" again.
Note: Very old V2 Accessport firmware may require selecting "Re-connect" from the main menu on the Accessport itself.
Software Navigation
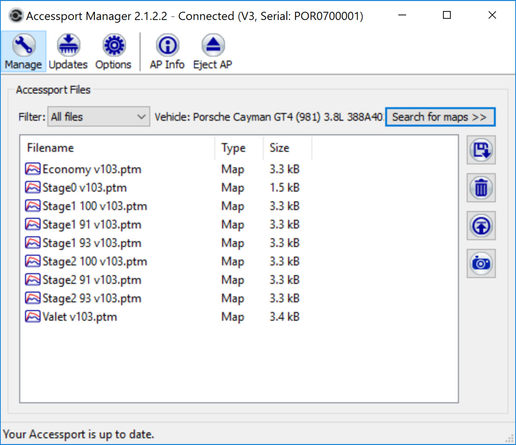
Three sections are displayed as buttons along the top of Accessport Manager: Manage, Updates, and Options. A fourth button, "AP Info," allows viewing details such as the installation state, vehicle, and serial number. Finally, the "Connect/Eject" button allows you to connect to, or safely eject your Accessport.
Manage
Transfer maps back and forth to the Accessport, retrieve datalogs and screenshots, and quickly search through many maps on your computer.
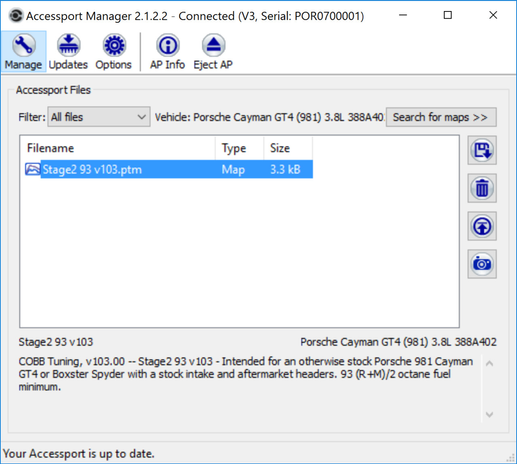
Map Details
When a map is selected, the details for that map will be displayed at the bottom of the window. These are the map's short description, vehicle, vendor, map version, and the long description.
Transferring maps
Once connected to the Accessport, transferring maps can be accomplished 4 different ways:
1. Drag a map from a folder on your computer to the Accessport file list.
2. Click the "Import file(s) to Accessport" button, browse to the map(s) and select "Open".
3. Drag a map from the map search results list directly to the Accessport
4. Click the "Upload selected map(s) to Accessport" button by the map search results list.
Retrieving datalogs
Datalogs that have been taken while in the car will sometimes need to be analyzed to determine how your vehicle is performing. To retrieve a datalog from the Accessport, follow these steps:
- Select "Datalogs" or "All files" from the Filter dropdown list
- Drag the appropriate datalog file to your computer, or select the datalog and click the "Save selected file(s) to my computer" button
You can also drag a datalog file directly from the Accessport file list to an email window, for example. For very large datalogs, it may take a few seconds for the file to copy from the Accessport to your computer.
Removing files from the Accessport
To remove a file from the Accessport, select the file and either press the Delete key on your keyboard or click the "Delete file(s)" button.
Searching for Maps
Accessport Manager allows searching through the internal map details of a large number of maps, by clicking the "Search for Maps" button. This will open a new area used for searching through the map descriptions, vendor names, map revisions, vehicle types, and more. This search feature is primarily used by COBB ProTuners that have thousands of customer maps to search through.
![]()
- Click the Browse button by the Location box to choose the location to search. All sub-folders and files will be indexed for searching, and all maps meeting the filter criteria will be displayed in the list. Perform a text search by typing in the "Search..." box or use the drop-down to filter by vehicle. Results will instantly be displayed, even while typing.
- These map details and search location are saved even when the software is closed, so searching the same location does not take a long time to load details next time the software is opened. If changes to map files happen while Accessport Manager is running, press the Refresh button and the changes will be detected and loaded.
- Additional columns can also be displayed in the map search area by right-clicking on any of the columns, and selecting the desired columns to display.
- A map file can also be located on your computer by right-clicking on a Map in the list and choosing "Open Map file location."
Map Packs
Accessport Manager 2.1.2.2 introduces introduced map pack support. Map packs allow similar maps to be grouped into a single file container and thus alleviating alleviate end users from having to look-up which specific ROM revision the Accessport is installed to. These file containers can be identified by the .ptp file extension and the cascading map image icon. Similar to .ptm files, .ptp files can be transferred directly to the Accessport. During the transfer step the appropriate map files are extracted from the map pack and transferred to the installed Accessport.
- Note: Map packs are favored on platforms where several ECU revisions are available for a given year model (i.e. BMW and Porsche).

Map Packs Fig1.0 - See red outline in the image above for a map pack file example in AP Manager.
- Note: The example shows the .ptp file extension and cascading map file icon.
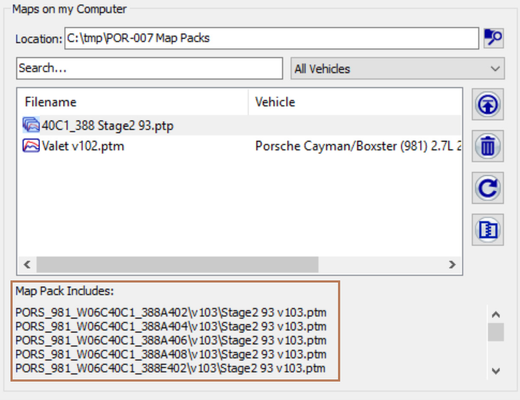
Map Packs Fig1.1 - See red outline above for map pack assortment details in AP Manager.
- Note: The example map pack includes 5 - Stage2 93 maps from a similar ECU strategy.
Transferring Map Packs to the Accessport
- To use map packs simply download the map pack from cobbtuning.com then locate the file on your computer.
- Next transfer the map pack onto the Accessport using Ctrl + L (Windows) or Cmd + L (Mac) or the "Upload selected map(s) to the Accessport" button.
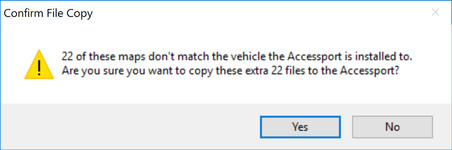
Map Packs Fig1.3 - During map pack transfer to the Accessport a warning might occur asking you if you want to transfer non compatible maps to the Accessport.
- Note: Incompatible maps transferred to the Accessport will be grayed out and not compatible for ecu flash.
Unpacking Map Packs
Alternatively map packs can be unpacked into individual map (.ptm) files by selecting the "Unpack Map Pack" button (illustrated in image below). This option is
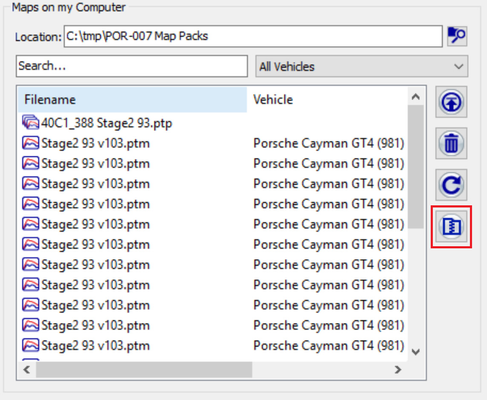
Map Packs Fig1.4 - Figure illustrates map pack "40C1_388 Stage2 93.ptp" unpacked into several .ptm files. The .ptm files from the map pack are show in the list above directly below the .ptp file.
Here is a video showing the complete process:
| Widget Connector | ||
|---|---|---|
|
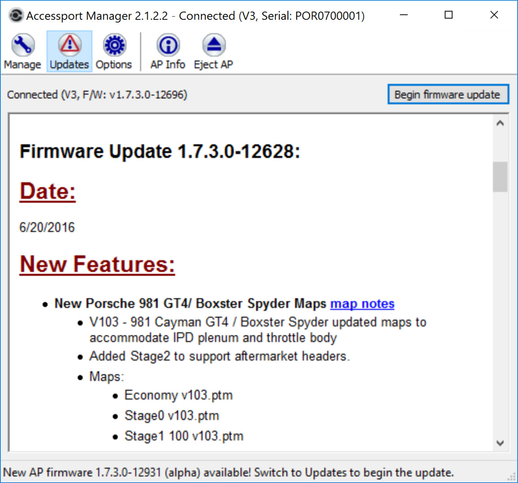
Updates
The firmware on the Accessport is updated periodically to add new features and fix issues that arise in the field. When an update is available, the icon for the Updates area will change and a notice will appear at the bottom of the window. By default, Accessport Manager will also prompt to update the Accessport when new firmware is available.
Note: We strongly recommend updating to the latest firmware when an update is detected. The release notes for each new release are easy to scan through to see what was fixed and what was changed/added, and the new update is only a click away!
Switch to the Updates area and click "Begin firmware update", " and the Accessport update will begin. This will only take a few minutes to complete.
Options
Accessport Manager is configured by default to always connect to an available Accessport, and to ask before transferring maps. If desired, these behaviors and others can be changed in the Options section.
Note: "Allow beta firmware updates" should only be checked at the direction of COBB Tuning or a Dealer/Protuner

Special Features:
Application Shortcuts
On Windows, all shortcuts use the Control key, plus another modifier key.
On OSX, the Command key is used instead of Control.
- Manage - Ctrl+G / Cmd+G
- Updates - Ctrl+U / Cmd+U
- Options - Ctrl+O / Cmd+O
- AP Info - Ctrl+N / Cmd+N
- Connect/Eject - Ctrl+E / Cmd+E
- Search for Maps - Ctrl+P / Cmd+P
- Save selected file(s) to my computer - Ctrl+S / Cmd+S
- Import file(s) to Accessport - Ctrl+I / Cmd+I
- Select image for startup screen - Ctrl+T / Cmd+T
- Browse for map search folder - Ctrl+B / Cmd+B
- Upload selected map(s) to Accessport - Ctrl+L / Cmd+L
- Refresh map list - Ctrl+R / Cmd+R
- Unpack Map Pack - Ctrl+Z / Cmd+Z
- Forced Firmware Update - Ctrl+Shift+F11