

715100 - COBB Tuning SF Intake Install Instructions
715300 - COBB Subaru SF Intake + Air Box Install Instructions
715315 - COBB Subaru SF Intake + Airbox Install Instructions
715150 - COBB Tuning SF Airbox Install Instructions
715160 - Subaru Airbox STI 2015 - 2019
724100 - COBB Subaru SF Intake
724150 - COBB Tuning SF Air Box Install Instructions
2008-2014 WRX, 2008-2019 STI (Sedan), 2009-2013 Forester XT, 2009-2010 Legacy GT
Congratulations on your purchase of the COBB Tuning SF Intake & Air Box Kit for your Subaru! The following instructions will assist you through your installation process. Please read them first BEFORE beginning the install and familiarize yourself with the steps and tools needed. If you feel that you cannot properly perform this installation, we HIGHLY recommend you take the vehicle to a qualified and experienced automotive technician.
| Table of Contents |
|---|
Parts List and Needed Tools
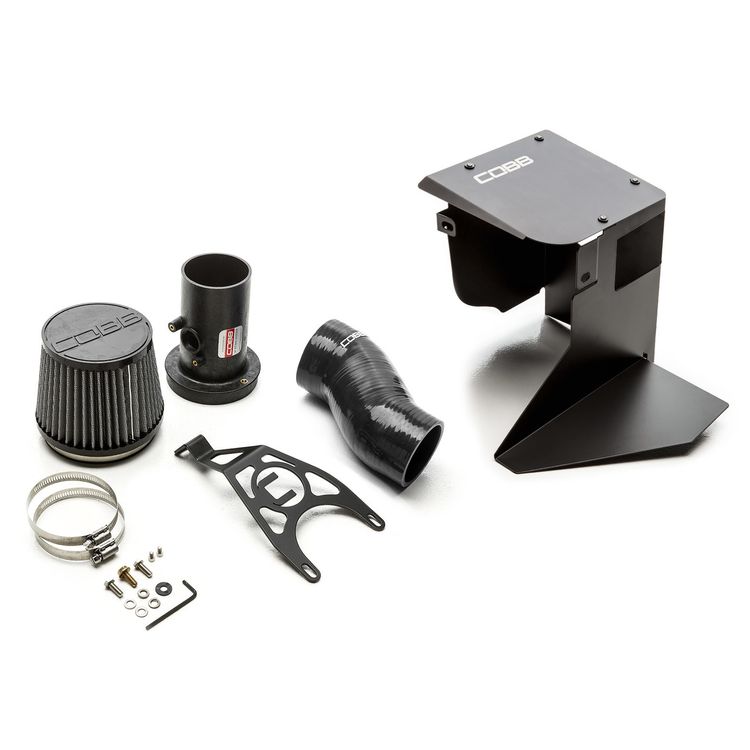
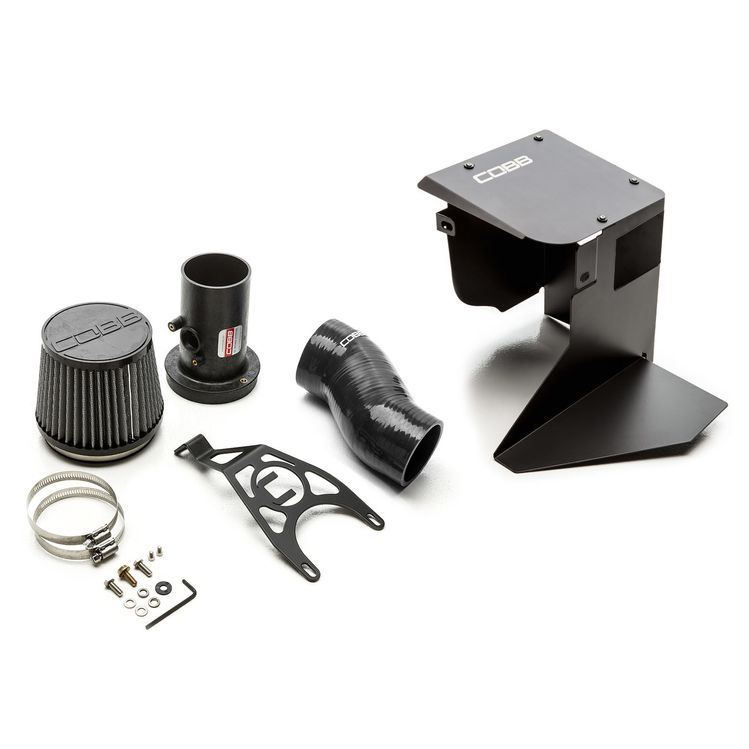
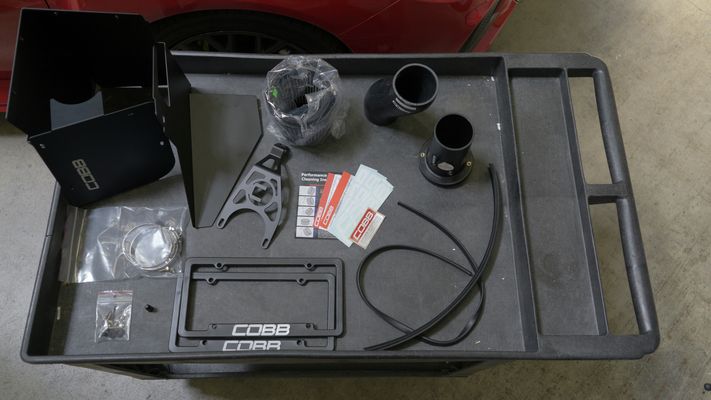
Part List (SF Airbox)
- 12” Large Trim-Lok seal
- 36” Small Trim-Lok seal
- 1 - M6-20mm Long Black 10mm Bolt
- 1 - M6-16mm Long Black 10mm Bolt
- 1 - M6 Black Nut
- 1 - M6 Nylon Washers
- 5 - M4 Nylon Washers
- 5 - M4 Button Head Hex Bolts
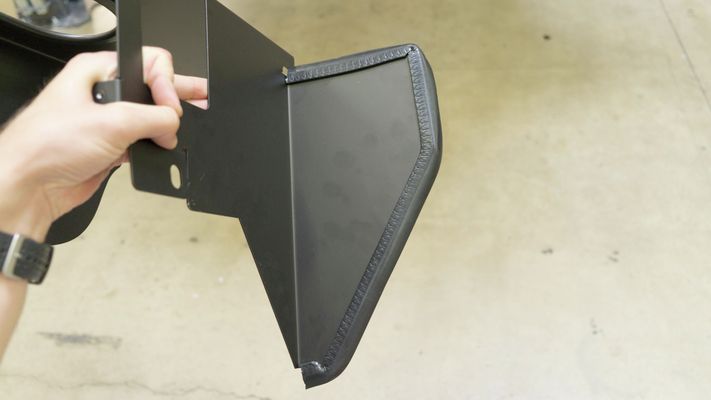
- 1 - Air Box
- 1 - Air Box Lid
Parts List (SF Intake)
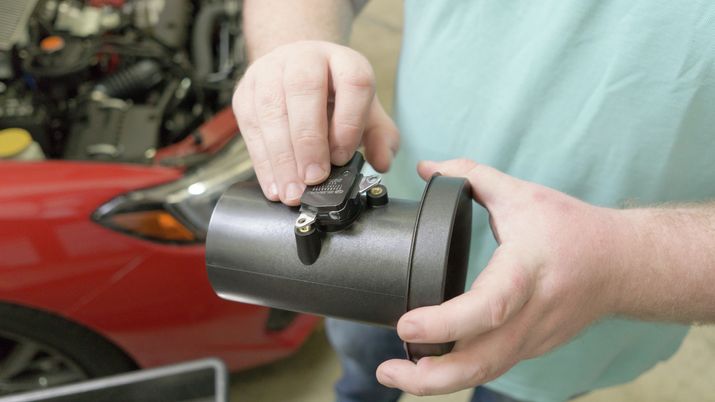
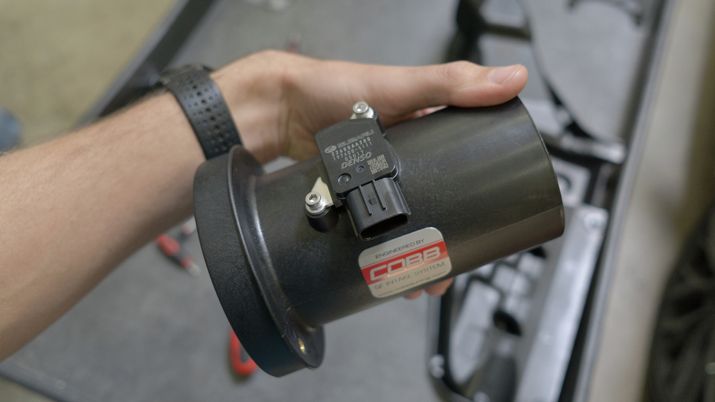
- 1 - MAF Housing
- 1 - Intake SIlicone
- 1 - MAF Housing Bracket
- 1 - Air Filter with Hose Clamp
- 2" - 3" Hose Clamps
- 1 - M6 Nylon Washers
- 2 - M6 Stainless Steel Bolts
- 2 -M6 Stainless Steel Washers
- 2 - M6 Stainless Steel Lock Washers
- 2 - M3 Allen Screws
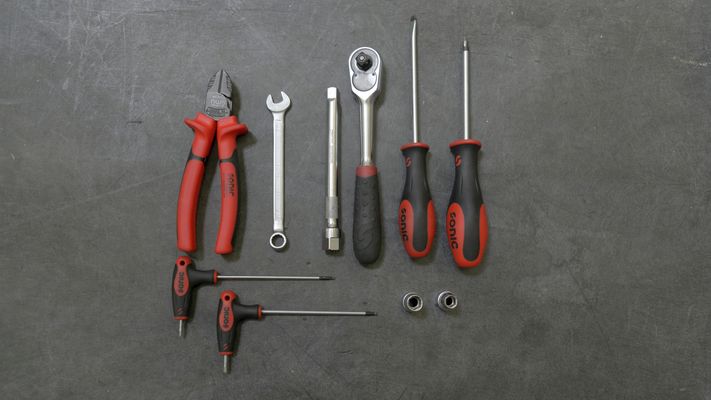
Needed Tools
- M2.5 Allen Wrench
- M3 Allen Wrench
- 8mm Socket
- 10mm Socket
- 10mm Open End Wrench
- 6" Extension
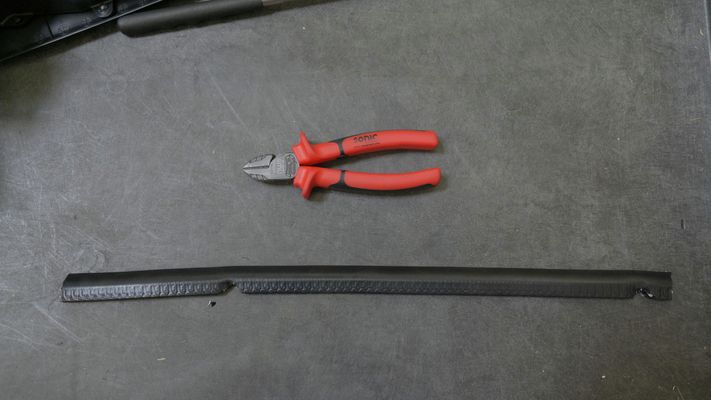
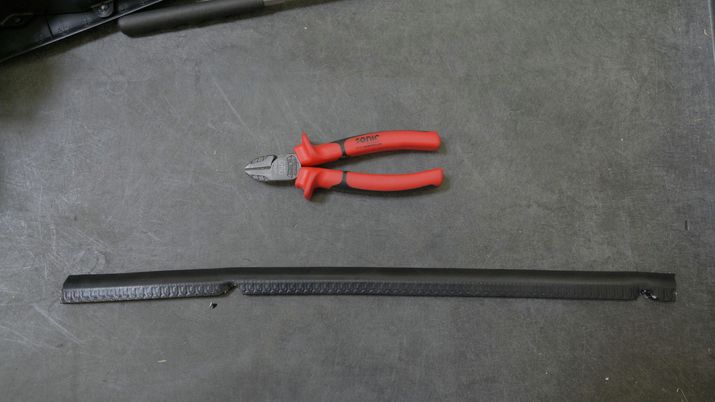
- Scissors/ Dikes
- Phillips Head Screwdriver
- Flat Head Screwdriver
*WARNING: Do not install this intake without also reflashing the appropriate mapping or severe engine damage can result. This intake system REQUIRES Mass Air Flow (MAF) sensor re-calibration for the vehicle to not only achieve full performance, but to also operate safely. COBB-provided mapping designated with "+SF" contains this re-calibration. You MUST use the Access PORT with the appropriate "+SF" map that can be downloaded for free from the Maps section of the www.cobbtuning.com website. You may also seek out custom calibration from a COBB Retail facility or member of our Dealer or Protuner from our professional tuning network. A list of these facilities is also available on our website.
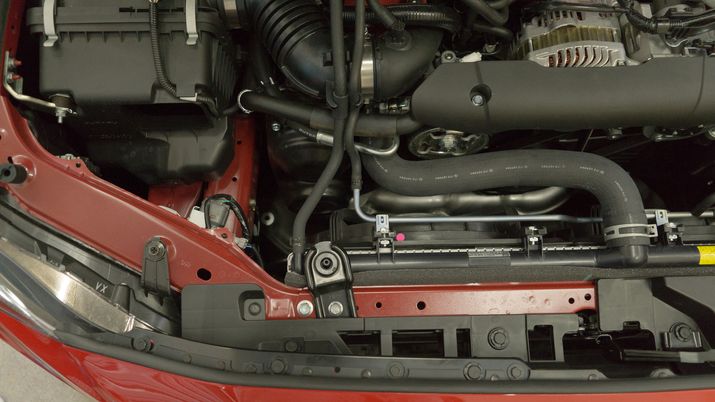
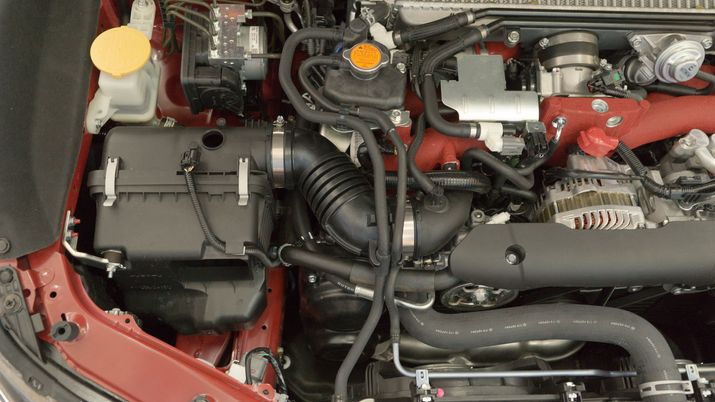
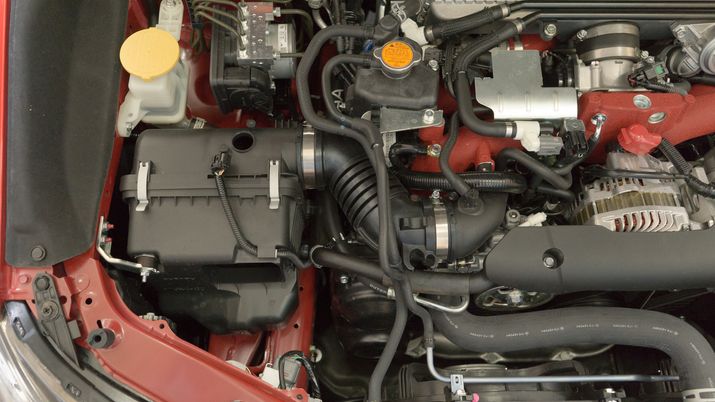
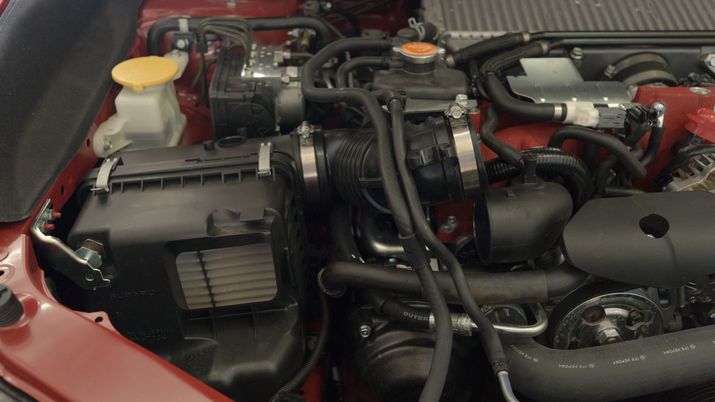
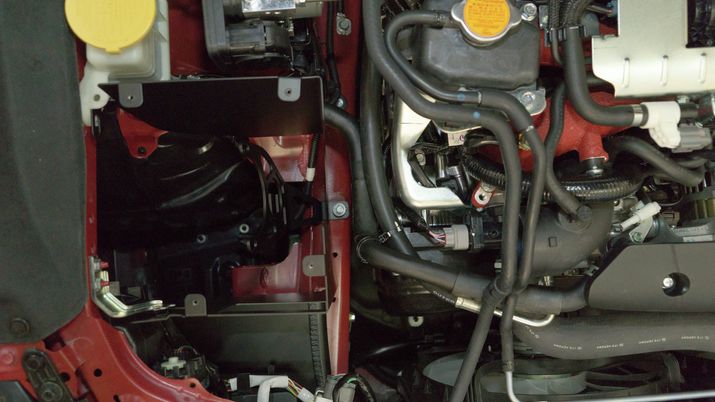
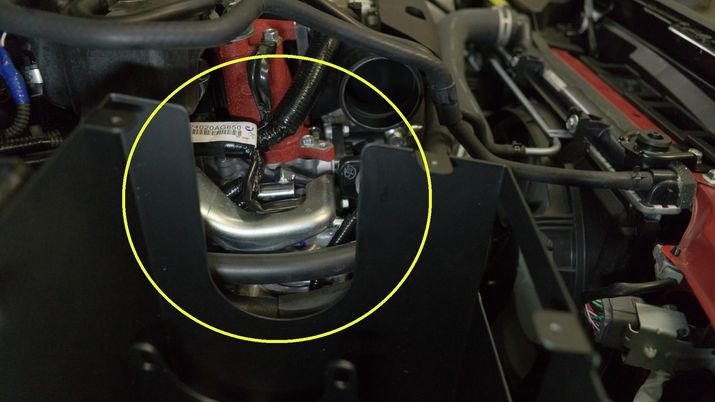
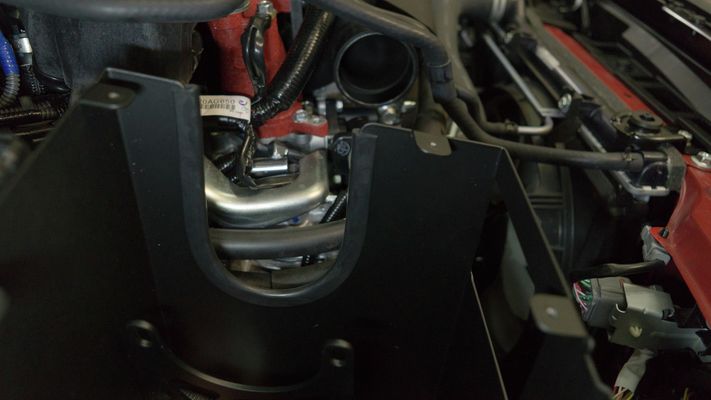
Removal of Stock Intake and Airbox
- Remove the (2) plastic retainers that hold down the intake snorkel using a flat head screwdriver.
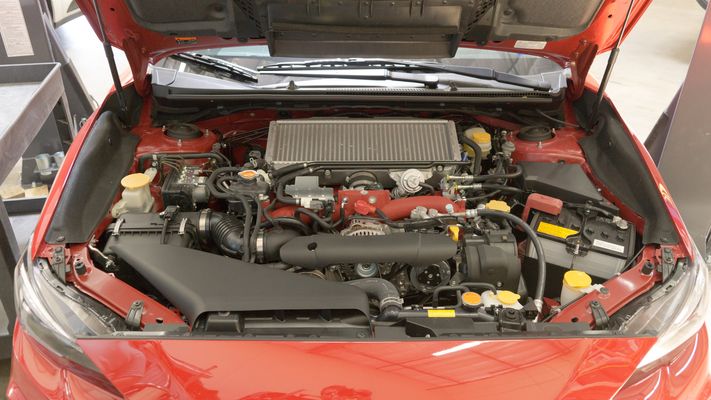


- Lift the intake snorkel from the engine bay.
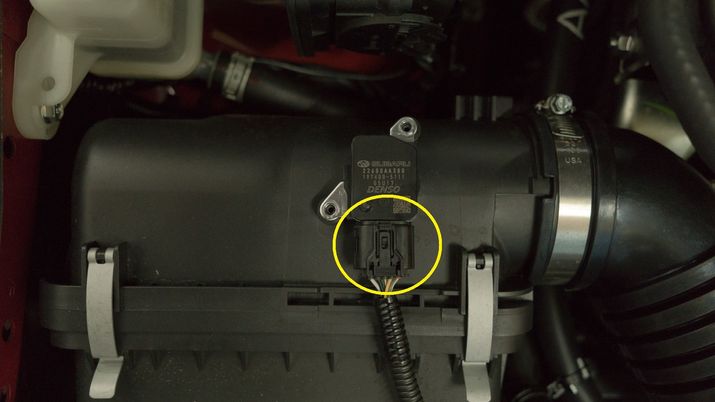
- Remove the (2) Phillips head screws holding down the MAF sensor using a Phillips head screwdriver.


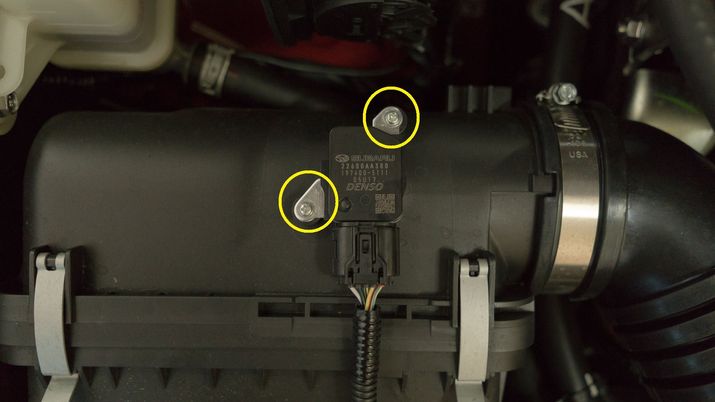

- Gently remove the MAF sensor and unclip the MAF sensor harness.


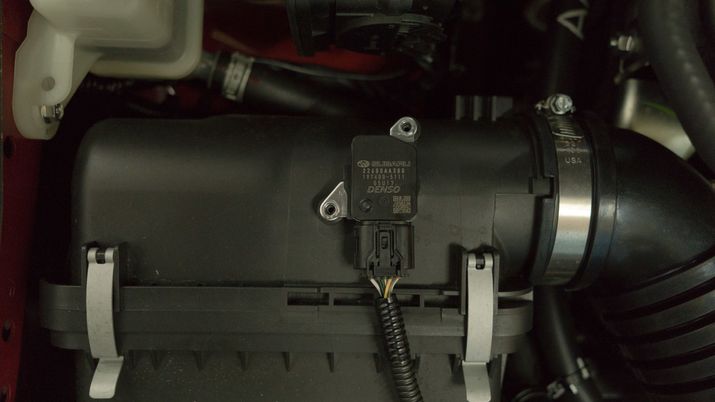
- In order to keep the MAF sensor safe and clean, install it into the COBB SF Intake MAF housing using the supplied M3 Allen head bolts, using the provided Allen key.


- Release the vacuum hoses from the clips on the intake silicone.

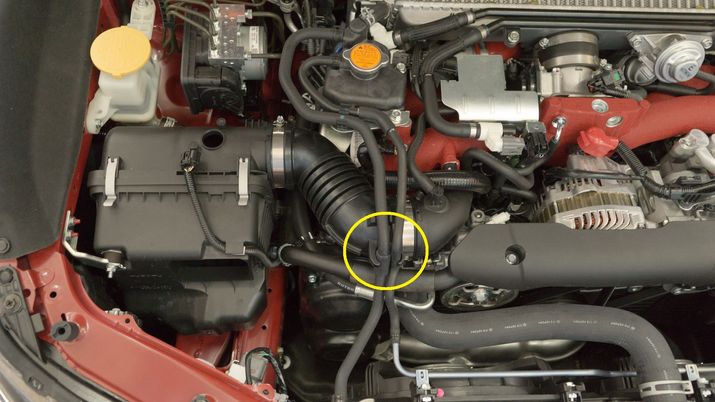

- Loosen the (2) hose clamps on the intake silicone.

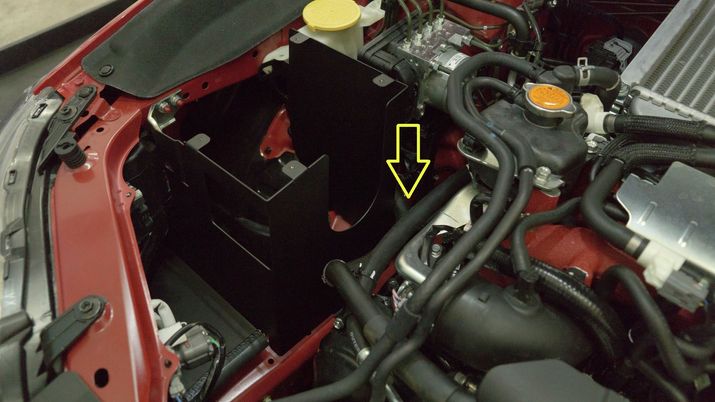
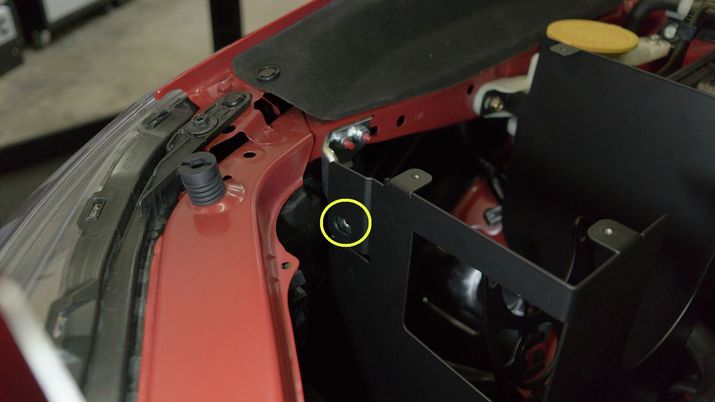
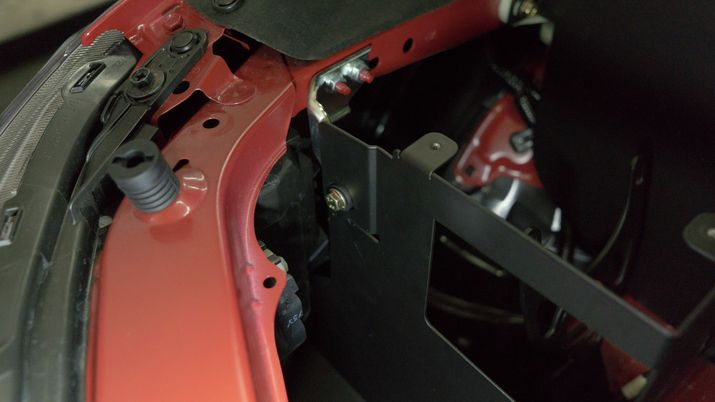
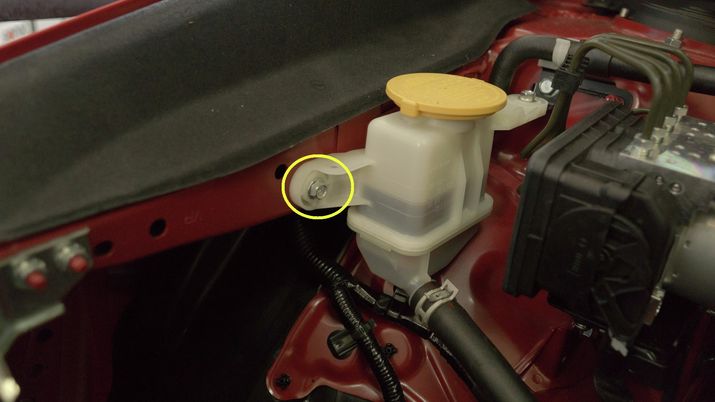
- Remove the 10mm bolt that holds the bottom of the airbox to the chassis using a 10mm socket and 6" extension.
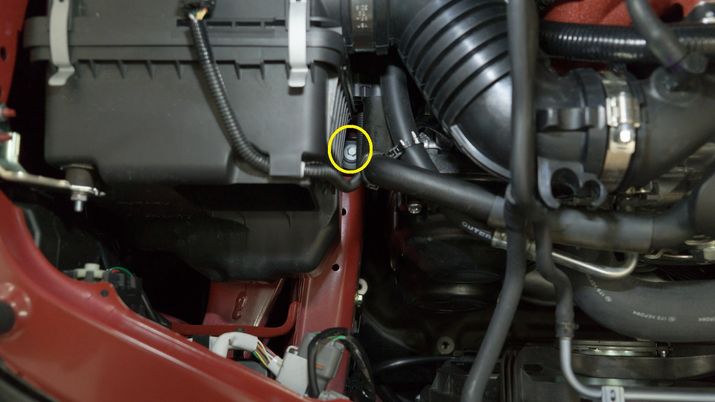
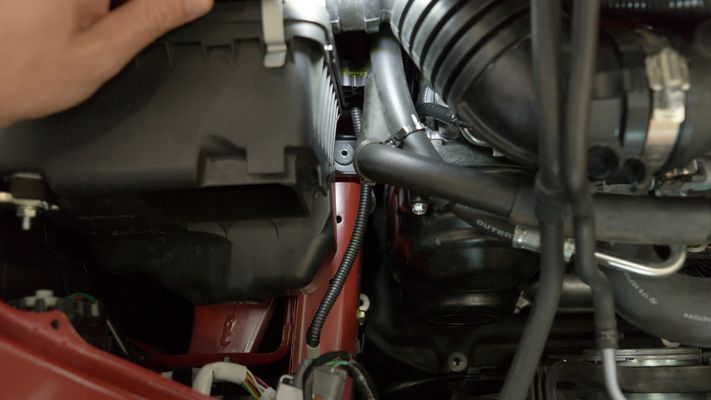

- Remove the 10mm nut holding the airbox to the airbox bracket.


- Gently lift and remove the airbox, being cautious of the other vacuum hoses in the engine bay.


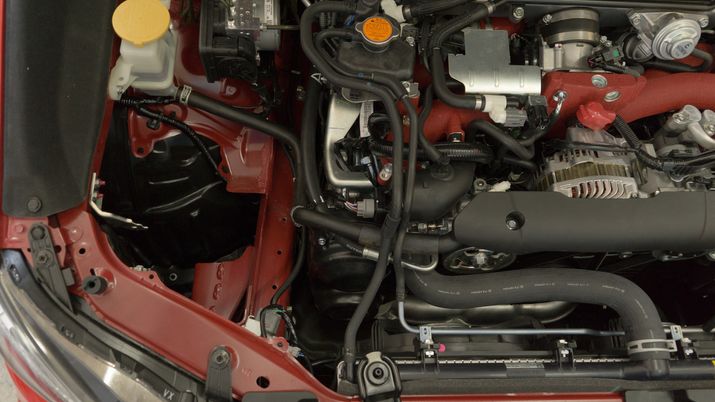
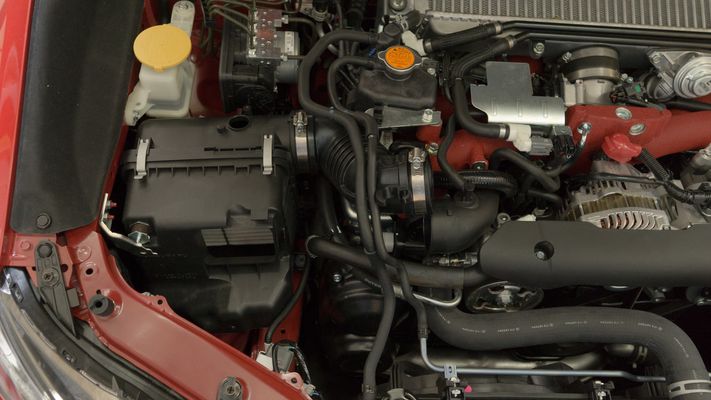
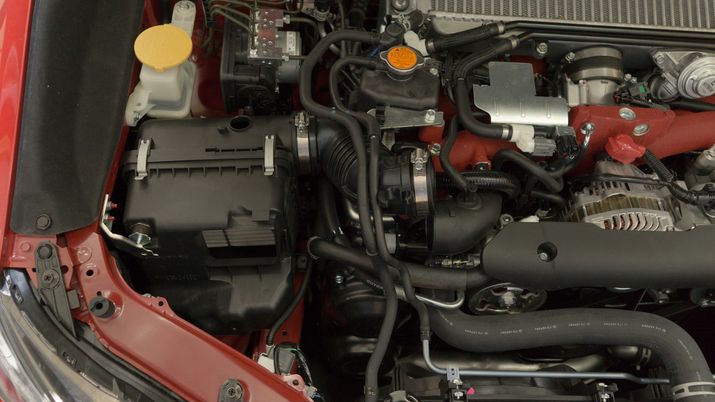
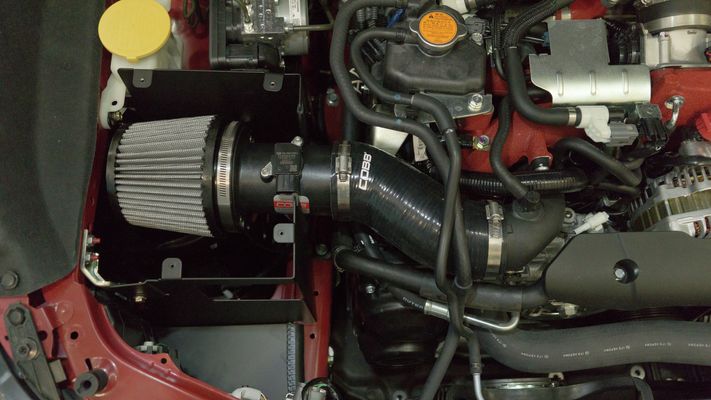
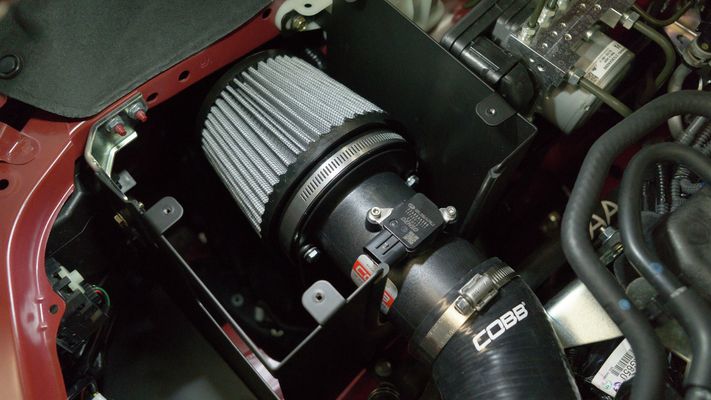
Installation of COBB SF Intake and Airbox
- VA STI Only - Install the large rubber trim on the bottom of the SF airbox.
- NOTE: We’ve found that making 90 degree triangle cutouts at each bend will allow the trim to seat flush.

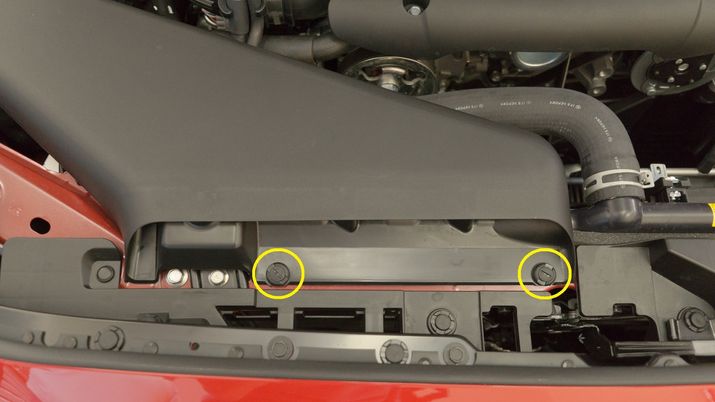
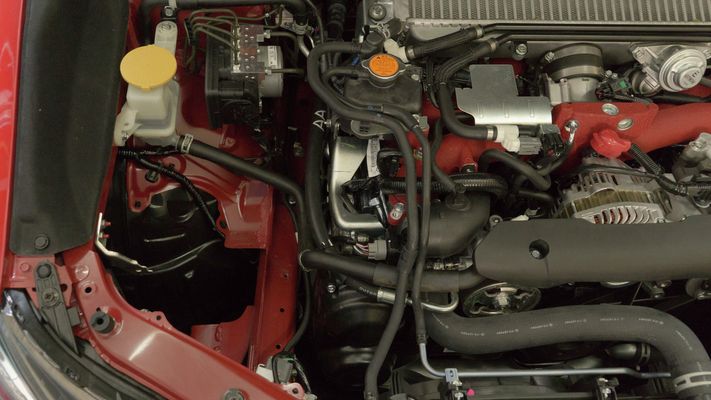
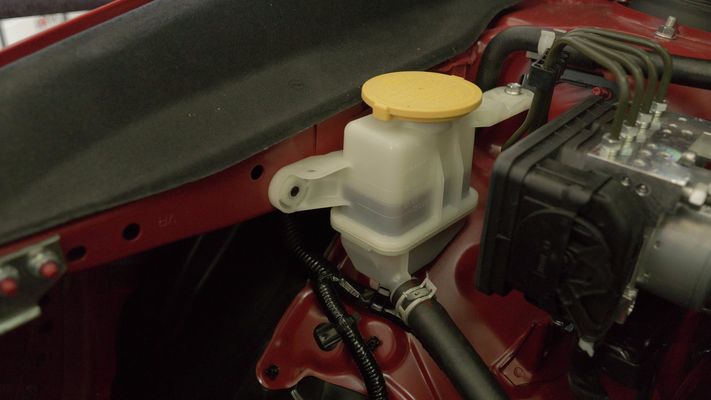
- Remove the 10mm bolt that holds the front of the power steering reservoir in place using a 10mm socket.

- NOTE: We’ve found that making 90 degree triangle cutouts at each bend will allow the trim to seat flush.
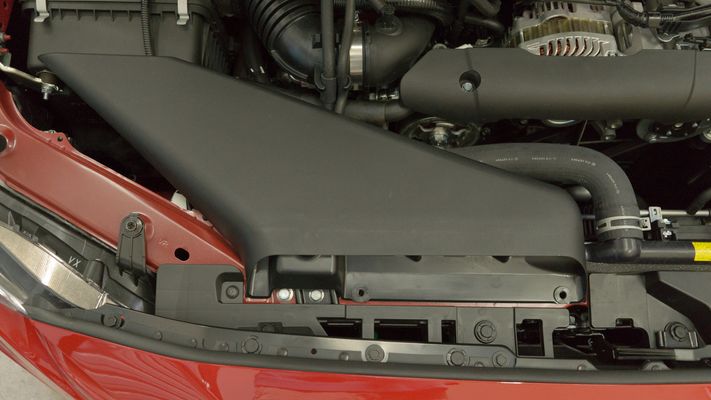
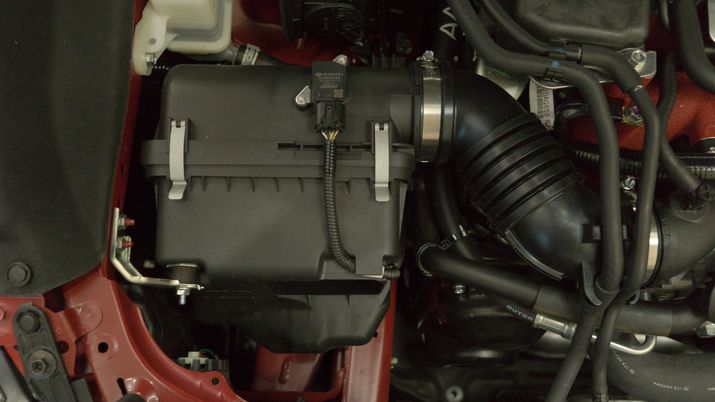
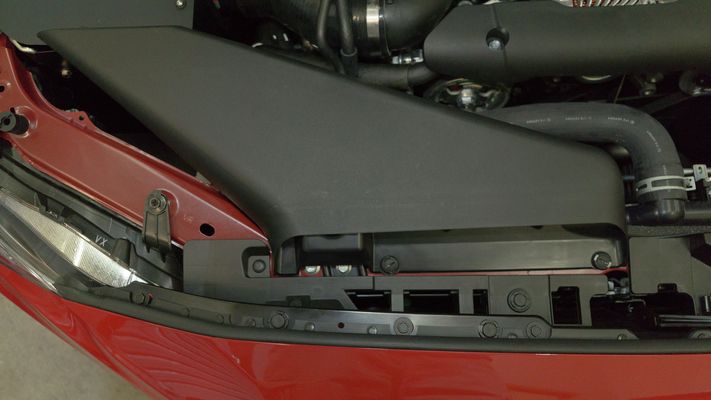
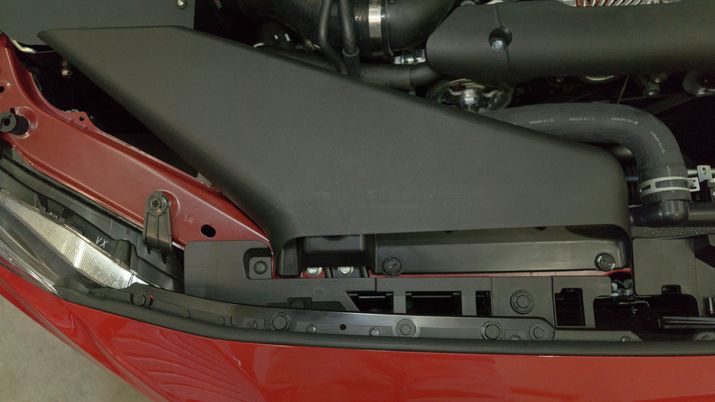
- Gently place the SF airbox into the engine bay,
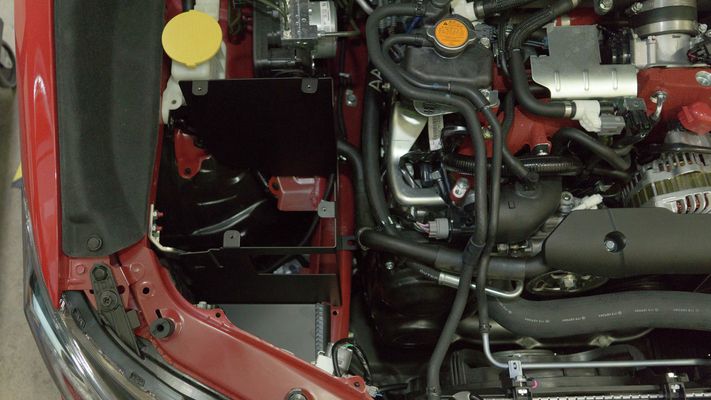

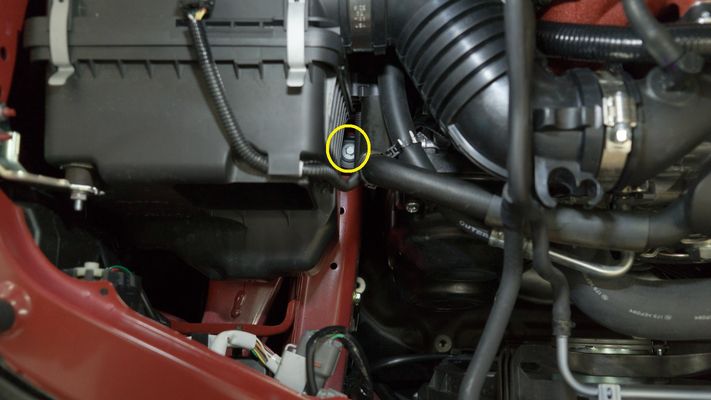
- Verify that the MAF harness is routed through the slot in the lower rear section of the airbox.


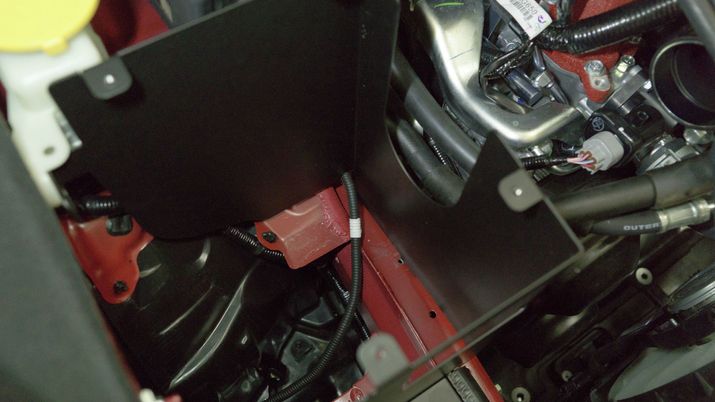
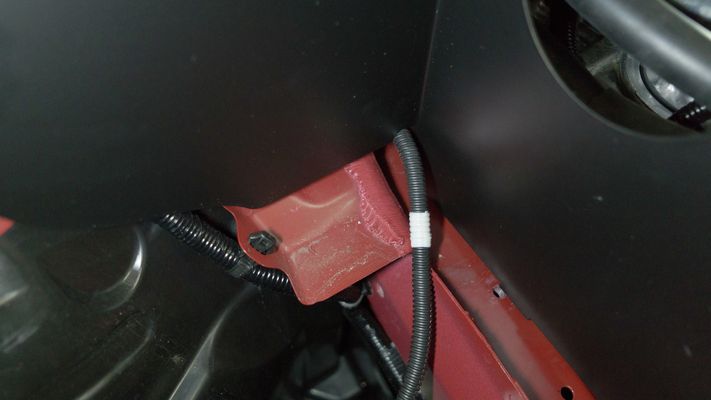

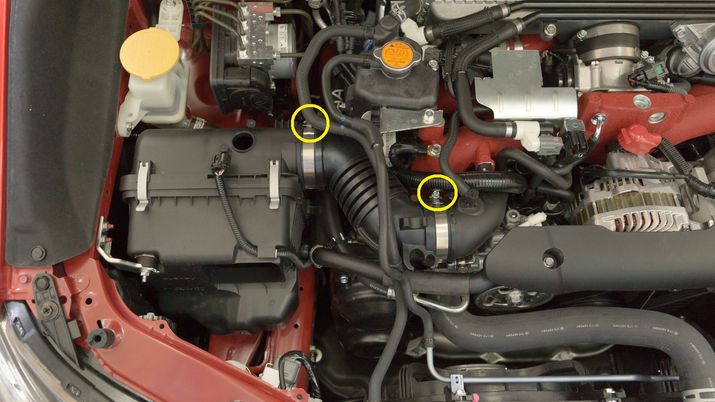
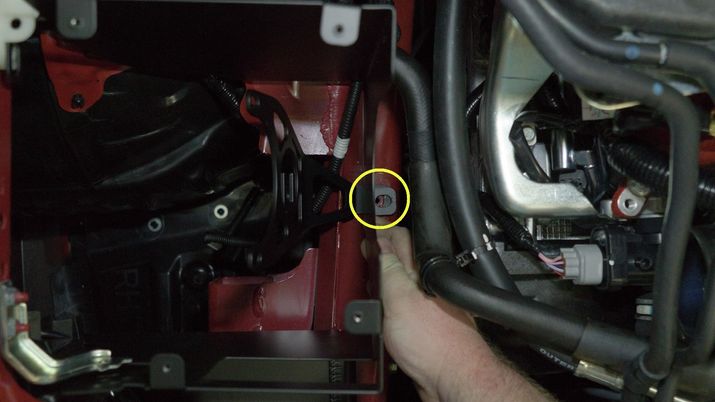
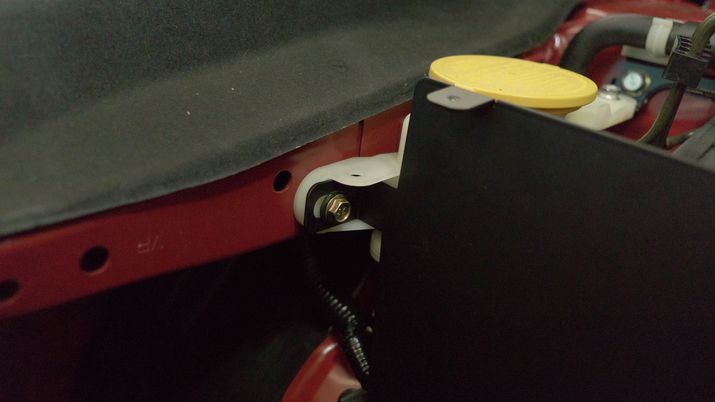
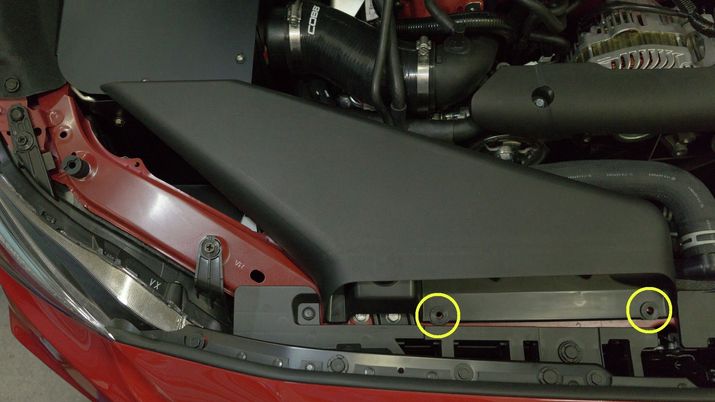
- Gently slide the MAF housing bracket between the bottom of the SF airbox and chassis, lining them up so that you can insert the OEM chassis bolt. Loosely tighten the bolt only as much to hold the airbox and bracket in place.


- Using the provided 20mm long 10mm bolt and washer, loosely attach the SF airbox to the power steering fluid reservoir bracket using a 10mm socket.
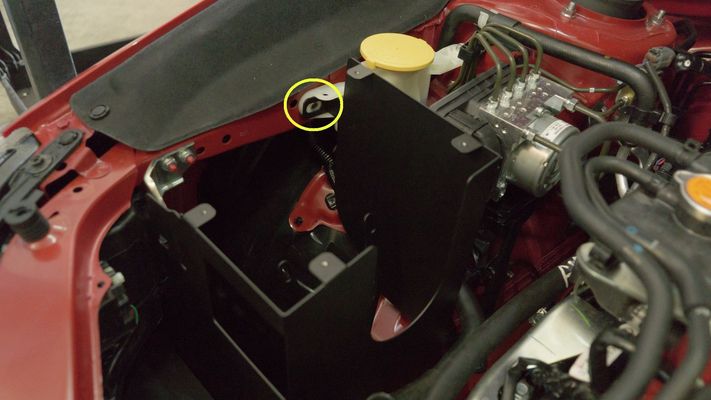


- Using the provided 16mm long 10mm bolt and nut, loosely attach the SF airbox to the chassis bracket using a 10mm socket.


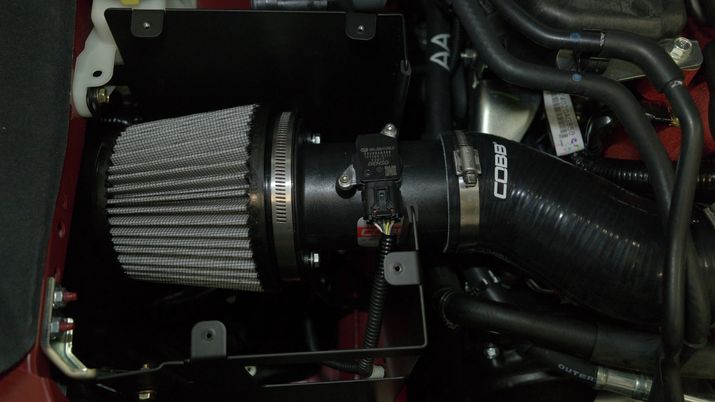
- Assemble the intake as such:
Filter — hose clamp — MAF housing (MAF sensor should be oriented on the top side) — hose clamp –- silicone (COBB logo should be oriented on the top side)— hose clamp- Loosen the clamp on the intake filter and attach it to the MAF housing.
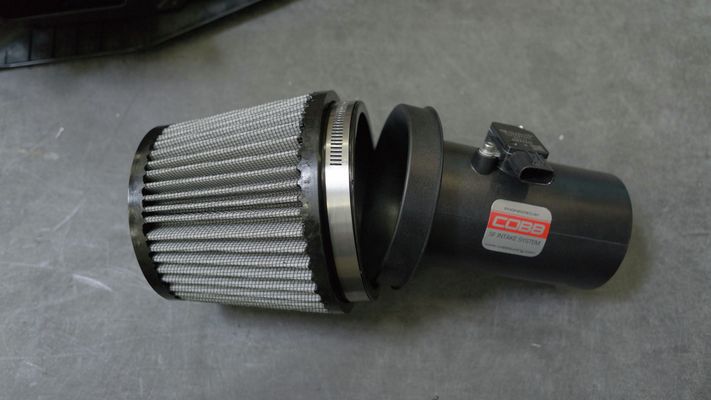
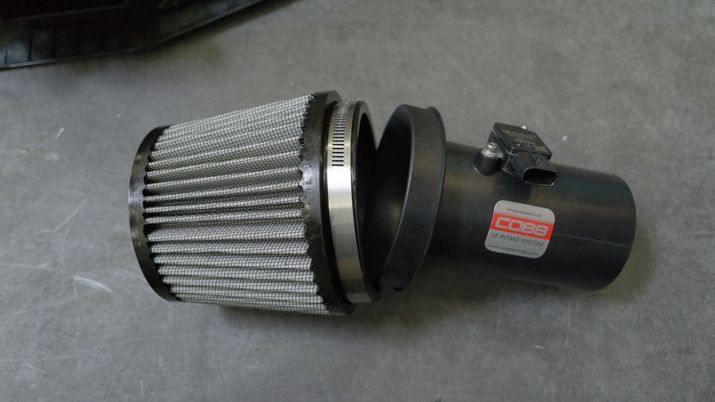

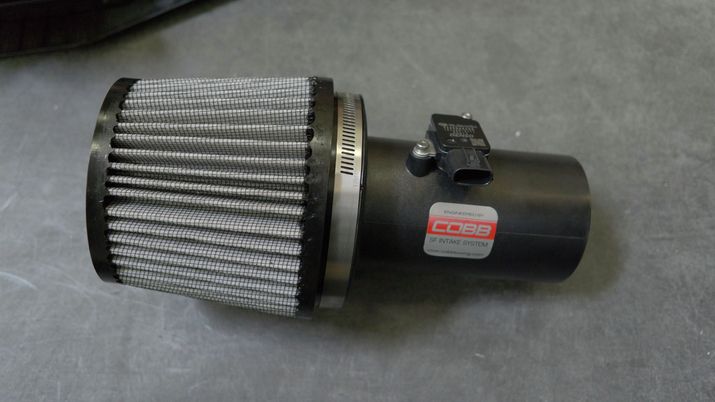
- Loosely attach the intake silicone to the MAF housing using the provided hose clamp.
- Loosen the clamp on the intake filter and attach it to the MAF housing.
- Using the provided thin rubber trim, line the airbox cutout.

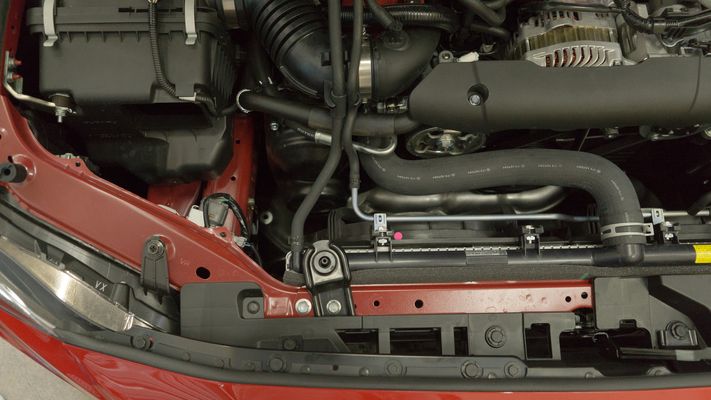
- Gently place the assembled intake in the engine bay.
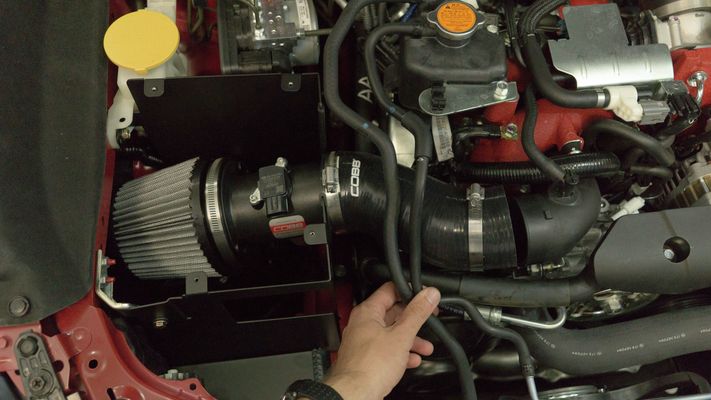

- Insert the intake silicone on the turbo inlet and loosely tighten the clamps.

- Line up the MAF housing bracket with the MAF housing, and use the (2) provided M6 bolts and washer to loosely secure it.
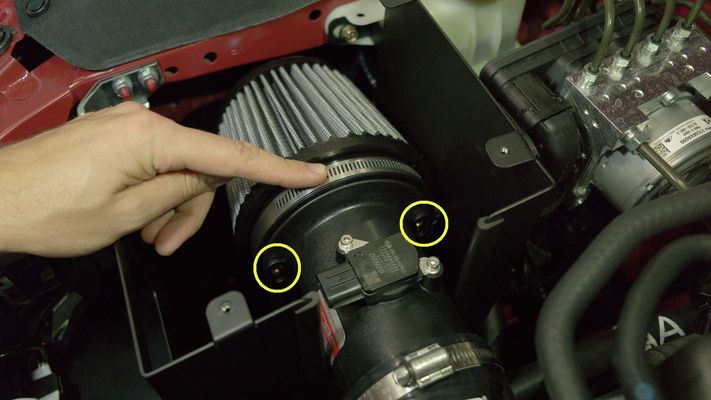


- Click in the MAF sensor harness.


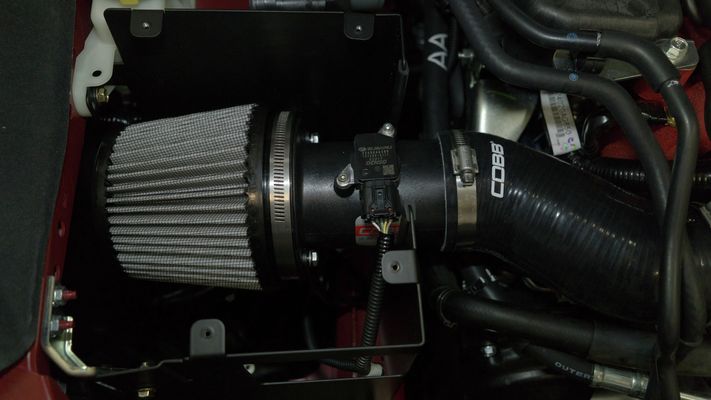
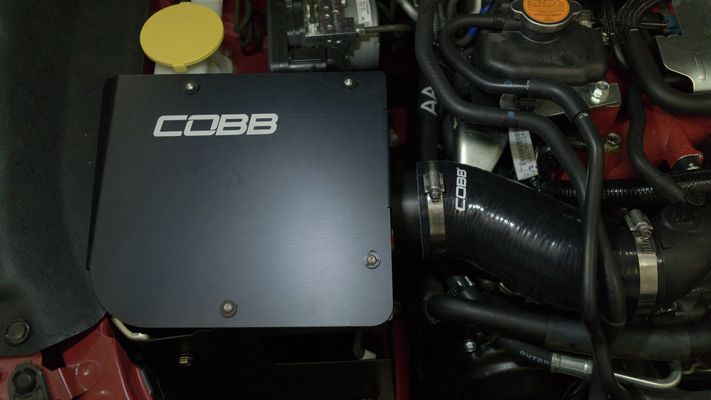
- At this point, you can now tighten down all the bolts and nuts.
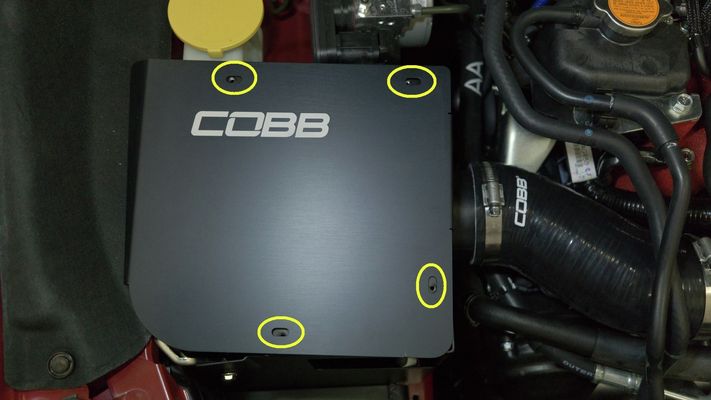
- Secure the lid to the SF airbox using the provided button head hex bolts and nylon washers, using the included Allen key.


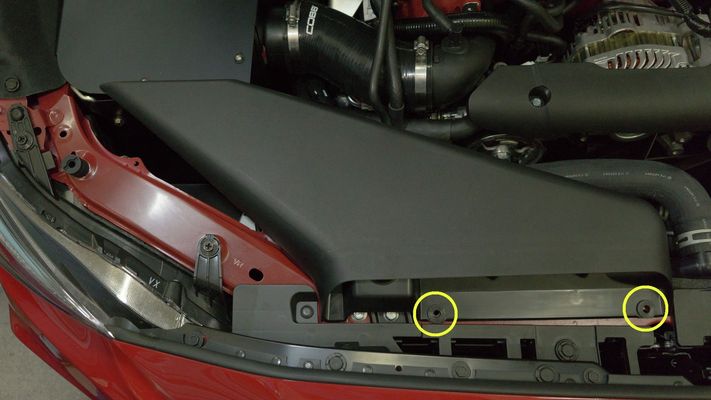
- Place the OEM intake snorkel in the engine bay and reattach the (2) plastic retainers.

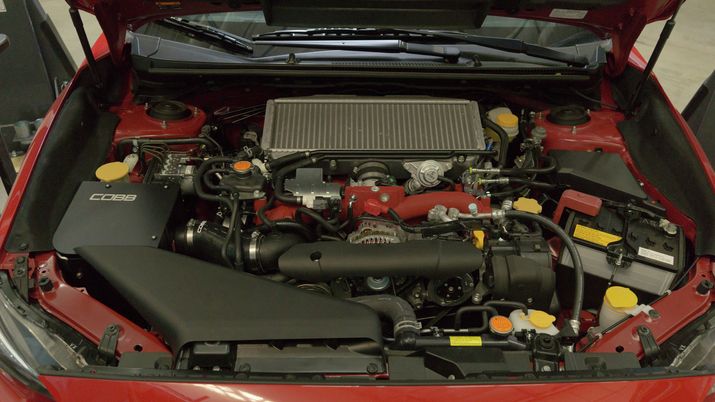
- Flash the appropriately calibrated COBB SF Intake map to your ECU.
- Done!


Links
Subaru Installation Instructions
Main Installation Instruction Repository for Subaru Parts
Link to Subaru Map Notes to see what map you should be on given the parts you've added
| Insert excerpt | ||||||
|---|---|---|---|---|---|---|
|